
Applied to: Microsoft Office Word 2020, 2019, 2016, 2013, 2010, 2007, and 2003
Closing the Word accidentally or a program/system crash may cause the unsaved Word document to disappear. Luckily, there is still a chance to recover unsaved Word documents in Windows 10/11 from Temporary Files, AutoRecover, or Word Document Recovery.
Besides, if your saved Word document gets deleted, you can restore deleted Word documents from the Recycle Bin or by using one of the best data recovery software.
| Workable Solutions | Step-by-step Troubleshooting |
|---|---|
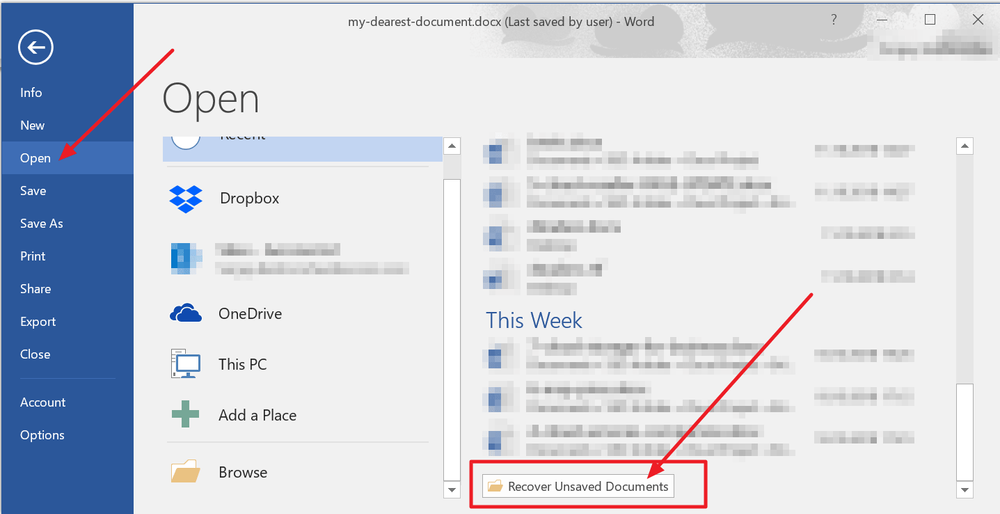
| Fix 1. Recover unsaved Word from Temporary Files | Open Word program, click «File» > «Info» > «Manage Document» > «Recover Unsaved Documents»…Full steps |
| Fix 2. Restore unsaved Word documents from AutoRecover | Open Word > click «File» > «Options» > «Save» > copy AutoRecover file location path and paste it…Full steps |
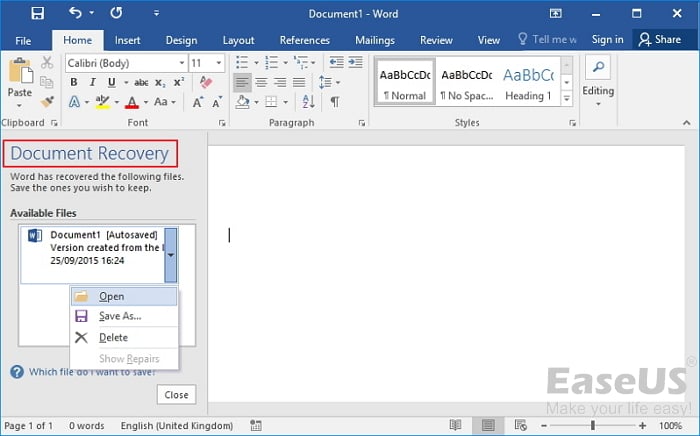
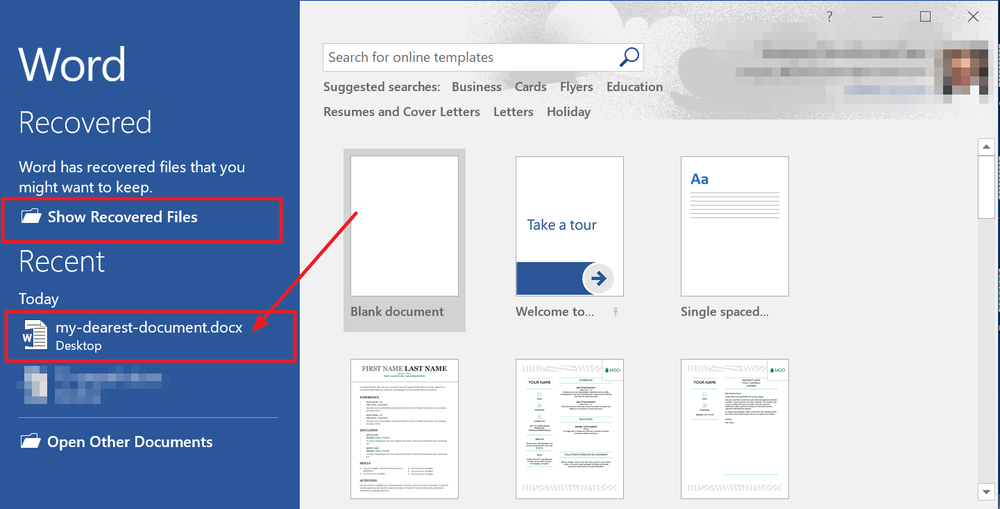
| Fix 3. Retrieve unsaved Word with Document Recovery | When your system comes back online, reopen Word, click available files under Document Recovery…Full steps |
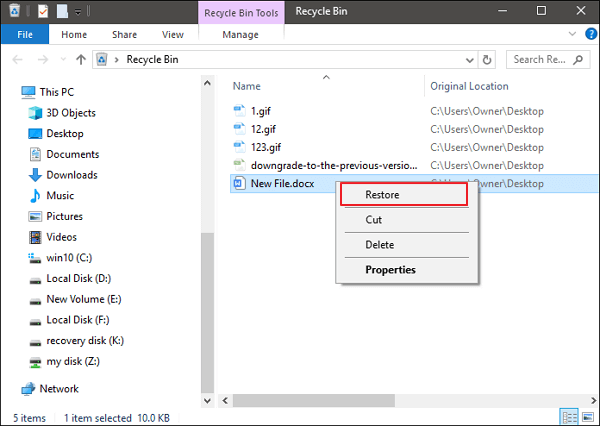
| Fix 4. Restore deleted Word from Recycle Bin | Go to the Recycle Bin. Check if the deleted word file is still there. If you don’t know the name…Full steps |
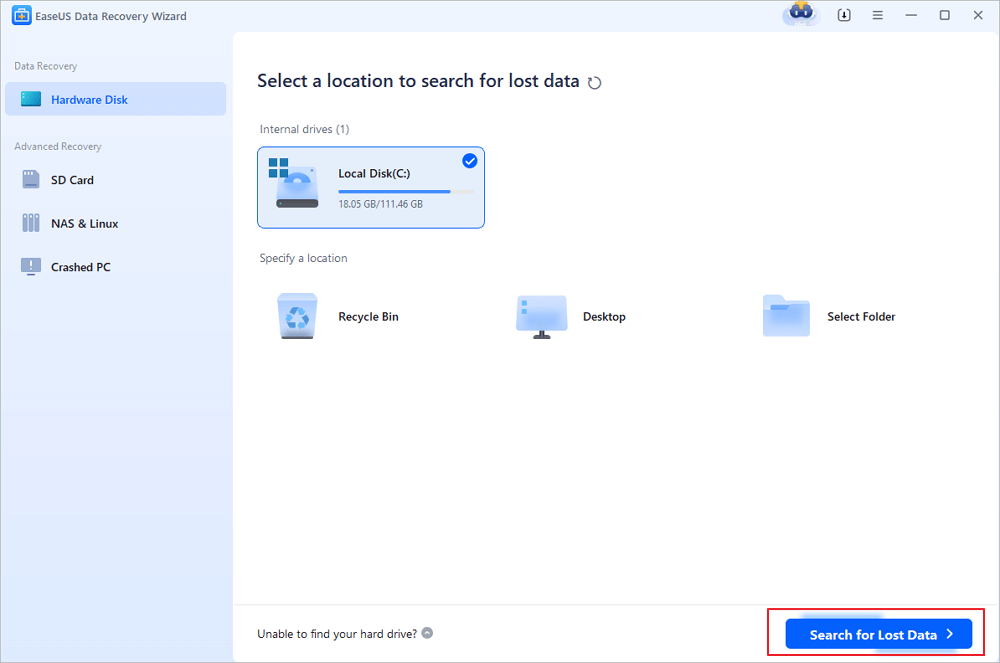
| Fix 5. Recover lost Word documents with Data Recovery Software | Choose the hard disk drive or a specific folder where the Word document was saved, click «Scan»…Full steps |
Have you accidentally closed your Word application without saving the document you had been working for a few hours? Have you lost the Word file unsaved due to a sudden program crash? Or mistakenly deleted some saved and essential Word document? If you are looking for an effective solution, you’ve come to the right place.
In this article, we will show you the most useful ways to recover unsaved Word documents. Furthermore, we also introduce you to a renowned office file recovery tool — EaseUS Data Recovery Wizard to help you restore deleted or permanently deleted Word documents in a few clicks. It is also competent to repair corrupted DOCX/DOC files as well as other documents.
Solution 1. Recover Unsaved Word Document from Temporary Files
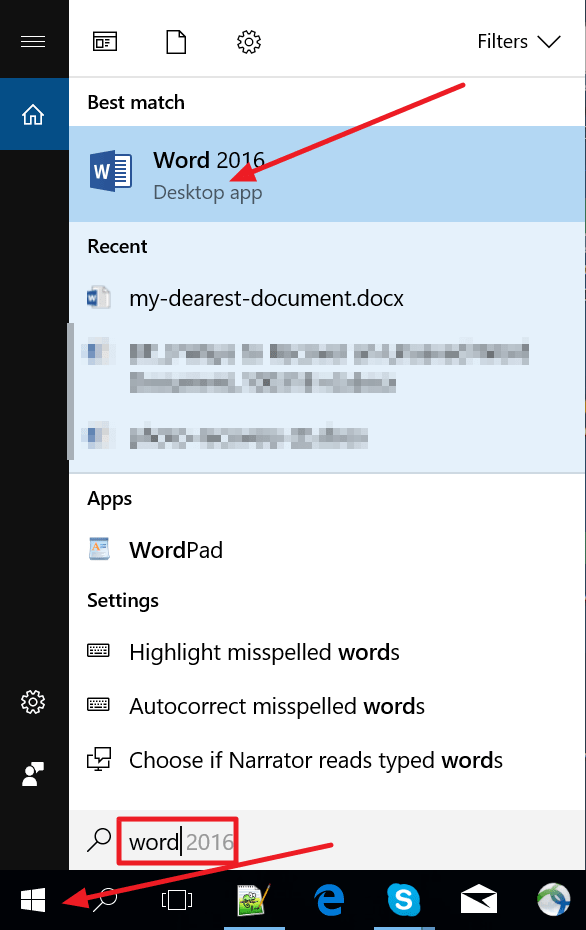
Unsaved Word documents vanishing is a very unpleasant problem. Take it easy. There are three possible ways to find a Word document that is not saved. The following operations use Word 2016 edition as an example. The steps for Word 2013-2019 are similar.
Recovering unsaved Word documents requires you to turn on AutoSave in advance. If this feature is turned on, you can find the unsaved files through the following path:
C:UsersOwnerAppDataLocalMicrosoftOfficeUnsavedFiles
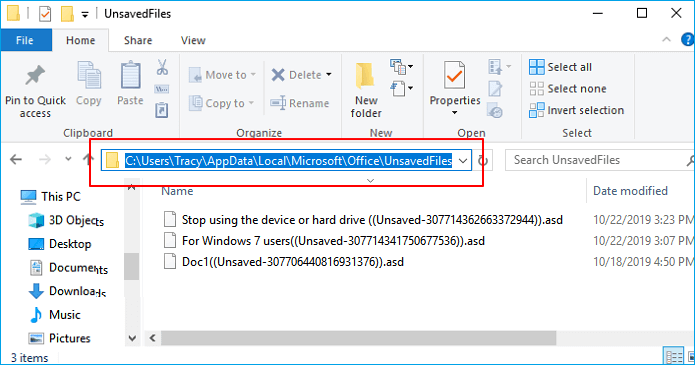
Or you can follow the steps given below to do it.
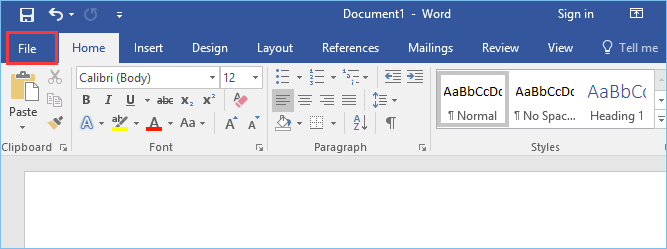
Step 1. In MS Word, click the «File» tab in the upper left.
Step 2. Click «Manage Document» and select «Recover Unsaved Documents» from the drop-down list.
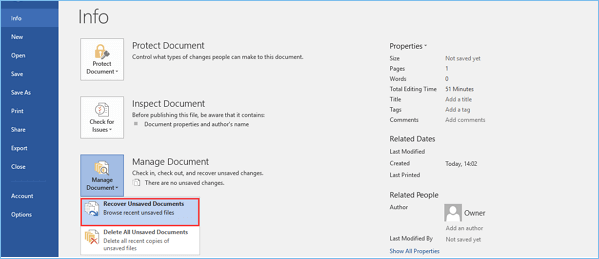
Step 3. Check for your missing File in the dialog box. If it was a recent loss, it should appear.
Step 4. Open the recovered Word document and click the «Save As» button in the top banner.
Additional Help — How to Turn on AutoRecover
Many of us have experienced a situation where we have created a Word document and then accidentally closed it out without saving it. To avoid this kind of situation, you’d better enable AutoRecove.
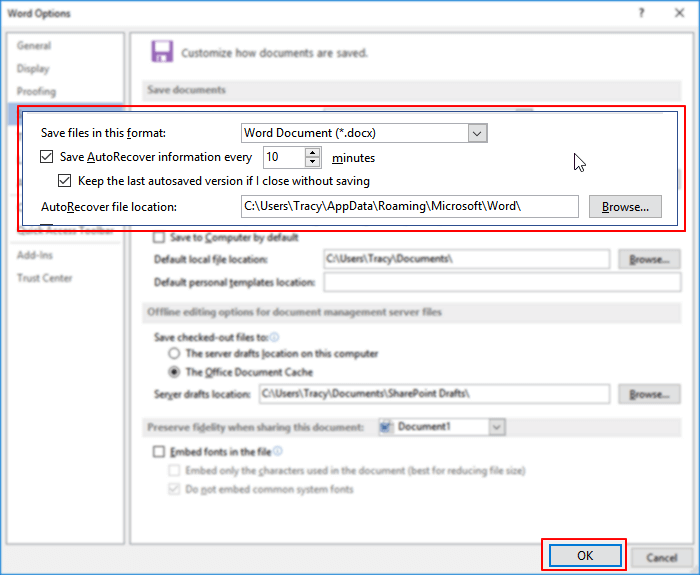
Step 1. Open Word, go to «File» > «Options» > «Save».
Step 2. Tick the box of «Save AutoRecover information every * minutes» and «Keep the last autosaved version if I close without saving».
Step 3. Click «OK» to save the changes.
Excel, like Word, is an indispensable office software. If you lose an unsaved Excel document, you can use the methods we recommend to retrieve it.
![]()
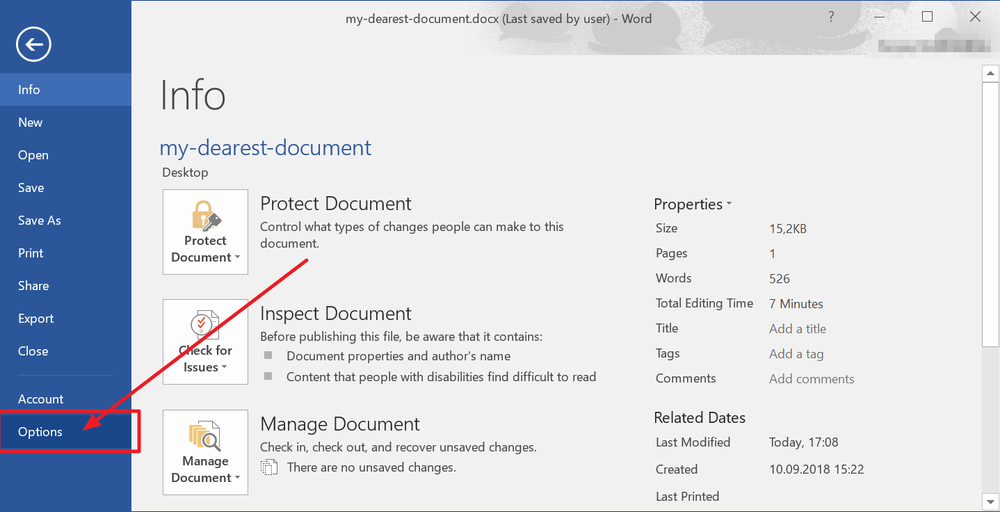
Solution 2. How to Recover Unsaved Word Document from AutoRecover
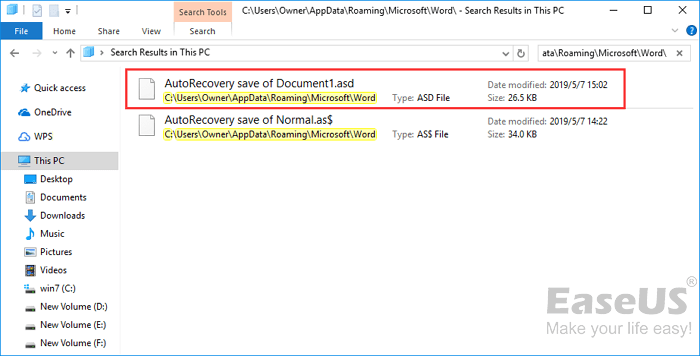
Another way to get back an unsaved Word document is by using AutoRecover. AutoRecover file names end in the .asd file name extension. By default, Word searches for AutoRecover files every time that it starts, and then it displays any data found in the Document Recovery task pane. If the Document Recovery pane does not open, manually search for auto-recovered files. To do this, use one of the following procedures according to your Word version:
For Word 2010 — 2019:
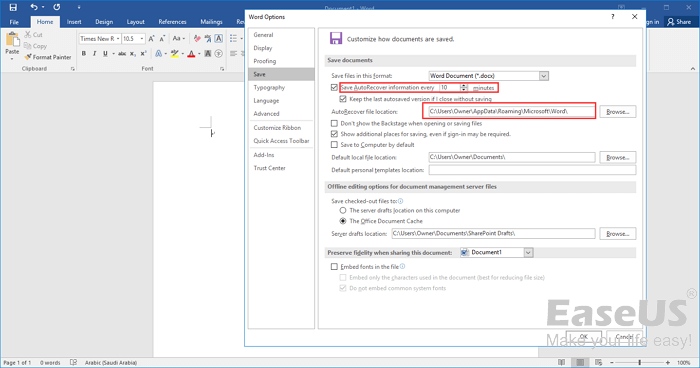
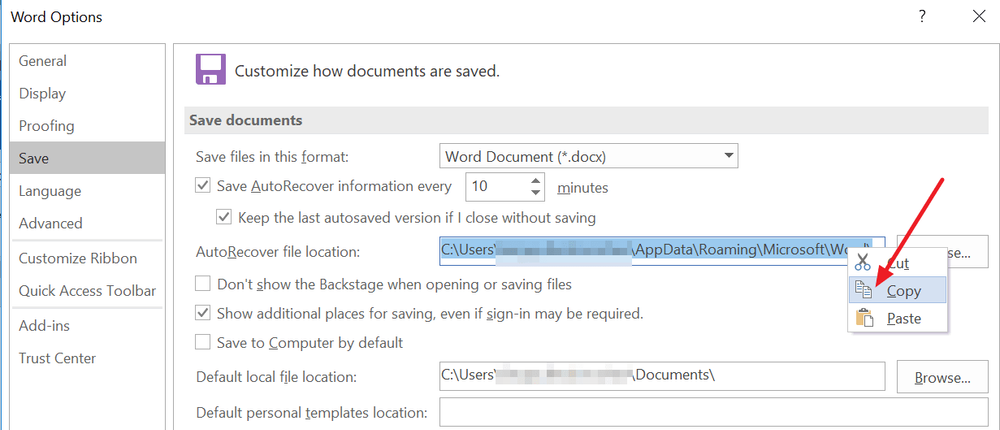
Step 1. Open the Word program, and click «File» > «Options». In the left navigation pane, click «Save». Copy the AutoRecover file location path and paste it into File Explorer.
Tip: You can change the time of AutoSave interval in «Save AutoRecover information every xx minutes» and click OK.
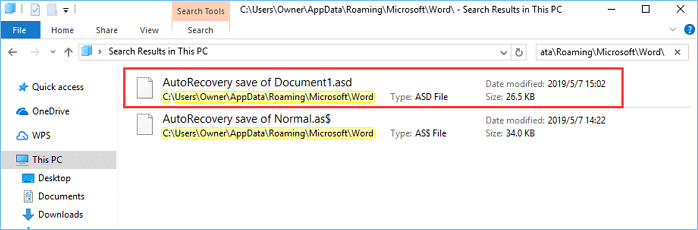
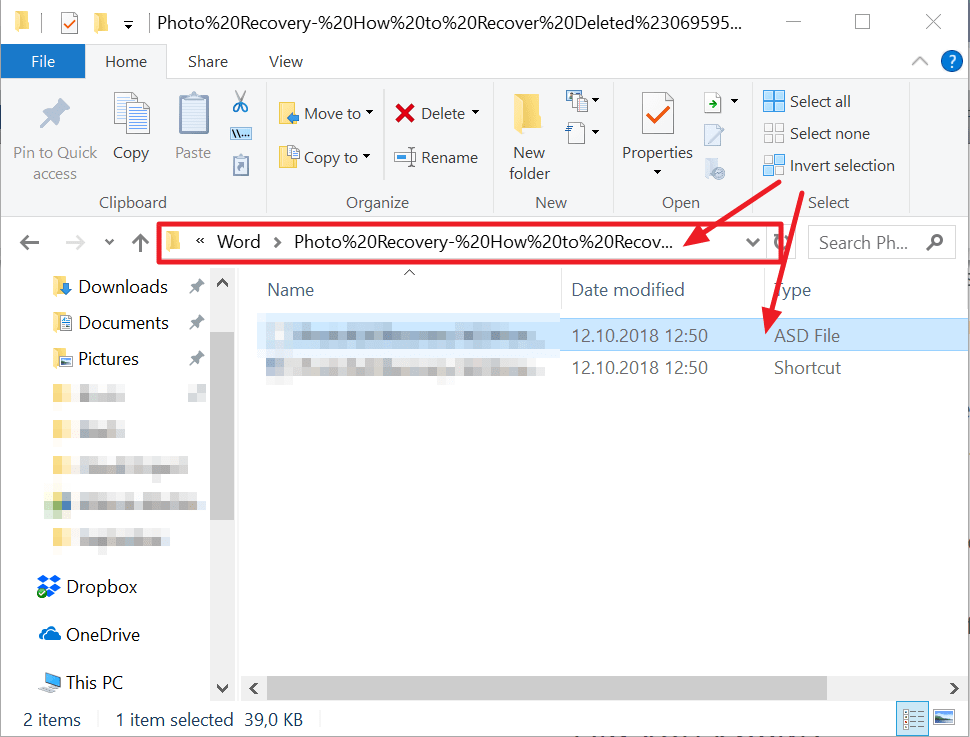
Step 2. Go to the File Explorer, find the unsaved document, and copy the .asd file.
Step 3. Go to your Word app, click «File» > «Open» > «Recover Unsaved Documents» at the bottom.

Step 4. Paste the copied .asd file into the File Name box popping up. Open the Word file recover it.

If Word warns that «Word experienced an error…», repeat the steps and click «Open and Repair» at the open Unsaved Document window.

For Word 2002 — 2007:
| Versions | Steps |
|---|---|
| Word 2007 |
1. Click the Microsoft Office Button, and then click «Word Options» > «Save». 2. In the AutoRecover file location box, note the path, and then click «Cancel» and close Word. 3. Open the folder that you noted in step 2. 4. Look for the Word document that you are looking for ends in .asd (AutoRecover files). Then, double-click it to open and save it immediately. |
| Word 2003 & 2002 |
1. On the «Tools» menu, click «Options». 2. Click the File Locations tab, double-click AutoRecover files, note the path, click «Cancel», and then click «Close». Note: In the Modify Location dialog box, you may have to click the down arrow in the Folder name list to see the whole path to your AutoRecover files. Close Word. 3. Look for files whose names end in .asd (AutoRecover files) after locating the AutoRecover file location. 4. Double-click the Word document to open it. Next, save it immediately. |
Then, you can check the file content and save it as a new Word file at another secure location.
Solution 3. How to Restore Unsaved Word with Document Recovery
If your Word crashes or closes abruptly, it will automatically restore unsaved Word documents in most cases when it comes back online. You can find the unsaved Word documents on the left panel, under Document Recovery.
Solution 4. How to Recover Word Document from Recycle Bin
If you deleted a Word document without emptying the Recycle Bin, you could undelete the Word document with simple clicks.
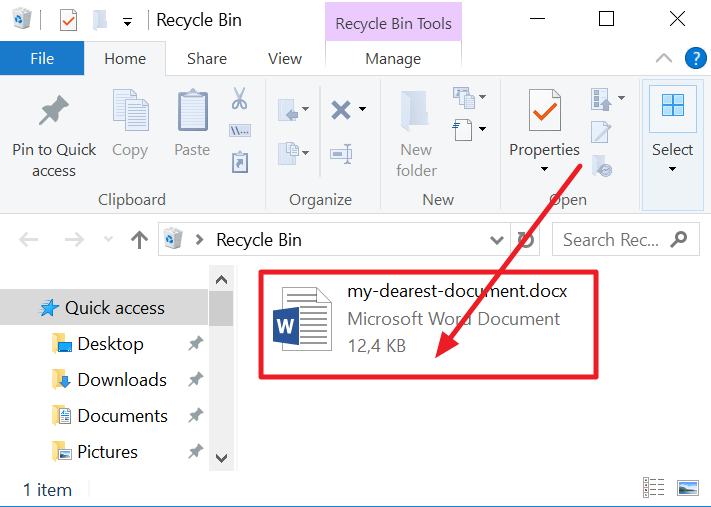
Step 1. Go to the Recycle Bin. Check if the deleted word file is still there. If you don’t know the name, look for file types such as DOC, DOCX, DOT, etc.
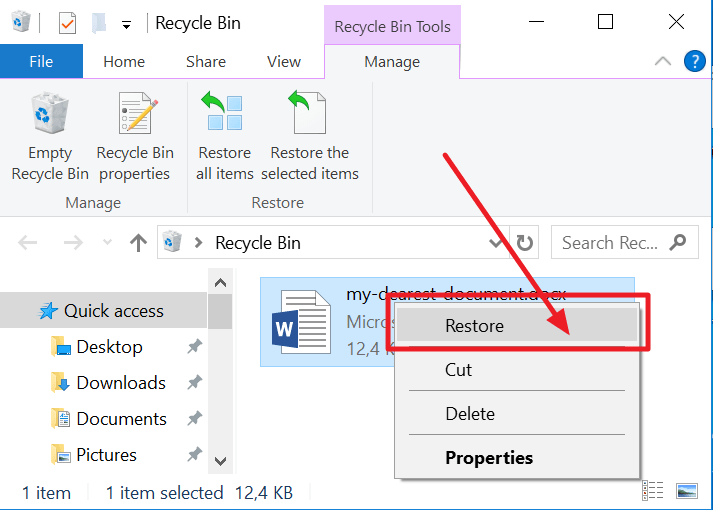
Step 2. Select the Word file and click «Restore» to recover it.
If you have emptied the recycle bin after deleting files, the deleted Word file may have been permanently removed. If you are in the same case, follow the next solution to restore deleted Word documents with a data recovery program.
Solution 5. How to Recover a Word Document with Word File Recovery Software
If you have lost saved Word documents because of careless deletion, hard drive formatting, or system errors, the above ways won’t work. At this time, you have to resort to a professional hard drive recovery software — EaseUS Data Recovery Wizard.
With this capable tool, you can recover deleted files in Windows 11/10/8/7 in various formats, including documents, videos, audio files, emails, ZIP, and more.
Note: This solution can be only used to recover deleted or lost Word documents that were saved on your computer before.
Step 1. Choose the Word file location
Choose the drive or a specific folder and click the «Scan» button.
Step 2. Locate your Word files
The software will start immediately scanning all lost data on the selected drive. After the scan, click the «Documents» option in the left panel. Choose «Word» from the category bar. Then, click «Preview».
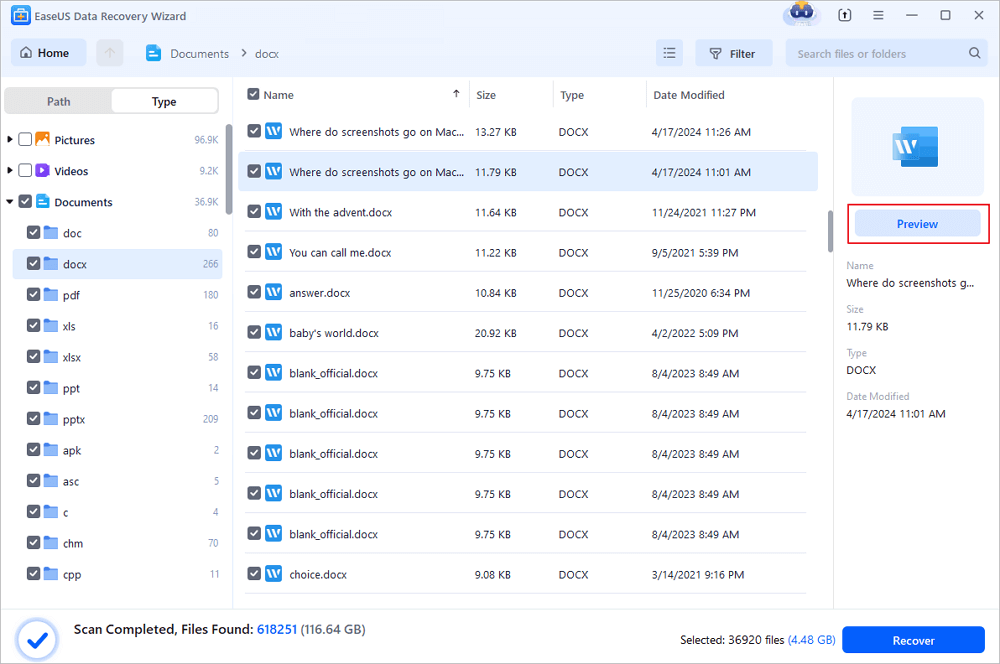
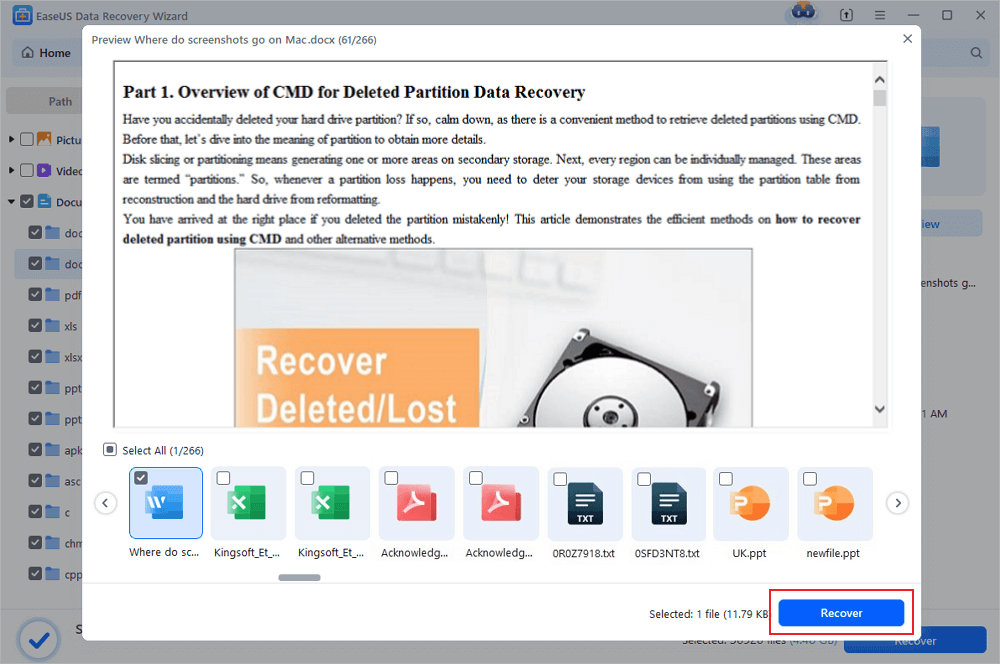
Step 3. Recover Word files
After previewing the lost Word files, select the desired Word files and click «Recover». Then, select a folder to store the Word files.
- Important
- We don’t recommend you try any data recovery software to recover unsaved Word documents. This type of program only helps you recover lost saved Word document due to accidental deletion, disk formatting, virus attack, partition loss, etc. Namely, there needs to be an original file saved before on your computer or storage media.
How to Recover Unsaved Word Document on Mac in 2 Ways
On Mac, AutoRecover is turned on by default. Take the two methods below to recover unsaved Word on Mac by using the AutoRecover function.
Solution 1. Restore Unsaved Word Document in Finder
Step 1. Start your Mac and open the Finder window.
Step 2. Search for AutoRecovery in the search bar. A list of files Word documents named «AutoRecovery save of» will appear.
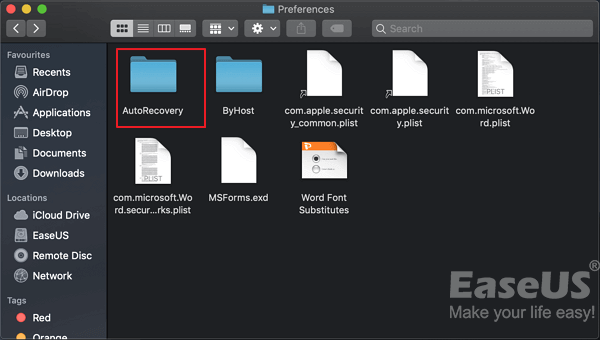
Step 3. Find and open the Word document you want to recover.
Step 4. Click the «File» menu and choose «Save As». Rename the restored files and click the Save button.
Solution 2. Restore Unsaved Word Document with Terminal
The unsaved Word document can be recovered from the temporary folder by using Terminal.
Step 1. Open your Mac and go to «Applications» > «Utilities» > «Terminal».
Step 2. Type open $TMPDIR and find the TemporaryItems folder on the list.
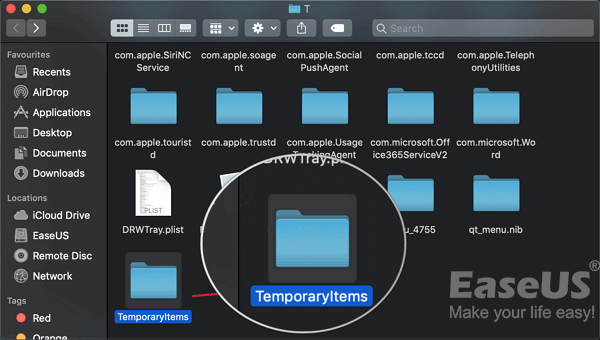
Step 3. Find the file you need. Open and save it to recover unsaved Word documents.
Conclusion
In this tutorial, you can learn five ways to recover unsaved Word documents on Windows and Mac devices. With the help of EaseUS file recovery software, you can restore lost Word documents, whether they are deleted, encrypted by malware, or corrupted when it was saved on a faulty partition.
Hope these solutions can help you get back any lost Word documents.
Recover Unsaved Word Document Frequently Asked Questions
If you still have some Word recovery problems, you can read the following questions and answers to get more help.
How do I recover an unsaved Word document Windows 10?
Step 1. Click the «File tab», then choose «Info», then select «Manage Documents».
Step 2. Select «Recover Unsaved Documents» from the drop-down menu.
Step 3. Click «Open» when you have selected the document you want to recover.
Step 4. Click the «Save As» button and save your Word document.
How to recover unsaved Word document from USB?
If you have unsaved changes to a Word document that is stored on a USB drive, you can recover your work in two ways:
One way is to try opening the document from the Recent Documents list in Microsoft Word. To do this, open Word and click on the File menu. Then, click on Open and select Recent Documents. If your unsaved document is listed, you should be able to open it and recover your work.
Another way to recover an unsaved Word document from a USB drive is to use the Autosave feature. To do this, open the document that you were working on and look for the Autosave folder. If you find the file, you can recover your work by opening it in Word.
How to recover unsaved Word document 2016?
Try these methods to restore unsaved Word document in Word 2019, 2016, 2013, or 2010:
- Check your recently opened documents
- Try opening a temporary file
- Use the AutoRecover tool
Where are unsaved Word documents stored?
These Word files can be found via «File> Open» and click the «Recover Unsaved Documents» button at the very bottom of the Recent File List.
There are few experiences as universally familiar as losing a Word document. Everyone from high schoolers with Catcher in the Rye book reports to business executives with quarterly earnings knows the panic of their work disappearing when it’s just a few crossed-t’s away from being completed.
Fortunately, there are dependable ways to recover Word documents quickly and reliably. Whether your work was accidentally deleted, lost in a Microsoft Word crash, or simply disappeared, here’s a simple guide on how to recover unsaved Word documents.
And remember, if all else fails, installing a data recovery program like Acronis Revive or falling back on a recent file or system backup may help get your documents back (at least in a workably recent state).
Can I retrieve a Word document that wasn’t saved?
Whether you rely on Word for personal or business tasks, losing an unsaved document sucks.
If you don’t save your Word documents manually, your files can fall victim to an unexpected crash. If you’ve already experienced such loss, chances are you have a habit of pressing the «Save» button once (or twice) every so minutes. However, not many users have that habit.
Nonetheless, even if your system crashes with an unsaved document open, you can still recover it through several options.
You can recover unsaved files through Temporary Files, AutoRecover Files, Document Recovery, Recycle Bin, and Data Recovery solutions. We’ll explore all of those options more deeply a bit later in the article.
Does Word keep backup files?
Like most programs in its class, Microsoft Word has an in-built «auto-save» feature to automatically back up your progress every few minutes. The default auto-save folder to support this function is the AppData folder.
Examples of the file path to harvest copies of your work are:
C:UsersYour_UsernameAppDataLocalMicrosoftWord
Or
C:UsersYour_UsernameAppDataLocalTemp
Or
C:UsersYour_UsernameAppDataLocalMicrosoftOfficeUnsavedFiles
Word backup files carry the «.wbk» extension. If you haven’t disabled the backup option in Word, the program will make copies of your documents regularly.
To check if the backup option is active, go to «File» -> «Options» -> «Advanced»; then scroll down to the «Save» section -> select «Always create backup copy».
Can Word save to the Cloud?
Yes, it can. If you rely on the native Windows option, your documents will be uploaded to OneDrive.
Having your documents on the cloud enables easier sharing and improves collaboration. It also allows easier mobile access (from a PC, laptop, smartphone, or tablet) and enhances data protection.
To save files to the cloud, do the following:
1. Select the «File» menu and go for the «Save As» option;
2. Choose «OneDrive»;
3. Choose a descriptive file name and go for «Save».
You can save personal and payment information to OneDrive – Personal, with work-related files going to a company OneDrive. You can also pick an alternative location in the list or «Add a Place» of your preference.
If you’re using a third-party backup solution like Acronis Cyber Protect Home Office, you can upload backup files to the Acronis cloud. Storing your files with a dedicated cloud backup service provides improved cybersecurity via backup encryption, automated backups, and concrete data recovery processes.
How do I restore a permanently deleted file?
Multitasking on a device may lead to losing critical data. (files, documents, images, audio, video, etc.)
Sometimes, you can get distracted and accidentally delete files and folders. The most common reasons for an accidental deletion are:
· Accidentally emptying your Recycle Bin;
· Erasing documents via «Shift+Delete» keys;
· Deleting files via the command line;
· Deleting files with the «Do not move deleted files to Recycle Bin» option enabled
File deletion or corruption can also result from malware or virus infection on your device.
Fortunately, you can recover perma-deleted data and documents in several feasible ways. Not all of them are guaranteed to recover permanently deleted documents, but you may try all of them in order when needed.
You can still recover seemingly perma-deleted files due to how your hard drive operates. Every file on your device resides on a specific portion of the hard drive. When you delete a file from your hard drive, the drive removes the deleted data and marks the space it used to occupy as «free» for writing new data.
However, the file can be restored to its original location unless you write new data on the newly available space. Remember, you need to act quickly – even if you don’t save new data to the hard drive manually, your computer can initiate updates or save system data on the newly available space.
In such a scenario, recovering permanently deleted files becomes close to impossible.
How to recover deleted Word documents via Backup?
Windows 10 and 11 pack a new feature called Backup and Restore.
The option enables users to create backups of their data to restore them later if needed. To recover permanently deleted files via Backup and Restore, you’d need to have enabled the option on your Windows device.
Here’s how to do it:
· Connect the external media carrier holding the backup to your primary device
· Go to «Control Panel» -> select «System and Security» -> click «Backup and Restore (Windows 7)» option
· Once in the Backup and Restore menu, go for the «Restore my files» option -> a Restore wizard will pop up to start file recovery
· If you can’t find the «Restore my files» option, go for the «Select another backup to restore files» option. Again, a wizard will pop up to assist you with your recovery
Recovering via Backup and Restore will replace all data on your Windows device with backed-up data. So, to avoid further data loss, make sure the backup contains all your crucial data.
How to recover deleted Word documents via Previous Windows 10/11 version?
Windows 10 and 11 offer another convenient feature to restore permanently deleted files – the «File History» option. If you had enabled the option before deleting a document, you could use it to recover permanently deleted files without additional software.
To do so:
· Type «File History» in the Start menu or the Windows search bar
· Select «File History Settings»
· From the left panel on the pop-up window, choose «Restore personal files»
· Navigate the feature to the backup you wish to restore. You can do that via the left and right navigation buttons at the bottom of the window. While you switch between backups, you can preview backup dates and the folders within them
· Once you’ve located the specific backup storing the deleted documents, press the «Restore» button to recover the files to their original location
· If Windows suggests it already carries a file with the same name in the destination folder, go for the «Replace the file in the destination» option
Lastly, close the window and check if the recovery is successful.
How to recover deleted Word documents via Command Prompt?
Sometimes, files and folders can be hidden due to the «Hidden files and folders» feature in Windows. You can use the Command Prompt to try and recover them.
To do so:
· Type in «cmd» in the Search Bar on the Start menu
· Choose the «Run as administrator» option
· Type chkdsk *: /f in the Command Prompt. The * represents the letter of your hard drive, so replace it properly. Once you do, hit «Enter»
· Type ATTRIB -H -R -S /S /D D:*.* in the Command Prompt window. Here, replace the «D» with the letter corresponding to your hard drive. Once you do, hit «Enter» again
A recovery process should start immediately if you’ve followed the above steps successfully. Let it finish and check if your files have been restored.
How to recover deleted Word documents via System Restore?
If you’re running Windows 10 or 11, you can opt for a System Restore to recover permanently deleted files. As System Restore takes regular (automated) snapshots of your whole OS, you can revert any unwanted changes to your system by reverting it to a previous point in time.
However, you’d need to have activated the System Restore option beforehand.
To recover perma-deleted files via System Restore, you need to:
· Type in «create a restore point» in the Start menu or Windows search bar, and click «Enter»
· Select «System Restore»
· Go through potential system restore points in time and select the most appropriate to recover the deleted document; then, click «Next»
· Confirm the specific restore point and choose «Finish»
· Your PC or laptop will then restart to allow Windows to apply the changes
Although this option is convenient, you must remember that System Restore may affect recently installed drives, programs, and browser updates. As its primary goal is to repair your Windows environment, it will revert your device to an older version of itself. And that older version may not have some programs or apps installed or updated correctly.
Nonetheless, before the System Restore process starts, the feature will show you a window containing all programs that will be affected by it. This way, you can back up all potentially affected programs and files before you revert your system.
How to recover deleted Word documents via System Image Recovery?
System Image backup enables users to back up the entirety of a Windows 10 or 11 OS. However, the feature doesn’t allow single file and folder backup, so you wouldn’t be able to restore individual documents if needed.
Here, it’s either recover everything or don’t recover anything.
To recover documents via System Image Recovery, you need to:
· Type «settings» in the Start menu or Windows search bar, and click «Enter»
· Browse and select «Update & Security»
· From the options list on the left, go for «Recovery»
· Save the progress on any open documents or programs
· Then, go for the «Restart now» button (you can find it under «Advanced Startup»)
· Afterward, select “Troubleshoot” -> “Advanced Options” -> “See more recovery options” -> “System Image Recovery”
· Browse through the list of System Image backup files and select the one containing the deleted document, then click «Next»
· Choose additional restore options, then click «Next»
· Review all System Image properties and click on «Finish» to start the restoration process
Once the restoration is complete, the deleted document should be restored to its original location. (or an alternative location, if you’ve chosen so in the Restore settings)
How to recover deleted Word documents via a third-party Backup solution?
If you’re using a dedicated backup solution, you can initiate data recovery and restore permanently deleted files from your device.
For example, Acronis Backup and Recovery enables users to initiate efficient backups with over 20 supported platforms. Via the cloud, your data is securely stored in physical, cloud, virtual, and mobile environments.
If you need to recover files from Acronis backup, you can do it via the user-friendly interface.
To do so:
· Start Acronis Cyber Protect Home Office -> select «Backup» on the sidebar
· Select the backup containing the deleted documents from the backup list
· On the panel to the right, select «Recovery»
· The interface will present you with possible recovery models for the selected backup; depending on the backup’s type, you’d be able to choose from «Entire PC», «Disks», «Partitions», and «Files» options. To recover one or more documents, select «Files»
· Cyber Protect Home Office will display the backup’s properties and the data inside it. Then, select a specific version of the backup based on the date and time. The default option here is the latest backup
· The panel on the left lets you navigate the files you wish to restore in the panel on the right; after you select all needed documents, press «Next»
· Choose a recovery destination on your device to place the selected documents after restoration. Here, you have two options – recover the data to its original location or choose a new location via the «Browse» button
· You can customize the recovery settings for the current session via the «Recovery options» menu.
· Once you’re done with the settings, go for the «Recovery now» button.
You can terminate recovery via the «Cancel» button at any time. However, aborted recoveries can still cause changes in the selected destination folder, so only go for the option if absolutely necessary.
Tips on preventing your Word Files from being deleted or unsaved
How to recover Unsaved Word Document?
We rely heavily on autosaves, yet huge chunks of progress and entire versions of documents can be lost when we don’t manually save our work. The good news is, this problem is so common that Microsoft has made it easy to recover unsaved Word documents:
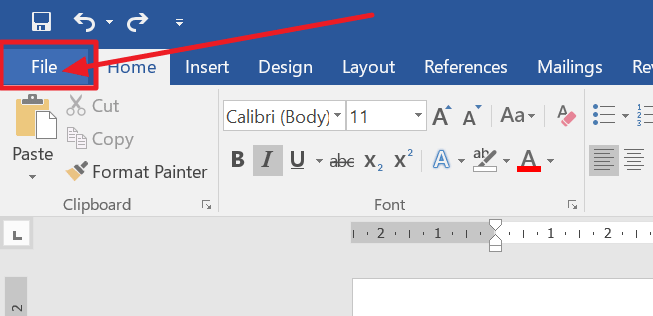
1. In MS Word, click the File Tab in the upper left.
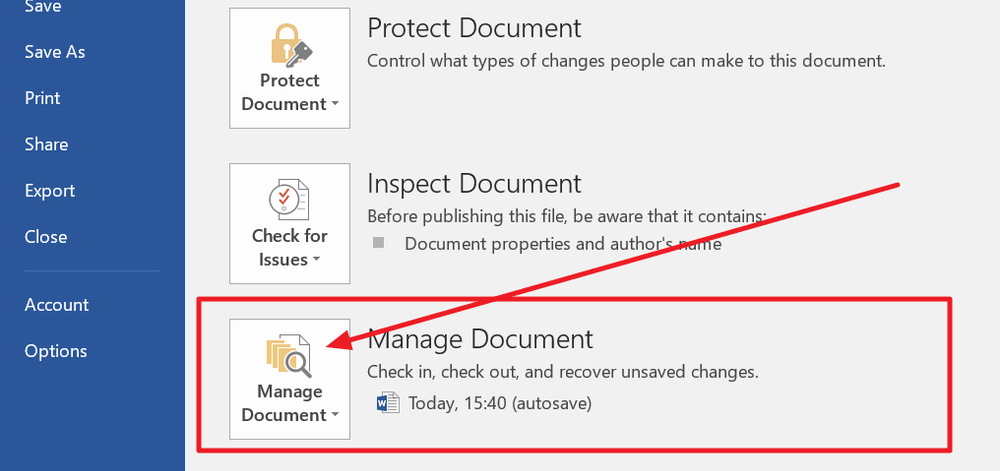
2. Click Manage Document and select Recover Unsaved Documents from the drop-down list.
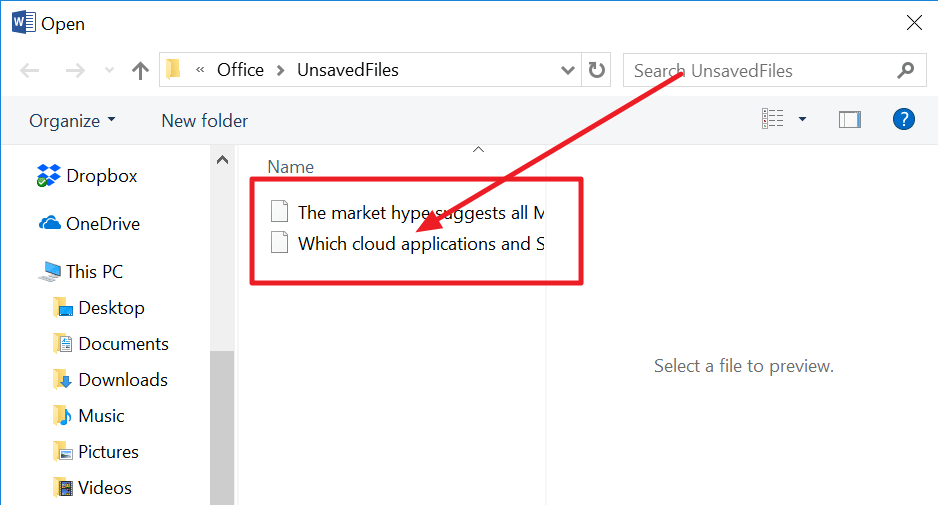
3. Check for your missing file in the dialog box. If it was a recent loss it should appear.
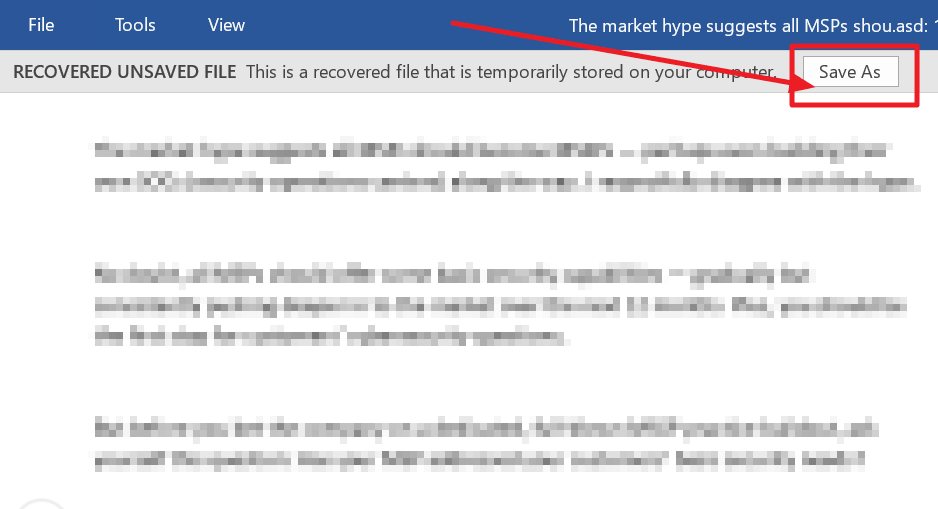
4. Open the recovered Word document and click the Save As button in the top banner.
Did You Know?
You can update the frequency with which Microsoft Word autosaves your documents. Click File > Options > Save and change the number of minutes to ensure you have a recoverable version of all your docs available in case you need to recover Word documents in the future.
Knowing how to recover deleted Word documents will make you seem like a wizard to many of the people in your office, but it’s not complicated at all. Whether you’re trying to recover MS Word documents that were accidentally deleted or compromised by malware, there are a few easy steps that could help you get it back.
1. On your desktop, open the Recycle Bin
2. Search for your file by document name, file type, or date deleted. If you find your missing file, note the Original Location. When you recover deleted Word documents, they automatically are restored to that location.
3. Restore the deleted document and either find it in its original location or click Quick Access to find it in the Recent Files list.
Did You Know?
When a file is deleted you’re actually just removing a marker that points to where the file was stored on the disc. The file actually exists on the disc until its space is overwritten by new information. Until that happens, you have a chance to recover Word documents.
How to recover Word Documents after a Crash?
Recovering Word documents that didn’t save doesn’t always stem from user errors. Whether your system unexpectedly went down or Microsoft Word crashed, Word documents can be recovered if you quickly search for the lost files before other files can take their disk space.
1. When your system comes back online, reopen Microsoft Word. The program automatically recovers unsaved Word documents in most cases.
2. If your document doesn’t appear in the AutoRecover list, click on File, then Options, then Save.
3. Copy the AutoRecover file location filepath and paste it into File Explorer.
4. Open the folder with your document’s name and copy the .asd file with the most recent modification date and time.
5. Return to MS Word, click File, then Open, then scroll to the bottom of the recent documents list and click Recover Unsaved Documents.

6. Paste the copied file into the folder that pops up and open the file to recover it.
Did You Know?
One of the most common reasons for Microsoft Word crashing is corrupt add-on or template. If your program consistently crashes, try running Word without any of these features loaded to see if that helps to improve reliability.
Can I recover a permanently deleted word doc without a backup?
Recovering a permanently deleted file via backup is the easiest and most reliable option. However, sometimes, users don’t have the chance to add a specific document to the backup. If they then accidentally delete the document, recovery gets a hell of a lot more complicated.
In such a scenario, you have two primary options.
The first one is to use data recovery software. Nowadays, many recovery tools claim to have an exceptionally high rate of recovering permanently deleted files. Usually, such solutions can recover over 1000 file types and formats and claim to restore data even from corrupted partitions or bad sectors on your hard drive.
They typically operate by collecting the lost data bit-by-bit until they can fully restore its original state. Such an approach can prove handy occasionally, but that depends heavily on the state of your computer’s hard drive.
If you lose a document due to a bad sector on your hard drive, the software may not be able to recover all of the document’s pieces successfully. This may lead to an altered version of the document or may not be able to restore it at all. In such a case, the document would be lost unless you have it stored in some form of backup.
This leads us to the second option.
Suppose a user perma-deletes a document by accident. In that case, most often, their reaction is to panic, especially if they don’t have the document stored in a backup outside their primary device.
However, we live in a technologically webbed world – anyone can send documents to multiple recipients via email, social media platforms, or free cloud services.
You can go through old emails, check DropBox or OneDrive shared storage, or go through your correspondence on Facebook and Instagram to find the deleted file. Nonetheless, if you’re 100% sure you haven’t sent the document to anyone, you can opt for the data recovery software option.
As we’ve mentioned, AutoSave is an in-built feature available in Word, Excel, and PowerPoint. (given you have a Microsoft 365 subscription)
AutoSave saves the progress on your Word files every few seconds unless you tell it otherwise. If you store your Word files on OneDrive, SharePoint, or OneDrive for Business, AutoSave is enabled by default.
To save a copy of your work before implementing any changes, it’s better to use the command «File -> Save a Copy» rather than «File -> Save As». That way, AutoSave will not overwrite the original document with the changes you make afterward.
If you skip that step and end up with an overwritten document, you can still restore the original via Version History. To do so:
· Open the Word file you wish to restore to a previous version
· At the top of the windows, click on the filename and go for «Version History»
· Review the dates and times of all versions to find the one you wish to restore -> click «Open Version»
· An additional window will pop up and show you the specific version of the document
· Once you’ve made sure this is the version you want to restore, click «Restore»
Whenever you open a Word document and make first changes, AutoSave will save those changes by adding a new file version to Version History. Afterward, AutoSave will regularly save changes to the document but only add new versions to Version History about every 10 minutes until you terminate the session. (ending the session means closing the Word document)
How do I get Microsoft Word to save AutoRecover versions every minute?
If you’re handling critical information via Word documents, saving a version of the file every 10 minutes may seem risky. However, Microsoft has thought of that – you can change the AutoRecover frequency to any number that suits you.
Here’s how to do it:
· Open Word and go to File -> Options -> Save
· You’ll see a settings section labeled «Save documents»
· Under the «Save documents» line, type your chosen number (of minutes) in the «Save AutoRecover information every (…)» box
· Once done, press «OK»
If you want to change the location for AutoRecover documents, go to:
· File -> Options -> Save
· Under the «Save documents» line, browse or type in the save path for saved documents in the «AutoRecover file location» field
· Once done, press «OK»
The AutoRecover settings window allows you to also:
· Disable AutoSave for OneDrive and SharePoint online files by default
· Change the cache location for AutoRecover files. The default should be «C:UsersYour_UsernameAppDataRoamingMicrosoft[OFFICEAPPFOLDER]
· Enable AutoSave on the computer by default
According to Microsoft, however, there is no option to use AutoSave locally in Office 2019 or 2021. Nonetheless, the AutoRecovery feature is still active to periodically save copies of your Word files to negate accidental data loss due to a crash.
Can I turn on AutoRecover in Word for Mac?
As with Windows, AutoRecover is available for Mac to protect the progress on your Word documents. Its default function here is the same – it makes a copy of your document every 10 minutes.
To enable AutoRecover and set the timeframe for making copies, you need to:
· With Word open on your Mac, go to the «Word» submenu on the top
· Choose «Preferences»
· Choose the «Save» option
· Choose «Save Auto-Recovery Information» and type in the duration you wish to set for AutoRecover copy creation
Microsoft advises users not to rely on AutoRecover as a substitute for manually saving their documents. (by clicking on the «Save» icon)
The most optimal way to preserve changes to your document is by manually saving it after every significant change. Nonetheless, it doesn’t hurt to set the AutoRecover timer to 5 minutes instead of 10 to guarantee you won’t lose progress due to a crash.
Keep in mind, when you manually save a document, its previous AutoRecover versions are removed.
On the other hand, AutoSave is a feature that saves your documents as you work on them. It works as if you’ve manually saved your progress. For Mac, AutoSave is available in Word, Excel, and PowerPoint for Mac and Microsoft 365 subscribers.
If you have AutoSave enabled, it’s less likely you’d need to rely on AutoRecover files.
Where is Autosave in Word located on Mac?
The AutoSave and AutoRecover features are linked in the Word menu. The path to enable AutoSave follows the same steps as with AutoRecover. However, you’ll have a few extra steps to complete before AutoSave is active for Word on your Mac.
Here’s how to do it:
· Open Word
· From the top menu, choose «Word» -> «Preferences»
· Click on the «Save» icon
· Tick the checkbox labeled «Turn on AutoSave by default»
· From the Word document, enable the AutoSave toggle to save your progress to the cloud (OneDrive or SharePoint)
· Explore more options from the AutoSave tab and select the «Automatically Save» option
· The AutoSave toggle will appear on the top side of the Word toolbar
· Name the document you’re working on and choose OneDrive or SharePoint as the storage location of the Word file
· Click «Save» to enable AutoSave to store changes in your desired location in real-time
· Your document will then be uploaded to the chosen location
·Once that’s done, AutoSave is on, and all changes you make to the document will be saved to OneDrive or SharePoint
Where can I find AutoSave Word documents on my computer?
If a power failure or a crash occurs, AutoRecover will typically recover the last version of your Word document automatically when you launch the app. Once AutoRecover opens the existing recovery file, it’s best to save it before editing or closing it immediately.
However, you may need to find AutoRecover files on your computer for other reasons. To do so:
· Switch to Finder
· Click «Go»
· Click «Go to Folder» (you can also use the SHIFT + COMMAND + G combo)
· Enter the specific folder path corresponding to Word, Excel, or PowerPoint
For Word:
/Users/Your_Username/Library/Containers/com.Microsoft/Data/Library/Preferences/AutoRecovery
For Excel:
/Users/Your_Username/Library/Containers/com.microsoft.Excel/Data/Library/Application Support/Microsoft
For PowerPoint: /Users/Your_Username/Library/Containers/com.Microsoft.Powerpoint/Data/Library/Preferences/AutoRecovery
Just a reminder: Replace «Your_Username» with your actual username.
As the AutoRecovery folder is hidden, typically, you won’t be able to find it by navigating in Finder. That’s why you need to use the «Go to Folder» feature and type in the full path to reach the folder.
Additionally, if you close a Word document and click «Don’t Save», the AutoRecover option won’t be active. The feature will delete the AutoRecover file because it assumes everything is okay and you wouldn’t need the AutoRecover file.
Can Microsoft Word recover previous versions of my document?
If you have turned the AutoRecover option on, it will automatically save versions of your documents regularly. (usually, at 10-minute intervals)
Once you have the AutoRecover files for your document, you can recover them depending on when you saved them.
There are two options: recover a saved file or an unsaved one.
If you have saved the document, you have to:
· Open the document you were working on
· Select “File” -> “Info”
· Find «Manage Documents» and choose the file labeled (when I closed without saving)
· A bar on the top of the file will appear; choose «Restore» to overwrite any previously saved versions
You can also compare AutoRecover versions by choosing «Compare» instead of «Restore».
If you haven’t saved the document, you have to:
· Open Word and go for “File” -> “Info” -> “Manage Document” -> “Recover Unsaved Documents”
· Select the specific file and click «Open»
· In the top file bar, choose «Save As» to save the document
If you have stored AutoRecover files in OneDrive or SharePoint in Microsoft 365, you can view all historical versions of a document.
To do so in Office 365:
· Open the file you want to inspect
· Select “File” -> “Info” -> “Version History”
· Browse through versions and select them to open them in a separate window
· If you want to restore the document to one of the previous versions, choose «Restore»
Keep in mind, if you operate via a Microsoft account, you’d be able to retrieve the last 25 versions of a document. If you sign in with a school or work account, the retrievable version volume will depend on your library configuration.
To view AutoRecover versions in Office 2019-2016:
· Open the document you want to inspect
· Click “File” -> “History”
· Choose a version to open in a separate window
If you can’t locate the «History» tab on the Word navigation pane, you may have a subscription version of Microsoft Office. If that’s the case, click the «Info» button and try accessing Version History from there.
To view AutoRecover versions on Mac:
· Open the document you want to view
· If you are using Microsoft 365 for Mac, choose the name of the document from the app’s title bar -> click «Browse Version History»
If you’re running Office 2016 or 2019 for Mac, go for «File» -> «Browse Version History»
· Browse AutoRecover versions and choose which ones to open in a separate window.
To view AutoRecover versions on the web:
· Open the document you want to view
· Go for “File” -> “Info” -> “Version History”
· Browse through AutoRecover versions and open the ones you want in a separate window
· When you find the version you’re looking for, choose «Restore»
If you use SharePoint in Microsoft 365 to handle documents, you can track AutoRecover versions, share them with others, and check recycle bin storage if you accidentally delete a file.
How to search for Word doc which I know I saved?
If you’re sure you have saved a Word document but haven’t been able to locate it, worry not. There are several ways to unfold saved documents, even when you’re computer is swamped with Word files.
You can search a file via the taskbar, the Documents tab, or File Explorer.
To find a Word document via the taskbar, type in the document’s name (if you remember it correctly) into the search box on the Windows taskbar. If you don’t know the full name of the document, you can use a keyword from it.
You can get results even if you remember a keyword from the text body of the document. (and not its name)
Once you type the name or keyword, Windows will show all matches on your device and OneDrive.
You can select the Documents tab if you wish to narrow your search. Once you do, your search results will only show documents.
Moreover, you can open File Explorer from a taskbar shortcut or right-click the Windows Start menu and choose File Explorer. Afterward, you can select a location on your hard drive from the left window pane.
You can then search or browse to find the document you need. You can search your entire device by selecting «This PC», or go for «Documents» and only look for files stored there.
How to search for Word backup files?
Although Word backup is seamless once set up for users, finding specific Word backups may be difficult without preparation. Luckily, you can learn how to pinpoint different Word backups below.
Check Word settings
If you remember how to open the AutoSave settings in Word, you can skip the next set of instructions. If not, you need to:
· Start Word -> click on «File»
· Choose «Options» and then click on «Save» on the left
· Ensure that the «Save AutoRecover information» option is enabled
Once you reach the settings window, go to the AutoRecover File Location field. Here, you can check the current AutoSave directory location.
By default, it would be «C:UsersYour_UsernameAppDataRoamingMicrosoftWord»
Once you locate the AutoSave directory location, you need to:
· Launch Word
· Navigate to the AutoSave directory
· Look for the version of the automatically saved backup and double-click it; the file will open in Word
As we’ve mentioned, the AutoSave directory may be a hidden folder on your computer, primarily if it resides in the AppData folder. However, you can bypass that by pasting the directory location in File Explorer’s address bar.
Nevertheless, you can navigate to the folder manually if you follow the path. Just make sure to reveal hidden items to be able to see the AppData folder. Once that’s done, you should easily find your way to the AutoSave directory.
Check the AppData folder
As we’ve said, the AppData folder is the default location for AutoSave backups. The pathing to the AutoSave directory can vary; the most common places to look are:
C:UsersYour_usernameAppDataLocalMicrosoftWord
and
C:UsersYour_usernameAppDataLocalTemp
Sometimes, the most recent AutoSave versions may use a different location. Most often, you’d be able to find them in
C:UsersYour_usernameAppDataLocalMicrosoftOfficeUnsavedFiles
As with previously shown paths, replace «Your_Username» with the username corresponding to your user account.
Regardless of which folder holds your Word backups, the AutoSave files have weird-looking names, especially for a casual user. They typically have a tilde before their name and the «.tmp» extension alongside a 4-digit number assigned to them.
Below are some examples of what Word backup files look like in different scenarios:
· ~wrdxxxx.tmp – such a name relates to a Word document within an AutoSave folder;
· ~wrfxxxx.tmp – such a name relates to a temporary document file;
· ~wraxxxx.tmp – such a name relates to an AutoRecovery file;
Complete AutoRecovery files won’t carry the «.tmp» extension but rather the «.wbk» extension. Once you locate them, you can double-click them to open the document in Word. An important note is always to save the file after you open it.
How to use the Recover unsaved documents option?
Sometimes, you’re sure you’ve saved a Word document, but your PC crashes, and you can’t locate the file afterward.
In such cases, you can still recover the document from the AutoSave location. To do so:
· Open Word and go to «File»
· Click «Recent», then select «Recover Unsaved Documents»
· You will be redirected to the AutoSave location folder; you can browse the documents here and find the one you’re looking for
Another path to reach the AutoSave folder is as follows:
“File” -> “Info” -> “Manage Versions” -> “Recover Unsaved Documents”
After you open the file, make sure to save it.
Check the Documents directory
To check the Documents directory, you should:
· Start Word
· Select «File», then choose «Open»
· Go for «Browse» and navigate to the directory you suspect holds the document
· Ensure to change the File Type of the folder from «All Word documents» to «All Files»
· If you’ve opened the correct folder, you should be able to see all corresponding backup files; you should easily spot the specific file as it is typically titled «Backup of (…)»
· Once you find the backup, you can open and save it
How to search your Windows temporary files manually?
In some instances, finding a backup file via traditional methods is more challenging, especially if you can’t find the AutoSave folder.
However, you can manually search for temporary files by tracking their extensions. Autosaved Word files usually carry the .asd or .wbk file extension.
To search for those, you should:
· Press the Windows Key + E on your keyboard; this will launch the File Explorer
· Once it’s up, click on the search bar on the top right
· Type in «.asd» or «.wbk» (without the quotes)
· Press «Enter»
· Windows will now search for all .asd and .wbk extensions
· Once the search is complete, you can browse through the matches and find the file you’re looking for
· Upon finding the specific file, right-click it and choose «Open File Location»; this will open the AutoSave directory location so that you can see all automatically saved backup files
If searching for .asd and .wbk extensions doesn’t bear any fruits, you can search for .tmp extensions. However, .tmp files aren’t necessarily all Word files. Many of them can support files from other applications, so you’d have to do some sorting.
How to recover Word Documents through Data Recovery Programs?
If none of these methods help you recover unsaved Word documents, your best bet is either backup software or data recovery software.
As always, the most secure and reliable way to recover data is with regular full image backups. Whether you use a Windows PC, a Mac, or a mobile device, having up-to-date backups ensure that you don’t lose your files – no matter what.
That said, if you didn’t have a backup plan in-place and active when you lost your Word document, you won’t have a backup to restore the file from.
In this case, personal cyber protection solutions like Acronis Cyber Protect Home Office are the best way to help you recover Word documents. Acronis Cyber Protect Home Office is an easy-to-use software solution that allows you to backup up the entire contents of your system so in the event of a disaster, you can locate a lost file and restore the MS Word document with just a few clicks.
Final Thought
Whether your Word doc was deleted, encrypted by malware or corrupted when it was saved on a faulty partition, you can recover it with Acronis Cyber Protect Home Office. When armed with regular backups, your docs can be recovered quickly and easily so you never have to worry about losing a Word doc or any other file ever again.
Содержание
- Способ 1: Автоматически
- Способ 2: Вручную
- Способ 3: Восстановление несохраненных документов
- Способ 4: Восстановление резервной копии
- Способ 5: Поиск несохраненных файлов и копий
- Дополнительно: Настройка автосохранения
- Восстановление документа при зависании программы
- Вопросы и ответы

Способ 1: Автоматически
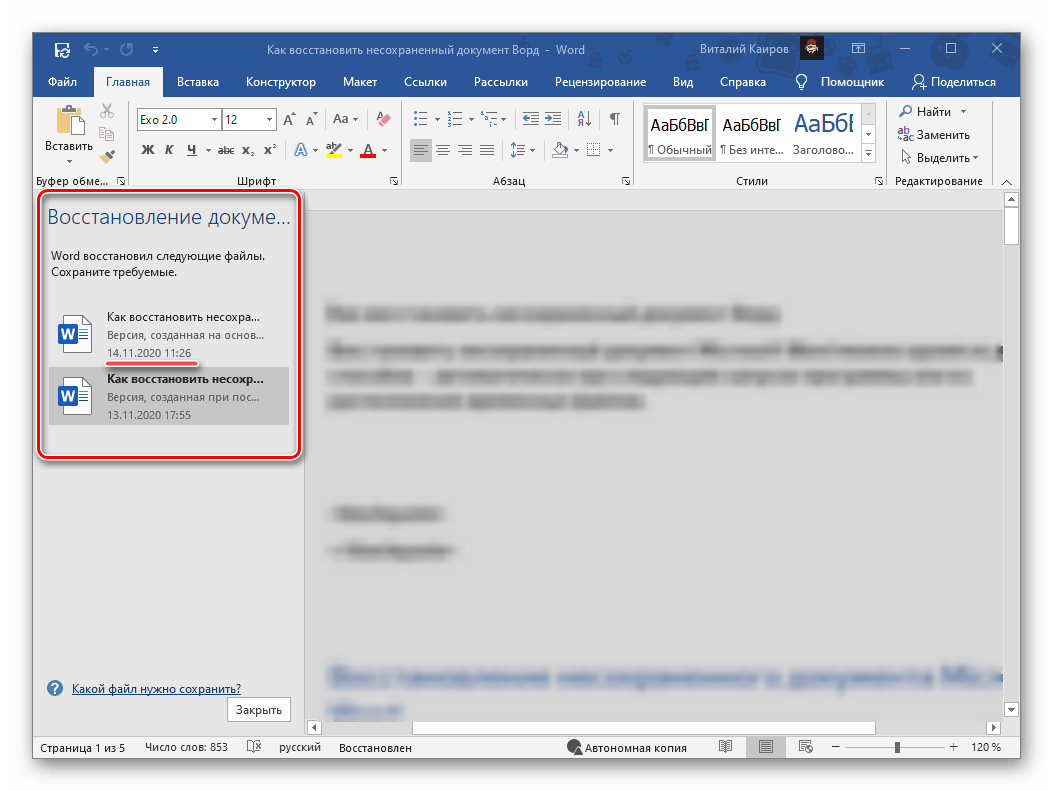
Если работа Майкрософт Ворд была экстренно завершена, например, вследствие зависания программы, ее принудительного закрытия или отключения ПК, восстановить последний несохраненный документ(ы), с которым(и) вы работали, будет предложено при следующем запуске.
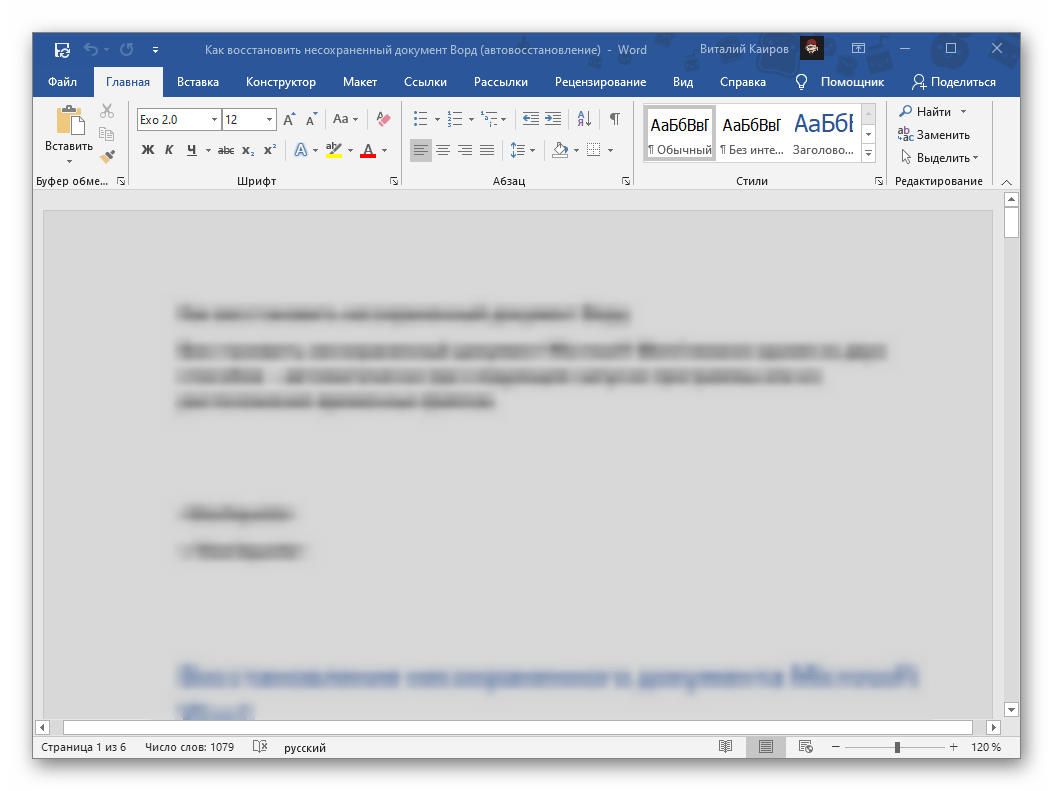
- Откройте текстовый редактор. Слева в его главном окне будет находиться блок «Восстановление документов» со списком «Доступные файлы». Ознакомьтесь с ним и, ориентируясь на название, дату и время создания (ищите самую «свежую» версию), найдите тот документ, который не удалось своевременно сохранить. Отыскав, кликните по нему левой кнопкой мышки.
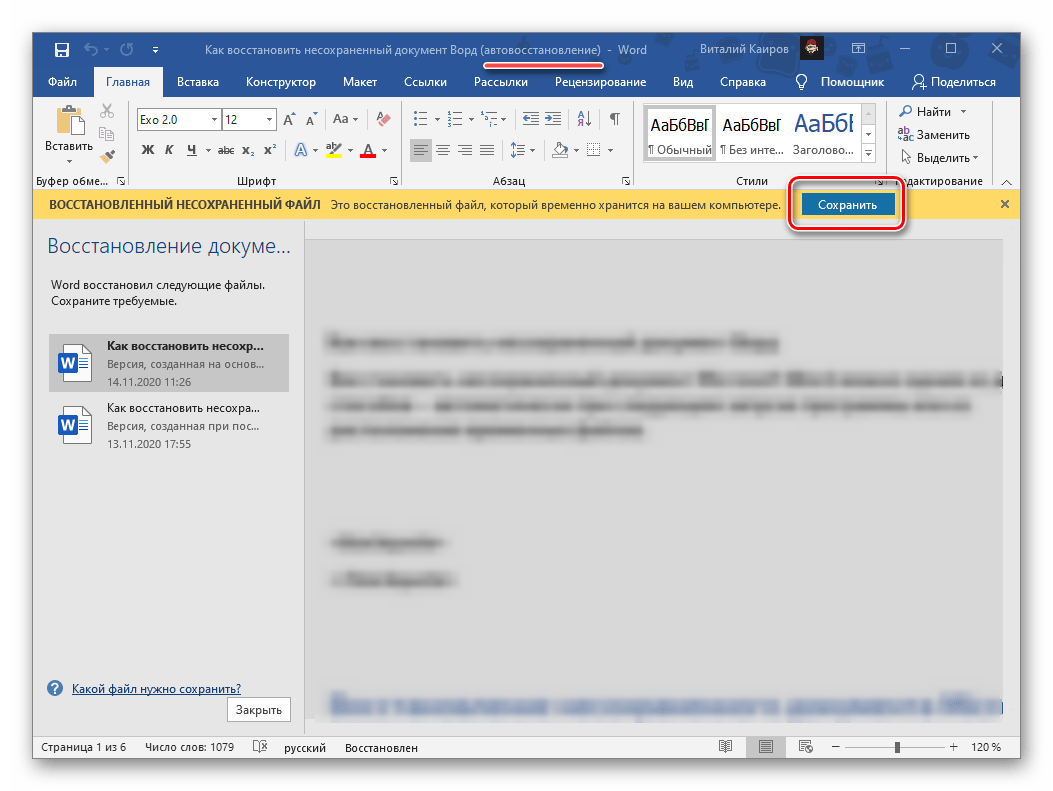
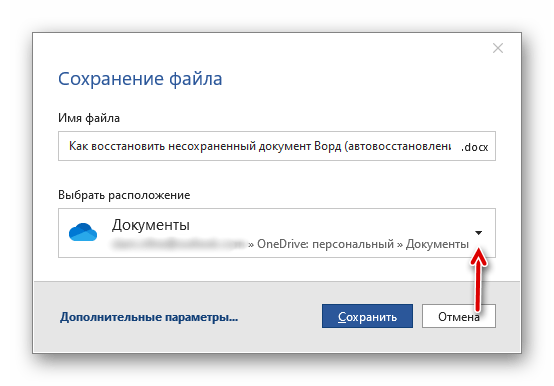
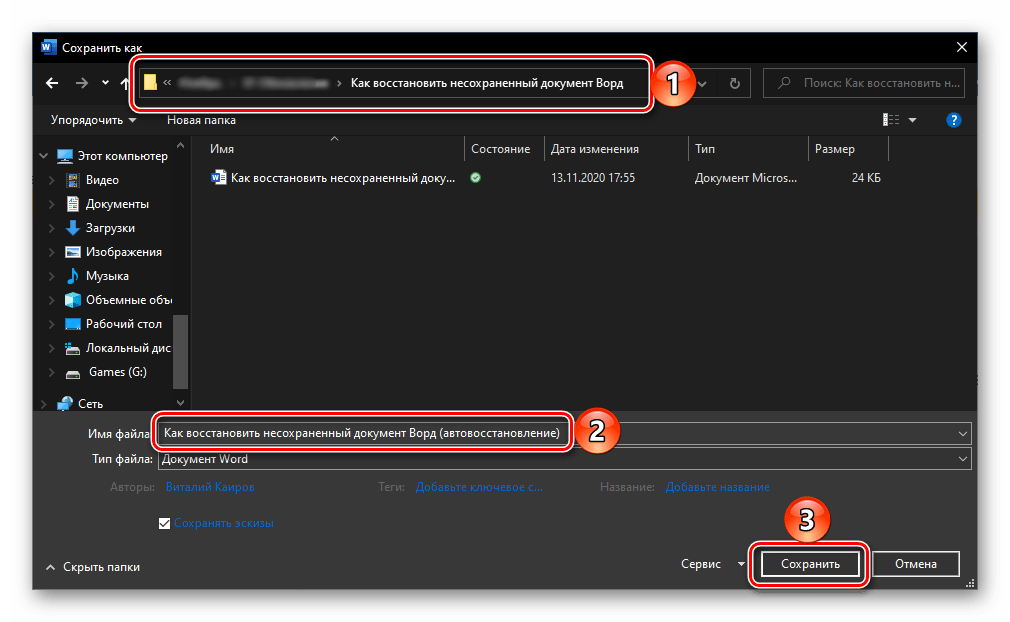
- Файл будет открыт в новом окне. Сохраните его в любое удобное место на диске ПК:

Воспользуйтесь для этого обозначенной выше кнопкой, затем выберите расположение

и укажите его в «Проводнике». Для подтверждения нажмите «Сохранить».

Примечание: К изначальному наименованию текстового документа будет добавлена приписка «(Автосохраненный)» или «(автовосстановление)». Если вы хотите сохранить его под прежним именем, заменив оригинальный файл, сначала закройте первое окно программы. Отметим, что к последнему решению стоит прибегать только в том случае, если больше нет документов для восстановления.
- Область «Восстановление документа» в его обновленной версии будет закрыта. Если требуется восстановить еще один или несколько файлов, которые тоже не были сохранены, вернитесь к первому открытому окну программы и повторите действия из первого шага настоящей инструкции.
В большинстве случаев содержимое текстового документа данным методом восстанавливается не в полном объеме. В первую очередь это связано с тем, какое значение времени установлено для доступной в Word функции автосохранения (подробнее о ней будет рассказано в предпоследней части статьи), – по умолчанию это 10 минут, и за этот промежуток более-менее опытные пользователи вполне могли написать достаточно большой фрагмент текста. К сожалению, он наверняка будет потерян.
Способ 2: Вручную
Упомянутая выше функция автоматического сохранения создает резервные копии документов Ворд и помещает их в указанное расположение на диске. Это те же файлы, которые предлагается восстановить при запуске программы после ее аварийного закрытия, но это происходит не всегда. Именно в таком случае потребуется самостоятельно выполнить данные действия.
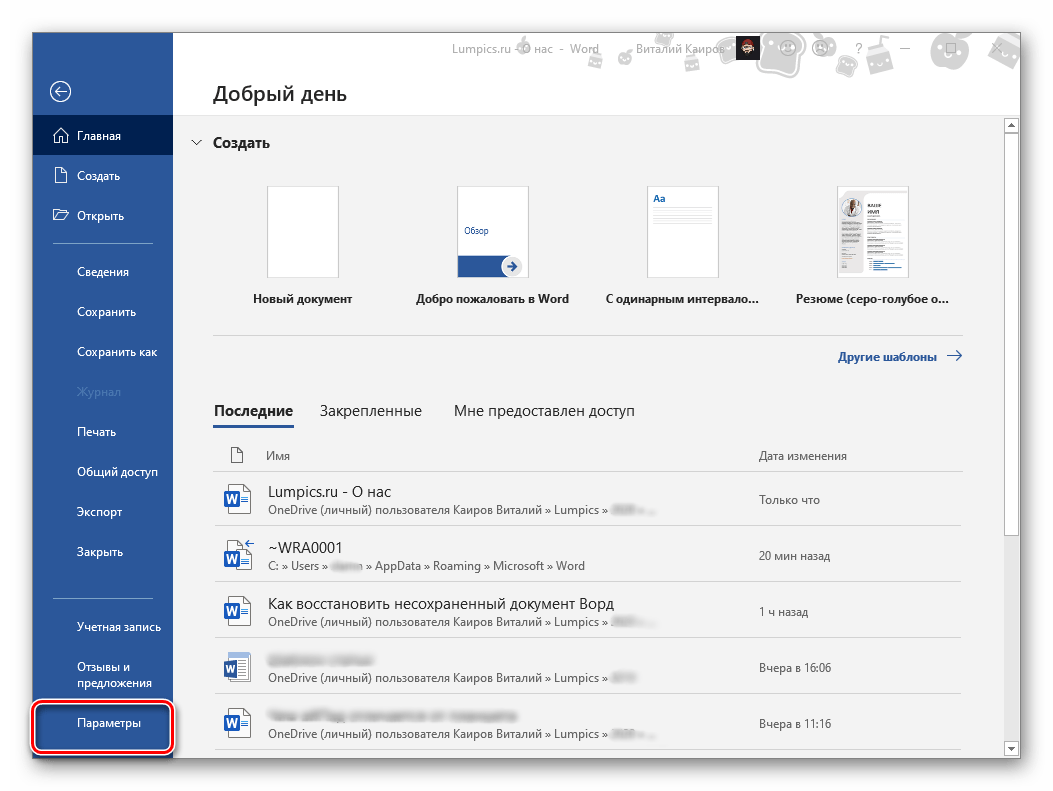
- Запустите Word, вызовите его меню «Файл» (в ранних версиях это расположенная слева на панели инструментов кнопка с логотипом MS Office)

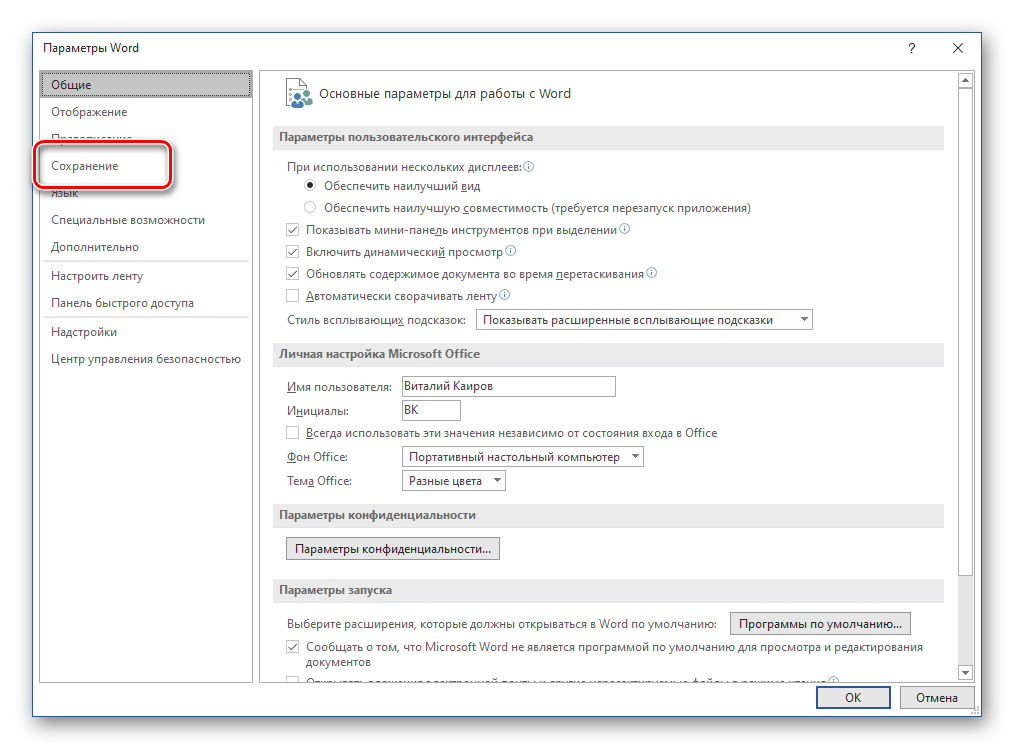
и откройте «Параметры».
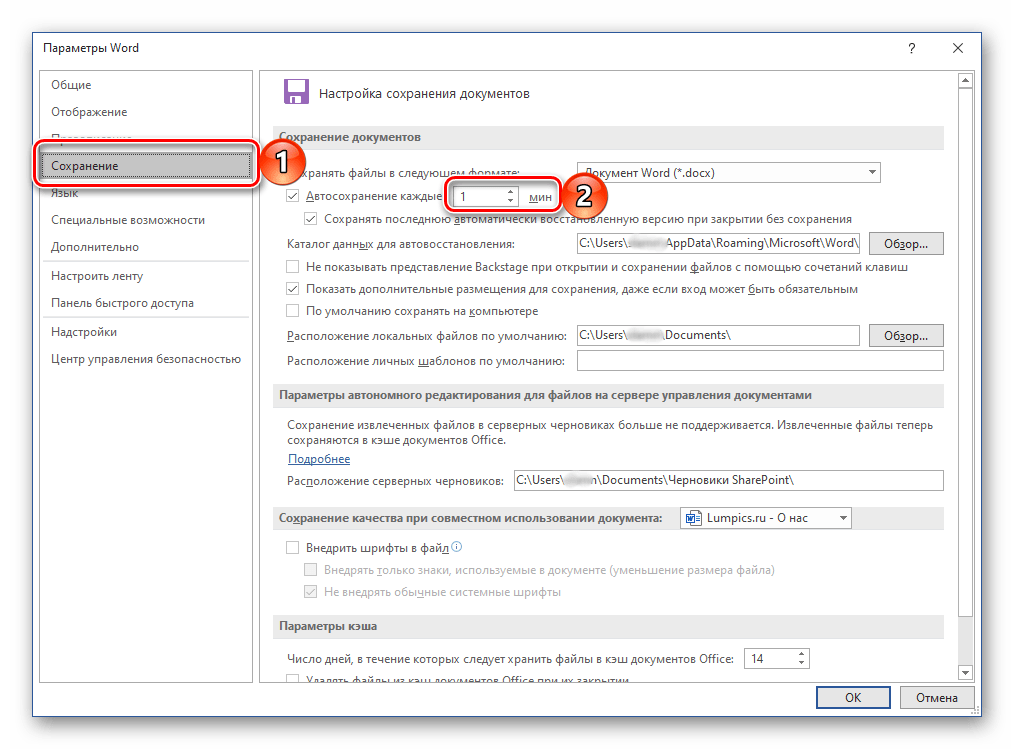
- В открывшемся окне перейдите во вкладку «Сохранение».
- Именно здесь задаются все параметры автосохранения, но сейчас нас интересует только один – «Каталог данных для автовосстановления». Скопируйте путь, указанный напротив данного пункта.
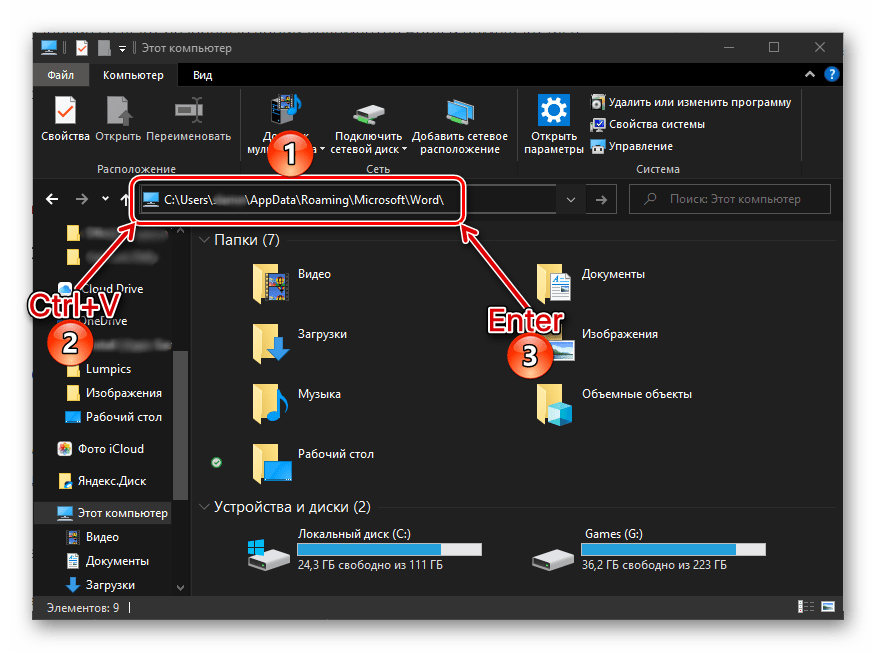
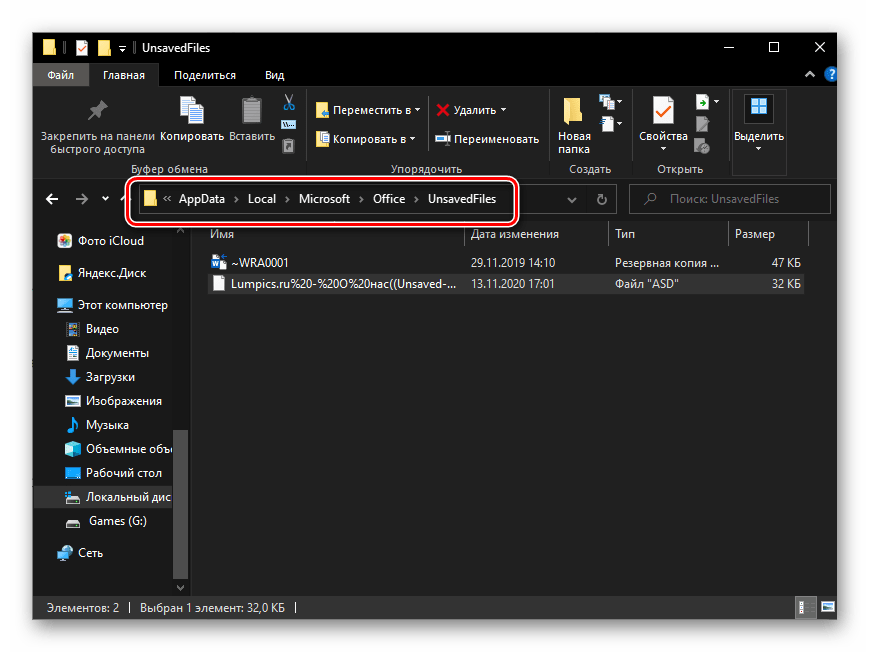
- Откройте «Проводник», например, воспользовавшись клавишами «Win+E», введите в его адресную строку скопированный на предыдущем шаге путь и нажмите «Enter» для перехода в это расположение.

Читайте также: Как открыть «Проводник» на компьютере с Windows
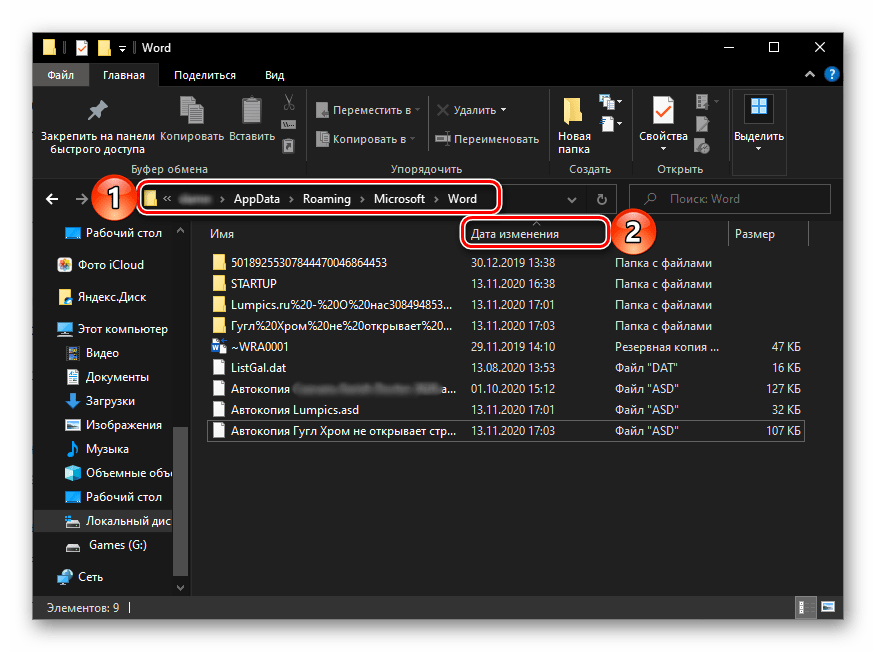
- В открывшейся директории может быть довольно много файлов и папок, но, так как нас интересуют последние версии, для удобства навигации следует упорядочить содержимое по дате изменения.
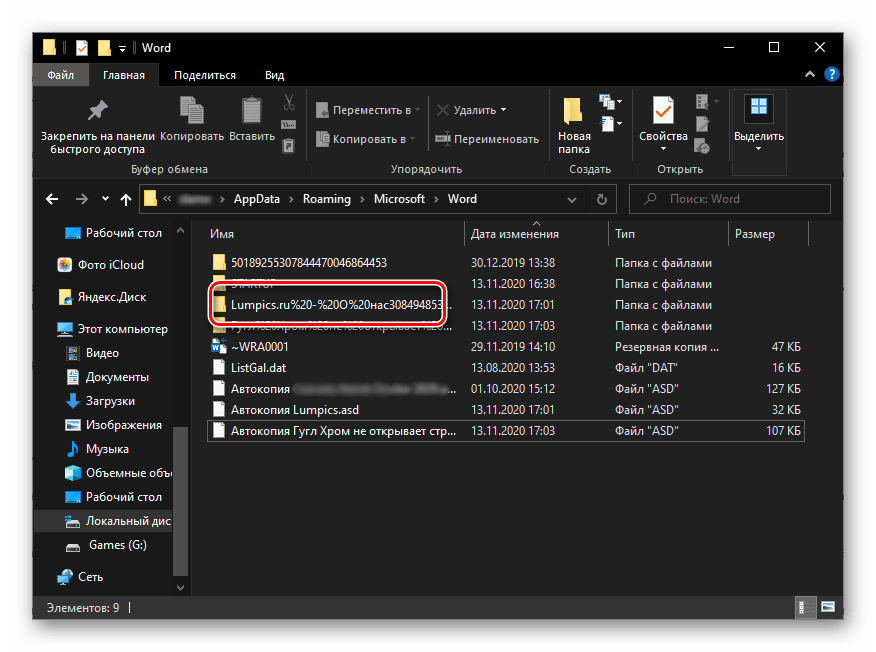
Резервная копия файла может храниться как непосредственно в самом каталоге, так и в отдельной папке,
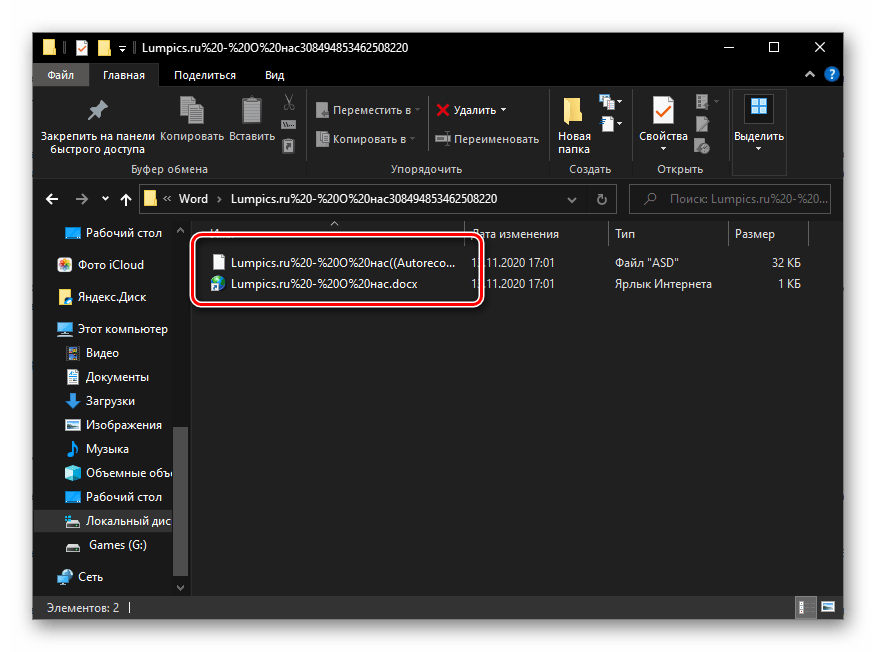
название которой будет повторять название документа, но «разбавленное» символами вместо пробелов. - Как и в предыдущем методе, ориентируясь на наименование документа и дату его создания, найдите тот, который не был сохранен и сейчас требуется восстановить.
- Откройте его двойным нажатием левой кнопки мышки или через контекстное меню и повторно сохраните на диск.


В плане результативности этот способ ничем не отличается от предыдущего и имеет те же недостатки – часть содержимого документа, которая была создана с момента последнего автоматического сохранения, не будет восстановлена. При этом в некоторых случаях такой подход является единственным решением задачи, озвученной в заголовке статьи.
Способ 3: Восстановление несохраненных документов
Помимо автоматического сохранения текстовых файлов в процессе работы с ними, Word также создает резервные копии, которые можно восстановить через меню программы.

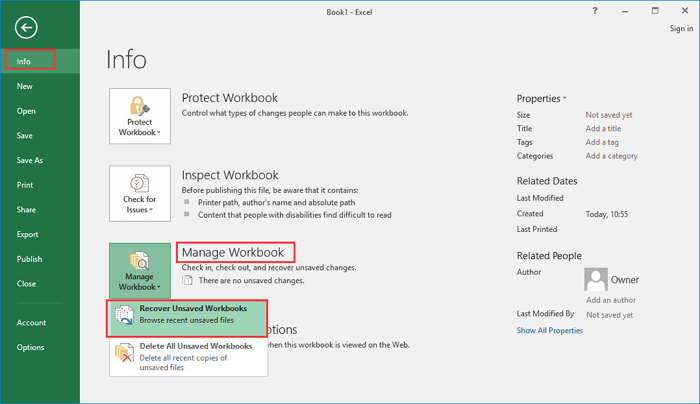
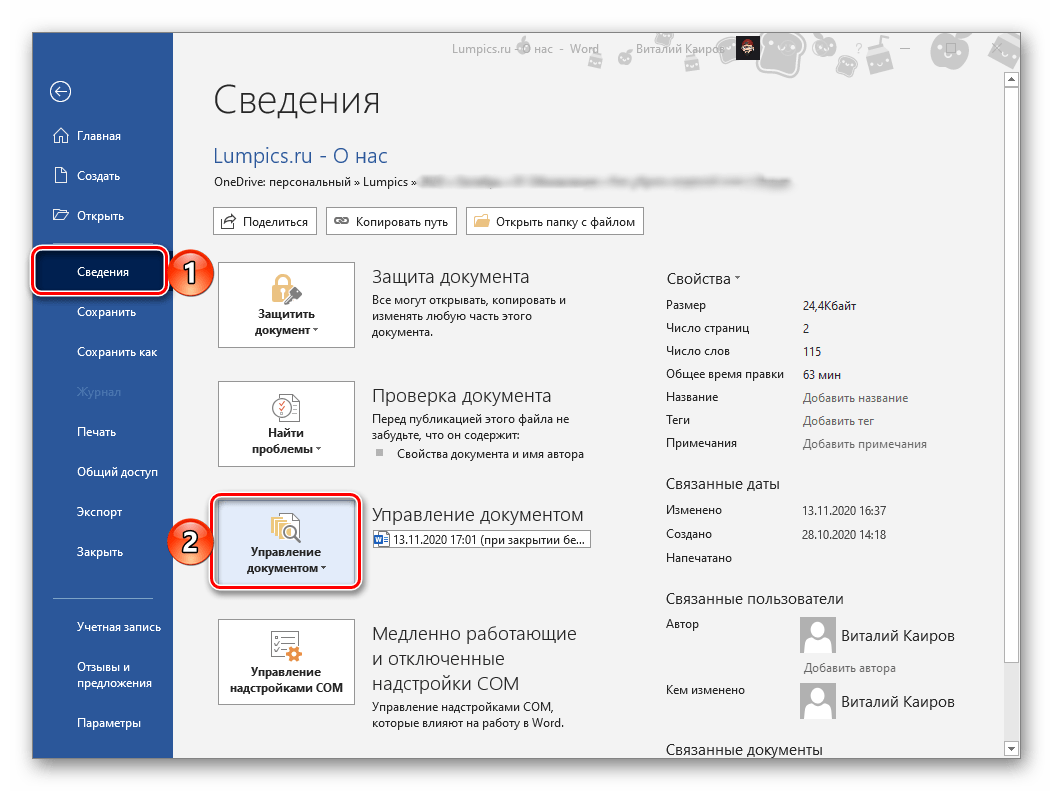
- Откройте Ворд, вызовите меню «Файл», перейдите к разделу «Сведения» и нажмите на кнопку «Управление документом».
- Выберите пункт «Восстановить несохраненные документы».
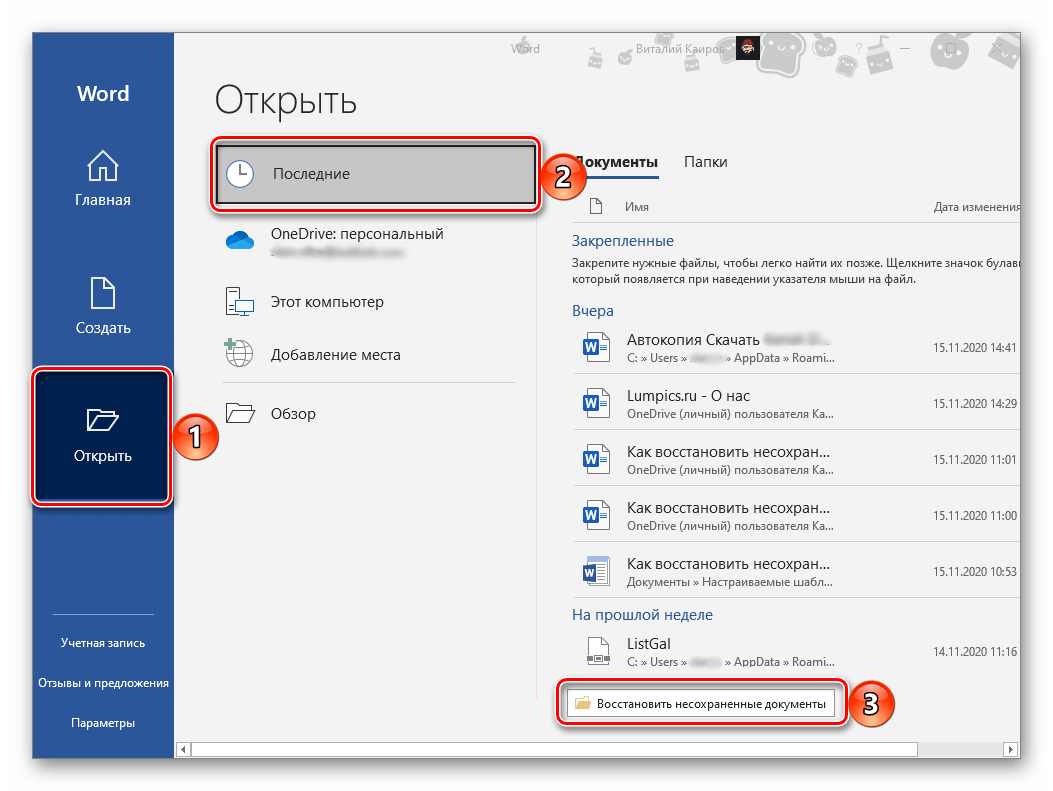
Примечание: Получить доступ к данной возможности программы можно и несколько иначе, перейдя по пути «Файл» — «Открыть» — «Последние» и нажав кнопку «Восстановить несохраненные документы».
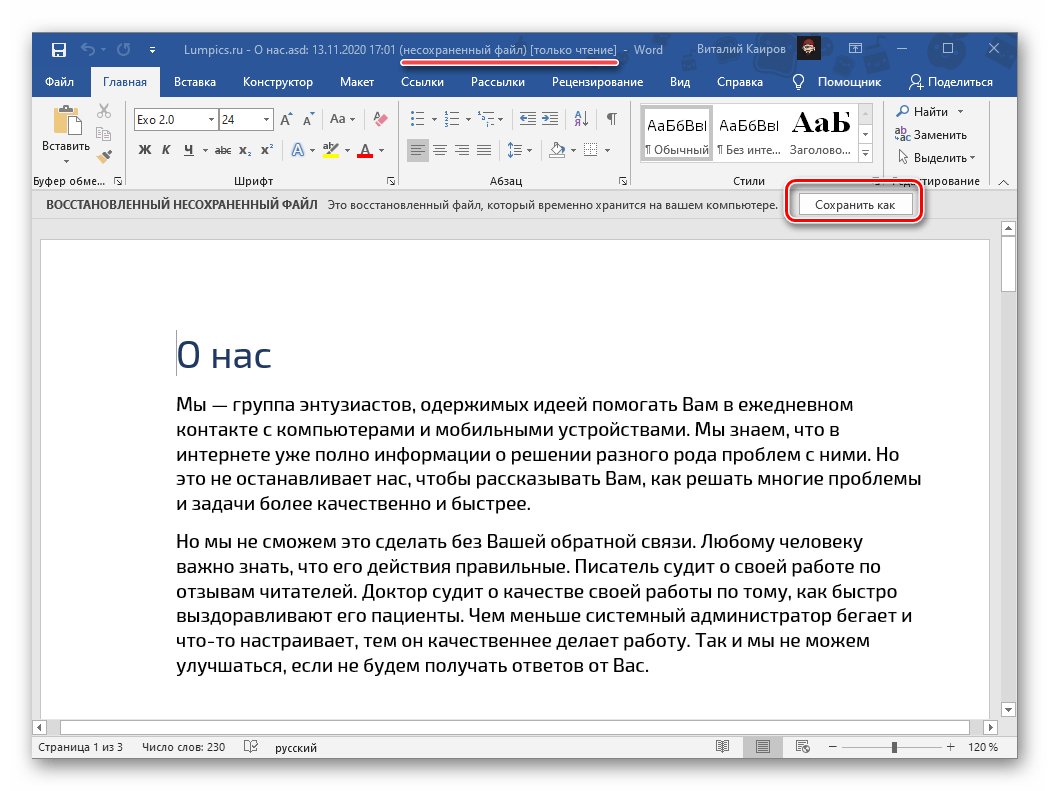
- Будет открыто окно системного «Проводника», в котором указано расположение папки с резервными копиями. Ориентируясь на название, найдите тот файл, который ранее не удалось сохранить. Выделите его и нажмите на кнопку «Открыть».

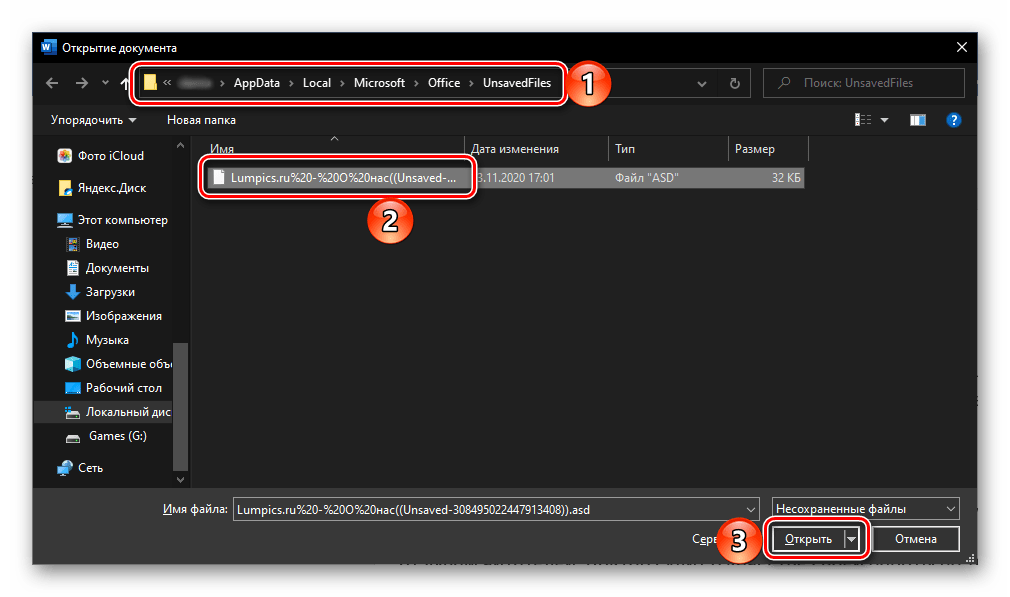
Все что остается сделать далее – повторно сохранить этот документ в любое удобное место на диске (изначально он будет открыт в режиме «Только чтение»).
Как и в рассмотренных выше случаях, велика вероятность, что содержимое будет восстановлено не полностью.
Способ 4: Восстановление резервной копии
При выполнении инструкции из Способов 2 и 3 вы наверняка могли заметить файлы в неизвестных форматах, которые содержатся в папке автосохранений Ворд. Среди них вполне могут находиться несохраненные документы, восстановить которые можно через саму программу.
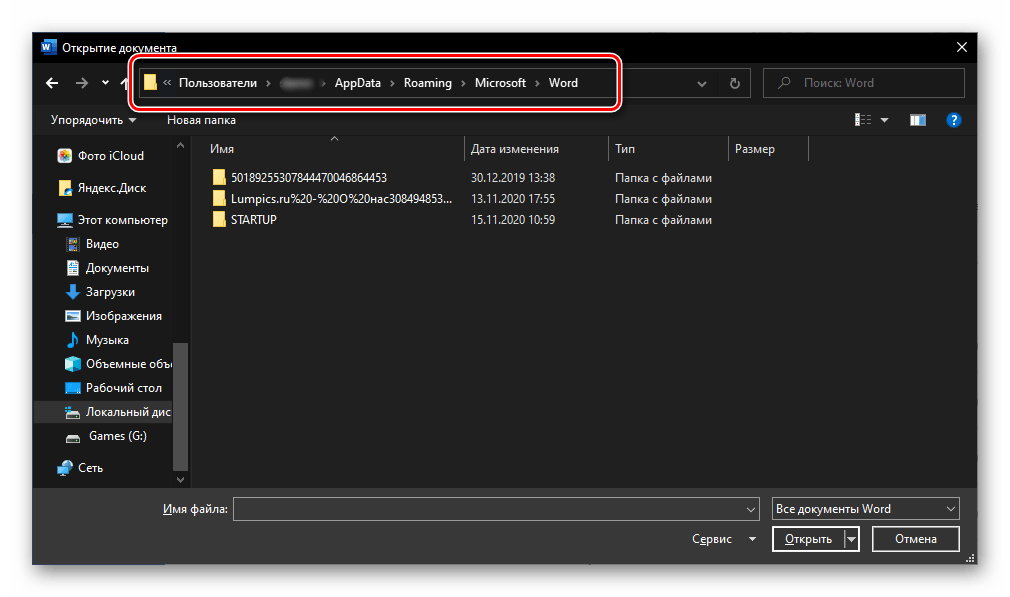
- Выполните действия из шагов № 1-3 части «Способ 2: Вручную» настоящей статьи. То есть узнайте расположение папки с автоматическими сохранениями и скопируйте его.
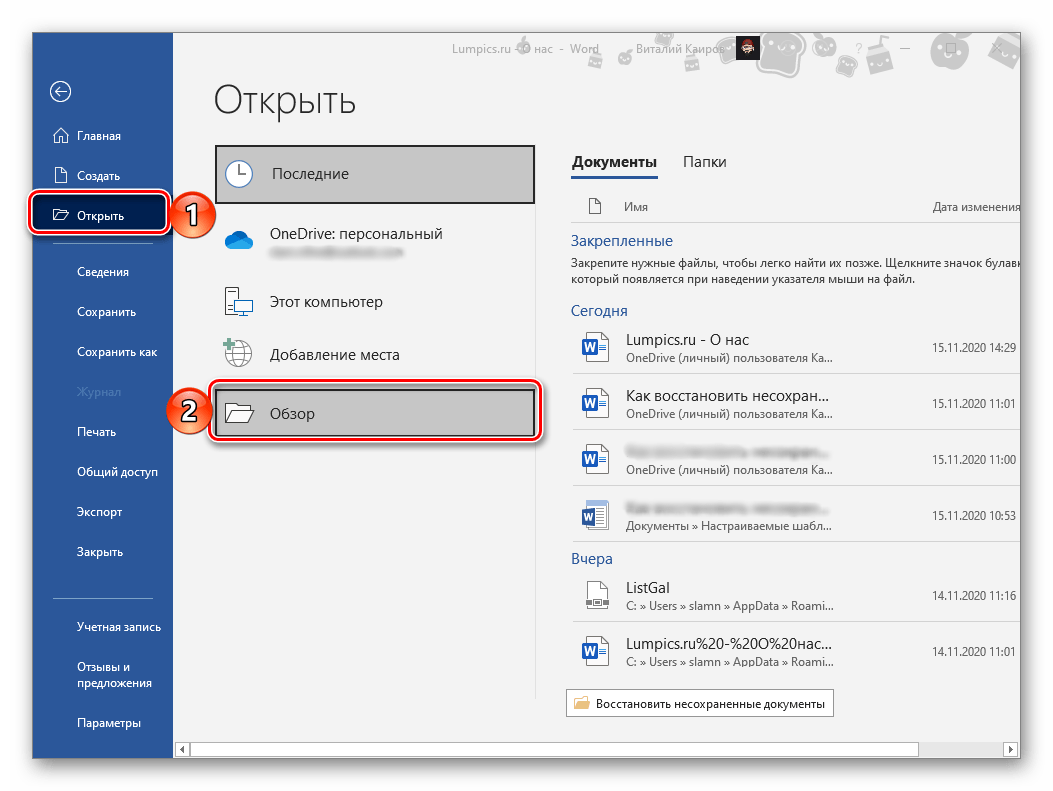
- Откройте меню «Файл» в Word, выберите пункт «Открыть», затем «Обзор».
- В адресную строку открывшегося «Проводника» вставьте скопированный адрес и перейдите к нему, нажав «Enter» или расположенную справа стрелку.
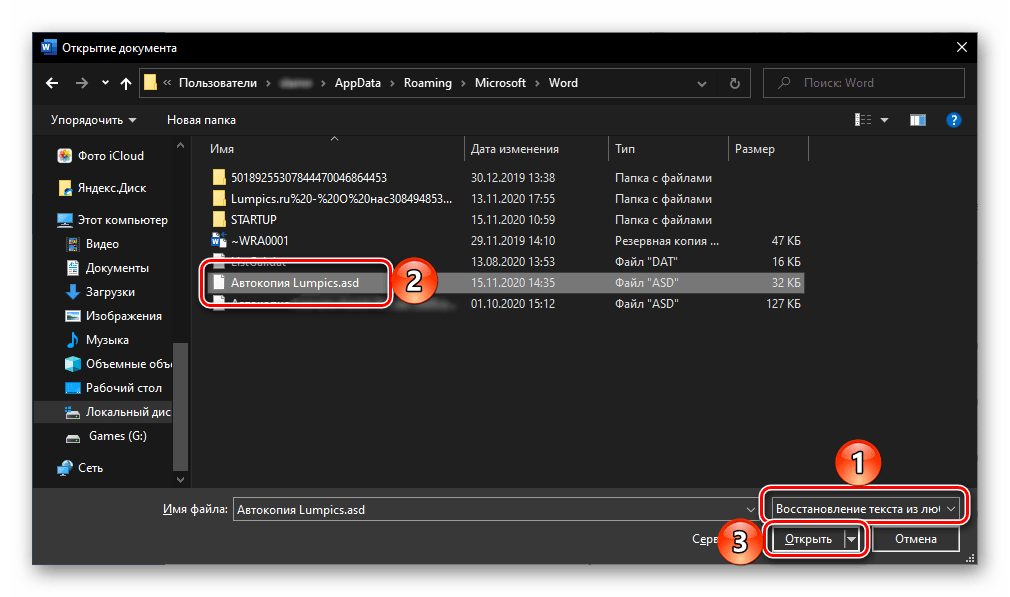
- В выпадающем списке «Все файлы» выберите «Восстановление текста из любого файла». Затем, ориентируясь на название и дату создания, найдите документ (или папку с ним), который требуется восстановить, выделите его и нажмите «Открыть».
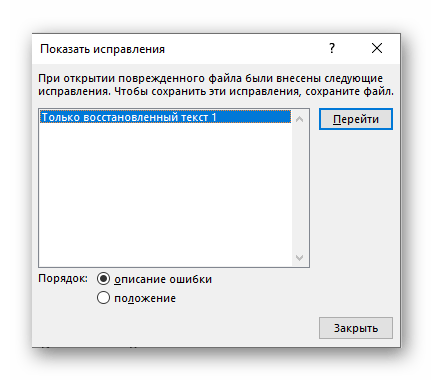
- Появится окно «Показать исправления» — ознакомьтесь с указанными в нем сведениями и нажмите «Закрыть».
Несохраненный документ будет открыт в Ворде, но со сброшенным форматированием – это обычный текст со шрифтом, размером и отступами по умолчанию, без какого-либо оформления. К сожалению, его придется восстанавливать самостоятельно, что поможет сделать отдельная инструкция на нашем сайте.
Подробнее: Как форматировать текст в документе Word
Отметим, что данный метод тоже не гарантирует полного восстановления содержимого текстового файла.
Способ 5: Поиск несохраненных файлов и копий
Последний метод восстановления несохраненных документов представляет собой смесь всех предыдущих. Заключается он в самостоятельном поиске файлов резервных копий и их последующем открытии в Ворде.
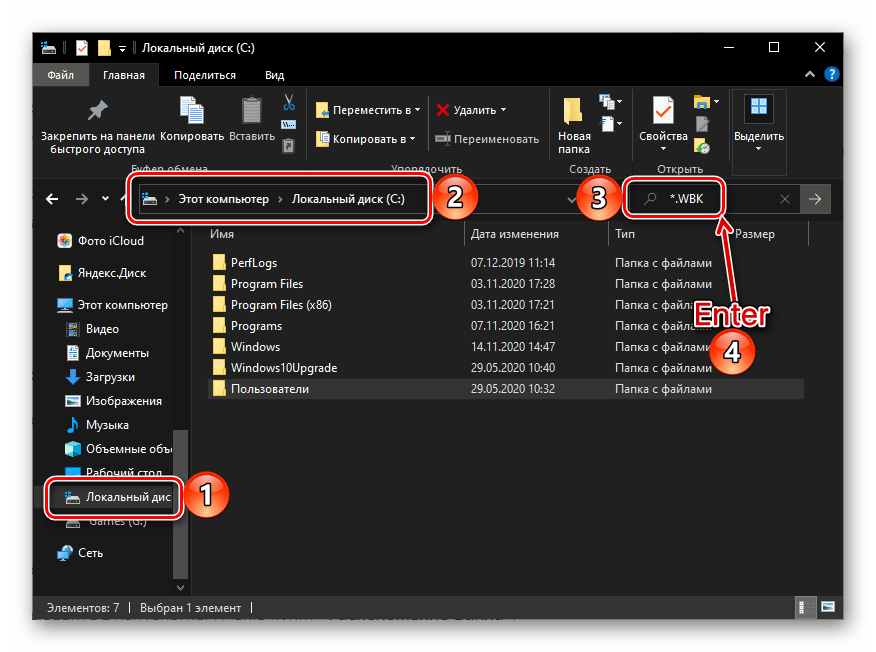
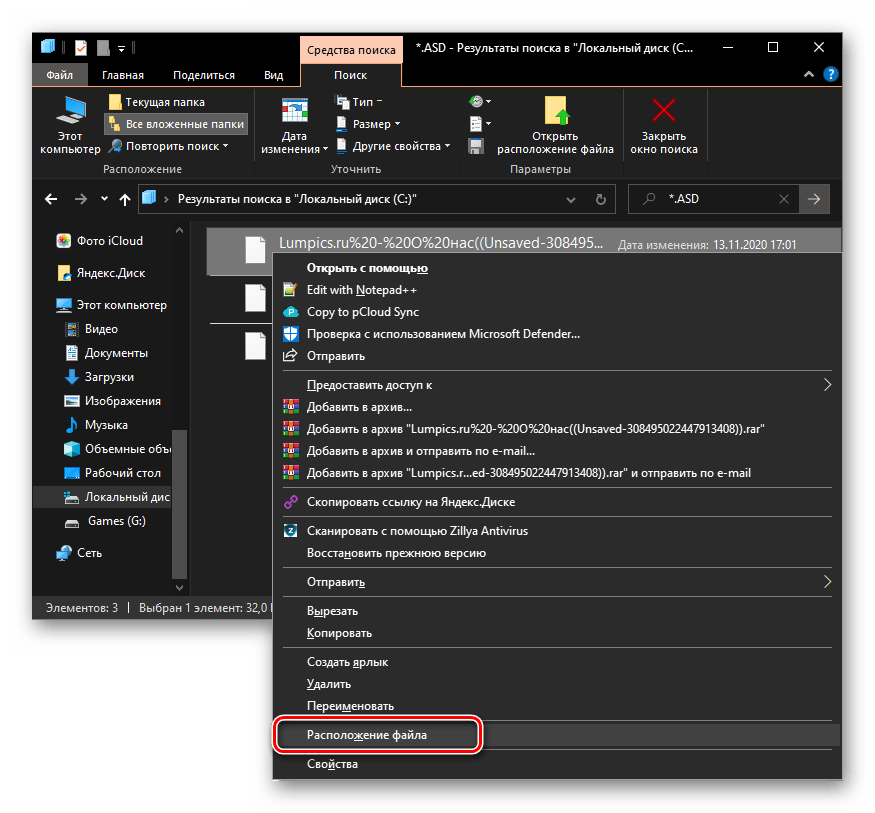
- Откройте «Проводник», перейдите в корень системного диска (в нашем примере таковым является (C:)), скопируйте и введите в его поисковую строку первое из указанных ниже значений. Нажмите «Enter» для начала поиска.
*.WBK
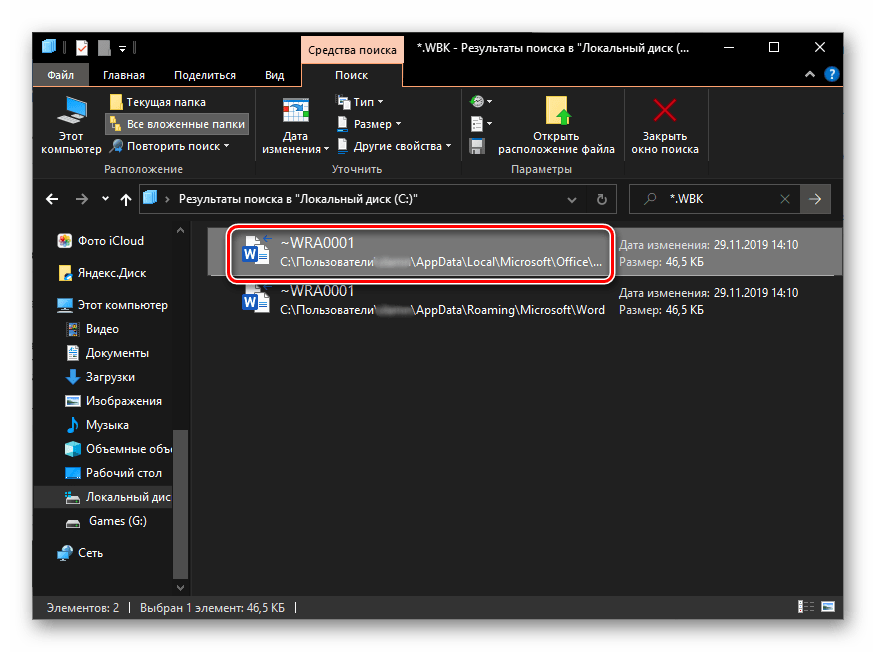
*.ASD - Ожидайте, пока процедура будет завершена (обычно это занимает несколько минут), после чего откройте найденный документ или документы. Его название скорее всего будет состоять из произвольных символов, поэтому ориентируйтесь в первую очередь на дату последнего изменения.
- Ознакомьтесь с содержимым файла и сохраните его.
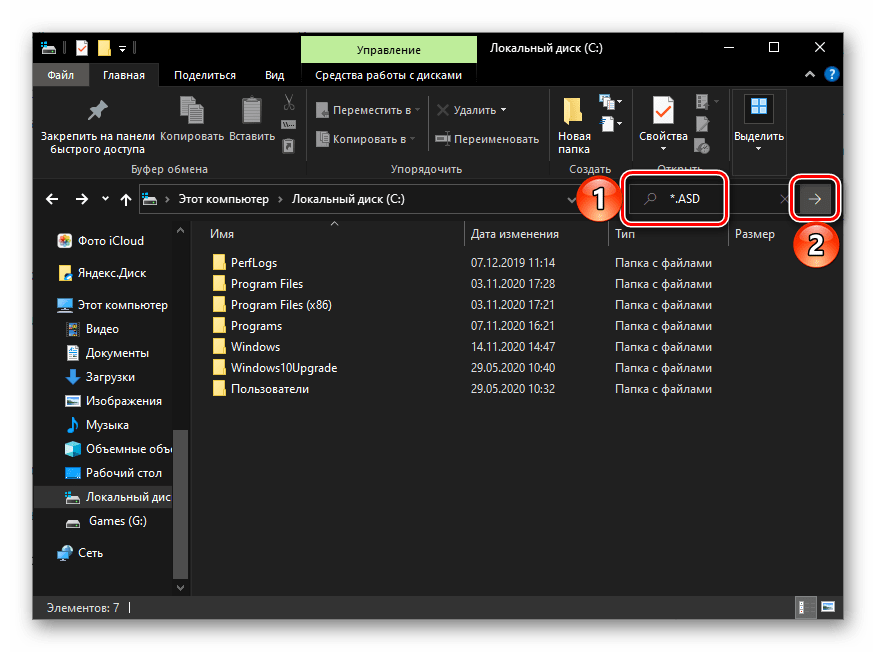
- Снова перейдите в «Проводнике» к системному диску, скопируйте второе из указанных выше значений, вставьте его в строку поиска и запустите процедуру.
- Дождитесь, пока поиск будет завершен, и ознакомьтесь с его результатами. Ориентируясь на название и дату изменения документа, найдите тот, который требуется восстановить.
- Нажмите по нему правой кнопкой мышки и выберите в контекстном меню пункт «Расположение файла».
- Скопируйте указанный в адресной строке «Проводника» путь и выполните инструкцию из предыдущей части статьи, чтобы восстановить несохраненный документ Word.
Данный метод найдет свое применение в случаях, когда в программе были изменены параметры автосохранения, в первую очередь, место для хранения резервных копий, или если она установлена не в папку по умолчанию. Сам же несохраненный документ может иметь как формат WBK, так и ASD, поэтому мы и искали их по порядку, в вашем же случае, возможно, будет достаточно найти один из них.
Дополнительно: Настройка автосохранения
Для того чтобы предотвратить возникновение подобных проблем в будущем или хотя бы минимизировать их последствия, рекомендуется изменить параметры автоматического сохранения, задав меньший чем указанный по умолчанию временной интервал. Оптимальным решением будет минимальное значение – 1 минута. Сделать это можно в разделе «Параметров» Ворд, который мы с вами открыли на третьем шаге инструкции из Способа 2, для получения более детальных сведений по самой процедуре ознакомьтесь с представленной по ссылке ниже статьей.
Подробнее: Настройка функции автосохранения в Microsoft Word
Обратите внимание! В лицензионных версиях Microsoft Office с авторизованным в приложении аккаунтом Microsoft сохранение осуществляется в фоновом режиме, на постоянной основе. Это исключает необходимость ручного или автоматического сохранения текстового документа, а значит, рассматриваемая нами в рамках настоящей статьи проблема в таком случае попросту не возникнет.
Восстановление документа при зависании программы
Если сохранить документ Ворд не удалось не по причине экстренного закрытия программы, а из-за ее зависания, алгоритм процедуры восстановления может выглядеть несколько иначе. Так, если текстовый редактор все еще запущен, но не отвечает и не реагирует на какие-либо действия, единственное, что остается – это сделать скриншот текста на экране и затем распознать его с помощью специализированного софта. Процедура автоматического и/или ручного восстановления, рассмотренная нами выше, в подобных ситуациях, к сожалению, доступна далеко не всегда.
Подробнее: Как сохранить текстовый документ, если Word завис
Еще статьи по данной теме:
Помогла ли Вам статья?
Отключили свет, зацепили шнур, неожиданно перезагрузился компьютер, а может и вовсе… слетела вся система… А вы так и не сохранили документ, над которым трудились полдня? Не стоит заранее отчаиваться. Восстановить файл можно. Тем более если потеря вызвана мелкой случайной неприятностью, и компьютер продолжает работать, как прежде.

Содержание
- Автоматическое восстановление
- Найти исходный файл
- Восстановление из папки с резервными копиями
- Восстановление документа при помощи программ для восстановления документов
Начать лучше с самого простого. Часто восстановить данные удается быстро и в полном объеме при использовании всего лишь встроенных ресурсов Word. Забегая наперед, скажем, что даже когда ни один из них не сработал, и данные вернуть так и не удалось, вероятность восстановить документ при помощи сторонних программ все еще остается высокой.
Автоматическое восстановление
Итак, что можно сделать, чтобы вернуть содержимое несохраненного файла исключительно силами Word?
Во-первых, данный текстовый редактор обладает функцией автоматического восстановления документа. После любого сбоя в системе или, скажем, того же отключения электричества, после которых Windows загружается с нуля, программа Word сама предлагает вернуть несохраненные данные и сохранить документы, которые ей удалось восстановить. Это может выглядеть следующим образом:

Важно помнить, что пользователь имеет возможность воспользоваться результатами автоматического восстановления файлов только при первом запуске текстового редактора после его принудительной перезагрузки. Если сразу не сохранить нужные документы, при этом закрыть и снова открыть программу, сохранить автоматически созданные резервные копии вам повторно не предложат. Поэтому лучше уже в первого раза определиться, какие именно восстановленные документы вам нужны, и не упускать шанс вернуть их.
Отметим, что функция автосохранения в Word всегда включена по умолчанию. Резервное копирование при работе в редакторе происходит каждые 10 минут. Иногда целесообразно уменьшить интервал между созданием резервных копий. Для этого, если вы работаете в Word 2003, используйте пункт «Параметры» в меню «Сервис». В открывшимся окне перейдите на вкладку «Сохранение» и измените значение до необходимого вам. На скорость работы компьютера это никак не повлияет.
При работе в Word 2007 периодичность автосохранения изменяется следующим образом: нажимаем на цветной круглый значок с логотипом редактора, в открывшемся списке выбираем пункт «Сохранить как», затем в самом низу появившегося окошка кликаем по «Сохранить копию документа». Теперь нажимаем «Параметры» и на вкладке «Сохранение» изменяем регулярность резервного копирования. Нажимаем «ОК» — и готово!
В Word 2010 данный параметр можно изменить через меню «Файл» – «Параметры». В открывшемся окошке кликаем на «Сохранение» и уже в следующем окне непосредственно изменяем интервал до необходимого. И снова – «ОК»!
Если вы просто не сохранили документ Word перед тем, как закрыть его, можно попытаться принудительно открыть его снова. Главное – учесть важную особенность данного способа восстановления: он не сработает, если вы создадите новый файл, добавите в него текст и сохраните документ. Алгоритм должен быть строго следующим:
- Создаем новый файл и открываем чистый лист
- В меню «Файл» выбираем пункт «Открыть»
- Во всплывающем окне выбираем команду «Открыть и восстановить».

Сразу предупредим, что результативность данного метода крайне низка, и в большинстве случаев с чистой страницей нового документа не происходит ровным счетом ничего. Однако, попытка – не пытка…
Найти исходный файл
Хоть вы и не сохранили документ, исходный файл в формате doc или docx мог все же остаться в системе. Найти его можно, используя следующую пошаговую инструкцию.
Сначала следует запустить поиск по файлу. Если вы работаете в Windows 10, сделайте это, используя панель «Пуск». В Windows 2008 просто нажмите WIN+W.
В поисковой строке введите заголовок документа, под которым, скорее всего, он мог быть сохранен в автоматическом режиме.

Windows представит вам список файлов с соответствующими ключевыми словами в названии. Если найдете среди них нужный документ, откройте и просмотрите содержимое файла.
Конечно, это простой, но совсем не идеальный способ вернуть данные. Шансы, что исходный файл останется в системе после критической ошибки, не велики…
Восстановление из папки с резервными копиями
Как мы уже упоминали, Word автоматически сохраняет резервные копии документов. Если вы не изменили параметры, при работе с текстовым документом происходит это каждые 10 минут. Все копии временно помещаются в специальную резервную папку. Папка – скрытая, и проверить ее содержимое можно только вручную.
Итак, переходим в меню «Файл» – «Параметры».
В открывшемся окне ищем пункт «Сохранение» и далее – строку «Каталог с авто-сохранениями» (в нем и хранятся резервные копии документов). Теперь нужно скопировать путь каталога и по нему перейти в папку. Здесь и можно найти последнюю версию несохраненного вами файла.

В Word 2010 данная папка может выглядеть примерно так:

Можно также испытать альтернативный способ из этой же серии. Используем меню «Файл» – «Сведения».
Если в «Управлении версиями» отображается информация «Нет предыдущих версий документа», нажимаем на значок «Управление версиями», а затем – «Восстановить несохраненные документы».

После чего вы должны увидеть папку с представленным в ней списком документов, доступных для открытия в текстовом редакторе. Данный способ весьма актуален для тех, у кого автосохранение по каким-то причинам, было отключено ранее (теперь-то вы уже исправили эту оплошность?). Также заметим, что таким образом можно восстановить документ, с которым вы уже успели поработать хоть какое-то время.
И еще одно: несохраненные файлы могут оставаться в системе в формате .asd, а его видит только Word 2010 и не видят более ранние версии редактора.
Восстановление документа при помощи программ для восстановления документов
Специализированные программы помогают вернуть потерянные, в том числе несохраненные файлы с любых устройств даже в самых сложных ситуациях: после случайного удаления файла без использования корзины, после повреждения файлов вирусом, форматирования и т.д.
Как показывает практика, сложнее всего восстанавливаются поврежденные изображения стандартных форматов .jpeg и .png, а вот файлы .doc и .docx в большинстве случаев восстанавливаются успешно.
Прежде всего, учтите общие рекомендации при работе с программами для восстановления данных:
- Перед началом процесса восстановления запрещено копировать на диск какие бы то ни было новые данные. Лучше всего вообще не производить никаких действий с носителей до восстановления с него всей необходимой информации.
- Не производить форматирование (даже если система Windows настаивает).
- Не рекомендуется восстанавливать документы на место их прежнего хранения, так как новый файл может затереть еще невосстановленные документы.
При восстановлении документов MS Office или OpenOffice, который вы не успели сохранить, мы рекомендуем использовать программы, поддерживающие самые мощные современные алгоритмы восстановления данных, такие как RS Partition Recovery или RS Office Recovery.
Установите выбранную программу и запустите сканирование диска. Все файлы, доступные для восстановления, будут отображены в отдельном окне.
На диске, где установлена система Windows (обычно диск С: ) найдите папку «Temp» — в данной папке система хранит все создаваемые ею временные файлы. Именно там должен находиться файл, с которым вы работали, но который не успели сохранить. Вы сможете просмотреть содержимое каждого файла и сохранить нужные документы.
При работе с документами Word их надо периодически сохранять. Так вы не потеряете данные из-за отключения электричества или чего-то подобного. Но, допустим, система зависла, и вам пришлось её перезапустить. Или вы случайно нажали «Не сохранять», когда выходили из программы. Заново напечатать пару предложений, конечно, можно. Но вдруг пропадут десятки страниц? Это несколько скрупулёзной часов работы. Поэтому полезно будет узнать, как восстановить несохраненный документ Ворд.

Полезным будет узнать, как восстановить несохраненный документ Ворд.
Восстановление из резервной копии
После аварийного завершения работы (компьютер внезапно завис или перезапустился) Word сам предложит восстановить файл. Для этого должна быть активна функция автосохранения.
- Запустите программу. В левой части окна появится список документов. Они были открыты, когда отключился компьютер. Там же указано время их последнего изменения.
- Найдите тот, который нужен. Просто кликайте на них — текст отобразится в Word.
- Как только вы уберёте список, копии будут помещены в корзину. Перед этим программа попросит подтвердить их удаление. Лучше подстраховаться — второй раз они не появятся.
Но если этот список не открылся, или вы случайно завершили работу программы, и документ Ворд не сохранился — как восстановить его в таком случае? Порядок действий зависит от версии офиса.

После аварийного завершения работы Word сам предложит восстановить файл
Office 2010
В Microsoft Office 2010 есть специальный инструментарий для этого:
- Нажмите на синюю кнопку «Файл» вверху окна. Она чуть левее строки меню.
- Перейдите в раздел «Сведения».
- Внизу есть блок «Версии». Там отображены данные автосохранения с датой и временем последнего изменения.
- Кликните на «Управление версиями» и выберите опцию «Восстановить».
- Откроется папка, в которой хранятся резервные копии. Найдите ту, название которой соответствует документу.
- Это временный файл. Он может быть удалён после чистки системы или системного диска от мусора. Чтобы продолжить работу с документом, преобразуйте его в формат Ворд. При запуске программа выдаст соответствующее оповещение. Чтобы сделать это вручную, прейдите в Файл — Сохранить как.
Если копия некорректно записалась, открыть её напрямую не получится. Но можно сделать так:
- Запустите Word.
- Нажмите Файл — Открыть.
- Укажите путь к копии.
- В списке над кнопкой «Отмена» вместо опции «Документы» поставьте «Все файлы». Резервные копии имеют расширение .asd или .wbk.
- Кликните на нужный значок. Если вы не сохраняли документ на диск, имя будет состоять из первых слов, которые вы там напечатали.
- Рядом с кнопкой «Открыть» найдите чёрную стрелочку и нажмите на неё.
- Выберите «Восстановить».
По умолчанию Word хранит эти копии в папке, которая может оказаться скрытой. Чтобы она отображалась, сделайте так:
- Пуск — Панель управления — Оформление и персонализация — Параметры папок (или Свойства папок).
- Вкладка «Вид».
- Поставьте маркер рядом с «Включить отображение скрытых папок».
- Нажмите «Применить» и «OK».

В предыдущих версиях Office нет раздела «Сведения» в меню. Поэтому такой способ недоступен. Но вернуть свои данные вполне возможно.
Office 2007
Вот как восстановить несохраненный документ Word 2007:
- Запустите программу.
- Нажмите на логотип Office слева вверху.
- Кликните на кнопку «Параметры».
- Перейдите в раздел «Сохранение».
- В блоке «Каталог данных для автовосстановления» написан путь к папке с резервными копиями. Запомните или запишите его.
- Уберите окно параметров.
- Снова нажмите на логотип Office и выберите «Открыть».
- Задайте путь к папке с копиями. Использовать их можно точно так же, как в Ворд 2010 (открыть и восстановить).
Этот метод сработает и с офисом 2003.
Конвертор резервных копий
Если файл автосохранения повреждён или при открытии выдаёт ошибку, воспользуйтесь конвертором резервных копий. Обычно он устанавливается вместе с Office и его не требуется включать отдельно. Но в случае чего можно активировать эту функцию вручную.
- Откройте Пуск — Панель управления.
- В категории «Программы» кликните на «Удаление программ» (или «Программы и компоненты»).
- Пункт «Microsoft Office» или «Microsoft Office Word».
- Нажмите «Изменить».
- В открывшемся окне выберите «Добавить компоненты» и продолжите.
- Перейдите в Общие средства Office — Конверторы и фильтры — Конверторы текстовых файлов — Конвертор восстановления текста.
- Выберите опцию «Запускать с компьютера» и нажмите «Продолжить». Настройка займёт время.
- Запустите Word.
- Нажмите на логотип Office или на синюю кнопку «Файл».
- Кликните на «Параметры», перейдите во вкладку «Дополнительно»
- Найдите блок «Общие». Для этого прокрутите меню вниз.
- Поставьте галочку в «Подтверждать преобразование формата».
Теперь вы можете пользоваться этой опцией, если до этого она была отключена. Делается это так:
- В Word перейдите в Файл — Открыть (в Office 2007 надо кликнуть на логотип).
- Укажите путь к резервной копии и кликните на неё.
- В поле над кнопкой «Отмена» задайте параметр «Восстановление текста»
- Нажмите на стрелочку рядом с «Открыть» и выберите «Восстановление».
Как включить автосохранение?
Чтобы не задумываться, как восстановить документ Ворд, если не сохранил резервную копию, включите автосохранение. Вот что нужно сделать:
- Синяя кнопка «Файл» — Параметры или Логотип Office — Параметры.
- Категория «Сохранение».
- Поставьте галочку в «Автосохранение каждые…» и задайте время. Например, 5 минут. И Word будет обновлять копию каждые 5 минут.
- В Word 2010 есть пункт «Сохранять последнюю версию при выключении». Так можно спасти случайно закрытый документ.

Включите автосохранение
Документы, хранящиеся в сети или на съёмных носителях
Файл, находящийся на флеш-накопителе, внешнем жёстком диске, в интернете или сетевой папке, Office воспринимает, как удалённый. Это никак не сказывается на работе. Вы можете спокойно печатать. Но если при сохранении возникнут проблемы со съёмным устройством или на время пропадёт доступ к сети, данные будут потеряны и труды многих часов уйдут насмарку. Чтобы этого не произошло, сделайте следующее:
- Синяя кнопка «Файл» — Параметры или Логотип Office — Параметры.
- Раздел «Дополнительно».
- В поле «Сохранение» (прокрутите чуть ниже, чтоб его увидеть) поставьте флажок в «Копировать удалённые файлы на компьютер».
Так при работе с документами Word будет создавать данные автосохранения на ПК. И вы вернёте их в случае поломки съёмного носителя или другого сбоя.
Как восстановить документ, если нет резервной копии?
Резервная копия может исчезнуть после того, как вы завершили работу программы. Даже с автосохранением. А если эта функция не используется и не настроена, вернуть свои данные через интерфейс программы вообще не получится. Но это не все так безнадёжно. Вот как восстановить закрытый документ Word в подобном случае.
Вариант 1
- Откройте «Мой компьютер».
- Справа вверху найдите строку поиска. Чтобы открыть всё окно поиска, нажмите Win+F (кнопка на клавиатуре с логотипом Windows). Та же строка находится в нижней части меню «Пуск».
- Введите туда имя или часть имени документа с расширением .asd. Пропущенные символы замените на * (звёздочка). Поиск воспринимает этот знак как команду «Тут может быть любой символ». Файл без имени (несохраненный на диск или забытый) надо вбивать как «*.asd» (без кавычек).
- Дождитесь, пока завершится поиск.
- Найдите в результатах резервную копию своих данных.
- Также попробуйте написать имя с расширением .wbk.
Вариант 2
Вариант 1 не помог? Значит, автоматически сохранённого документа просто нет. Но данные могут находиться во временных файлах.
- Откройте «Мой компьютер».
- Кликните на строку поиска. Под ней появятся фильтры. Укажите в них дату последнего изменения документа. Можно задать диапазон.
- Введите название с расширением .tmp. А лучше сразу ищите «*.tmp», так как система могла чуть изменить имя.
- Появится достаточно большой список. Но в нём могут найтись нужные данные.

Вариант 3
Временные файлы иногда сохраняются с ~ (тильда) в начале названия. Этот символ привязан к той же клавише, что буква «ё».
- В поиске задайте дату или диапазон дат последнего изменения.
- Напишите «~*.*» (без кавычек). Так система найдёт все файлы, имя которых начинается на тильду.
- Появится список. Попробуйте в нём отыскать то, что вам нужно.
Эти резервные копии можно открыть в Word так же, как и данные автосохранения .ads. Если ни один из способов не дал результатов, воспользуйтесь утилитами для восстановления файлов. Например, Perfect File Recovery или Recuva.
При работе с важными или объёмными документами не забывайте их сохранять. Чтобы не потерять прогресс и не печатать всё снова, используйте функцию автосохранения. Но и в случае каких-то непредвиденных событий ваши данные можно будет спасти.
Don’t worry if you don’t know how to recover unsaved Word document? This post will show you two wonderful solutions to work things out after losing a Word document due to accidental deletion, formatting, program crash, or unknown reasons. One is recovering lost Word document through Microsoft Word and the other is using MiniTool Power Data Recovery.
People are used to saving personal information, business data and study materials in Word documents, Excel files and PowerPoint files mainly because of its convenience. It is possible to lose the Word document due to different reasons no matter where it is stored (in the internal hard drive, external hard drive, USB flash drive, or other places).
- The document is deleted accidentally
- The document is lost due to system crash or Microsoft Word crash
- Other reasons
How To Retrieve Deleted Files On PC — Step By Step Tutorial.
You’re lucky if you do have back of the lost/unsaved Word document. But, in most cases, users don’t have the latest backup for the Word document. So they are wondering can I retrieve a Word document that wasn’t saved.
How to recover unsaved Word document at this time? In brief, you have two choices:
- Use MiniTool Power Data Recovery to recover lost Word document.
- Recover previous version of Word document through Microsoft Word.
In fact, unexpected file loss is a common problem that lots of people are facing with or have ever met. Most of them struggle to know how do I recover an unsaved Word document on my computer, instead of recreating a new document with almost the same content.
In this part, you’ll learn how to recover an unsaved Word document with MiniTool Power Data Recovery in different platforms.

Learn Practical Ways To Recover Missing Files On Windows 10.
Tip: Just open the backup file and find your needed Word document directly if you have backed up the latest version of the unsaved Word document. Click here if you want to do backup but has no idea of which tool to choose.
How Do I Recover an Unsaved Word Document
How do I recover an unsaved Word document in Windows 10 or other Windows systems? There are mainly three steps to complete.
Note: If you want to recover a deleted Word document, please open Recycle Bin to check first. If it is contained in the Recycle Bin, please drag it out directly; if it is not here, please click here to see how to recover deleted documents missing from Recycle Bin.
How do I recover a permanently deleted Word document?
Step 1: get & install MiniTool Power Data Recovery to your computer. Then, launch it to see the main interface. Now, you are supposed to choose one from the four function options displayed in the left-hand panel.
Free Download
Tips on choosing a suitable one for your case:
- If the deleted/lost Word document was saved on a local partition, please select Logical Drives.
- If your document is included in a USB flash drive/SD card, please connect the device to your computer and choose Devices. (How to fix when USB flash drive not recognized or external hard drive not showing up)
- If you want to recover corrupt Word files from an inaccessible hard disk, you should also choose Devices and select your hard disk.

Step 2: select the target partition/disk to scan and click on the Scan button in the lower right corner.
If you want to search for only Word files, please do the following things:
- Click on the Scan Settings icon on the left side.
- Check only Office WORD Document (*.doc) and Office2007 Word Document (*.docx) under Extra search for known file types.
- Click on the OK button to confirm changes.
- Click on the Scan button to start detecting Word documents.

Step 3: check all the Word documents you want to recover from the scan result. Then, you should click on the Save button to choose a storage path for them. At last, click on the OK button to confirm and wait for the recovery to complete.
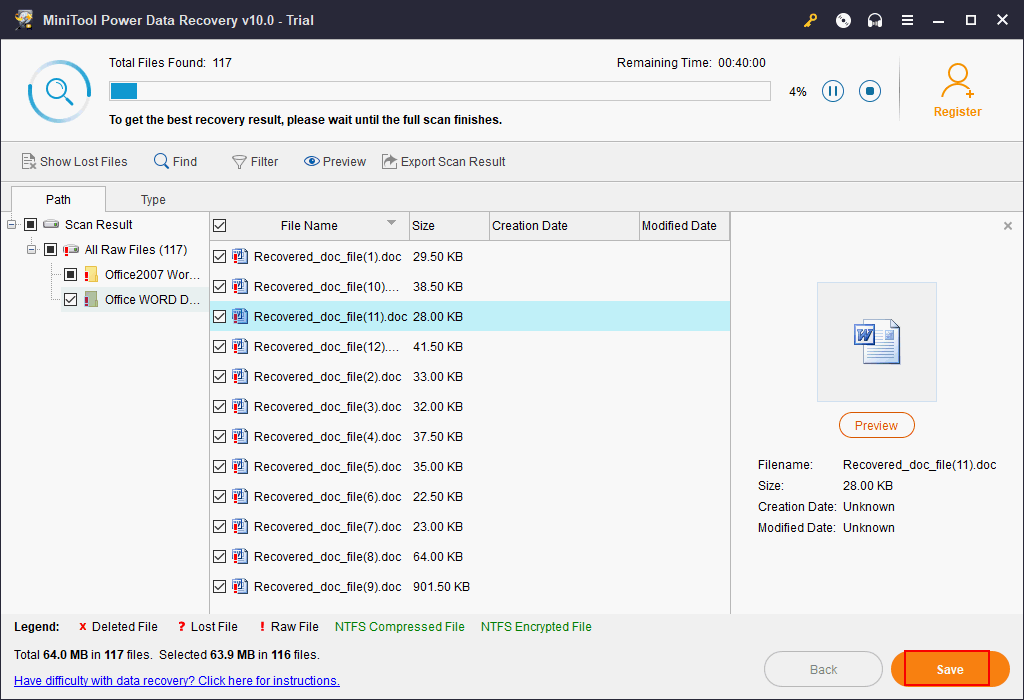
That’s how to recover the documents you have deleted or the corrupt files on Windows platform. If you have deleted a Word document from USB and want to recover it, please connect the USB device to your computer before running the Power Data Recovery software.
What if you have lost files on a Windows Server system? Please read this page:
How to Recover Unsaved Word Document Mac
To recover lost Word document on your Mac, you should use Stellar Data Recovery for Mac.
The recovery steps are:
- Get & install the software properly.
- Launch it to start Mac Word files recovery. Please select Documents; toggle the switch to On.
- Select the partition/disk that contains the unsaved Word document and click on the Scan button to search for lost Word documents.
- Wait for the scan and check all the Word documents you want to recover from Mac. Click on the Recover button to set a safe location for storing recovered Word documents. Then, click Save and wait for the recovery to finish.

That’s how to recover a Word document on Mac. To know more about Mac file recovery, please read:
Click to Tweet
Recover Unsaved Word Document with AutoSave Feature
Definitely, there is an AutoSave function built-in Microsoft Word that can be used to help you recover Word document easily from the automatically saved versions or unsaved files. If you’d like to learn the way to recover lost Word document by using the built-in AutoSave feature in different cases, just keep reading.
How to Recover a Word Document That Was Saved Over
You should recover previous version of Word document when you need a Word document that was saved over. The recovery steps are:
- Keep the certain Word document opening.
- Click on the File button located in the upper left corner of the pane.
- The file window will appear and the Info option will be chosen by default.
- Three sections are provided under Info: Permissions, Prepare for Sharing and Versions. All the versions saved automatically will be shown to you here according to the saving time.
- Look at the save time of them and figure out which is the version you want.
- Click on a version and Microsoft Word will open a new Word window for you.
- In the new window, two options are available: Compare and Restore.
- Click on the Restore button to overwrite the last saved version with the version you choose.

How Do You Recover a File You Didn’t Save
The situation seems to get worse if you have made many changes to a document, then you close it without saving any changes. When you open the Word document again, you won’t be able to see any automatically saved versions in the Info window after clicking the File menu. How can you recover the unsaved document under such circumstances?
Well, you can rely on the Recover Unsaved Documents feature or open the AutoRecover file location to check.
Where is the Recover Unsaved Documents feature?
- Open the Word document on your computer.
- Click on the File menu in the upper left corner.
- Find Manage Document option under Info.
- Click on Manage Document and choose Recover Unsaved Documents.
- Browse the recent unsaved files.
- Select a file to open.
- Click on the Save As button at the top of the file to save the changes.

How to open asd file?
You can also open the AutoRecover file location and check whether your need documents are contained here. Generally, the AutoSaved Word document files will be stored in the computer with a name formed by the original file name, Unsaved tag and some special symbols & numbers (please see the picture below). The AutoRecover files are saved as asd files and they are read-only.

Where are AutoRecover files saved?
You can find the location of AutoRecover files by the following steps:
- Click on the File option in the menu bar.
- Choose Options from the left-hand pane of the window.
- Select Save in the Word Options window you see.
- Navigate to the Save documents section on the right-hand pane.
- Find the AutoRecover file location and look at the storage path after it. The default path is: C:UsersUsernameAppDataRoamingMicrosoftWord and you can change it according to needs.
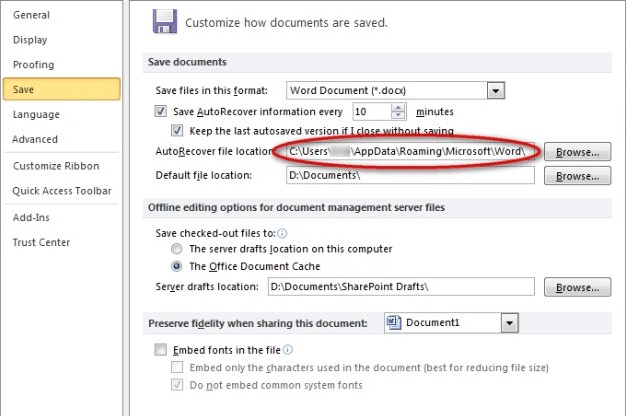
When you finally find your needed document in that location, please double click to open the asd file in Microsoft Office Word. Also, two choices are available: Compare and Restore. If it is the one you need, please select Restore to recover the unsaved Word document.
Now, you know exactly where Word saves AutoRecover files.
How do I turn on AutoRecover in Word?
Actually, the AutoRecover feature will be enabled by default. The Save AutoRecover information every _ minutes and Keep the last autosaved version if I close without saving options under Save documents section are both checked by default. You can uncheck these two options as you need.
Can I change the time interval of AutoRecover?
In fact, the time interval is set to 10 minutes by default and you can change it to an integer ranging from 1 to 120.
- The timer will be initialized every time when the new modification has been made to the Word document after the completion of the last auto-save/manual saving. And when the specified time interval is reached, a new version of the current Word document will be generated.
- If you would like to save current changes manually by pressing the Save button, the timer will be cleared and stop working until new changes have been made to the document.
How Can You Recover an Unsaved Word Document after Crash
Sometimes, you may suffer from a sudden Microsoft Office Word app crash or a system crash while you’re working on a Word document. What’s the right thing to do at this time? Definitely, you should do the following things to recover unsaved Word document after the crash:
- Restart the Microsoft Office Word or the restart the computer.
- Go to the original place to find and open the correct Word document.
- Take a look at the Document Recovery section located in the left-hand pane of Word.
- There may be many files that Word has recovered for you and they are available in the list; you should make sure which one you need.
- Right click on the file and choose Save As.
- Choose a location for it and click on the Save button.
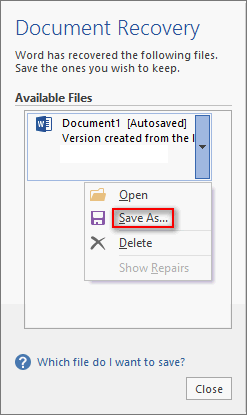
Please note:
- If you see many files in the list and you don’t know which one to save, you may look at the date and creation time under the name of each file (that may give a clue).
- If you see multiple versions of the same file, it’s better for you to choose the one with the most recent time since it often contains the most recent changes.
- To see the detailed content and changes, you can click on a file to open the document directly. You can continue working with the file you choose or save it first.
- Please close the Document Recovery pane when you are sure you have recovered all the documents you need.
All in all, if you find your Word document with very important information stored in is missing, you should react immediately by following the suggestions gave in the previous content to recover Unsaved Word document all by yourself.
Click to Tweet
The steps to recover unsaved excel file and the process to recover unsaved PowerPoint are basically the same. You can also watch the following demonstration video guide. If you would like to recover a pdf file, please click here.
Bottom Line
Word document missing seems to be inevitable and non-ignorable. Almost all users have ever been stuck in Word document loss issues. What a pity!
But the loss of an important Word document is actually not the end of the world; on the contrary, you can recover the unsaved/deleted/lost Word document in different ways.
For instance, both MiniTool Power Data Recovery software and the built-in AutoSave function can be used to help you find back the lost Word document information. They can be useful in most of the case.
What you should do is choosing the proper method according to your actual situation to complete the Word document recovery work at once.
Recommendations:
- Download Microsoft Template for Word. Excel, PowerPoint, and more.
- Create a template for Microsoft Word, Excel, and PowerPoint
Recover Unsaved Word Document FAQ
Can I retrieve a Word document that wasn’t saved?
Of course, you can. And there are three ways available for you: recover the unsaved Word document by using previous version; recover the Word document by using data recovery software; and recover the file by checking the AutoRecover file location.
Where does word save AutoRecover files?
The default AutoRecover directory is: C:UsersuserAppDataRoamingMicrosoftWord. Users can go to check by clicking File, selecting Options, choosing Save in left sidebar and looking at the AutoRecover file location.
Does Word save backup files?
That depends on whether you have configured the Word program to create backup copy. You can go to check through these steps: click File -> choose Options -> select Advanced -> scroll down to find Save section -> look at Always create backup copy option.
How do I recover temporary files?
- Open a Word document.
- Click the File menu in the upper left corner.
- Select Info from the left sidebar.
- Click Manage Document from the right pane.
- Choose Recover Unsaved Documents.
- Choose the correct asd file and click Open.
![]()
 Доброго дня.
Я думаю что многие, кто работает часто с документами в программе Microsoft Word, сталкивались с достаточно неприятной ситуацией: набирали-набирали текст, редактировали его, а потом вдруг — компьютер перезагрузился (отключили свет, ошибка или просто Word закрылся, сообщив о каком-то внутреннем сбое). Что делать?
Собственно так же произошло и со мной — отключили электричество на пару минут, когда я готовил одну из статей для публикации на этот сайт (так и родилась тема для этой статьи). И так, рассмотрим несколько простых способов восстановления несохраненных документов Word.
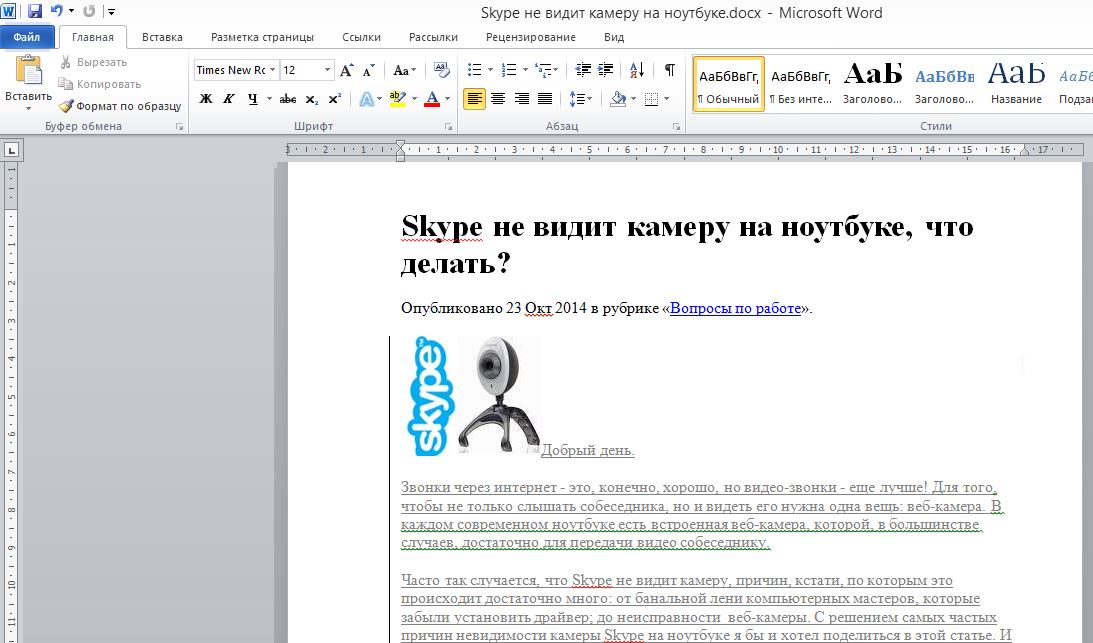
Текст статьи, который мог быть утерян из-за сбоя электричества.
Способ №1: автоматическое восстановление в Word
Что бы не случилось: просто ошибка, компьютер резко перезагрузился (даже не спрося вас об этом), сбой на подстанции и у всего дома отключили свет — главное не паниковать!
По умолчанию, программа Microsoft Word достаточно «умная» и сама автоматически (в случае аварийного завершения работы, т.е. завершение работы без согласия пользователя) попытается восстановить документ.
В моем случае Micrisift Word после «резкого» выключения ПК и включения (через минут 10) — после запуска предложил сохранить не сохраненные документы docx. На картинке ниже приведено как это выглядит в Word 2010 (в других версиях Word картина будет аналогичная).
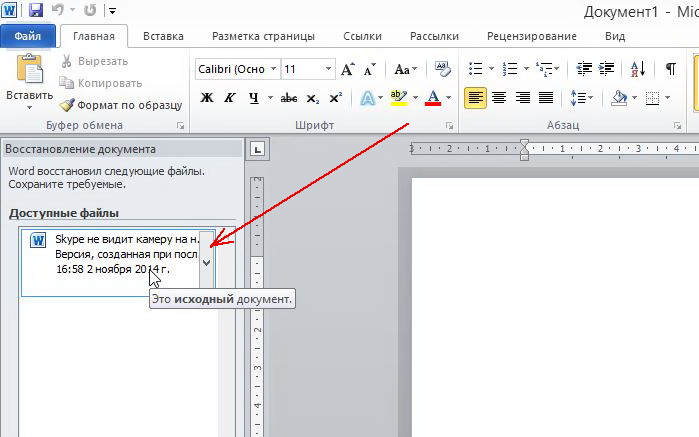
Важно! Word предлагает восстановить файлы только при первом перезапуске после аварийного завершения. Т.е. если вы открыли Word, закрыли, а затем снова решите его открыть — то предлагать он вам уже ничего более не будет. Поэтому, рекомендую при первом же запуске сохранить все, что требуется для дальнейшей работы.
Способ 2: через папку авто-сохранения
Чуть выше в статье я говорил, что программа Word по умолчанию достаточно умная (подчеркнуто специально). Программа, если вы не меняли настройки, каждые 10 минут автоматически сохраняет документ в «резервную» папку (на случай непредвиденных ситуаций). Логично, что второе, что следует сделать — это проверить, нет ли в этой папке пропавшего документа.
Как найти эту папку? Приведу пример в программе Word 2010.
Нажимаете по меню «файл/параметры» (см. скриншот ниже).
Далее нужно выбрать вкладку «сохранение». В этой вкладке есть интересующие нас галочки:
— автоматическое сохранение документа каждые 10 мин. (можно поменять, например, на 5 мин., если электричество у вас часто отключается);
— каталог данных для авто-сохранения (он то нам и нужен).
Просто выделите и скопируйте адрес, затем откройте проводник ![]() и вставьте в его адресную строчку скопированные данные. В открывшемся каталоге — возможно что-то удастся найти…
и вставьте в его адресную строчку скопированные данные. В открывшемся каталоге — возможно что-то удастся найти…
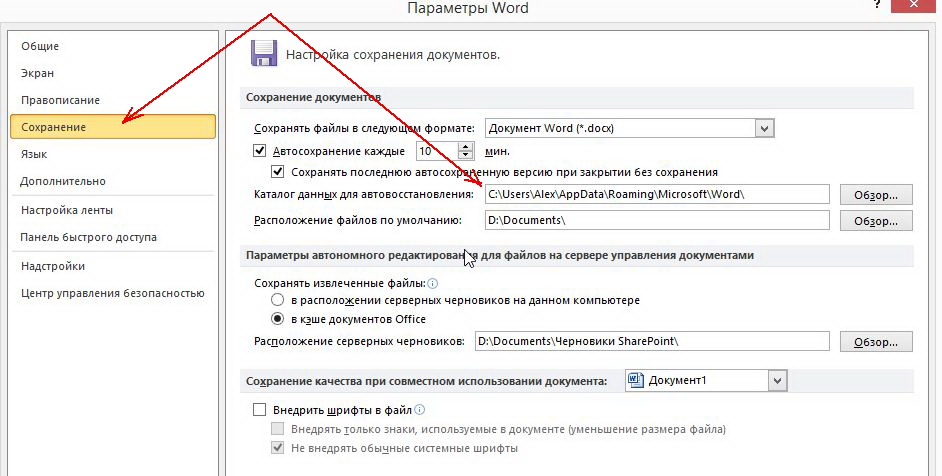
Способ №3: восстановление удаленного документа Word с диска
Этот способ поможет в самых тяжелых случаях: например, был файл на диске, а теперь его нет. Такое может произойти по множеству причин: вирусы, случайное удаление (тем более, что Windows 8, например, не переспрашивает, точно ли вы хотите удалить файл, если нажмете по кнопке Delete), форматирование диска и пр.
Для восстановления файлов есть огромное число программ, часть из них я уже публиковал в одной из статей:
Программы для восстановления данных на: дисках, флешках, картах памяти и т.д.
В рамках этой статьи хотел бы остановиться на одной из лучших (и вместе с тем простых для начинающих пользователей) программ.
Wondershare Data Recovery
Официальный сайт: http://www.wondershare.com/
Программа поддерживает русский язык, работает очень быстро, помогает восстанавливать файлы в самых тяжелых случаях. Кстати, весь процесс восстановления занимает всего лишь 3 шага, более подробно о них ниже.
Что не делать перед восстановлением:
— не копировать на диск (на котором пропали документы/файлы) никаких файлов, да и вообще с ним не работать;
— не форматировать диск (даже если он отображается как RAW и ОС Windows предлагает вам его отформатировать);
— не восстанавливать файлы на этот диск (эта рекомендация пригодится дальше. Многие восстанавливают файлы на тот же диск, который и сканируют: так делать нельзя! Дело в том, что при восстановление файла на тот же диск — он может затереть еще не восстановленные файлы).
Шаг 1.
После установки программы и ее запуска: она предлагает нам на выбор несколько вариантов. Выбираем самый первый: «восстановление файлов». См. картинку ниже.
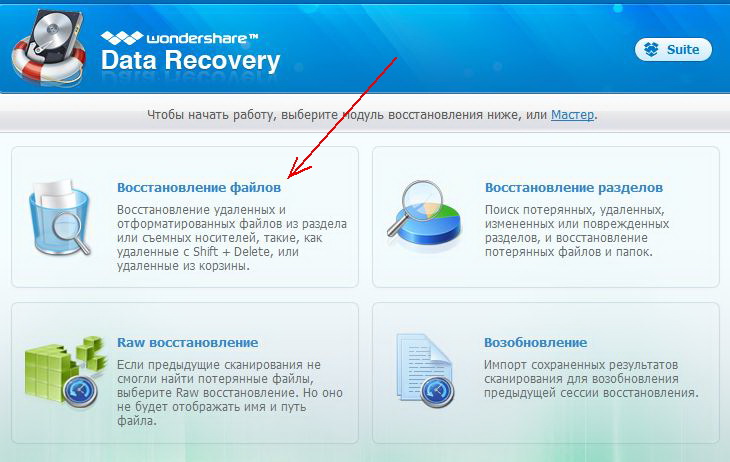
Шаг 2.
В этом шаге нас просят указать дик, на котором располагались пропавшие файлы. Обычно документы лежат на диске C (если, конечно вы их не перенесли на диск D). В общем-то можно поочередно просканировать оба диска, тем более, что сканирование идет быстро, например, мой диск на 100 Гб был просканирован за 5-10 мин.
Кстати, желательно поставить галочку «на глубоком сканировании» — время сканирования сильно возрастет, зато сможете восстановить большее число файлов.
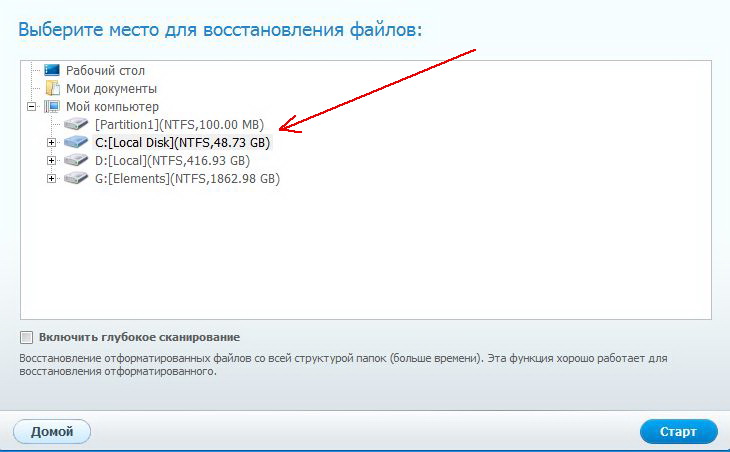
Шаг 3.
После сканирования (кстати, во время него лучше вообще не трогать ПК и закрыть все остальные программы) программа покажет нам все типы файлов, которые можно восстановить.
А поддерживает она их, надо сказать, в большом количестве:
— архивы (rar, zip, 7Z и пр.);
— видео (avi, mpeg, и т.д.);
— документы (txt, docx, log и пр.);
— картинки, фото (jpg, png, bmp, gif и пр.) и т.д.
Собственно, останется только выбрать, какие файлы восстановить, нажать соответствующую кнопку, указать отличный от сканирования диск и восстановить файлы. Это происходит достаточно быстро.
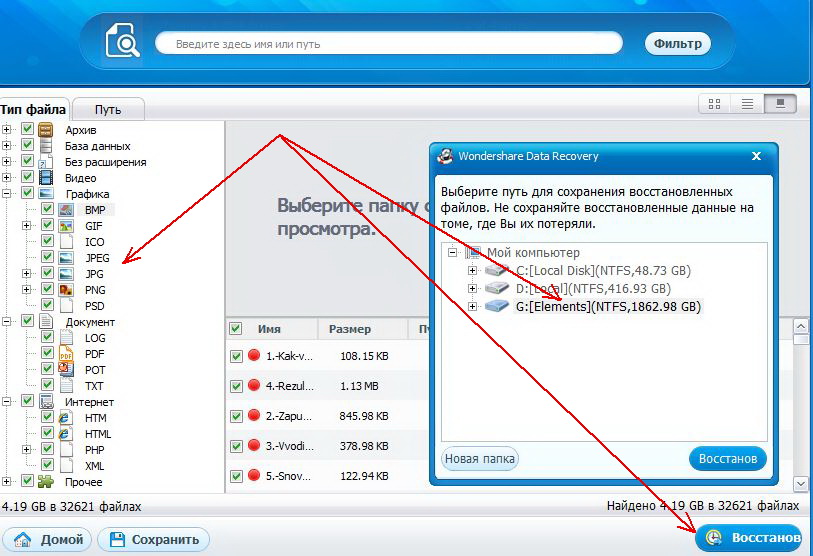
Кстати, после восстановления, часть файлов может стать не читаемой (или не полностью читаемой). Об этом нас предупреждает и сама программа Date Recovery: файлы помечаются кружками разного цвета (зеленые — файл может быть восстановлен в хорошем качестве, красные — «шансы есть, но мало»…).
На этом сегодня все, всем удачной работы Word!
Счастливо!
- Распечатать
Оцените статью:
- 5
- 4
- 3
- 2
- 1
(27 голосов, среднее: 4.5 из 5)
Поделитесь с друзьями!