
Open a Word document that has text boxes. Click the “Review” tab, then click the “Restrict Editing” button in the Protect group. Word displays a pane allowing you to manage editing permissions for specific parts of the document, including text boxes.
Contents
- 1 How do I lock text in Word?
- 2 How do I lock text?
- 3 How do I restrict editing in Word 2016?
- 4 How do I lock a text box so it doesn’t move in Word?
- 5 Can you password protect text messages?
- 6 Can you lock fields in Word?
- 7 How do I protect a form in Word?
- 8 How do I lock text boxes in Word?
- 9 How do you anchor a text box in Word?
- 10 What is lock anchor in Word?
- 11 Can you hide text messages?
- 12 How do I send a private text message?
- 13 Is there a way to hide a text thread?
- 14 How do I lock a form in Microsoft Word?
- 15 How do you lock fields?
- 16 Can you lock a Microsoft form?
- 17 What does the anchor symbolize?
- 18 How do I find an anchored object in Word?
- 19 What are anchor text links?
On the Review tab, in the Protect group, click Protect Document, and then click Restrict Formatting and Editing. In the Editing restrictions area, select the Allow only this type of editing in the document check box. In the list of editing restrictions, click No changes (Read only).
How do I lock text?
There are a few ways to learn how to lock text messages on Android.
Signal Private Messenger: Chat Lock & Disappearing Messages
- Tap on your profile in the Signal app.
- Go to Privacy.
- Under Privacy, you should be able to enable or disable screen lock.
How do I restrict editing in Word 2016?
Start protection
- Open a document in Word 2016.
- Switch to the Review tab on the ribbon.
- Click Restrict Editing in the Protect section of the ribbon.
- In the Restrict Editing panel on the right, check Allow only this type of editing in the document under 2.
- No changes (Read only) is the default restriction type.
How do I lock a text box so it doesn’t move in Word?
Prevent text boxes from moving (Word 2010)
- The Text Box Tools Tab — Position Drop-Down.
- The Layout Dialog: The Position Tab.
- The Layout Dialog: The Text Wrapping Tab.
- The Wrap Text Drop-Down.
Can you password protect text messages?
Neither Android or iOS have a built-in way to password protect message apps, so if this is the route you want to go down then it will require third-party software. Sadly, iOS doesn’t allow third-party app lockers, so only Android users have this option.
Can you lock fields in Word?
To Lock Fields
On the toolbar ribbon, on the Review tab, under Protect, click Protect Document, and then click Restrict Formatting and Editing.
How do I protect a form in Word?
Protect the form
- Go to Developer > Protect Form. Note: To unprotect the form and continue editing, select Protect Form again.
- Save and close the form.
How do I lock text boxes in Word?
Click on the “Select sections” option and then select the section of your document where your text box is located. Click on the “OK” option and then click on the “Yes, Start Enforcing Protection” button.
How do you anchor a text box in Word?
Follow these steps to anchor an object in Word:
- Select an object.
- On the Ribbon’s Format tab, go to the Arrange group and choose Position→More Layout Options.
- Click the Position tab.
- (Optional) Set the position of an object precisely using controls in this dialog.
- Under Options, select the Lock Anchor check box.
What is lock anchor in Word?
When you turn on “Lock Anchor,” you can then move your image to any position on the same page as the anchor paragraph, and the object will stay in that position. However, if you move the anchor paragraph to another page, the object will also move to that page, but stay in the same relative position on the page.
Can you hide text messages?
If you want to hide your texts from the home screen, here’s what to do: Open the Messaging app on your phone. Then, tap on the three dot icon in the upper right-hand corner to access the Settings menu.Doing this will disable all pop-up messages so that no one can see them.
How do I send a private text message?
Send anonymous texts by email
- AT&T. SMS (a text-only message): [email protected]
- Metro PCS. SMS/MMS: [email protected]
- Sprint. MMS: [email protected]
- T-Mobile. SMS/MMS: [email protected]
- Verizon Wireless. MMS: [email protected]
Is there a way to hide a text thread?
The most simple way to hide text messages on your Android phone is by securing it with a password, fingerprint, PIN or lock pattern. If someone can’t get past the lock screen they can’t access your text messages.
How do I lock a form in Microsoft Word?
Lock/Unlock a form
- Step 1: Show the Developer tab on the ribbon. Right click on any of the ribbon commands. For example, right click on Home and then click Customize the Ribbon. Open Customize the Ribbon dialog.
- Step 2: Lock or unlock the form. On the Developer tab, click Restrict Editing command. Where is it?
How do you lock fields?
To lock a field, perform these steps:
- Select the field you want to lock.
- Update the field, if desired, by pressing Shift+F9.
- Press Ctrl+F11.
Can you lock a Microsoft form?
Microsoft Word provides a function called Restrict Editing that lets you either lock down the form in its entirety or allow users to access only the fillable areas within the form.
What does the anchor symbolize?
In ancient times, the anchor was viewed as a symbol that represented safety; because of this, Christians adopted the anchor as a symbol of hope.The anchor was chosen as it holds a ship in place, representing strength and security.
How do I find an anchored object in Word?
Figure 1.
- Display the Word Options dialog box. (In Word 2007 click the Office button and then click Word Options.
- Click Display at the left side of the dialog box. (See Figure 2.)
- To view object anchors, make sure the Object Anchors check box is selected.
- Click on OK.
What are anchor text links?
Anchor text is the clickable text in a hyperlink.The words contained in the anchor text help determine the ranking that the page will receive by search engines such as Google or Yahoo and Bing. Links without anchor text commonly happen on the web and are called naked URLs, or URL anchor texts.
You may have an enclosed text box within the content in your MS Word document. By default, the text box moves with the content. If you do not want it to move with the content, you must lock the text box.
If you are sharing your document with others, you may not want them to change the content within the text box. Again, you can lock the text box.
Word allows you to lock the text box for the above cases. Thus, by locking the text box, you can:
- Prevent the text box from moving with the content.
- Protect the contents of the text box.
We will explain both methods stepwise. Let us start.
Method #1: Prevent the text box from moving with the content
Step #1: Open the Word document
Open the Word document that has at least one text box.

Note that if you add more lines/text to the top of the paragraph, the text box moves down with the text.

Step #2: Enable Drawing Tools
Click the bottom of the text box to select it.
Drawing Tools tab will be visible on the top menu bar.

Step #3: Lock the text box position
Click on the Format tab under Drawing Tools to change the ribbon.
In the section Arrange, click on the Wrap Text icon to open a drop-down menu.

In the drop-down menu, click on Move with Text to remove the tick mark next to it.
Note that now the tick mark appears against Fix Position on Page.

Now, the text box remains locked on the page and will not move with the text.

Method #2: Protect the contents of the text box.
Step #1: Open the Word document
Open the Word document that has at least one text box.

Step #2: Restrict editing
Click on the Review tab on the top menu bar to change the ribbon.

Under section Protect, click on the Restrict Editing icon to open the Restrict Editing drop-down menu.

In the Restrict Editing drop-down menu, click the checkbox under Editing Restrictions so that a tick mark appears in the box.
In the box under the checkbox, select No Changes (Read only).

Step #3: Select the exceptions
Now select the entire document with Ctrl+A.
Holding the Ctrl key down, click on the text boxes to unselect them.

In the Restrict Editing drop-down menu, under Exceptions (optional), click on the box beside Everyone. Ensure a check mark appears in the box.

Under Start enforcement, click on Yes, Start Enforcing Protection to open a dialog box.

Step #4: Enforce the Protection
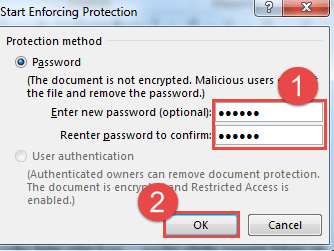
In the Start Enforcing Protection dialog box, click to enable Password.
Enter a password of your choice in Enter new password (optional).
Repeat the password entry in Reenter password to confirm.
Note: if you do not enter a password, no one, including you, will be able to edit the text box ever again. The same will happen if you forget the password you have entered.

Click on Ok to change the Restrict Editing dialog box.

The editable text in the document will have a yellow highlight.

Step#5: Remove the highlight
In the Restrict Editing dialog, click on Highlight the regions I can edit to remove the tick mark in the box.
Exit the Restrict Editing dialog by clicking on the X button on the top right-hand corner.

Word will remove the yellow highlight in the document.
Now, anyone can edit the document. But to edit the text box contents, they will require a password.
Conclusion
Follow our instructions to lock a text box. You can prevent the text box from moving with the text. You can also disallow editing the text box contents.

In the process of working in groups, the problem of exchanging documents between group members is a common thing, and it can be said that it is often encountered.
However, due to the specificity of the assigned field. You do not want your data to be edited by colleagues without permission, so the question is HOW?
How to lock text that you don’t want to be edited?
Yes! and in today’s article I will answer this small question when you work in groups and need to set up security keys for your text content.
Read more:
#first. How to create a text key on a Word file
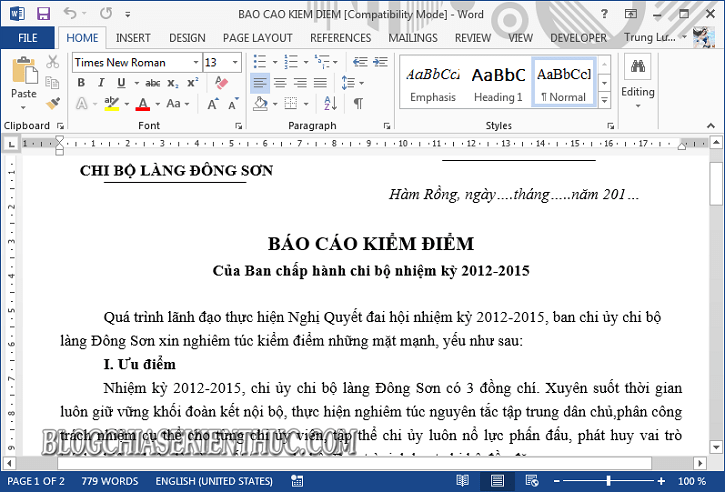
+ Step 1: First, open your Word file.
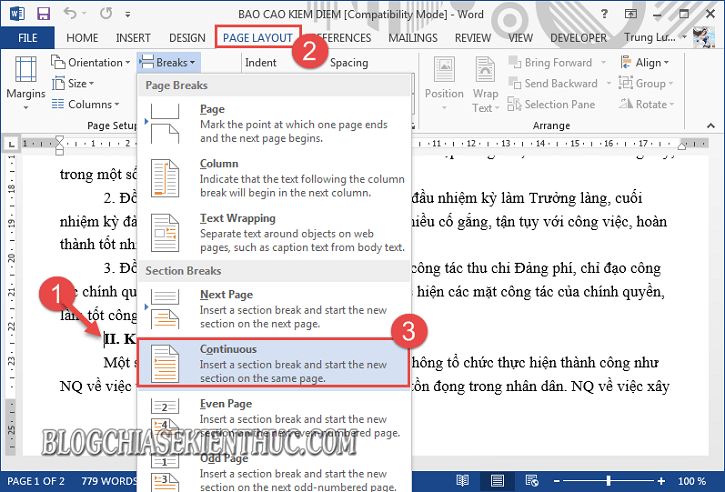
+ Step 2: Here, you put the mouse pointer where you need to split the text (ie the text that you will lock, and the text that is not locked) => Then click to open the tab Page layout => choose Breaks => and choose next Continuous.
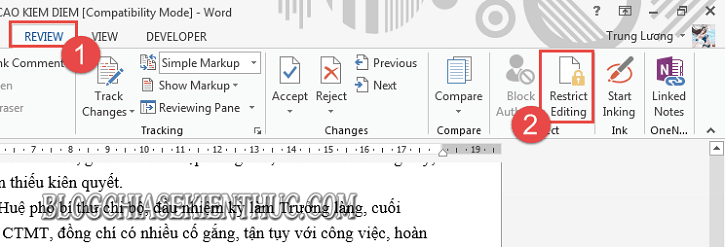
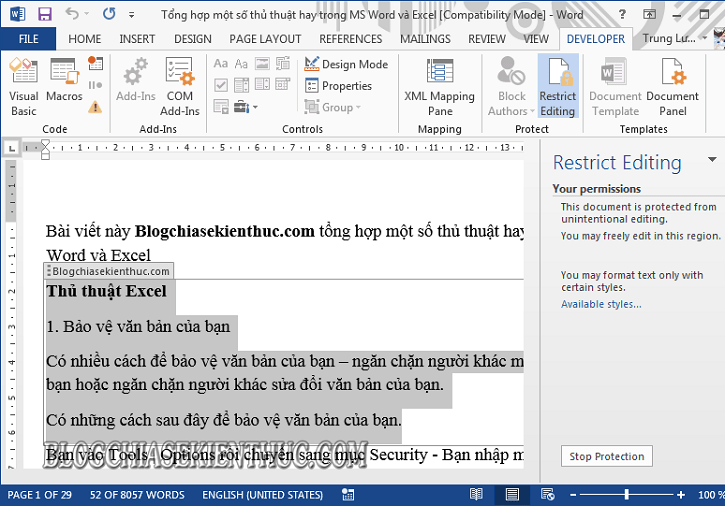
+ Step 3: Then open tab Review => and choose Restrict Editing.
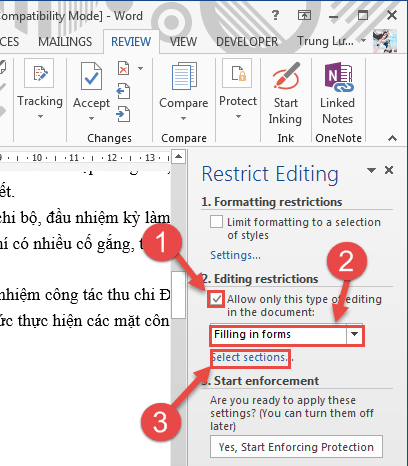
+ Step 4: Window Restrict Editing showing up. Here, you select Allow only this type of editing in the document => and choose Filling in forms => then select Select sections same picture.
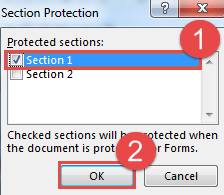
+ Step 5: Dialog box Section Protection appears, here uncheck the unlocked section and check the section (Section lock) => Then press OK to establish.
+ Step 6: Then press Yes, start Enforcing Protection.

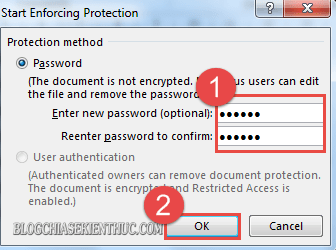
+ Step 7: And now you set the password in the dialog box Start Enforcing Protection => confirm password before clicking OK to generate the key.
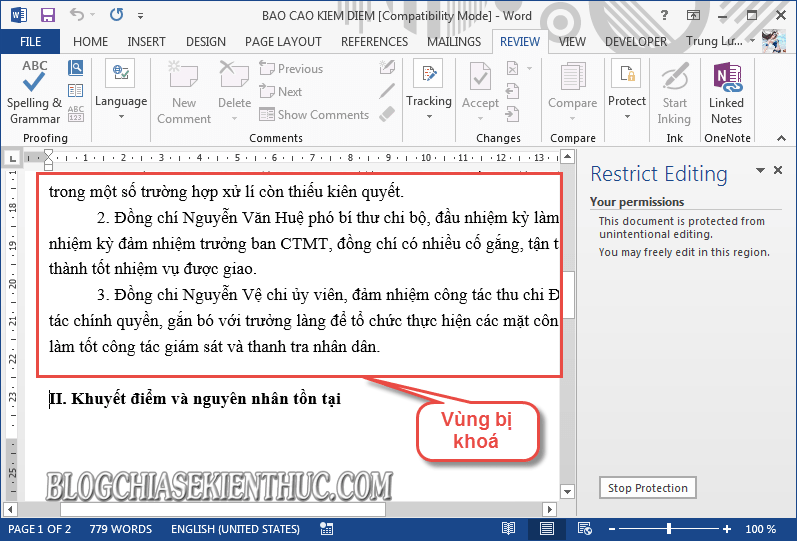
Finally we get the result as shown below.
#2. Remove the text lock on Word
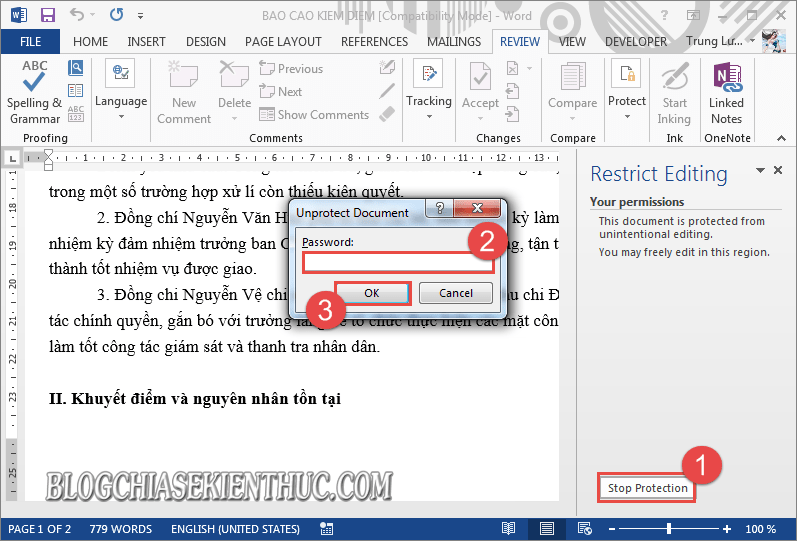
When you want to remove the text content lock in Word so that you can edit it as usual, you just need to click the button. Stop Protection.
=> Then enter Password in the dialog box Unprotect Document => press OK to unlock.
#3. How to create a text lock on a Word file
+ Step 1: First to lock the text on the Word file => You need to highlight the text => And open the Developer tab.
Note: If your Word app doesn’t have a tab Developer then you click on the menu File.
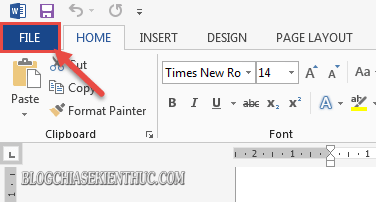
Then select tab Options.
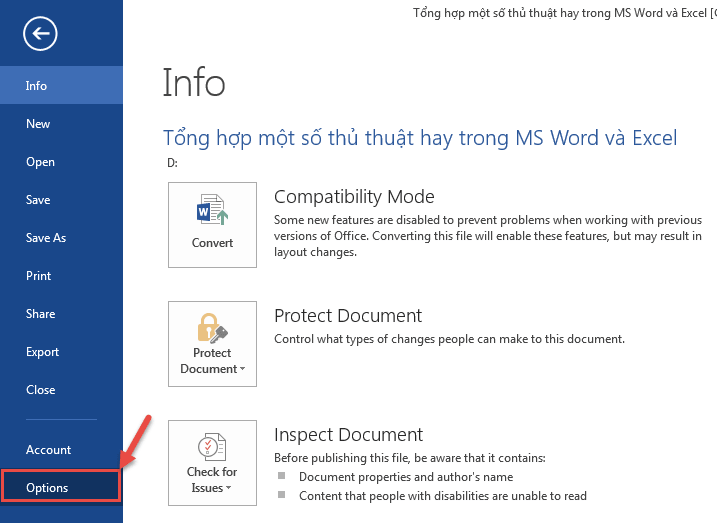
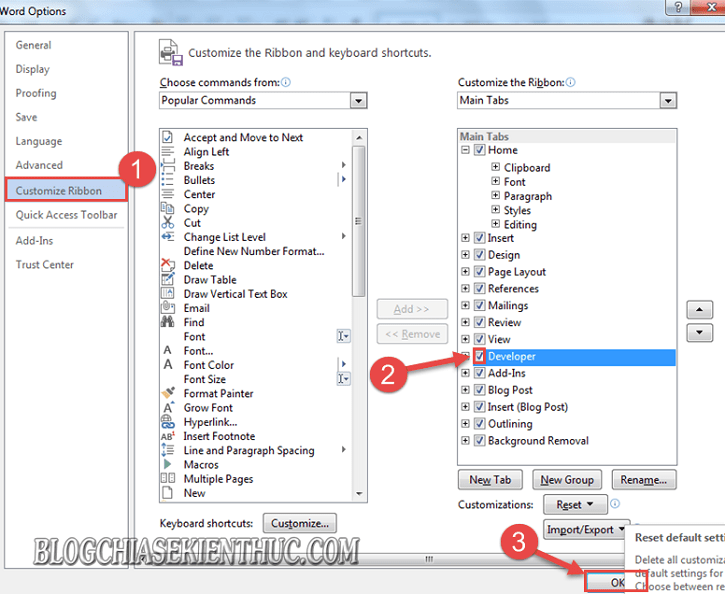
At the dialog box Word Options => you click tab Customize Ribbon => then tick Developer => and press OK to apply.
+ Step 2: After opening Developer then you choose Rich Text Content Controltext area.
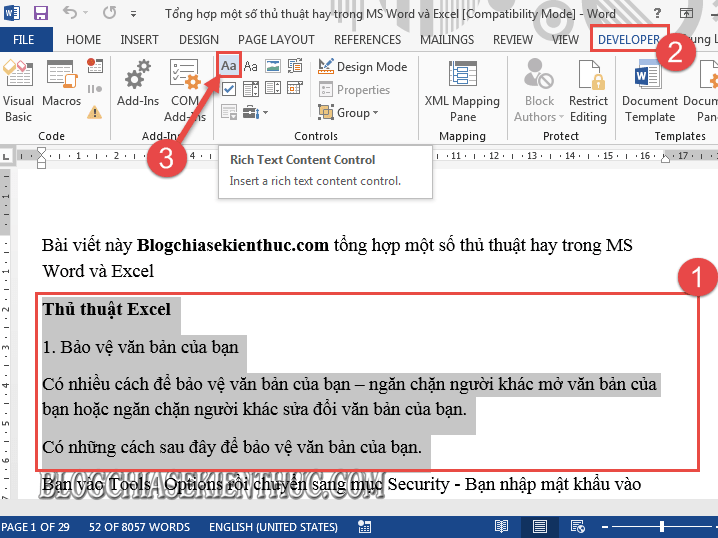
+ Step 3: Then choose Properties.
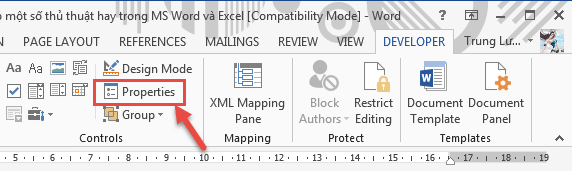
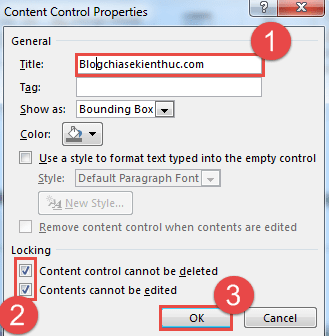
+ Step 4: Then set the caption at Titleand tick Content Control canot be deleted and Content canot be edited => Then choose OK.
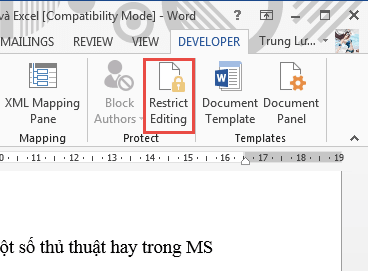
And click Restrict Editing.
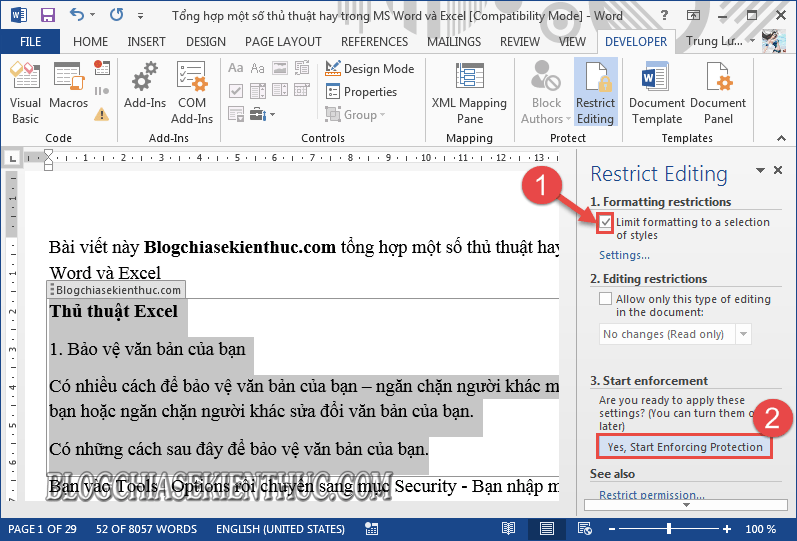
+ Step 5: Window Restrict Editing appear. Here you choose Limit Formating to a selection of styles => Then click Yes Start Enforcing Protection.
And enter the password in the dialog box Start Enforcing Protection => Press OK to create a paragraph key.
Different from locking the text, locking the paragraph will still allow the user to copy, but not edit the text content.
#4. Remove the text lock on Word
Similar to how to unblock the text you just need to click the . button Stop Protection => and enter your password in the dialog box Unprotect Document => Then click OK To confirm.
So it’s done.

#5. Epilogue
Okay! That’s it, I just finished showing you the trick of locking text and text on Word files in a simple and easy way. Helps you to secure the content in Word files, avoid sharing group data that will make “three copies” of your original data.
Come here article Instructions to lock text in Word files I also want to pause. Hope this trick will be useful to you.
Good luck !
CTV: Luong Trung – techtipsnreview
The article achieved: 4/5 stars – (There are 3 reviews)
Note: Was this article helpful to you? Don’t forget to rate the article, like and share it with your friends and family!
Source: How to lock any text in a Word file
– TechtipsnReview
Table of Contents
- How do I stop words being split in Word?
- How do I keep headings and text together in Word?
- How do I lock the size of a text box in Word?
- How do I lock a text box in Word except?
- How do you save a Word document as a fillable form?
- Can you turn a Word document into a fillable form?
- What is the best way to create a fillable form?
- How do I make a Word document fillable and not editable?
- How do you insert a fill in the blank line in Word?
- How do I make multiple Word documents editable?
- Why is my Word document not letting me edit it?
- Why does my Word document says locked for editing?
- Why is my Word document frozen?
- How do I unfreeze my Word document?
- What do you do when a Word document freezes?
- How do I fix word?
- Why is my word not working?
- Why can’t I use my Microsoft Word?
- Why isn’t my word opening?
- Why does Word take forever to open?
- Is Microsoft Word no longer free?
- Is there a free version of Microsoft Word for Windows 10?
- Does Windows 10 home include Word and Excel?
- Which office is best for Windows 10?
- Do you have to pay for Microsoft Word every year?
- Is Microsoft Word a one-time purchase?
First, go ahead and open the Word document to be protected and head over to the “Review” tab. Next, click the “Restrict Editing” button. The “Restrict Editing” pane will appear on the right side of Word. Here, tick the “Allow only this type of editing in the document” checkbox.
How do I stop words being split in Word?
To stop words from splitting across lines in a paragraph or paragraphs by turning off automatic hyphenation:
- Select the paragraph or paragraphs.
- Click the Home tab in the Ribbon.
- Click the dialog box launcher on the bottom right corner of the Paragraph group.
- Click Line and Page Breaks.
- Select or check Don’t Hyphenate.
How do I keep headings and text together in Word?
RECOMMENDED FOR YOU
- Right-click the heading.
- From the resulting context menu, choose Paragraph.
- Click the Line and Page Break tab.
- In the Pagination section, check the Keep Lines Together option.
- Click OK.
How do I lock the size of a text box in Word?
How to Lock Text Boxes in Word
- Open the Microsoft Word document that contains the text boxes that you want to lock.
- Click on the “Layout” tab and then click on the “Advanced” button.
- Select the “Margin” option from the drop-down menu next to the “relative to” field.
How do I lock a text box in Word except?
Select all parts of the document except for the text boxes that you want to lock. Select the “Everyone” check box under Editing Restrictions in the Restrict Formatting and Editing pane to indicate that anyone can edit the selected areas.
How do you save a Word document as a fillable form?
How to Make a Word Document Fillable
- Step 1: Show Developer tab.
- Step 2: Open a Word document and you will be able to make the Word document fillable.
- Step 3: Set or change “Properties” to “Content Control Properties”.
- Step 4: You can add protection to the form by using the “Restrict Editing”.
Can you turn a Word document into a fillable form?
You can create a fillable form in Word itself, so that other people can fill out the form without editing the underlying document. You can also use Adobe Acrobat and other PDF tools to convert a Word document to an editable form that anyone with PDF-compatible software can fill out.
What is the best way to create a fillable form?
How to create fillable PDF files:
- Open Acrobat: Click on the “Tools” tab and select “Prepare Form.”
- Select a file or scan a document: Acrobat will automatically analyze your document and add form fields.
- Add new form fields: Use the top toolbar and adjust the layout using tools in the right pane.
- Save your fillable PDF:
How do I make a Word document fillable and not editable?
In the “Restrict Editing” pane that appears on the right, select the option under the “Editing Restrictions” section. Next, in the same section, click the arrow to make the drop-down menu appear and select “Filling in forms.” Finally, select “Yes, Start Enforcing Protection.”
How do you insert a fill in the blank line in Word?
Blank Space Method
- Place the insertion point where you want the ruling line (underlining).
- On the Format menu, click Font. In the Underline style box, select the line style you want, and then click OK.
- For every blank space you want to underline, press CTRL+SHIFT+SPACEBAR.
How do I make multiple Word documents editable?
How to Co-Edit a Document in Word 2016
- Save your Word document to OneDrive or a SharePoint Online.
- Click the Share button in Word and then enter one or more email addresses of people you want to share with.
- Set their permissions to “Can edit” (selected by default).
Why is my Word document not letting me edit it?
The Word file may be set to open in read-only mode, which is why you are unable to edit it. If editing the Word document has been restricted, then this problem can occur. If more than one user has the document open in a shared network, then you cannot edit the Word document. The the file may not be a Word document (.
Why does my Word document says locked for editing?
This may occur if one or more of the following conditions are true: Word previously quit improperly and, therefore, did not delete the owner file. A second instance of Word is running in the background with the document already open. The document is shared over a network, and another user has it open.
Why is my Word document frozen?
One of the prime factors that cause Word file to freeze is corruption of Word’s Normal Template. Damage to MS Office settings related to Word application can cause crash / freezing of DOC file opened in Word. Presence of third party add-ins in Word program usually result in freezing of Word on start up.
How do I unfreeze my Word document?
Press CTRL+SHIFT+ESC.
What do you do when a Word document freezes?
Step 1. Press the combination Cmd+Option+Esc, and a window will pop-up. Step 2. After pressing the above keyboard combination, the Force Quit Applications should appear, select Microsoft Word and then click on the “Force Quit” button.
Obey these steps:
- Close Word and any other Office programs.
- Press the Win+X keyboard shortcut.
- Choose Control Panel.
- Below the Programs heading, click the Uninstall a Program link.
- Select Microsoft Office from the list of programs.
- Click the Change button.
- Choose Quick Repair.
- Click the Repair button.
Why is my word not working?
If “Word not responding” is not an error in Safe Mode, an incompatible add-in is a likely culprit. Select File > Options > Add-ins to open Word Options. Choose the Go button under Manage near the bottom of the window to open the COM Add-ins dialog box. Clear the check boxes next to each add-in to disable all add-ins.
Why can’t I use my Microsoft Word?
Close all the Office applications. Click on Start< Control Panel< Programs and Features. In the Programs list check if there is any trial version of Office installed, if present right click on it and click on Uninstall and check if it helps.
Why isn’t my word opening?
If Microsoft Word won’t open you can try repairing the Office installation. Next, select the option “Quick Repair” to repair your Office programs. Follow the instructions on the screen to complete the process. If Microsoft Word won’t open, the integrated Office repair system can help get to the bottom of the issue.
Why does Word take forever to open?
Hidden Content. Some Word documents that appear small actually contain a lot of content, which cause such documents to open slowly. One source of hidden content is a document’s properties, which you can display with the Document Properties pane. The Properties flyout of the File tab’s Info screen opens this pane.
Is Microsoft Word no longer free?
Except for the advertising-supported Microsoft Word Starter 2010, Word has never been free except as part of a limited-time trial of Office. When the trial expires, you cannot continue to use Word without buying either Office or a freestanding copy of Word.
Is there a free version of Microsoft Word for Windows 10?
It’s a free app that will be preinstalled with Windows 10, and you don’t need an Office 365 subscription to use it. That’s something Microsoft has struggled to promote, and many consumers simply don’t know that office.com exists and Microsoft has free online versions of Word, Excel, PowerPoint, and Outlook.
Does Windows 10 home include Word and Excel?
Windows 10 includes online versions of OneNote, Word, Excel and PowerPoint from Microsoft Office. The online programs often have their own apps as well, including apps for Android and Apple smartphones and tablets.
Which office is best for Windows 10?
If you must have everything that the suite has to offer, Microsoft 365 (Office 365) is the best option since you get all the apps to install on every device (Windows 10, Windows 8.1, Windows 7, and macOS). It’s also the only option that provides continuous updates at a low cost.
Do you have to pay for Microsoft Word every year?
Why do you think they call it “365”, you have to pay for it 365 days a year, every day, every year. Yes Office 365/2016 is MS’s newest release. MS has switched all of it’s marketing efforts to pushing the subscription. There still are one-time-payment licenses, but you have to know where to look or what to ask for.
Is Microsoft Word a one-time purchase?
Learn more about Microsoft 365. Office 2019 is a one-time purchase that includes classic applications such as Word, Excel, and PowerPoint for use on a single PC or Mac. Office as a one-time purchase does not include any of the services included in Microsoft 365.
In the process of working in groups, the problem of exchanging documents between group members is a common thing, and it can be said that it is often encountered.
However, due to the specificity of the assigned field. You do not want your data to be edited by colleagues without permission, so the question is HOW?
How to lock text that you don’t want to be edited?
Yes! and in today’s article I will answer this small question when you work in groups and need to set up security keys for your text content.
#first. How to create a text key on a Word file
+ Step 1: First, open your Word file.

+ Step 2: Here, you put the mouse pointer where you need to split the text (ie the text that you will lock, and the text that is not locked) => Then click to open the tab Page layout => choose Breaks => and choose next Continuous.

+ Step 3: Then open tab Review => and choose Restrict Editing.

+ Step 4: Window Restrict Editing showing up. Here, you select Allow only this type of editing in the document => and choose Filling in forms => then select Select sections same picture.

+ Step 5: Dialog box Section Protection appears, here uncheck the unlocked section and check the section (Section lock) => Then press OK to establish.

+ Step 6: Then press Yes, start Enforcing Protection.

+ Step 7: And now you set the password in the dialog box Start Enforcing Protection => confirm password before clicking OK to generate the key.

Finally we get the result as shown below.

#2. Remove the text lock on Word
When you want to remove the text content lock in Word so that you can edit it as usual, you just need to click the button. Stop Protection.
=> Then enter Password in the dialog box Unprotect Document => press OK to unlock.

#3. How to create a text lock on a Word file
+ Step 1: First to lock the text on the Word file => You need to highlight the text => And open the Developer tab.
Note: If your Word app doesn’t have a tab Developer then you click on the menu File.

Then select tab Options.

At the dialog box Word Options => you click tab Customize Ribbon => then tick Developer => and press OK to apply.

+ Step 2: After opening Developer then you choose Rich Text Content Controltext area.

+ Step 3: Then choose Properties.

+ Step 4: Then set the caption at Titleand tick Content Control canot be deleted and Content canot be edited => Then choose OK.

And click Restrict Editing.

+ Step 5: Window Restrict Editing appear. Here you choose Limit Formating to a selection of styles => Then click Yes Start Enforcing Protection.

And enter the password in the dialog box Start Enforcing Protection => Press OK to create a paragraph key.

Different from locking the text, locking the paragraph will still allow the user to copy, but not edit the text content.
#4. Remove the text lock on Word
Similar to how to unblock the text you just need to click the . button Stop Protection => and enter your password in the dialog box Unprotect Document => Then click OK To confirm.

So it’s done.

#5. Epilogue
Okay! That’s it, I just finished showing you the trick of locking text and text on Word files in a simple and easy way. Helps you to secure the content in Word files, avoid sharing group data that will make “three copies” of your original data.
Come here article Instructions to lock text in Word files I also want to pause. Hope this trick will be useful to you.
Good luck !
CTV: Luong Trung – techtipsnreview
The article achieved: 4/5 stars – (There are 3 reviews)
Note: Was this article helpful to you? Don’t forget to rate the article, like and share it with your friends and family!