
In the following article, we will focus on introducing you 5 smart ways of how to link one Word document to another.
There are many times when we need to link two or more related documents, so an update in source file can also refresh the text pasted on another one. Speaking of this, Word provides several distinct solutions. Let’s take a look to find out more details.

Method 1: Use “Paste Link” Option
- Firstly, copy a range of text or the entire source document.
- Then put insertion pointer properly and click “Paste” under “Home” tab.
- Next choose “Paste Special” to open the same name dialog box.

- In the “Paste Special” box, select “Paste link”.
- And click to select a link type, such as “Formatted Text” or “Unformatted Text”.
- Lastly, click “OK”.


Any change made in source text should reflect in the new document if you update the link by right click and choosing “Update Link”.
Method 2: Insert an Object
- To begin with, click “Insert” tab then click “Object” in “Text” group.

- Next in “Object” box open, click “Create from File” tab first.
- Then click “Browse” to select a file.
- And check “Link to file” box.
- Finally, click “OK”.


Notice that you will insert the whole document into the new location. You can use the same way in method 1 to update the link.
Method 3: Create a Master Document Linking to Its Subdocument
It’s also a good choice to create a master document that link to subdocument to connect the two files. We have a previous article that explains every detailed step. You can refer to this link: How to Create a Master Document that Links to Multiple Subdocuments in Your Word
Method 4: Hyperlink a Bookmark from Source Document
- First and foremost, create a bookmark for a block of texts in the source document.
- Then in a new document, put insertion pointer at a proper location. Click “Insert” tab and choose “Hyperlink”.

- Put cursor at the “Address” text box and click “Browse for File” tab to select the file which contains the texts you need.
- Next click “Bookmark” tab to open the “Select Place in Document” box.
- Select the bookmark just created and click “OK” in both 2 boxes open.


You will get a hyperlink as bellow:
You can visit the source document through “Ctrl+ Click”.
Method 5: Utilize the “IncludeText” Field
- Click “Insert” tab first and the “Quick Parts” next.
- Then choose “Field” on the drop-down menu.

- In “Field” dialog box, choose “Links and References” for the “Categories”.
- Next select “IncludeText” field.
- Enter the file name of the source document.
- Lastly, click “OK”.


All texts of the source file shall be visible by now in the new document. To update the field, you can click on it and press “F9”.
Deal with Corrupt Word Documents
Once we end up with a damaged document, we certainly won’t discard it immediately. Instead we should try all out to bring a dead file back to life. One of the most important means to address doc corruption is to acquire an advanced recovering tool as soon as possible.
Author Introduction:
Vera Chen is a data recovery expert in DataNumen, Inc., which is the world leader in data recovery technologies, including Excel recovery and pdf repair software products. For more information visit www.datanumen.com
You can add hyperlinks to your document that give your readers instant access to information in another part of the same document. The hyperlink can be text or graphics. By using hyperlinks, you can provide information to your readers without repeating the same information on different pages.
To add links that jump from one part of a document to another part of the same document, mark the destination and then add a link to it.
Mark the destination
Mark the hyperlink destination with a bookmark or a heading style.
Insert a bookmark
-
Select text or an item, or click where you want to insert a bookmark.
-
Click Insert > Bookmark.

-
Under Bookmark name, type a name.
Note: Bookmark names need to begin with a letter. They can include both numbers and letters, but not spaces. If you need to separate words, you can use an underscore ( _ )—for example, First_heading.
-
Click Add.

Apply a heading style
Headings are automatically marked as a destination. All you need to do is apply one of the built-in heading styles.
-
Select the text to which you want to apply a heading style.
-
On the Home tab, click the style you want.
Add the link
After you’ve marked the destination, you’re ready to add the link.
-
Select the text or object you want to use as a hyperlink.
-
Right-click and then click Hyperlink
. -
Under Link to, click Place in This Document.
-
In the list, select the heading or bookmark that you want to link to.
Note: To customize the Screen Tip that appears when you rest the pointer over the hyperlink, click ScreenTip, and then type the text that you want.
 .
.See Also
Add or delete bookmarks in a Word document or Outlook message
Add a PDF to your Office file
Use hyperlinks in a table of contents
Create a table of contents
Need more help?
If you are referencing to another Word document from another one of your Word Documents, you will be required to link to this document.
Placing a link in your Word Documents makes it easy for the reader to acquire additional information on a certain point, that you have already written a piece on that topic. Or makes it easy for the reader to see the reference file you are speaking of or quoting from.
In this post, we will walk you through how to link a Microsoft Word Document to another Word Document as well as linking to another file or webpage.
Linking to another Word Document
- Open your Word Document
- Highlight and position the mouse pointer over the word or text you want to link

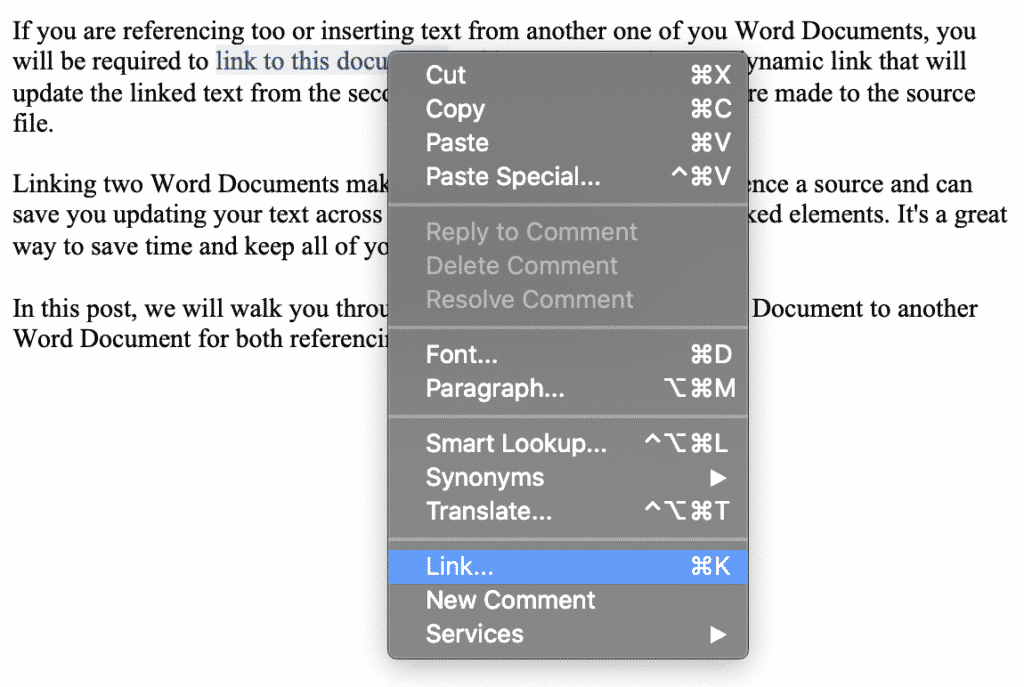
- Right click on the highlighted word
- Click Link
- Select Web Page or File tab
- Press Select

- Select the document you with to link
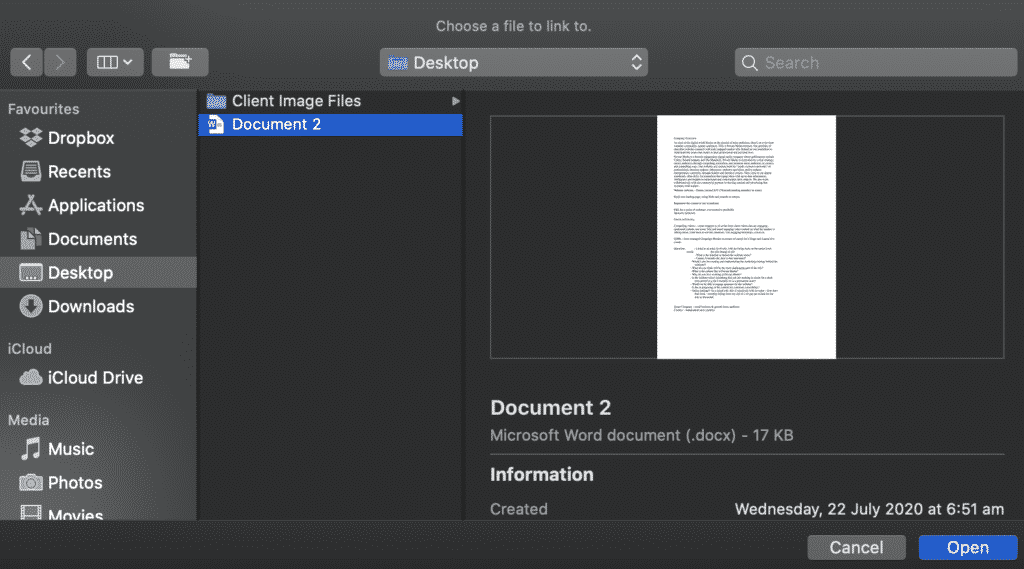
- Press Open
- When you press Open, the file source will automatically drop into the address window
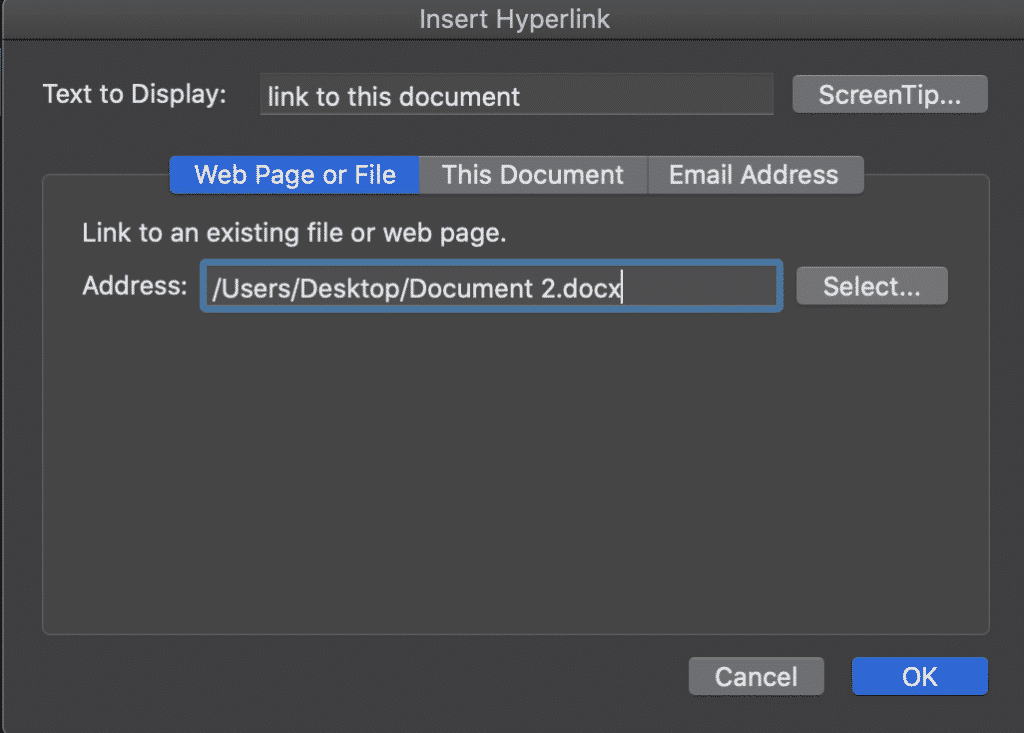
- Press OK

You have now successfully linked your Microsoft Word Document.
On the hunt for an easier way to manage version control?
If you’re collaborating on Microsoft Word Documents and need to keep track of each new version along the way, it is likely that you (like so many of us) have a messy shared drive full of cluttered, badly named versions and no real way of knowing which one if the most recent and who made changes to what.
The endless scrolling through what feeling like 500 versions to figure out if Report_v9_edited_final_FINALFINAL_2 is actually the most recent version.
Is it the final one? Let’s say it is, now you have added your edits and are ready to save a new version, do you just add a _updated onto the end of the already long file name, or the current date – hoping no body else edits and saves on the same day?
Its a mind-field out there!
Then just to add another hidden bomb to the field, there is always one person in the team that saves a version in a different spot and it’s near impossible to figure out where it went.

Collaborating in Word can be challenging, with Version control the number one frustration for most small to large corporations who collaborate regularly and do not have an automatic version control tool on hand.
A tool that manages version control for you, such as Simul Docs will take all of the file naming and searching out of your job description leaving you to spend more time to edit.
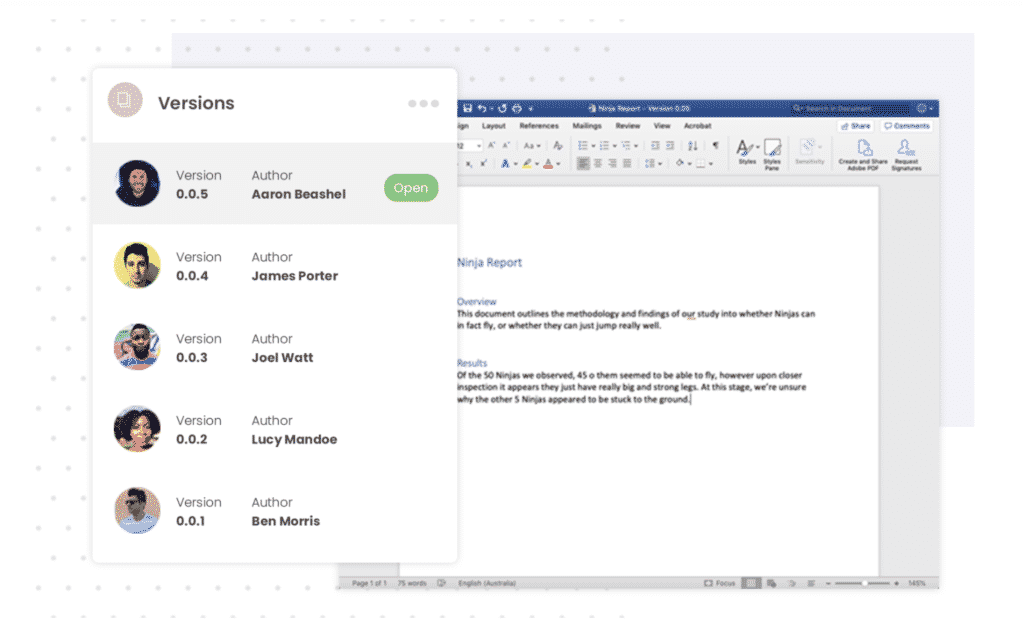
Simul Docs manages version control for you. When you open a new file, Simul will save it as file 0.0.1, then John from Marketing opens your file, makes some changes and presses save – this becomes file 0.0.2 and so on.
It’s version control that makes sense.

Then you want to go back and see what changes John has made over the course of the documents life. Well that’s easy, because Simul not only tracks the versions for you with the edits saved in each it places the authors name next to the document so you know who owns which version at a glance.
So now it’s your turn to edit the Word Document, which one is the most recent one?
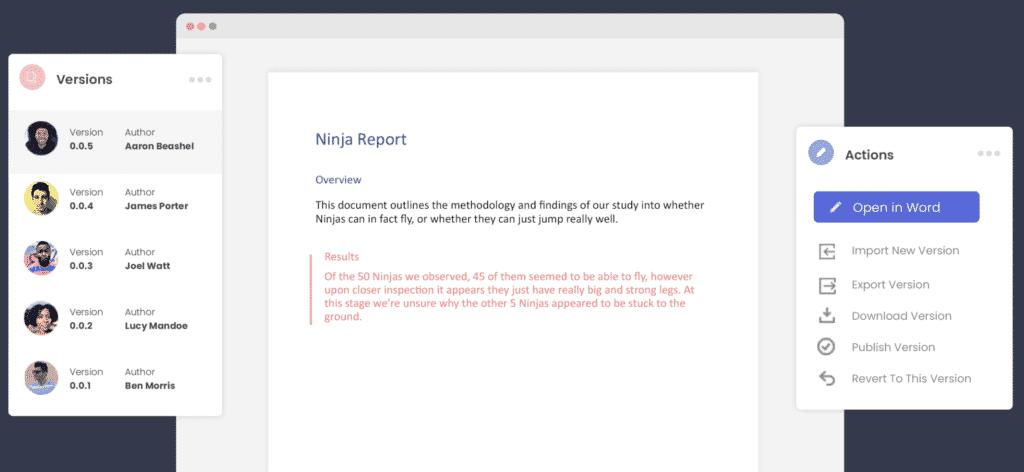
Simul lists all of the versions in an easy to view ‘versions list’ at the side of your dashboard. The most recent version will be listed at the top, with the highest version number, e.g 0.0.5.
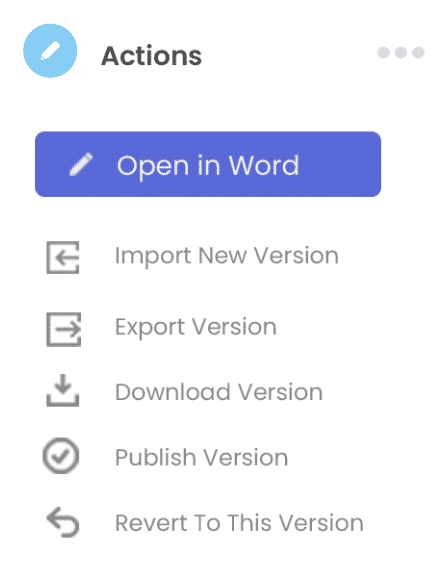
You can open version 0.0.5 at the click of a button, edit it directly in Simul or open it in Microsoft Word, depending on which interface you personally prefer working within.
Now that you are editing away, Simul also knows that you are going to want your changes tracked, so tracked changes are automatic, every, single, time you open the document. Because collaborating can be stressful enough without having to remember to turn on tracked changes or save the document as a new version before you start editing to avoid saving over the last file.
So now you’ve made your edits, with all of your changes tracked (thanks Simul!) and are ready to press save and share your file and let your team know you have finished. Simul has you covered again – when you press save Simul automatically sends an email to the document owner letting them know a new version is available for their review.
If you did want to share your document directly, Simul allows you to share via a directly link, email or to any of the popular cloud storage systems such as Dropbox, GoogleDrive, OneDrive and more.
Save, export and download the document out of Simul docs at the click of a button. Simul gives you the option to do so in the original Word Document format or as a PDF.
With collaboration in mind, purpose built tools such as Simul Docs were built to make collaboration easy. From version control, to tracking changes, saving, editing, merging and more – Simul has you covered!
If you find yourself wasting time searching through a messy shared drive, we suggest you give Simul Docs a go.
With free trials available, you’ve got nothing to loose.
How can I create a link between a Word document and one or more other Word documents?
For example, I’m doing a roster schedule for staffs’ chores and while I’m doing that in one window, I want to have another window showing something else — say, a table of schedule roles. I might even open a third Word window showing something else.
I want to link between these files; if I’m doing the roster schedule for staff, I want to be able to either press a key or click on something in the Word window and it populates to a second, and perhaps even a third, Word file.
![]()
Gaff
18.4k15 gold badges57 silver badges68 bronze badges
asked Jul 11, 2011 at 12:39
![]()
2
I can’t be more specific since I do not have a version, but here is how you do in in Word 2010.
Go to the Insert tab, then click on Object (it is in the text sub-category over near the far right). You will then see the following screenshot:
Browse to the file, and check the «Link to file» box. You can either update the source file (I would do this to avoid confusion), or if you are in the destination file, when you try to edit it, it actually opens the file within the file. Hard to explain, but you will get it when you see it.
Other versions of Office are very similar.
answered Jul 11, 2011 at 13:30
![]()
KCotreauKCotreau
25.5k5 gold badges47 silver badges72 bronze badges
 Please Note:
This article is written for users of the following Microsoft Word versions: 2007 and 2010. If you are using an earlier version (Word 2003 or earlier), this tip may not work for you. For a version of this tip written specifically for earlier versions of Word, click here: Linking Word Documents.
![]()
Written by Allen Wyatt (last updated March 12, 2020)
This tip applies to Word 2007 and 2010
Besides being able to link information from other Windows applications into your document, you can link other Word documents to your current document. This comes in real handy if you are working with a document that needs to pull information from other documents. For instance, you might have a contract that has standard clauses in it. These clauses may be stored in other documents and then be pulled into the contract as necessary. This is done in the following manner:
- Position the insertion point where you want the document inserted and linked.
- Display the Insert tab of the ribbon.
- Click the down-arrow next to the Object tool within the Text group. Word displays a few choices you can make.
- Click Text from File. Word displays the Insert File dialog box.
- Specify a filename for the document you want inserted and linked.
- Click your mouse on the pull-down arrow at the right side of the Insert button. Word displays a menu of the different ways you can insert the document.
- Choose Insert As Link from the menu.
This process results in Word displaying the other file, but the INCLUDETEXT field is used instead of the actual text from the file. The advantage to adding links in this way instead of inserting the other file completely is that the original documents (the ones you are linked to) can be independently updated, and those changes are reflected in the document with the links. (Provided, of course, that you update the links in the document by selecting the link and pressing F9.)
WordTips is your source for cost-effective Microsoft Word training.
(Microsoft Word is the most popular word processing software in the world.)
This tip (11622) applies to Microsoft Word 2007 and 2010. You can find a version of this tip for the older menu interface of Word here: Linking Word Documents.
Author Bio
With more than 50 non-fiction books and numerous magazine articles to his credit, Allen Wyatt is an internationally recognized author. He is president of Sharon Parq Associates, a computer and publishing services company. Learn more about Allen…
MORE FROM ALLEN
Adding Drop Shadows
Want your shapes to really «pop» off the page? Add a drop shadow to them, as described in this tip.
Discover More
Sorting or Filtering by Conditional Format Results
Conditional formatting is a great feature in Excel. Unfortunately, you can’t sort or filter by the results of that …
Discover More
Resetting Excel Menus
Excel allows you to easily change what appears on its menus. If you later want to return to Excel’s default menu …
Discover More
More WordTips (ribbon)
Document is Too Large for Word to Handle
Imagine trying to open a familiar document one day, only to find that Word gives you an error message that the file is …
Discover More
Finding Documents Containing Multiple Occurrences of a Word
Searching for documents that contain a particular word is rather straightforward. The task becomes a bit trickier when …
Discover More
Some Documents Open Slower than Others
It’s great when your documents open quickly, particularly when you need to work with lots of documents at the same time. …
Discover More