
Word for Microsoft 365 Outlook for Microsoft 365 Project Online Desktop Client Word 2021 Outlook 2021 Project Professional 2021 Project Standard 2021 Word 2019 Outlook 2019 Project Professional 2019 Project Standard 2019 Word 2016 Outlook 2016 Project Professional 2016 Project Standard 2016 Office 2016 Word 2013 Outlook 2013 Project Professional 2013 Project Standard 2013 Office 2013 Word 2010 Outlook 2010 Office 2010 Word 2007 Outlook 2007 Office 2007 InfoPath 2013 InfoPath Edit Mode 2010 InfoPath Filler 2013 Word Starter 2010 More…Less
The fastest way to create a basic hyperlink in a Microsoft 365 document is to press ENTER or the SPACEBAR after you type the address of an existing webpage, such as http://www.contoso.com. Microsoft 365 automatically converts the address into a link.
In addition to webpages, you can create links to existing or new files on your computer, to email addresses, and to specific locations in a document. You can also edit the address, display text, and font style or color of a hyperlink.
Notes:
-
If you want to remove links or stop Microsoft 365 from automatically adding hyperlinks, see Remove or turn off hyperlinks.
-
This article applies to desktop versions of Word, Excel, Outlook, and PowerPoint. A simplified set of hyperlink features is offered on Microsoft 365 Online. If you have a desktop version of Microsoft 365, you can edit your document there for more advanced hyperlink features, or you can try or buy the latest version of Microsoft 365.
-
Select the text or picture that you want to display as a hyperlink.
-
On ribbon, on the Insert tab, select Link.
You can also right-click the text or picture and click Link on the shortcut menu.
-
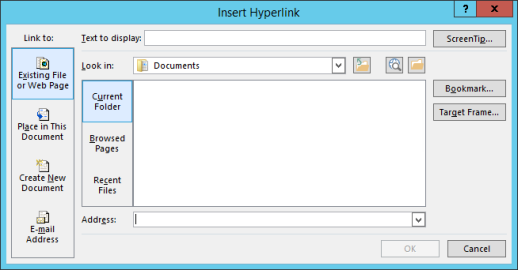
In the Insert Hyperlink box, type or paste your link in the Address box.
Note: If you don’t see the Address box, make sure Existing File or Web Page is selected under Link to.
Optionally, type different display text for your link in the Text to display box.
Note: If you don’t know the address for your hyperlink, click Browse the Web
 to locate the URL on the Internet and copy it.
 to locate the URL on the Internet and copy it.
Optional: To customize the ScreenTip that appears when you rest the pointer over the hyperlink, click ScreenTip in the top-right corner of the Insert Hyperlink dialog box and enter the text you want.
You can add a hyperlink to a file on your computer, or to a new file that you want to create on your computer.
-
Select the text or picture that you want to display as a hyperlink.
-
Press Ctrl+K.
-
Under Link to, do one of the following:
-
To link to an existing file, click Existing File or Web Page under Link to, and then find the file in the Look in list or the Current Folder list.
-
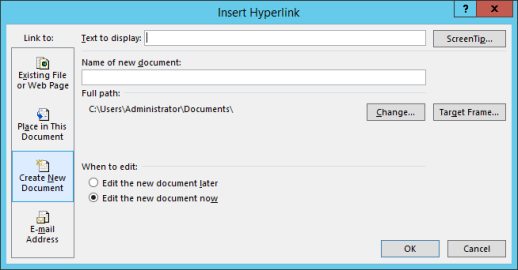
To create a new, blank file and link to it, click Create New Document under Link to, type a name for the new file, and either use the location shown under Full path or browse to a different save location by clicking Change. You can also choose whether to Edit the new document later or open and Edit the new document now.
-
Optional: To customize the ScreenTip that appears when you rest the pointer over the hyperlink, click ScreenTip in the top-right corner of the Insert Hyperlink dialog box and enter the text you want.
-
Select the text or picture that you want to display as a hyperlink.
-
Press Ctrl+K.
You can also right-click the text or picture and click Link on the shortcut menu.
-
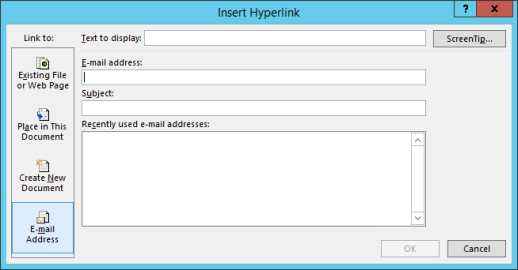
Under Link to, click E-mail Address.
-
Either type the email address that you want in the E-mail address box, or select an address in the Recently used e-mail addresses list.
-
In the Subject box, type the subject of the message.
Note: Some web browsers and email programs might not recognize the subject line.
Optional: To customize the ScreenTip that appears when you rest the pointer over the hyperlink, click ScreenTip in the top-right corner of the Insert Hyperlink dialog box and enter the text you want.
You can also create a hyperlink to a blank email message by simply typing the address in the document. For example, type someone@example.com, and Microsoft 365 creates the hyperlink for you (unless you turned off automatic formatting of hyperlinks).
You can create hyperlinks that link to a Word document or Outlook email message that includes heading styles or bookmarks. You can also link to slides or custom shows in PowerPoint presentations and specific cells and sheets in Excel spreadsheets.
Tips:
-
Learn about adding bookmarks.
-
To add a heading style, select your heading text, click the Home tab in Word or the Format Text tab in Outlook, and select a style in the Styles group.
Create a hyperlink to a location in the current document
-
Select the text or picture that you want to display as a hyperlink.
-
Press Ctrl+K.
You can also right-click the text or picture and click Link on the shortcut menu.
-
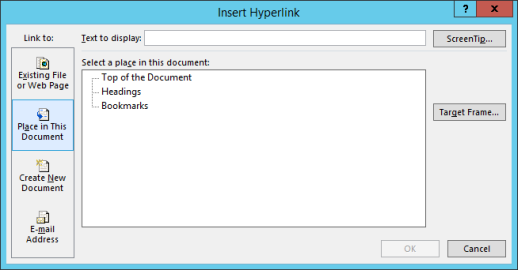
Under Link to, click Place in This Document.
-
In the list, select the heading (current document only), bookmark, slide, custom show, or cell reference that you want to link to.
Optional: To customize the ScreenTip that appears when you rest the pointer over the hyperlink, click ScreenTip in the top-right corner of the Insert Hyperlink dialog box and enter the text you want.
Create a hyperlink to a location in another document
-
Select the text or picture that you want to display as a hyperlink.
-
Press Ctrl+K.
You can also right-click the text or picture and click Link on the shortcut menu.
-
Under Link to, click Existing File or Web Page.
-
In the Look in box, click the down arrow, and find and select the file that you want to link to.
-
Click Bookmark, select the heading, bookmark, slide, custom show, or cell reference that you want, and then click OK.
Optional: To customize the ScreenTip that appears when you rest the pointer over the hyperlink, click ScreenTip in the top-right corner of the Insert Hyperlink dialog box and enter the text you want.
-
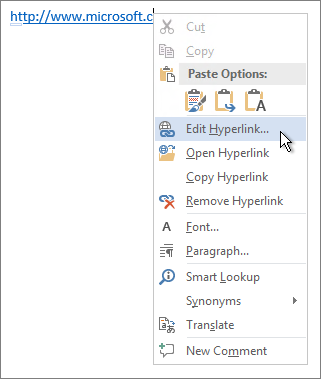
To change the address or display text of a hyperlink you added, right-click the link and click Edit Hyperlink.
-
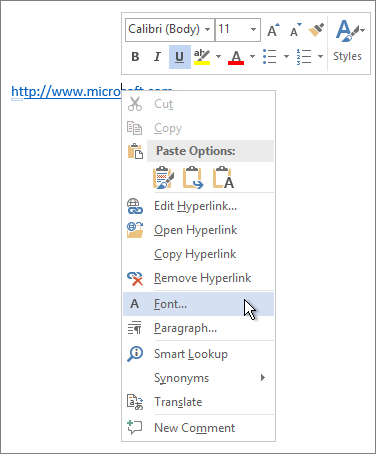
To change the appearance of a hyperlink, such as font style, size, or color, right-click the link and click Font on the shortcut menu, or click a style option on the mini toolbar that appears.
-
To customize the ScreenTip that appears when you rest the pointer over the hyperlink, right-click the link, click Edit Hyperlink, click ScreenTip in the top-right corner of the dialog box, and enter the text you want.
See also
Remove or turn off hyperlinks
Create a hyperlink in Publisher
Create a hyperlink in OneNote
Hyperlinks in Word for the web
Need more help?

Вариант 1: Документы на диске ПК
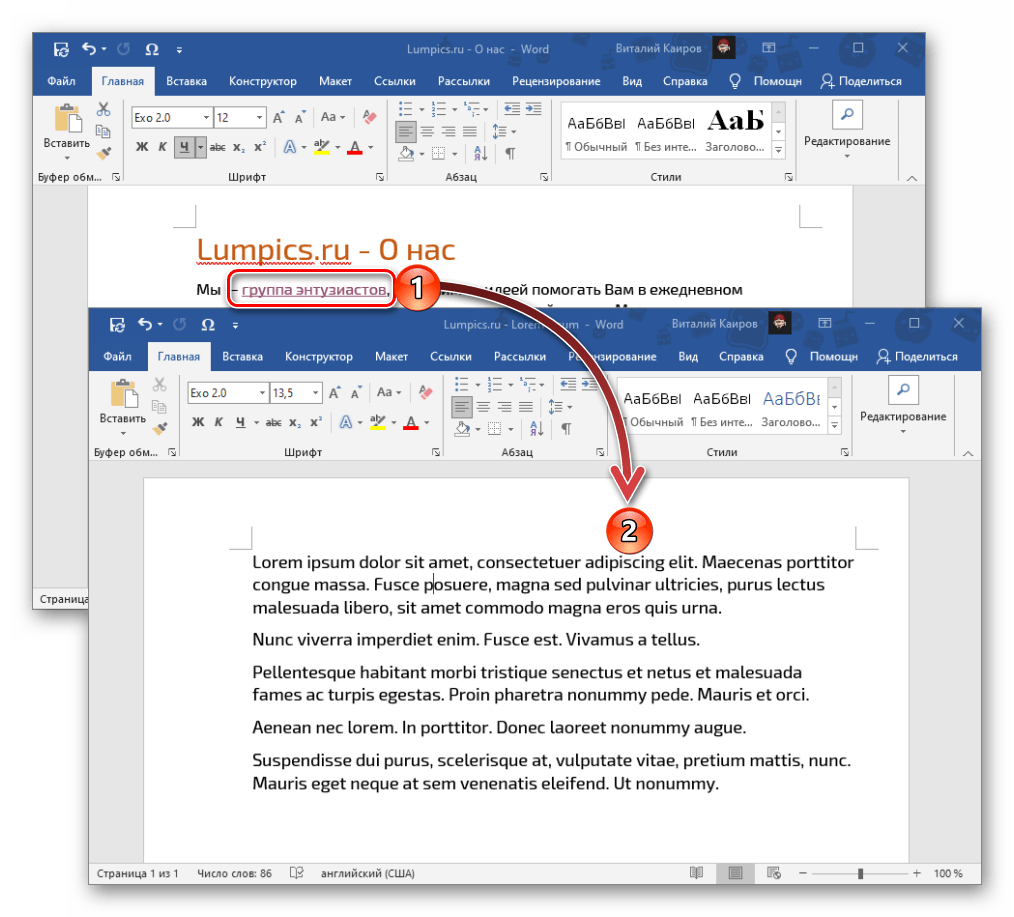
Добавление ссылки на документ в Ворде осуществляется по следующему алгоритму:
Примечание: Ссылка может вести на любой документ из пакета приложений Microsoft Office (Word, Excel, PowerPoint и т. д.), обычные текстовые файлы (Блокнот) и файлы многих других форматов. При этом важно учитывать, что рассмотренным ниже способом можно создать заведомо рабочую ссылку только на локальные файлы, которые хранятся на вашем компьютере, просмотр тоже будет доступен только на нем.
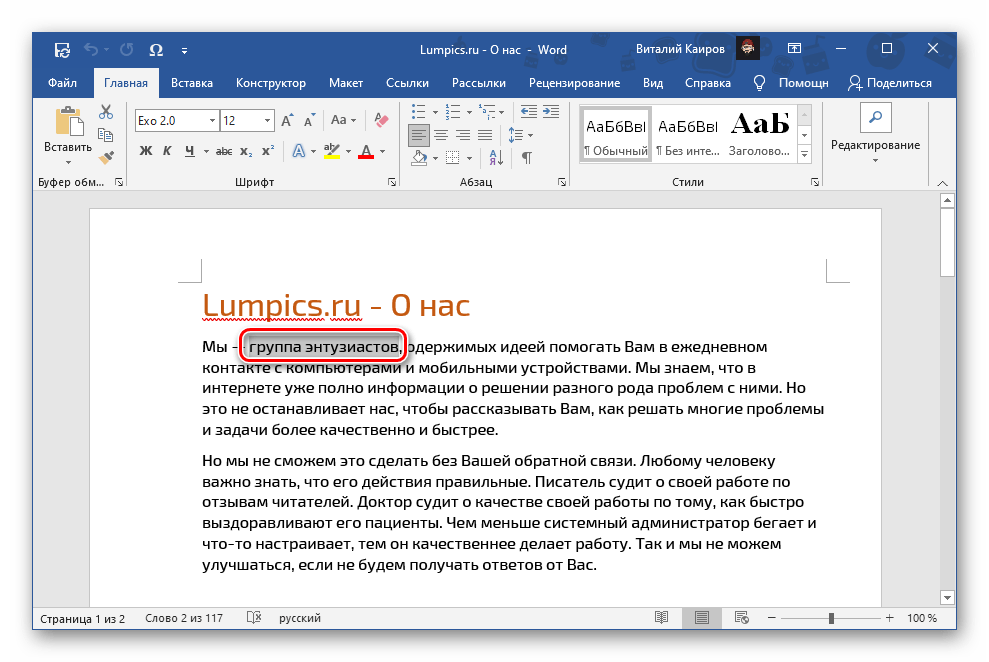
- Выделите то слово или фразу, которое в дальнейшем станет ссылкой на документ.

Обратите внимание! Ссылкой в файле Word может быть не только текст, но и любое изображение, фигура, текстовое поле, SmartArt, WordArt и другие объекты. Алгоритм действий, которые требуется выполнить в подобных случаях, ничем не отличается от рассмотренного ниже.
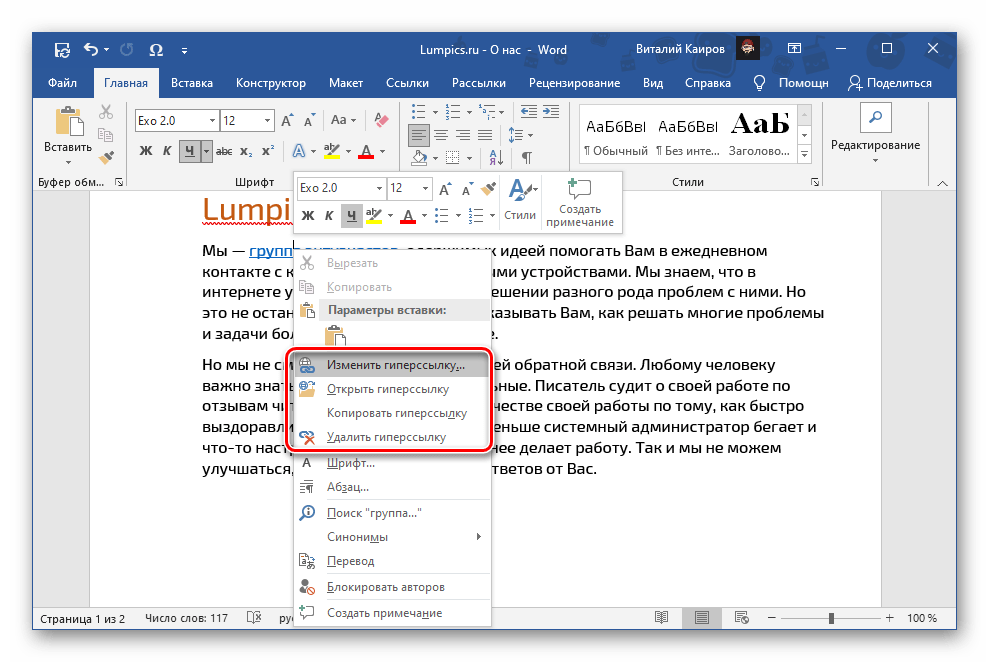
- Далее можно пойти по одному из трех путей:
Читайте также: Сочетания клавиш для удобной работы в Ворде
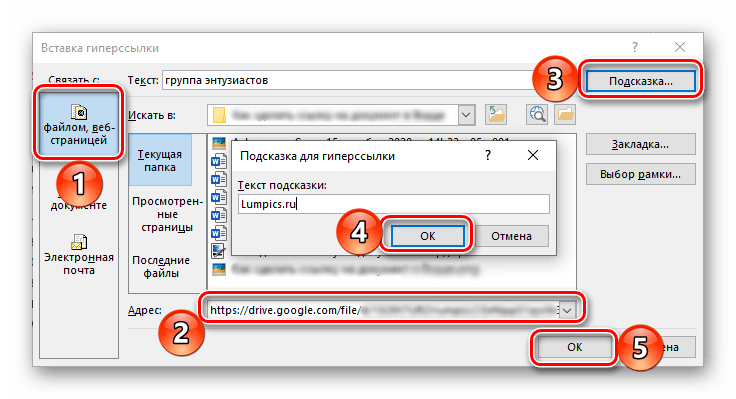
- Каким бы из предложенных выше методов вы не воспользовались, будет открыто окно «Вставка гиперссылки».
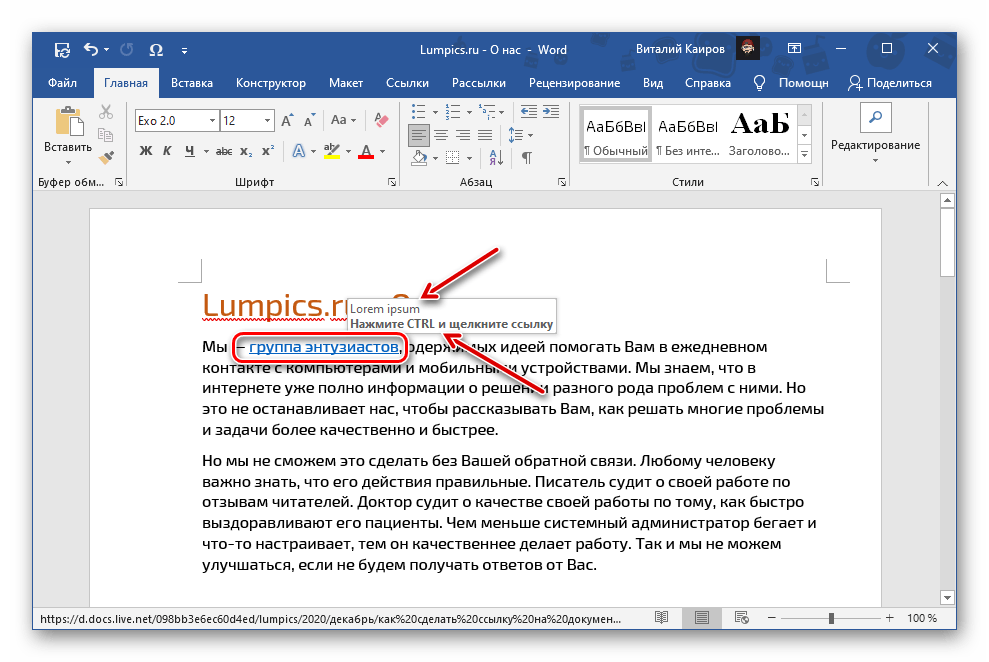
Ссылка на выбранный вами файл будет добавлена в документ Word. Для «перехода» по ней наведите указатель курсора на подсвеченный адрес (во всплывающем окошке будет отображаться подсказка, если ранее она добавлялась), зажмите клавишу «Ctrl» и щелкните левой кнопкой мышки (ЛКМ).
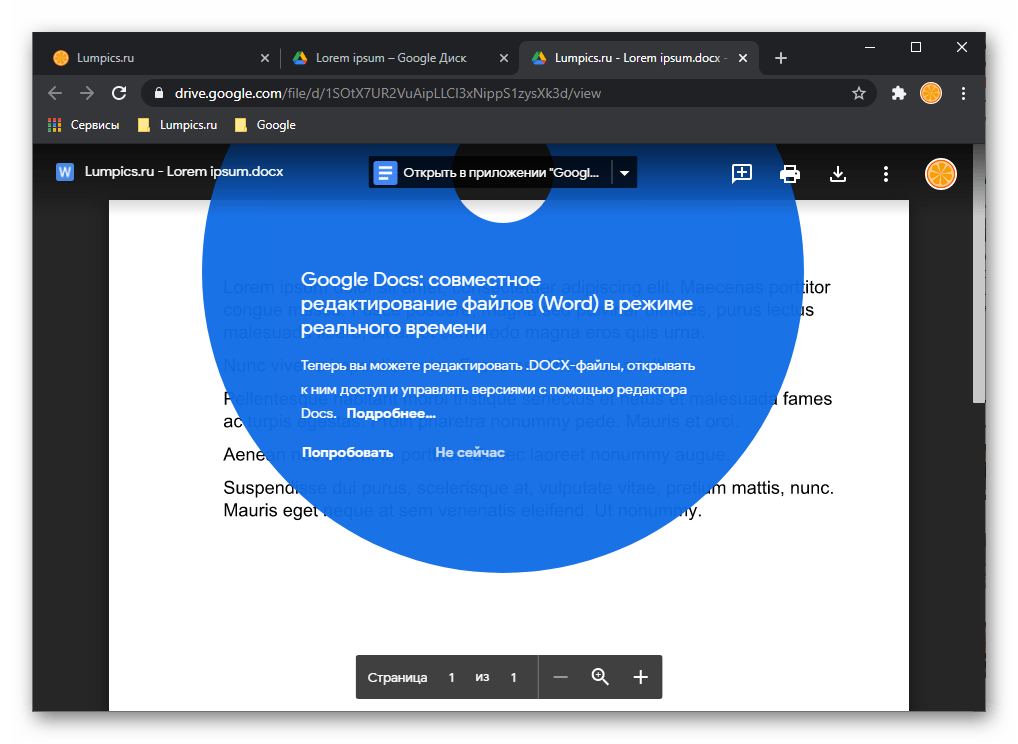
Это действие откроет соответствующий файл.
Если ссылку потребуется изменить или удалить, кликните по ней ПКМ и выберите необходимый пункт в контекстном меню. В нем же доступна возможность перехода и копирования адреса.

Читайте также: Как убрать ссылки в документе Ворд
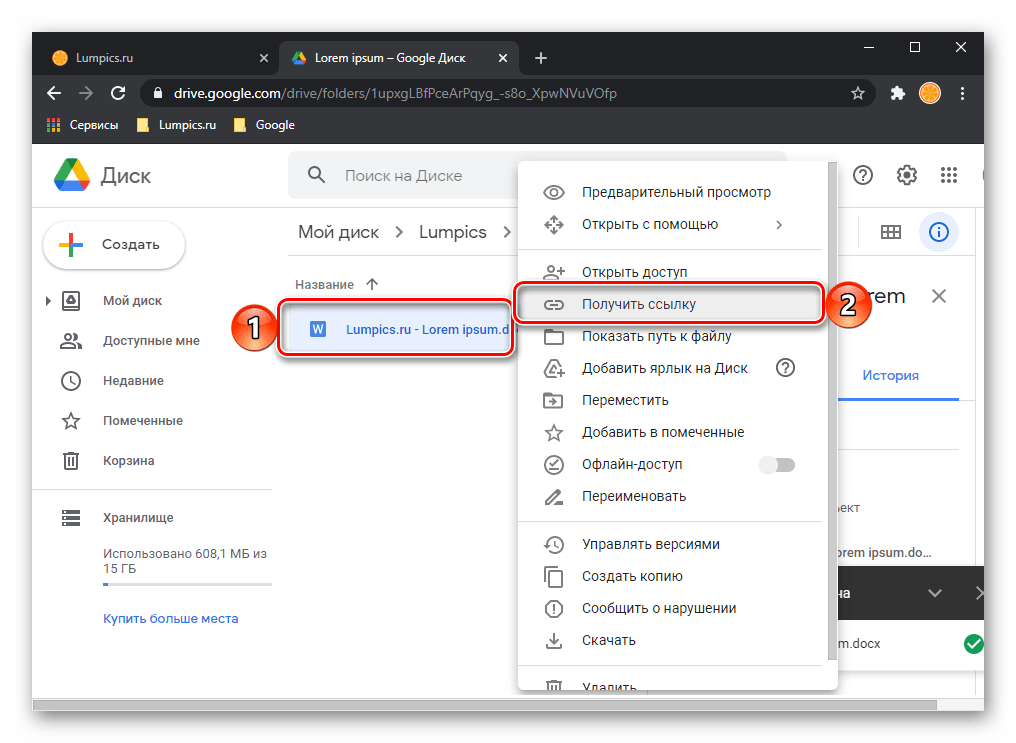
Вариант 2: Документы в облаке
Для того чтобы добавить ссылку на документ, сохраненный в облачном хранилище, потребуется выполнить практически те же действия, что и в рассмотренном выше случае, но с несколькими отличиями.
- Создайте общую ссылку на файл. В большинстве сервисов это можно сделать с помощью контекстного меню и функции «Поделиться» или, как в нашем примере «Получить ссылку».
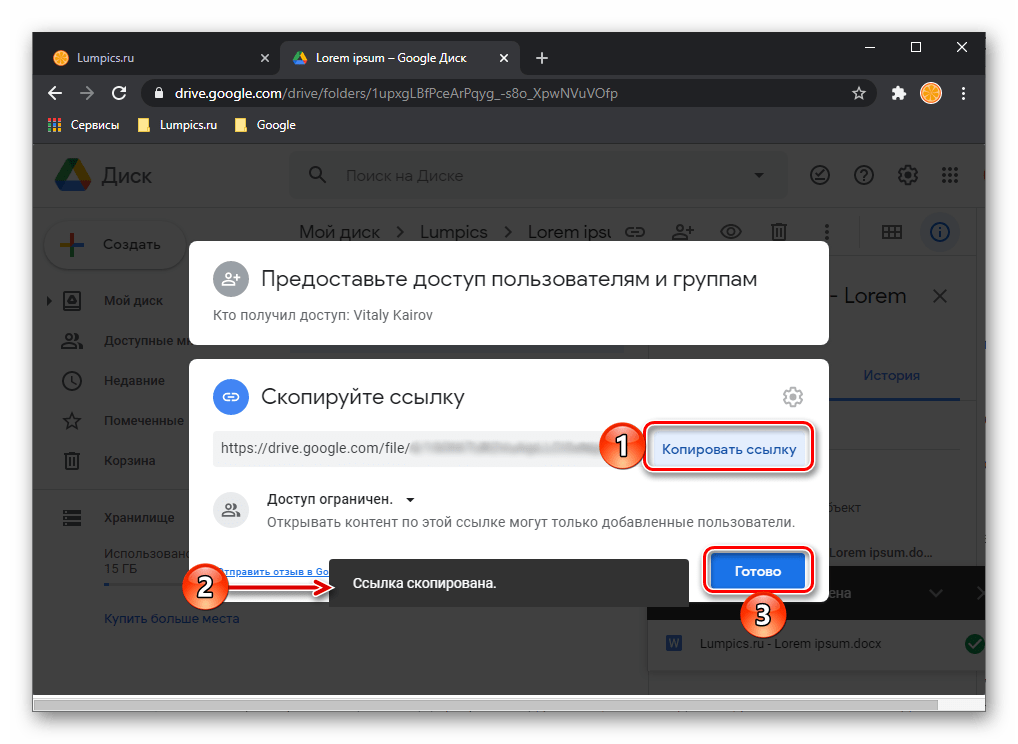
- Скопируйте сгенерированный адрес в буфер обмена, воспользовавшись клавишами «Ctrl+C» или одноименной кнопкой.
- Выполните все действия из предложенной выше инструкции, пропустив при этом выбор локального документа (средства навигации в строке «Искать в»), но указав полученную ссылку в строке «Адрес».
Когда вы передадите этот документ Word другому пользователю,
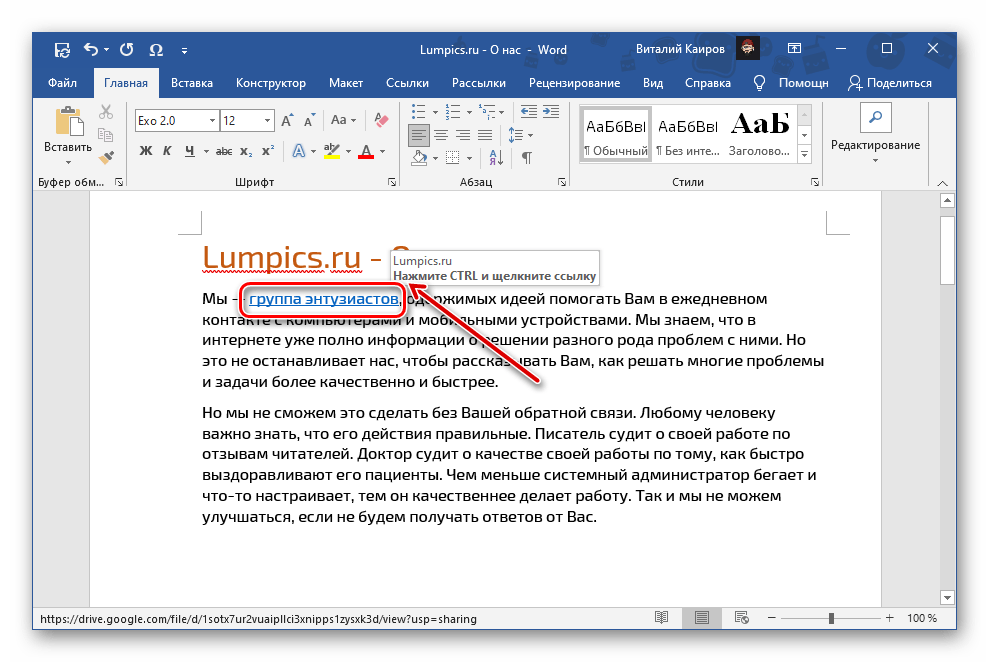
он сможет открыть добавленный в ссылку файл путем нажатия по ней ЛКМ с зажатой клавишей «Ctrl».
Читайте также: Как сделать ссылку на сайт в Ворде
Еще статьи по данной теме:
Помогла ли Вам статья?
What to Know
- Highlight text or image > right-click text and select Link or Hyperlink > choose destination and enter info > OK.
- Next, select Existing File or Web Page and enter URL to link outside of document.
- Select Place in This Document > select location to link inside of document.
This article explains how to insert or remove a hyperlink in a Word document using Microsoft 365, Word 2019, Word 2016, Word 2013, Word 2010, and Word Starter 2010.
Insert and Remove a Hyperlink in Word
To add and delete hyperlinks in a Word document:
-
Highlight the text or image that you want to link.
-
Right-click the text and choose Link or Hyperlink (depending on the version of Microsoft Word).
-
Select the type of destination you want to link to, then fill in the appropriate information.
- Choose Existing File or Web Page, go to the Address text box, then enter a URL.
- Choose Place in This Document, then select a location within the document.
- Choose Create New Document, go to the Name of new document text box, then enter the name of a new document. If needed, in the Full path section, select Change to change the document folder. In the When to edit section, choose whether you want to edit the document now or later.
- Choose E-mail Address, go to the E-mail Address text box, then enter the email address you want readers to send email to. In the Subject text box, type the subject.
-
Select OK.
-
The text now shows up as a hyperlink in the document.
-
To remove a hyperlink, right-click the link text, then choose Remove Hyperlink.
Use the Right Kind of Hyperlink
There are different kinds of hyperlinks. Choose the one that points your readers to the most helpful information to supplement your document.
Existing File or Web Page Hyperlinks
When you choose this option, the hyperlink opens a website or file. For example, if you’re writing an article about your camping trip to Rocky Mountain National Park, provide a hyperlink to the appropriate section of the National Park Service so readers can quickly find the information they need to plan a similar trip.
Another use might be if you wrote an article about the National Park Service and the document is available to your readers, link to the Word file you created. When the reader selects the hyperlink, that file opens.
Place in This Document Hyperlinks
Another type of hyperlink jumps to a different place in the same document upon selection. Often called an anchor link, this type of link doesn’t take the reader away from the document.
When a document is long and includes sections or chapters that are formatted as headings, create a table of contents at the beginning of the document. Include hyperlinks in the table of contents so that readers can jump to a particular heading.
You could also use this type of hyperlink at the end of each section to return to the top of the document.
Create a New Document Hyperlink
A hyperlink can create a new document when selected. When adding this type of hyperlink, choose whether to make the document at the time you create the link or later. If you choose to make the new document when you create the hyperlink, a new document opens, which you can edit and save. After that, the hyperlink points to that document, exactly like the Existing File or Web Page option.
If you choose to make the document later, you’re prompted to create the new document when you select the hyperlink after the hyperlink has been created. This type of hyperlink is useful if you want to link new content to the current document but don’t want to create the new content yet. Instead, provide the hyperlink to it so you’ll remember to work on the document later. When you do create the document, it will be linked in the main document.
Email Address Hyperlinks
The last type of hyperlink you can make in Microsoft Word is one that points to an email address so that, when selected, the default email client opens and begins composing the message using the information from the hyperlink.
Choose a subject for the email and more than one email address that the message should be sent to. This information is pre-filled for readers when they select the hyperlink but they can change this information before they send the message.
This type of hyperlink is useful for situations when you want readers to contact you to set up a meeting or request additional information.
About Linking in a Word Document
A hyperlink in a Microsoft Word document enables readers to jump from the link to a different place in the document, to a different file or website, or to a new email message. In Word documents, hyperlink text is a different color than other text and is underlined. When you hover over a hyperlink, a preview shows where the link goes. When you select the link, you’re directed to the other content.
Thanks for letting us know!
Get the Latest Tech News Delivered Every Day
Subscribe
![]()
Download Article
A user-friendly guide to creating interactive links in Microsoft Word
![]()
Download Article
- Linking to Another Document or Website
- Linking to a Blank Email Message
- Linking to a Place in the Same Document
- Video
- Q&A
- Tips
|
|
|
|
|
Do you want to add a clickable link in your Microsoft Word document? You can easily turn any text or image in your document into a hyperlink. When clicked, a hyperlink can bring readers to another place in the document, an external website, a different file, and even a pre-addressed email message. This wikiHow article will walk you through creating different types of hyperlinks in your Word document.
Things You Should Know
- To link to a website or document, highlight the text. Click the «Insert» tab, then «Link». Find your file or paste your website link. Click «OK».
- Click «E-mail Address» in the Hyperlink menu. Enter an email address and subject, then click «OK».
- Click «Insert», then «Bookmark» to save a position in the document. Click «Place in This Document» in the Hyperlink menu, then click the bookmark.
-
1
-
2
Select the text or image that you want to turn into a link. You can turn any text or image in your document into a link. Highlight the text or click the image that you want to convert into a hyperlink.
- To insert an image into your document, click the Insert tab and select «Pictures.» You’ll be able to browse your computer for an image file to add. You can also insert clip art to use as a link.
Advertisement
-
3
Press ⌘ Command+K (Mac) or Ctrl+K (Windows). This opens the Insert Hyperlink window. You can also get to this menu by clicking the Insert tab and then clicking the Link button in the toolbar.
-
4
Select Existing File or Web Page from the left panel. More options will appear in the right panel.
-
5
Select a file or enter a web address. You can choose to link to an existing document, a new document, or a website.
- To link to a website or a file that’s accessible on the web, type or paste the full address (including the «https://» at the beginning) into the «Address» field near the bottom of the window.
- To link to a file on your computer or local network, select that file in the center panel. If it’s in the current folder, click Current folder to open its contents. If you opened it recently, click Recent Files to browse those. You can also use the menus at the top to navigate to the correct folder and select the file.
- To create a new blank document instead of opening a certain file, click Create a new document in the left menu, then choose a location for the document.
-
6
Set a ScreenTip (optional). You can change the text that appears when the user hovers the cursor over the link by clicking the ScreenTip button at the top-right corner and specifying your text.
- If you don’t change it, the screen tip will display the website address or file path.
-
7
Click OK to save your link. To open the link within the Word document, hold Command (Mac) or CTRL (Windows) and click the link.
- If you want to remove the hyperlink, right-click the hyperlink and select Remove Hyperlink.[2]
- If you want to remove the hyperlink, right-click the hyperlink and select Remove Hyperlink.[2]


Advertisement
-
1
Open a project in Microsoft Word. This looks like a W on top of a blue square.
- You must have a subscription to use Office 365.
-
2
Select the text or click the image you want to turn into an email link. You can use any text or image in your document. When you’re finished with this method, clicking the selected text or image will bring up a new email message to the address of your choice.
-
3
Press ⌘ Command+K (Mac) or Ctrl+K (Windows). This opens the Insert Hyperlink window. You can also get to this menu by clicking the Insert tab and then clicking the Link button in the toolbar.
-
4
Click E-Mail Address in the left panel. This allows you to set up the blank message.
-
5
Enter the e-mail address and subject. This will be the address that the reader will be sending the email to. What you enter into the «Subject» field will be automatically filled in for the reader, but they will be able to change it if they want.
- If you use Outlook, you’ll see recently used email addresses in the field at the bottom of the window. Feel free to select one of those.
- Some mail apps, especially web-based email apps, may not recognize the subject line.
-
6
Set a ScreenTip (optional). You can change the text that appears when the user hovers the cursor over the link by clicking the ScreenTip button at the top-right corner and specifying your text. If you don’t change it, the screen tip will show the email address.
-
7
Click OK to save your link. To open the link within the Word document, hold Command (Mac) or CTRL (Windows) and click the link.
- If you want to remove the hyperlink, right-click the hyperlink and select Remove Hyperlink.


Advertisement
-
1
Open a project in Microsoft Word. This looks like a W on top of a blue square.
- You must have a subscription to use Office 365.
-
2
Place your cursor at the location you want to link to. You can use the Bookmark tool to create links to specific spots in your document. This is great for tables of contents, glossaries, and citations. You can highlight a portion of text, select an image, or just place your cursor in the spot you want.
-
3
Click the Insert tab. It’s in the menu bar at the top of Word, between Home and Draw.
-
4
Click the Bookmark icon. It’s in the toolbar at the top of Word in the «Links» section.
-
5
Enter a name for the bookmark. Make sure the name is descriptive enough that you’ll be able to recognize it. This is especially important if you are using a lot of bookmarks or more than one person is editing the document.
- Bookmark names have to start with letters but can also contain numbers. You can’t use spaces, but you can use underscores instead (e.g. «Chapter_1»).
-
6
Click Add to insert the bookmark. Bookmarks will appear on the page surrounded by brackets. You won’t see the bookmark on the page if you’re using the current version of Word, but in earlier versions, it may be surrounded by brackets.
- If you want to see brackets around the bookmark so you don’t forget where you placed it, click the File menu, select Options, and click Advanced in the left panel. Then, scroll down the right panel and check the box next to «Show bookmarks» under the «Show document content» header.
-
7
Select the text or image you want to create the link from. Highlight the text or click the image that you want to turn into a link to your bookmark.
-
8
Press ⌘ Command+K (Mac) or Ctrl+K (Windows). This opens the Insert Hyperlink window. You can also get to this menu by clicking the Insert tab and then clicking the Link button in the toolbar.
-
9
Click Place in This Document in the left panel. This displays a navigation tree with your heading styles and bookmarks.
-
10
Select the bookmark you want to link to. Expand the «Bookmarks» tree if it isn’t already and select the bookmark you created. You can also select from heading styles you’ve applied throughout the document.
-
11
Set a ScreenTip (optional). To change the text that appears when the user rests the cursor over the link, click the Screen Tip button at the top-right corner. If you don’t change the text, the screen tip will display the website address or file path.
-
12
Click OK to save your link. To test the hyperlink, hold Command (Mac) or CTRL (Windows) and click the link.
- This will recenter the view to the line on which you placed the bookmark.
- If you want to remove the hyperlink, right-click the hyperlink and select Remove Hyperlink.


Advertisement
Add New Question
-
Question
What hyperlinks are inserted into a document by default?

A link to any website or a file with a url will become a hyperlink automatically after you press the space bar, tab key, or return/enter key.
-
Question
How can I add hyperlinks to Microsoft Word?
Edit>Add Hyperlink>add the link. To test the link, Ctrl+Click and it should get you there.
-
Question
How can I embed a hyperlink into a word or phrase in a Word document?
Highlight the word/phrase you want to embed a link into, got into the insert tab, press link. A box that says «insert hyperlink» on the top should pop up, copy/type the link you want into the box at the bottom that says «address» and then press «ok» and you are done!
Ask a Question
200 characters left
Include your email address to get a message when this question is answered.
Submit
Advertisement
-
If you type a URL into a document (e.g., https://www.wikihow.com), Word will automatically make that text a clickable link.
-
You can remove a hyperlink by right-clicking it and selecting Remove Hyperlink.
-
Looking for money-saving deals on Microsoft Office products? Check out our coupon site for tons of coupons and promo codes on your next subscription.
Thanks for submitting a tip for review!
Advertisement
About This Article
Article SummaryX
1. Select the text or object you want to turn into a hyperlink.
2. Click the Insert tab.
3. Click the Link button in the toolbar.
4. Click Existing File or Web Page in the left and enter the URL.
5. To link to another file instead of a website, leave the «»Address»» bar blank and select the file instead.
6. Click OK.
Did this summary help you?
Thanks to all authors for creating a page that has been read 675,210 times.
Is this article up to date?
 Please Note:
This article is written for users of the following Microsoft Word versions: 2007 and 2010. If you are using an earlier version (Word 2003 or earlier), this tip may not work for you. For a version of this tip written specifically for earlier versions of Word, click here: Linking Word Documents.
![]()
Written by Allen Wyatt (last updated March 12, 2020)
This tip applies to Word 2007 and 2010
Besides being able to link information from other Windows applications into your document, you can link other Word documents to your current document. This comes in real handy if you are working with a document that needs to pull information from other documents. For instance, you might have a contract that has standard clauses in it. These clauses may be stored in other documents and then be pulled into the contract as necessary. This is done in the following manner:
- Position the insertion point where you want the document inserted and linked.
- Display the Insert tab of the ribbon.
- Click the down-arrow next to the Object tool within the Text group. Word displays a few choices you can make.
- Click Text from File. Word displays the Insert File dialog box.
- Specify a filename for the document you want inserted and linked.
- Click your mouse on the pull-down arrow at the right side of the Insert button. Word displays a menu of the different ways you can insert the document.
- Choose Insert As Link from the menu.
This process results in Word displaying the other file, but the INCLUDETEXT field is used instead of the actual text from the file. The advantage to adding links in this way instead of inserting the other file completely is that the original documents (the ones you are linked to) can be independently updated, and those changes are reflected in the document with the links. (Provided, of course, that you update the links in the document by selecting the link and pressing F9.)
WordTips is your source for cost-effective Microsoft Word training.
(Microsoft Word is the most popular word processing software in the world.)
This tip (11622) applies to Microsoft Word 2007 and 2010. You can find a version of this tip for the older menu interface of Word here: Linking Word Documents.
Author Bio
With more than 50 non-fiction books and numerous magazine articles to his credit, Allen Wyatt is an internationally recognized author. He is president of Sharon Parq Associates, a computer and publishing services company. Learn more about Allen…
MORE FROM ALLEN
Adding Drop Shadows
Want your shapes to really «pop» off the page? Add a drop shadow to them, as described in this tip.
Discover More
Sorting or Filtering by Conditional Format Results
Conditional formatting is a great feature in Excel. Unfortunately, you can’t sort or filter by the results of that …
Discover More
Resetting Excel Menus
Excel allows you to easily change what appears on its menus. If you later want to return to Excel’s default menu …
Discover More
More WordTips (ribbon)
Document is Too Large for Word to Handle
Imagine trying to open a familiar document one day, only to find that Word gives you an error message that the file is …
Discover More
Finding Documents Containing Multiple Occurrences of a Word
Searching for documents that contain a particular word is rather straightforward. The task becomes a bit trickier when …
Discover More
Some Documents Open Slower than Others
It’s great when your documents open quickly, particularly when you need to work with lots of documents at the same time. …
Discover More
We like books. But one thing that you can’t do on paper is link to another book. On that level at least, electronic media has a distinct advantage. And with Microsoft Word, it’s easy to add a hyperlink in a document.
But how does this work? In this post, we look at how to add a link in Microsoft Word, as well as how to edit and remove hyperlinks in a document.
How to Embed a Hyperlink in a Document
Whether you’re writing website copy, where hyperlinks enable navigation, or simply adding links to useful internet resources in a document, Microsoft Word makes it simple. For instance, if you type a web address and hit space or return, MS Word will automatically format it as a link.
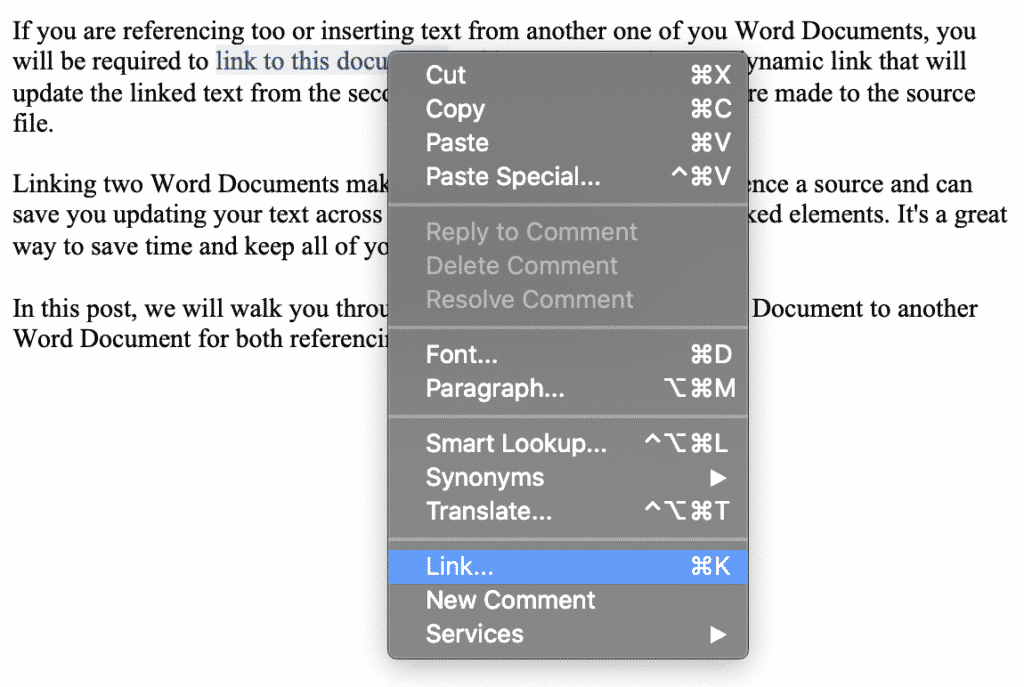
However, most of the time, you’ll want to embed a link in the text. To do this:
- Highlight the text you want to use as a link
- Go to Insert > Links > Link (or right click the text and select Link)
- Type the URL for the link destination into the Address field
- Click OK to create your hyperlink
Link options in the contextual menu.
The highlighted text will then become a hyperlink.
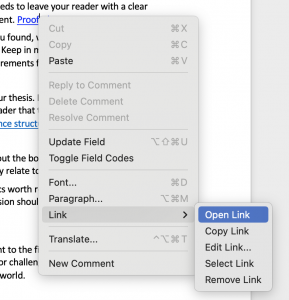
To test the link, hold CTRL and left click (or right click and select Open Hyperlink). This will open the destination in your default web browser.
You can use this same process to link to another file on your computer.
To link to a file, simply select it via the Insert Hyperlink menu and click OK. Keep in mind, though, that this link will only work on your computer/network, since this is where the destination file is stored.
How to Edit Hyperlinks
You can edit a hyperlink in the same way as you would any text in a document: simply place the cursor in the hyperlinked text and type.
Find this useful?
Subscribe to our newsletter and get writing tips from our editors straight to your inbox.
Alternatively, if you right click the link you can select Edit Hyperlink. In the window that opens, you can then change both:
- The text that will be used for the hyperlink
- The destination of the link (i.e., file path or URL)
If you then click OK when you’re done, the link will be updated automatically.
How to Format Hyperlinks
By default, Microsoft Word formats links with blue, underlined text. However, you can edit hyperlinks with the standard formatting options, so you can use these to change the appearance of any links in a document.
And if you want to change the default hyperlink style, simply:
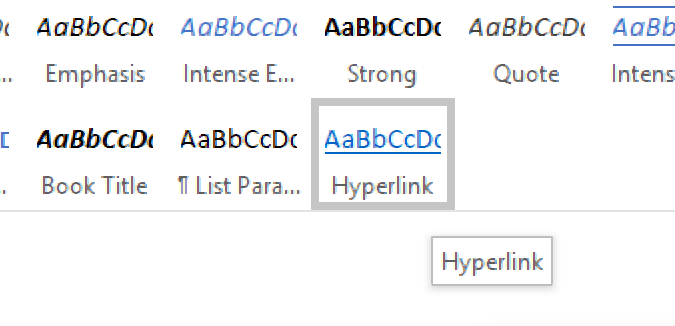
- Open the Styles menu
- Find the style named “Hyperlink”
- Right click the style name and select Modify…
- Apply any formatting options as required and click OK
This will update the default hyperlink formatting, including any links you had added to the document previously. And if you then add more new links while editing, they will all use your updated hyperlink formatting.
How to Remove a Hyperlink in Microsoft Word
To remove a hyperlink from document, you can simply delete it. But this will also remove the text you’d formatted as a link.
To remove a link and keep the text, though, you have two options.
- Go to Insert > Links > Link and select Remove Link in the menu
- Right click the link and select Remove Hyperlink from the menu
MS Word will then remove the link and any formatting from the selected text.
Proofreading Hyperlinks
If you have a document containing hyperlinks, why not submit it for proofreading? As well as checking your spelling, grammar and punctuation, we can make sure your links work properly, saving you from encountering any unfortunate “404 Error – Page Not Found” messages when it counts.
If you are referencing to another Word document from another one of your Word Documents, you will be required to link to this document.
Placing a link in your Word Documents makes it easy for the reader to acquire additional information on a certain point, that you have already written a piece on that topic. Or makes it easy for the reader to see the reference file you are speaking of or quoting from.
In this post, we will walk you through how to link a Microsoft Word Document to another Word Document as well as linking to another file or webpage.
Linking to another Word Document
- Open your Word Document
- Highlight and position the mouse pointer over the word or text you want to link

- Right click on the highlighted word
- Click Link
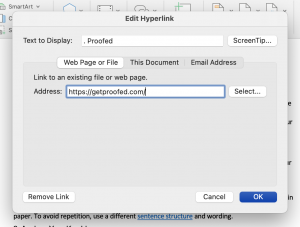
- Select Web Page or File tab
- Press Select

- Select the document you with to link
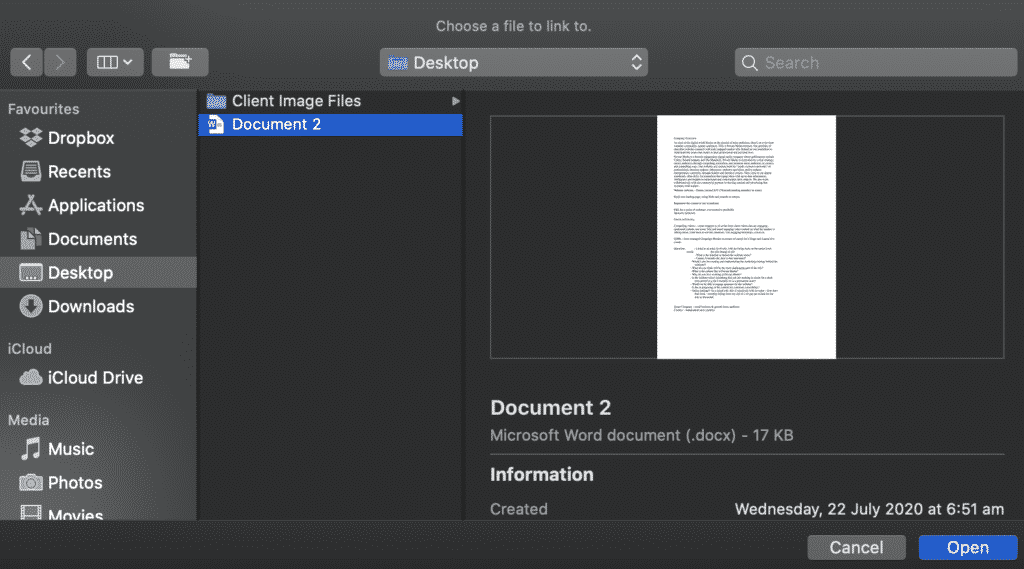
- Press Open
- When you press Open, the file source will automatically drop into the address window
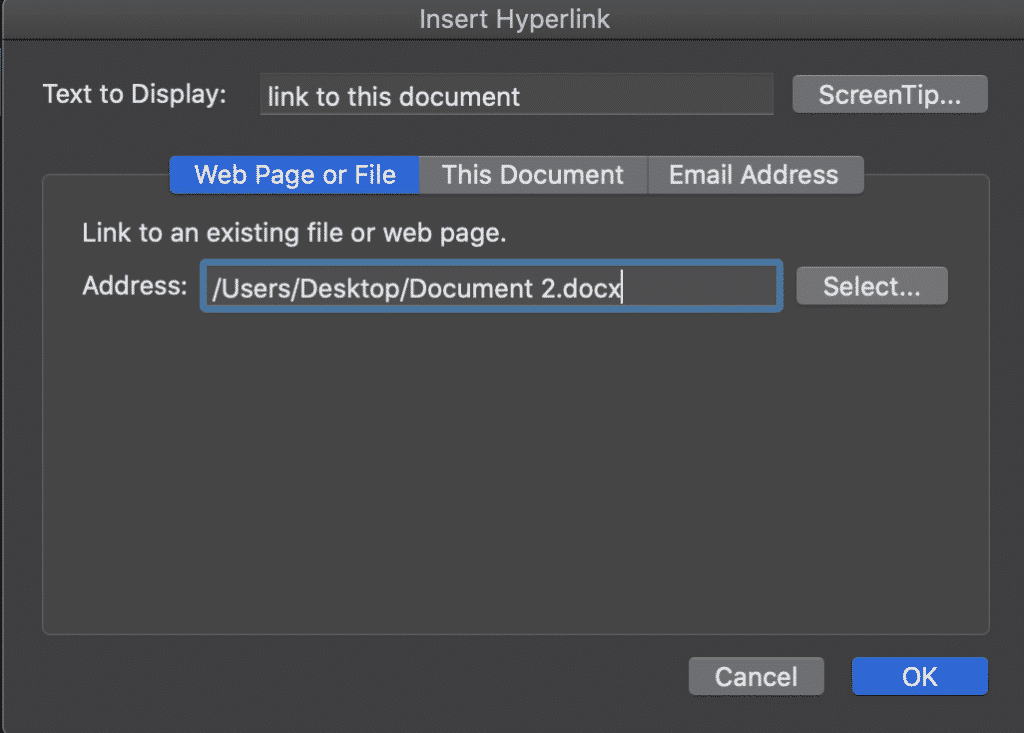
- Press OK

You have now successfully linked your Microsoft Word Document.
On the hunt for an easier way to manage version control?
If you’re collaborating on Microsoft Word Documents and need to keep track of each new version along the way, it is likely that you (like so many of us) have a messy shared drive full of cluttered, badly named versions and no real way of knowing which one if the most recent and who made changes to what.
The endless scrolling through what feeling like 500 versions to figure out if Report_v9_edited_final_FINALFINAL_2 is actually the most recent version.
Is it the final one? Let’s say it is, now you have added your edits and are ready to save a new version, do you just add a _updated onto the end of the already long file name, or the current date – hoping no body else edits and saves on the same day?
Its a mind-field out there!
Then just to add another hidden bomb to the field, there is always one person in the team that saves a version in a different spot and it’s near impossible to figure out where it went.

Collaborating in Word can be challenging, with Version control the number one frustration for most small to large corporations who collaborate regularly and do not have an automatic version control tool on hand.
A tool that manages version control for you, such as Simul Docs will take all of the file naming and searching out of your job description leaving you to spend more time to edit.
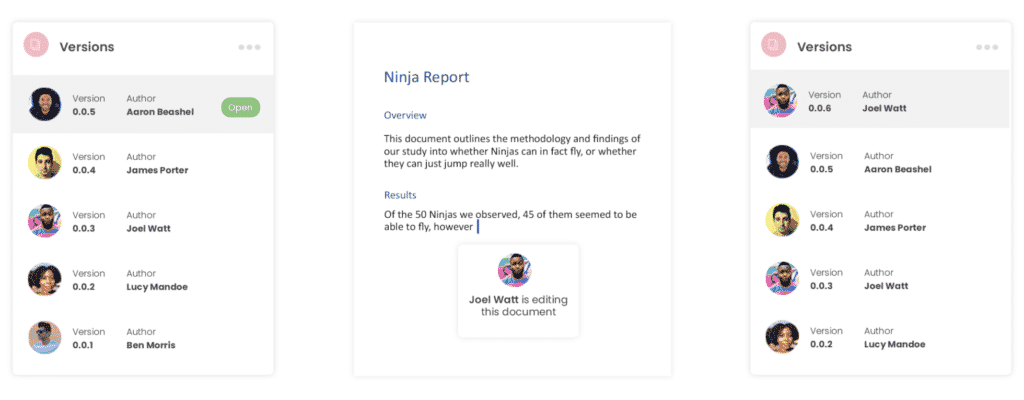
Simul Docs manages version control for you. When you open a new file, Simul will save it as file 0.0.1, then John from Marketing opens your file, makes some changes and presses save – this becomes file 0.0.2 and so on.
It’s version control that makes sense.
Then you want to go back and see what changes John has made over the course of the documents life. Well that’s easy, because Simul not only tracks the versions for you with the edits saved in each it places the authors name next to the document so you know who owns which version at a glance.
So now it’s your turn to edit the Word Document, which one is the most recent one?
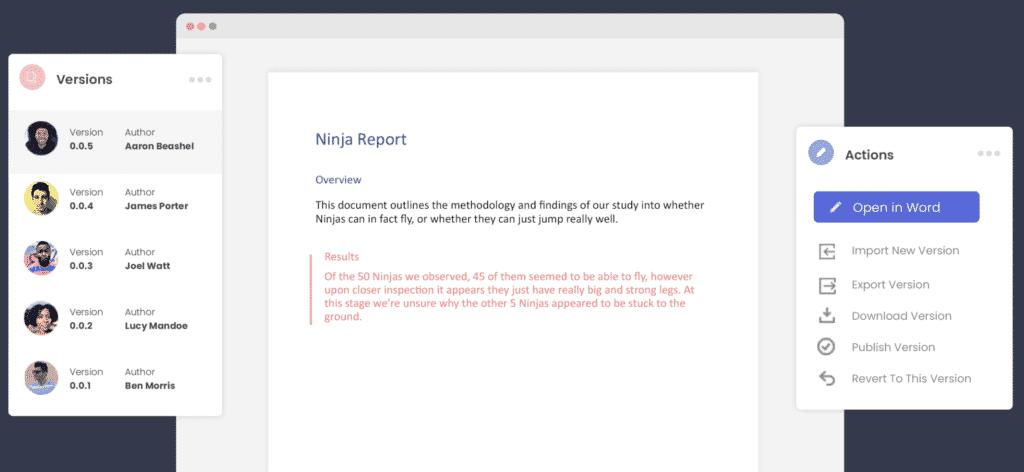
Simul lists all of the versions in an easy to view ‘versions list’ at the side of your dashboard. The most recent version will be listed at the top, with the highest version number, e.g 0.0.5.
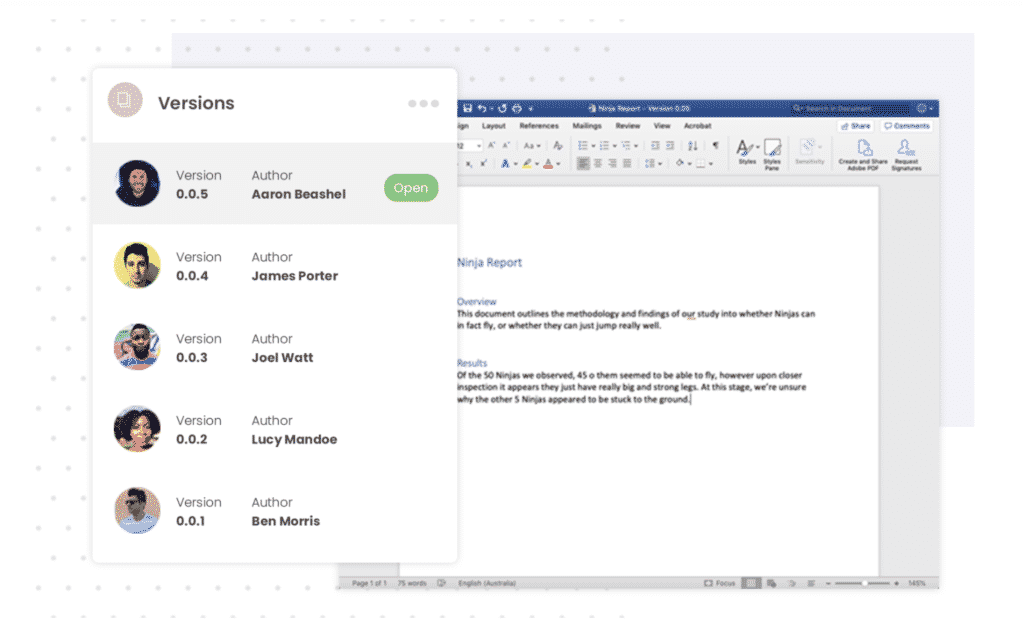
You can open version 0.0.5 at the click of a button, edit it directly in Simul or open it in Microsoft Word, depending on which interface you personally prefer working within.
Now that you are editing away, Simul also knows that you are going to want your changes tracked, so tracked changes are automatic, every, single, time you open the document. Because collaborating can be stressful enough without having to remember to turn on tracked changes or save the document as a new version before you start editing to avoid saving over the last file.
So now you’ve made your edits, with all of your changes tracked (thanks Simul!) and are ready to press save and share your file and let your team know you have finished. Simul has you covered again – when you press save Simul automatically sends an email to the document owner letting them know a new version is available for their review.
If you did want to share your document directly, Simul allows you to share via a directly link, email or to any of the popular cloud storage systems such as Dropbox, GoogleDrive, OneDrive and more.
Save, export and download the document out of Simul docs at the click of a button. Simul gives you the option to do so in the original Word Document format or as a PDF.
With collaboration in mind, purpose built tools such as Simul Docs were built to make collaboration easy. From version control, to tracking changes, saving, editing, merging and more – Simul has you covered!
If you find yourself wasting time searching through a messy shared drive, we suggest you give Simul Docs a go.
With free trials available, you’ve got nothing to loose.