In this Article
- VBA Hyperlinks
- Add a Hyperlink with VBA
- Adding Text to Display with VBA
- Adding a ScreenTip with VBA
- Delete a Hyperlink with VBA
- Delete all the Hyperlinks in a Worksheet
- Follow a Website Hyperlink Using VBA
- Follow a Hyperlink to a Folder on Your Drive
- Follow a Hyperlink to a File on Your Drive
- Go to a Cell in another sheet in the same Workbook
- Display all the Hyperlinks in a Worksheet
- Display all the Hyperlinks in a Workbook
- Using the FollowHyperlink Method to Create Emails
- Adding a Hyperlink to an AutoShape in Excel
- Inserting the Hyperlink Formula into a Cell Using VBA
- Adding a Hyperlink to a Button in Access
- Creating a Hyperlink from a Selection in Word
This VBA Tutorial covers the different ways to work with hyperlinks in VBA.
VBA Hyperlinks
With VBA, you can add hyperlinks, remove hyperlinks, create emails using hyperlinks, and open files using hyperlinks in VBA.
Add a Hyperlink with VBA
The Hyperlinks.Add Method adds a hyperlink to a cell using VBA.
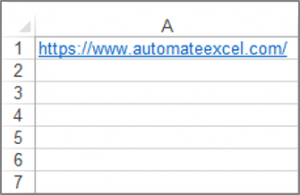
The following code will add a hyperlink to cell A1:
Sub AddHyperlinkToCell()
  ActiveSheet.Hyperlinks.Add Range("A1"), Address:="https://www.automateexcel.com/excel/"
End Sub
The result is:
Adding Text to Display with VBA
You can add neat user-friendly text to display to your hyperlink with VBA. If you used the worksheet functionality you would insert a hyperlink and then add a text to display in the dialog box provided.
The code below demonstrates how to add text to display to your hyperlink using VBA:
Sub TextToDisplayForHyperlink()
  ActiveSheet.Hyperlinks.Add Range("A1"), Address:="https://www.automateexcel.com/excel/", TextToDisplay:="Automate Excel"
End Sub
The result is:
Adding a ScreenTip with VBA
You can add a ScreenTip to your hyperlink that the viewer will see when they hover over the link.
The code below shows how to add a ScreenTip to your hyperlink using VBA:
Sub ScreenTipForHyperlink()
  ActiveSheet.Hyperlinks.Add Range("A1"), Address:="https://www.automateexcel.com/excel/", TextToDisplay:="Automate Excel", ScreenTip:="This is the link for Automate Excel"
End Sub
The result is:
Delete a Hyperlink with VBA
The Hyperlinks.Delete Method can be used to delete a hyperlink from a cell.
The following code will delete the hyperlink from cell A1 and the text in the cell.
Note that just deleting the hyperlink, does not delete the text itself that’s why if you want the text deleted you also have to use the Clear method.
Sub DeleteHyperlinkinCell()
  Range("A1").Hyperlinks.Delete
  Range("A1").Clear
End Sub
Delete all the Hyperlinks in a Worksheet
You can also delete all the hyperlinks in your worksheet using the Hyperlinks.Delete method.
The following code will delete all the hyperlinks in the first worksheet in your workbook:
Sub RemoveAllHyperlinksInASheet()
  ThisWorkbook.Sheets(1).Hyperlinks.Delete
End Sub
VBA Coding Made Easy
Stop searching for VBA code online. Learn more about AutoMacro — A VBA Code Builder that allows beginners to code procedures from scratch with minimal coding knowledge and with many time-saving features for all users!
Learn More
Follow a Website Hyperlink Using VBA
The following code allows you to open a website address, in a new window in your browser using the FollowHyperlink method in your workbook:
Sub FollowHyperlinkForWebsite()
  ActiveWorkbook.FollowHyperlink Address:="https://www.automateexcel.com/excel", NewWindow:=True
End Sub
Follow a Hyperlink to a Folder on Your Drive
The following code will open a folder called ExcelFiles on the Desktop using the FollowHyperlink Method:
Sub FollowHyperlinkForFolderOnDrive()
  ActiveWorkbook.FollowHyperlink Address:="C:DesktopExcelFiles"
End Sub
Follow a Hyperlink to a File on Your Drive
The following code will open an Excel file called WorkbookOne in the folder called ExcelFiles on the Desktop using the FollowHyperlink Method:
Sub FollowHyperlinkForFile()
  ActiveWorkbook.FollowHyperlink Address:="C:DesktopExcelFilesWorkbookOne.xlsx", NewWindow:=True
End Sub
VBA Programming | Code Generator does work for you!
Go to a Cell in another sheet in the same Workbook
You can add a hyperlink to a cell in one sheet that takes you to another sheet, in the same workbook with VBA. Let’s say you are on Sheet1, cell A1 of your workbook and you want to insert a hyperlink to Sheet2, cell B2 of the same workbook, you can use the SubAddress property to do this.
The following code demonstrates how to do this:
Sub GoToAnotherCellInAnotherSheetInTheSameWorkbook()
  ActiveSheet.Hyperlinks.Add Range("A1"), Address:="", SubAddress:="'" & Sheet2.Name & "'!B2", TextToDisplay:="Click Here to Go to Sheet2, cell B2 of the same workbook"
End Sub
Display all the Hyperlinks in a Worksheet
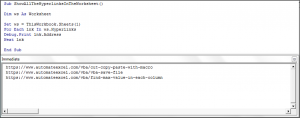
You can access the hyperlinks collection and display all the hyperlinks in your worksheet in the Intermediate window in the VBA Editor. You must first press CTRL+G on your keyboard or go to View>Intermediate Window in the VBE Editor, to view the Intermediate Window.
The following code shows how to view the hyperlinks in your worksheet in the Intermediate Window:
Sub ShowAllTheHyperlinksInTheWorksheet()

Dim ws As Worksheet

Set ws = ThisWorkbook.Sheets(1)

For Each lnk In ws.Hyperlinks
Debug.Print lnk.Address
Next lnk

End Sub
The results are shown in the Intermediate Window.
Display all the Hyperlinks in a Workbook
You can access the hyperlinks collection, to loop through and display all the hyperlinks in your Workbook in a Message Box.
The following code shows how to do this, and uses a nested loop in order to achieve this:
Sub ShowAllTheHyperlinksInTheWorkbook()

Dim ws As Worksheet

For Each ws In ActiveWorkbook.Worksheets
For Each lnk In ws.Hyperlinks
MsgBox lnk.Address
Next lnk
Next ws

End Sub
Using the FollowHyperlink Method to Create Emails
You can also create emails using the FollowHyperlink Method.
The code below will show you how to create emails using the FollowHyperlink Method in VBA:
Sub SendEmailUsingHyperlink()

Dim msgLink As String

msgLink = "mailto:" & "person@email.com" & "?" & "subject=" & "Hello" & "&" & "body=" & "How are you?"
ActiveWorkbook.FollowHyperlink (msgLink)

End Sub
The result is:
Adding a Hyperlink to an AutoShape in Excel
You can add a hyperlink to an Autoshape in Excel so that when the user clicks on the shape they get taken to a website address.
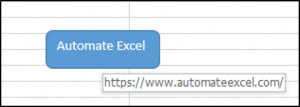
The following code creates a rounded rectangle, adds the text to the rectangle and adds a hyperlink to the rectangle:
Sub AddingAHyperlinkToAShape()

Dim myShape As Shape
Set myDocument = Worksheets("Sheet1")
Set myShape = myDocument.Shapes.AddShape(msoShapeRoundedRectangle, 100, 100, 90, 30)

With myShape
.TextFrame.Characters.Text = "Automate Excel"
End With

ActiveSheet.Hyperlinks.Add Anchor:=myShape, Address:="https://www.automateexcel.com/excel"

End Sub
The result is:
AutoMacro | Ultimate VBA Add-in | Click for Free Trial!
Inserting the Hyperlink Formula into a Cell Using VBA
Let’s say you have a post title in cell A4 and a post link in cell B4 as shown in the image below.
A quick reminder of the worksheet Hyperlink formula syntax is:
HYPERLINK(link_location, [friendly_name])
link_location – This is the link to the document, file, place in the workbook or online site.
friendly_name – (Optional) – The text or numeric value that is displayed in the cell.
In cell C4, you want to add the hyperlink with a friendly text to display, now usually you would enter the formula =HYPERLINK(B4,A4) in C4 to get the following:
You could instead use VBA to achieve the same result, and insert this formula in the cell, on Sheet1 with the following code:
Sub InsertHyperlinkFormulaInCell()
  ActiveWorkbook.Worksheets("Sheet1").Range("C4").Formula = "=hyperlink(B4,A4)"
End Sub
Adding a Hyperlink to a Button in Access
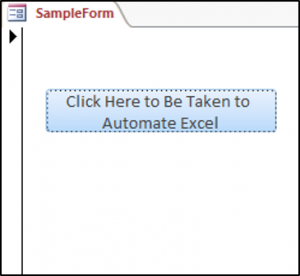
VBA allows you to work with hyperlinks in Access too. Let’s say we have a button on a form and when the user clicks on that button we want them to be taken to a website. One way that you can use to do this, is through the Application.FollowHyperlink method.
We have our sample form with a button called buttonOne shown below.
The code for this button would be:
Private Sub buttonOne_Click()

Application.FollowHyperlink ("https://www.automateexcel.com/excel/")

End Sub
Creating a Hyperlink from a Selection in Word
You can work with hyperlinks in Word VBA as well.
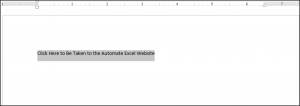
Let’s say we have text in Word that says “Click Here to Be Taken to the Automate Excel Website”, that is selected as shown below.
To turn this text into a hyperlink using VBA, you can use the following code:
Private Sub TurnASelectionIntoAHyperlink()
  ActiveDocument.Hyperlinks.Add Anchor:=Selection.Range, Address:="https://www.automateexcel.com/excel/", ScreenTip:="Click Here Please", Target:=NewWindow
End Sub
The result is:
Hyperlinks are URL attached to a value that one may see when we hover the mouse over it. When we click on it, the URL opens. In VBA, we have an inbuilt property to create hyperlinks in VBA. To use this property, we must use the Add method together with the hyperlink statement to insert a hyperlink in a cell.
Hyperlinks in Excel VBA
Even though we have Page Up and Page Down shortcut key in excelAn Excel shortcut is a technique of performing a manual task in a quicker way.read more to move from one sheet to another. But it becomes complex when we have to move between 10 to more worksheets. It is where the beauty of “Hyperlinks in Excel” comes into the picture. The hyperlink is a predetermined URL that takes you to the respective cell or worksheet as assigned.
We all know how to quickly create hyperlinks in the worksheet to move from one sheet to another. But, of course, you can also go to any other sheet. But in today’s article, we will show you how to create hyperlinks using VBA coding.
Table of contents
- Hyperlinks in Excel VBA
- The formula of VBA Hyperlinks
- How to Create Hyperlinks in Excel VBA?
- Hyperlinks of Multiple Sheets with Loops
- Recommended Articles
You are free to use this image on your website, templates, etc, Please provide us with an attribution linkArticle Link to be Hyperlinked
For eg:
Source: VBA Hyperlinks (wallstreetmojo.com)
The formula of VBA Hyperlinks
Let us look at the formula of the hyperlinks in Excel VBA.
- Anchor: In which cell would you like to create a hyperlink?
- Address: What is the URL to the hyperlink to navigate?
- [Sub Address]: What is the location of the page?
- [Screen Tip]: What is the value shown when you place a mouse pointer on the hyperlink name or cell?
- [Text to Display]: What test will display in the cell? For example, Worksheet Name.
How to Create Hyperlinks in Excel VBA?
You can download this VBA Hyperlinks Template here – VBA Hyperlinks Template
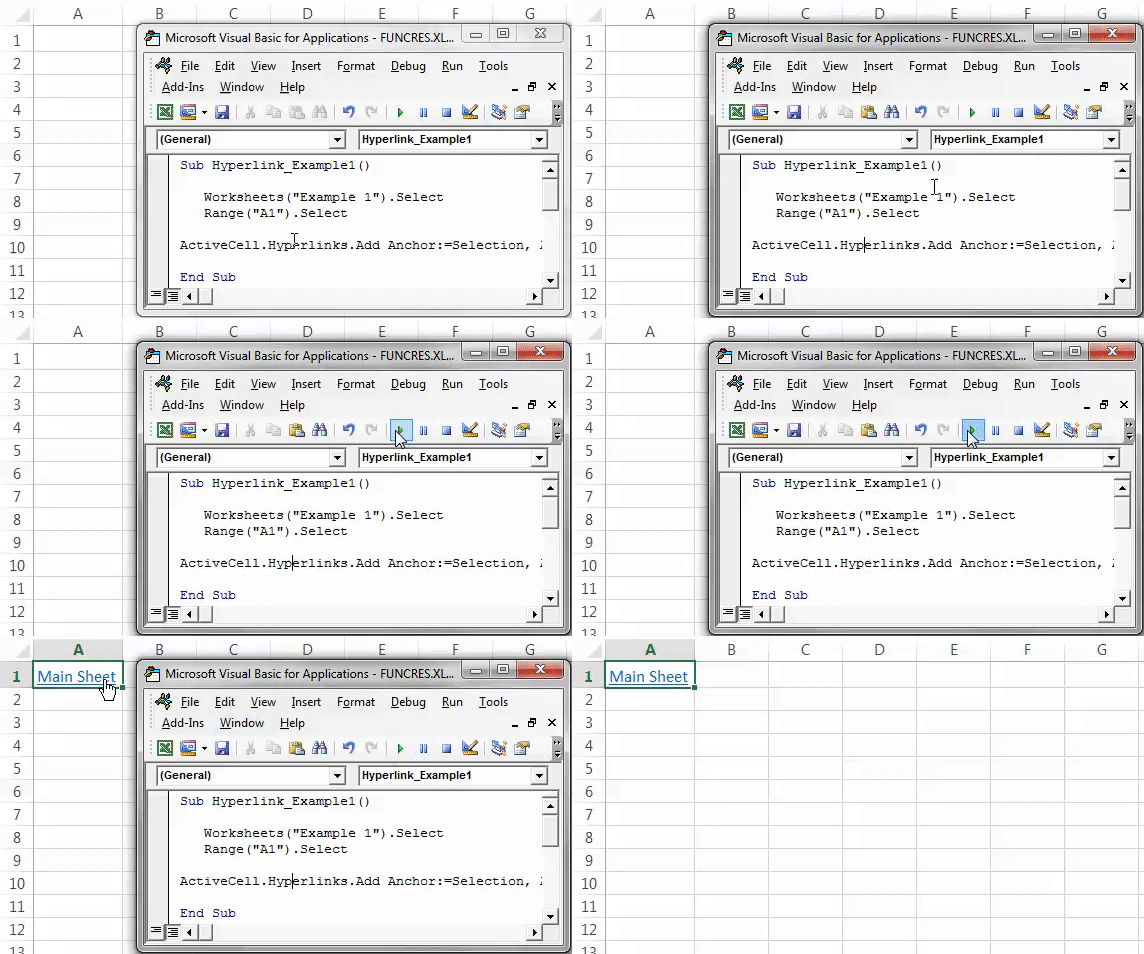
Assume you want to create a VBA hyperlink to the “Main Sheet” sheet from the other sheet, “Example 1.”
In the worksheet “Example 1” and cell A1, we will create the hyperlink using Code in VBAVBA code refers to a set of instructions written by the user in the Visual Basic Applications programming language on a Visual Basic Editor (VBE) to perform a specific task.read more.
Step 1: First, select the cell A1 of the worksheet example 1.
Code:
Sub Hyperlink_Example1()

   Worksheets("Example 1").Select
   Range("A1").Select

End Sub
Step 2: Now, open hyperlinks using the Active Cell object. Add method.
Code:
Sub Hyperlink_Example1()

  Worksheets("Example 1").Select
  Range("A1").Select

  ActiveCell.Hyperlinks.Add(

End Sub
Step 3: The first argument is “Anchor,” i.e., in which cell we would link to create the VBA hyperlink. In this case, cell A1 and since we have already selected cell A1 to mention it as “Selection.”
Code:
Sub Hyperlink_Example1()

   Worksheets("Example 1").Select
   Range("A1").Select

   ActiveCell.Hyperlinks.Add(Selection,

End Sub
Step 4: We are not creating any address here, so ignore the Address as of now.
Code:
Sub Hyperlink_Example1()

   Worksheets("Example 1").Select
   Range("A1").Select

   ActiveCell.Hyperlinks.Add Anchor:= Selection, Address:="",

End Sub
Step 5: Next is ‘Sub Address.’ Here, we need to mention which sheet we are referring to and the first cell of that sheet.
Code:
Sub Hyperlink_Example1()

Worksheets("Example 1").Select
Range("A1").Select

ActiveCell.Hyperlinks.Add Anchor:=Selection, Address:="", SubAddress:="'Main Sheet'!A1",

End Sub
We have mentioned the sheet name as “Main Sheet.” In that sheet cell address is “A1.”
Step 6: Ignore the screen tip as well. For text to display, mention the sheet name.
Code:
Sub Hyperlink_Example1()

Worksheets("Example 1").Select
Range("A1").Select

ActiveCell.Hyperlinks.Add Anchor:=Selection, Address:="", SubAddress:="'Main Sheet'!A1", TextToDisplay:="Main Sheet"

End Sub
Run this code using the F5 key or manually. Then, it will create a hyperlink in cell A1 in the sheet “Example 1.”
When you click on the hyperlink “Main Sheet,” it redirects to the main sheet.
Hyperlinks of Multiple Sheets with Loops
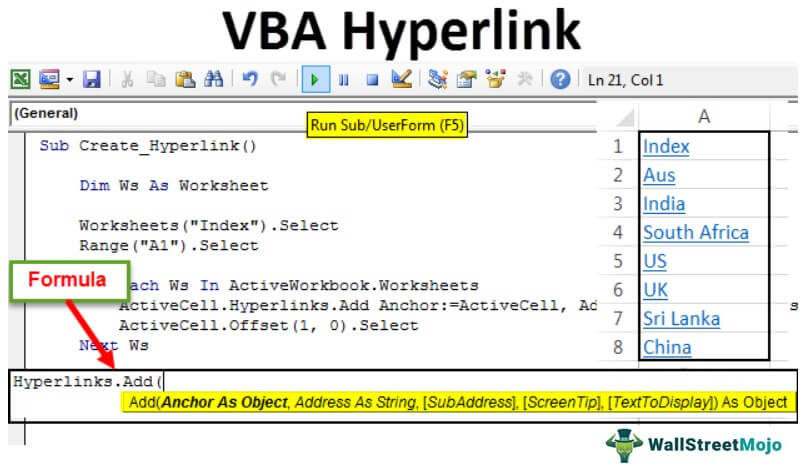
We have seen creating a VBA hyperlink for one sheet. However, when we have many sheets, it isn’t easy to create a VBA hyperlink for each sheet with the same line of code.
Assume you have 11 worksheets, as shown in the below image.
You want to create a hyperlink for each sheet in the Index sheet using VBA code.
Step 1: Define the variable as a worksheet.
Code:
Sub Create_Hyperlink()

Dim Ws As Worksheet

End Sub
Step 2: The first thing is to select the worksheet Index and select cell A1.
Code:
Sub Create_Hyperlink()

Dim Ws As Worksheet

Worksheets("Index").Select
Range("A1").Select

End Sub
Step 3: Now, open For Each Loop in VBAVBA For Each Loop helps the user to inspect and analyze the groups of objects or values individually. It even facilitates performing the specific activity for every object or value by passing a statement or group of statements in this reference.read more.
Code:
Sub Create_Hyperlink()

Dim Ws As Worksheet

Worksheets("Index").Select
Range("A1").Select

For Each Ws In ActiveWorkbook.Worksheets

Next Ws

End Sub
Step 4: Since we have selected cell A1, it is now an active cell. So, start the hyperlink with the active cell.
Code:
Sub Create_Hyperlink()

Dim Ws As Worksheet

Worksheets("Index").Select
Range("A1").Select

For Each Ws In ActiveWorkbook.Worksheets
ActiveCell.Hyperlinks.Add(

Next Ws

End Sub
Step 5: An anchor is a hyperlink cell. So, it is the active cell.
Code:
Sub Create_Hyperlink()

Dim Ws As Worksheet

Worksheets("Index").Select
Range("A1").Select

For Each Ws In ActiveWorkbook.Worksheets
ActiveCell.Hyperlinks.Add Anchor:=ActiveCell,

Next Ws

End Sub
Step 6: Address is nothing mentioned it as “.
Code:
Sub Create_Hyperlink()

Dim Ws As Worksheet

Worksheets("Index").Select
Range("A1").Select

For Each Ws In ActiveWorkbook.Worksheets
ActiveCell.Hyperlinks.Add Anchor:=ActiveCell,Address:="",

Next Ws

End Sub
Step 7: Subaddress: When we loop through the sheet, it should be the sheet name. To refer to the sheet name, we need a single quote, “’” with sheet name and “! Cell Address,” and close the sheet name with a single quote “’.”
Code:
Sub Create_Hyperlink()

Dim Ws As Worksheet

Worksheets("Index").Select
Range("A1").Select

For Each Ws In ActiveWorkbook.Worksheets
ActiveCell.Hyperlinks.Add Anchor:=ActiveCell,Address:="",SubAddress:=""& Ws.Name&"!A1"&"",

Next Ws

End Sub
Step 8: Ignore the screen tip. For text to display, you can enter the worksheet name.
Code:
Sub Create_Hyperlink()

Dim Ws As Worksheet

Worksheets("Index").Select
Range("A1").Select

For Each Ws In ActiveWorkbook.Worksheets
ActiveCell.Hyperlinks.Add Anchor:=ActiveCell, Address:="", SubAddress:="" & Ws.Name & "!A1" & "", ScreenTip:="", TextToDisplay:=Ws.Name
Next Ws

End Sub
Step 9: To store the hyperlink of each sheet in a different cell, every time a hyperlink, one must create it for one sheet. We need to move down one cell from the active cell.
Code:
Sub Create_Hyperlink()

Dim Ws As Worksheet

Worksheets("Index").Select
Range("A1").Select

For Each Ws In ActiveWorkbook.Worksheets
ActiveCell.Hyperlinks.Add Anchor:=ActiveCell, Address:="", SubAddress:="" & Ws.Name & "!A1" & "", ScreenTip:="", TextToDisplay:=Ws.Name
ActiveCell.Offset(1, 0).Select

Next Ws

End Sub
It will create a hyperlink of all the sheets in the Index sheet. This code is dynamic whenever there is any addition or deletion of sheets. Therefore, we need to run this code to have an updated hyperlink.
Recommended Articles
This article has been a guide to VBA Hyperlinks. Here, we learn how to create hyperlinks in the worksheet using VBA code to quickly move from one sheet to another, along with some simple to advanced examples. Below are some useful Excel articles related to VBA: –
- Excel Find Links
- VBA Today
- Hyperlink Formula in Excel
- Concatenate in VBA
The first sheet of my workbook is like a contents page. Each cell in column A holds an IP address string. For each IP address string, there is a worksheet named with the IP address.
I want to turn the string in the cells in column A into hyperlinks to their corresponding sheets (cell A1 of the destination sheet).
I only need the VBA line that makes the hyperlink; I can figure out the looping, etc. Remember that the name of the sheet to be linked to is the same as the value of the cell that will become the link.
Research has only brought up forum posts that give a stack of code without explaining any of it.
asked Mar 21, 2012 at 21:57
4
I recorded a macro making a hiperlink. This resulted.
ActiveCell.FormulaR1C1 = "=HYPERLINK(""[Workbook.xlsx]Sheet1!A1"",""CLICK HERE"")"
answered Mar 21, 2012 at 22:10
curialcurial
5144 silver badges17 bronze badges
This is the code I use for creating an index sheet.
Sub CreateIndexSheet()
    Dim wSheet As Worksheet
    ActiveWorkbook.Sheets.Add(Before:=Worksheets(1)).Name = "Contents" 'Call whatever you like
    Range("A1").Select
    Application.ScreenUpdating = False 'Prevents seeing all the flashing as it updates the sheet
    For Each wSheet In Worksheets
        ActiveSheet.Hyperlinks.Add Anchor:=Selection, Address:="", SubAddress:="'" & wSheet.Name & "'" & "!A1", TextToDisplay:=wSheet.Name
        ActiveCell.Offset(1, 0).Select 'Moves down a row
    Next
    Range("A1").EntireColumn.AutoFit
    Range("A1").EntireRow.Delete 'Remove content sheet from content list
    Application.ScreenUpdating = True
End Sub
bad_coder
10.8k20 gold badges44 silver badges68 bronze badges
answered Jul 6, 2015 at 13:26
LeeLee
1811 silver badge2 bronze badges
1
Something like the following will loop through column A in the Control sheet and turn the values in the cells into Hyperlinks. Not something I’ve had to do before so please excuse bugs:
Sub CreateHyperlinks()

Dim mySheet As String
Dim myRange As Excel.Range
Dim cell As Excel.Range
Set myRange = Excel.ThisWorkbook.Sheets("Control").Range("A1:A5") '<<adjust range to suit

For Each cell In myRange
    Excel.ThisWorkbook.Sheets("Control").Hyperlinks.Add Anchor:=cell, Address:="", SubAddress:=cell.Value & "!A1" '<<from recorded macro
Next cell

End Sub
answered Mar 21, 2012 at 22:16
whytheqwhytheq
34k64 gold badges170 silver badges265 bronze badges
1
The «!» sign is the key element. If you have a cell object (like «mycell» in following code sample) and link a cell to this object you must pay attention to ! element.
You must do something like this:
.Cells(i, 2).Hyperlinks.Add Anchor:=.Range(Cells(i, 2).Address), Address:="", _
     SubAddress:= "'" & ws.Name & "'" & _
     "!" & mycell.Address
c0der
18.3k6 gold badges32 silver badges65 bronze badges
answered Mar 15, 2014 at 15:58
If you need to hyperlink Sheet1 to all or corresponding sheets, then use simple vba code. If you wish to create a radio button, then assign this macro to that button ex «Home Page».
Here is it:
Sub HomePage()
'
' HomePage Macro
'


' This is common code to go to sheet 1 if do not change name for Sheet1
    'Sheets("Sheet1").Select
' OR

' You can write you sheet name here in case if its name changes

    Sheets("Monthly Reports Home").Select
    Range("A1").Select

End Sub
answered Aug 17, 2016 at 12:13
This macro adds a hyperlink to the worksheet with the same name, I also modify the range to be more flexible, just change the first cell in the code. Works like a charm
Sub hyper()
 Dim cl As Range
 Dim nS As String

 Set MyRange = Sheets("Sheet1").Range("B16")
 Set MyRange = Range(MyRange, MyRange.End(xlDown))

 For Each cl In MyRange
  nS = cl.Value
  cl.Hyperlinks.Add Anchor:=cl, Address:="", SubAddress:="'" & nS & "'" & "!B16", TextToDisplay:=nS
 Next
End Sub
answered Jul 18, 2017 at 4:00
In my implementation, the cell I was referencing could have been several options. I used the following format where ‘ws’ is the current worksheet being edited
For each ws in Activeworkbook.Worksheets
    For i…
       For j...
...
ws.Cells(i, j).Value = "=HYPERLINK(""#'" & SHEET-REF-VAR & "'!" & CELL-REF-VAR & """,""" & SHEET-REF-VAR & """)"
answered Jan 2, 2020 at 22:38
0
- Remove From My Forums
-
Question
-
I would like to add a hyperlink that refers to a cell within a worksheet and I would like to do this dynamically.
As an example:
Sheets(«Sheet1»).Hyperlinks.Add Anchor:=Sheets(«sheet1″).Cells(1,2), Address:=»», SubAddress:= _
«‘sheet2’!A1», TextToDisplay:=»Back <<«This works.
But now I would like to assign the subaddress dynamically. I have tried several things but I cannot get it working.
so: «‘Sheets2’!A1» should be replaced by a dynamic assignment.
Anybody any ideas?
Answers
-
Have you tried using the Address property? That returns the address of the range as a string.
Something like:
Code Snippet
Sheets(«P&L»).Hyperlinks.Add Anchor:=Sheets(«P&L»).Cells(1, 1), _
Address:=»», SubAddress:=Cells(5, 5).AddressIf a post answers your question, please mark it as the solution.
Definition of VBA Hyperlink
The hyperlink is commonly used with websites for navigating from one page to another or one website to another on the internet. In a similar way, we can control the movements within excel worksheet too. The different operations that can be performed in Excel are:
- Moving to a specific location within the current workbook.
- Opening different documents and select a mentioned area within the document.
- Navigating to webpages from the worksheet.
- Sending email to a defined address.
The hyperlink is easy to recognize because of its color change, mostly in blue. There exist different methods to create a hyperlink in excel and let using VBA.
How to Create a Hyperlink in Excel Using VBA Code?
You can add a hyperlink to a text or one sheet to another worksheet within excel using hyperlink add property. The format needs to be followed by specifying where the hyperlink should be created and navigation URL etc.
Format for VBA Hyperlink Add
The format shows the parameters need to be provided to add a hyperlink to a worksheet.
- Anchor: Defines the cell you want to create the hyperlink.
- Address: The URL to which the navigation should move.
- [SubAddress]: Subaddress of the URL.
- [ScreenTip]: The mouse pointer value to be showed while placing a mouse pointer.
- [Text to Display]: The text needs to be displayed on the cell.
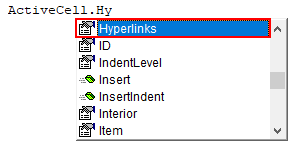
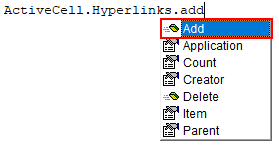
Use the Active cell property to add a hyperlink.
Select the add method from the list
Examples to Create Hyperlinks in Excel VBA
Below are the different examples to create hyperlinks in excel using VBA code.
You can download this VBA Hyperlink Excel Template here – VBA Hyperlink Excel Template
Example #1 – Creating a hyperlink from the Worksheet to a website
We want to create a hyperlink from worksheet named sub to a website using VBA code in excel.
Below are the steps to create a hyperlink in Excel VBA:
Step 1: Create a function named hyper to add the hyperlink.
Code:
Private Sub hyper()

End Sub
Step 2: Use the Active cell object to get open the hyperlink add method.
Code:
Private Sub hyper()

ActiveCell.Hyperlinks.Add(

End Sub
Step 3: Provide the parameter values to the hyperlink add method.
Code:
Private Sub hyper()

ActiveCell.Hyperlinks.Add Anchor:=Sheets("sub").Range("A1"), Address:="https://www.educba.com/", SubAddress:="", ScreenTip:="it is a Hyperlink", TextToDisplay:="Excel Training"

End Sub
- Anchor: name of the worksheet
- Address: Hyperlink to where the control to be navigated, given the website address
- ScreenTip: The mouse pointer text
- TextToDisplay: To which text the hyperlink is to be assigned
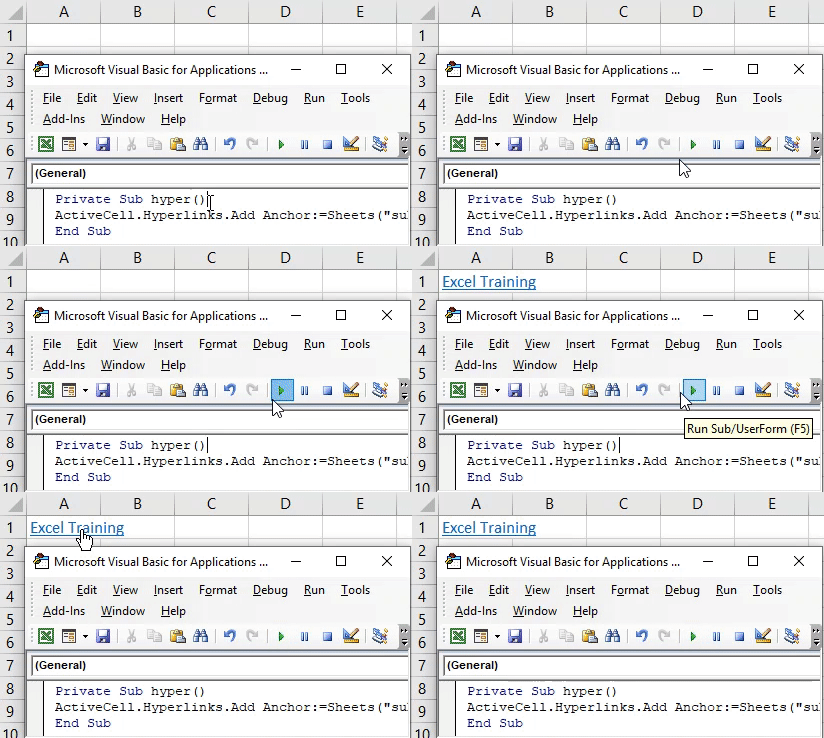
Step 4: Hit F5 or Run button under VBE to run this code and see the output.
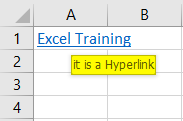
The cell range A1 is selected and the text is assigned with a hyperlink, once you click on the text “Excel Training” it will redirect to the website https://www.educba.com/. When you move the mouse pointer next to the text it will show the mouse pointer text.
Example #2 – Hyperlink to Connect Two Worksheets
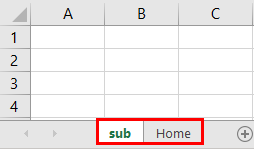
We have two worksheets named Home and sub. Let’s try to create a hyperlink from sub to home using VBA code.
Follow the below steps to create a hyperlink from one worksheet to another within the same workbook using the VBA code.
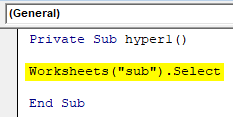
Step 1: Create a function, where we will write all codes to perform the action. Write code to select the worksheet ‘sub’ using the selection method of the worksheet.
Code:
Private Sub hyper1()

Worksheets("sub").Select

End Sub
Since the control moves within the sheet, it is necessary to select the worksheet in which you are creating the hyperlink.
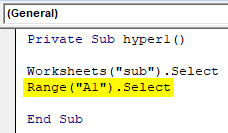
Step 2: Select the cell range within the sheet where the hyperlink is want to create.
Code:
Private Sub hyper1()

Worksheets("sub").Select
Range("A1").Select

End Sub
Step 3: Now let’s add the hyperlink using the active cell property.
Code:
Private Sub hyper1()

Worksheets("sub").Select
Range("A1").Select
ActiveCell.Hyperlinks.Add Anchor:=Selection, Address:="", SubAddress:="'Home'!A1", TextToDisplay:="Click to move home sheet"

End Sub
Since the worksheet is already selected, Anchor is given as ‘Selection’. The hyperlink is specified as ‘Home’ sheet and range A1.
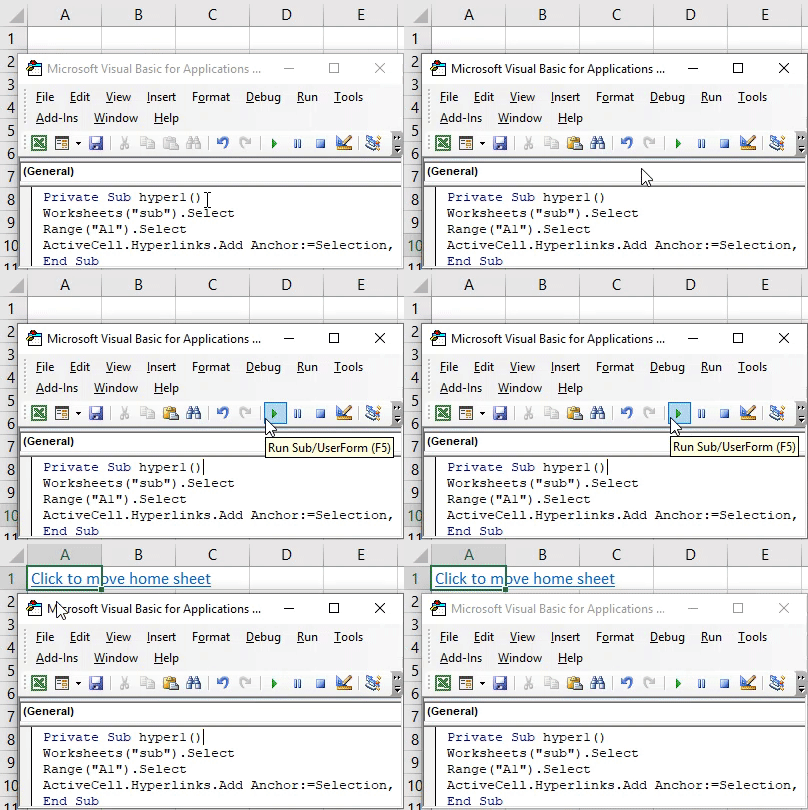
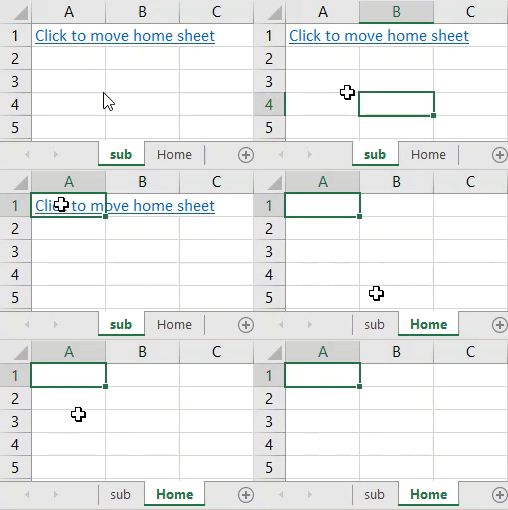
Step 4: Run the code and sheet sub will be shown the hyperlink as below.
Step 5: Once the text is clicked the control will be moved to the ‘Home’ sheet. And cell A1 will be selected.
Example #3 – Hyperlink with Multiple Worksheets
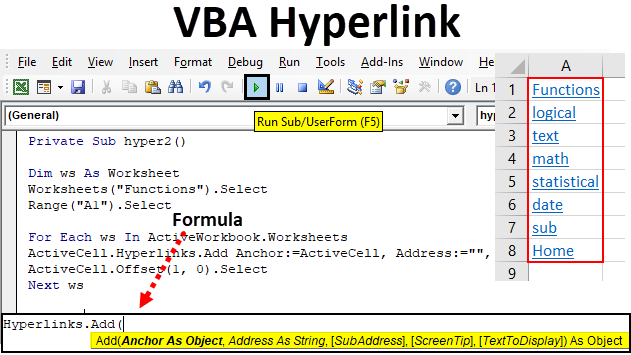
If you want to create hyperlink across multiple worksheets it is also possible. In this example, we have multiple sheets within the same workbook. Different type of excel functions exists so from the main worksheet ‘Functions’. Let’s try to create a hyperlink to the different worksheet named with different functions using VBA code:
The multiple worksheets are named as below with different excel function names
Since we want to create a hyperlink to each worksheet it’s difficult to repeat the code. Follow the below steps to create a hyperlink using VBA Code in Excel:
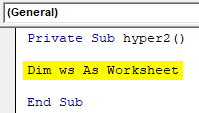
Step 1: Create a variable to deal with worksheet easily.
Code:
Private Sub hyper2()

Dim ws As Worksheet

End Sub
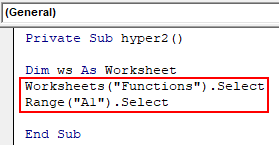
Step 2: Now we want to select the main page which acts as an index page and select the cell range A1.
Code:
Private Sub hyper2()

Dim ws As Worksheet
Worksheets("Functions").Select
Range("A1").Select

End Sub
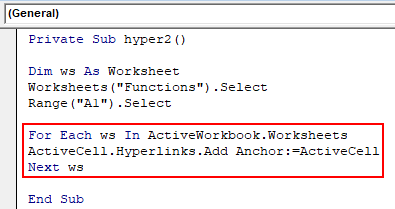
Step 3: To move through multiple worksheet and hyperlink we are creating a for each loop. A1 is already selected as active cell so creating a hyperlink from this.
Code:
Private Sub hyper2()

Dim ws As Worksheet
Worksheets("Functions").Select
Range("A1").Select

For Each ws In ActiveWorkbook.Worksheets
ActiveCell.Hyperlinks.Add Anchor:=ActiveCell
Next ws

End Sub
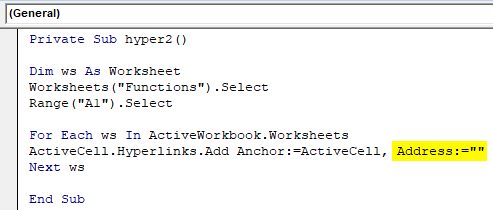
Step 4: Provide the parameter values to create a hyperlink for each worksheet. Since hyperlink starts from active cell anchor=Active cell, the address is given as ” “.
Code:
Private Sub hyper2()

Dim ws As Worksheet
Worksheets("Functions").Select
Range("A1").Select

For Each ws In ActiveWorkbook.Worksheets
ActiveCell.Hyperlinks.Add Anchor:=ActiveCell, Address:=""
Next ws

End Sub
Step 5: The hyperlink is looped through worksheet so we should give subaddress as sheet names. To get the sheet names we can use the variable ws and cell range as A1. The sheet name will have referred with a single quotation. Sheet name and range will be specified and also closed with a single quotation.
Code:
Private Sub hyper2()

Dim ws As Worksheet
Worksheets("Functions").Select
Range("A1").Select

For Each ws In ActiveWorkbook.Worksheets
ActiveCell.Hyperlinks.Add Anchor:=ActiveCell, Address:="", SubAddress:="" & ws.Name & "!A1" & ""
Next ws

End Sub
Step 6: To get the hyperlink with sheet name gives TextToDisplay as ws.Name
Code:
Private Sub hyper2()

Dim ws As Worksheet
Worksheets("Functions").Select
Range("A1").Select

For Each ws In ActiveWorkbook.Worksheets
ActiveCell.Hyperlinks.Add Anchor:=ActiveCell, Address:="", SubAddress:="" & ws.Name & "!A1" & "", TextToDisplay:=ws.Name
Next ws

End Sub
This code will store hyperlink for each worksheet in the same cell A1.
Step 7: To change this each sheet to different cell down one cell from the active cell.
Code:
Private Sub hyper2()

Dim ws As Worksheet
Worksheets("Functions").Select
Range("A1").Select

For Each ws In ActiveWorkbook.Worksheets
ActiveCell.Hyperlinks.Add Anchor:=ActiveCell, Address:="", SubAddress:="" & ws.Name & "!A1" & "", TextToDisplay:=ws.Name
ActiveCell.Offset(1, 0).Select
Next ws

End Sub
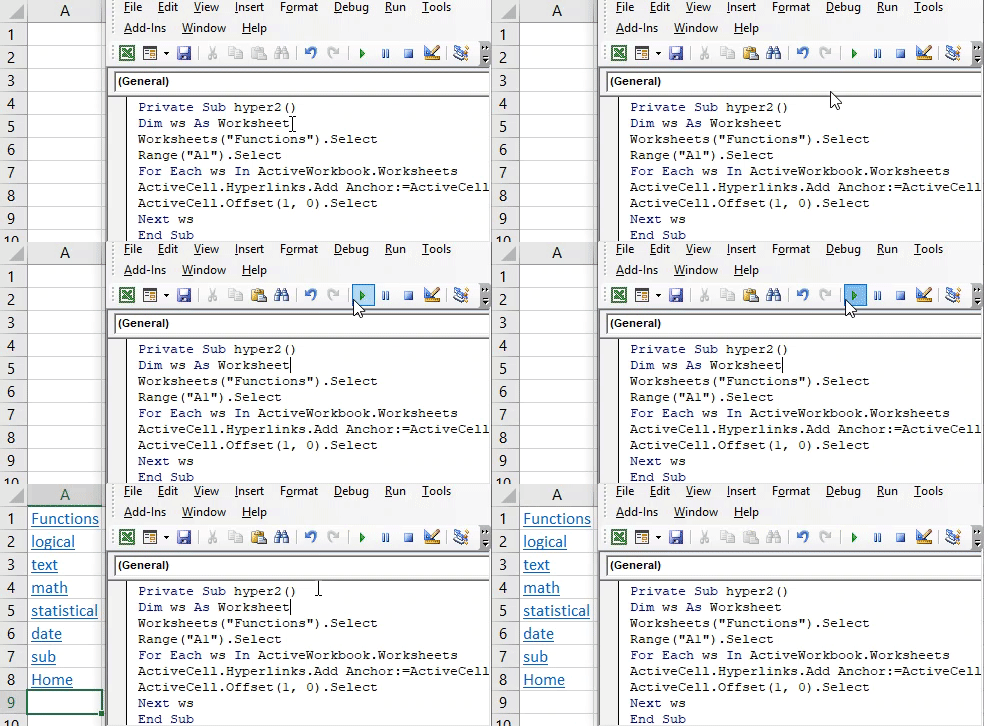
Step 8: Run the program and each sheet name will be displayed on the sheet ‘Functions’ and while clicking on it the control will move to the corresponding sheet.
Things to Remember
- Hyperlink property of active cell used to create hyperlinks in VBA.
- Hyperlink help to move within the workbook easily.
Recommended Articles
This is a guide to VBA Hyperlinks. Here we learn how to create hyperlinks in Worksheet Using VBA Code to quickly move from one sheet to another sheet along with some practical examples and downloadable excel template. You can also go through our other suggested articles –
- VBA Loops
- VBA RGB
- VBA Break for Loop
- VBA XML

In my case, it’s probably cells. After all, most of the time we spend working with Excel, we’re working with cells. Therefore, it makes sense that, when using Visual Basic for Applications for purposes of becoming more efficient users of Excel, one of the topics we must learn is how to work with cells within the VBA environment.
This VBA tutorial provides a basic explanation of how to work with cells using Visual Basic for Applications. More precisely, in this particular post I explain all the basic details you need to know to work with Excel’s VBA Range object. Range is the object that you use for purposes of referencing and working with cells within VBA.
However, the importance of Excel’s VBA Range object doesn’t end with the above. A substantial amount of the work you carry out with Excel involves the Range object. The Range object is one of the most commonly used objects in Excel VBA.
Despite the importance of Excel’s VBA Range, creating references to objects is generally one of the most confusing topics for users who are beginning to work with macros and Visual Basic for Applications. In the case of cell ranges, this is (to a certain extent) understandable, since VBA allows you to refer to ranges in many different ways.
The fact remains that, regardless of how confusing the topic of Excel’s VBA Range object may be, you must master it in order to become a macro and VBA expert. My main purpose with this VBA tutorial is to help you understand the basic matters surrounding this topic and illustrate the most common ways in which you can refer to Excel’s VBA Range object using Visual Basic for Applications.
More precisely, in this post you’ll learn about the following topics related to Excel’s VBA Range object:
Let’s start by taking a more detailed look at…
What Is Excel’s VBA Range Object
Excel’s VBA Range is an object. Objects are what is manipulated by Visual Basic for Applications.
More precisely, you can use the Range object to represent a range within a worksheet. This means that, by using Excel’s VBA Range object, you can refer to:
- A single cell.
- A row or a column of cells.
- A selection of cells, regardless of whether they’re contiguous or not.
- A 3-D range.
As you can see from the above, the size of Excel’s VBA Range objects can vary widely. At the most basic level, you can be making reference to a single (1) cell. On the other extreme, you have the possibility of referencing all of the cells in an Excel worksheet.
Despite this flexibility when referring to cells within a particular Excel worksheet, Excel’s VBA Range object does have some limitations. The most relevant is that you can only use it to refer to a single Excel worksheet at a time. Therefore, in order to refer to ranges of cells in different worksheets, you must use separate references for each of the worksheets.
How To Refer To Excel’s VBA Range Object
One of the first things you’ll have to learn in order to master Excel’s VBA Range object is how to refer to it. The following sections explain the most relevant rules you need to know in order to craft appropriate references.
The first few sections cover the most basic way of referring to Excel’s VBA Range object: the Range property. This is also how the macro recorder generally refers to the Range object.
However, further down, you’ll find some additional methods to create object references, such as using the Cells or Offset properties.
These are, however, not the only ways to refer to Excel’s VBA Range objects. There are a few more advanced methods, such as using the Application.Union method, which I don’t cover in this beginners VBA tutorial.
You may be wondering, which way is the best for purposes of referring to Excel’s VBA Range object?
Generally, the best method to use in order to craft a reference to Excel’s VBA Range object depends on the context and your specific needs.
Introduction To Referencing Excel’s VBA Range Object And The Object Qualifier
In order to be able to work appropriately with Range objects, you must understand how to work with the 2 main parts of a reference to Excel’s VBA Range object:
- The object qualifier. This makes reference, more generally, to the general rules to creating object references. I cover this topic thoroughly here.
- The relevant property or method that you’re using for purposes of returning a Range object. This makes reference, more generally, to the specific rules that apply to referring to Excel’s VBA Range object.
This VBA tutorial focuses on the second element above: the main properties you can use in order to refer to Excel’s VBA Range object.
Nonetheless, I explain a few key points regarding object referencing below. If you’re interested in learning more about the general rules that apply to object references, please refer to Excel VBA Object Model And Object References: The Essential Guide, which you can find in the Archives.
Introduction To Fully Qualified VBA Object References
Objects are capable of acting as containers for other objects.
At a basic level, when referencing a particular object, you tell Excel what the object is by referencing all of its parents. In other words, you go through Excel’s VBA object hierarchy.
You move through Excel’s object hierarchy by using the dot(.) operator to connect the objects at each of the different levels.
These types of specific references are known as fully qualified references.
How does a fully qualified reference look in the case of Excel’s VBA Range object?
The object at the top of the Excel VBA object hierarchy is Application. Application itself contains other objects.
Excel’s VBA Range object is contained within the Worksheet object. More precisely:
- The Worksheet object has a Range property (Worksheet.Range).
- The Worksheet.Range property returns a Range object.
The parent object of Worksheets is the Workbook object. Workbooks itself is contained within the Application object.
The hierarchical relationship between these different objects looks as follows:
Therefore, the basic structure you must use to refer to Excel’s VBA Range object is the following:
Application.Workbooks.Worksheets.RangeYou’ll notice that a few things within the basic structure described above are ambiguous. In particular, you’ll notice that this doesn’t specify the particular Excel workbook or worksheet that you’re referring to. In order to do this, you must understand…
How To Refer To An Object From A Collection
Within Visual Basic for Applications, an object collection is a group of related objects.
Both Workbooks and Worksheets, which are used to create a fully qualified reference to Excel’s VBA Range object, are examples of collections. There are 2 basic ways to refer to a particular object within a collection:
- Use the VBA object name. In this case, the syntax is “Collection_name(“Object_name”)”.
- Use an index number instead of the object name. If you choose this option, the basic syntax is “Collection_name(Index_number)”.
Notice how, in the first method you must use quotations (“”) within the parentheses. If you use the second method, you don’t have to surround the Index_number with quotes.
Let’s assume, then, that you want to work with the Worksheet named “Sheet1” within the Workbook “Book1.xlsm”. Depending on which of the 2 methods to refer to an object within a collection you use, the reference looks different.
If you create the reference using the VBA object name, the reference looks as follows:
Application.Workbooks("Book1.xlsm").Worksheets("Sheet1").RangeWhereas if you decide to use an index number, the reference is the following:
Application.Workbooks(1).Worksheets(1).RangeI usually use the first option when working with Visual Basic for Applications. Therefore, this is the method that I use in the examples throughout this VBA tutorial.
Simplifying Fully Qualified Object References
Excel’s VBA object model contains some default objects. These are assumed unless you enter something different.
You can simplify fully qualified object references by relying on these default VBA objects. I don’t generally suggest doing this blindly, as it involves some dangers.
There are 2 main types of default objects that you can use for purposes of simplifying fully qualified object references:
- The Application object.
- The active Workbook and Worksheet objects.
The Application object is always assumed. In other words, Visual Basic for Applications always assumes that you’re working with Excel itself. Therefore, you can simplify your fully qualified object references by omitting the Application. For example, in the cases that I use as an example above, the simplified references are as follows:
Workbooks("Book1.xlsm").Worksheets("Sheet1").Range Workbooks(1).Worksheets(1).RangeAdditionally, VBA assumes that you’re working with the current active workbook and active worksheet. This simplification is trickier than the previous one because it relies on you correctly identifying the active workbook and worksheet. As you’ll imagine, this is slightly more difficult than identifying the Excel application itself 😉 .
However, you can also use these 2 default objects for creating even simpler VBA object references. Continuing with the same examples above, these become:
RangeThis brings us to the end of the introduction to the general rules to creating VBA object references. This summary has explained how to create fully qualified references and simplify them for purposes of creating the object qualifier that you use when crafting references to Excel’s VBA Range object.
The following sections focus on the specific rules that you can apply for purposes of referring to Excel’s VBA Range object. These are the most commonly used properties for returning a Range object.
How To Refer To Excel’s VBA Range Object Using The Range Property
The sections above explain, to a certain extent, the basic rules that you can apply to refer to Excel’s VBA Range object. Let’s start by recalling the 2 methods you can use to create a fully qualified reference if you’re working with the worksheet called “Sheet1” within the workbook named “Book1.xlsm”.
Application.Workbooks("Book1.xlsm").Worksheets("Sheet1").Range Application.Workbooks(1).Worksheets(1).RangeYou need to specify the particular range you want to work with. In other words, just using “Range” as it still appears in the examples above, isn’t enough.
Perhaps the most basic way to refer to Excel’s VBA Range object is by using the Range property. When applied, this property returns a Range object which represents a cell or range of cells.
There are 2 versions of the Range property: the Worksheet.Range property and the Range.Range property. The logic behind both of them is the substantially the same. The main difference is to which object they’re applied:
- In the case of the Worksheet.Range property, the Range property is applied to a worksheet.
- When using the Range.Range property, Range is applied to a range.
In other words, the Range property can be applied to 2 different types of objects:
- Worksheet objects.
- Range objects.
In the sections above, I explain how to create fully qualified object references. You’ve probably noticed that, in all of the examples above, the parent of Excel’s VBA Range object is the Worksheet object. In other words, in these cases, the Range property is applied to a Worksheet object.
However, you can also apply the Range property to a Range object. If you do this, the object returned by the Range property changes.
The reason for this, as explained by Microsoft, is that the Range.Range property acts in relation to the object to which it is applied to. Therefore, if you apply the Range.Range property, the property acts relative to the Range object, not the worksheet.
This means that you can apply the Range.Range property for purposes of referencing a range in relation to another range. I provide examples of how such a reference works below.
Basic Syntax Of The Range Property
The basic syntax that you can use to refer to Excel’s VBA Range object is “expression.Range(“Cell_Range”)”. You’ll notice that this syntax follow the general rules that I explain above for other VBA objects such as Workbooks and Worksheets. In particular, you’ll notice that there are 4 basic elements:
- Element #1: The keyword “Range”.
- Element #2: Parentheses that follow the keyword.
- Element #3: The relevant cell range. I explain different ways in which you can define the range below.
- Element #4: Quotations. The Cell_Range to which you’re making reference is generally within quotations (“”).
In this particular case, “expression” is simply a variable representing a Worksheet object (in the case of the Worksheet.Range property) or a Range object (for the Range.Range object).
Perhaps the most interesting item in the syntax of the Range property is the Cell_Range.
Let’s take a look at some of its characteristics…
In very broad terms, you can usually make reference to Cell_Range in a similar way to the one you use when writing a regular Excel formula. This means using A1-style references. However, there are a few important particularities, which I introduce in this section.
Don’t worry if everything seems a little bit confusing at first. I show some sample references in the following sections in order to make everything clear.
You can use 2 different syntaxes to define the range you want to work with:
Syntax #1: (“Cell1”)
This is the minimum you must include for purposes of defining the relevant cell range. As a general rule, when you use this syntax, the argument (Cell1) must be either of the following:
- A string expressing the cell range address.
- The name of a named cell range.
When naming a range, you can use any of the following 3 operators:
- Colon (:): This is the operator you use to set up arrays. In the context of referring to cell ranges, you can use to refer to entire columns or rows, ranges of contiguous cells or ranges of noncontiguous cells.
- Space ( ): This is the intersection operator. As shown below, you can use the intersection operator for purposes of referring to cells that are common to 2 separate ranges.
- Comma (,): This is the union operator, which you can use to combine several ranges. As shown in the example below, you can use this operator when working with ranges of noncontiguous cells.
Syntax #2: “(Cell1, Cell2)”
If you choose to use this syntax, you’re basically delineating the relevant range by naming the cells in 2 of its corners:
- “Cell1” is the cell in the upper-left corner of the range.
- “Cell2” is the cell in the lower-right corner of the range.
However, this syntax isn’t as restrictive as it may seem at first glance. In this case, arguments can include:
- Range objects;
- Cell range addresses;
- Named cell range names; or
- A combination of the above items.
Let’s take a look at some specific applications of the Range property:
How To Refer To A Single Cell Using The Worksheet.Range Property
If the Excel VBA Range object you want to refer to is a single cell, the syntax is simply “Range(“Cell”)”. For example, if you want to make reference to a single cell, such as A1, type “Range(“A1″)”.
We can take it a step further and create a fully qualified reference for this single cell, assuming that we continue to work with Sheet1 within Book1.xlsm:
Application.Workbooks("Book1.xlsm").Worksheets("Sheet1").Range("A1")You’ve probably noticed something very important:
There is no such thing as a Cell object. Cell is not an object by itself. Cells are contained within the Range object.
Perhaps even more accurately, cells are a property. Properties are the characteristics that you can use to describe an object. I cover the topic of object properties here.
You can actually use this property (Cells) to refer to a range. I explain how you can do this below.
The example above applies the Range property to a Worksheet object. In other words, it is an example of the Worksheet.Range property.
Now let’s take a look at what happens if the Range property is applied to a Range object:
How To Refer To A Single Cell In Relation To Another Range Using The Range.Range Property
Let’s assume, that instead of specifying a fully qualified reference as above, you simply use the Selection object as follows:
Selection.Range("A1")Further, let’s assume that the current selection is the cell range between C3 and D5 (cells C3, C4, C5, D3, D4 and D5) of the active Excel worksheet. This selection is a Range object.
Since the Selection object represents the current selected area in the document, the reference above returns cell C3. It doesn’t return cell A1, as the previous fully qualified reference.
The reason for the different behavior of the 2 sample references above is because the Range property behaves relative to the object to which it is applied. In other words, when the Range property is applied to a Range object, it behaves relative to that Range (more precisely, its upper-left corner). When it is applied to a Worksheet object, it behaves relative to the Worksheet.
Creating references by applying the Range property to a Range object is not very straightforward. I personally find it a little confusing and counterintuitive.
However, the ability to refer to cells in relation to other range has several advantages. This allows you to (for example) refer to a cell without knowing its address beforehand.
Fortunately, there are alternatives for purposes of referring to a particular cell in relation to a range. The main one is the Range.Offset property, which I explain below.
How To Refer To An Entire Column Or Row Using The Worksheet.Range Property
Excel’s VBA Range objects can consist of complete rows or columns. You can refer to an entire row or column as follows:
- Row: “Range(“Row_Number:Row_Number”)”.
- Column: “Range(“Column_Letter:Column_Letter”)”.
For example, if you want to refer to the first row (Row 1) of a particular Excel worksheet, the syntax is “Range(“1:1″)”.
If, on the other hand, you want to refer to the first column (Column A), you type “Range(“A:A”).
Assuming that you’re working with Sheet 1 within Book1.xlsm, the fully qualified references are as follows:
Application.Workbooks("Book1.xlsm").Worksheets("Sheet1").Range("1:1") Application.Workbooks("Book1.xlsm").Worksheets("Sheet1").Range("A:A")How To Refer To A Range Of Contiguous Cells Using The Worksheet.Range Property
You can refer to a range of cells by using the following syntax: “Range(“Cell_Range”). I describe how you can use 2 different syntaxes for purposes of referring to these type of ranges above:
- By identifying the full range.
- By delineating the range, naming the cells in its upper-left and lower-right corners.
Let’s take a look at how both of these look like in practice:
If you want to make reference to a range of cells between cells A1 and B5 (A1, A2, A3, A4, A5, B1, B2, B3, B4 and B5), one appropriate syntax is “Range(“A1:B5″)”. Continuing to work with Sheet1 within Book1.xlsm, the fully qualified reference is as follows:
Application.Workbooks("Book1.xlsm").Worksheets("Sheet1").Range("A1:B5")
However, if you choose to apply the second syntax, where you delineate the relevant range, the appropriate syntax is “Range(“A1”, “B5″)”. In this case, the fully qualified reference looks as follows:
Application.Workbooks("Book1.xlsm").Worksheets("Sheet1").Range("A1", "B5")How To Refer To A Range Of NonContiguous Cells Using The Worksheet.Range Property
The syntax for purposes of referring to a range of noncontiguous cells in Excel is very similar to that used to refer to a range of contiguous cells. You simply separate the different areas by using a comma (,). Therefore, the basic syntax is “Range(“Cell_Range_1,Cell_Range_#,…”)”.
Let’s assume that you want to refer to the following ranges of noncontiguous cells:
- Cells A1 to B5 (A1, A2, A3, A4, A5, B1, B2, B3, B4 and B5).
- Cells D1 to D5 (D1, D2, D3, D4 and D5).
You refer to such range by typing “Range(“A1:B5,D1:D5″)”. In this case, the fully qualified reference looks as follows:
Application.Workbooks("Book1.xlsm").Worksheets("Sheet1").Range("A1:B5,D1:D5")

However, when working with ranges of noncontiguous cells, you may want to process each of the different areas separately. The reason for this is that some methods/properties have issues when working with such noncontiguous cell ranges.
You can handle the separate processing with a loop.
How To Refer To The Intersection Of 2 Ranges Using The Worksheet.Range Property
I describe how, when using the Range property, you can use 3 operators for purposes of identifying the relevant Range above. We’ve already gone through examples that use the colon (:) and comma (,) operators. These were used in the previous sections for purposes of referring to ranges of contiguous or noncontiguous cells.
The third operator, space ( ), is useful when you want to refer to the intersection of 2 ranges. The reason for this is clear:
The space ( ) operator is, precisely, the intersection operator.
Let’s assume that you want to refer to the intersection of the following 2 ranges:
- Cells B1 to B10 (B1, B2, B3, B4, B5, B6, B7, B8, B9 and B10).
- Cells A5 to C5 (A5, B5 and C5).
In this case, the appropriate syntax is “Range(“B1:B10 A5:C5″)”. When working with Sheet1 of Book1.xlsm, a fully qualified reference can be constructed as follows:
Application.Workbooks("Book1.xlsm").Worksheets("Sheet1").Range("B1:B10 A5:C5")Such a reference returns the cells that are common to the 2 ranges. In this particular case, the only cell that is common to both ranges is B5.
How To Refer To A Named VBA Range Using The Worksheet.Range Property
If you’re referring to a VBA Range that has a name, the syntax is very similar to the basic case of referring to a single cell. You simply replace the address that you use to refer to the range with the appropriate name.
For example, if you want to create a reference to a VBA Range named “Excel_Tutorial_Example”, the appropriate syntax is “Range(“Excel_Tutorial_Example”)”. In this case, a fully qualified reference looks as follows:
Application.Workbooks("Book1.xlsm").Worksheets("Sheet1").Range("Excel_Tutorial_Example")
Remember to use quotation marks (“”) around the name of the range. If you don’t use quotes, Visual Basic for Applications interprets it as a variable.
How To Refer To Merged Cells Using The Worksheet.Range Property
In general, working with merged cells isn’t that straightforward. In the case of macros this is no exception. The following are some of the (potential) challenges you may face when working with a range that contains merged cells:
- The macro behaving differently from what you expected.
- Issues with sorting.
I may cover the topic of working with merged cells in future tutorials. For the moment, I explain how to refer to merged cells using the Range property. This should help you avoid some of the most common pitfalls when working with merged cells.
The first thing to consider when referring to merged cells is that you can reference them in either of the following 2 ways:
- By referring to the entire merged cell range.
- By referring only to the upper-left cell of the merged range.
Let’s assume that you’re working on an Excel spreadsheet where the cell range from A1 to C5 is merged. This includes cells A1, A2, A3, A4, A5, B1, B2, B3, B4, B5, C1, C2, C3, C4 and C5. In this case, the appropriate syntax is either of the following:
- If you refer to the entire merged range, “Range(“A1:C5″)”. In this case, the fully qualified reference is “Application.Workbooks(“Book1.xlsm”).Worksheets(“Sheet1”).Range(“A1:C5″)”.
- If you refer only to the upper-left cell of the merged range, “Range(“A1″)”. The fully qualified reference under this method is “Application.Workbooks(“Book1.xlsm”).Worksheets(“Sheet1”).Range(“A1″)”.
In both cases, the result is the same.
You should be particularly careful when trying to assign values to merged cells. Generally, you can only carry this operation by assigning the value to the upper-left cell of the range (cell A1 in the example above). Otherwise, Excel VBA (usually) doesn’t:
- Carry out the value assignment; and
- Return an error.
How To Refer To A VBA Range Object Using Shortcuts For The Range Property
References to Excel’s VBA Range object using the Range property can be made shorter using square brackets ([ ]).
You can use this shortcut as follows:
- Don’t use the keyword “Range”.
- Surround the relevant property arguments with square brackets ([ ]) instead of using parentheses and double quotes (“”).
Let’s take a look at how this looks in practice by applying the shortcut to the different cases and examples shown and explained in the sections above.
Shortcut #1: Referring To A Single Cell
Instead of typing “Range(“Cell”)” as explained above, type “[Cell]”.
For example if you’re making reference to cell A1, use “[A1]”. The fully qualified reference for cell A1 in Sheet1 of Book1.xlsm looks as follows:
Application.Workbooks("Book1.xlsm").Worksheets("Sheet1").[A1]

Shortcut #2: Referring To An Entire Row Or Column
In this case, the usual syntax is either “Range(“Row_Number:Row_Number”)” or “Range(“Column_Letter:Column_Letter”)”. I explain this above.
By applying square brackets, you can shorten the references to the following:
- Row: “[Row_Number:Row_Number]”.
- Column: “[Column_Letter:Column_Letter]”.
For example, if you’re referring to the first row (Row 1) or the first column (Column A) of an Excel worksheet, the syntax is as follows:
And the fully qualified references, assuming you’re working with Sheet1 of Book1.xlsm are the following:
Application.Workbooks("Book1.xlsm").Worksheets("Sheet1").[1:1] Application.Workbooks("Book1.xlsm").Worksheets("Sheet1").[A:A]Shortcut #3: Referring To A Range Of Contiguous Cells
Generally, you refer to a range of cells by using the syntax “Range(“Cell_Range”)”. If you’re identifying the full range by using the colon (:) operator, as I explain above, you usually structure the reference as “Range(“Top_Left_Cell:Right_Bottom_Cell”)”.
You can shorten the reference to a range of contiguous cells by using square brackets as follows: “[Top_Left_Cell:Right_Bottom_Cell]”.
For example in order to refer to a range of cells between cells A1 and B5 (A1, A2, A3, A4, A5, B1, B2, B3, B4 and B5), you can type “[A1:B5]”. Alternatively, if you’re using a fully qualified reference and are working with Sheet1 of Book1.xlsm, the syntax is as follows:
Application.Workbooks("Book1.xlsm").Worksheets("Sheet1").[A1:B5]
Shortcut #4: Referring To A Range Of NonContiguous Cells
This case is fairly similar to the previous one, in which we made reference to a range of contiguous cells. However, in order to separate the different areas, you use the comma (,) operator, as explained previously. In other words, the basic syntax is usually “Range(“Cell_Range_1,Cell_Range_#,…”)”.
When using square brackets, you can simplify the reference above to “[Cell_Range_1,Cell_Range_#,…]”.
If you want to refer to the following ranges of noncontiguous cells:
- Cells A1 to B5 (A1, A2, A3, A4, A5, B1, B2, B3, B4 and B5).
- Cells D1 to D5 (D1, D2, D3, D4 and D5).
The syntax of a reference using square brackets is “[A1:B5,D1:D5]”. The fully qualified reference looks as follows:
Application.Workbooks("Book1.xlsm").Worksheets("Sheet1").[A1:B5,D1:D5]

Shortcut #5: Referring To The Intersection Of 2 Ranges
Generally, the syntax for referring to the intersection of 2 ranges uses the space operator and is “Range(“Cell_Range_1 Cell_Range_2″)”. When using square brackets, this becomes “[Cell_Range_1 Cell_Range_2]”.
Let’s go back to the example I use above and assume that you want to refer to the intersection of the following 2 ranges:
- Cells B1 to B10 (B1, B2, B3, B4, B5, B6, B7, B8, B9 and B10).
- Cells A5 to C5 (A5, B5 and C5).
You can create a reference using square brackets as follows: “[B1:B10 A5:C5]”. When working with Sheet1 of Book1.xlsm, the fully qualified reference is:
Application.Workbooks("Book1.xlsm").Worksheets("Sheet1").[B1:B10 A5:C5]And this returns the only cell common to both ranges: B5.
Shortcut #6: Referring To A Named VBA Range
As explained above, when referring to a VBA Range that has a name, you replace the address of the range with the relevant name. Therefore, the basic syntax is “Range(“Range_Name”)”.
When using square brackets, the logic is the same. Therefore, you can refer to a named range by typing “[Range_Name]”.
For example, when referring to a VBA Range named “Excel_Tutorial_Example”, the reference can be structures as “[Excel_Tutorial_Example]”. When using a fully qualified reference, it looks as follows:
Application.Workbooks("Book1.xlsm").Worksheets("Sheet1").[Excel_Tutorial_Example]
How To Refer To A VBA Range Object Using The Cells Property
There is no Cell object within Visual Basic for Applications. There is a Worksheet.Cells property and a Range.Cells property. You can use the Cells property to return a Range object representing the cells.
The main difference between both Cells properties is in connection with the object to which the property is applied to:
- When using the Worksheet.Cells property, you’re applying the property to a Worksheet object.
- When using the Range.Cells property, that property is applied to a Range object.
This is important because, depending on the context, the properties may return different cells. More precisely, when applying the Cells property to a Range object, you’re referring to a cell in relation to another range.
This probably sounds confusing, I agree. Don’t worry, as the explanation and examples below make this topic clear. The most important thing to remember is that the Cells property allows you to refer to a cell range.
Since the basic logic behind both properties (Worksheet.Cells and Range.Cells) is similar, I cover both at the same time.
There are several ways in which you can use the Cells property to refer to a Range object. I explain the main methods of doing this in the following sections.
Syntax Of The Cells Property
The basic syntax of the Cells property is “expression.Cells(Row_Number, Column_Number)”, where:
- “expression” is a variable representing a VBA object. This VBA object can be either a worksheet (in the case of the Worksheet.Cells property) or a range (for the Range.Cells property).
- “Row_Number” and “Column_Number” are the numbers of both the row and the column.
- Is common to use numbers in both cases.
- When using this syntax, you can also use a letter to refer to the column. In this case, wrap the letter in double quotes (“”). Other than the quotations (“”) (surrounding the letter), you don’t need to use other quotations in the same way as you do when using the Range property.
One of the main differences between the Range and the Cells properties is that the Cells property takes row and column numbers as arguments. You can see this reflected in the syntax described above.
There are additional possible ways to implement the Cells property. However, they’re secondary and I explain them below.
The Range object has a property called the Range.Item property, which I explain below. The reason why you can specify the Row_Number and Column_Number arguments immediately after the Cells keyword is that the Range.Item property is the default property of the Range object. This is the same reason why, as explained above, you can also use a letter wrapped in double quotes (“”) to refer to the column. If you’re interested in understanding the relationship between the Range.Item property and the Cells property, please refer to the relevant section below.
For the moment, let’s go back to some of the VBA Ranges that have appeared in previous examples and see how to refer to them using the Cells property.
How To Refer To A Single Cell Using The Worksheet.Cells Property
The most basic use case of the Cells property is referring to a single cell.
The fact that the Cells property can only be used (usually) for purposes of returning a range of 1 cell is one of the main characteristics that distinguishes the Cells from the Range property.
There is actually a way to use the Cells property for purposes of referring to larger cell ranges. However, this involves combining the Range and Cells properties. I explain this method below.
Referring to a single cell using the Cells property is relatively simple. For example, if you want to refer to cell A1 within Sheet1 of Book1.xlsm, the fully qualified reference is pretty much what you’d expect considering the basic syntax shown in the previous section:
Application.Workbooks("Book1.xlsm").Worksheets("Sheet1").Cells(1, 1)
Application.Workbooks("Book1.xlsm").Worksheets("Sheet1").Cells(1, "A")

There is, however, a second way to create references to a single cell when using the Worksheet.Cells property. Let’s take a look at this…
Alternative Syntax For Referring To A Single Cell Using The Worksheet.Cells Property
The syntax of the Cells property that I describe above is probably the one that you’ll use the most in practice.
The following alternative is substantially the same as the syntax that I have explained above. It also starts with “expression.Cells”. The difference lies in the arguments that appear within the parentheses.
This alternative syntax is “expression.Cells(Cell_Index)”. In this particular case, there is only 1 argument: the index of the relevant cell.
The main question, then, is how does Visual Basic for Applications determine the index of a cell?
For these purposes, each and every cell is assigned a number. Cells are numbered from left to right and from top to bottom. In other words:
- Numbering begins with the first row:
- Cell A1 is assigned the number 1.
- Cell B1 is assigned the number 2.
- Cell C1 is assigned the number 3.
- The process continues with each of the subsequence cells, until…
- Cell XFD1 (the last cell in the first row) is assigned the number 16,384.
- Once all the cells in the first row have been assigned a number, the process continues with the second row:
- Cell A2 is assigned the number 16,385.
- Cell B2 is assigned the number 16,386.
- Cell C2 is assigned the number 16,387.
- The number assignment continues until…
- Cell XFD2 (the last cell in the second row) is assigned the number 32,768.
- The process continues with the third row.
- Then the fourth row.
- And so on, until…
- It reaches row 1,048,576.
- And…
- The last cell in an Excel worksheet (cell XFD1048676) is assigned the number 17,179,869,184.
The following screenshot gives you an idea of how this number assignment goes:
For example, if you want to refer to cell A2 using this syntax, the appropriate reference is “Cells(16385)”. A fully qualified reference for cell A2 in Sheet1 of Book1.xlsm is as follows:
Application.Workbooks("Book1.xlsm").Worksheets("Sheet1").Cells(16385)
The initial 2 examples of the Cells property, show how it is applied to a Worksheet object. However, you can also use this syntax to apply the property to a Range object. This allows you to refer to a cell relative to another range.
How To Refer To A Single Cell In Relation To A Range Using The Range.Cells Property
Assume that the current selection is a range covering cells C3 through D5 (cells C3, C4, C5, D3, D4 and D5) of the active Excel worksheet. You already know that this is a Range object.
We can use the Selection property to create the following reference:
Selection.Cells(1, 1)This reference returns cell C3 itself.
This is different from what the previous example (a fully qualified reference) returned (cell A1).
The reason for the different behaviors seen in the examples above is that the Range property behaves relative to the object to which it is applied (a worksheet or a range). In the case of cell ranges (such as the example above), the Range property behaves in relation to the upper-left corner of the range. The logic is the same that explains the different behaviors when applying the Range property to a Worksheet object or a Range object.
Similarly, you can create references to a single cell in relation to a range using the alternative syntax of the Cells property that I described above. Let’s take a look at this case:
Alternative Syntax For Referring To A Single Cell In Relation To A Range Using The Range.Cells Property
To recall, the alternative syntax is “expression.Cells(Cell_Index)”.
In such case:
- Each of the cells within the range is assigned a number.
- The assignment is carried out following the same pattern described above for the whole worksheet. From left to right and from top to bottom.
For example, let’s assume that you are working with the cell range from A1 to B10 and want to select cell A5.
In this case, the reference is “Range(“A1:B10″).Cells(9)”. The following screenshot shows the way the Cell_Index numbers are assigned to the cells within the relevant range:
A fully qualified reference, when working with Sheet1 of Book1.xlsm is as follows:
Application.Workbooks("Book1.xlsm").Worksheets("Sheet1").Range("A1:B10").Cells(9)
An interesting aspect of applying this syntax of the Cells property to a Range object is that the argument for the Cells property is not limited by the number of cells in the referenced range. If you use a number that is larger than the amount of cells in the relevant range, Visual Basic for Applications continues counting as if the range was taller (extending to the bottom) than it’s in reality. In other words: The Range object returned by the Cells property doesn’t have to be inside the original/source cell range.
In the case of the range described in the example above (A1:B10), the Cell_Index assignment continues as shown in the following screenshot:
For example, the cell range from A1 to B10 contains 20 cells. Let’s assume that you type “21” as an argument for the Cells property. The resulting reference is “Range(“A1:B10″).Cells(21)”. The fully qualified reference is:
Application.Workbooks("Book1.xlsm").Worksheets("Sheet1").Range("A1:B10").Cells(21)This statement makes reference to cell A11 which is outside the originally referenced range (A1:B10).
How To Refer To A Cell Range Using The Range And Cells Properties
As anticipated above, you can combine the Range and Cells properties to refer to cell ranges. Perhaps the easiest way to do this is to use the Cells property as a parameter of the Range property.
For these purposes, use the following syntax: “Range(Cells(Row_Number_First_Cell, Column_Number_First_cell), Cells(Row_Number_Last_Cell, Column_Number_Last_Cell))”.
For example, if you want to refer to a range covering cells A1 to B5 (A1, A2, A3, A4, A5, B1, B2, B3, B4 and B5) in Sheet1 of Book1.xlsm using the Cells property, you’d type “Range(Cells(1, 1), Cells(5, 2)). The corresponding fully qualified reference is as follows:
Application.Workbooks("Book1.xlsm").Worksheets("Sheet1").Range(Cells(1, 1), Cells(5, 2))
This technique is useful (for example) when you use variables to specify the parameters of the Cells property. This can happen, for example, when looping.
How To Refer To All The Cells In A Worksheet Using The Worksheet.Cells Property
This is probably the simplest, but also most limited, way to implement the Cells property. The statement “expression.Cells” returns absolutely all of the cells in the relevant Excel worksheet.
For example, the following statement returns absolutely all of the cells of Sheet1 in Book1.xlsm:
Application.Workbooks("Book1.xlsm").Worksheets("Sheet1").CellsThis method doesn’t allow you to reference a single cell.
Why You Should Learn To Use The Cells Property To Refer To Excel’s VBA Range Object
Using the Cells property may seem like a slightly more complicated way to refer to Excel’s VBA Range object than using the Range property. However there are some scenarios where using the Cells property may be more appropriate.
Perhaps the most important scenario in which the Cells property shows its usefulness is when you’re using variables instead of the actual numbers as the arguments for the Cells property. In practice, you’re likely to find yourself in this situation (using variables instead of hardcoded numbers as arguments of the Cells property) often.
The Cells property and the ability to use variables as arguments is helpful when carrying out certain activities with Visual Basic for Applications. A common case of such an activity is looping (a topic I cover here).
How To Refer To A VBA Range Object Using The Range.Offset Property
Just as the previously explained properties, the Range.Offset property also returns a Range object.
However, in the case of the Range.Offset property, the Range object returned is that located a certain number of rows and columns from a specified range.
In other words, the returned Range object is determined by the following factors:
- A base range, which is going to be the base of the offset.
- The number of rows by which the base range is to be offset.
- The number of columns by which the base range is to be offset.
The syntax of the Range.Offset property reflects these 3 elements. This syntax is “expression.Offset(Row_Offset, Column_Offset)”, where:
- “expression” is a variable representing a VBA Range object.
- “Row_Offset” is the number of rows by which the range is to be offset. This value can be either positive (offset is done downwards) or negative (offset is done upwards).
- “Column_Offset” is the number of columns by which the range is to be offset. In the case of positive values, the offset is made to the right. When using negative values, the offset is made to the left.
Both the Row_Offset and the Column_Offset arguments carry the offset from the upper-left cell of the VBA Range object represented by “expression”.
The way the Offset property works means that it can only be applied to a Range object. In other words, there is no Worksheet.Offset property. This means that this property is a great alternative for purposes of referring to a particular cell in relation to a range without using the more complicated methods that I explain above, namely applying the Range or the Cells properties to a Range object.
Let’s look at a few examples of how to use the Range.Offset property to refer to a VBA Range object:
How To Refer To A Single Cell Using The Range.Offset Property
In the simplest case, you can use Range.Offset for referring to a single cell as follows:
Application.Workbooks("Book1.xlsm").Worksheets("Sheet1").Range("A1").Offset(RowOffset:=1, ColumnOffset:=1)You can simplify this statement by omitting the keywords “RowOffset” and “ColumnOffset”. The resulting reference is the following:
Application.Workbooks("Book1.xlsm").Worksheets("Sheet1").Range("A1").Offset(1, 1)In this particular case, Visual Basic for Applications returns a cell that is 1 row below and 1 column to the right of cell A1. In other words, the base range is cell A1.
And, from there, VBA moves 1 row down and 1 column to the right. Therefore, the above reference, refers to cell B2.
In certain cases, you may want to create a relative reference in which the Range.Offset property only needs to move a certain number of rows or columns (but not both) to find the cell it should return. In these cases, you can simply omit the irrelevant argument.
For example, the following statements refer to a cell one row below the cell A1. In other words, it refers to cell A2:
Application.Workbooks("Book1.xlsm").Worksheets("Sheet1").Range("A1").Offset(RowOffset:=1) Application.Workbooks("Book1.xlsm").Worksheets("Sheet1").Range("A1").Offset(1)
Similarly, the following statements refer to cell B1, which is one column to the right of cell A1:
Application.Workbooks("Book1.xlsm").Worksheets("Sheet1").Range("A1").Offset(ColumnOffset:=1) Application.Workbooks("Book1.xlsm").Worksheets("Sheet1").Range("A1").Offset(, 1)
Let’s take a look at a different way to refer to the base range. The following statement also refers to a single cell. However, notice the difference in the way the base cell for the offset is expressed.
ActiveCell.Offset(1, 1)In this case, instead of using “Range”, I use the Application.ActiveCell property. This property returns a Range object that represents the current active cell.
Therefore, Visual Basic for Applications returns a cell that is 1 row below and 1 column to the right of the current active cell. For example, if the current active cell is A1, the statement above returns cell B2.
The Range.Offset property generates an error if it is used for trying to return a cell that doesn’t exist. This may happen, for example, if the current active cell is A1 and you use the following reference:
ActiveCell.Offset(-1, -1)The statement above is asking Visual Basic for Applications to return the cell that is 1 row above and 1 column to the left of cell A1. Since no such cell exists, an error is generated.
How To Refer To A Range Of Cells Using The Range.Offset Property
You already know the different operators that you can use for purposes of referring to a range of cells using Visual Basic for Applications. Particularly important is the colon (:) operator, which you can use to set up arrays and create references to ranges of contiguous cells.
If you want to refer to a range of cells using the Range.Offset property, you can simply use the same colon operator in order to define the cell range that is the base of the offset.
The logic of the offset continues to be the same.
Take a look, for example, at the following VBA Range object reference:
Application.Workbooks("Book1.xlsm").Worksheets("Sheet1").Range("A1:B5").Offset(3, 3)This statement proceeds as follows:
- It sets as base range that containing cells A1 through B5 (A1, A2, A3, A4, A5, B1, B2, B3, B4 and B5).
- It moves the range 3 cells to the right and 3 cells down.
As a consequence of the above, the statement returns the range from cells D4 to E8 (D4, D5, D6, D7, D8, E4, E5, E6, E7 and E8).
Why You Should Learn To Use The Range.Offset Property To Refer To Excel’s VBA Range Object
The Range.Offset property is (usually) most useful when:
- You’re working with variables instead of actual numbers as arguments; and
- In looping procedures.
The Range.Offset property is also commonly used by the macro recorder when you use relative references while recording a macro. Therefore, you can expect to encounter this type of reference structure constantly when working with macros and Visual Basic for Applications.
How To Refer To A VBA Range Object Using The Range.Item Property
For reasons that I explain at the end of this section, you may not end up using the Range.Item property too much in your day-to-day Excel work. However, you may still need to use this property from time to time. Additionally, having a good understanding of the Range.Item property is helpful for purposes of becoming a better user of the Cells property which I describe above and understanding its syntax.
Just as some of the other properties discussed throughout this VBA tutorial, the Range.Item property returns an object. The object is a range.
In this particular case, the range is determined by starting with a particular specified range. The Range.Item property then accesses a particular cell in that range, based on the arguments you use.
The syntax of the Range.Item property is very similar to those of the other properties covered by this VBA tutorial: “expression.Item(Row_Index,Column_Index)”. In this case, “expression” is a variable representing a Range object.
Notice, however, that in the case of the Range.Item property, I refer to “Row_Index” and “Column_Index”. In the case of most of the other properties covered in this VBA tutorial, the arguments made reference to either numbers (for example “Row_Number”) or letters (such as “Column_Letter”).
The only other time I use the word index for purposes of describing a property’s arguments is when explaining an alternative syntax for purposes of referring to a single cell with the Cells property. The reason why the Range.Item property uses index in order to identify both the row and column is because the behavior of the Row_Index argument is very similar to that of the Cell_Index argument in that use case of the Cells property.
Let’s take a closer look at this Row_Index argument. The main characteristics of this argument are the following:
- It is required.
- It must be a number.
- It determines the cell that you access within the relevant range. For these purposes, there are 2 options.
- If the only argument you’re using is Row_Index, cells are numbered from left to right and from top to bottom. I explain, in detail, how this works above.
- If you’re using both Row_Index and Column_Index, Row_Index determines the row of the cell you access within the applicable range.
The other argument of the Range.Item property (Column_Index) behaves slightly different. The following are its main characteristics:
- It’s optional.
- It can be a number or a string. As a consequence of this characteristic you can use both the column number or the column letter (wrapped in quotations) to refer to a particular column. I show you how this works below.
- It determines the column of the cell you access within the relevant range.
Both arguments are relative offsets. Visual Basic for Applications uses those arguments to determine how many rows and columns to move away from the originally specified range.
I explain (above) how, when applied to a Range object, the Cells property is not limited by the number of cells in the specified range. In other words, you can use the Cells property to refer to cells outside that range. The same thing happens with the Range.Item property.
After reading about the other properties above, you probably have a good idea about what the Range.Item property does. Nonetheless, let’s take a look at a couple of examples.
For example, the following statements all return cell A1 of Sheet1 in Book1.xlsm:
Application.Workbooks("Book1.xlsm").Worksheets("Sheet1").Range("A1:D10").Cells.Item(1) Application.Workbooks("Book1.xlsm").Worksheets("Sheet1").Range("A1:D10").Cells.Item(1, 1) Application.Workbooks("Book1.xlsm").Worksheets("Sheet1").Range("A1:D10").Cells.Item(1, "A")
However, let’s assume that you want to refer to cell B8. For these purposes, you can use either of the following references:
Application.Workbooks("Book1.xlsm").Worksheets("Sheet1").Range("A1:D10").Cells.Item(30) Application.Workbooks("Book1.xlsm").Worksheets("Sheet1").Range("A1:D10").Cells.Item(8, 2) Application.Workbooks("Book1.xlsm").Worksheets("Sheet1").Range("A1:D10").Cells.Item(8, "B")
Part of the importance of the Range.Item property is that it allows you to refer to a specific cell in relation to a range.
However, perhaps even more important for purposes of this VBA tutorial, the Item property is the default property for the Range object. You can generally omit the Item keyword before specifying the Row_Index and Column_Index arguments. In the case of the last example above, this results in the following shortened references:
Application.Workbooks("Book1.xlsm").Worksheets("Sheet1").Range("A1:D10").Cells(30) Application.Workbooks("Book1.xlsm").Worksheets("Sheet1").Range("A1:D10").Cells(8, 2) Application.Workbooks("Book1.xlsm").Worksheets("Sheet1").Range("A1:D10").Cells(8, "B")The structure used in these references probably looks quite familiar by now. The reason for this is that this structure is substantially the same as that which I describe above when explaining the Cells property.
Due mainly to this reason, you’ll probably won’t use the Range.Item property too often. Instead, you’ll likely resort to the Cells property.
However, now you know that, if required for your purposes, you can use the Range.Item property for purposes of referring to Excel’s VBA Range objects.
Furthermore, having a good knowledge about the Range.Item property is helpful for, among others purposes:
- Having a better understanding of the Cells property.
- Crafting better references to Excel’s VBA Range objects with the Cells property.
Conclusion
The Range object is one of the most important and frequently used Excel VBA objects.
Unfortunately, the topic of Excel’s VBA Range object can sometimes be confusing for certain users. One of the main reasons for this is the fact that there are several different ways to refer to the Range object.
This VBA tutorial provides a brief introduction to the topic of Excel’s VBA Range object. Perhaps more importantly, this post explains and illustrates some of the most common methods for purposes of creating appropriate references to the Range object.
Now that you’ve read this post, you probably have a good understanding of Excel’s VBA Range object and won’t be confused by the different alternatives you can use to reference it. In particular, you’re probably now an expert when it comes to creating references to Range objects using any of the following properties:
- Range.
- Cells.
- Offset.
- Item.
There are still some other ways to refer to and manipulate Excel’s VBA Range objects. Some of these are the Application.Union method and the Range.Areas property.

