
Word for Microsoft 365 Word 2021 Word 2019 Word 2016 Word 2013 Word 2010 Word 2007 More…Less
Underline words and the spaces between them
The quickest way to underline text is to press Ctrl+U and start typing. When you want to stop underlining, press Ctrl+U again.
You can also underline text and spaces in several other ways.
|
What do you want to do? |
Example |
|---|---|
|
Underline words and the spaces between them |
|
|
Underline words, but not the spaces between them |
|
|
Change the underline style and color |
|
|
Use a double underline |
|
|
Underline blank spaces |
|
|
Remove underlining |
text without underline |


-
Select the text that you want to underline.
-
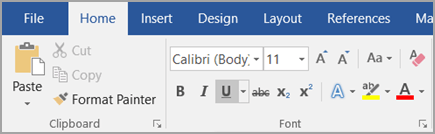
Go to Home > Underline. Or press Ctrl+U.

Underline words, but not the spaces between them
-
Select the text that you want to underline.
-
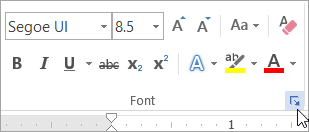
Go to Home and select Font dialog box launcher
.
-
Go to Font and select Words only in the Underline style drop-down list.
 .
.
Change the underline style and color
-
Select the text that you want to underline.
-
Go to Home and select Font dialog box launcher
.Tip: You can also use the keyboard shortcut Ctrl+D.
-
Use the Underline style drop-down list to select an underline style.
Use the Underline color drop-down list to change the color of the line.
Use a double underline
-
Select the text that you want to underline.
-
Go to Home and select Font dialog box launcher
.
-
Select double underline in the Underline style drop-down list.
Underline blank spaces
You can underline blank spaces by pressing Shift+Hyphen (-), but it is difficult to line up the underlines — if you are creating a fill-in form, for example. Also, if the AutoFormat option for changing underscore characters into border lines is turned on, pressing Shift+Hyphen (-) three or more times in a row will result in a line that extends the width of the paragraph, which may not be what you want.
A better way to underline blank spaces for a printed document is to use the Tab key and apply the underline formatting to the tab characters.
When you want to create an underline in an online form, insert table cells with the bottom border turned on.
Underline blank spaces for a printed document
To underline blank spaces for a printed document, use the Tab key and apply the underline formatting to the tab characters.
-
Go to Home > Show/Hide ¶ so that you can see the marks that indicate spaces and tab stops.
-
Press the Tab key.
-
Select the tab characters that you want to underline. A tab character looks like a small arrow.
-
Do one of the following:
-
Press Ctrl+U to apply a simple underline.
-
To apply a different style of underline, go to Home and select Font dialog box launcher
.Select Underline style to choose a different underline style.
-
Underline blank spaces for an online document
To create an underline in an online document or form, insert a table cell with the bottom border turned on. This method ensures that when someone types on the line, the line stays in place.
-
Click or tap where you want to insert a blank underline.
-
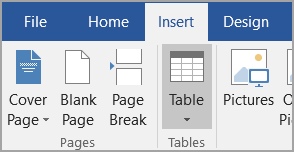
Go to Insert > Table.
-
Select the upper-left box to insert a 1×1 Table.
If you want to add introductory text, such as a name or Social Security Number, before the underline, insert a 2×1 Table.
To change the length of the line, move the pointer over the end of the table until it becomes a resize pointer
, and then move the arrow right or left to lengthen or shorten the line. -
Click or tap in the table (or in the second table cell if you created a 2×1 table).
-
The Table Tools appear. On the Design tab, select Borders > Borders and Shading.
-
Under Setting, select None.
-
Under Style, select the line type, color, and width that you want.
-
In the diagram under Preview, click or tap between the lower margin markers to add the bottom border. Make sure only the bottom line is displayed.
Note: If you prefer to view the table without the light gray gridlines that do not print, select the table, go to Layout next to the Table Design tab and select View Gridlines.
If you used a 2×1 table to make room for introductory text, you can type the text before the line.
 , and then move the arrow right or left to lengthen or shorten the line.
Remove underlining
To remove single underlining from words and spaces, select the underlined text and press Ctrl+U.
To remove other styles of underlining, press Ctrl+U twice.
Need more help?
Want more options?
Explore subscription benefits, browse training courses, learn how to secure your device, and more.
Communities help you ask and answer questions, give feedback, and hear from experts with rich knowledge.
Microsoft Word provides a rich list feature that allows you to create custom numbered and bulleted lists, but making some changes to the way a list appears may not be intuitive. If you want to align the bullets in a list with the text paragraphs preceding or following it, you must change the margin. You can do so by changing the paragraph settings of the list to match those of the paragraphs.
-
Click anywhere inside of the paragraph in which you want to align your bulleted list. Click the dialog launcher in the lower-right corner of the Paragraph section of the Home tab to open the Paragraph dialog box. Note the number in the Before Text box in the Indentation section. Click «OK» to close the dialog.
-
Click anywhere inside the bulleted list. Click the dialog launcher in the lower-right corner of the Paragraph section of the Home tab to open the Paragraph dialog box.
-
Change the number in the Before Text box in the Indentation section to match the number in the Paragraph settings. Click «OK» to apply the changes and align the list with the paragraph.
![]()
Download Article
A user-friendly guide to making different types of lines in Microsoft Word
![]()
Download Article
- Using Shapes to Draw a Line
- Using Borders to Add a Line
- Using Keyboard Shortcuts
- Using the Mobile App
- Q&A
- Tips
|
|
|
|
|
Do you want to create a horizontal line in your resumé or other Microsoft Word document? If you want to customize the color and format of the line, you can use the Shapes tool. If you need to make a quick, basic line, you can use the keyboard shortcut. While you can use the keyboard shortcut on Windows and Mac, you cannot use it on the mobile app. This wikiHow will show you how to insert different lines in Microsoft Word on your Windows, Mac, iPhone, or Android device.
Things You Should Know
- On desktop, go to the Insert tab. Click Shapes, then select a line. Click and drag across the document to create a line.
- To customize the line, double-click it. Click Shape Outline to change the color.
- On mobile, click the three dots. Tap Home and select Insert. Tap Shapes to select a line. Tap and drag across the document to create a line.
-
1
Open Microsoft Word on your Windows or Mac computer. Click or double-click the Word app icon, which resembles a white «W» on a dark-blue background.
- If you want to draw a line in an existing Word document, double-click the Word document to open it and skip the next step.
- You’ll need a subscription to use Office 365.
-
2
Click Blank document. It’s in the upper-left side of the page.
Advertisement
-
3
Click the Insert tab. This tab is in the blue ribbon at the top of the Word window, between Home and Draw.
-
4
Click Shapes. It’s in the Insert toolbar, next to the icon of an overlapping circle and square.
- A drop-down menu will appear.
-
5
Select a line shape. In the «Lines» heading, click one of the line templates. You can choose a line, line arrow, double line arrow, and more.
-
6
Draw your line. Click and drag across the document to create your line.
- If you need to adjust the line’s length and orientation, click the left or right circle. Drag it left or right to adjust the length, or drag it up and down to adjust the orientation.
- To move the line, double-click and drag it to the desired position.


Advertisement
-
1
Open Microsoft Word on your Windows or Mac computer. Click or double-click the Word app icon, which resembles a white «W» on a dark-blue background.
- If you want to draw a line in an existing Word document, double-click the Word document to open it and skip the next step.
-
2
Click Blank document. It’s in the upper-left side of the page.
-
3
Click the Home tab. This tab is in the blue ribbon at the top of the Word window, between File and Insert.
- You may already be on this tab by default.
-
4
Click the «Borders» arrow. This is next to the icon of the dotted square with a solid bottom line.
- A drop-down menu will open.
-
5
Click Horizontal Line. This will be towards the bottom, above Draw Table.
- A horizontal line will be added.
-
6
Format your line. Double-click the line; a dialogue box will appear.
- To change the line thickness, use the up and down arrow below Height. The higher the number, the thicker the line will be.
- To change the color, click the color box underneath Color. Select your desired color.
- Click OK to save and apply your changes.
- To move the line, double-click and drag it to the desired position.


Advertisement
-
1
Open Microsoft Word on your Windows or Mac computer. Click or double-click the Word app icon, which resembles a white «W» on a dark-blue background.[1]
- If you want to draw a line in an existing Word document, double-click the Word document to open it and skip the next step.
-
2
Click Blank document. It’s in the upper-left side of the page.
-
3
Place your cursor where you want your line to appear. You’ll need to be on a blank line, as this won’t work if there is text before or after your cursor on the same line.
- You’ll be creating a horizontal line that spans from one edge of your page to the other. The line will stop at your set margins.
- If you want to make the line span the whole page, you’ll need to change your document margins.
-
4
Type three dashes in a row. Use your dash key on the number row at the top of your keyboard, or on the numeric pad.
-
5
Press ↵ Enter to convert the dashes into a line. AutoCorrect will automatically create a solid line that will situate itself directly beneath the previous line of text.
- Note that the line does not occupy the space of a line of text, but instead exists between lines of text.
- If you do not have AutoCorrect enabled, do so by clicking File → Options → Proofing → AutoCorrect Options…. This will open a new window.
- Make sure the Border Lines box is checked. This can be found underneath Apply as you type.
- If you want to turn off AutoCorrect, uncheck the boxes.
-
6
Use different characters for different line styles. There are a variety of different lines that you can create by using characters other than the dash:[2]
- Thin line: Three hyphens (-).
- Thick line: Three underscores (_).
- Double line: Three equal signs (=).
- Dotted line: Three asterisk (*).
- Triple line: Three pound signs (#).
- Squiggly line: Three tildes (~).
-
7
Move the line by entering text above it. You can prompt the line to move down by typing text above it and then pressing Enter.
- Deleting text above the line will prompt it to move upward.


Advertisement
-
1
Open a document in the Microsoft Word app. This looks like a blue notebook next to a W.
- Microsoft Word is available for iOS in the App Store and for Android in the Google Play Store.
- Tap Blank document to open a new document or tap a file to open an existing document.
-
2
Tap ••• . This can be found above the keyboard, to the right.
- If you don’t see your keyboard, tap the document to bring it up.
- A new menu will open.
-
3
Tap Home. This will be to the left of the formatting window.
- A drop-down menu will open.
-
4
Tap Insert. You’ll see a list of all objects you can insert.
-
5
Tap Shapes. This is next to the icon of an overlapping circle and square.
-
6
Select a line shape. In the «Lines» heading, tap one of the line templates. You can choose a line, line arrow, double line arrow, and more.
-
7
Draw your line. Tap and drag across the document to create your line.
- Use two fingers to pinch and zoom out to view the entire document.
- If you need to adjust the line’s length and orientation, tap the left or right circle. Drag it left or right to adjust the length, or drag it up and down to adjust the orientation.
- To move the line, tap and drag it to the desired position.


Advertisement
Add New Question
-
Question
How do I view all available symbols in Microsoft Word?

Click «Insert» and then click «Symbols» and you should be shown a box with all of the symbols in it.
-
Question
How do I add a line on the first page, and no lines on the second?
Click «Insert» and then click «Symbols» and you should be shown a box with all of the symbols in it.
-
Question
How do I change the color of the line?
In the paragraph section, open the drop-down menu on the «Borders» button. At the very bottom is a «Borders and Shading» option. In that option, change the color of the bottom border to your specified color. Click the «Borders» button.
See more answers
Ask a Question
200 characters left
Include your email address to get a message when this question is answered.
Submit
Advertisement
-
Looking for money-saving deals on Microsoft Office products? Check out our coupon site for tons of coupons and promo codes on your next subscription.
Thanks for submitting a tip for review!
Advertisement
About This Article
Article SummaryX
1. Click Insert.
2. Click Shapes.
3. Select a line template.
4. Click and drag across your Microsoft Word document to draw the line.
Did this summary help you?
Thanks to all authors for creating a page that has been read 2,043,531 times.
Is this article up to date?
In today’s article, we find out 3 easy ways to guide you when insert different types of horizontal lines in Word documents.
Now and then, if you write a long Word document, you may encounter a situation where you have to add some horizontal lines. Never overlook these lines. They are often easy on the eyes so that your document will be clear and reader-friendly.
Following are 3 methods for you to get different styles of lines you want. Please read on to find out the exact steps.
Tip 1: Insert Horizontal Lines by Setting “Borders and Shading”
- To begin with, put your cursor right at the place where you want to insert a horizontal line.
- Click “Home”.
- Then, find and click the “Borders and Shading” icon in “Paragraph” area.
- Click “Horizontal Line” on the drop list of “Borders and Shading”.

- Now you have got a horizontal line. In case you want to make your line special, just right click the line to set up.

- Click “Format Horizontal Line” on the menu.
- In “Format Horizontal Line” window, you will be able to change the color, height and so on.
- Remember to click “OK” when you are done.

- Right click the line again.
- Choose “Borders and Shading” this time.
- Click “Horizontal Line” button on the left down of the “Borders and Shading” window.

- Now you can choose one style you like for your line.

- Still, click “OK” to save the change as your last move.


Tip 2: Insert Lines with the Help of Special Characters
Sometimes you may need lines of different types. Believe it or not, these lines can make your document appealing visually. Certainly, there is a shortcut to do so.
- First and foremost, you have to place your cursor properly before you start all the work.
- Type certain characters three times.
- Then press “Enter” and you will be able to get lines you like.
For example, you can get lines as below:

This is definitely a quick way to get various of horizontal lines in the least time. Still, there is the third way to get this task done.
Tip 3: Type Lines Directly
Sure, you can also type the lines you want directly so as to save yourself much time.
If you want the most common horizontal line, follow the steps below:
- Put your cursor at the place you would like to insert a line.
- Press “Shift” and “-(hyphen)” in succession at the same time.
If you want a broken line, then follow the steps below:
- Put your cursor at the place you would like to insert a line.
- Press “-(hyphen)” in succession.
Watch out the File corruption
Word is perhaps one of the most used software in office work. With its powerful functions, we can easily carry out our daily office performance. However, despite all the advantages, we still need to be aware of unexpected document corruption. Thus, it’s advisable to keep regular backup of some important files.
When the tragedy happens, remember to use the built-in function of Word. If that doesn’t work, you can turn to third-party doc repair product.
Author Introduction:
Vera Chen is a data recovery expert in DataNumen, Inc., which is the world leader in data recovery technologies, including excel recovery and pdf repair software products. For more information visit www.datanumen.com
465
465 people found this article helpful
Use these three methods to quickly insert a line in your document
Updated on December 4, 2020
What to Know
- AutoFormat: Type the three characters for the desired line style > Enter.
- Horizontal Line tool: In Home tab, select Borders drop-down menu > Horizontal Line.
- Shapes menu: Go to Insert > Shapes. In Lines group, select and drag a line shape across the page.
This article covers three ways to insert horizontal lines in Word for Microsoft 365, Word 2019, Word 2016, Word 2013, and Word 2010.
Use AutoFormat to Insert a Line in Word
You can quickly insert a line into a Word document with the AutoFormat feature. To create a line, place the cursor in the location that you’d like to insert it, type the three characters for the desired line style, then press Enter.
To create the different types of lines, press the associated keys on the keyboard:
- Plain single line: Three hyphens (—)
- Plain double line: Three equal signs (===)
- Broken or dotted line: Three asterisks (***)
- Bold single line: Three underline symbols (___)
- Wavy line: Three tildes (~~~)
- Triple line with a thick center: Three number signs (###)
Here’s what each of these line types looks like in Word:
Use the Horizontal Line Tool to Insert a Line in Word
To insert a line into a Word document using the built-in Horizontal Line tool:
-
Place the cursor where you want to insert a line.
-
Go to the Home tab.
By default, the Home tab is selected when you open a new or existing Word document.
-
In the Paragraph group, select the Borders drop-down arrow and choose Horizontal Line.
-
To change the look of the line, double-click the line in the document.
-
In the Format Horizontal Line dialog box, modify the width, height, color, and alignment of the line.
Use the Shapes Menu to Insert a Line in Word
A third way to add a line to a Word document is to draw it on the page. The Shapes menu contains several line options, including lines with arrow points on one or both ends. After you draw the line, customize the color and appearance.
-
Place the cursor in the spot where you want to insert a line.
-
Go to the Insert tab.
-
In the Illustrations group, select the Shapes drop-down arrow.
-
In the Lines group, choose a line shape.
-
In the Word document, drag across the location where you want the line to appear.
-
To change the look of the line, select the line to enable the Shape Format tab. (Some versions of Word call this Format.)
-
Go to the Shape Format tab and change the color, use a different line style, or apply effects.
FAQ
-
How do I change line spacing in Word?
To fix spacing in Word, highlight the text whose spacing you want to change and select the Home tab. Next to Paragraph, select the down arrow to expand the options. In the Spacing section, set the amount of space before and after line breaks or choose a preset line-spacing option.
-
How do I add a signature line in Word?
To insert a signature line in Word, go to the Insert tab and select Signature Line. Selecting few or no options leaves a blank line, and a signature line will appear in the document.
-
How do I add line numbers in Word?
To add line numbers in Word, go to Layout > Page Setup > Line Numbers and choose Continuous, Restart Each Page or Restart Each Section > Line Numbering Options.
Thanks for letting us know!
Get the Latest Tech News Delivered Every Day
Subscribe
Insert Lines in Microsoft Word Documents
by Avantix Learning Team | Updated October 9, 2021
Applies to: Microsoft® Word® 2010, 2013, 2016, 2019 and 365 (Windows)
You can insert a line in Word using the Ribbon or by using keyboard shortcuts. It’s best to avoid drawing lines and instead insert border lines in Microsoft Word (normally paragraph borders) so the line or lines will move as you edit the document.
In this article, we’ll focus on inserting lines using borders attached to paragraphs. In Microsoft Word, anything with a hard return after it is a paragraph. If you use border lines, you can customize the type of border, line thickness and color. You can also include paragraph border lines in styles so they will appear throughout your document. If you draw lines using Insert Shapes, you’ll have to worry about the line being inline or floating.
You can insert a line in Word in 3 ways using borders:
- Use the Borders command on the Home tab in the Ribbon
- Select and apply different types of lines using the Borders and Shading dialog box
- Insert different types of lines using keyboard shortcuts (which add lines using AutoCorrect)
Recommended article: How to Keep Text Together in Microsoft Word
Do you want to learn more about Microsoft Word? Check out our virtual classroom or live classroom Word courses >
Inserting a line using the Borders button
To insert a line in Word above and / or below a paragraph using the Borders button:
- Select the paragraph(s) to which you want to add a line.
- Click the Home tab in the Ribbon.
- Click Borders in the Paragraph group. A drop-down menu appears.
- Select the line you want to use.
Below is the Borders command in the Ribbon in Word:
![]()
Removing lines using the Borders command
To remove a border line or lines from one or more paragraphs:
- Select the paragraph(s) with the border lines you want to remove.
- Click the Home tab in the Ribbon and then click Borders. A drop-down menu appears.
- Choose No Border from the drop-down menu.
Inserting a line using the Borders and Shading dialog box
You can apply a line or custom border lines to one or more paragraphs using the Borders and Shading dialog box.
To insert a line in Word above and / or below a paragraph using the Borders and Shading dialog box:
- Select the paragraph(s) to which you want to add a line.
- Click the Home tab in the Ribbon.
- Click Borders in the Paragraph group. A drop-down menu appears.
- Select Borders and Shading. A dialog box appears.
- Select a border style, color and width.
- Click between the guides in the sample area on the right (above or below the sample).
- Click Options (if required), enter any offset amounts to control the distance between the line and the paragraph and click OK.
- In Apply to, ensure Paragraph is selected.
- Click OK.
Below is the Borders and Shading dialog box where you can add a line or lines to paragraphs:

Removing lines using the Borders and Shading dialog box
To remove lines from one or more paragraphs using the Borders and Shading dialog box:
- Select the paragraph(s) with the lines you want to remove.
- Click the Home tab in the Ribbon and click Borders. A drop-down menu appears.
- Select Borders and Shading. A dialog box appears.
- Click None in the Setting area.
- In Apply to, ensure Paragraph is selected.
- Click OK.
Inserting a line using keyboard shortcuts
You can also insert a horizontal line using keyboard shortcuts (which insert border lines as AutoCorrect entries).
Type the following characters and then press Enter or Return to insert lines:
- To insert a plain single line, type three hyphens (—).
- To insert a plain double line, type three equal signs (===).
- To insert a dotted line, type three asterisks (***).
- To insert a bold single line, type three underlines (___).
- To insert a wavy line, type three tildes (~~~).
- To insert a triple line, type three number signs or hash tags (###).
To remove these lines, select the paragraph with the line, click the Borders button on the Home tab and select No Border.
Subscribe to get more articles like this one
Did you find this article helpful? If you would like to receive new articles, join our email list.
More resources
How to Double Space in Word (4 Ways)
14 Shortcuts to Quickly Select Text in Microsoft Word
4 Ways to Insert or Type the Pound Symbol in Word (£)
How to Create a Hanging Indent or First Line Indent in Microsoft Word
How to Insert an Em or En Dash in Microsoft Word (4 Ways with Shortcuts)
Related courses
Microsoft Word: Intermediate / Advanced
Microsoft Excel: Intermediate / Advanced
Microsoft PowerPoint: Intermediate / Advanced
Microsoft Word: Long Documents Master Class
Microsoft Word: Styles, Templates and Tables of Contents
Microsoft Word: Designing Dynamic Word Documents Using Fields
VIEW MORE COURSES >
Our instructor-led courses are delivered in virtual classroom format or at our downtown Toronto location at 18 King Street East, Suite 1400, Toronto, Ontario, Canada (some in-person classroom courses may also be delivered at an alternate downtown Toronto location). Contact us at info@avantixlearning.ca if you’d like to arrange custom instructor-led virtual classroom or onsite training on a date that’s convenient for you.
Copyright 2023 Avantix® Learning
Microsoft, the Microsoft logo, Microsoft Office and related Microsoft applications and logos are registered trademarks of Microsoft Corporation in Canada, US and other countries. All other trademarks are the property of the registered owners.
Avantix Learning |18 King Street East, Suite 1400, Toronto, Ontario, Canada M5C 1C4 | Contact us at info@avantixlearning.ca