
Word for Microsoft 365 Word for Microsoft 365 for Mac Word for the web Word 2021 Word 2021 for Mac Word 2019 Word 2019 for Mac Word 2016 Word 2016 for Mac Word 2013 Word 2010 Word for Mac 2011 More…Less
You can control the vertical space between the lines of text in your document by setting the line spacing. Or, you can change the vertical space between paragraphs in your document by setting the spacing before or spacing after paragraphs. You can also choose to keep lines of text together or keep paragraphs together on a page.
Change the line spacing in an entire document
-
Go to Design > Paragraph Spacing.
-
Choose an option. To single space your document, select No Paragraph Space.
To return to the original settings later, go to Design > Paragraph Spacing and choose the option under Style Set. This may be Default or the name of style you’re currently using.
Change the line spacing in a portion of the document
-
Select one or more paragraphs to update. Press Ctrl + A to select all.
-
Go to Home > Line and Paragraph Spacing

-
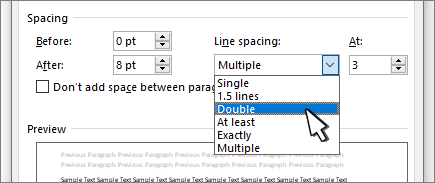
Select Line Spacing Options and choose an option in the Line spacing box.
-
Adjust the Before and After settings to change spacing between paragraphs.
-
Select OK.

For more info, see Adjust indents and spacing.
Change the line spacing in an entire document
-
Go to Design > Paragraph Spacing.
-
Choose the option you want. If you want to single space your document, choose No Paragraph Space.

This overrides the settings of the style you’re currently using. If you decide later to return to the original settings, go to Design > Paragraph Spacing and choose the option under Style Set. The option might be Default, as shown above, or it will show the name of style you’re currently using.
Change the line spacing in a portion of the document
-
Select the paragraphs you want to change.
-
Go to Home > Line and Paragraph Spacing.
-
Choose the number of line spaces you want or select Line Spacing Options, and then select the options you want under Spacing.
-
To change the spacing before or after each of the paragraphs in the text you selected, click the arrow next to Before or After and enter the amount of space that you want.
-
Select OK.

-
Select the paragraph whose lines you want to keep together.
-
Go to Format > Paragraph >Line and Page Breaks.
-
Select Keep lines together.
-
Select the first of the two paragraphs that you want to keep together.
Tip: If you want to keep more than two paragraphs together, select all but the last paragraph.
-
Go to Format > Paragraph.
-
Go to Line and Page Breaks.
-
Select Keep with next.
-
Select OK.
-
Select the paragraphs you want to change, or press Ctrl+A to select everything.
-
Go to Home > Line Spacing.
-
Choose the number of line spaces you want, or select Line Spacing Options and then select the options you want in the Paragraph dialog box under Spacing:
Tip: If you want to change the spacing before or after the selected paragraphs, select the arrows in the Before or After boxes, or type a number directly.
Need more help?
Want more options?
Explore subscription benefits, browse training courses, learn how to secure your device, and more.
Communities help you ask and answer questions, give feedback, and hear from experts with rich knowledge.

There are several ways to adjust line spacing in Microsoft Word. Today’s tutorial explains the basic method using the ribbon and a more advanced method using the Paragraph dialog box.
See the Quick Tip at the bottom of this tutorial to learn how to single-space an entire document from the Paragraph dialog box.
This tutorial is available as a YouTube video showing all the steps in real time.
Watch more than 150 other document software tutorials on my YouTube channel.
The images below are from Word for Microsoft 365.The steps are the same in Word 2021, Word 2019, and Word 2016, and similar for Word 2013 and Word 2010. However, your interface may look slightly different in those older versions of the software.
Basic Method: Adjust Line Spacing from the Ribbon
- Select the Home tab in the ribbon.

- (Optional Step) Select the Show/Hide button in the Paragraph group to show paragraph break symbols and other formatting that may affect line spacing.

- Select the text with the line spacing that needs to be changed.

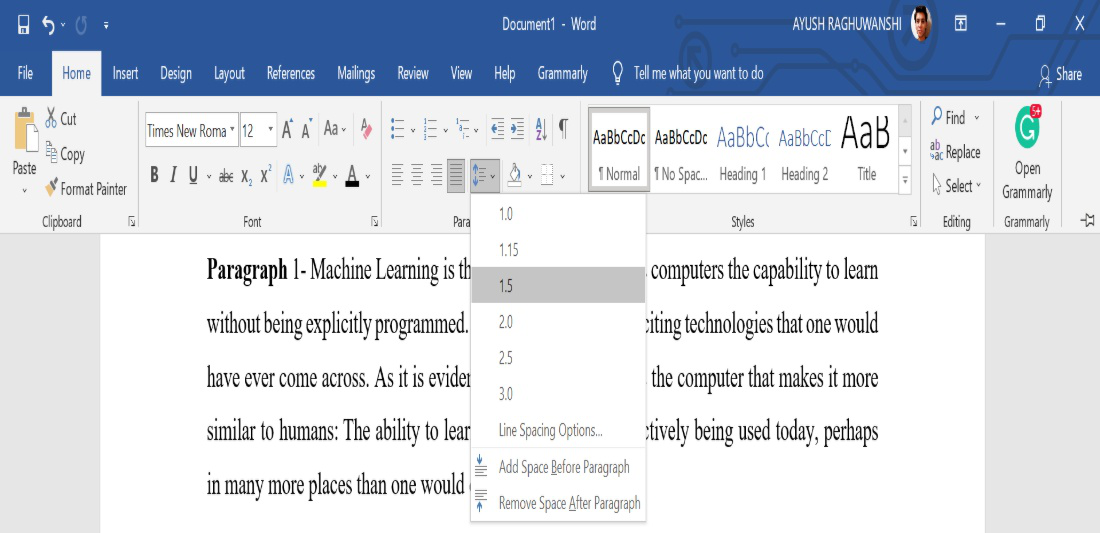
- Select the Line and Paragraph Spacing button in the Paragraph group.

- Select an option from the drop-down menu:
A. Numbers 1.0 through 3.0 add space between lines.
B. Add Space Before Paragraph adds space before paragraphs but not before the lines within them.
C. Remove Space After Paragraph removes space after paragraphs but not after the lines within them.
These three options are based on your current font size with 1.0 being the equivalent of single-spacing.

Your changes will be applied immediately.

Note that you can apply the individual line spacing (the numbers 1.0 through 3.0) and the paragraph spacing to the same text to further customize your results.
- (Optional Step) Select the Show/Hide button again to hide paragraph symbols and other formatting (see figure 2).
Now, let’s move on to an advanced method offering additional spacing options.
Advanced Method: Adjust Line Spacing from the Paragraph Dialog Box
- Select the Home tab in the ribbon (see figure 1).
- (Optional Step) Select the Show/Hide button in the Paragraph group to show paragraph break symbols and other formatting that may affect line spacing (see figure 2).
- Select the text with the line spacing that needs to be changed (see figure 3).
Pro Tip: PC users can press Ctrl + A to select the entire document if all the line spacing needs to be changed. However, this includes items you may not want to alter, including headings, tables, table titles, figure captions, tables of contents, footnotes, endnotes, and reference lists.
- Select the dialog box launcher in the Paragraph group.

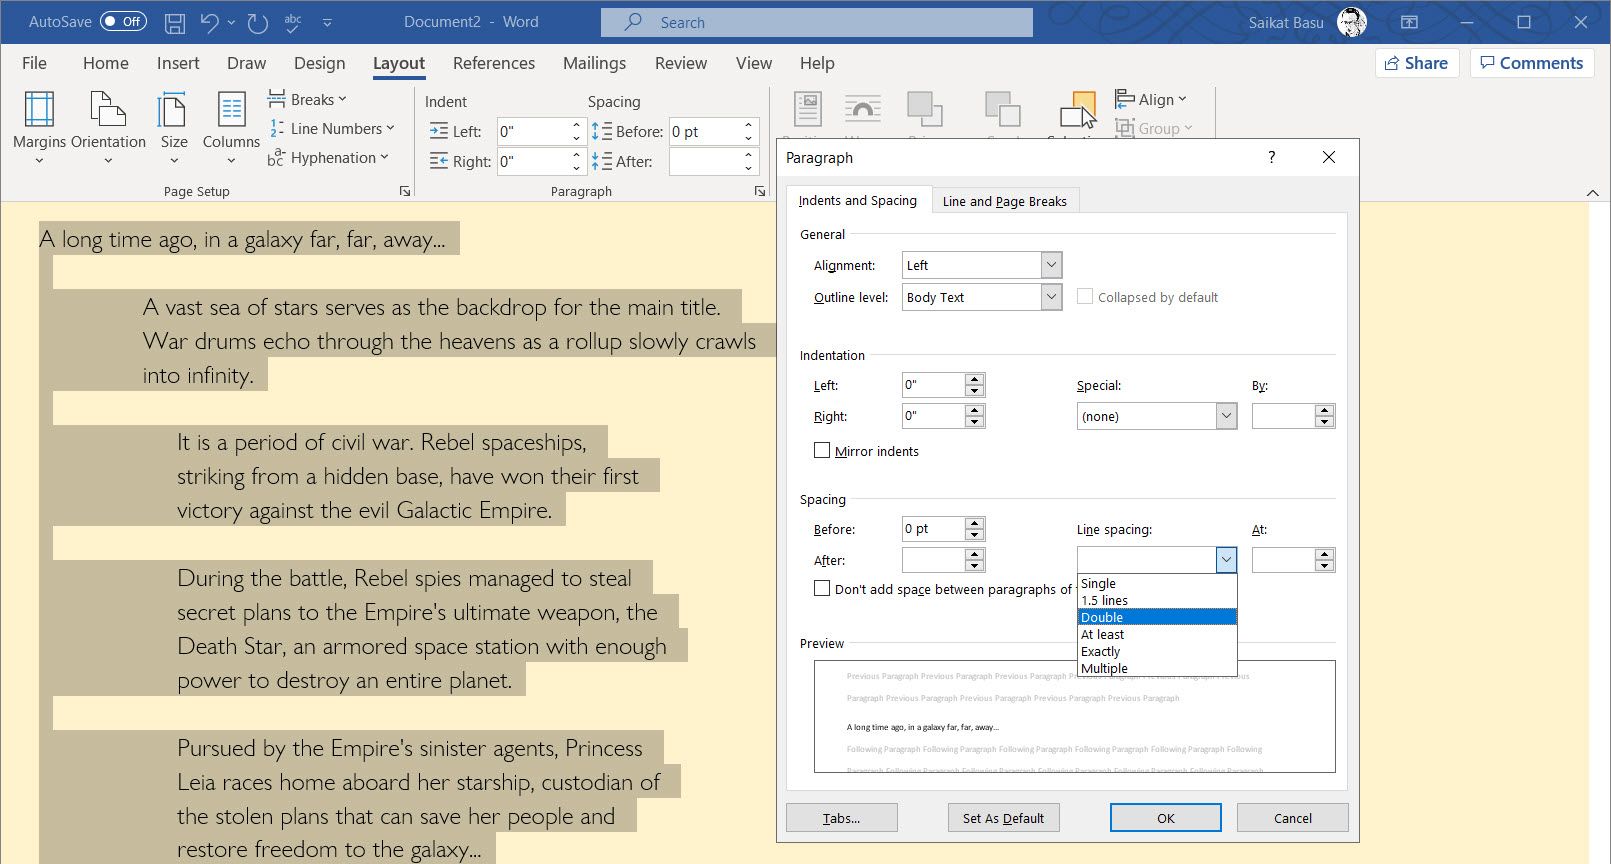
- Make changes in the Spacing section of the Paragraph dialog box:
A. The Before and After boxes represent the spaces before and after paragraphs measured in points with one point being 1/72 of an inch tall. Use the increment arrows to choose a whole number or enter a number with a decimal (e.g., 2.75) directly into the box.
B. The Line spacing drop-down menu offers six options:
1. Single—Creates single-spacing based on your current font size.
2. 1.5 Lines—Creates a space and a half as large as your current font size.
3. Double—Creates double-spacing based on your current font size.
4. At Least—Determines the minimum amount of space between lines based on the number of points entered in the At box.
5. Exactly—Creates space between lines based on the number of points entered in the At box.
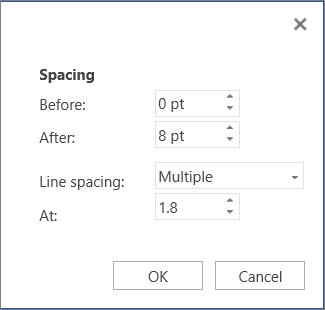
6. Multiple—Creates spacing multiplied by the number entered in the At box. For example, if you enter four in the At box, your spacing will be four times as large as your current single-spacing.
C. Don’t add space between paragraphs of the same style—For many users, this will remove spaces between all paragraphs because general documents commonly have only one paragraph style.

Note that the Preview box updates as you make adjustments in the Spacing section.
- Select the OK button to close the Paragraph dialog box.

- (Optional Step) Select the Show/Hide button again to hide paragraph symbols and other formatting (see figure 2).
Quick Tip: Single-Space an Entire Document from the Paragraph Dialog Box
- Select the Home tab in the ribbon (see figure 1).
- Select the entire document. (PC users can press Ctrl + A.)
- Select the dialog box launcher in the Paragraph group (see figure 7).
- Enter 0 in the Before box in the Paragraph dialog box (see figure 8).
- Enter 0 in the After box in the Paragraph dialog box (see figure 8).
- Select Single in the Line spacing drop-down menu (see figure 8).
- Select the OK button (see figure 9).
Related Resources
How to Adjust Letter Spacing in Microsoft Word (PC & Mac)
How to Adjust the Space between Words in Microsoft Word
How to Adjust Page Margins in Microsoft Word
Updated June 25, 2022
Line Spacing refers to the amount of space between any two lines in the Word Document. The default size of Line Spacing is 1.08 in MS Word. However, we can add custom line spaces to different lines, paragraphs in our Word Document according to our requirements and ensure quite good readability of our content to others.
In MS Word there are multiple ways to adjust Line Spacing which are as follows:
Method 1: Using the Line Spacing button
One way of setting the Line Spacing is using directly the Line and Paragraph Spacing feature in MS Word, which comes under the Home menu.
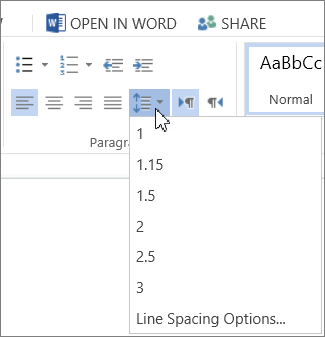
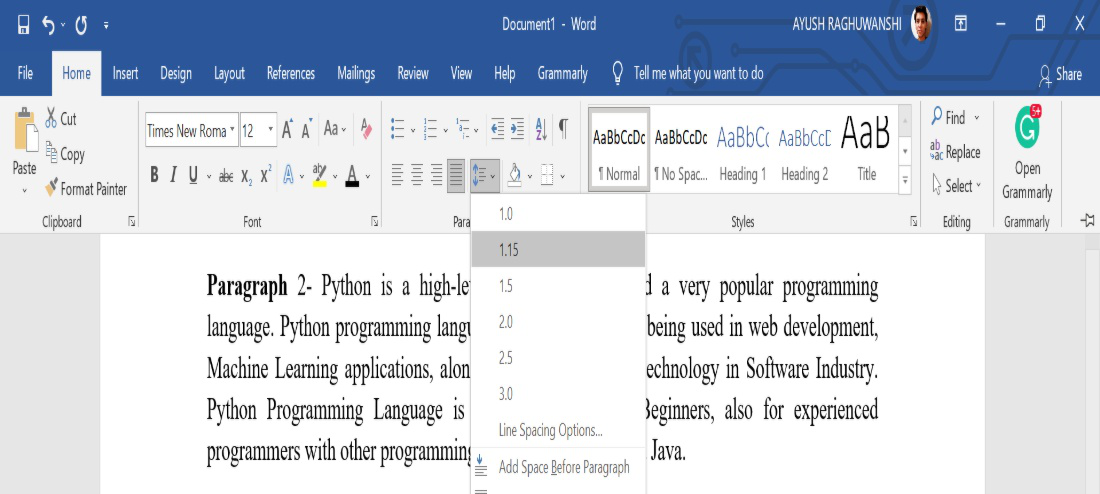
There are multiple Line Spaces like: 1.0, 1.15, 1.5, 2.0, 2.5, 3.0, etc.
Steps to Apply:
Step 1: Select the text/line/Paragraph you want to change the spacing.

Step 2: Now, select the Line and Paragraph Spacing tab from the Paragraph menu under the Home tab and select the line spacing of your choice.
Perform the same steps for different line spacing:
- Select the text/line/Paragraph you want to change the spacing.

- Now, select the Line and Paragraph Spacing tab from the Paragraph menu under the Home tab and select the line spacing of your choice.
- Select the text/line/Paragraph you want to change the spacing.

- Now, select the Line and Paragraph Spacing tab from the Paragraph menu under the Home tab and select the line spacing of your choice.

Results:
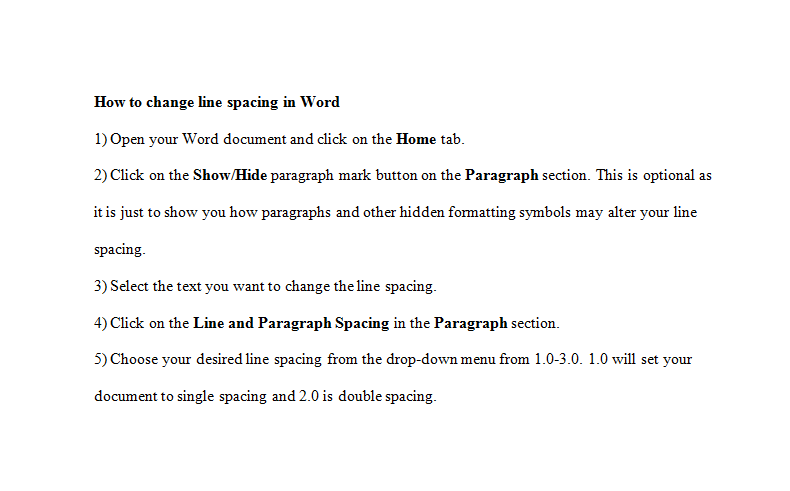
Final Result of the Complete Word Document.

Method 2: Using Paragraph Dialog Box
Another way of setting the Line Spaces is using the Paragraph dialog box feature in MS Word. The Paragraph dialog box provides a wide variety of features along with Line Spacing that we can use in our Word Document to modify beautifully and accurately.
There are multiple Line Spaces in the Paragraph dialog box like- Single, 1.5 lines, Double, At least, Exactly, Multiple, etc,
Steps to Apply:
Step 1: Select the text/line/Paragraph you want to change the spacing.

Step 2: Now, select the Show/Hide Paragraph tab from the Paragraph menu under the Home tab.

Step 3: Now, Select the dialog box launcher-Paragraph Setting from the Paragraph menu under the Home tab.
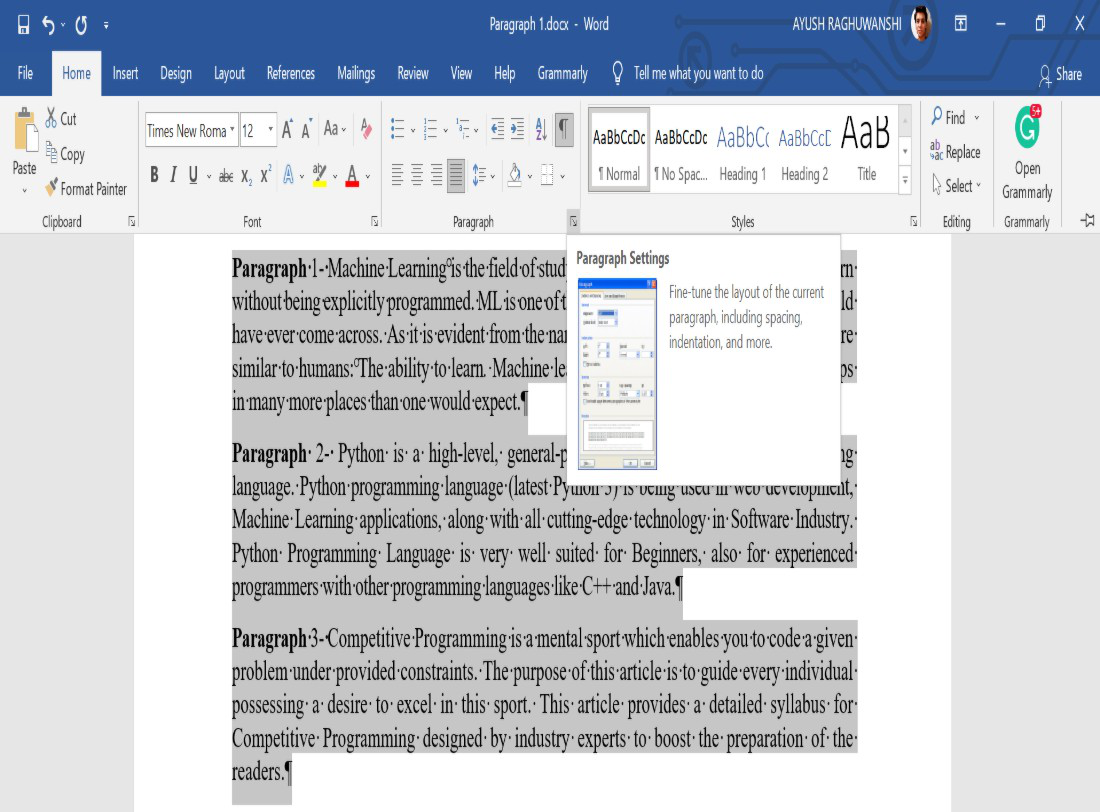
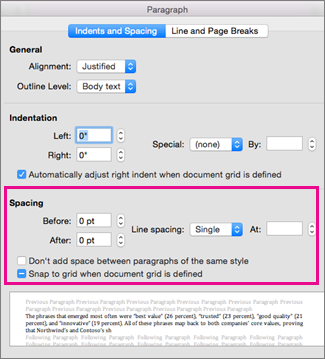
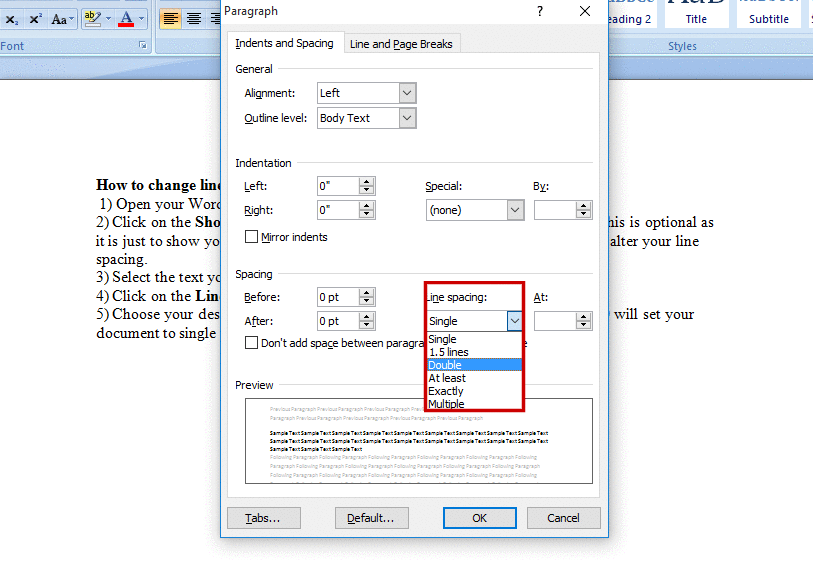
Step 4: Then select the Line Spacing from the dialog box under the Indents and Spacing tab- Single, 1.5 lines, Double, At least, Exactly, Multiple, etc, and then press the OK button.

Result:
As the whole Document was selected initially, so the Complete Word Document’s line spacing is changed to 1.5 lines.

Want to improve the readability of your text or fit more text in your Word document? Changing line spacing can help with that.
There are various ways you can change the line spacing of your Word document. This article is going to show you step by step how to change line spacing in Word.
How to Change Line Spacing in Word
1. Open your Word document and click on the Home tab.

2. Click on the Show/Hide paragraph mark button on the Paragraph section. This is optional, as it is just to show you how paragraphs and other hidden formatting symbols may alter your line spacing.
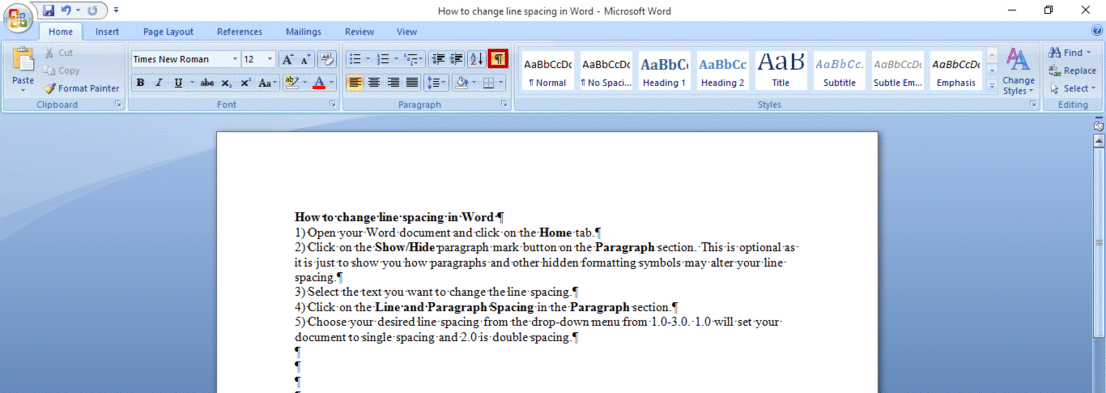
3. Select the text you want to change the line spacing.
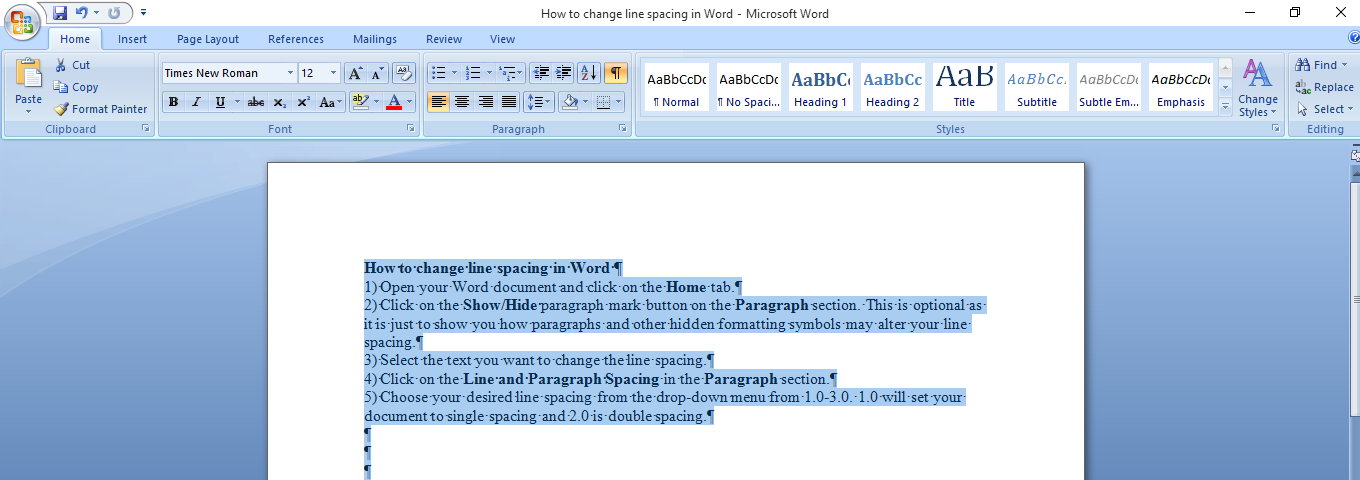
4. Click on the Line and Paragraph Spacing in the Paragraph section.
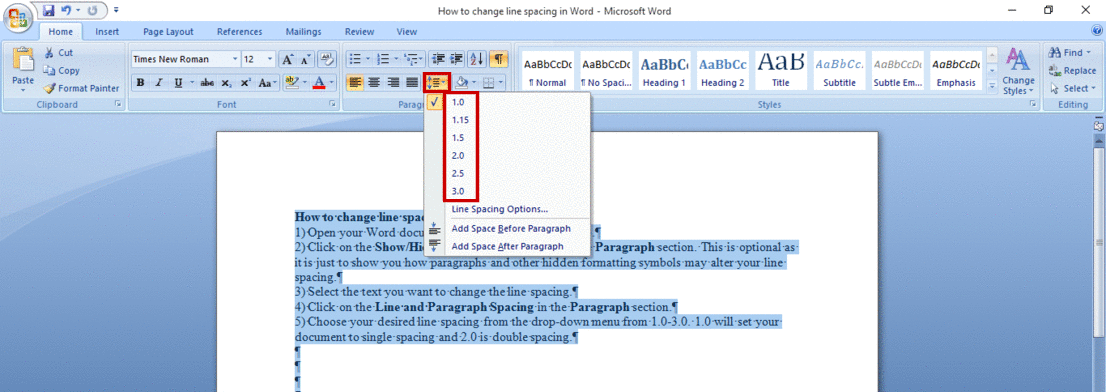
5. Choose your desired line spacing from the drop-down menu from 1.0-3.0. Here, 1.0 will set your document to single spacing and 2.0 is double-spacing.
How to Change Line Spacing in Word From the Paragraph Dialog Box
1. You can change line spacing in Word using the Paragraph Dialog Box. The process is the same as above, however when you get to step 4, click on the Paragraph Dialog Box.
![]()
2. The Paragraph Dialog Box will pop up. Click on to Line spacing and choose your desired line spacing. Click OK to set the change in line spacing.
How to Double Space in Word From the Page Layout Tab
To use this method:
- Open Microsoft Word.
- Click on the Page Layout tab.
- Go to the Paragraph section. Click on the down-facing arrow in the bottom right corner, which will pop the Paragraph dialog box.
- Click on the Indents and Spacing tab.
- In the Spacing segment, look for the Line Spacing box and click on it.
- Then click on Double from the list box.
- Click OK to set the double-spacing, and that will also exit the dialog box.
Line Spacing in Word
One of the easiest ways to improve the readability of your Word document is by changing the line spacing. With the above steps, you can do that and have a readable document.
A TextBox simply shows single or multiline text with no formatting options — it can have a font but that applies to the TextBox and not to the text, so you can’t have paragraph settings like line spacing as far as I know.
My first suggestion would be to use a RichTextBox, but then again, RTF doesn’t have a code for line spacing so I believe that would be impossible as well.
So my final suggestions is to use an owner-drawn control. It shouldn’t be too difficult with a fixed-width font — you know the location of each character is (x*w, y*h) where x and y are the character index and w and h are the size of one character.
Edit: Thinking about it a bit more, it’s even simpler — simply separate the string to lines and draw each line.
Here’s a simple control that does just that. When testing it I found that for Font = new Font(FontFamily.GenericMonospace, 10, FontStyle.Regular), the best value for Spacing was -9.
/// <summary>
/// Displays text allowing you to control the line spacing
/// </summary>
public class SpacedLabel : Control {
    private string[] parts;

    protected override void OnPaint(PaintEventArgs e) {
        Graphics g = e.Graphics;
        g.Clear(BackColor);

        float lineHeight = g.MeasureString("X", Font).Height;

        lineHeight += Spacing;

        using (Brush brush = new SolidBrush(ForeColor)) {
            for (int i = 0; i < parts.Length; i++) {
                g.DrawString(parts[i], Font, brush, 0, i * lineHeight);
            }
        }
    }

    public override string Text {
        get {
            return base.Text;
        }
        set {
            base.Text = value;
            parts = (value ?? "").Replace("r", "").Split(new[] { 'n' }, StringSplitOptions.RemoveEmptyEntries);
        }
    }

    /// <summary>
    /// Controls the change in spacing between lines.
    /// </summary>
    public float Spacing { get; set; }
}