
Word for Microsoft 365 Word 2021 Word 2019 Word 2016 Word 2013 Word 2010 Word Starter 2010 More…Less
You can make a chart in Word. If you have lots of data to chart, create your chart in Excel, and then copy from Excel to another Office program. This is also the best way if your data changes regularly and you want your chart to always reflect the latest numbers. In that case, when you copy the chart, keep it linked to the original Excel file.
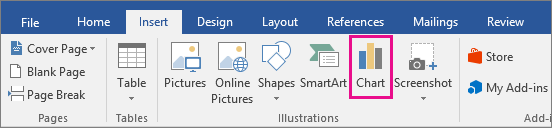
To create a simple chart from scratch in Word, click Insert > Chart, and pick the chart you want.
-
Click Insert > Chart.

-
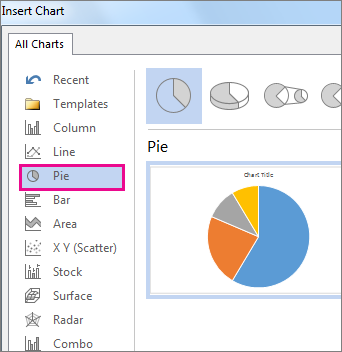
Click the chart type and then double-click the chart you want.
-
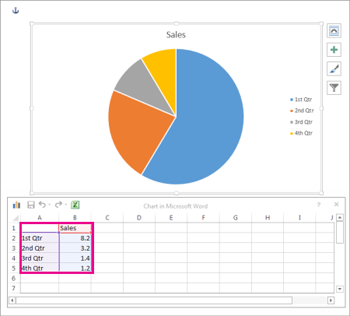
In the spreadsheet that appears, replace the default data with your own information.
-
When you’ve finished, close the spreadsheet.
-
If you want, use the Layout Options button
to arrange the chart and text in your document.
 to arrange the chart and text in your document.
You can make a chart in Word or Excel. If you have lots of data to chart, create your chart in Excel, and then copy from Excel to another Office program. This is also the best way if your data changes regularly and you want your chart to always reflect the latest numbers. In that case, when you copy the chart, keep it linked to the original Excel file.
To create a simple chart from scratch in Word, click Insert > Chart and pick the chart you want.
-
Click Insert > Chart.
-
Click the chart type and then double-click the chart you want.
-
In the spreadsheet that appears, replace the default data with your own information.
-
When you’ve finished, close the spreadsheet.
-
If you want, use the Layout Options button
to arrange the chart and text in your document.
Important:
Office 2010 is no longer supported. Upgrade to Microsoft 365 to work anywhere from any device and continue to receive support.
Upgrade now
In Microsoft Word 2010, you can insert many kinds of data charts and graphs, such as column charts, line graphs, pie charts, bar charts, area graphs, scatter graphs, stock charts, surface charts, doughnut charts, bubble graphs, and radar graphs.
Notes:
-
Don’t see the chart that you want in this article? For more information about the variety of graphs and charts you can use, see Available chart types.
-
Want to create an organization chart? For more information about how to create organization charts, see Create an organization chart.
-
If Microsoft Excel 2010 isn’t installed on your computer, you will not be able to take advantage of the advanced data charting capabilities in the Microsoft Office 2010. Instead, when you create a new data chart in Word 2010, Microsoft Graph opens.
How?
|
|
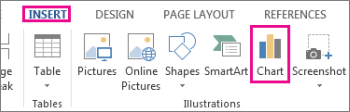
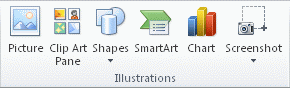
On the Insert tab, in the Illustrations group, click Chart.
|

|
|
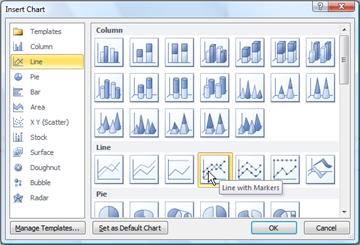
In the Insert Chart dialog box, click the arrows to scroll through the chart types. Select the type of chart that you want and then click OK.
When you rest the mouse pointer over any chart type, a ScreenTip displays its name. |

|
|
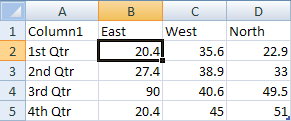
Edit the data in Excel 2010. When you are finished editing your data, you can close Excel.
Sample data in an Excel worksheet |

Tips
-
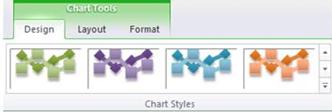
To get a good idea of what you can add to or change in your chart, under Chart Tools, click the Design, Layout, and Format tabs, and then explore the groups and options that are provided on each tab.
Note: If you don’t see the Chart Tools, make sure that you click anywhere inside the chart to activate it.
-
You can also access design, layout, and formatting features that are available for specific chart elements (such as chart axes or the legend) by right-clicking those chart elements.
More information
-
To learn about the available chart types, see Available chart types.
-
To edit data in your chart, see Change the data in an existing chart.
Top of Page
See also
Present data in a chart
Need more help?
Want more options?
Explore subscription benefits, browse training courses, learn how to secure your device, and more.
Communities help you ask and answer questions, give feedback, and hear from experts with rich knowledge.
To insert a line graph, go to the Insert Tab and click on Charts. A pop-up window will appear containing different types of charts and graphs. Scroll down to Line Chart and select the desired one. Then click on OK to insert the line graph on your blank page.
Contents
- 1 How do I make a line graph in Word 2021?
- 2 How do I make a line graph?
- 3 How do you make a line of best fit graph on Microsoft Word?
- 4 How do you make a graph on Microsoft Word 365?
- 5 How do I create a bar graph in Word?
- 6 How does a line graph look like?
- 7 How do you make a graph on Microsoft Excel?
- 8 What is a simple line graph?
- 9 What is Y MX B?
- 10 How do you add a line of best fit?
- 11 How do I make a line graph in Word 2020?
- 12 How do you make a line graph on Excel 365?
- 13 How do I make a bar graph?
- 14 How do I create a bar graph from Excel in Word?
- 15 How do you use a line graph?
- 16 How do I make a graph from sheets?
- 17 How do I use Excel to make a bar graph?
- 18 How do you create a graph in PowerPoint?
- 19 What is needed for a line graph?
- 20 What are the 7 parts of a line graph?
How do I make a line graph in Word 2021?
Add a chart to your document in Word
- Click Insert > Chart.
- Click the chart type and then double-click the chart you want.
- In the spreadsheet that appears, replace the default data with your own information.
- When you’ve finished, close the spreadsheet.
- If you want, use the Layout Options button.
To draw a line graph, first draw a horizontal and a vertical axis. Age should be plotted on the horizontal axis because it is independent. Height should be plotted on the vertical axis. Then look for the given data and plot a point for each pair of values.
How do you make a line of best fit graph on Microsoft Word?
Plotting A Best Fit Line
- Be sure you are on the worksheet which contains the chart you wish to work with.
- Move the mouse cursor to any data point and press the left mouse button.
- From within the “Trendline” window, click on the box with the type of fit you want (e.g., Linear).
How do you make a graph on Microsoft Word 365?
Creating a graph in Microsoft 365 for Windows follows the same steps as Word 2013 – 2019:
- Open a Word document.
- Click on the “Insert’ tab and choose the “Chart” button.
- In the “Chart” drop-down menu, hover or click on your preferred graph type.
- Choose from one of the different graph styles in that category.
How do I create a bar graph in Word?
Open Microsoft Word, go to the “insert” tab on the ribbon, and select the “chart” icon. Once the “chart” wizard window has opened, select “column” and then select “clustered bar type.” Then select “OK.”
How does a line graph look like?
The line graph consists of a horizontal x-axis and a vertical y-axis. Most line graphs only deal with positive number values, so these axes typically intersect near the bottom of the y-axis and the left end of the x-axis.Data points are plotted and connected by a line in a “dot-to-dot” fashion.
How do you make a graph on Microsoft Excel?
How to Make a Graph in Excel
- Enter your data into Excel.
- Choose one of nine graph and chart options to make.
- Highlight your data and click ‘Insert’ your desired graph.
- Switch the data on each axis, if necessary.
- Adjust your data’s layout and colors.
- Change the size of your chart’s legend and axis labels.
What is a simple line graph?
A simple line graph is a kind of graph that is plotted with only a single line. Like in the diagram above, it shows the relationship between two variables. In most cases, one of these variables is independent, while the other is a dependent variable.
What is Y MX B?
Solved Examples on y=mx+b
Example 1: Find the equation of the line whose graph contains the points (1,3) and (3,7) Solution: The required equation of the line is y = mx + b.
How do you add a line of best fit?
Right Click on any one of the data points and a dialog box will appear. Click “Add Trendline”; this is what Excel calls a “best fit line”: 16.
How do I make a line graph in Word 2020?
To insert a line graph, go to the Insert Tab and click on Charts. A pop-up window will appear containing different types of charts and graphs. Scroll down to Line Chart and select the desired one. Then click on OK to insert the line graph on your blank page.
How do you make a line graph on Excel 365?
Create a line chart
- Copy the example worksheet data into a blank worksheet, or open the worksheet that contains the data that you want to plot into a line chart.
- Select the data that you want to plot in the line chart.
- Click the Insert tab, and then click Insert Line or Area Chart.
- Click Line with Markers.
How do I make a bar graph?
- Open Excel.
- Select all the data that you want included in the bar chart.
- Click the Chart Wizard toolbar button, or choose Chart from the Insert menu.
- Make sure that Column is selected under Chart type (it’s the default setting).
- Select a subtype of bar graph from the display on the right, and click Next.
How do I create a bar graph from Excel in Word?
Select the “Insert” tab in the Ribbon at the top of the page. Click the drop-down box for the “Column,” “Pie” or “Bar” chart type. These chart types allow number and word variables, where Line charts, Scatter charts, and Area charts require two numeric variables.
How do you use a line graph?
Line graphs are used to track changes over short and long periods of time. When smaller changes exist, line graphs are better to use than bar graphs. Line graphs can also be used to compare changes over the same period of time for more than one group.
How do I make a graph from sheets?
How to make a graph or chart in Google Sheets
- Select cells.
- Click Insert.
- Select Chart.
- Select which kind of chart.
- Click Chart Types for options including switching what appears in the rows and columns or other kinds of graphs.
- Click Customization for additional formatting options.
- Click Insert.
How do I use Excel to make a bar graph?
To insert a bar chart in Microsoft Excel, open your Excel workbook and select your data. You can do this manually using your mouse, or you can select a cell in your range and press Ctrl+A to select the data automatically. Once your data is selected, click Insert > Insert Column or Bar Chart.
How do you create a graph in PowerPoint?
To create a simple chart from scratch in PowerPoint, click Insert > Chart and pick the chart you want. On the Insert tab, in the Illustrations group, click Chart. In the Insert Chart dialog box, click the arrows to scroll through the chart types. Select the type of chart that you want and then click OK.
What is needed for a line graph?
Constructing a Line Graph
Line graphs consist of two axes: x-axis (horizontal) and y-axis (vertical). Each axis represents a different data type, and the points at which they intersect is (0,0). The x-axis is the independent axis because its values are not dependent on anything measured.
What are the 7 parts of a line graph?
The following pages describe the different parts of a line graph.
- The Title. The title offers a short explanation of what is in your graph.
- The Legend. The legend tells what each line represents.
- The Source. The source explains where you found the information that is in your graph.
- Y-Axis.
- The Data.
- X-Axis.
In this tutorial you will learn How to Make a Line Graph in Microsoft Word
To make a Line Graph in Microsoft Word Navigate to the Insert Menu and Clkck on Charts.On the Insert Chart Screen ,Select the Line Chart with a specific style then Click OK .
A Chart with demo data will be inserted which you can customize later.Let’s go through the steps in detail.
Enclosed are the steps to Make a Line Graph in Microsoft Word
Step 1 : Start Microsoft Word
- Start Microsoft Word on your Laptop or desktop .After Opening Microsoft word Click on New Blank document.
- You can also open and use an exisiting document where you need to make a Line Graph
Shortcut to open a new blank Microsoft Word document
Press Win+R key in combination and type winword on the Run dialog box and press OK
Step 2 : Add a Chart to Microsoft Word
Go to Insert Menu and Click on Chart Option

Once you click on the Insert->Chart option. Insert Chart screen will appear

Step 3 : Select a Chart Style
- On the left-hand side of the Insert Chart screen, Click on the Line option as shown below
- Now Select a Chart Style from the available option,then click OK.

Step 4 : Customize the Chart
- Once you click on OK an example Line Graph with an excel dataset will appear on your word document.
- You can customize the demo data shown as Category and Series in the spreadsheet with your own dataset to create a Line graph.
- You can also customize the color,font and size in your line graph

To Edit the data on Chart ,Righ Click on the Chart and Select “Edit data“

Step 5 : Save your Document.
- Once your done with your final formatting and Changes .You can save the document by clicking on File->Save.
- A window will pop up which will ask you to save the document .
- Specify a name for the document and Select the Location on your PC where you need to save tjhe file
How to Make a Line Graph in Microsoft Word(Conclusion)
In the above tutorial, we have provided you with a Step by Step Guide using which you can make a Line in Ms word. You can further explore various customizing options for the Line Graph in Ms Word.
Related articles :
How to Make a Pie Chart in Ms Word(Quick & Easy Guide )
How to disable Live Preview in Outlook and MsWord
is it possible to export Notion to Word (Easy Essential Guide )
Skip to content

Are you tearing your hair out trying to figure out how to create a bar-line chart (i.e. a combination of a bar chart and a line chart) in Microsoft Word? Look no further, we’ve got step-by-step instructions for you in this post, as well as an accompanying video guide.
Note: This guide was created using Microsoft Word 2010. If you are looking for a guide that uses a more modern version of Word, check out this article instead.
How do we create a bar and line chart?
- To begin, create a bar chart in your Word document by going to the Insert panel, then clicking on the Chart icon. This will open a pop-up window where you can select the chart you want to insert.
- Bar charts are categorised under the Column tab in this pop-up. Select the first chart in the Column tab, then click OK to create the chart.
- A bar chart should appear on your Word document, alongside a Microsoft Excel window containing the data for the chart. Each horizontal category of your chart should be partitioned into 3 “series”. We will be removing Series 3, and formatting Series 2 so that it displays as a line (instead of a bar). Remember to also resize your data range to exclude Series 3, so you don’t have a empty space in your chart.
- Go to the Word document. Right-click on one of the Series 2 bars, and on the context menu that appears, select Change Series Chart Type. This should bring up a pop-up similar to the one seen when first creating the bar graph.
- On the ensuing pop-up, select one of the line graphs, then click OK.
- You should now have a bar graph from Series 1, and a line graph from Series 2, which come together to form a bar and line graph.
Video guide
Having trouble with the instructions above? Here’s a video guide to help you along.
Article continues after the advertisement:
![]()
Get a virtual business domain email
If you are running a small business and currently using a @gmail.com address, check out our new Virtual Email Hosting service. It maps a custom email address onto your existing Gmail mailbox, so you get to send and receive emails using the new address whilst keeping the same Gmail mailbox — no migrations needed.
Find out more →
-
1
Open a Microsoft Word document. To do so, you can double-click an existing Word document, or you can open Microsoft Word and select your document from the Recent section.
- If you’re opening a new document, simply open the Microsoft Word program and click Blank document instead.
-
2
Click in the document where you want to insert your graph. Doing so will place the blinking cursor where you clicked; this is where your graph will appear when you add it.
- For example, clicking below a paragraph of text will set that location as the place to insert your graph.
Advertisement
-
3
Click the Insert tab. It’s at the top of the Word page, to the right of the Home tab.
-
4
Click Chart. You’ll see this option below and to the right of the Insert tab. Its icon resembles several different-colored bars.
-
5
Click a chart format. These are listed on the left side of the Chart pop-up window.
- A few common chart formats are Line, Column, and Pie.
- You can customize your chart’s format by clicking an appearance option at the top of your format’s window.
-
6
Click OK. Doing so will insert your chart into your document.
- You’ll also see a small Excel window with cells appear—this is where you’ll input your data.


Advertisement
-
1
Click a cell in the Excel window. Doing so will select it, which will allow you to add a point of data to that cell.
- The values in the «A» column dictate the X-axis data of your graph.
- The values in the «1» row each pertain to a different line or bar (e.g., «B1» is a line or bar, «C1» is a different line or bar, and so on).
- Numerical values outside of the «A» column or the «1» row represent different points of data on the Y-axis.
- Anything written in an Excel cell can be re-written to reflect your data.
-
2
Type in a number or name.
-
3
Press ↵ Enter or ⏎ Return. Doing so will enter your data into the cell, allowing you to move on to another cell.
-
4
Repeat this process for every point of data you need. As you enter data, your graph will change to display it.
-
5
Click X in the top right corner of the Excel window. Doing so will close the window and save your graph changes.
- You can re-open the Excel window at any time by clicking on your graph.


Advertisement
Add New Question
-
Question
How do I label the axes in a line graph?

The «Chart Tools» menu. Click on the tab entitled «Layout» in the Chart Tools menu. Click on «Axis Titles» from within the «Labels» group. Click on «Primary Horizontal Axis Title» or «Secondary Horizontal Axis Title» to add a horizontal axis text box to your chart.
-
Question
How do I make a table around existing text in my document?
You need to click «Insert» and then click «Smartapp.» Then click on «Relationships» on the left hand side and pick your table.
-
Question
How do I change the title if I update entries?
You can just click on your title and type in the updated title when you’re ready.
See more answers
Ask a Question
200 characters left
Include your email address to get a message when this question is answered.
Submit
Advertisement
-
On Word 2010 or earlier, the Excel window will pop up outside of Microsoft Word as an entirely new Excel document.
Thanks for submitting a tip for review!
Advertisement
-
Make sure you save your work!
Advertisement
About This Article
Article SummaryX
1. Click where you want to put the graph.
2. Click Insert.
3. Click Chart.
4. Select a format.
5. Click OK.
6. Click the Excel window.
7. Add graph data.
Did this summary help you?
Thanks to all authors for creating a page that has been read 646,939 times.