Support reading and writing by using Immersive Reader to customize how word documents appear while you read and edit. Immersive Reader provides options for a comfortable and easy to process experience by allowing you to listen to the text read aloud or adjust how text appears by modifying spacing, color and more.
Looking for more options to Listen to your Word documents? Check out Listen to your Word documents for more info.
Choose the version of Word you’re using below:

Use Immersive Reader in Word desktop
-
Open your Word document.
-
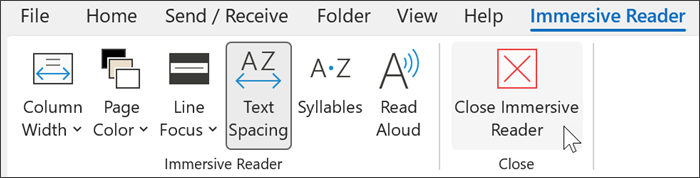
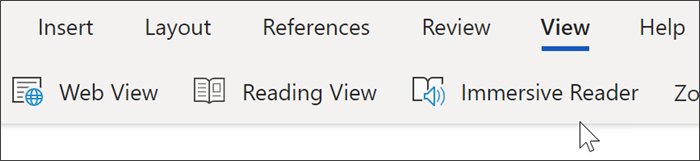
Select the View tab, then select Immersive Reader
 . Immersive Reader will launch a full screen experience.
 -
Choose the Immersive Reader options that work for you from the ribbon.
-
Once you click in your Word document to read or edit, the Immersive Reader ribbon will minimize. To make the ribbon visible so you can change Immersive Reader settings or close Immersive Reader, select the … at the top of the screen.
 . Immersive Reader will launch a full screen experience.
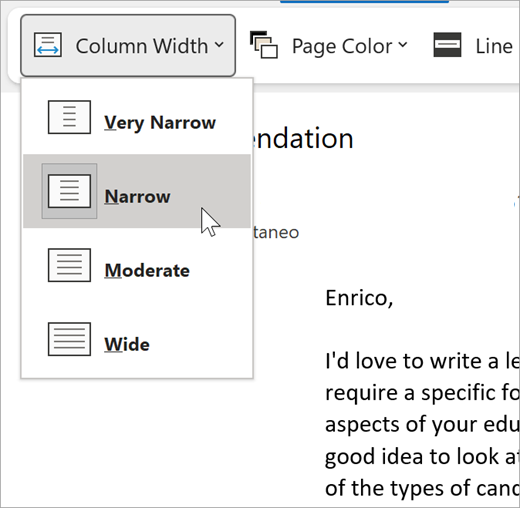
Column Width changes line length to improve focus and comprehension.
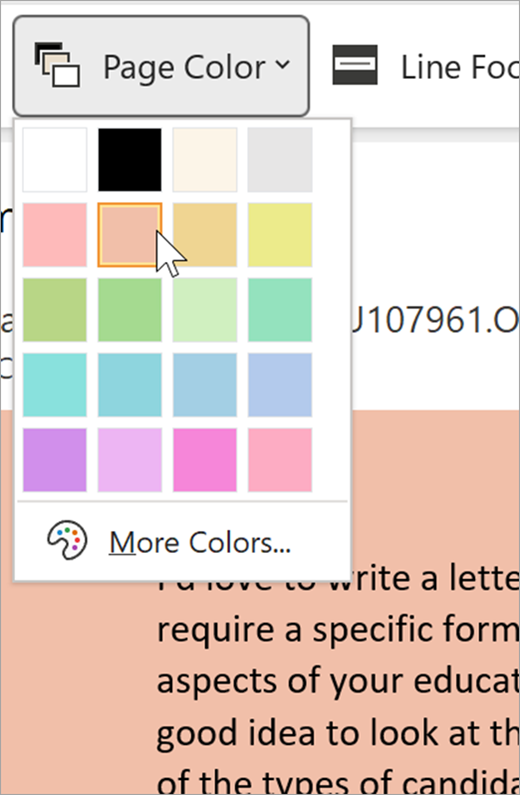
Page Color can make text easy to scan with less eye strain.
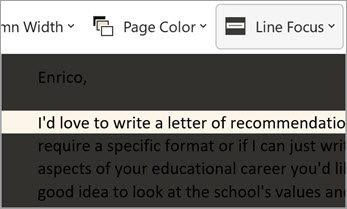
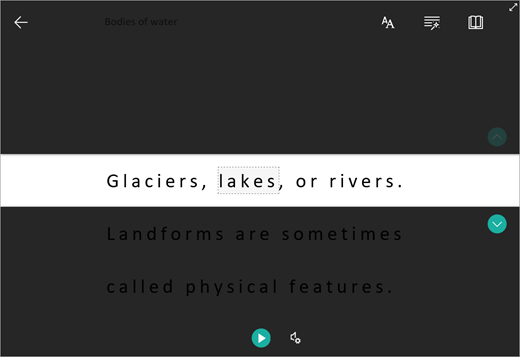
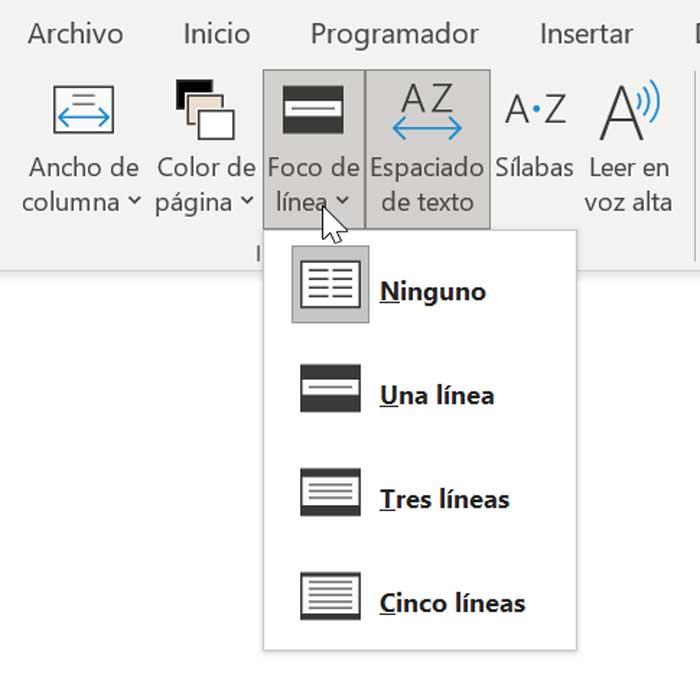
Line Focus removes distractions so that you can move through a document line by line. Adjust the focus to put one, three, or five lines in view at a time.
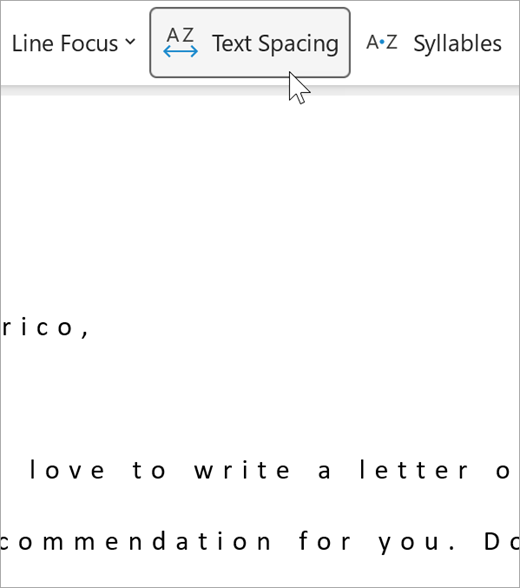
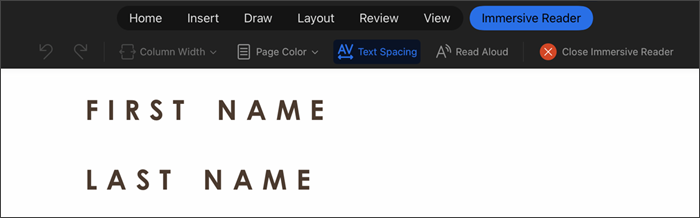
Text Spacing increases the spacing between words, characters, and lines.
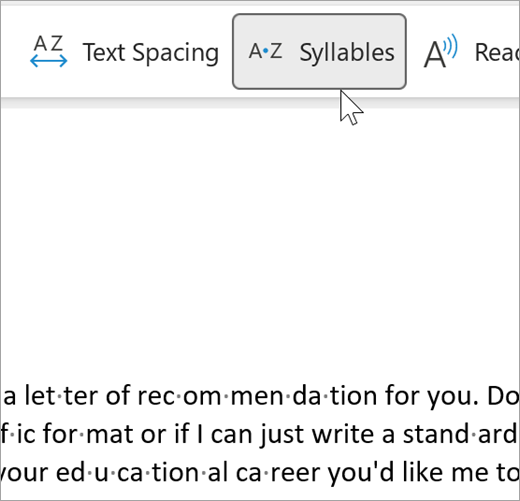
Syllables shows breaks between syllables, to improve word recognition and pronunciation.
Read Aloud highlights each word as it reads your document to you.
-
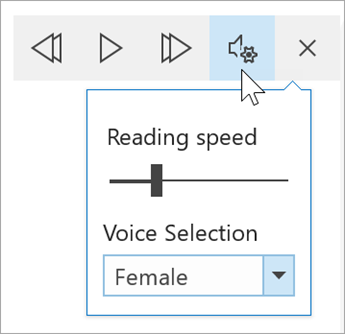
Select the Settings icon, then:
-
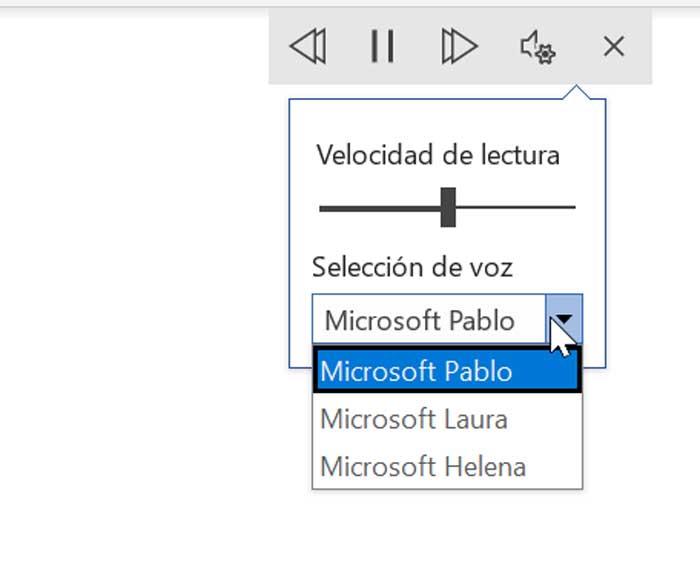
Drag the Reading speed control to adjust reading speed. Move to the right to increase speed and to the left to decrease it. Press Play to hear the different speeds.
-
Use the Voice Selection dropdown menu to choose different voices for the reader. Select a voice and then press Play to hear it.
-
-
Select X to close Read Aloud
Tip: Get directly to Read Aloud by right clicking anywhere in your document and selecting Read Aloud.
Close Immersive Reader
Select the View tab, then select Immersive Reader, then select Close Immersive Reader.
Keyboard shortcuts for Read Aloud
Start or exit Read Aloud: Ctrl+Alt+Space
Pause or play Read Alout: Ctrl+Space
Speed up reading speed: Alt+Right
Slow down reading speed: Alt+Left
Read the previous paragraph: Ctrl+Right
Read the next paragraph: Ctrl+Left
Use Immersive Reader in Word for macOS
Go to View > Learning Tools, and select your options:
-
Column Width changes line length to improve focus and comprehension.
-
Page Color can make text easy to scan with less eye strain.
-
Text Spacing increases the spacing between words, characters, and lines.
-
Syllables shows breaks between syllables, to improve word recognition and pronunciation.
-
Read Aloud lets you hear your document as each word is highlighted.
Note: Use the playback controls to start and stop the narration, to change the speed of the reading, and to switch between reading voices.
Use Immersive Reader in Word for the web
-
Select the View, then Immersive reader. Your document will open in a full screen format.
Using Immersive Reader
Once your document opens within Immersive Reader, you can do one or more of the following, depending on how you want to focus on the content in your document:
-
To hear the paragraphs read to you, select the Play button.
-
To listen from a certain point on your page, select that word.
Voice Options
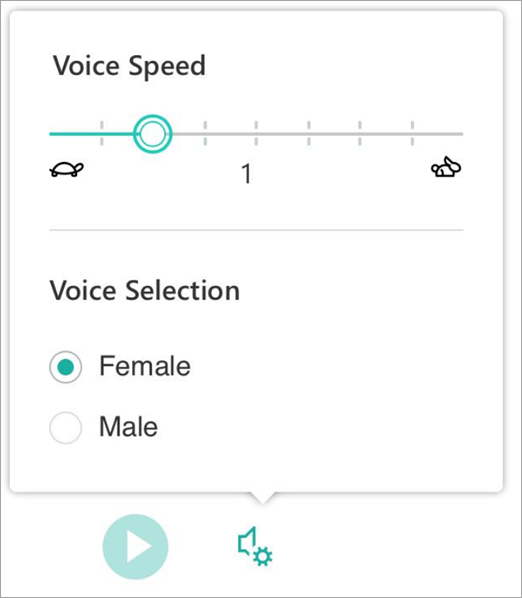
Select the gear icon to open Voice Settings.
The Voice Speed slider controls the playback speed of the reader.
-
Select Voice Speed, then drag the control to the right or left. Move to the right to increase speed and to the left to decrease it.
-
Select your preference of Male or Female voice.
-
Press Play to hear the different speeds and voices.
Text options
You can change the appearance of your document by using Text options. The choices you make in text options can help remove visual distraction and improve text readability.
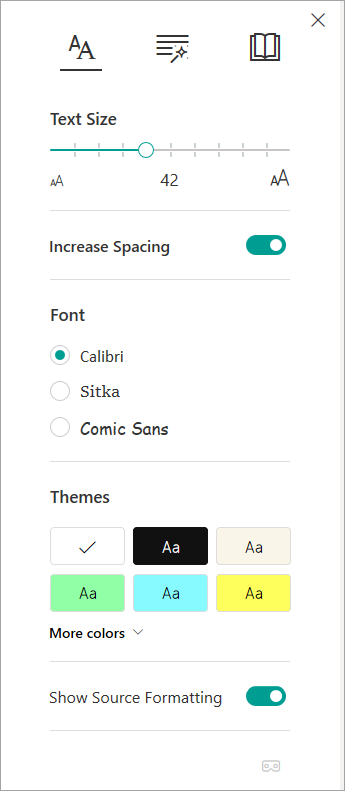
The Text Options menu lets you:
-
Change text size
-
Reduce crowding between letters
-
Change the font
-
Change background color
Parts of Speech
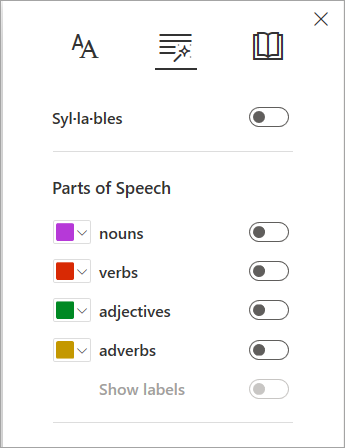
Parts of Speech controls grammar highlighting and helps readers understand complex sentences.
-
To use, select Parts of Speech (looks like three books).
-
Choose what to highlight:
-
Syl·la·bles splits words by showing small dots between syllables.
-
Under Parts of speech, turn on Nouns, Verbs, or Adjectives to highlight every noun, verb, or adjective on the page in a color that corresponds to the color of the label.
-
Reading preferences
-
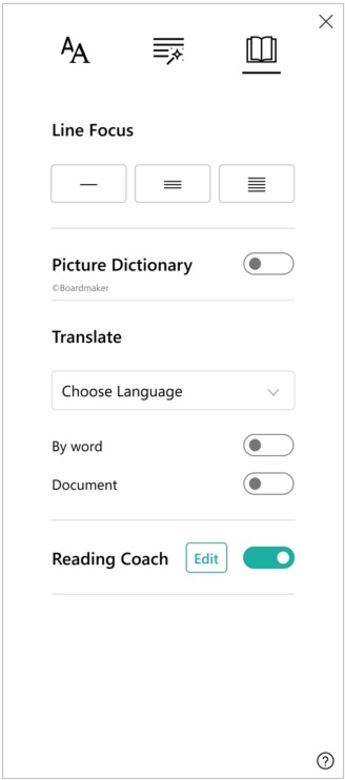
Line Focus enables readers to narrow the focus of their reading experience by highlighting sets of one, three, or five lines within their chosen material in Immersive Reader.
-
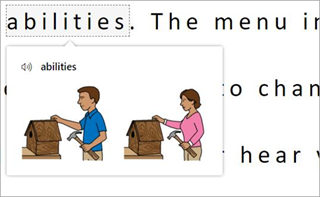
Picture Dictionary gives you the ability to click on any single word and view visual support. You can also hear the word read aloud.
-
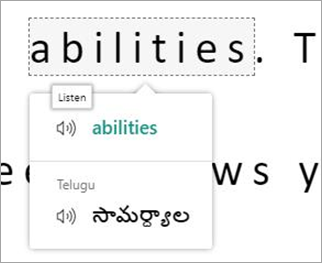
Translate allows you to view a selected word or the entire document in your preferred language.
-
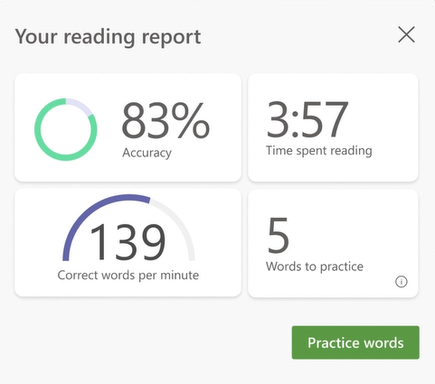
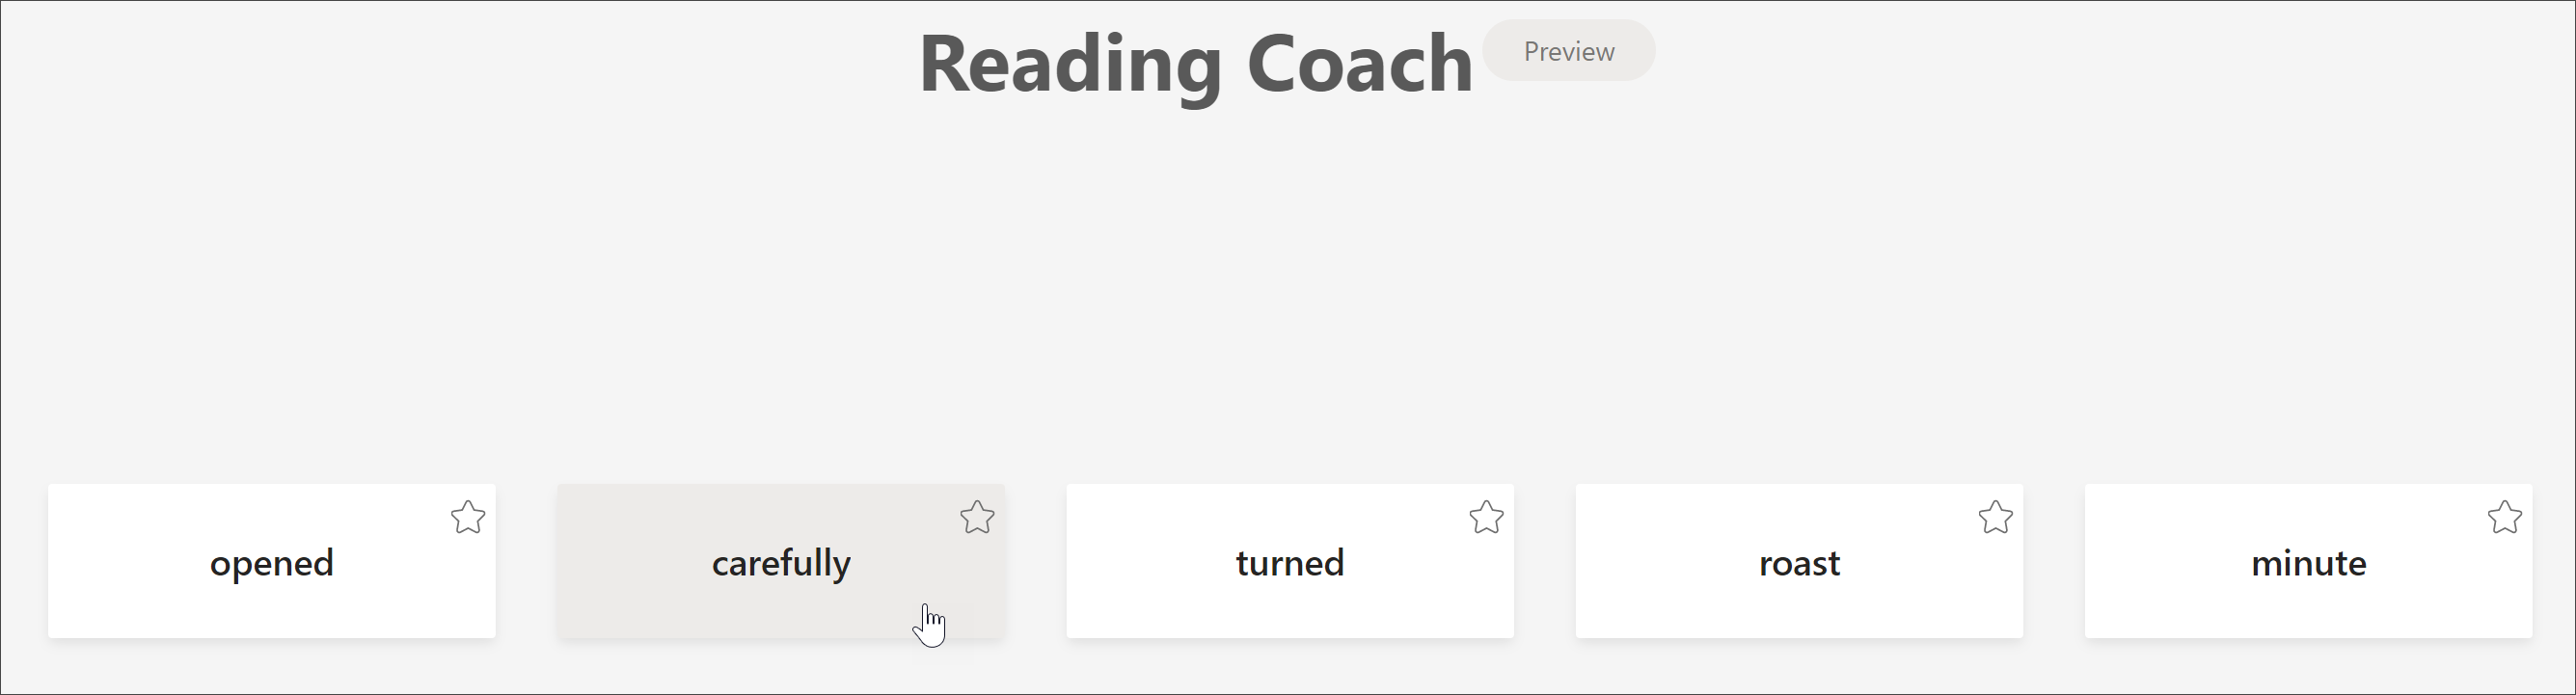
Reading Coach allows you to practice reading out loud, provides a report on your reading speed and accuracy, then identifies the five words you struggled with most and provides a supported opportunity to practice the words again.
Use the toggles to adjust your reading preferences.
Shortcut keys for Immersive Reader
Use keyboard shortcuts to navigate.
-
Up/Down arrow scrolls line by line
-
Page Up/Page Down scrolls screen by screen
-
Left/Right arrow goes to previous/next page in your OneNote Notebook
-
Esc key closes the reader or menu
-
Tab advances to the next control in Immersive Reader settings
-
Space selects the current tool
Close Immersive Reader
Select the back arrow or tap Esc on your keyboard to exit Immersive Reader.

Use Immersive Reader in Word for iPad
Some Immersive Reader tools are available in Word for iPad. To turn on Immersive Reader while reading or editing a Word document:
-
Select View

2. Select Immersive Reader

3. Choose from the following tools to make your document more comfortable to read and edit.
-
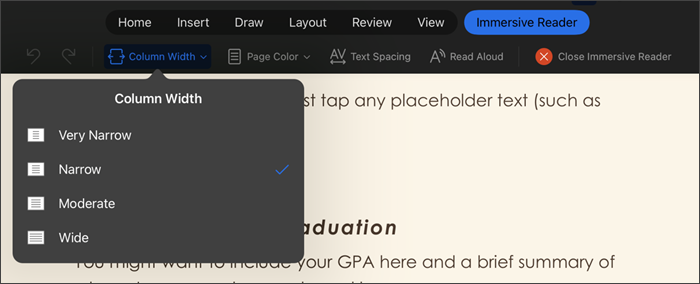
Select Column Width to change the line length. This can improve focus and comprehension.
-
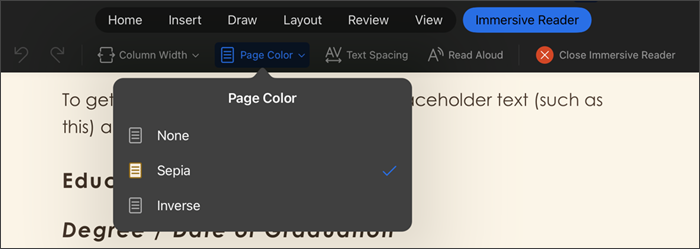
Select Page Color to choose between
-
None (standard white page)
-
Sepia (pale yellow page with print feel)
-
Inverse (black background with white text)
-
-
Select Text Spacing to increase the distance between characters.
-
Select Read Aloud to have sections of text highlighted as your document is read out loud to you. To change Read Aloud settings:
-
Select the Settings icon, then:
-
Drag the Reading speed control to adjust reading speed. Move to the right to increase speed and to the left to decrease it. Press Play to hear the different speeds.
-
Use the Voice Selection dropdown menu to choose different voices for the reader. Select a voice and then press Play to hear it.
-
-
-
Select X to close Read Aloud
Note: Read Aloud reads text in the default speech language of your operating system. For information about supported languages and how to add additional text-to-speech voices, see How to download Text-To-Speech languages for Windows
-
Select Close Immersive Reader to close the assistive experience and return to the Word document as it is formatted.
Language support
Languages and products supported by Immersive Reader
Need more help?
This article covers how to use Line Focus in MS Word to focus on 1 line, 3 lines, or 5 lines. When line focus is enabled, the rest of the lines are covered with dark grey color. Only the current line (if 1 line focus is enabled) where the mouse cursor is available is visible with the normal view mode. If 3 line focus mode is enabled, then the line with the mouse cursor, line above the cursor, and the line just below the active line are visible with the normal view. This will be helpful to focus better while writing a document.
Before you rush to try this interesting feature, do note this feature is a part of Learning Tools in Word Desktop (including Office Online) and available for Office 365 users only. Also, this feature is available to Office Insider users, but it will soon be available to all users without any insider program.

In the image above, you can see that 3 lines focus mode is enabled in Word document.
Step 1: I’m assuming that Office 365 is already installed on your PC and you’ve already joined the Office Insider program. Or else, you may sign up for Office Insider Program. You can do that by accessing File menu → Account and using Office Insider option in Word Desktop.
Step 2: Open a document in Word Desktop. After that, go to View tab in Ribbon menu and click the “Learning Tools” option. It will open a separate tab for Learning Tools.

Step 3: Under Learning Tools tab, you will see a “Line Focus” drop-down menu. Click that menu and you will see One Line, Three Lines, Five Lines, and None (to close focus mode) options. Select a line option and it will show the changes immediately.

You will see that focus mode is showing only those lines in normal view and the rest of the document area is covered with dark grey background. You can also switch focus mode to other lines by moving the cursor or using Up and Down arrows in the document.
The Conclusion:
Line Focus in Microsoft Word is an interesting and important feature. A similar feature is also available in Microsoft Edge, some Markdown editor, and other software. Now MS Word also supports this feature. Though the feature is available to insiders currently, it will be a part of the stable release and available for all the Office 365 users. This is a good way to focus on the content while creating or editing a document in Word Desktop.
In a previous post of mine I had mentioned about the Learning Tools that are available in Microsoft Word 365 and you can find here. Microsoft has built the Learning Tools that will help all the users develop and enhance the following abilities:
-
Decoding: it is the ability to pronounce words the right way.
-
Fluency: it is the ability to read quickly and accurately.
-
Comprehension: it is the ability to understand what we read.
The new feature available in Learning Tools is the Line Focus command. What does it do? It removes distractions so we can move through a Document Line by Line. We can adjust the Focus to put One, Three or Five Lines in View at a time. All you need to do is to continue reading the post below to find out how the Line Focus command works.

We must select the View tab, and then from the left of the ribbon we locate the area named Immersive as shown in the image below.

In the Immersive area of the ribbon is located the command Learning Tools, where we can Switch To An Immersive Editing Experience That Helps Improve Your Reading Skills. We Can Adjust How The Text Is Displayed And Have Text Read Aloud To Us. All we need to do is to press the Learning Tools command.

In the image below, I have selected the Learning Tools command, and the Learning Tools tab has appeared. The new command available now is the Line Focus command as shown below. With this command we can Narrow Our Reading By Highlighting Sets Of One, Three or Five Lines Within The Document.

In the image below, I have selected the Line Focus command and from the drop-down the default is None.

In the image below, I have selected the Line Focus command and from the drop-down I have selected the command One Line. Straight away the distractions are removed, and we can move in the Document line by line. We can move up and down in our Document with the up and down arrows located at the right of our screen area as shown below.

In the image below, I have selected the Line Focus command and from the drop-down I have selected the command Three Lines. Straight away the distractions are removed, and we can move in the Document three by three lines. We can move up and down in our Document with the up and down arrows located at the right of our screen area as shown below.

In the image below, I have selected the Line Focus command and from the drop-down I have selected the command Five Lines. Straight away the distractions are removed, and we can move in the Document five by five lines. We can move up and down in our Document with the up and down arrows located at the right of our screen area as shown below.

Below you can check out the video describing What Is The Line Focus Feature available in Microsoft Word?
Don’t Forget To Subscribe To My YouTube Channel.


About Smart Office — philippospan
MVP:
Honored with the MVP (Most Valuable Professional) for OFFICE SYSTEM title for the years 2011, 2012, 2013, 2014 and 2015 by Microsoft, for my contribution and commitment to the technical communities worldwide.
Microsoft Master Specialist:
This certification provides skill-verification tools that not only help assess a person’s skills in using Microsoft Office programs but also the ability to quickly complete on-the-job tasks across multiple programs in the Microsoft Office system
Posted on February 11, 2019, in Microsoft Office 365 ProPlus English, Word 365 English and tagged Document, Editing Experience, Five Lines, Highlighting, How To, Immersive, Know How, Learning Tools, Microsoft Excel, Microsoft Office, Microsoft Outlook, Microsoft PowerPoint, Microsoft Word, My YouTube Channel, Narrow Our Reading, Office Smart, Office System, OfficeSmart, One Line, philippospan, Reading Skills, Smart Office, smartoffice, Subscribe, Text Is Displayed, Three Lines, Tip & Tricks, View. Bookmark the permalink. Comments Off on What Is The Line Focus Feature available in Microsoft Word?.

Возможно, вы знакомы с функцией иммерсивного чтения в таких приложениях Microsoft, как Edge. Эта полезная функция является частью Коллекция средств обучения для подписчиков Microsoft 365. Цель инструмента — помочь другим в таких вещах, как произношение слов, точное чтение и понимание.
Что хорошо в Immersive Reader в Microsoft Word, так это то, что вы можете настроить его. Это позволяет настроить инструмент в соответствии с вашими личными предпочтениями. Вот как включить и настроить иммерсивное средство чтения в Word: от ширины столбца до интервала текста и прослушивания документа, читаемого вслух.
В Microsoft Word эта функция считается «представлением». Итак, вы включите его на одноименной вкладке. Щелкните значок Вид вкладка и нажмите Иммерсивный читатель кнопку на ленте.

Как только вы это сделаете, вы увидите новую вкладку для иммерсивного средства чтения и параметров ленты, которые позволят вам настроить его работу.
Настроить иммерсивный читатель
Эта функция работает примерно так же в Windows и Mac, за исключением, на которое мы укажем ниже. Почти все остальное должно выглядеть одинаково для Immersive Reader in Word на обеих платформах.
Ширина колонки
Начиная с левой стороны ленты, вы можете начать с выбора способа отображения документа, используя Ширина колонки. Когда вы нажимаете эту кнопку, вы можете выбрать очень узкий, узкий, средний или широкий вид. Выбрав объем текста, который вы хотите разместить в каждой строке, вам будет легче читать слова.

Цвет страницы
Следующая настройка предназначена для Цвет страницы. Щелкнув эту кнопку, вы можете выбрать любой из цветов радуги для фона документа. Если у вас возникают проблемы с просмотром документов с черным текстом на белом, вы можете использовать этот параметр, чтобы выбрать лучший цвет фона для вас.

Линия фокусировки
Линия фокусировки это следующая настройка для иммерсивного читателя. Важно отметить, что это одно из различий между использованием этой функции в Windows и Mac. Word для Mac в настоящее время не имеет параметра «Фокус линии».
Используя Line Focus, выберите одну, три или пять линий вместе с None, если вы вообще не хотите использовать эту настройку. Что это значит, так это выделить количество линий, которые вы выбираете, при затемнении фона. Таким образом, у вас есть именно то, что подразумевает название: линия для лучшей концентрации при чтении.

Интервал текста
В Интервал текста настройка — простое нажатие кнопки; у вас нет возможности выбирать, как другие настройки. Если вы хотите увеличить интервал между буквами, словами и абзацами, нажмите кнопку «Text-Spacing» на ленте. Нажмите кнопку еще раз, чтобы вернуться к исходному интервалу.

Слоги
Слоги работает как Text Spacing. Нажмите кнопку, чтобы отобразить текст с разрывами слогов. Это может быть очень полезно для тех, кто работает над произношением слов. Нажмите кнопку еще раз, чтобы вернуться к исходному виду.

Читать вслух
Последний вариант, который у вас есть с Immersive Reader, называется Читать вслух. Как бы то ни было, вы можете прочитать вам вслух весь документ или выделенный текст. Это еще один полезный инструмент для произношения слов, но он также может помочь людям с нарушениями зрения.
Когда вы щелкаете Читать вслух на ленте, вы увидите небольшую панель управления. Это позволяет легко воспроизводить, приостанавливать, перематывать назад или двигаться вперед. Но помимо этого вы можете настроить голос и скорость чтения.
![]()
Щелкните значок с микрофон и оборудование. Затем с помощью ползунка отрегулируйте скорость произнесения голоса. Ниже вы можете использовать раскрывающийся список, чтобы выбрать другой голос. Если вы используете Windows, вы увидите несколько голосов Microsoft, а на Mac вы увидите свою коллекцию голосов macOS с некоторыми дополнениями.

Также не забудьте прочитать нашу статью: Как сделать так, чтобы Microsoft Edge читал вам статьи. Это функция Edge, которая позволяет ему читать вслух веб-статьи.
Выйти из Immersive Reader
В любой момент при использовании Immersive Reader вы можете выйти и просмотреть свой документ в том виде, в котором он был до его включения. Просто нажмите на Читатель с близким погружением кнопку на ленте.

Лучше сосредоточьтесь с иммерсивным читателем в Word
Несмотря на то, что Immersive Reader считается «инструментом обучения», он может быть полезен для всех. Если вам нужен больший интервал между текстом, другой цвет страницы или чтобы слова читались вслух, вы можете просмотреть свои собственные документы или документы других с помощью удобного иммерсивного читателя в Word.
Для получения дополнительной информации посмотрите, как использовать средство проверки доступности в Microsoft Office или как настроить кернинг для шрифтов в Word.
Одним из таких инструментов является так называемый Иммерсивный читатель или иммерсивный читатель, доступный для подписчиков Microsoft 365 и пользователей Office 2019, как в Windows а в macOS и Word для IPad. Цель этого инструмента — не что иное, как помочь пользователям улучшить такие вещи, как понимание слов, произношение и точность чтения.
Функции иммерсивного читателя

Мы можем определить эту функциональность как другой способ, который Microsoft предоставляет нам в Word для чтения документа. С вашей помощью мы сможем улучшить наши навыки чтения, произношения и беглости речи . Это также позволяет устранить визуальное отвлечение, улучшая концентрацию внимания, что помогает нам быть более сосредоточенными. Для этого инструмент отвечает за чтение текста вслух, деление его на слоги и увеличение расстояния между строками и буквами.
Эта функция также помогает изучающим английский или другие языки с произношением, а также укрепляет доверие у читателей, которые учатся читать. Кроме того, он предлагает решения для декодирования текста для студентов с различиями в обучении, такими как дислексия.
Среди возможностей, предлагаемых иммерсивным читателем, является возможность изменять цвет фона, чтобы было легче видеть буквы, делить слова на слоги, выделять часть текста и использовать функцию повествования для прослушивания текста вслух. выделяя слова, чтобы мы могли легко следить за ним.
Но Immersive Word Reader не только имеет фиксированные функции, но и также можно настроить , чтобы адаптировать инструмент к нашим предпочтениям. Это то, что мы рассмотрим позже.
Включить иммерсивное средство чтения
Функция иммерсивного чтения доступна на верхней панели инструментов Microsoft Word, хотя мы, возможно, даже не осознали этого, поскольку это довольно неизвестный инструмент для многих пользователей. Чтобы найти его, необходимо перейти на вкладку «Просмотр». Оказавшись здесь, в столбце «Immersive Reader», мы найдем кнопку «Immersive Reader».

После того, как мы нажали кнопку, появляется новое окно, в котором можно использовать Immersive Reader с разными варианты и инструменты что позволит нам настроить его работу. Оттуда мы можем изменить ширину столбца, цвет страницы, интервал между слогами, среди других параметров, которые мы увидим, как это сделать дальше.

Как только мы окажемся внутри функции иммерсивного читателя, мы увидим, как мы можем настроить каждый из составляющих его инструментов.
Ширина колонки
На верхней панели в разделе Immersive Reader, начиная слева, мы находим функцию ширины столбца. Из этого раздела мы можем контролировать строки текста это может повлиять как на читаемость, так и на видимость контента.
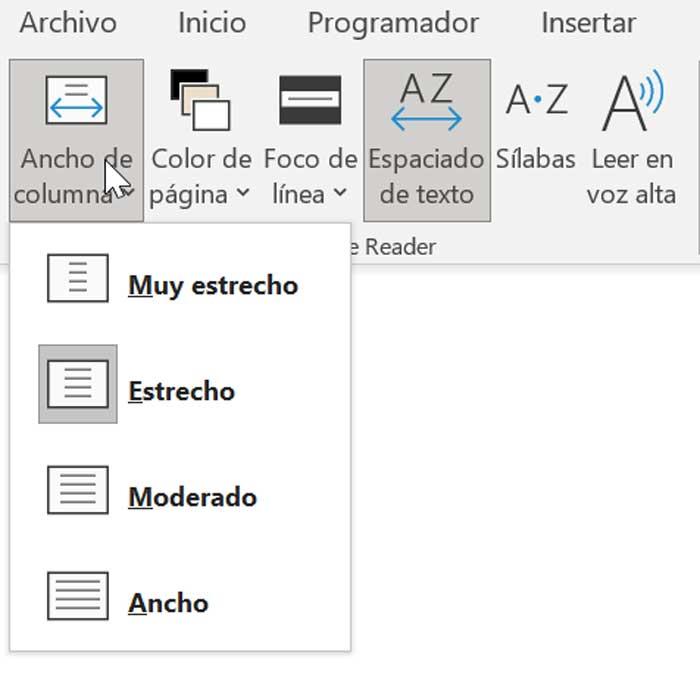
Если мы нажмем на кнопку, мы сможем выбирать между различными типами просмотра нашего текста: «Очень узкий», «Узкий», «Умеренный» и «Широкий». В зависимости от выбранного типа количество слов текста, которое появляется в каждой строке, изменяется, так что мы можем выбрать то, которое позволяет нам читать слова более комфортно.
Цвет страницы
До сих пор обычным делом было писать и читать в Word на заранее заданном белом фоне. Теперь с иммерсивным ридером у нас есть возможность изменить цвет фона страницы чтобы иметь возможность выбрать тот, который больше всего подходит нашим глазам во время чтения. Например, если у нас возникли проблемы с просмотром документов с черным текстом на белом.
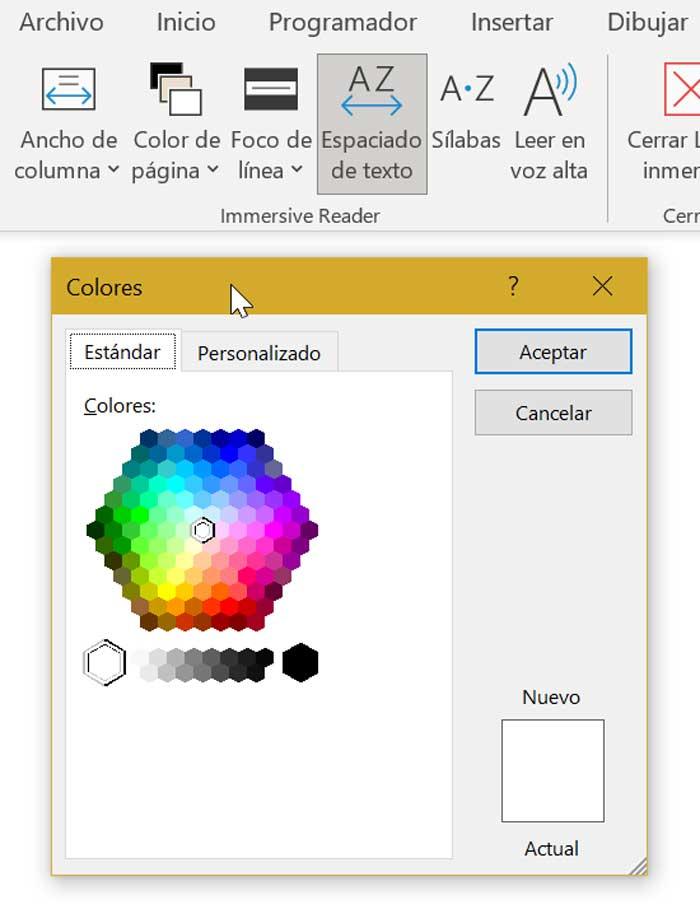
При нажатии на кнопку «Цвет страницы» открывается новое меню, показывающее цветовую палитру, из которой мы можем выбрать ту, которая нам больше всего нравится. Если мы наведем курсор мыши на любой из цветов, мы получим предварительный просмотр того, каким будет результат. Таким образом, мы можем проверить, какой цвет нам больше всего подходит, не выходя из функции и повторно не входя в нее. При выборе цвета важно убедиться, что он меньше всего воздействует на наши глаза при чтении текста.
Линия фокусировки и интервал текста
Следующая функция, с которой мы сталкиваемся, — это Line Focus. Как мы можем интерпретировать по его названию, мы можем сосредоточить внимание на одной или нескольких строках , выделение текста при ослаблении фона. Таким образом, мы получили то, что предполагает название: линия фокусировки для лучшей концентрации и избегания визуального отвлечения во время чтения. Мы можем выбрать одну, три или пять строк или выбрать «Нет», если мы не хотим использовать эту конфигурацию.
Используя Text Spice, мы можем увеличивайте пробелы между каждым символом, словом, абзацем и строкой нашего контента. Нам просто нужно сделать простой щелчок по кнопке, поскольку они не содержат дополнительных опций для выбора, как если бы это происходит в других конфигурациях, которые мы видели. Если мы снова нажмем на кнопку, мы сможем вернуться к исходному интервалу текста.
Слоги и читать вслух
Слоги работают как интервалы между текстом, поэтому эта функция может разбивать слова на слоги . Это еще больше поможет нам с произношением, и мы сможем быстро определять слова. Просто нажмите кнопку, чтобы отобразить текст слогового разрыва. Чтобы вернуться к исходному виду, просто нажмите ту же кнопку.
Чтение вслух — последний доступный вариант, позволяющий документ или текст для чтения вслух . Это полезно для пользователей с проблемами зрения или для произношения слов. После того, как мы нажмем на кнопку, появится полоса, откуда можно простым способом воспроизвести, приостановить, перемотать назад или продвинуться вперед. Точно так же, нажав на микрофон шестеренки, мы можем настроить скорость чтения и голоса, а также выбрать другой голос.