
Word for Microsoft 365 Word 2021 Word 2019 Word 2016 Word 2013 Word 2010 Word Starter 2010 More…Less
You can make a chart in Word. If you have lots of data to chart, create your chart in Excel, and then copy from Excel to another Office program. This is also the best way if your data changes regularly and you want your chart to always reflect the latest numbers. In that case, when you copy the chart, keep it linked to the original Excel file.
To create a simple chart from scratch in Word, click Insert > Chart, and pick the chart you want.
-
Click Insert > Chart.

-
Click the chart type and then double-click the chart you want.
-
In the spreadsheet that appears, replace the default data with your own information.
-
When you’ve finished, close the spreadsheet.
-
If you want, use the Layout Options button
to arrange the chart and text in your document.
 to arrange the chart and text in your document.
You can make a chart in Word or Excel. If you have lots of data to chart, create your chart in Excel, and then copy from Excel to another Office program. This is also the best way if your data changes regularly and you want your chart to always reflect the latest numbers. In that case, when you copy the chart, keep it linked to the original Excel file.
To create a simple chart from scratch in Word, click Insert > Chart and pick the chart you want.
-
Click Insert > Chart.
-
Click the chart type and then double-click the chart you want.
-
In the spreadsheet that appears, replace the default data with your own information.
-
When you’ve finished, close the spreadsheet.
-
If you want, use the Layout Options button
to arrange the chart and text in your document.
Important:
Office 2010 is no longer supported. Upgrade to Microsoft 365 to work anywhere from any device and continue to receive support.
Upgrade now
In Microsoft Word 2010, you can insert many kinds of data charts and graphs, such as column charts, line graphs, pie charts, bar charts, area graphs, scatter graphs, stock charts, surface charts, doughnut charts, bubble graphs, and radar graphs.
Notes:
-
Don’t see the chart that you want in this article? For more information about the variety of graphs and charts you can use, see Available chart types.
-
Want to create an organization chart? For more information about how to create organization charts, see Create an organization chart.
-
If Microsoft Excel 2010 isn’t installed on your computer, you will not be able to take advantage of the advanced data charting capabilities in the Microsoft Office 2010. Instead, when you create a new data chart in Word 2010, Microsoft Graph opens.
How?
|
|
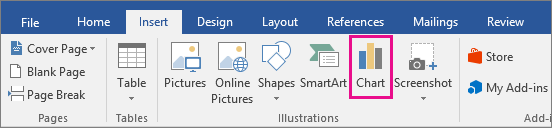
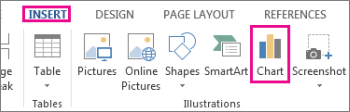
On the Insert tab, in the Illustrations group, click Chart.
|

|
|
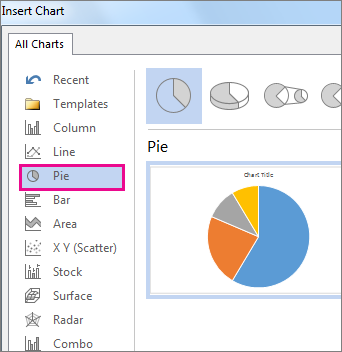
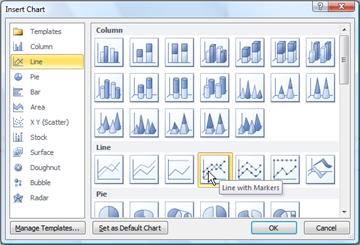
In the Insert Chart dialog box, click the arrows to scroll through the chart types. Select the type of chart that you want and then click OK.
When you rest the mouse pointer over any chart type, a ScreenTip displays its name. |

|
|
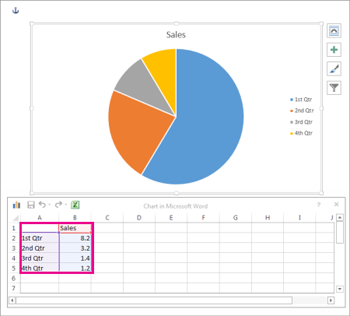
Edit the data in Excel 2010. When you are finished editing your data, you can close Excel.
Sample data in an Excel worksheet |

Tips
-
To get a good idea of what you can add to or change in your chart, under Chart Tools, click the Design, Layout, and Format tabs, and then explore the groups and options that are provided on each tab.
Note: If you don’t see the Chart Tools, make sure that you click anywhere inside the chart to activate it.
-
You can also access design, layout, and formatting features that are available for specific chart elements (such as chart axes or the legend) by right-clicking those chart elements.
More information
-
To learn about the available chart types, see Available chart types.
-
To edit data in your chart, see Change the data in an existing chart.
Top of Page
See also
Present data in a chart
Need more help?
Want more options?
Explore subscription benefits, browse training courses, learn how to secure your device, and more.
Communities help you ask and answer questions, give feedback, and hear from experts with rich knowledge.
Skip to content

Are you tearing your hair out trying to figure out how to create a bar-line chart (i.e. a combination of a bar chart and a line chart) in Microsoft Word? Look no further, we’ve got step-by-step instructions for you in this post, as well as an accompanying video guide.
Note: This guide was created using Microsoft Word 2010. If you are looking for a guide that uses a more modern version of Word, check out this article instead.
How do we create a bar and line chart?
- To begin, create a bar chart in your Word document by going to the Insert panel, then clicking on the Chart icon. This will open a pop-up window where you can select the chart you want to insert.
- Bar charts are categorised under the Column tab in this pop-up. Select the first chart in the Column tab, then click OK to create the chart.
- A bar chart should appear on your Word document, alongside a Microsoft Excel window containing the data for the chart. Each horizontal category of your chart should be partitioned into 3 “series”. We will be removing Series 3, and formatting Series 2 so that it displays as a line (instead of a bar). Remember to also resize your data range to exclude Series 3, so you don’t have a empty space in your chart.
- Go to the Word document. Right-click on one of the Series 2 bars, and on the context menu that appears, select Change Series Chart Type. This should bring up a pop-up similar to the one seen when first creating the bar graph.
- On the ensuing pop-up, select one of the line graphs, then click OK.
- You should now have a bar graph from Series 1, and a line graph from Series 2, which come together to form a bar and line graph.
Video guide
Having trouble with the instructions above? Here’s a video guide to help you along.
Article continues after the advertisement:
![]()
Get a virtual business domain email
If you are running a small business and currently using a @gmail.com address, check out our new Virtual Email Hosting service. It maps a custom email address onto your existing Gmail mailbox, so you get to send and receive emails using the new address whilst keeping the same Gmail mailbox — no migrations needed.
Find out more →
Lesson 24: Charts
/en/word2016/tables/content/
Introduction
A chart is a tool you can use to communicate information graphically. Including a chart in your document can help you illustrate numerical data—such as comparisons and trends—so it’s easier for the reader to understand.
Optional: Download our practice document.
Watch the video below to learn more about creating charts.
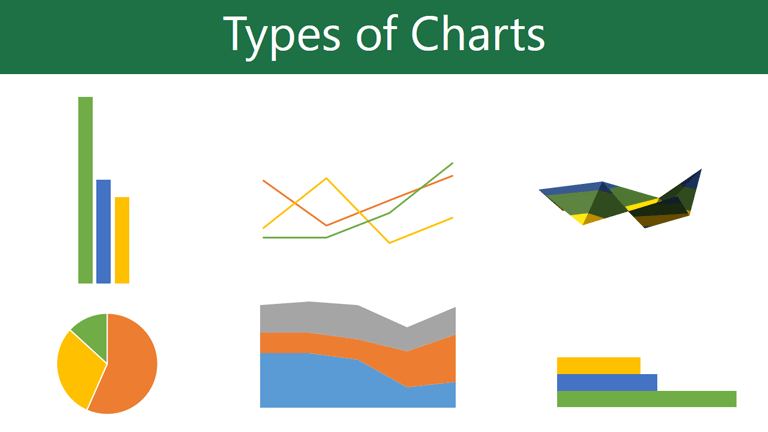
Types of charts
There are several types of charts to choose from. To use charts effectively, you’ll need to understand what makes each one unique.
Click the arrows in the slideshow below to learn more about the types of charts in Word.

Word has a variety of chart types, each with its own advantages. Click the arrows to see some of the different types of charts available in Word.
-
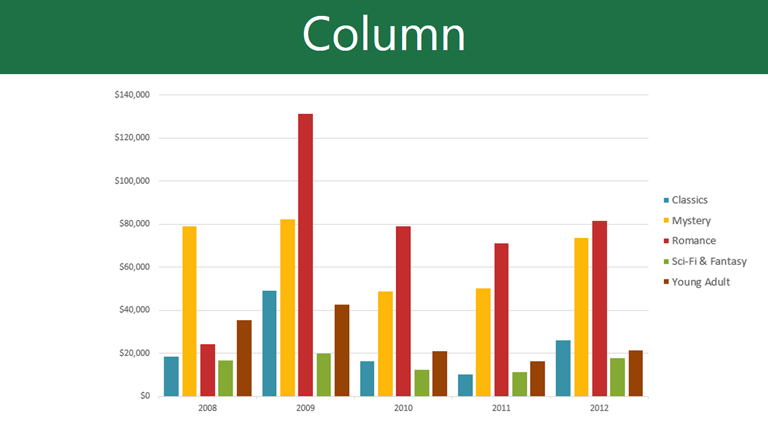
Column charts use vertical bars to represent data. They can work with many different types of data, but they’re most frequently used for comparing information.
-
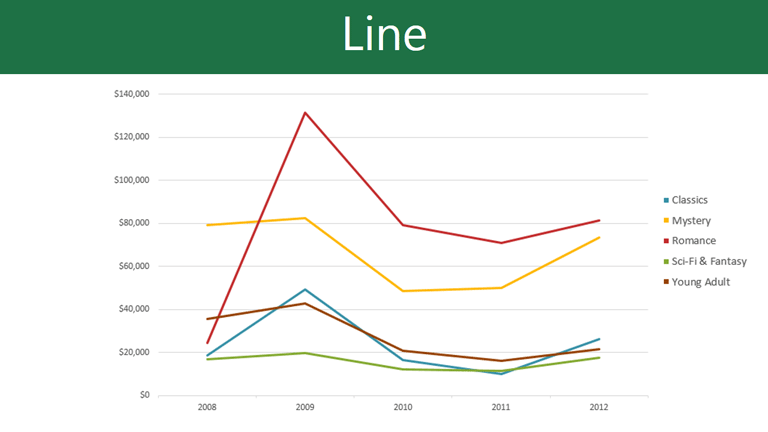
Line charts are ideal for showing trends. The data points are connected with lines, making it easy to see whether values are increasing or decreasing over time.
-
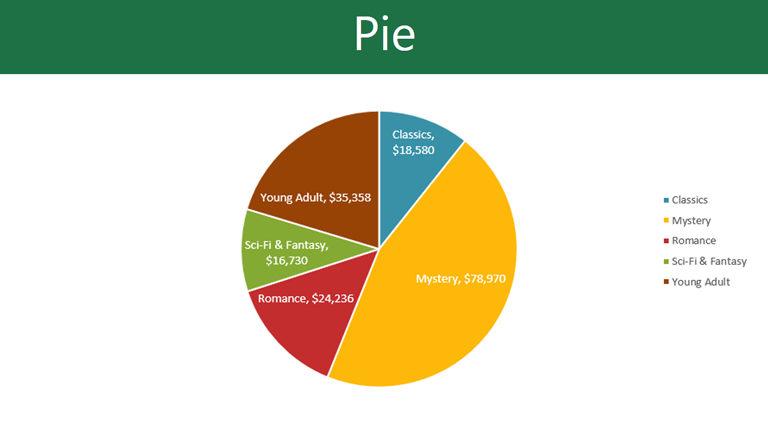
Pie charts make it easy to compare proportions. Each value is shown as a slice of the pie, so it’s easy to see which values make up the percentage of a whole.
-
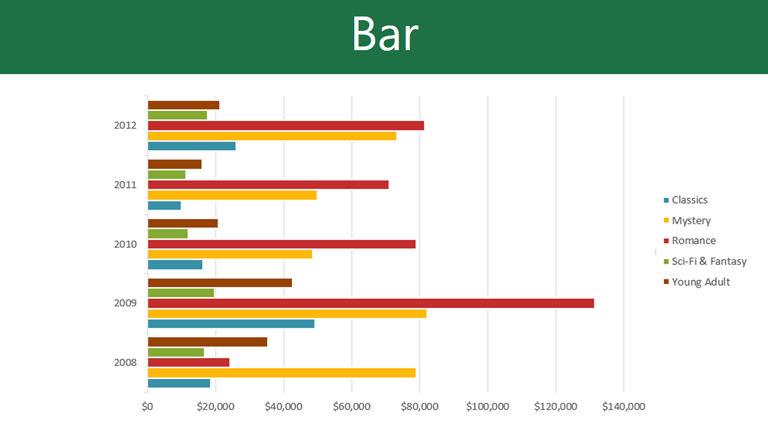
Bar charts work just like column charts, but they use horizontal rather than vertical bars.
-
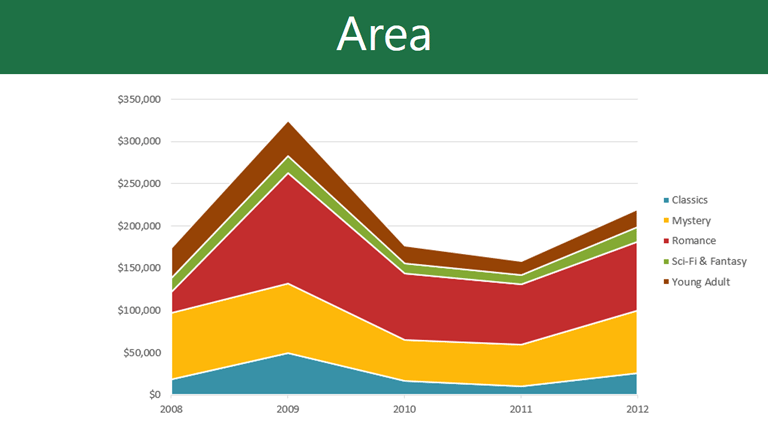
Area charts are similar to line charts, except the areas under the lines are filled in.
-
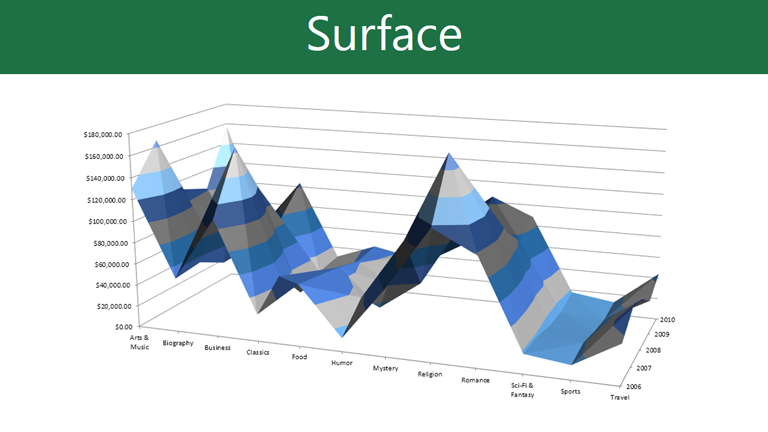
Surface charts allow you to display data across a 3D landscape. They work best with large data sets, allowing you to see a variety of information at the same time.

Identifying the parts of a chart
In addition to chart types, you’ll need to understand how to read a chart. Charts contain several different elements—or parts—that can help you interpret data.
Click the buttons in the interactive below to learn about the different parts of a chart.
Inserting charts
Word utilizes a separate spreadsheet window for entering and editing chart data, much like a spreadsheet in Excel. The process of entering data is fairly simple, but if you’re unfamiliar with Excel, you might want to review our Cell Basics lesson.
To insert a chart:
- Place the insertion point where you want the chart to appear.
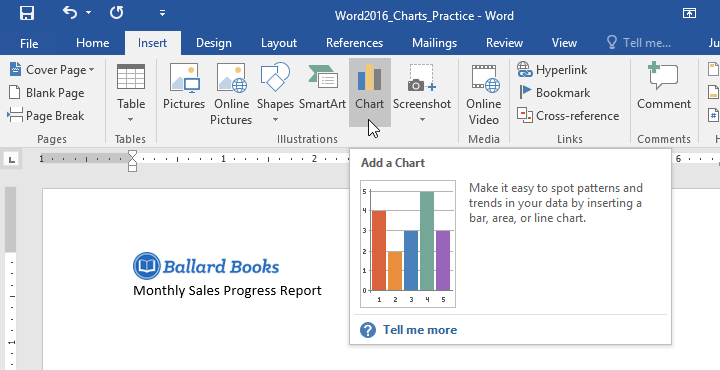
- Navigate to the Insert tab, then click the Chart command in the Illustrations group.
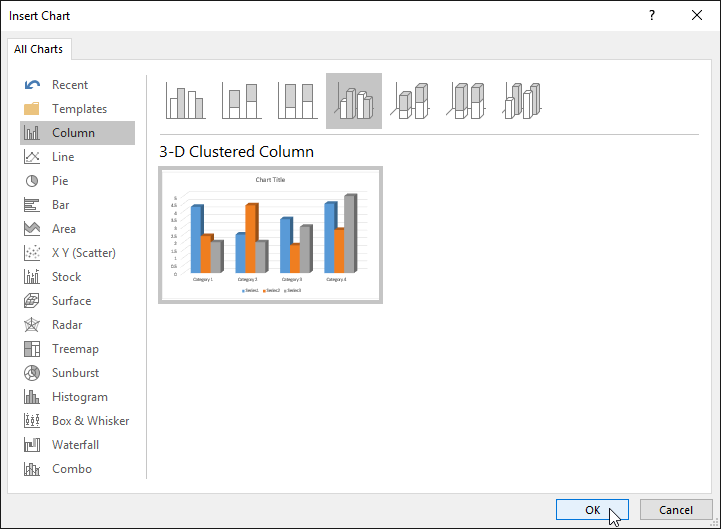
- A dialog box will appear. To view your options, choose a chart type from the left pane, then browse the charts on the right.
- Select the desired chart, then click OK.
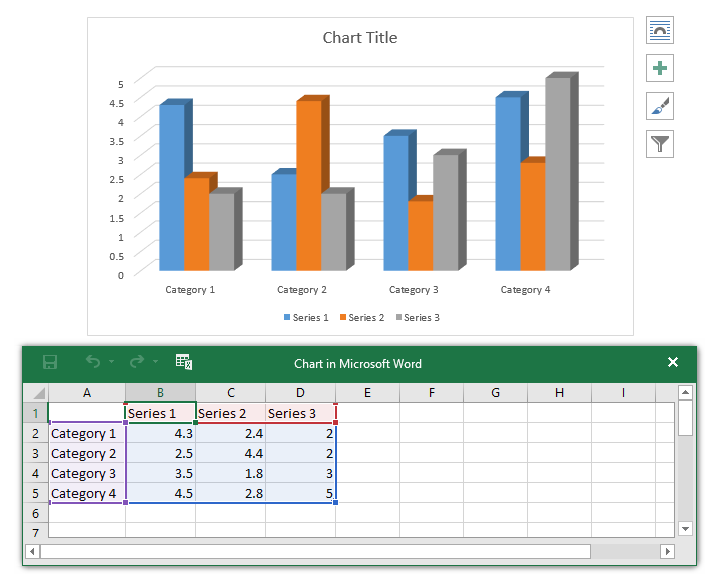
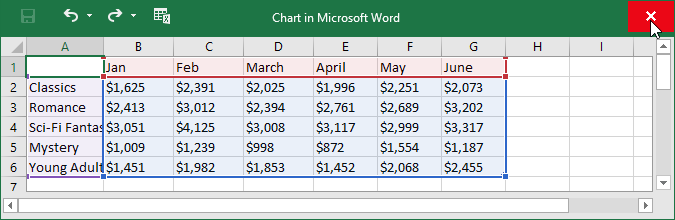
- A chart and spreadsheet window will appear. The text in the spreadsheet is merely a placeholder that you’ll need to replace with your own source data. The source data is what Word will use to create the chart.
- Enter your source data into the spreadsheet.
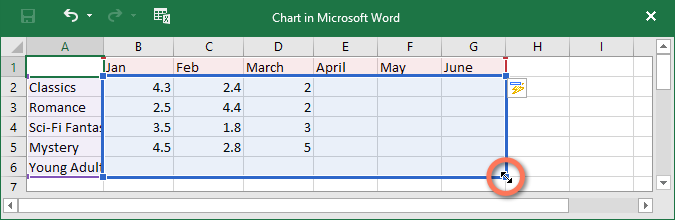
- Only the data enclosed in the blue box will appear in the chart. If necessary, click and drag the lower-right corner of the blue box to manually increase or decrease the data range.
- When you’re done, click X to close the spreadsheet window.
- The chart will be complete.

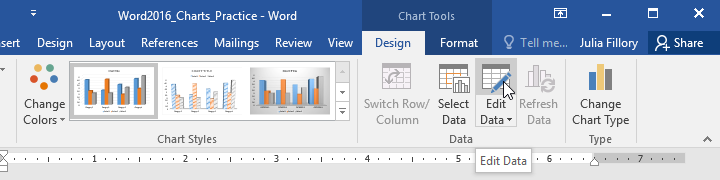
To edit your chart again, simply select it, then click the Edit Data command on the Design tab. The spreadsheet window will reappear.
Creating charts with existing Excel data
If you already have data in an existing Excel file that you’d like to use in Word, you can copy and paste it instead of entering it by hand. Just open the spreadsheet in Excel, copy the data, then paste it as the source data in Word.
You can also embed an existing Excel chart into your Word document. This is useful if you know you’re going to be updating your Excel file later; the chart in Word will update automatically any time a change is made.
Read our guide on Embedding an Excel Chart for more information.
Modifying charts with chart tools
There are many ways to customize and organize your chart in Word. For example, you can quickly change the chart type, rearrange the data, and even change the chart’s appearance.
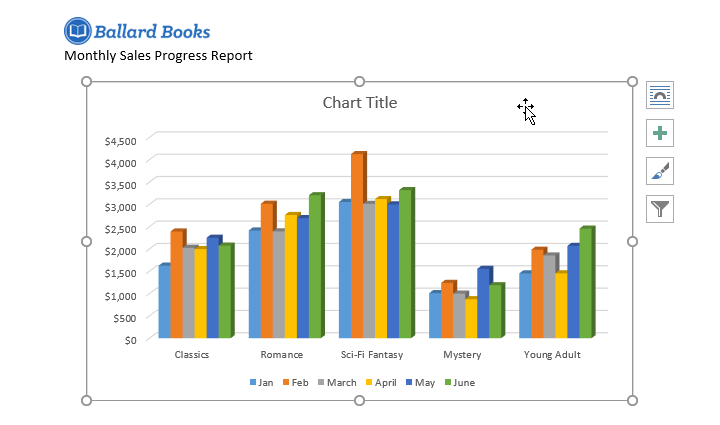
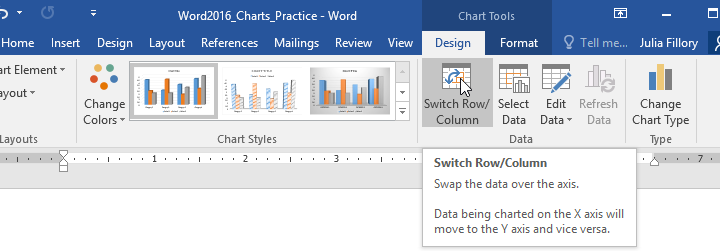
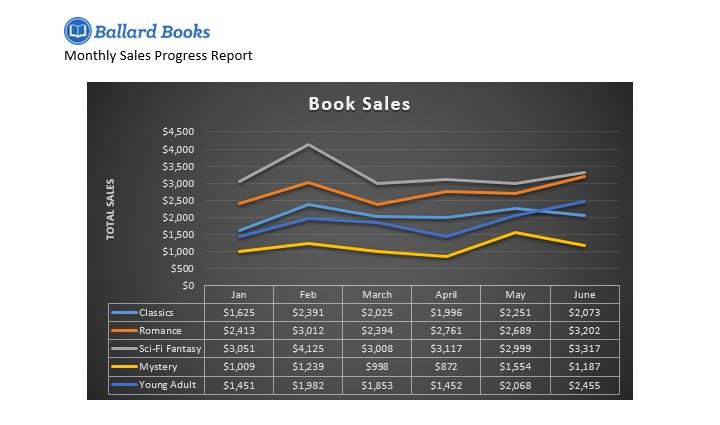
To switch row and column data:
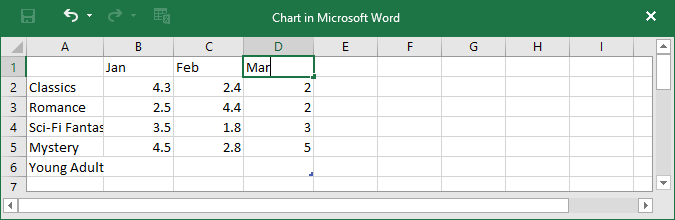
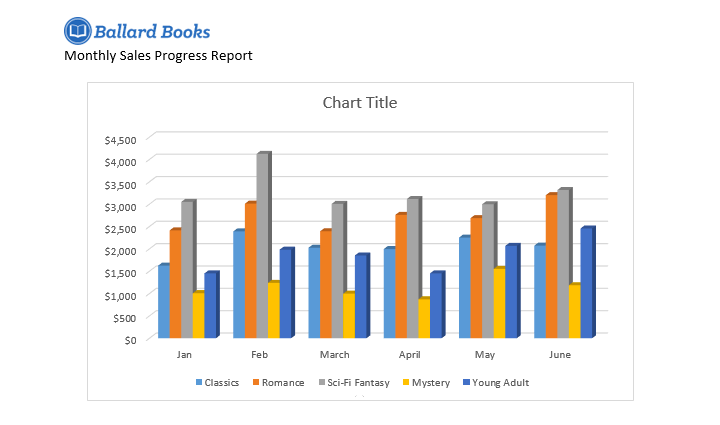
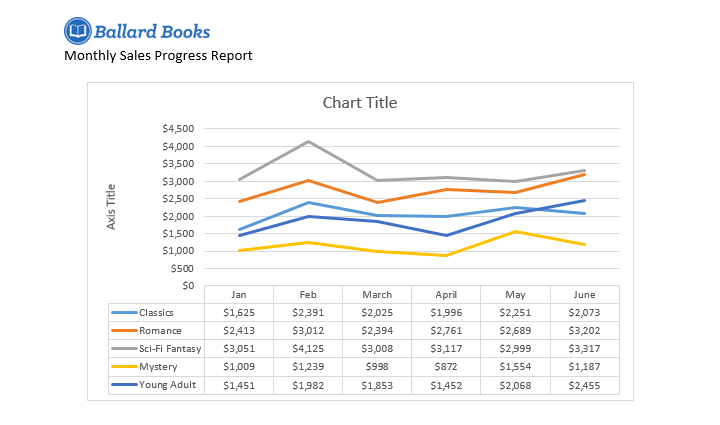
Sometimes you may want to change the way your chart data is grouped. For example, in the chart below the data is grouped by genre, with columns for each month. If we switched the rows and columns, the data would be grouped by month instead. In both cases, the chart contains the same data—it’s just presented in a different way.
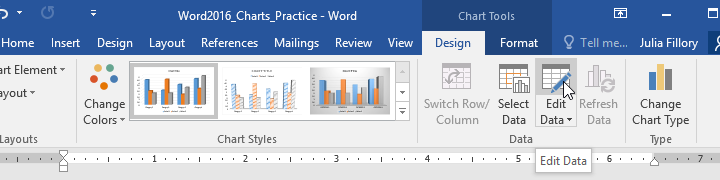
- Select the chart you want to modify. The Design tab will appear on the right side of the Ribbon.
- From the Design tab, click the Edit Data command in the Data group.
- Click the chart again to reselect it, then click the Switch Row/Column command.
- The rows and columns will be switched. In our example, the data is now grouped by month, with columns for each genre.
To change the chart type:
If you find that your chosen chart type isn’t suited to your data, you can change it to a different one. In our example, we’ll change the chart type from a column chart to a line chart.
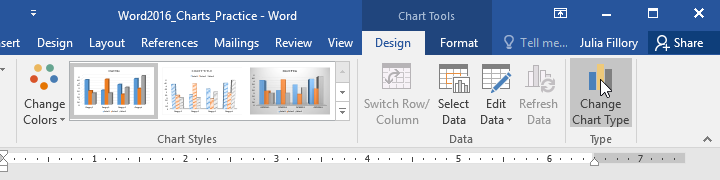
- Select the chart you want to change. The Design tab will appear.
- From the Design tab, click the Change Chart Type command.
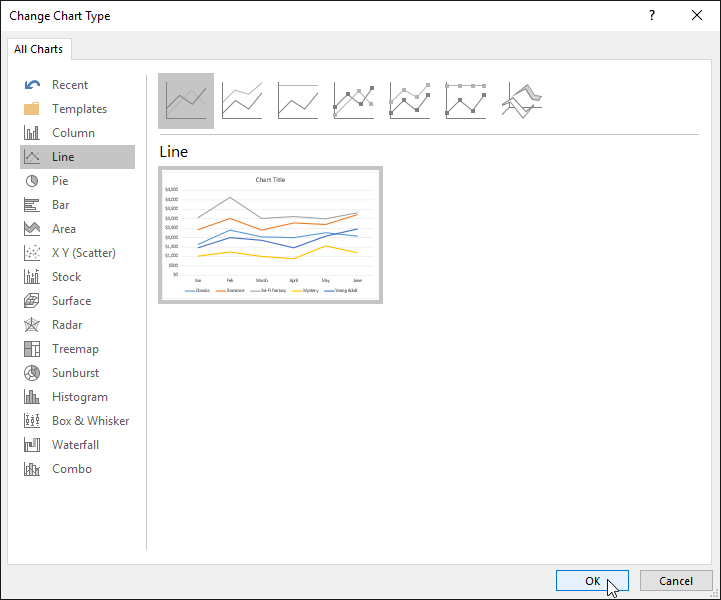
- A dialog box will appear. Select the desired chart, then click OK.
- The new chart type will be applied. In our example, the line chart makes it easier to see trends over time.

To change the chart layout:
To change the arrangement of your chart, try choosing a different layout. Layout can affect several elements, including the chart title and data labels.
- Select the chart you want to modify. The Design tab will appear.
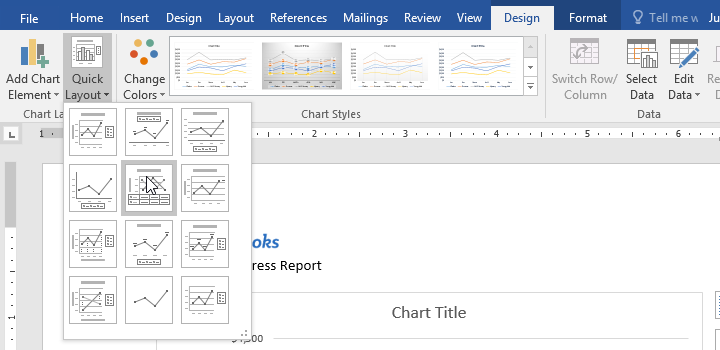
- From the Design tab, click the Quick Layout command.
- Choose the desired layout from the drop-down menu.
- The chart will update to reflect the new layout.
If you don’t see a chart layout that has exactly what you need, you can click the Add Chart Element command on the Design tab to add axis titles, gridlines, and other chart elements.
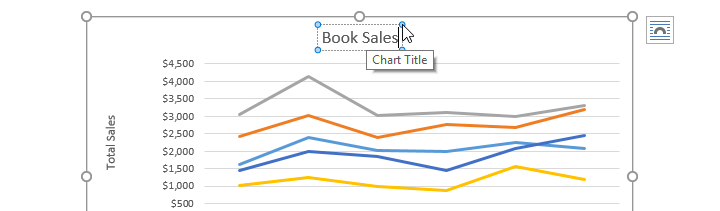
To fill in a placeholder (such as the chart title or axis title), click the element and enter your text.
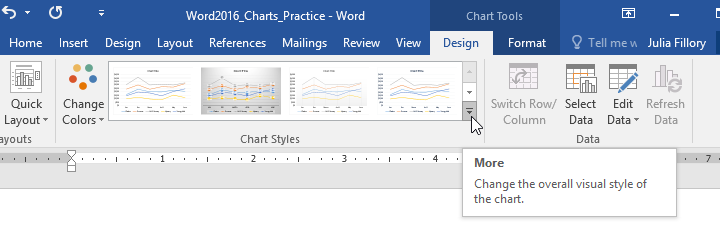
To change the chart style:
Word’s chart styles give you an easy way to change your chart’s design, including the color, style, and certain layout elements.
- Select the chart you want to modify. The Design tab will appear.
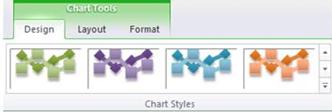
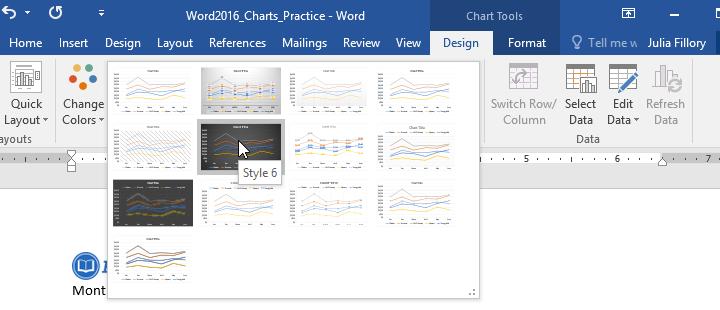
- From the Design tab, click the More drop-down arrow in the Chart Styles group.
- A drop-down menu of styles will appear. Select the style you want.
- The chart style will be applied.
For even faster customization, use the formatting shortcuts to the right of your chart. These allow you to adjust the chart style, chart elements, and even add filters to your data.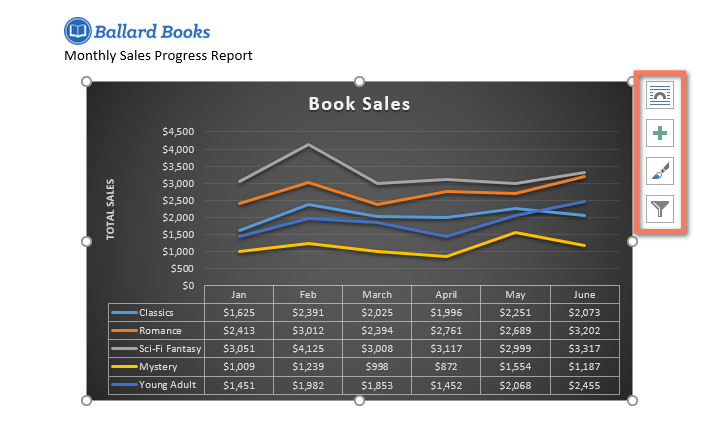
Challenge!
- Open our practice document. You will also need to download our practice workbook.
- Insert a Line chart into our practice Word document.
- Open our practice workbook in Excel. Copy the data and paste it into the chart’s spreadsheet.
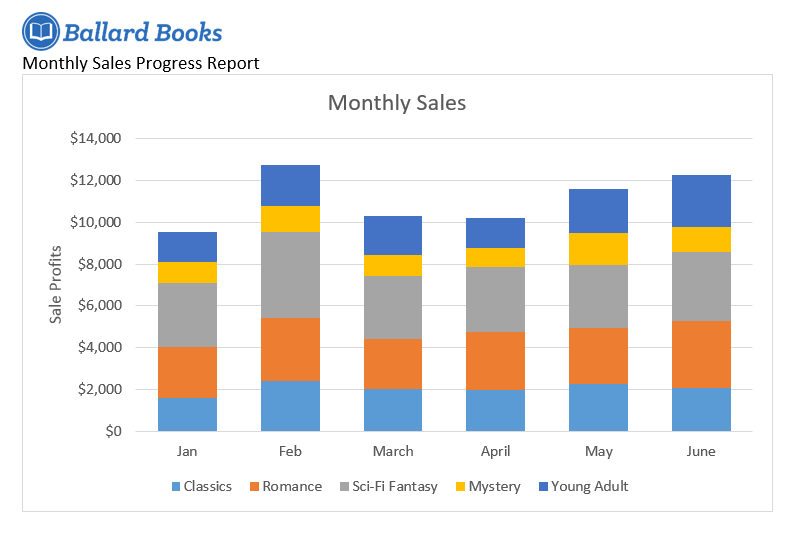
- Change the chart title to Monthly Sales.
- Change the chart type to Stacked Column.
- Use the Quick Layout drop-down menu to change to Layout 3.
- Use the Add Chart Element drop-down menu to add a Primary Vertical Axis Title.
- Double-click the axis title, then rename it Sale Profits.
- Switch the Row/Column data.
- When you’re finished, your chart should look something like this:

/en/word2016/checking-spelling-and-grammar/content/
Many people assume that Microsoft Word is only for text and Microsoft Excel is for data and graphs. Surprisingly, Microsoft Word can actually be used to create line graphs. It is helpful when putting a presentation or data analysis together to include a line graph along with text.
Line graphs are very useful if one wants to show continuous data over a period of time with a common scale. Line graphs connect data points to form a line that represents the data. Follow the instructions below to create a line graph on Microsoft Word.
Instructions for Making a Line Graph on Microsoft Word
The instructions may vary depending on the Microsoft Word version. This basic set of instructions should work for all Microsoft Word versions. If the options on one’s Microsoft Word version are not worded exactly how they are in these instructions, they should be similar enough to recognize which option to choose.
Follow these instructions to create a line graph on Microsoft Word:
- Open up Microsoft Word. To add a line graph to an existing file, pull up that file. If not, start with a new page.
- Click the Insert tab on the screen’s top left.
- Click Object on the drop-down menu.
- For some Microsoft Word versions, another menu appears to the side after Object is clicked. Click Chart on this menu. For other versions, a window pops up after Object is clicked. Go to the Object Type section and click Microsoft Graph Chart then click OK.
- A bar graph will appear in the text document. Right-click the center of the bar graph and a pop-up menu will appear. Choose Chart Type on this pop-up menu.
- When the Chart Type dialog box comes up on the screen, click Line in the left-hand menu then click OK.
- Insert all of one’s data into the data sheet provided. The data sheet should be below one’s line graph and one will be able to insert one’s numbers in place of the example provided.
- If the data sheet is not below the chart, select and right-click the chart’s center then select Chart Data Table from the pop-up menu. This will allow one to insert all of one’s data.
- Microsoft Word automatically creates the line graph after one’s data is entered.
- If one double-clicks the chart, one should be able to select the specific details for the chart, such as color.

Sometimes documents you’re authoring can benefit from an illustrative chart. Rather than taking the time to set up a chart in another application and embedding it or copying and pasting it into Microsoft Word, you can use the built-in chart feature.
RELATED: How to Link or Embed an Excel Worksheet in a Word Document
Create a Chart in Word
You might be creating a company report, business proposal, or college essay where a data-filled visual is an ideal addition.
Place your cursor where you want the chart in your Word document. Then, go to the Insert tab and click “Chart” in the Illustrations section of the ribbon.

Pick the type of chart you want to add on the left and the style on the right. If you’re familiar with the chart options in Excel, you can choose from the same types in Word like bar, column, pie, line, and many others. Click “OK” to insert the chart.
Once you insert the chart, an Excel spreadsheet will open. The sheet contains sample data to get you started and is a stripped-down version of Excel without tabs or a ribbon.
You can edit the data in the spreadsheet to include your own or copy and paste the data from another spot into the attached sheet. You’ll then see the chart in Word immediately update with your changes.
RELATED: How to Choose a Chart to Fit Your Data in Microsoft Excel
Update the Chart Data
Anytime you want to update the data for the chart, you can do so by heading to the Chart Design tab.
Click the drop-down arrow for Edit Data. Select “Edit Data” to display the small spreadsheet you had when you created the chart, or select “Edit Data in Excel” to open the sheet in a standard Excel window with tabs and a ribbon.
Customize a Chart in Word
Once you insert the chart into Word with the data you want, you can make some customizations. You can add a title, adjust the colors, pick a theme, include a legend, and more. Again, if you’re familiar with customizing charts in Excel, you’ll recognize the below options.
RELATED: How to Create and Customize a Funnel Chart in Microsoft Excel
Use the Chart Design Tab
Select the chart and go to the Chart Design tab. Starting on the left side of the ribbon you can add, remove, and position chart elements, change the layout, pick new colors, and select a style.
On the right side of the Chart Design ribbon, you have an option for Change Chart Type. If you believe a different type of graph would work better with your data, you can select it here.
Open the Format Chart Sidebar
If you’d like to change the font, border, or specifics of the chart like a series or axis, you can use the Format Chart sidebar.
Right-click the chart and pick “Format Chart Area” or double-click the chart.
When the sidebar opens, click the arrow next to Chart Options to select a part of the chart to adjust.
Use the tabs at the top of the sidebar for fill and line colors, effects, and properties. These tabs change depending on the chart area you select in the drop-down list.
Use the Floating Buttons on Windows
If you’re using Word on Windows, you also have floating buttons for quick changes to your chart. Select the graph, and these will display on the right side.
You can then change the Layout Options for the chart’s placement within the text. You can also use the Chart Elements, Chart Styles, and Chart Filters buttons to adjust items on the chart, choose a color scheme, and apply filters.
By creating a chart directly in Microsoft Word, you can save yourself a bit of time. This is especially handy if you’re using a small amount of data that’s beneficial to your Word document.
If you’re interested in other ways to use charts in your documents, take a look at how to create a flowchart in Word.
READ NEXT
- › How to Remove Borders in Microsoft Word
- › Google Chrome Is Getting Faster
- › The New NVIDIA GeForce RTX 4070 Is Like an RTX 3080 for $599
- › BLUETTI Slashed Hundreds off Its Best Power Stations for Easter Sale
- › This New Google TV Streaming Device Costs Just $20
- › HoloLens Now Has Windows 11 and Incredible 3D Ink Features
- › How to Adjust and Change Discord Fonts