
Были ли сведения полезными?
(Чем больше вы сообщите нам, тем больше вероятность, что мы вам поможем.)
(Чем больше вы сообщите нам, тем больше вероятность, что мы вам поможем.)
Насколько вы удовлетворены качеством перевода?
Что повлияло на вашу оценку?
Моя проблема решена
Понятные инструкции
Понятные сведения
Без профессиональной лексики
Полезные изображения
Качество перевода
Не соответствует интерфейсу
Неверные инструкции
Слишком техническая информация
Недостаточно информации
Недостаточно изображений
Качество перевода
Добавите что-нибудь? Это необязательно
Спасибо за ваш отзыв!
×
Microsoft Office Word 2010 allows you to create and edit personal and business documents, such as letters, reports, invoices, emails and books. By default, documents saved in Word 2010 are saved with the .docx extension. Microsoft Word can be used for the following purposes −
-
To create business documents having various graphics including pictures, charts, and diagrams.
-
To store and reuse readymade content and formatted elements such as cover pages and sidebars.
-
To create letters and letterheads for personal and business purpose.
-
To design different documents such as resumes or invitation cards etc.
-
To create a range of correspondence from a simple office memo to legal copies and reference documents.
Audience
This tutorial has been designed for computer users who are willing to learn Microsoft Word in simple steps and they do not have much knowledge about computer usage and Microsoft applications. This tutorial will give you enough understanding on MS Word from where you can take yourself to higher levels of expertise.
Prerequisites
Before you begin with this tutorial, we assume you have a basic understanding of Computer peripherals like mouse, keyboard, monitor, screen, etc. and their basic operations.
This Microsoft Word beginner guide provides free & basic lessons, tutorials & fundamentals for learning MS Office Word software. Microsoft Word is everyone’s favorite text editor. With so many features, it can meet all your requirements. It may look complicated to use initially, but once you get the hang of it, things start falling in place. This blog post is for those who want to learn the basic functions and features and know more about Microsoft Word.
To start the Microsoft Word application, click on the START button > Microsoft Office > Word or simply search for ‘Word’ in the search box and then click on the result. Once it is opened, select New document.
This is how the opened blank Microsoft Word document will look like.

Now let us take a look at the features that it has to offer.
1] Title and the Quick Access Toolbar
At the top, you have the Title of the document, the Quick Access Toolbar and a few other functions such as Minimize, Restore Down / Maximize, Close and Ribbon Display Options.
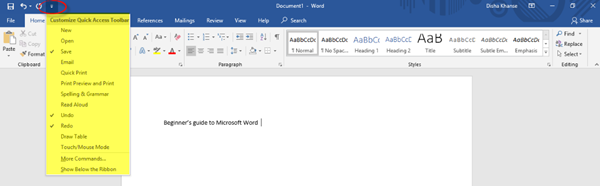
In the Quick Access Toolbar to the left of the Title Bar, you will find the Save button (Ctrl+S), wherein you can save the document in the desired folder; the Undo Typing button (Ctrl+Z); the Repeat Typing button (Ctrl+Y); and the Customize Quick Access Toolbar, wherein you have the various commands as shown in the image below.
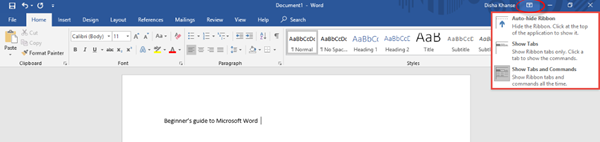
In the Ribbon Display Options, it is possible to Auto-hide the ribbon, show the ribbon tabs only or show the tabs and commands all the time. Refer to the image below.
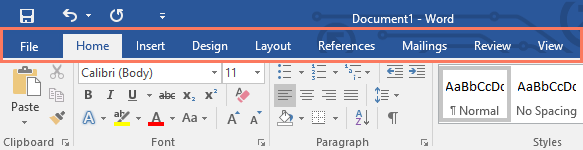
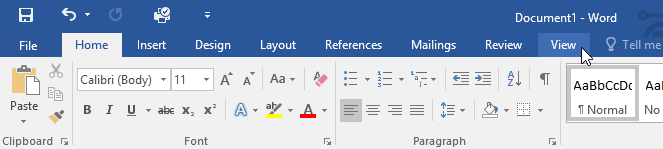
Below the Title Bar, you will see what is called the Ribbon which consists of various tabs such as File, Home, Insert, Design, Layout, References, Mailings, Review, View, Help, Search. Now let us go through every Tab and its commands.
2] Home
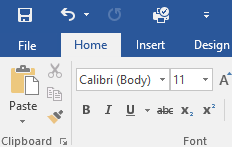
The Home tab is the default tab in Microsoft Word. This tab comprises of features related to the clipboard, font, paragraph, styles, and editing.
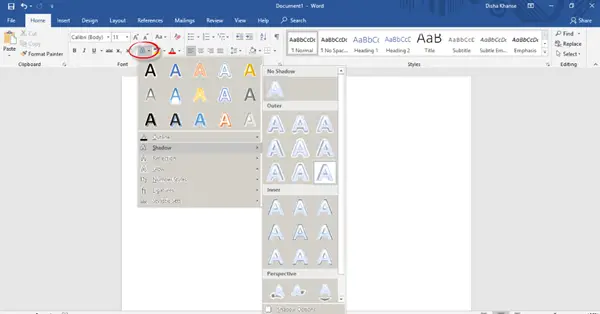
In the Clipboard section, you will find commands such as copy, cut and paste. Next, we have the Font section. Here you can change the font and the font size for your text, change the case, apply bold or italic formatting, underline, change the font color and highlight text and also add various text effects and typography. Go ahead and explore all the different options to make your text look great and innovative!

The Paragraph section includes the alignment options where you can choose to align your text in the center, left, right or justify it (that is, evenly distribute the text between the margins).
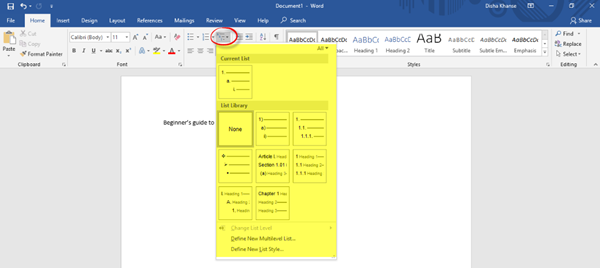
You can add or remove borders, increase or decrease indent, adjust the line and paragraph spacing, and also add bullets and numbers from the bullets and numbering libraries.
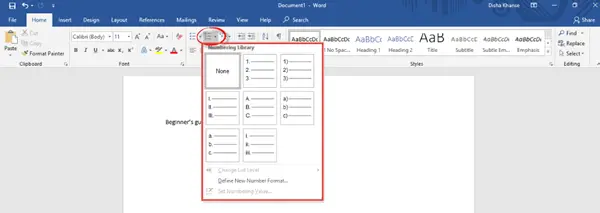
You can also create a multilevel list to organize items or create an outline.
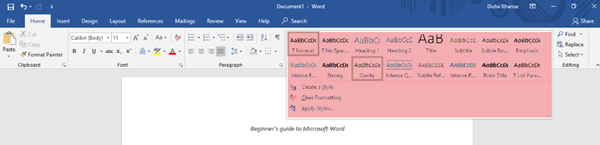
From the Styles section, you can select any style of your choice to change the way your document looks. In the Editing section, you can find text or any content in the document and also replace a specific word or text with something else.
3] Insert
The next tab is the Insert tab.

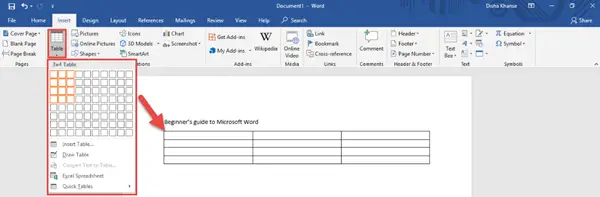
You can add a stylish cover page from the numerous styles available to make your document look more professional and also add a blank page from the Pages section. Another important feature is inserting a table, a picture from your picture gallery, an online picture from the web, shapes, 3D models, charts, SmartArt and screenshots from the Tables and the Illustrations section. Refer to the images below for guidance.
You can insert Tables.
You can insert Shapes.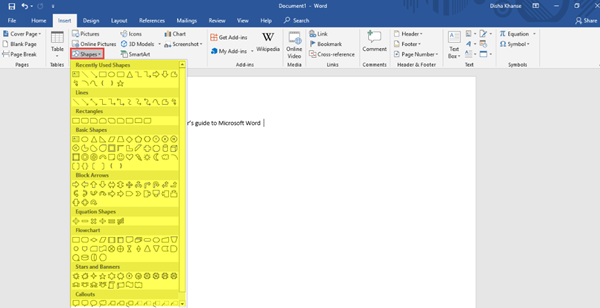
You can insert SmartArt – and more!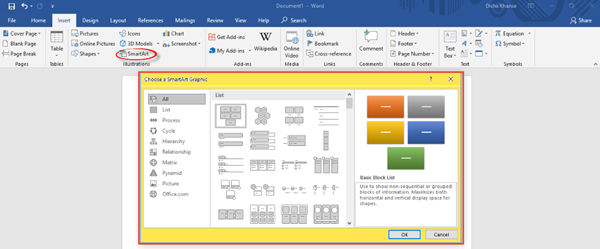
In the Header & Footer section, you can add a built-in header and a footer or from online sources. You can also add page numbers to your document.
Similarly, there are a lot of other features and commands in the Add-ins, Media, Links, Comments, Text and Symbols sections.
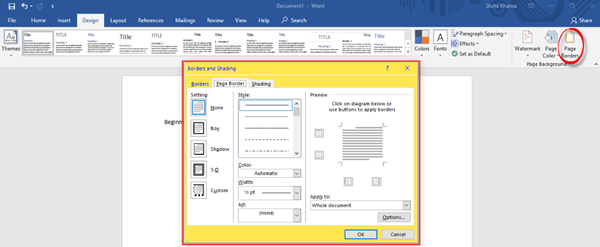
4] Design
The Design tab comprises of commands related to Document Formatting and Page Background. To make your document look more consistent and classy, choose the right theme of your liking from the various options available. Additional features include colors, fonts, effects, and paragraph spacing.
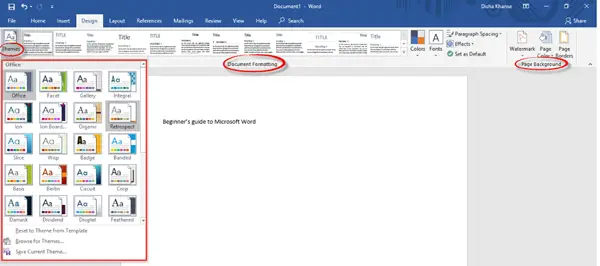
If you wish to go for a splash of color for the document background, you can change the page color as well, add Watermark and page borders.
5] Layout
In this tab, in the Page Setup section, you can adjust margins for the entire document or for a particular section; and also customize it. You can change the Page Orientation to Landscape or Portrait; choose the page size for your document, and add or remove columns.
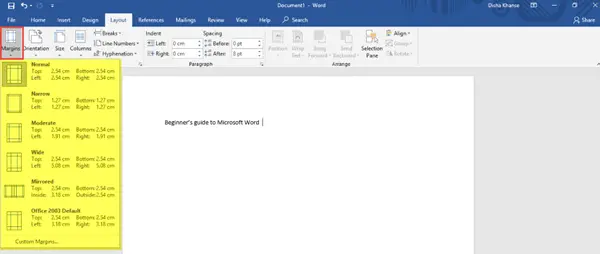
You can also decide the Size for the document.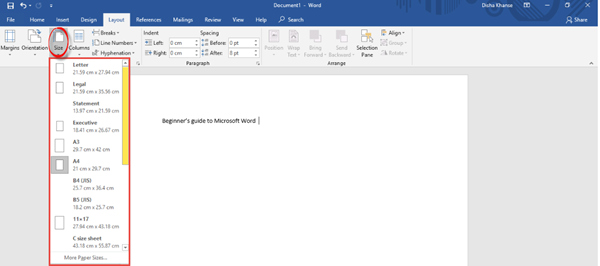
Find the settings to increase or decrease the Indent and Spacing in the Paragraph section.
Other features related to the placement of text and pictures, grouping multiple images and rotation options will be found in the Arrange section.
6] References
In the References tab, you will find different commands related to the table of contents, footnotes, research, citations and bibliography, captions, index and table of authorities.

7] Mailings
Here, you will find settings that will help you to create envelopes and labels, start the mail merge wherein you can send it to multiple recipients, write and insert fields, preview results and finish mail merge.

8] Review
The Review tab includes various functions related to proofing, speech, accessibility, language, comments, tracking, changes, compare, protect and ink. Out of all these, the Spelling and Grammar function (F7) is of utmost importance. Do check for spelling and grammatical errors after you are done writing your document.

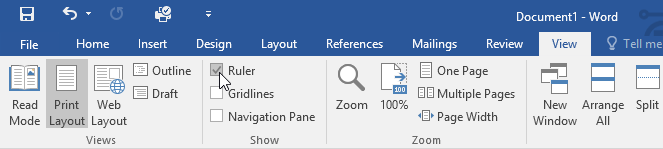
9] View
In the View tab, you can change the views such as Read Mode, Print Layout, Web Layout, etc. Feel free to explore the additional features from the immersive, page movement, show, zoom, window, macros, and SharePoint sections.

10] Help
In the Help tab, you can contact an office support agent and give feedback.

11] Search
In the Search tab, you can type any feature that you are looking for and get help.
12] File
In the File tab, you can save the document, print and share the document, and also publish it.

In this post, I have tried to cover all the basic and useful features and functions of Microsoft Word.
This is my first blog post and I hope it was helpful to you. Your suggestions are most welcome.
Do try out all these features in order to make your MS Word document absolutely presentable and perfect!
Next, you might want to take a look at our Microsoft Word Tips And Tricks post.
Lesson 1: Getting Started with Word
Introduction
Microsoft Word is a word processing application that allows you to create a variety of documents, including letters, resumes, and more. In this lesson, you’ll learn how to navigate the Word interface and become familiar with some of its most important features, such as the Ribbon, Quick Access Toolbar, and Backstage view.
Watch the video below to become more familiar with Word.
About this tutorial
The procedures in this tutorial will work for all recent versions of Microsoft Word, including Word 2019, Word 2016, and Office 365. There may be some slight differences, but for the most part these versions are similar. However, if you’re using an earlier version, you may want to refer to one of our other Word tutorials instead.
The Word interface
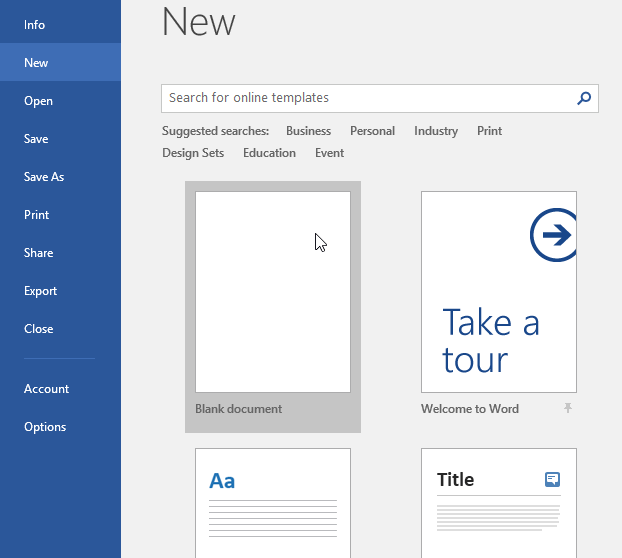
When you open Word for the first time, the Start Screen will appear. From here, you’ll be able to create a new document, choose a template, and access your recently edited documents. From the Start Screen, locate and select Blank document to access the Word interface.
Click the buttons in the interactive below to learn more about the Word interface.
Working with the Word environment
All recent versions of Word include the Ribbon and the Quick Access Toolbar, where you’ll find commands to perform common tasks in Word, as well as Backstage view.
The Ribbon
Word uses a tabbed Ribbon system instead of traditional menus. The Ribbon contains multiple tabs, which you can find near the top of the Word window.
Each tab contains several groups of related commands. For example, the Font group on the Home tab contains commands for formatting text in your document.
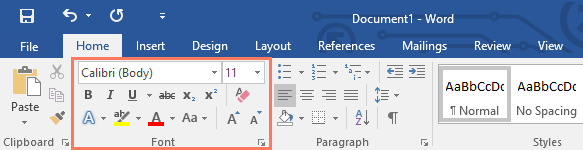
Some groups also have a small arrow in the bottom-right corner that you can click for even more options.
![]()
Showing and hiding the Ribbon
If you find that the Ribbon takes up too much screen space, you can hide it. To do this, click the Ribbon Display Options arrow in the upper-right corner of the Ribbon, then select the desired option from the drop-down menu:
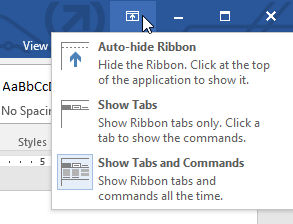
- Auto-hide Ribbon: Auto-hide displays your document in full-screen mode and completely hides the Ribbon from view. To show the Ribbon, click the Expand Ribbon command at the top of screen.
- Show Tabs: This option hides all command groups when they’re not in use, but tabs will remain visible. To show the Ribbon, simply click a tab.
- Show Tabs and Commands: This option maximizes the Ribbon. All of the tabs and commands will be visible. This option is selected by default when you open Word for the first time.
To learn how to add custom tabs and commands to the Ribbon, review our Extra on Customizing the Ribbon.
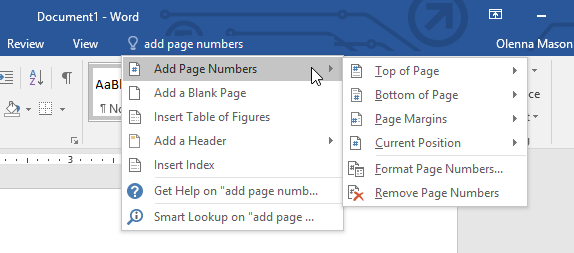
Using the Tell me feature
If you’re having trouble finding a command you want, the Tell Me feature can help. It works just like a regular search bar. Type what you’re looking for, and a list of options will appear. You can then use the command directly from the menu without having to find it on the Ribbon.
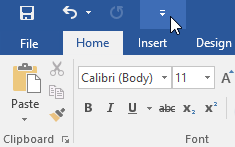
The Quick Access Toolbar
Located just above the Ribbon, the Quick Access Toolbar lets you access common commands no matter which tab is selected. By default, it shows the Save, Undo, and Redo commands, but you can add other commands depending on your needs.
To add commands to the Quick Access Toolbar:
- Click the drop-down arrow to the right of the Quick Access Toolbar.

- Select the command you want to add from the menu.
- The command will be added to the Quick Access Toolbar.

The Ruler
The Ruler is located at the top and to the left of your document. It makes it easier to adjust your document with precision. If you want, you can hide the Ruler to create more screen space.
To show or hide the Ruler:
- Click the View tab.
- Click the checkbox next to Ruler to show or hide the Ruler.
Backstage view
Backstage view gives you various options for saving, opening a file, printing, and sharing your document. To access Backstage view, click the File tab on the Ribbon.

Click the buttons in the interactive below to learn more about using Backstage view.
Document views and zooming
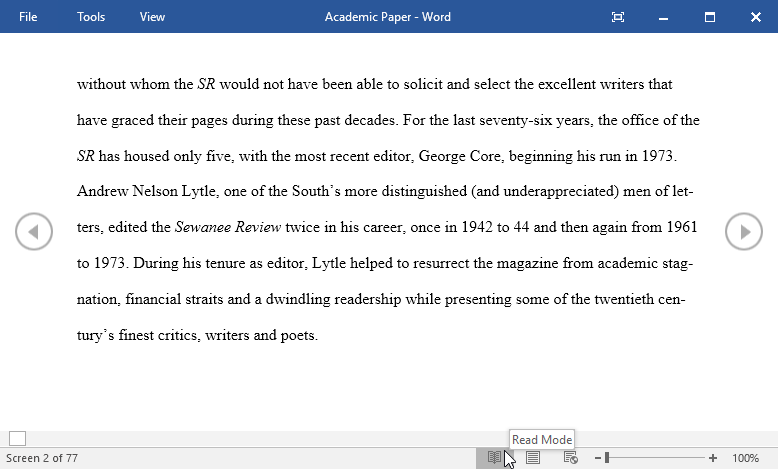
Word has a variety of viewing options that change how your document is displayed. You can choose to view your document in Read Mode, Print Layout, or Web Layout. These views can be useful for various tasks, especially if you’re planning to print the document. You can also zoom in and out to make your document easier to read.
Switching document views
Switching between different document views is easy. Just locate and select the desired document view command in the bottom-right corner of the Word window.
- Read Mode: This view opens the document to a full screen. This view is great for reading large amounts of text or simply reviewing your work.
- Print Layout: This is the default document view in Word. It shows what the document will look like on the printed page.
- Web Layout: This view displays the document as a webpage, which can be helpful if you’re using Word to publish content online.


Zooming in and out
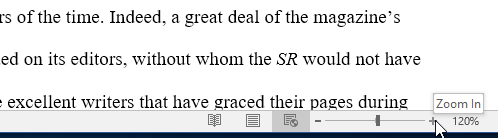
To zoom in or out, click and drag the zoom control slider in the bottom-right corner of the Word window. You can also select the + or — commands to zoom in or out by smaller increments. The number next to the slider displays the current zoom percentage, also called the zoom level.
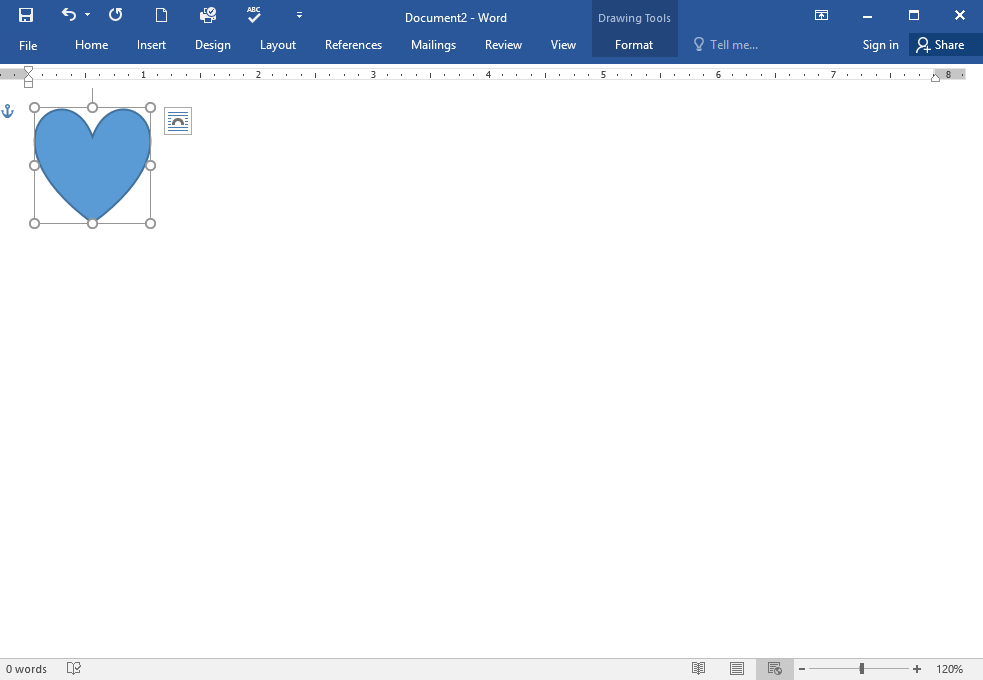
Challenge!
- Open Word, and create a blank document.
- Change the Ribbon Display Options to Show Tabs.
- Using Customize Quick Access Toolbar, add New, Quick Print, and Spelling & Grammar.
- In the Tell me bar, type Shape and press Enter.
- Choose a shape from the menu, and double-click somewhere on your document.
- Show the Ruler if it is not already visible.
- Zoom the document to 120%.
- Change the Document view to Web Layout.
- When you’re finished, your document should look something like this:

-
Change the Ribbon Display Options back to Show Tabs and Commands, and change the Document View back to Print Layout.
/en/word/understanding-onedrive/content/
Приветствую всех читателей на нашем бесплатном курсе по Word. У нашей команды давно зрела мысль создать что-то полезное и интересное для всех. Большинство курсов в интернете либо платные, либо неполные – с большим количеством пробелов. И в этом году мы решили создать свой курс с нуля. В него мы постарались вложить все самое важное и нужное для тех людей, кто постоянно работает в программе Microsoft Word. Не смотря на то, что редактор достаточно популярный, даже заядлые Word-старожилы до сих пор находят в нем все новые и интересные фишки, которыми пользуются не все.
Содержание
- Почему курс бесплатный?
- Чему я научусь?
- Часть 1: Основы
- Часть 2: Работа с дополнительными элементами
- Часть 3: Графика
- Часть 4: Дополнительный функционал
- Задать вопрос автору статьи
Почему курс бесплатный?
На данный момент у нас уже собрано более 50 уроков, и каждую неделю наш курс будет пополняться новыми инструкциями. Пока он не полный, но мы стараемся над ним работать в свободное время. Из нашей команды над курсом работают два специалиста. Мы изначально хотели сделать полезный и доступный курс, которым можно будет делиться со всеми. Вы можете просто скопировать ссылку и отправить её любому знакомому, другу, подруге, маме, папе или тому человеку, кто в данный момент изучает эту программу. Курс доступен всем.
Чему я научусь?

Курс рассчитан как для продвинутых пользователей, так и для начинающих. Мы поэтапно будем изучать все аспекты программы Word. Мы начнем с самых азов и потихоньку будем продвигаться от самого простого к сложному. На любом этапе обучения вы можете обращаться к нам с вопросами – для этого достаточно написать их в комментариях. Старайтесь писать максимально подробно, чтобы мы точно смогли вам помочь.
Если какие-то моменты в уроке не указаны, мы будем их дополнять. Мы вместе с вами и делаем этот курс – ваша обратная связь, поможет сделать его удобным, полезным и простым для всех. Для удобства, как я и говорил ранее, уроки разбиты на несколько частей. Я советую начинать с самого первого шага и продолжать обучение поэтапно. Если у вас сложно со временем, много работы и есть домашние хлопоты – я настоятельно рекомендую проходить как минимум по одному уроку каждый день. Именно регулярность – залог успеха в любом обучении.
Часть 1: Основы
Вот мы и подошли к самым азам, без которых работать в программе просто невозможно. Мы научимся подчеркивать текст, работать с ориентацией. Вы научитесь настраивать страницу по параметрам и отличать тире от дефиса. Дополнительно мы научимся работать с горячими клавишами, которые в разы облегчают работу в любой программе.
- Подчеркнутый текст.
- Делаем большие буквы маленькими.
- Зачеркиваем текст.
- Тире и дефис.
- Интервалы между символами и буквами.
- Интервалы между абзацами.
- Настройка полей.
- Красная строка.
- Включаем линейку.
- Параметры страницы.
- Книжная ориентация.
- Что такое колонтитул?
- Уменьшаем размер колонтитула
- Нумерация страниц.
- Копирование листа.
- Заголовки.
- Как сохранить файл.
- Маркированные и нумерованные списки.
- Разметка страницы.
- Как поставить индексы?
Часть 2: Работа с дополнительными элементами
Первая часть позади, а дальше только самое интересное. Здесь мы будем работать с таблицами, научимся их создавать, переносить из Excel, объединять таблицы и даже переворачивать. Также вы наконец-то поймете, что же такое табуляция и зачем эта штука нужна.
- Как вставить таблицу в документ?
- Как выровнять текст в таблице в Word и саму таблицу.
- Объединение ячеек.
- Добавление новой строки в таблицу.
- Табуляция – что за непонятное слово?
- Перенос таблицы из Excel в Word.
- Подсчет суммы в таблице.
- Объединение таблиц.
- Можно ли перевернуть таблицу?
- Удаление таблицы (все варианты).
- Как сжать таблицу?
- Делаем невидимую таблицу
- Как удалить строку или столбец в таблице?
- Как преобразовать таблицу в текст?
Часть 3: Графика
Вот мы и подошли к самой красочной части нашего курса. Здесь мы научимся рисовать различные элементы, вставлять картинки, фотографии. Попробуем добавлять красивые эффекты. Также вы поймете, что из себя представляет графический объект на листе в Word документе и как с ним правильно нужно работать.
- Рисуем график.
- Вставка картинки.
- Обтекание текстом.
- Обрезаем картинку.
- Поворот изображения.
- Рисуем стрелки.
- Линии.
- Как сделать визитку.
- Как сделать зеркальный текст.
- Как перемещать картинку?
- Как сделать текст полукругом?
- Как написать текст на картинке
- Как наложить картинку на картинку?
Часть 4: Дополнительный функционал
В четвертой части мы более глубоко начнем изучать все тайные механизмы программы Word. Мы научимся сортировать список. Попробуем самостоятельно составить список литературы, а также с помощью функции начертим дробное выражение. Окунемся в мир самого популярного редактора более глубоко.
- Пишем над подчеркнутой строкой.
- Голосовой ввод текста без рук.
- Сортировка.
- Степень числа.
- Черта для подписи.
- Можно ли писать вертикально?
- Содержание с многоточием.
- Меняем страницы местами.
- Список литературы.
- Презентация в Word – можно ли сделать?
- Галочка в квадрате.
- Дроби.
- Удаляем лишние большие пробелы в документа.
- Убираем разрывы страниц.
- Все секреты полос.
- Непечатаемые символы.
- Квадратные скобки.
- Знак градуса.
- Римские цифры.
- Рамки и их секреты.
- Убираем примечания.
- Удаление лишних пробелов.
- Удаление пустых страниц.
- Количество знаков в документе.
- Разрывы раздела: как вставить и использовать.
- Как выбрать формат в Word: А3, А4, А5
- Работа с примечаниями
- Ставим пароль на файл
- Сетка
- Если Word не отвечает
- Меняем кодировку
- Создание шаблонов
- Меняем автора документа.
- Работа с закладками.