
Introduction
We have seen a few Laravel tutorials for beginners and through one of our blog posts, we received a query- Laravel 8 export data excel file with example. So here we are with another Laravel tutorial!
In this step-by-step guideline of Laravel 8 export data as excel file, we will build a demo application in which we will use the maatwebsite/excel package for exporting data. You might be familiar with the package; it provides the best way for exporting the data as a CSV file or Excel file.
We will build a demo application where we will see how to implement Excel export functionality in Laravel using the maatwebsite/excel package.
Before starting the development part, let’s see the below video so that you can have an idea of what are we going to build in this blog.
Create a Model with Migration
Run this command to create a modal

php artisan make:model Student -m
// Student.php
Here we have to store the student data to create a table and define the table’s fields.
Create a Data Table
Go to the database/migration folder, then open the migration file and write the following code.
// 2021_07_16_041455_create_students_table
id();
            $table->string('name');
            $table->string('email');
            $table->string('city');
            $table->timestamps();
        });
    }
    /**
     * Reverse the migrations.
     *
     * @return void
     */
    public function down()
    {
        Schema::dropIfExists('students');
    }
}
We will create a table using the above fields.
Now run this command. This command is useful for creating actual tables in the GUI and migrating tables in the database.
php artisan migrate
Install maatwebsite/excel package
To install maatwebsite/excel, run the below-mentioned command
composer require maatwebsite/excel.
With the help of this package, we can export data into an excel file.
Now open config/app.php and add service provider and alias.
'providers' => [
      ....
     MaatwebsiteExcelExcelServiceProvider::class,
],
'aliases' => [
      ....
     'Excel' => MaatwebsiteExcelFacadesExcel::class,
],
Define the routes
Routes are required for navigating the web pages for defining routes in our demo app, open routes/web.php, and use the following code.
// web.php
Route::resource('student', StudentController::class);
Route::get('student_export',[StudentController::class, 'get_student_data'])->name('student.export');
Create an Export Class
In this section, we will create an export class and define the model to which it is connected. The maatwebsite package offers a way for building an export class so that we can further use it in the controller.
Run the below command for the same.
php artisan make:export StudentExport --model=Student
Here StudentExport class will define the data that we want to export in our excel file.
Go to app/Exports/ StudentExport.php and make the following changes in your code
// StudentExport.php
The heading() function will define the heading, which would be displayed in an excel file.
The collection() method will return the data which we have to export. Here in our demo app, we will export all student data using the Student Model.
Create Controller
Before creating the controller we have to make a request.
The command for creating a request.
php artisan make::request StoreStudentRequest
Here are the validation rules applied for entering student data.
public function rules()
    {
        return [
            'name' => 'bail|required|string|max:255',
            'email' => 'bail|required|string|email|max:255',
            'city' => 'bail|required|string|max:255'
        ];
    }
}
Run this command to create a resource controller for writing the logic.
php artisan make:controller StudentController –resource
Go to app/Http/Controllers/StudentController.php and write a code.
// StudentController.php
name = $request->name;
        $student->email = $request->email;
        $student->city = $request->city;
        $student->save();
        return redirect(route('student.index'))->with('success','Data submited successfully!');
    }
    /**
     * Display the specified resource.
     *
     * @param  int  $id
     * @return IlluminateHttpResponse
     */
    public function show($id)
    {
        //
    }
    /**
     * Show the form for editing the specified resource.
     *
     * @param  int  $id
     * @return IlluminateHttpResponse
     */
    public function edit($id)
    {
        //
    }
    /**
     * Update the specified resource in storage.
     *
     * @param  IlluminateHttpRequest  $request
     * @param  int  $id
     * @return IlluminateHttpResponse
     */
    public function update(Request $request, $id)
    {
        //
    }

    /**
     * Remove the specified resource from storage.
     *
     * @param  int  $id
     * @return IlluminateHttpResponse
     */
    public function destroy($id)
    {
        //
    }
    public function get_student_data()
    {
        return Excel::download(new StudentExport, 'students.xlsx');
    }
}
Now we will use the download method of the Laravel excel package within the get_student_data() function. It will accept two parameters: export class and name of the file (you can name it anything you want)
The second parameter is the name of the file in which we want to export the data.
- The create() function is used to create the form.
- The store() method is used to store the data in the database
- The index() method is used to display the data.
Create a View to Add Records and Display Details
Go to the resources/views folder. Create a new folder layout with a file named a main.blade.php
// main.blade.php
    href="https://cdn.jsdelivr.net/npm/bootstrap@5.0.2/dist/css/bootstrap.min.css" rel="stylesheet" integrity="sha384-EVSTQN3/azprG1Anm3QDgpJLIm9Nao0Yz1ztcQTwFspd3yD65VohhpuuCOmLASjC" crossorigin="anonymous">
    @yield('title')


     @yield('content')
Now create another folder within the views folder named student. We have to add the records of the student, and for that, we will need forms. Forms are defined in the view file.
Here main.blade.php is the parent layout file containing all the common header and footer.
In the Student folder, create two files, namely: create.blade.php and index.blade.php.
The create.blade.php file is required to create the form so that students can enter the data. Open create.blade.php and write the following code.
//create.blade.php
@extends('layout.main')

@section('title')
    Registration form
@endsection

@section('content')

    Student Registration Form

        @csrf

            Name

            @error('name')
            {{ $message }}
            @enderror


            Email

            @error('email')
            {{ $message }}
          @enderror


            City

            @error('city')
            {{ $message }}
            @enderror

        Submit


@endsection
In the index.blade.php file, we have displayed the Student data in the table format, and we can easily download the data and export it as an excel file by clicking the Export button.
// index.blade.php
@extends('layout.main')

@section('title')
    Student Data
@endsection

@section('content')

    @if ($message = session('success'))

        {{ $message }}

     @endif
    Student Data


             Export Data


            Add Data


                ID
                Name
                Email
                City


            @foreach ($students as $student)

                      {{ $student->id }}
                      {{ $student->name }}
                      {{ $student->email }}
                      {{ $student->city }}

            @endforeach


        {{ $students->links() }}


@endsection
Develop. Maintain. Optimize. Deploy – with Bacancy!
Are you looking for proficient developers to build highly-optimized applications? Get in touch with us to hire Laravel developer. Contact the best, to get the best! Period!
Run the Demo Application
The last section of the tutorial- laravel 8 export data as excel file is to run the app. Now it’s time to run our demo. Run the below command.
php artisan serve
After running the server successfully you can see the app working on
http://localhost:8000/student/create
GitHub Repository
The entire source code is available here: laravel-excel-export-example. Feel free to clone the repo and play around with the code.
Conclusion
So, I hope the tutorial of laravel 8 export data as excel file was helpful to you. Are you a laravel enthusiast and find it difficult for basic tutorials? If yes, then the Laravel tutorials page is for you! Feel free to visit and explore more such laravel tutorials.
Bacancy has dedicated, skilled, and experienced laravel developers with problem-solving skills. If you are looking for laravel developers who can help you with your requirements and project then without wasting your time contact Bacancy and hire laravel developer.

Supercharged Excel exports and imports
A simple, but elegant Laravel wrapper around PhpSpreadsheet
exports and imports.
Quickstart
·
Documentation
·
Video Course
·
Nova
·
Blog
·
Contributing
·
Support
![]()

✨ Features
-
Easily export collections to Excel. Supercharge your Laravel collections and export them directly to an Excel or CSV document. Exporting has never been so easy.
-
Supercharged exports. Export queries with automatic chunking for better performance. You provide us the query, we handle the performance. Exporting even larger datasets? No worries, Laravel Excel has your back. You can queue your exports so all of this happens in the background.
-
Supercharged imports. Import workbooks and worksheets to Eloquent models with chunk reading and batch inserts! Have large files? You can queue every chunk of a file! Your entire import will happen in the background.
-
Export Blade views. Want to have a custom layout in your spreadsheet? Use a HTML table in a Blade view and export that to Excel.
🎓 Learning Laravel Excel
You can find the full documentation of Laravel Excel on the website.
We welcome suggestions for improving our docs. The documentation repository can be found at https://github.com/SpartnerNL/laravel-excel-docs.
Some articles and tutorials can be found on our blog: https://medium.com/maatwebsite/laravel-excel/home
📬 License & Postcardware

Laravel Excel is created with love and care by Spartner (formerly known as Maatwebsite) to give back to the Laravel community. It is completely free (MIT license) to use, however the package is licensed as Postcardware. This means that if it makes it to your production environment, we would very much appreciate receiving a postcard from your hometown.
Spartner
Markt 2
6231 LS Meerssen
The Netherlands.
More about the license can be found at: https://docs.laravel-excel.com/3.1/getting-started/license.html
Created by Spartner (formerly Maatwebsite)
We are a strategic development partner, creating web-based custom built software from Laravel. In need of a digital solution for your challenge? Give us a call.
https://spartner.software
info@spartner.nl
+31 (0) 10 — 7449312
🔧 Supported Versions
Versions will be supported for a limited amount of time.
| Version | Laravel Version | Php Version | Support |
|---|---|---|---|
| 2.1 | <=5.6 | <=7.0 | Unsupported since 15-5-2018 |
| 3.0 | ^5.5 | ^7.0 | Unsupported since 31-12-2018 |
| 3.1 | >=5.8 | <=10.x | ^7.2 | ^8.0 | New features |
In this tutorial, we will see Laravel Export In Excel and CSV Data Example using the maatwebsite/excel 3.1 packages. In the general Laravel project, we always need to import or export the rows from the database. The maatwebsite/excel makes it very easy to import-export data in Laravel.
To export data in excel and csv in Laravel, use the maatwebsite/excel 3.1 package. Laravel Excel package is intended at being Laravel-flavoured PhpSpreadsheet: a simple but elegant wrapper around PhpSpreadsheet to simplify the exports and imports. PhpSpreadsheet is the library written in pure PHP and provides the set of classes that allow us to read from and write to different types of spreadsheet file formats, like Excel and LibreOffice Calc.
If you want to get up and running with basic laravel functionality, go to my other article on this web blog called Laravel 7 Crud Example From Scratch.
If you want to Generate PDF In Laravel, check out Laravel Generate PDF From View Example. For this example, we use the package called maatwebsite/excel version 3.1. So, our Laravel 9 and maatwebsite/excel 3.1.
When using the package in your application, it’s good to understand how it functions behind the scenes. Following the behind-the-scenes will make you feel more comfortable and confident using the maximum potential of the tool.
Laravel Excel Features
- We can easily export collections to Excel.
- We can export queries with automatic chunking for better performance.
- We can queue exports for better performance.
- We can easily export Blade views to Excel.
- We can easily import it to collections.
- We can read the Excel file in chunks.
- We can handle the import inserts in batches.
Requirements
- PHP:
^7.0 - Laravel:
^5.5 - PhpSpreadsheet:
^1.6 - PHP extension
php_zipenabled - PHP extension
php_xmlenabled - PHP extension
php_gd2enabled
Step 1: Installation
Require the following package in the composer.json of your Laravel 9 project. The following command will download the package and PhpSpreadsheet.
composer require maatwebsite/excel
➜  laravel6 git:(master) ✗ composer require maatwebsite/excel
Using version ^3.1 for maatwebsite/excel
./composer.json has been updated
Loading composer repositories with package information
Updating dependencies (including require-dev)
Package operations: 4 installs, 0 updates, 0 removals
  - Installing markbaker/matrix (1.1.4): Downloading (100%)
  - Installing markbaker/complex (1.4.7): Downloading (100%)
  - Installing phpoffice/phpspreadsheet (1.9.0): Downloading (100%)
  - Installing maatwebsite/excel (3.1.17): Downloading (100%)
phpoffice/phpspreadsheet suggests installing mpdf/mpdf (Option for rendering PDF with PDF Writer)
phpoffice/phpspreadsheet suggests installing tecnickcom/tcpdf (Option for rendering PDF with PDF Writer)
phpoffice/phpspreadsheet suggests installing jpgraph/jpgraph (Option for rendering charts, or including charts with PDF or HTML Writers)
Writing lock file
Generating optimized autoload files
> IlluminateFoundationComposerScripts::postAutoloadDump
> @php artisan package:discover --ansi
Discovered Package: barryvdh/laravel-dompdf
Discovered Package: facade/ignition
Discovered Package: fideloper/proxy
Discovered Package: laravel/tinker
Discovered Package: laravel/ui
Discovered Package: maatwebsite/excel
Discovered Package: nesbot/carbon
Discovered Package: nunomaduro/collision
Package manifest generated successfully.
➜  laravel6 git:(master) ✗
Step 2: Configure package
The MaatwebsiteExcelExcelServiceProvider is auto-discovered and registered by default.
If you want to register by yourself, then add the ServiceProvider in config/app.php:
'providers' => [
    /*
     * Package Service Providers...
     */
    MaatwebsiteExcelExcelServiceProvider::class,
]
Excel facade is auto-discovered.
If you want to add it manually, add a Facade in config/app.php:
'aliases' => [
    ...
    'Excel' => MaatwebsiteExcelFacadesExcel::class,
]
If you want to publish a config, run the vendor publish command:
php artisan vendor:publish --provider="MaatwebsiteExcelExcelServiceProvider"
➜  laravel6 git:(master) ✗ php artisan vendor:publish --provider="MaatwebsiteExcelExcelServiceProvider"
Copied File [/vendor/maatwebsite/excel/config/excel.php] To [/config/excel.php]
Publishing complete.
➜  laravel6 git:(master) ✗
This will create the new config file named config/excel.php.
Step 3: Create model and migration files
Type the following command.
php artisan make:model Disneyplus -m
Now, go to the [timestamp].create_disneypluses_table.php file and add the columns.
public function up()
{
        Schema::create('disneypluses', function (Blueprint $table) {
            $table->bigIncrements('id');
            $table->string('show_name');
            $table->string('series');
            $table->string('lead_actor');
            $table->timestamps();
        });
}
Now, migrate the database using the following command.
php artisan migrate
Step 4: Create a controller and routes
The next step is to create a DisneyplusController.php file.
php artisan make:controller DisneyplusController
Now, add the two routes inside the routes >> web.php file.
// web.php

Route::get('disneyplus', 'DisneyController@create')->name('disneyplus.create');
Route::post('disneyplus', 'DisneyController@store')->name('disneyplus.store');
Now, create two methods inside the DisneyplusController.php file.
<?php

// DisneyplusController.php

namespace AppHttpControllers;

use IlluminateHttpRequest;
use AppDisneyplus;

class DisneyplusController extends Controller
{
    public function create()
    {

    }

    public function store()
    {

    }
}
Step: 5 Create a form blade file for input the data
Now, inside the views folder, create the form.blade.php file. Add the following code.
@extends('layout')

@section('content')
<style>
  .uper {
    margin-top: 40px;
  }
</style>
<div class="card uper">
  <div class="card-header">
    Add Disneyplus Shows
  </div>
  <div class="card-body">
    @if ($errors->any())
      <div class="alert alert-danger">
        <ul>
            @foreach ($errors->all() as $error)
              <li>{{ $error }}</li>
            @endforeach
        </ul>
      </div><br />
    @endif
      <form method="post" action="{{ route('disneyplus.store') }}">
          <div class="form-group">
              @csrf
              <label for="name">Show Name:</label>
              <input type="text" class="form-control" name="show_name"/>
          </div>
          <div class="form-group">
              <label for="price">Series :</label>
              <input type="text" class="form-control" name="series"/>
          </div>
          <div class="form-group">
              <label for="quantity">Show Lead Actor :</label>
              <input type="text" class="form-control" name="lead_actor"/>
          </div>
          <button type="submit" class="btn btn-primary">Create Show</button>
      </form>
  </div>
</div>
@endsection
Step 6: Store data in the database
Now, we will write the two functions inside the DisneyplusController.php file.
<?php

namespace AppHttpControllers;

use IlluminateHttpRequest;
use AppDisneyplus;

class DisneyplusController extends Controller
{
    public function create()
    {
        return view('form');
    }

    public function store(Request $request)
    {
        $validatedData = $request->validate([
            'show_name' => 'required|max:255',
            'series' => 'required|max:255',
            'lead_actor' => 'required|max:255',
        ]);
        Disneyplus::create($validatedData);

        return redirect('/disneyplus')->with('success', 'Disney Plus Show is successfully saved');
    }
}
So, in the above file, first, we have shown the form file, and then inside the store function, we check for validation and then store the data into the database.
Also, add the fillable fields inside the Disneyplus.php model file.
<?php

namespace App;

use IlluminateDatabaseEloquentModel;

class Disneyplus extends Model
{
    protected $fillable = ['show_name', 'series', 'lead_actor'];
}
Now, go to this route: http://laravel6.test/disneyplus or http://localhost:8000/disneyplus.
You will see one form. Try to save the data, and if everything in the code is right, you will see one entry in the database.
Step: 7 Create a view file to display the data.
Before creating a view file, we need to add one route inside the web.php.
// web.php

Route::get('disneyplus/list', 'DisneyplusController@index')->name('disneyplus.index');
Now, create a view file called list.blade.php file. Add the following code.
@extends('layout')
@section('content')
<table class="table table-striped">
  <thead>
    <th>ID</th>
    <th>Show Name</th>
    <th>Series</th>
    <th>Lead Actor</th>
    <th>Action</th>
  </thead>
  <tbody>
    @foreach($shows as $show)
    <tr>
      <td>{{$show->id}}</td>
      <td>{{$show->show_name}}</td>
      <td>{{$show->series}}</td>
      <td>{{$show->lead_actor}}</td>
    </tr>
    @endforeach
  </tbody>
</table>
@endsection
Now, add the code inside the index() function of the DisneyplusController.php file.
public function index()
{
        $shows = Disneyplus::all();

        return view('list', compact('shows'));
}
Now, go to the http://laravel6.test/disneyplus/list or http://localhost:8000/disneyplus/list.
You will see the listing of the shows.
Step 8: Create Exports class
You may do this by using the make:export command.
php artisan make:export DisneyplusExport --model=Disneyplus
The file can be found in app/Exports directory.
The file DisneyplusExport.php is the following.
<?php

namespace AppExports;

use AppDisneyplus;
use MaatwebsiteExcelConcernsFromCollection;

class DisneyplusExport implements FromCollection
{
    /**
    * @return IlluminateSupportCollection
    */
    public function collection()
    {
        return Disneyplus::all();
    }
}
If you prefer to create the export manually, you can build the following in app/Exports.
Step 9: Write the export function
Inside the DisneyplusController.php file, add the following code.
// DisneyplusController.php

use AppDisneyplus;
use AppExportsDisneyplusExport;
use MaatwebsiteExcelFacadesExcel;

public function export()
{
        return Excel::download(new DisneyplusExport, 'disney.xlsx');
}
So, our final file looks like below.
<?php

namespace AppHttpControllers;

use IlluminateHttpRequest;
use AppDisneyplus;
use AppExportsDisneyplusExport;
use MaatwebsiteExcelFacadesExcel;

class DisneyplusController extends Controller
{
    public function create()
    {
        return view('form');
    }

    public function store(Request $request)
    {
        $validatedData = $request->validate([
            'show_name' => 'required|max:255',
            'series' => 'required|max:255',
            'lead_actor' => 'required|max:255',
        ]);
        Disneyplus::create($validatedData);

        return redirect('/disneyplus')->with('success', 'Disney Plus Show is successfully saved');
    }

    public function index()
    {
        $shows = Disneyplus::all();

        return view('list', compact('shows'));
    }

    public function export()
    {
        return Excel::download(new DisneyplusExport, 'disney.xlsx');
    }
}
Finally, add the route to be able to access the export:
// web.php

Route::get('export', 'DisneyplusController@export');
Also, add the link to the Export inside the list.blade.php file.
@foreach($shows as $show)
    <tr>
      <td>{{$show->id}}</td>
      <td>{{$show->show_name}}</td>
      <td>{{$show->series}}</td>
      <td>{{$show->lead_actor}}</td>
      <td><a href="{{action('DisneyplusController@export')}}">Export</a></td>
    </tr>
@endforeach
Okay, now eventually go to the http://laravel6.test/disneyplus/list, and now you can see one link called Export.
Click on the Export link, and you will see the disney.xlsx file inside your Download folder.
Exporting collections in CSV in Laravel
By default, the export format is determined by the file’s extension.
public function export()
{
        return Excel::download(new DisneyplusExport, 'disney.csv');
}
It will download the CSV file.
If you want to configure the export format explicitly, you can pass it through as 2nd parameter.
You can find more details about export in different formats on this link.
Finally, Laravel Export in Excel and CSV data example is over.

Export Data to Excel Files in Laravel 8
Today I am Going To Explain you about how you can Export Excel Files in Laravel 8.
I am going to use Tech-Admin Panel for this.
For Exporting excel file i am using Laravel Excel.
You can read about Laravel Import From CSV/ Excel Files Here!
Step 1 — Installation
To Install the Laravel Excel Package via composer run command below.
composer require maatwebsite/excel
Enter fullscreen mode
Exit fullscreen mode
Next to export config file you need run command below.
php artisan vendor:publish --provider="MaatwebsiteExcelExcelServiceProvider" --tag=config
Enter fullscreen mode
Exit fullscreen mode
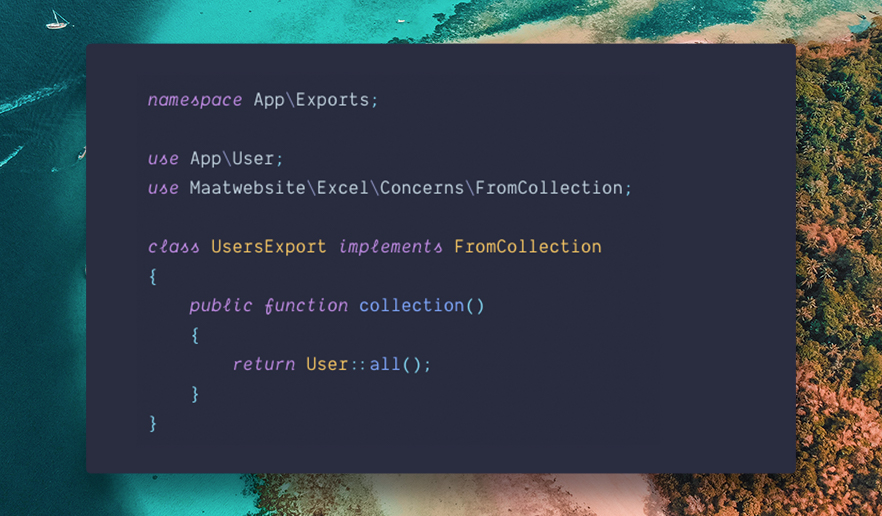
Step 2 — Create an Exports Class inside app/Exports
Create Exports Class by using artisan command
php artisan make:export UsersExport --model=User
Enter fullscreen mode
Exit fullscreen mode
Step 3 — Handle Export To Excel Function
public function export()
{
   return Excel::download(new UsersExport, 'users.xlsx');
}
Enter fullscreen mode
Exit fullscreen mode
You can watch the explanation video for more clarity.
Thank You for Reading
In case of any query related to LARAVEL.
Reach Out To me.
Twitter
Instagram
Laravel 9 Export data in excel and csv file using laravel
15-03-2022
| Share:
https://www.fundaofwebit.com/post/how-to-export-data-in-excel-file-using-laravel-9
Laravel 9 Export data in excel and csv file using laravel from database.
In this tutorial, you will be learning how to export data to excel file in laravel 9. So to export data in excel and csv in Laravel, use the maatwebsite/excel 3.1 package. So start with Laravel Excel Export.
Step 1: Install maatwebsite/excel Package with following command:
composer require psr/simple-cache:^1.0 maatwebsite/excel
If you are using less than laravel 9 version, then install with below command:
composer require maatwebsite/excel
If you are using less than laravel 9 version, lets add it manually in the following path: config/app.php and add service provider and alias:
‘providers’ => [
….
MaatwebsiteExcelExcelServiceProvider::class,
],
‘aliases’ => [
….
‘Excel’ => MaatwebsiteExcelFacadesExcel::class,
],
after adding the provider and aliases, run the below command to pushlish.
php artisan vendor:publish —provider=«MaatwebsiteExcelExcelServiceProvider» —tag=config
Step 2: Create Export Class with the following command:
php artisan make:export StudentsExport
Step 3: After Export created successfully, Open StudentsExport.php file in the following path: app/Exports/StudentsExport.php and paste the below code:
<?php
namespace AppExports;
use AppModelsStudent;
use IlluminateContractsViewView;
use MaatwebsiteExcelConcernsFromView;
class StudentsExport implements FromView
{
public function view(): View
{
return view(‘exports.studentexport’, [‘students’ => Student::all()]);
}
}
Step 4: Create a file named studentexport.blade.php in following path: resources/views/exports/studentexport.blade.php and paste below code:
This file is going to be converted in Excel Sheet when you export data. This file is called in Step 3.
<!DOCTYPE html>
<html lang=«en»>
<head>
<meta charset=«UTF-8»>
<meta name=«viewport» content=«width=device-width, initial-scale=1.0»>
<meta http-equiv=«X-UA-Compatible» content=«ie=edge»>
<title>Export Student Data</title>
</head>
<body>
<table>
<thead>
<tr>
<th>ID</th>
<th>Name</th>
<th>Email</th>
<th>Phone</th>
<th>Course</th>
<th>Created At</th>
</tr>
</thead>
<tbody>
@foreach($students as $student)
<tr>
<td>{{ $student->id }}</td>
<td>{{ $student->name }}</td>
<td>{{ $student->email }}</td>
<td>{{ $student->phone }}</td>
<td>{{ $student->course }}</td>
<td>{{ $student->created_at->format(‘d-m-Y’) }}</td>
</tr>
@endforeach
</tbody>
</table>
</body>
</html>
Step 5: Create a controller eg: StudentController.php and paste the below code in it.
<?php
namespace AppHttpControllers;
use IlluminateHttpRequest;
use AppExportsStudentsExport;
use MaatwebsiteExcelFacadesExcel;
class StudentController extends Controller
{
public function index()
{
return view(‘student.view’);
}
public function exportExcel()
{
return Excel::download(new StudentsExport, ‘students.xlsx’);
}
}
Step 6: Define the Routes in following path:
Route::get(‘students’, [AppHttpControllersStudentController::class, ‘index’]);
Route::get(‘export-student’, [AppHttpControllersStudentController::class, ‘exportExcel’]);
Step 7: Create a file view.blade.php in the path: resources/views/student/view.blade.php and paste the below code:
@extends(‘layouts.app’)
@section(‘content’)
<div class=«container mt-4»>
<div class=«card»>
<div class=«card-header»>
<h4>Export Excel / CSV File data in Laravel</h4>
</div>
<div class=«card-body»>
<a href=«{{ url(‘export-student’) }}« class=«btn btn-primary»>Export Student Data</a>
</div>
</div>
</div>
@endsection
Step 8: That’s it, you are done, Now serve the application.
php artisan serve
Once you download the excel format will be:
Thank you
In Laravel, you don’t have to write long code to export your data, there is already a package available for that – Laravel Excel.
It allows exporting data in various formats like – XLSX, CSV, XLS, HTML, etc.
In this tutorial, I show how you can export MySQL database data in CSV & Excel format using the Laravel Excel package in Laravel 8.

Contents
- Install Package
- Update app.php
- Publish package
- Database Configuration
- Create Table
- Model
- Create Export class
- Route
- Controller
- View
- Demo
- Conclusion
1. Install Package
Requirement –
- PHP:
^7.2|^8.0 - Laravel:
^5.8 - PhpSpreadsheet:
^1.21 - psr/simple-cache:
^1.0 - PHP extension
php_zipenabled - PHP extension
php_xmlenabled - PHP extension
php_gd2enabled - PHP extension
php_iconvenabled - PHP extension
php_simplexmlenabled - PHP extension
php_xmlreaderenabled - PHP extension
php_zlibenabled
Install the package using composer –
composer require maatwebsite/excel
If you are getting an error while executing the above command then execute the below command –
composer require psr/simple-cache:^1.0 maatwebsite/excel
After that again execute –
composer require maatwebsite/excel
2. Update app.php
- Open
config/app.phpfile. - Add the following
MaatwebsiteExcelExcelServiceProvider::classin'providers'–
'providers' => [
      ....
      ....
      ....
      MaatwebsiteExcelExcelServiceProvider::class
];
- Add the following
'Excel' => MaatwebsiteExcelFacadesExcel::classin'aliases'–
'aliases' => [
     ....
     ....
     ....
     'Excel' => MaatwebsiteExcelFacadesExcel::class
];
3. Publish package
Run the command –
php artisan vendor:publish --provider="MaatwebsiteExcelExcelServiceProvider" --tag=config
This will create a new excel.php file in config/.
4. Database Configuration
Open .env file.
Specify the host, database name, username, and password.
DB_CONNECTION=mysql
DB_HOST=127.0.0.1
DB_PORT=3306
DB_DATABASE=tutorial
DB_USERNAME=root
DB_PASSWORD=
5. Create Table
- Create a new table
Employeesusing migration and add some records.
php artisan make:migration create_employees_table
- Now, navigate to
database/migrations/folder from the project root. - Find a PHP file that ends with
create_employees_tableand open it. - Define the table structure in the
up()method.
public function up()
{
    Schema::create('employees', function (Blueprint $table) {
        $table->id();
        $table->string('username');
        $table->string('name');
        $table->string('email');
        $table->smallInteger('age');
        $table->timestamps();
    });
}
- Run the migration –
php artisan migrate
- The table is been created and add some records in it.
6. Model
- Create
EmployeesModel.
php artisan make:model Employees
- Open
app/Models/Employees.phpfile. - Specify mass assignable Model attributes – username, name, email, and age using the
$fillableproperty.
Completed Code
<?php

namespace AppModels;

use IlluminateDatabaseEloquentFactoriesHasFactory;
use IlluminateDatabaseEloquentModel;

class Employees extends Model
{
    use HasFactory;

    protected $fillable = [
       'username','name','email','age'
    ];
}
7. Create Export class
I am creating 2 export classes just for example purpose –
1. EmployeesExport Class –
php artisan make:export EmployeesExport --model=Employees
- Open
app/Exports/EmployeesExport.phpfile.
Class has 2 methods –
- collection() – Load export data. Here, you can either –
- Return all records.
- Return specific columns or modify the return response which I did in the next Export class.
- headings() – Specify header row.
NOTE – Remove headings() methods if you don’t want to add a header row.
Completed Code
<?php

namespace AppExports;

use AppModelsEmployees;
use MaatwebsiteExcelConcernsFromCollection;
use MaatwebsiteExcelConcernsWithHeadings;

class EmployeesExport implements FromCollection, WithHeadings
{

    /**
    * @return IlluminateSupportCollection
    */
    public function collection()
    {
        ## 1. Export all data
        // return Employees::all();

        ## 2. Export specific columns
        return Employees::select('id','username','name')->get();

    }

    public function headings(): array
    {
        return [
          '#',
          'Username',
          'Name'
        ];
    }
}
2. EmployeesByAgeExport Class –
php artisan make:export EmployeesByAgeExport --model=Employees
- Open
app/Exports/EmployeesByAgeExport.phpfile. - In this class, I added
__construct()to allow a parameter send while creating class instance and use it to retrieve data. - After initializing
$resultArray pass$resultincollect()for return –return collect($result); - Mention header row names in the
heading()method.
Completed Code
<?php

namespace AppExports;

use AppModelsEmployees;
use MaatwebsiteExcelConcernsFromCollection;
use MaatwebsiteExcelConcernsWithHeadings;

class EmployeesByAgeExport implements FromCollection, WithHeadings
{
    private $agegreaterthan;

    public function __construct($age=0)
    {
        $this->agegreaterthan = $age;
    }

    /**
    * @return IlluminateSupportCollection
    */
    public function collection()
    {
        ## 3. Conditional export and customize result
        $records = Employees::select('*')->where('age','>',$this->agegreaterthan)->get();

        $result = array();
        foreach($records as $record){
           $result[] = array(
              'id'=>$record->id,
              'username' => $record->username,
              'name' => $record->name,
              'email' => $record->email,
              'age' => $record->age,
              'status' => 1 // Custom data
           );
        }

        return collect($result);
    }

    public function headings(): array
    {
       return [
         '#',
         'Username',
         'Name',
         'Email',
         'Age',
         'Status'
       ];
    }
}
8. Route
- Open
routes/web.phpfile. - Define 4 routes –
- / – Load index view.
- employees/exportcsv – Export data in CSV format.
- employees/exportexcel – Export data in Excel format.
- employees/exportbyagecsv – POST route to export data by age.
Completed Code
<?php

use IlluminateSupportFacadesRoute;
use AppHttpControllersEmployeesController;

Route::get('/', [EmployeesController::class, 'index'])->name('home');
Route::get('employees/exportcsv', [EmployeesController::class, 'exportCSV'])->name('employees.exportcsv');
Route::get('employees/exportexcel', [EmployeesController::class, 'exportExcel'])->name('employees.exportexcel');
Route::post('employees/exportbyagecsv', [EmployeesController::class, 'exportByAgeCSV'])->name('employees.exportbyagecsv');
9. Controller
- Create
EmployeesControllerController.
php artisan make:controller EmployeesController
- Open
app/Http/Controllers/EmployeesController.phpfile. - Import
EmployeesExport,EmployeesByAgeExportandExcel. - Create 4 methods –
- index() – Load
indexview. - exportCSV() – To export data call
Excel::download().
- index() – Load
It takes 2 parameters –
-
- Class instance.
- File name with extension.
$file_name = 'employees_'.date('Y_m_d_H_i_s').'.csv';
return Excel::download(new EmployeesExport, $file_name);
-
- exportExcel() – Using the same above code and change the file extension to .xlsx.
- exportByAgeCSV() – Read POST age value and pass it with
EmployeesByAgeExport($age)instance.
$file_name = 'employees_'.date('Y_m_d_H_i_s').'.csv';
return Excel::download(new EmployeesByAgeExport($age), $file_name);
Completed Code
<?php

namespace AppHttpControllers;

use IlluminateHttpRequest;
use AppExportsEmployeesExport;
use AppExportsEmployeesByAgeExport;
use Excel;

class EmployeesController extends Controller
{
    public function index(){
       return view('index');
    }

    // CSV Export
    public function exportCSV(){
       $file_name = 'employees_'.date('Y_m_d_H_i_s').'.csv';
       return Excel::download(new EmployeesExport, $file_name);
    }

    // Excel Export
    public function exportExcel(){
       $file_name = 'employees_'.date('Y_m_d_H_i_s').'.xlsx';
       return Excel::download(new EmployeesExport, $file_name);
    }

    // Conditional Export (csv)
    public function exportByAgeCSV(Request $request){

       $age = $request->age;

       $file_name = 'employees_'.date('Y_m_d_H_i_s').'.csv';
       return Excel::download(new EmployeesByAgeExport($age), $file_name);
    }
}
10. View
Create index.blade.php file in resources/views/ folder.
Create 2 anchor elements –
- Set
hrefto{{ route('employees.exportcsv') }}for CSV export. - Set
hrefto{{ route('employees.exportexcel') }}for Excel export.
Create a <form method='post' action="{{ route('employees.exportbyagecsv') }}">. Add input element to enter age and a submit button.
Completed Code
<!DOCTYPE html>
<html>
<head>
<meta charset="utf-8">
<meta name="viewport" content="width=device-width, initial-scale=1">
<title>How to Export data to CSV & Excel format in Laravel 8</title>
<!-- CSS -->
<link href="https://cdn.jsdelivr.net/npm/bootstrap@5.2.0-beta1/dist/css/bootstrap.min.css" rel="stylesheet" >
</head>
<body>
<div class="container mt-5">
<a class="btn btn-primary" href="{{ route('employees.exportcsv') }}">CSV Export</a>
<a class="btn btn-primary" href="{{ route('employees.exportexcel') }}">Excel Export</a><br><br>
<form method='post' action="{{ route('employees.exportbyagecsv') }}">
@csrf
<div class="mb-3">
<label for="age" class="form-label">Age</label>
<input type="number" class="form-control" id="age" name="age" value="0">
</div>
<button type="submit" class="btn btn-success">Export</button>
</form>
</div>
</body>
</html>
11. Demo
View Demo
12. Conclusion
Use constructor in Export class to handle passed parameters and use it to fetch data.
In this tutorial, I only mentioned 2 export formats – CSV, and Excel but there is more format available. You can learn more about it from here.
You can view this tutorial to know how to import data using the Laravel Excel package.
If you found this tutorial helpful then don’t forget to share.
For web applications, importing Excel sheet data into our database and exporting data from the database into an Excel sheet, is an important feature. Because of this feature, we can easily perform batch import/export data by the web application. It is difficult in other Frameworks but easiest in laravel 8. It gives Maatwebsite/excel package to easily import/export data. In this article, we learn about, how data is exported and imported.
Features:
- Effectively send out assortments to Excel.
- Send out questions with programmed piecing for better execution.
- Line sends out for better execution.
- Effectively send out Blade perspectives to Excel.
- Effectively import to accumulations.
- Peruse the Excel record in pieces.
- Handle the import embeds in clumps.
Steps to laravel Import Export excel data: We want to follow a few steps to import and export data easily. There are 9 easy steps to follow.
- Install new laravel project
- Configure Database details and model
- Install maatwebsite/excel package
- Create Routes
- Create import class for import data
- Create an export class for export data
- Create controller
- Create blade / view files
- Run laravel project
1. Install new laravel project: In step first, create a new laravel project named laravel-excel. Use the below command to create a new laravel project.
composer create-project laravel/laravel excel
2. Configure Database details and make a model: In the second step, set up database configuration in the .env file in laravel 8.
PHP
DB_CONNECTION=mysql
DB_HOST=127.0.0.1
DB_PORT=8258
DB_DATABASE=laravel
DB_USERNAME=localhost
DB_PASSWORD=
Make model: Then make a new model named User model to connect with the user table in the database. In user, the table contains various fields like ID, name, phone, and email.
3. Install maatwebsite/excel Package: Now, using composer we install package name maatwebsite/excel to export and import data by using composer
composer require maatwebsite/excel
After installing the package we want to register the plugin’s service in providers and aliases.
We want to write the following code into the config/app.php file:
PHP
<?php
'providers' => [
MaatwebsiteExcelExcelServiceProvider::class, ],
'aliases' => [
'Excel' =>
MaatwebsiteExcelFacadesExcel::class, ],
?>
To publish the above configuration execute the vendor:publish command:
php artisan vendor:publish –provider=”MaatwebsiteExcelExcelServiceProvider” –tag=config
This command is to create a new config file config/excel.php
4. Create Routes: Then we create routes to handle requests from import and export files.
PHP
<?php
use AppHttpControllersUserController;
Route::get('/file-import',[UserController::class,
'importView'])->name('import-view');
Route::post('/import',[UserController::class,
'import'])->name('import');
Route::get('/export-users',[UserController::class,
'exportUsers'])->name('export-users');
?>
5. Create Import class import for import data: The package maatwebsite/excel provides you to build an import class file. Using the following command, we create an import class file.
php artisan make:import ImportUser --model=User
The file will create at the app/Imports/ImportUser.php path:
PHP
<?php
namespace AppImports;
use AppModelsUser;
use MaatwebsiteExcelConcernsToModel;
class ImportUser implements ToModel
{
public function model(array $row)
{
return new User([
'name' => $row[0],
'email' => $row[1],
'password' => bcrypt($row[2]),
]);
}
}
6. Create an Export class for export data: The package maatwebsite/excel provides you to build an export class file. Using the following command, we create an export class file.
php artisan make:export ExportUser --model=User
The file will create at the app/Exports/ExportUser.php path:
PHP
<?php
namespace AppExports;
use AppModelsUser;
use MaatwebsiteExcelConcernsFromCollection;
class ExportUser implements FromCollection {
public function collection()
{
return User::select('name','email')->get();
}
}
?>
7. Create Controller: To display data from the database, we need to create one controller. Using the below command we create a controller named UserController.
php artisan makes: controller UserController
The above command will create a controller file UserController.php at the path app/Http/controllers directory.
Write the below code into the UserController.php file:
PHP
<?php
namespace AppHttpControllers;
use IlluminateHttpRequest;
use MaatwebsiteExcelFacadesExcel;
use AppImportsImportUser;
use AppExportsExportUser;
use AppModelsUser;
class UserController extends Controller
{
public function importView(Request $request){
return view('importFile');
}
public function import(Request $request){
Excel::import(new ImportUser,
$request->file('file')->store('files'));
return redirect()->back();
}
public function exportUsers(Request $request){
return Excel::download(new ExportUser, 'users.xlsx');
}
}
?>
8. Create Blade/View file: To handle export and import at frontend of a web application, we need to create a view or blade file. Create a blade file at resources/views/importFile.blade.php:
HTML
<!DOCTYPE html>
<html>
<head>
<title> Import and Export Excel data to database Using Laravel 5.8 </title>
<link rel="stylesheet"
href=
</head>
<body>
<h6> Import and Export Excel data to
database Using Laravel 5.8
</h6>
<div class="container">
<div class="card bg-light mt-3">
<div class="card-header">
Import and Export Excel data
to database Using Laravel 5.8
</div>
<div class="card-body">
<form action="{{ route('import') }}"
method="POST"
enctype="multipart/form-data">
@csrf
<input type="file" name="file"
class="form-control">
<br>
<button class="btn btn-success">
Import User Data
</button>
<a class="btn btn-warning"
href="{{ route('export') }}">
Export User Data
</a>
</form>
</div>
</div>
</div>
</body>
</html>
9. Run laravel project: Run the below command on command prompt and check http://localhost:8000/file-import in the browser:
php artisan serve
Output:

Laravel Import Export