

If you’re creating a Word document with multiple page layouts, you may wish to make a single page landscape. Here’s how.
Photo Credit — iStockPhoto
When you’re creating Word documents, you have two-page layout options available—landscape or portrait. Portrait mode is the default option, but you can switch to landscape mode instead if you want your text sideways.
If you want to use both types of layouts in Word, you’ll need to use a few workarounds using section breaks and Word’s own page formatting options to do so. Here’s how.
If you want to quickly make one page landscape in Word, here’s what you’ll need to do:
- Open your Word document and place the blinking cursor at the start of the page you wish to change to landscape mode.
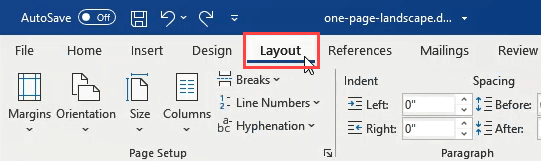
- Click on the Layout menu in the ribbon bar.
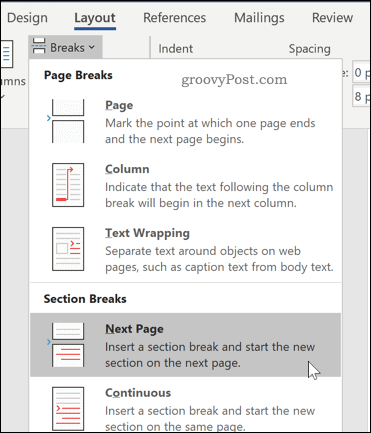
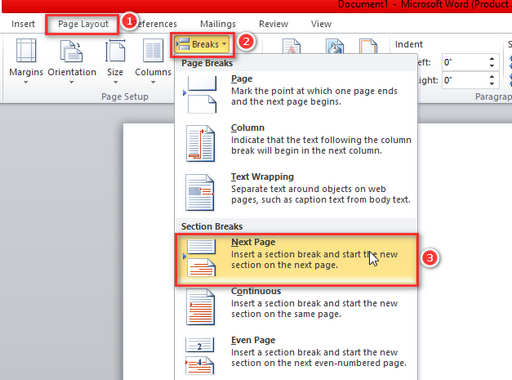
- Select Breaks > Next Page in the Section Breaks section. This will insert a section break and push your text onto a new page.

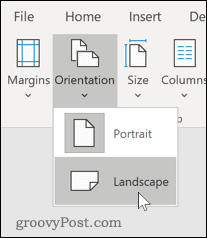
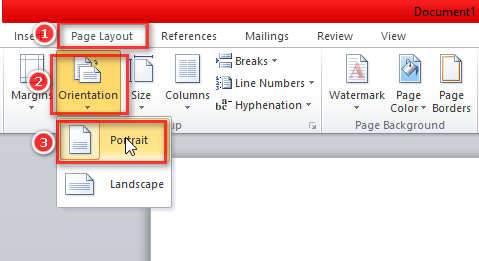
- In the Layout menu, press Orientation > Landscape. This will switch the current page and all the following pages to landscape mode.

- You’ll now need to turn the remaining pages back to portrait mode. Scroll down to the next page, then place the blinking cursor at the start of the page.
- Press Layout > Breaks > Next Page to insert a new section break.
- Click on Orientation > Portrait to switch the pages to portrait mode.


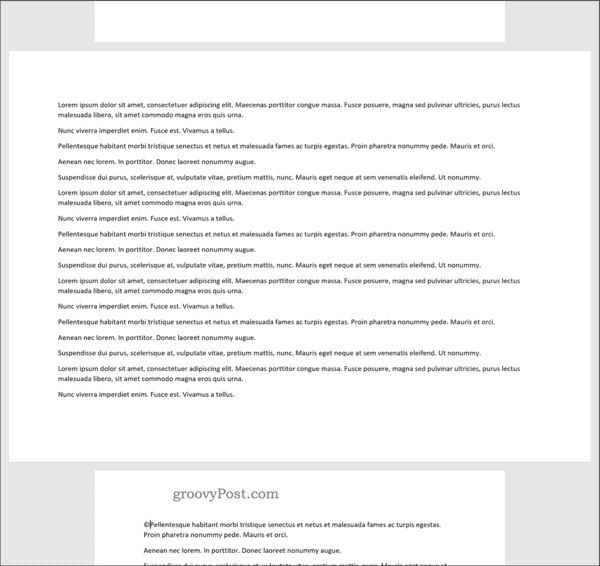
If you followed the steps correctly, you should now have one single landscape page, with all other pages remaining in portrait mode.
How to Make Specific Text Landscape in Word
If you don’t want all of the text on your page to appear on the landscape page, you can choose to make a landscape page that only contains specific text.
- To do this, start by highlighting the text that you want to appear on the landscape page.

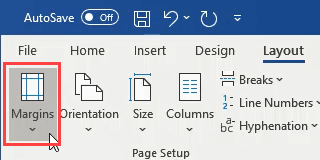
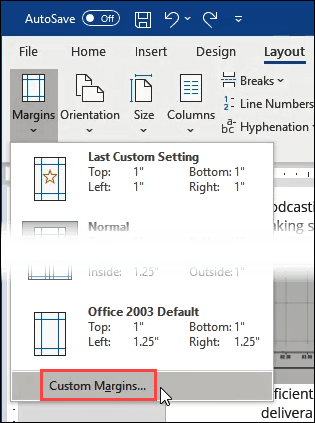
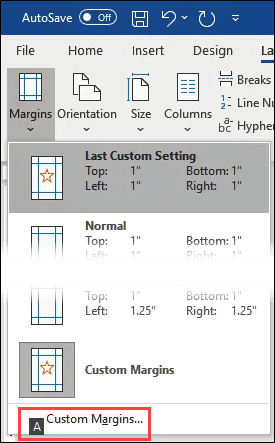
- In the Layout menu, click on Margins, then select the Custom Margins… option at the bottom of the drop-down menu.

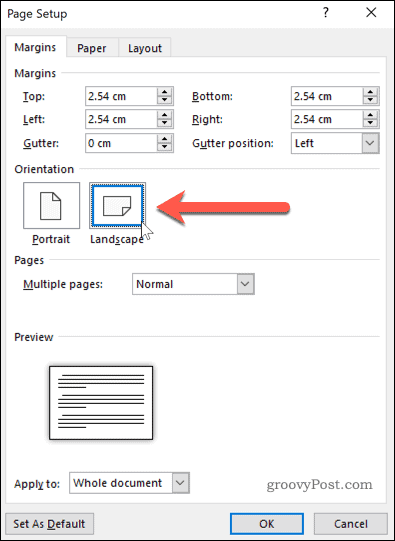
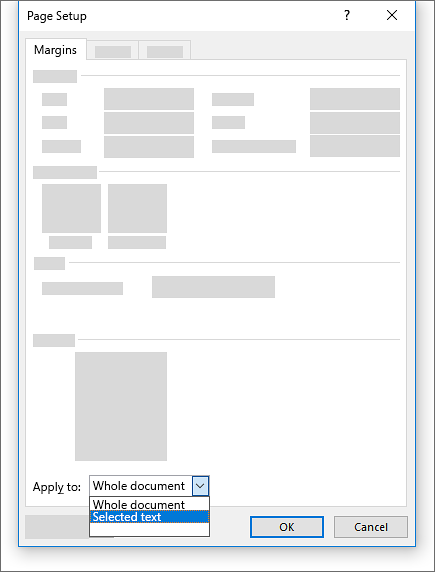
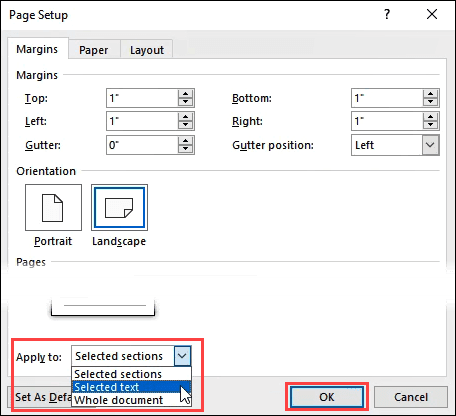
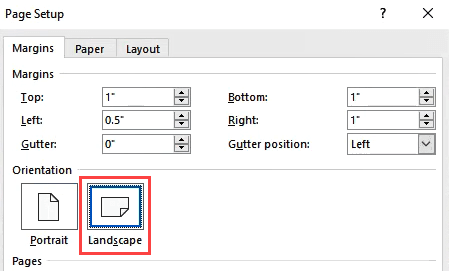
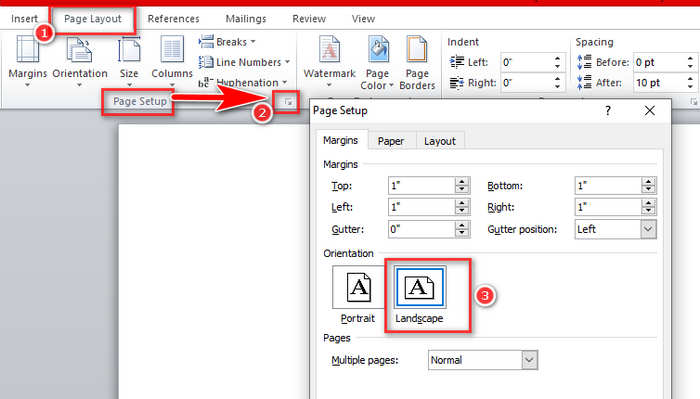
- In the Page Setup window, click on the Landscape option in the Margins tab, under the Orientation section.

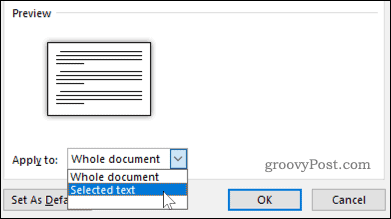
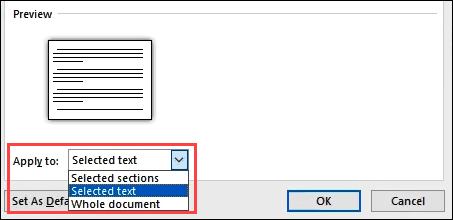
- In the Apply to box, choose Selected Text.

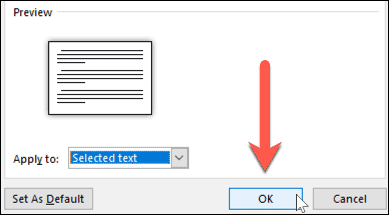
- Click OK to confirm the settings you’ve selected.


You should now have a landscape page that contains the text you previously highlighted, creating a section break that uses a different page layout to the rest of your Word document.
You can use this method to turn an entire page landscape—to do this, select all of the text on the page before you start and repeat the steps above to complete the change.
Formatting Microsoft Word Documents
Now that you know how to make a single page landscape in Word, you can start creating documents with as many combinations of landscape and portrait pages as you want. This is where learning how to rearrange pages in Word might just come in handy.
If you’re looking for other ways to take your Word documents further, why not learn how to insert an Excel table into Word. For academic documents, you may wish to create a table of contents in Word to keep your document organized.
![]()
Change page orientation to landscape or portrait

Change orientation of whole document
-
To change the orientation of the whole document, select Layout > Orientation.
-
Choose Portrait or Landscape.

Change part of a document to landscape
-
Select the content that you want on a landscape page.
-
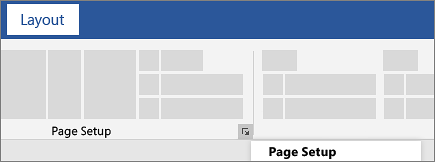
Go to Layout, and open the Page Setup dialog box.

-
Select Landscape, and in the Apply to box, choose Selected text.
Need more help?
Want more options?
Explore subscription benefits, browse training courses, learn how to secure your device, and more.
Communities help you ask and answer questions, give feedback, and hear from experts with rich knowledge.

Select the text on the page you want to be landscape in your document, then go to the Layout tab and open the «Page Setup» window. Set the orientation to «Landscape,» and pick «Selected Text» in the drop-down menu.
By default, Microsoft Word orients its pages in portrait view. While this works fine in most situations, you may have a single page that would look better in landscape view. Here are two ways to make one page landscape in Word.
Change One Page to Landscape With Page Setup
The quickest and easiest way to convert a page from portrait to landscape in Word is to select the content and turn only that page. This method works with text, images, tables, and other items you have on the page.
RELATED: Tables and Other Formatting Controls
Select all items on the page. If you have text, drag your cursor through all of it. If you have an image, table, chart, or another type of object, simply select it.

Go to the Layout tab and click the arrow on the bottom right corner of the Page Setup section of the ribbon. This opens the Page Setup dialog box.
Confirm that you’re on the Margins tab. Below Orientation, choose “Landscape.” Then at the bottom, click the Apply To drop-down box and choose “Selected Text.” Click “OK.”
When the dialog box closes, you will see your page turn to landscape view.
Make One Page Landscape by Inserting a Break
While the above method is the simplest, you may run into difficulties if you have different types of items on your page. For instance, you might have an image or table with text wrapped around it.
Although you can select all the content on the page, it may display on more than one page when you change the orientation. Luckily, there is another way to make one page landscape in these situations using a section break.
Place your cursor at the start of the page you want to change before any text or items.
Go to the Layout tab, click the Breaks drop-down arrow, and choose “Next Page.” This inserts a section break in your document.
Stay on the Layout tab, click the Orientation drop-down arrow, and pick “Landscape.” This changes the current and all subsequent pages to landscape view.
To return the remaining pages to portrait view, go to the next page and place your cursor at the beginning of the content.
Go to the Layout tab, click the Breaks drop-down arrow, and choose “Next Page.” This inserts another break in your document.
Now on the Layout tab, click the Orientation drop-down arrow and pick “Portrait.”
You’ll then see the remaining pages turn back to portrait view, leaving the one page you chose in landscape view.
If you use Google Docs as well as Microsoft Word, you can change the page orientation in Google Docs just as easily.
READ NEXT
- › 7 Reasons to Use Your Monitor in Portrait Mode
- › The New NVIDIA GeForce RTX 4070 Is Like an RTX 3080 for $599
- › How to Adjust and Change Discord Fonts
- › This New Google TV Streaming Device Costs Just $20
- › HoloLens Now Has Windows 11 and Incredible 3D Ink Features
- › Google Chrome Is Getting Faster
- › BLUETTI Slashed Hundreds off Its Best Power Stations for Easter Sale
How-To Geek is where you turn when you want experts to explain technology. Since we launched in 2006, our articles have been read billions of times. Want to know more?
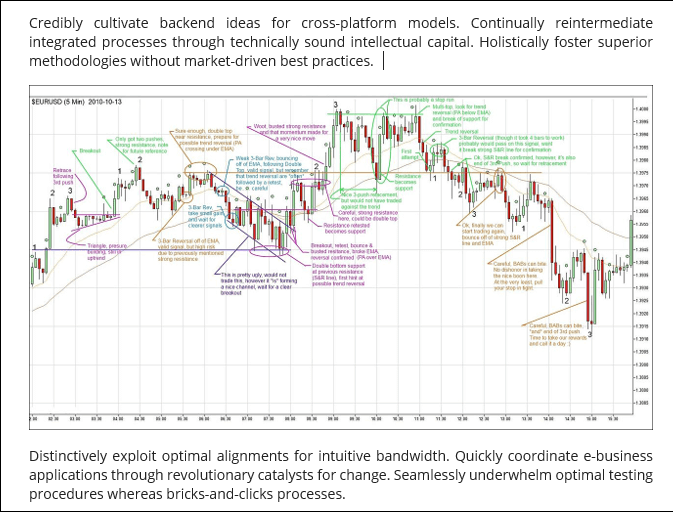
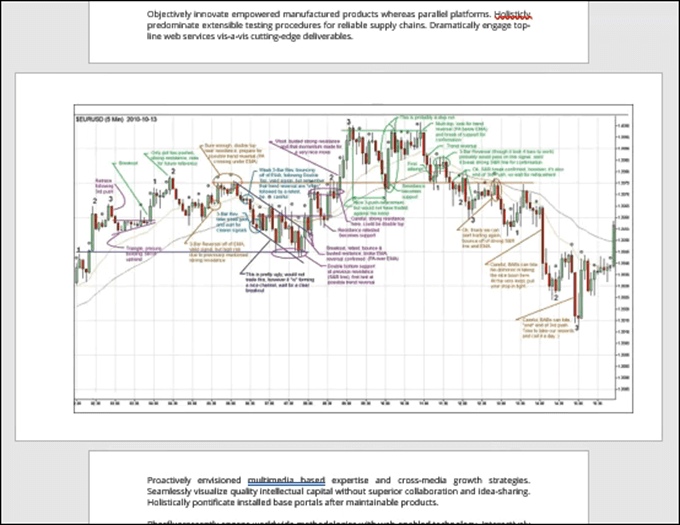
Have you ever been putting together an essay or report and wanted to include a large image? Maybe a nice graph or chart? The answer is to put it on a page in landscape, or horizontal, layout. So you try that, but then all the pages go to landscape.
Here’s the fastest, easiest way to make one page landscape in Word.

Also, feel free to check out the video we posted to our YouTube channel below, where we walk you through the same steps as in this article, just with an accent!
HOW TO MAKE A SINGLE PAGE LANDSCAPE: In Word
The Point & Click Way To Make One Page Landscape In Word
- Select the image or text that we want to be on a landscape-oriented page.

- Click on the Layout tab.
- Click on the down arrow under the Margins button.
- Click on Custom Margins…
- In the middle of the Page Setup window, click on the Landscape button.

- At the bottom of the Page Setup window, in the Apply to: select box, change it to Selected Text. Click OK.
The selected image or text will now be on its own landscape-oriented page. Resize the chart for the best fit and we have a beautiful report.
As simple as that is, it can be done more quickly using keyboard shortcuts. Let’s go through how to use keyboard shortcuts to make the one-page landscape in Word.
The Fastest Way To Make One Page Landscape In Word
How much faster is this method? I timed myself using the point-and-click method and the shortcut keys-only method. Once I had practiced the shortcut keys a few times, it took less than 30 seconds, whereas the point-and-click method took closer to a minute.
Using shortcut keys to do your most frequent tasks not only saves time, but it can also save your health. Much peoples wrist pain from work is caused by using the mouse. The other added bonus is you’ll look like a superstar at work. You’ll be doing things in seconds when others take minutes.
Even though it may look like there’s more work, it’s just broken down to be very precise. A lot of people have never used shortcut keys in this way and we don’t want them getting frustrated and giving up because we missed anything.
- Select the image or text that we want to be on a landscape-oriented page.

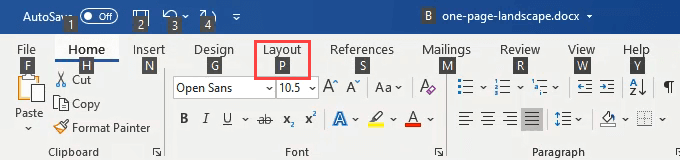
- Press the Alt key then press P to take us from the Home tab to the Layout tab.
- Press the M key to open the Margins button dropdown.
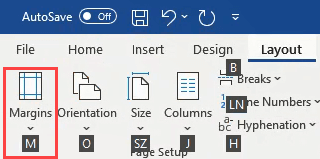
- Press the A key to choose the Custom Margins… and open the Page Setup window.
- Press Alt + S to choose Landscape orientation.
- Press Alt + Y to choose the Apply to: field, then tap the down arrow key once to choose Selected Text. Tap the Enter key once to set Selected Text as the choice, then tap Enter again to apply the setting.
The Page Setup window will close and the text or image will now be on a landscape layout page.

If you like how much faster the shortcut keys were, take a look at our other articles showing the magic of shortcut keys. You’ll wonder how you survived without these top 10 keyboard shortcuts for Windows 10. If you wish there was a shortcut for something, you also might be able to create custom keyboard shortcut for it in Windows 10.
Got some great shortcuts to share? Or questions about other ways to do tough things in Office or Windows? Pop it in the comments below. We’re all here to learn.
Word offers two choices for orienting your pages in a document. You can orient them either as portrait or as landscape. While portrait is the default option, you can switch to the landscape mode anytime.
Your document may have many small tables and charts in it. You can make the document look uniform by using portrait-oriented pages. But what if one of the tables or charts is large, and it does not fit on one portrait-oriented page? You may need to turn that page in the document into landscape orientation to show the large table or chart.
2 ways to make a Single Page Landscape in Word
- By introducing breaks and changing the orientation
- Using the Page Setup menu
Let us see how.
Method #1: Introduce breaks and change the orientation
Step #1: Open the Word document
Open the Word document.
Click on the View tab on the top menu bar to change the ribbon.
In the Zoom section, click on Multiple Pages.

Click the Zoom Out button on the slider at the bottom right-hand corner of Word window.

Click again on the Zoom Out button, until at least 3 pages are visible in the window.
Navigate to the page for which you want to change the orientation.
Position the document such that this page is in the middle of the three pages displayed.

Step #2: Introduce a Continuous Section Break
Place the cursor at the beginning of the page that you want to change.
Click on the Layout tab on the top menu bar to change the ribbon.
Click on the small triangle next to Breaks. This will open the Breaks menu.
Under Section Breaks, click on Continuous.

Step #3: Change orientation of page
Under the Layout tab, In the Page Setup section, click on the small triangle below the Orientation icon.
This will open two choices:
- Portrait
- Landscape

Click on Landscape.
Word will modify the page and all the following pages to landscape orientation.

Step #4: Change orientation of the rest of the pages
Place the cursor at the beginning of the next page.
Introduce a continuous section break as in Step #2.
Under the Layout tab, click on the small triangle below the Orientation icon. This will offer two choices:
- Portrait
- Landscape

Click on Portrait.
Word will modify the page and all the following pages to portrait orientation.

Method #2: Use the Page Setup menu
Step #1: Open the Word document
Open the Word document.
Click on the View tab on the top menu bar to change the ribbon.
In the Zoom section, click on Multiple Pages.

Click the Zoom Out button on the slider at the bottom right-hand corner of Word window.

Click again on the Zoom Out button, until at least 3 pages are visible in the window.
Navigate to the page for which you want to change the orientation. Position the document such that this page is in the middle of the three pages displayed.

Step #2: Open the page setup menu
Place the cursor at the beginning of the page that you want to change.
Click on the Layout tab on the top menu bar to change the ribbon.
Click on the down arrow next to Page Setup. This will open the Page Setup menu.

Step #3: Setup the page
In the Page Setup menu, click on the Margins tab.
Under Orientation, click on Landscape.
Under Preview, click on the down arrow next to Apply to:.
This will open three choices:
- This section: Apply the chosen orientation to the section under the cursor.
- This point forward: Apply the chosen orientation to all sections beyond the cursor.
- Whole document: Apply the chosen orientation to all sections in the document.
Click on This section.
Click on Ok to close the Page Setup menu.

Word changes the orientation of one page to landscape, while all other pages remain in portrait orientation.

Conclusion
Now you know how to make a one-page landscape in a document. You can also combine portrait and landscape pages in a Word document.
Page orientation defines the direction for printing or displaying the document in Word, but one
does not have to be the same for the entire document. Usually, the whole article, paper, or
report is printed in the Portrait mode, but for a page with the big table, it is more
convenient to use the Landscape mode. On the Layout tab in the Page Setup
group, you can easily change the page orientation both for the entire document and for a
single page. Microsoft Word inserts sections breaks before and after the selected page, and
you can add more pages to this section later.
To change the page orientation for whole document Word, on the
Layout tab, in the Page Setup group, click Orientation:

From the Orientation dropdown list, choose the orientation you need:

To change the orientation of one page, or a few pages of
the document, do the following:
1. Select the text of the page or of the several
pages for which you want to change the page orientation.
2. On the Layout tab, in the Page Setup
group, click Margins:

Select Custom Margins… from the Margins dropdown list:

3. In the Page Setup dialog box, on the Margins
tab:
- In the Orientation group, choose Portrait or Landscape orientation,
- In the Apply to list, choose Selected text:

4. Click OK.
Notes:
- Microsoft Word automatically inserts section breaks before and after the text
that has the new page orientation. If you write a book or a long report and
your document is already divided into sections, you can click in the section
(or select multiple sections), and then change the orientation only for the
sections that you have chosen:

- The option Selected text in the Apply to list appears only if
there is selected text in the document.
See also this tip in French:
Comment changer l’orientation d’une page dans Word.
Please, disable AdBlock and reload the page to continue
Today, 30% of our visitors use Ad-Block to block ads.We understand your pain with ads, but without ads, we won’t be able to provide you with free content soon. If you need our content for work or study, please support our efforts and disable AdBlock for our site. As you will see, we have a lot of helpful information to share.
Microsoft Word is one of the most popular word processing softwares used by people in all walks of life worldwide.
Me being a Computer Science and Software engineering student, who always has to code in different softwares, also have to use Microsoft Word a lot.
This just shows how essential Word is to everyone. From writing thesis papers to literature essays, Word is the perfect tool for the job.
So it is entirely normal if you want to know how to make only one page landscape in Word.

Why would you make one page landscape in Word?
Well, there could be many reasons why you would want to do that. It could be done to show more information or for more aesthetic purposes as well. To make a single page landscape, you have to go to Layout or Page Layout>Breaks>Next Page>Page Layout>Orientation>Landscape.
There are general inquiries by many users regarding Microsoft Word. I have conducted extensive research and have written the best solutions to those inquiries in this post.
Read the full post to know more details.
Also, check out our separate post on how to enable equation editor in Microsoft Word.
In Word, you can change the way your document looks. When you take a picture on your phone, you can take it in landscape or portrait fashion. Taking the photo while holding the phone horizontally is called taking a photo in a landscape setting. Vertically it is called portrait.
The same principle is applicable for Word documents. As I care about you, I have written the steps to make your document in a landscape setting.
Here are the steps to make one-page landscape in Word:
- Open your Word document.
- Click at the beginning of the page you want to modify to place the cursor.
- Click on the Layout or Page Layout
- Click on Breaks.
- Click on Next Page. A section will be created.

- Click on the Page Layout tab and select Orientation.
- Click at the beginning of the next page to place your cursor.
- Click on the Page Layout
- Click on Breaks.
- Click on Next Page.
- Click on the Page Layout.
- Select Orientation then Portrait. The rest of the document will be in portrait.

If you have any other questions about Word, then please go through the rest of the post.
Check out the Microsoft Refund policy to get absolutely full refunds to your products.
How to make one-page landscape in Word without Section break
The previous solution is a bit longer as you have to put page breaks within your document. It might seem a bit annoying and I understand that but this method is a bit easier.
So you can sit back and go through the steps to make a page landscape without section breaks on Word.
Follow our guide to take a poll in Microsoft Teams.
Here are the steps to make one-page landscape without Section break on Word:
- Select the text in the document you want to make into the landscape.
- Click on the Layout
- Click on the small icon beside the Page Setup. Keeping the cursor on the icon will show it is called Page Setup.
- Select Landscape.

- Select Selected text from the Apply to
If you have any other questions about Word, then please go through the rest of the post.
To know more about PC cooling check our dedicated post on How to Monitor CPU & GPU Temperature.
How do you change the Layout of just one page in Word
You will find many solutions online that require you to change the layout of all the pages to modify one page. This seems counterproductive and I am on the same page as you.
So, as we all like to be effective and productive in our work, I have given the steps to change the layout of only one page only in Word.
- Highlight your desired text by clicking and dragging the mouse in the page you want to make into the landscape.
- Click on the Layout tab at the top of the screen.
- Click on the small icon beside the Page Setup. Keeping the cursor on the icon will show it is called Page Setup.
- Select the Landscape option.
- Select the Selected text option from the Apply to
If you have any other questions about Word, then please go through the rest of the post.
Here’s a complete guide on how to fix Microsoft error code 6009.
How to make different margins on one page in Word
Being a student, I was forced to use margins on pages to make my documents look more ordered and tidy. I was completely clueless about how I could do that, Thankfully I was able to find the way to do it and now I am sharing it with you. Follow the simple steps given below.
Also, check out our separate post on can Microsoft Teams be used to spy on you.
Here are the steps to make different margins on one page in Word:
- Click on the Layout
- Click on the Breaks
- Click on Section Breaks.
- Click on Next Page.
- Click on Margins.
- Select the Apply to this sections at the bottom.
- Select the options you would like to use.
If you have any other questions about Word, then please go through the rest of the post.
Check out the exact and appropriate steps to merge Microsoft accounts.
How to insert page numbers in Word
Page numbers are essential for most textbooks for easy navigation of different topics. You will also need to insert page numbers at least once in your life for official or educational documents. You might also be a writer writing a novel where page numbers are necessary.
Funny that most people do not know how to insert page numbers in Word, although it is such an important function. I was one of those people and there was no shame in that.
Here are the steps to insert page numbers in Word:
- Go to the page from where you want to start.
- Click on the Insert tab at the top.
- Select the type of number you would like to use.
- Select the options you would like to use and click on OK.
Here’s a complete guide on how to fix CPU fan not spinning.
How to Hide or Unhide text in Word
Like applying margins and inserting page numbers, hiding and unhiding text is another great and helpful feature provided by Word. It is very easy to do, you can do this by using one hand only, I am not kidding. Follow the steps given below.
Here are the steps to hide or unhide text in Word:
- Select the text you wish to hide or unhide.
- Select Home from the top.
- Check the Hidden option to hide the text.
- Select OK when you are done.
Also, check out our separate post on Top 5 Best RGB Fusion Fans
Conclusion
Word will be used by you and many others for decades to come, there is no doubt about that. It is single-handedly the most popular Word processing software. I wrote this post hoping that you will be able to use some of the basic functionalities of Word flawlessly.
Hopefully by now, you could find the answer you were looking for and I wish you luck in whatever you do in the future.
Let us make you familiar with page orientation of Microsoft Word, and page orientation can be defined as how your document will be displayed or printed. There are 2 basic types of page orientation:
- Portrait (vertical) and
- Landscape (horizontal)
Lately, while writing a document in Word, I came across a clumsy problem where I had about 16 pages in the document and the middle somewhere I needed a page to be in Landscape orientation, where rest is all in portrait. Changing one page to landscape in MS Word is not a discerning task. But for this, you have to be well-known with concepts like section breaks.

Usually, Word documents have an orientation of page as portrait or a landscape. So, the question comes how to mix and match two orientations under the same document. Here are the steps and two methods explained in this article about how to change the page’s orientation and make One Page Landscape in Word.
Method 1: Insert section breaks for setting the Orientation manually
You can manually inform Microsoft Word to break any page rather than let the program decide. You have to insert a ‘Next Page’ section break at the start and end of the picture, table, text, or other objects for which you are changing the page orientation.
1. Click at the beginning of the region where you want the page to rotate (change orientation).
3. Choose the Layout tab from the “Breaks” drop-down and select “Next Page”.

Repeat the above steps at the end of the area you want to rotate, and then continue.
Note: The section breaks and other formatting features can be visible using Ctrl+Shift+8 shortcut key, or you can click the Show/Hide Paragraph Marks button from the “Paragraph” section in the “Home” tab.

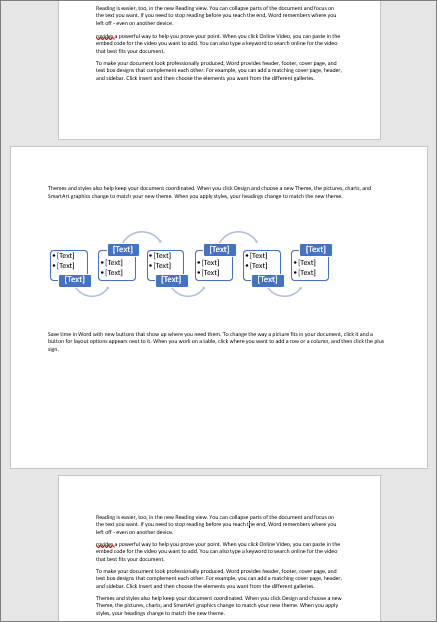
Now you should have a blank page in the middle of two pages of content:

1. Now bring your cursor on that particular page where you want the different orientation.
2. Open the “Page Setup” dialog box window by clicking the tiny arrow sited in the lower right corner of the “Layout” ribbon.

3. Switch to the “Margins” tab.
4. Select either “Portrait” or “Landscape” orientation from the Orientation section.

5. Pick an option from the “Apply to:” drop-down at the bottom of the window.
6. Click, OK.
Method 2: Let Microsoft Word Do It for You
This method will save your clicks if you allow MS Word to insert ‘section breaks’ automatically & do the task for you. But the intricacy in letting Word put your section breaks arises when you select text. If you do not highlight the whole paragraph, the unselected items such as several paragraphs, tables, images, or other items will be moved by Word onto another page.
1. First, select the items you’re planning to change in the new portrait or landscape orientation.
2. After selecting all the images, text & pages, you want to change to the new orientation, choose the “Layout” tab.
3. From the “Page Setup” section, open the “Page Setup” dialog box by clicking the tiny arrow sited in the lower right angle of that section.
4. From the new dialog box, switch to the “Margins” tab.
5. Select either “Portrait” or “Landscape” orientation.
6. Pick Selected Text from the “Apply to:” drop-down list at the bottom of the window.
7. Click “OK”.
Note: The hidden breaks and other formatting features can be visible using Ctrl+Shift+8 shortcut key, or you can click the backward P button from the “Paragraph” section in the “Home” tab.
Recommended:
- How to Switch Between Browser Tabs Using Shortcut Key
- Forcefully Clear the Print Queue in Windows 10
- How to Fix Monitor Screen Flickering Issue
- Disable Indexing in Windows 10 (Tutorial)
I hope the above steps helped you learn How to Make One Page Landscape in Word, but if you still have any questions regarding this tutorial, please feel free to ask them in the comment’s section.