
1. Right-click the image that you want to label and click the option Format Picture. 2.In the Format Picture window, click this icon.
- Click the picture you want to add a caption to.
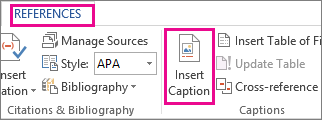
- Click References > Insert Caption.
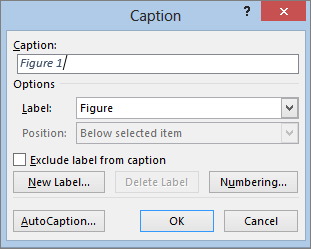
- To use the default label (Figure), type your caption in the Caption box.
Contents
- 1 How do I label my photos?
- 2 How do I create a picture label in Word?
- 3 How do I label digital photos?
- 4 Can you write on photos?
- 5 How do I fill a label in Word?
- 6 How do I create labels in Word 2016?
- 7 What is label in MS Word?
- 8 How do you label a JPEG?
- 9 How do I scan photos into labels?
- 10 How do I write on a JPEG image?
- 11 How do you write on photo paper?
- 12 How do you put captions on pictures?
- 13 How do I edit text in a picture in Word?
- 14 How do I make labels the same in Word?
- 15 How do I make decorative address labels in Word?
- 16 How can I turn a jpeg into a PDF?
- 17 How do I add text to a JPEG image in paint?
- 18 Can you write on a scanned document?
How do I label my photos?
Sorry for the confusion, but the original post was about Android.
Add a description.
- Select and open a photo in Google Photos.
- Select the overflow : menu in the upper right.
- Select Info.
- Add a description and exit to save.
How do I create a picture label in Word?
Create a single label with a graphic
- Start by creating a New Document of labels. For more info, see Create a sheet of nametags or address labels.
- Insert a graphic and then select it.
- Go to Picture Format > Text Wrapping, and select Square.
- Drag the image into position within the label.
- Save or print your label.
How do I label digital photos?
First of all, make sure that your open window is large enough to display the metadata at the bottom. Navigate to the folder where your photos reside. Select a photo or photos, find the “Title” field at the bottom of the screen (and also the “tag” field if you want to add tags or keywords), and type in your caption.
Can you write on photos?
Write on the back of your photos, along the edge, and keep your notes succinct. There are two main reasons why professional archivists recommend using a regular #2 pencil. It is reversible—it can usually be easily erased. Pen and marker ink is not reversible—it can’t be erased or undone.
How do I fill a label in Word?
Formatting Labels
- Click or tap the “Mailings” tab on the command ribbon and then click or tap “Labels” in the Create group.
- Enter the text for your label in the Address box on the Labels tab.
- Click or tap the radio button for “Full page of the same label.”
- Click or tap “Options” to open the dialog box.
How do I create labels in Word 2016?
Follow these steps:
- Click the Mailings tab.
- In the Create group, click the Labels button.
- Ensure that the proper label format is chosen in the lower-right part of the dialog box.
- Type the label’s text into the Address box.
- Ensure that the item Full Page of the Same Label is chosen.
- Click the New Document button.
What is label in MS Word?
Labels refer to the information or Address (in particular) we want to get displayed on products, banners, etc. We can also set the quantity of the labels we want and can print them instantly. Follow the steps to get labels in MS Word: Step 1: Go to the Mailings bar and select the Labels option under the Create bar.
How do you label a JPEG?
Select “Markup,” tap the “+” icon and select “Text.” When the text box appears on the photo, double-tap it to raise the keyboard. Type the caption and use the options at the bottom of the screen to change the font, color and size. Drag the caption to wherever you want it and tap “Done.”
How do I scan photos into labels?
Get started scanning your pictures in five easy steps.
- Buy the Right Equipment. You’ll need a computer and a scanner to scan your old family photos.
- Clean Your Scanner and Prepare Photos for Scanning.
- Adjust Your Settings.
- Start Scanning.
- Label and Edit Your Images.
How do I write on a JPEG image?
How to Add Text to an JPG Image
- Open your photo editing program. How you open programs will depend on your operating system.
- Open the JPEG image.
- Click your program’s “Text” tool.
- Click on the image where you want to insert the text.
- Type your text.
- Select your font color, size and typeface.
How do you write on photo paper?
When it comes to writing on glossy paper, it’s best to go for those with alcohol or oil-based ink since they dry faster. It’s best to avoid gel pens when writing on photos. Gel pen ink, made from an oil and water emulsion, will likely smear on photographs.
How do you put captions on pictures?
- Choose a Photo Caption That Fits the Platform.
- Use a Conversational Tone and Present Tense.
- Decide on the Purpose of Your Caption.
- Know Who Your Audience Is.
- Identify the Main People in Your Photo.
- Use a Quote or Lyrics Wisely.
- Add Value with Your Photo Caption.
- Create Involvement With Your Photo Caption.
How do I edit text in a picture in Word?
Click the picture to reveal the “Format” tab. Press the “Corrections” option to reveal the dropdown. This will reveal to you how to edit image text in word. Apply the required correction to complete the process in full.
How do I make labels the same in Word?
Microsoft Word: Create a Sheet of the Same Label
- From the Mailings tab, click the Labels button in the Create group on the left.
- In the Address box at the top, type the address or other information that will be on each label.
- In the Print box on the left, select Full page of the same label.
How do I make decorative address labels in Word?
- Choose your shape. Beginning with a blank document, click on the “Insert” tab, select “Shapes,” and choose the desired shape for your label.
- Adjust your outline and fill settings.
- Add a layer, if desired.
- Add your text.
- “Group” your label.
How can I turn a jpeg into a PDF?
How to convert JPG to PDF online:
- Upload your image to the JPG to PDF converter.
- Adjust the letter size, orientation, and margin as you wish.
- Click ‘Create PDF now!’ and wait for the conversion to take place.
- And that’s all there is. Save the converted PDF to your computer.
How do I add text to a JPEG image in paint?
To add a text box in Paint, open an image with the program and locate the “A” symbol in the “Tools” group of the “Home” tab. Click the “A” and then click on the image and drag the mouse pointer to place a text box. To resize the text box, click and drag one of the small squares around the edge of the box.
Can you write on a scanned document?
Browse to the scanned document and double-click it, then click the “OK” button to insert it. Format the text in the text box the same way you would when typing text in a Word document, using the Font section of the ribbon. You can try to match the text in your text box with any text already on your scanned document.
Excel for Microsoft 365 Word for Microsoft 365 Outlook for Microsoft 365 PowerPoint for Microsoft 365 Excel 2021 Word 2021 Outlook 2021 PowerPoint 2021 Excel 2019 Word 2019 Outlook 2019 PowerPoint 2019 Excel 2016 Word 2016 Outlook 2016 PowerPoint 2016 Excel 2013 Word 2013 Outlook 2013 PowerPoint 2013 More…Less
The Insert Caption feature in Word makes it easy to systematically add captions to pictures in a document.
In other Office apps, such as PowerPoint, you manually add a text box near the image and then group the text box and image. See the instructions below. If you have multiple pictures in a series, you have to manually number them.
Word
-
Click the picture you want to add a caption to.
-
Click References > Insert Caption.

-
To use the default label (Figure), type your caption in the Caption box.
Tip: You can also create your own default caption label by clicking New Label, and then adding your caption in the Label box. Word automatically numbers the new labels for you.
All other Office apps
-
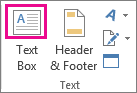
Use Insert > Text Box to draw a box near the picture. (See add a text box for additional details.)
-
Click inside the text box and type the text you want to use for a caption.
-
Select the text. On the Home tab, use the Font options to style the caption as you want.
-
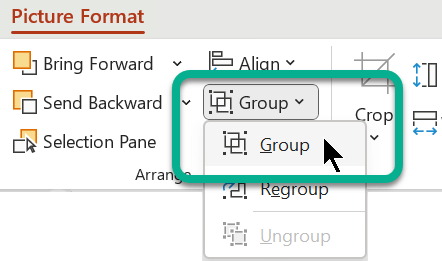
Use Ctrl+click to select the picture and text box, and then on the Picture Format tab, in the Arrange group, select Group > Group.
See Also
Group or ungroup objects
Need more help?
Want more options?
Explore subscription benefits, browse training courses, learn how to secure your device, and more.
Communities help you ask and answer questions, give feedback, and hear from experts with rich knowledge.
With Microsoft Office Word, you can create labels for any purpose. The process of creating labels in Word is menu-driven and simple to execute. Word offers a variety of label templates that correspond to precut labels, such as those produced by Avery. You can also create a label with a logo, photo or picture in Word.
-
Open Microsoft Office Word, and then click the “Mailings” tab on the top navigation ribbon. The navigation ribbon displays Mailing options.
-
Click the “Labels” option on the left side of the navigation ribbon. The Labels dialog box opens.
-
Type the first recipient’s address into the “Address” input box. Highlight the text and right-click to change the justification and font of the text. Click “OK.”
-
Click the “Options” button. A list of label vendors and product numbers opens.
-
Click the “Label Vendor” drop-down box and click the vendor of the labels you will print. The Product Number field populates with products produced by the specified vendor.
-
Click the “Product Number” for the label you will use. The new label you are creating is formatted for the template for the selected label product. Click “OK.”
-
Click the “New Document” button. The labels display in the selected template.
-
Click inside a label where the image will be placed, and then click the “Insert” tab on the top navigation ribbon.
-
Click the “Picture» option. A file navigation dialog box opens. Navigate to and click on the image to add to the label. Click “Open.”
-
Repeat the process of clicking inside each label and inserting the desired image.
When you have too many images in the document, it is necessary to insert captions to them, which could make the document more organized and enhance the connection between text and images. So how can we achieve it? Here’s a simple guide to insert a caption for an image.
1. Select the image you want to insert a caption for, and go to References tab, then click Insert Caption, which is in Captions section.

2. When Caption dialog box appears, click New Label and type a caption you prefer in New Label pop-up box, then hit OK when you are done. Here I take Must-see attraction as an example.

3. The caption you typed in Step 2 will automatically be entered into Caption box and Label box, and the sequence numbers will also be generated automatically. You could also choose the position where the caption is placed: Above selected item or Below selected item, by selecting option from the related drop-down list.

4. Now check out the example below. Microsoft Word will renumber captions appropriately if you insert a new image in the same document.

Copyright Statement: Regarding all of the posts by this website, any copy or use shall get the written permission or authorization from Myofficetricks.
To make your mailing stand out, you can add a picture to the mailing labels you design and print in Microsoft Office. For example, you might print your company logo or a graphic related to the purpose of the mailing. Create a mail merge document in Word, design your labels, add a picture to the labels and align the picture and text. The recipient list can be taken from an Excel spreadsheet, Access database, Outlook contact list or a list that you manually enter.
Step 1
Launch Word. Select «Mailings,» «Start Mail Merge» and choose «Labels.»
Step 2
Select the correct Avery or Avery-equivalent label size and layout from the list of choices.
Step 3
Choose «Select Recipients» and «Use Existing List» if you have a recipient list in Excel or Access. Choose «Select from Outlook Contacts» if you want to use your Outlook contact list. Choose «Type a New List in Word» if you want to enter the recipients and their addresses manually in the template provided and save it as an Access database.
Step 4
Select «Edit Recipient List» if you want to include only a subset of the individuals in your list. Review the list and check the box next to the people for whom you want to print a label.
Step 5
Click the first label and place the mouse cursor where you want the address block to appear. Select «Address Block» and choose how you want the name formatted on the label.
Step 6
Select «Insert» and «Picture» from the menu to insert a photo on the first label. Navigate to the folder where the picture is stored, highlight it and choose «Open.»
Step 7
Click the «Layout Options» button and either «Square» or «Tight» to format the text around the photo. Select «Update Labels» to copy the mail merge template from the first label to the other labels on the sheet.
Step 8
Select «Preview Results» to ensure the labels appear correctly. Choose «Finish» and «Merge» to complete the merge, and then click «Print Documents.»
Step 9
Print a single page to test the alignment by changing the Print Records selection to «From 1 To 1» and selecting «OK.» Choose «Print Documents» again and print all the labels when the test page prints successfully.
Step 10
Choose «File,» Save As…,» navigate to a folder, type a filename and save the template on disk so you can use it again.
References
Resources
Writer Bio
Steve McDonnell’s experience running businesses and launching companies complements his technical expertise in information, technology and human resources. He earned a degree in computer science from Dartmouth College, served on the WorldatWork editorial board, blogged for the Spotfire Business Intelligence blog and has published books and book chapters for International Human Resource Information Management and Westlaw.
Image Credit
Jupiterimages/Photos.com/Getty Images
label
Word 2007 Tutorial 14 — Working With Shapes and Drawing Tools
Video time control bar
0:00
▶️
⏸️
🔊
Audio volume control bar
0:00 / 0:00
Quality:
↔️
↕️
Sharing buttons:
![]()
![]()
![]()
![]()
![]()
![]()
Generate Transcript