Return to VBA Code Examples
This tutorial will demonstrate how to work with Cell comments in VBA.
The following code snippets show you how to add or delete a comment in a cell.
1. Put the following code somewhere in your macro to add a comment.
Sheet1.Range("A1").AddComment ("Hello World")2. To delete a comment use this code
Sheet1.Range("A1").Comment.Delete3. To edit a comment in a certain cell you need to read the existing comment and edit it. Use the code below
Dim OldComment As Variant
Dim NewComment As Variant

OldComment = Sheet1.Range("A1").Comment.Text
NewComment = OldComment & " Edited comment"

Sheet1.Range("A1").Comment.Delete

Sheet1.Range("A1").AddComment (NewComment)
First, you need to read the existing comment in OldComment variable.
After that you can edit a comment, e.g. add the new text to the existing one in NewComment variable.
Now, you need to delete the old comment and add the new one. In order to delete the comment, you have to use the .Comment.Delete command.
Finally, you can add the comment from the NewComment variable using the .AddComent command.
VBA Coding Made Easy
Stop searching for VBA code online. Learn more about AutoMacro – A VBA Code Builder that allows beginners to code procedures from scratch with minimal coding knowledge and with many time-saving features for all users!
Learn More!
Is there a way to activate a comment on a cell by hovering over it? I have a range of cells that I would like to pull respective comments from another sheet when hovered over each individual cell. The hover event would pull the comments from their respective cells in the other sheet.
The comments are of string value. Basically, I have a range of cells in Sheet 1, let’s say A1:A5 and I need comments to pop-up when I hover over them and pull from Sheet 2 range B1:B5. The reason why I won’t do it manually is because the contents of Sheet 2 change every day. That is why I am trying to see if there is a VBA solution.
asked Aug 9, 2017 at 21:09
![]()
studentofarkadstudentofarkad
1551 gold badge1 silver badge8 bronze badges
4
hovering over any cell, that contains a comment, shows that cell’s comment
this is how you add a comment to a cell and how you update the comment text
Sub aaa()
    With Range("E6")
        If Not .Comment Is Nothing Then .Comment.Delete
        .AddComment "this is a comment"
        .Comment.Text "abc123" 'No need the assignment sign "=" after .Comment.Text
    End With
End Sub
![]()
answered Aug 9, 2017 at 21:24
![]()
jsotolajsotola
2,2391 gold badge9 silver badges22 bronze badges
0
Try this code.
Sub test()
    Dim rngDB As Range, rngComent As Range
    Dim rng As Range
    Dim cm As Comment, i as integer
    Set rngComent = Sheets(1).Range("a1:a5")
    Set rngDB = Sheets(2).Range("b1:b5")

    For Each rng In rngComent
        i = i + 1
        If Not rng.Comment Is Nothing Then
            rng.Comment.Delete
        End If
        Set cm = rng.AddComment
        With cm
            .Visible = False
            .Text Text:=rngDB(i).Value
        End With
    Next rng

End Sub
answered Aug 10, 2017 at 4:20
![]()
Dy.LeeDy.Lee
7,4771 gold badge11 silver badges14 bronze badges
2
A less bulky «All-in-One» solution:
Sub comment(rg As Range, Optional txt As String = "")
  If rg.comment Is Nothing Then
    If txt <> "" Then rg.addComment txt
  Else
    If txt = "" Then rg.comment.Delete Else rg.comment.text txt
  End If
End Sub
Usage:
Using cell [a1] as an example …but shortcut notation like [a1]) should generally be avoided except for testing, etc
- Add or change comment:
comment [a1], "This is my comment!" - Delete existing comment:
comment [a1], ""or simplycomment [a1]
Related stuff:
- set comment box size:
[a1].comment.Shape.Width = 15and[a1].comment.Shape.Height = 15 - set the box position:
[a1].comment.Shape.Left=10and[a1].comment.Shape.Top=10 - change background box color:
[a1].comment.Shape.Fill.ForeColor.RGB = vbGreen
Nowadays I think that comments (or «notes», as they’re now called) are hidden by default.
-
Always show all comments:
Application.DisplayCommentIndicator=1 -
Show when mouse hovers over cell:
Application.DisplayCommentIndicator=-1 -
Disable comments (hide red indicator):
Application.DisplayCommentIndicator=0 -
show/hide individual comments like
[a1].comment.visible=true, etc. -
get comment text:
a=[a1].comment.text
![]()
hornetbzz
9,1285 gold badges35 silver badges53 bronze badges
answered Nov 9, 2021 at 12:06
![]()
ashleedawgashleedawg
20k8 gold badges73 silver badges104 bronze badges
This code will refresh the contents of the comments every time you open the workbook. It is based on ranges of both destination as well as source. Make sure to first add a comment for the cell range first. You won’t need VBA for that.
Private Sub Workbook_Open()
    Dim ws As Worksheet
    Dim rg As Range
    Dim comment As String
    Dim i As Integer

i = 1
Set rg = Range("E1:E10") 'set range of where the comments will be seen
Set ws = Sheets("Sheet1")


For Each c In rg
comment = ws.Cells(i, 2).Value 'set location of comments you are grabbing from
c.comment.Text Text:=comment
i = i + 1
Next c
End Sub
![]()
answered Aug 9, 2017 at 21:50
![]()
TJYenTJYen
3435 silver badges13 bronze badges
1
I’ve discovered that if the sheet cell is previously formatted and contains data the VBA Add Comments routines may not work. Also, you have to refer to the cell in the «Range» («A1») format, not the «Cells» (Row Number, Column Number) format. The following short sub worked for me (utilize prior to program formatting/adding data to cell):
Sub Mod01AddComment()

Dim wb As Workbook
Set wb = ThisWorkbook
Dim WkSheet As Worksheet
Set WkSheet = wb.Sheets("Sheet1")

Dim CellID As Range

Set CellID = WkSheet.Cells(RowNum, ColNum)
` ( or, Set CellID = WkSheet.Range("A1") )

CellID.Clear

CellID.AddComment
CellID.Comment.Visible = False
CellID.Comment.Text Text:="Comment Text"

End Sub
answered Nov 27, 2021 at 18:25
![]()
Some Excel users love comments; they put comments all over their workbooks. Other users despise them as they are unsightly and annoying. Whatever your preference, you can control them with VBA; add, delete, list on a worksheet – it can all be done with VBA.
Adapting the code to your needs
It is unlikely that any of the code below will meet your exact requirements. Every code snippet uses variables to hold either the worksheet, workbook comment, cell or a setting value. By changing those variables, the code can easily be changed and combined with other code snippets to meet your specific requirements.
Basic comment actions
This first group of macros feature some of the basic actions you may include as part of a longer procedure.
Test if a cell has a comment
The following code will check if the active cell has a comment. If so, it will output a message box to state that a comment exists.
Sub TestCellForComment()

'Create variables
Dim c As Range
Dim commentText As String

'Set variables
Set c = ActiveCell

'Try to set variable. If error then comment does not exist
On Error Resume Next
commentText = c.comment.Text
On Error GoTo 0

'If comment exists then display message box
If commentText <> "" Then

    MsgBox "Cell contains a comment"

End If

End Sub
Add a comment to a cell
The following code will insert the text “Insert my comment” as a comment attached to the active cell.
Sub AddComment()

'Create variables
Dim c As Range
Dim commentText As String

'Set variables
commentText = "Insert my comment"
Set c = ActiveCell

'Add comment
c.AddComment

'Change the comment
c.comment.Text Text:=commentText

End Sub
Get the text from a comment
The following code will capture text from a comment and display it within a message box.
Sub DisplayCommentFromCell()

'Create variables
Dim c As Range
Dim commentText As String

'Set variables
Set c = ActiveCell

'Try to set variable. If error then comment does not exist
On Error Resume Next
commentText = c.comment.Text
On Error GoTo 0

'If comment exists then display comment
If commentText <> "" Then

    MsgBox commentText

End If

End Sub
Clear comments from a worksheet
The following macro will clear the existing comments from the worksheet.
Sub ClearCommentsWorksheet()

'Creates variables
Dim ws As Worksheet

'Set variables
Set ws = ActiveSheet

'Clear comments from worksheet
ws.Cells.ClearComments

End Sub
Clear comments from a range
The following macro will clear the comments from a specified set of cells (A1-B20 of the active sheet) in this example.
Sub DeleteCommentsFromRange()

'Creates variables
Dim ws As Worksheet
Dim rng As Range

'Set variables
Set ws = ActiveSheet
Set rng = ws.Range("A1:B20")

'Clear comments from worksheet
rng.ClearComments

End Sub
Looping through comments
Some actions can be applied to all comments at the same time (such as clearing them). But, other actions must be applied individually by looping through each of the comments one-by-one.
Loop through all comments in the worksheet
The following VBA code will loop through all the comments in the active worksheet.
Sub LoopThroughCommentsInWorksheets()

'Create variables
Dim ws As Worksheet
Dim com As comment

'Set variables
Set ws = ActiveSheet

'Loop through each comment on worksheet
For Each com In ws.Comments

    'Do somthing to each comment
    'Use com. to reference each comment

Next com

End Sub
Loop through all comments in the workbook
The following expands on the code above and loops through all the comments in the active workbook.
Sub LoopThroughCommentsInWorkbook()

'Create variables
Dim wb As Workbook
Dim ws As Worksheet
Dim com As comment

'Set variables
Set wb = ActiveWorkbook

'Loop through each worksheet
For Each ws In wb.Worksheets

    'Loop through each comment on worksheet
    For Each com In ws.Comments

        'Do something to each comment
        'Use com. to reference each comment

    Next com

Next ws

End Sub
Cells with comments
When thinking about comments, we also need to consider the cell to which the comment is attached. The following examples specifically relate to those types of cells.
Select all the cells with comments
Excel provides a method to select all the cells with comments, which is used in the macro below.
Sub SelectCellsWithComments()

'Create variables
Dim ws As Worksheet

'Set variables
Set ws = ActiveSheet

'Select the cells with comments
ws.Cells.SpecialCells(xlCellTypeComments).Select

End Sub
Loop through all cells with comments in the worksheet
Where methods must be applied to each cell individually, it is necessary to loop through them one-by-one. The code below will loop through each cell in the active worksheet which contains a comment.
Sub LoopThroughAllCellsWithCommentsWorksheet()

'Create variables
Dim ws As Worksheet
Dim c As Range

'Set variables
Set ws = ActiveSheet

'Loop through each comment on worksheet
For Each c In ws.Cells.SpecialCells(xlCellTypeComments)

    'Do somthing to each cell
    'Use c to reference each cell

Next c

End Sub
Loop through all cells with comments in the workbook
The following expands on the code above and loops through all cells in the workbook which have comments attached.
Sub LoopThroughAllCellsWithCommentsWorkbook()

'Create variables
Dim wb As Workbook
Dim ws As Worksheet
Dim c As Range

'Set Variables
Set wb = ActiveWorkbook

'Loop through each worksheet
For Each ws In wb.Worksheets

    'Loop through each comment on worksheet
    For Each c In ws.Cells.SpecialCells(xlCellTypeComments)

        'Do something to each cell
        'Use c to reference each cell

    Next c

Next ws

End Sub
Change comment display settings
Comment display settings can be changed to one of three options:
- The comment is hidden
- The comment is hidden but the indicator (i.e., the red triangle) is visible
- The comment and indicator are visible
The following macro will hide the comment and indicator.
Sub ChangeCommentDisplay()

'Create variables
Dim indicatorType As Long

'Set variables
indicatorType = xlNoIndicator

'Apply comment indicator
Application.DisplayCommentIndicator = indicatorType

End Sub
To apply the other settings change this line of code:
indicatorType = xlNoIndicator
For one of these lines of code:
Show comment indicator:
indicatorType = xlCommentIndicatorOnly
Show comment indicator and comment:
indicatorType = xlCommentAndIndicator
Displaying and printing comments on a separate page
If you would prefer comments to be displayed in a single worksheet or a single printed page, then these next two macros will be useful.
Print comments on an additional page
Within Excel, there are settings which control comments. We don’t tend to look for them unless we have a specific problem or requirement. One of these options controls the print settings. The macro below will print all the comments on a separate page.
Sub PrintSetupListComments()

'Create variables
Dim ws As Worksheet
Dim printOptions As Long

'Set variables
Set ws = ActiveSheet
printOptions = xlPrintSheetEnd

'Set comments to print on an additional page
ws.PageSetup.PrintComments = printOptions

End Sub
The PrintComments setting has three options. Therefore this line of code:
printOptions = xlPrintSheetEnd
Can be exchanged for one of these options.
Set comments to print if they are displayed:
printOptions = xlPrintInPlace
Set comments to never print:
printOptions = xlPrintNoComments
List all comments on a separate worksheet
The following code will create a new worksheet which lists all the comments. There is limited error checking, so if you already have a worksheet called “Comments”, it will display an error.
Sub ListAllCommentsOnSeparateSheet()

'Create variables
Dim wb As Workbook
Dim ws As Worksheet
Dim newWs As Worksheet
Dim c As Range
Dim i As Integer

'Set variables
Set wb = ActiveWorkbook
Set newWs = wb.Worksheets.Add
newWs.Name = "Comments"

'Insert header row into Comments Worksheet
newWs.Cells(1, 1).value = "Sheet"
newWs.Cells(1, 2).value = "Cell Ref"
newWs.Cells(1, 3).value = "Comment"

'Loop through each worksheet
For Each ws In wb.Worksheets

    'Ignore errors from worksheets with no comments
    On Error Resume Next

    'Loop through each cell with a comment
    For Each c In ws.Cells.SpecialCells(xlCellTypeComments)

        'If there are no errors (i.e. comments exist)
        If Err.Number = 0 Then

            'Increment counter
            i = i + 1

            'List comments in the Comments Worksheet
            newWs.Cells(i + 1, 1).value = ws.Name
            newWs.Cells(i + 1, 2).value = c.Address
            newWs.Cells(i + 1, 3).value = c.comment.Text

        End If

    Next c

    'Reset error checking
    On Error GoTo 0

Next ws

End Sub
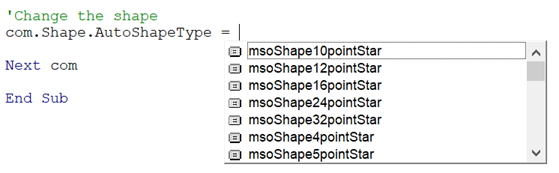
Change the shape of all comments boxes on a worksheet
Comment boxes always seem to be boring squares, but they can be a variety of shapes. Use the following code to change all the shapes to boxes with a folded corner.
Sub ChangeCommentsBoxShape()

'Create variables
Dim ws As Worksheet
Dim com As comment
Dim shapeType As Long

'Set variables
Set ws = ActiveSheet
shapeType = msoShapeFoldedCorner

'Loop through each cell with a comment
For Each com In ws.Comments

    'Change the shape
    com.Shape.AutoShapeType = shapeType

Next com

End Sub
Some alternative shapes you could try are:
- msoShapeRoundedRectangle
- msoShapeOval
- msoShapeRectangle
If you want other shapes, probably best to use the macro recorder to find the name of the shape, or you could use the IntelliSense feature. IntelliSense will list all the available options as shown in the screenshot below.

About the author
Hey, I’m Mark, and I run Excel Off The Grid.
My parents tell me that at the age of 7 I declared I was going to become a qualified accountant. I was either psychic or had no imagination, as that is exactly what happened. However, it wasn’t until I was 35 that my journey really began.
In 2015, I started a new job, for which I was regularly working after 10pm. As a result, I rarely saw my children during the week. So, I started searching for the secrets to automating Excel. I discovered that by building a small number of simple tools, I could combine them together in different ways to automate nearly all my regular tasks. This meant I could work less hours (and I got pay raises!). Today, I teach these techniques to other professionals in our training program so they too can spend less time at work (and more time with their children and doing the things they love).
Do you need help adapting this post to your needs?
I’m guessing the examples in this post don’t exactly match your situation. We all use Excel differently, so it’s impossible to write a post that will meet everybody’s needs. By taking the time to understand the techniques and principles in this post (and elsewhere on this site), you should be able to adapt it to your needs.
But, if you’re still struggling you should:
- Read other blogs, or watch YouTube videos on the same topic. You will benefit much more by discovering your own solutions.
- Ask the ‘Excel Ninja’ in your office. It’s amazing what things other people know.
- Ask a question in a forum like Mr Excel, or the Microsoft Answers Community. Remember, the people on these forums are generally giving their time for free. So take care to craft your question, make sure it’s clear and concise. List all the things you’ve tried, and provide screenshots, code segments and example workbooks.
- Use Excel Rescue, who are my consultancy partner. They help by providing solutions to smaller Excel problems.
What next?
Don’t go yet, there is plenty more to learn on Excel Off The Grid. Check out the latest posts:
Ну, приблизительно так
‘Работа с комментариями
‘1) меняем штрифт у комментария в заданной ячейке
Range(«D10»).Comment.Shape.TextFrame.Characters.Font.Size
‘2) изменяем размер окошка всех примечаний на листе ровно под текст (AutoSize)
Sub All_Comments_Size_Change()
Dim iComment As Comment
For Each iComment In ActiveSheet.Comments
iComment.Shape.TextFrame.AutoSize = True
Next iComment
End Sub
‘3) добавляем комментарий в ячейку и меняем его шрифт
Sub ChangeFontInComment()
With Range(«B2»)
.ClearComments
.AddComment
.Comment.Text «бла-бла-бла»
With .Comment.Shape.TextFrame.Characters.Font
.Name = «Times New Roman»
.Size = 14
.Bold = True
End With
End With
End Sub
‘4) меняем шрифт у всех комментариев
Sub All_Comments_Font_Change()
Dim iComment As Comment
For Each iComment In ActiveSheet.Comments
With iComment.Shape.TextFrame.Characters.Font
.Name = «Times New Roman»
.Size = 14
.Bold = True
End With
Next iComment
End Sub
‘5) устанавливаем высоту и ширину окна примечания
Sub Change_Size_Comment_Window()
With Range(«A1»)
.AddComment «Bla-bla-bla»
With .Comment.Shape
.Width = 100
.Height = 200
.Visible = True
End With
End With
End Sub
‘6) устанавливаем высоту и ширину для всех примечаний
Sub Размер_Комментарий()
Dim iComment As Comment
For Each iComment In ActiveSheet.Comments
iComment.Shape.TextFrame.AutoSize = True
iComment.Shape.Height = iComment.Shape.Height + 10
iComment.Shape.Width = iComment.Shape.Width + 15
Next iComment
MsgBox «Размеры комментарий исправлены!», vbInformation, «Комментарии»
End Sub
‘7 устанавливаем размер окна комментария AutoSize и меняем свойство окно на «Перемещать, но не именять размеры»
Sub AutoSizeMoveDontChangeSizeComments()
‘Свойство XlPlacement объекта Shape может быть одним из этих констант (Формат примечания/Свойства/)
‘- xlFreeFloating — не перемещать и не изменять размеры
‘- xlMove — перемещать, но не именять размеры
‘- xlMoveAndSize — перемещать и изменять объект вместе с ячейками
Dim iComment As Comment
For Each iComment In ActiveSheet.Comments
With iComment.Shape
.TextFrame.AutoSize = True
.Placement = xlMove ‘перемещать, но не именять размеры
End With
Next iComment
MsgBox «Все комментарии обработаны!», 64, «Конец»
End Sub
‘8 Добавление даты в комментарий
Private Sub Worksheet_Change(ByVal Target As Range)
‘если изменения в диапазоне A1:A10
If Not Intersect(Target, Range(«A1:A10»)) Is Nothing Then
‘если выделили больше одной ячейке, то выход
If Selection.Cells.Count > 1 Then Exit Sub
Target.NoteText Text:=Application.UserName & Chr(10) & «Дата: » & Now
End If
End Sub
1 августа 2012,
VBA,
Konstantin
Создание примечания для ячейки в Excel с помощью макроса, которое также имело бы сложное внутреннее форматирование, не самая тривиальная задача. Для этого можно воспользоваться например таким кодом:
With Worksheets(1).Cells(4, 12).Comment
   .Visible = False
   .Text "Жирный шрифт:" & Chr(10) & "курсив"
   .Shape.DrawingObject.Characters(1, 13).Font.Bold = True
   .Shape.DrawingObject.Characters(15, 20).Font.Italic = True
End With
В итоге получится примерно такое примечание: