
Many users find that using an external keyboard with keyboard shortcuts for Excel helps them work more efficiently. For users with mobility or vision disabilities, keyboard shortcuts can be easier than using the touchscreen and are an essential alternative to using a mouse.
Notes:
-
The shortcuts in this topic refer to the US keyboard layout. Keys for other layouts might not correspond exactly to the keys on a US keyboard.
-
A plus sign (+) in a shortcut means that you need to press multiple keys at the same time.
-
A comma sign (,) in a shortcut means that you need to press multiple keys in order.
This article describes the keyboard shortcuts, function keys, and some other common shortcut keys in Excel for Windows.
Notes:
-
To quickly find a shortcut in this article, you can use the Search. Press Ctrl+F, and then type your search words.
-
If an action that you use often does not have a shortcut key, you can record a macro to create one. For instructions, go to Automate tasks with the Macro Recorder.
-
Download our 50 time-saving Excel shortcuts quick tips guide.
-
Get the Excel 2016 keyboard shortcuts in a Word document: Excel keyboard shortcuts and function keys.
In this topic
-
Frequently used shortcuts
-
Ribbon keyboard shortcuts
-
Use the Access keys for ribbon tabs
-
Work in the ribbon with the keyboard
-
-
Keyboard shortcuts for navigating in cells
-
Keyboard shortcuts for formatting cells
-
Keyboard shortcuts in the Paste Special dialog box in Excel 2013
-
-
Keyboard shortcuts for making selections and performing actions
-
Keyboard shortcuts for working with data, functions, and the formula bar
-
Keyboard shortcuts for refreshing external data
-
Power Pivot keyboard shortcuts
-
Function keys
-
Other useful shortcut keys
Frequently used shortcuts
This table lists the most frequently used shortcuts in Excel.
|
To do this |
Press |
|---|---|
|
Close a workbook. |
Ctrl+W |
|
Open a workbook. |
Ctrl+O |
|
Go to the Home tab. |
Alt+H |
|
Save a workbook. |
Ctrl+S |
|
Copy selection. |
Ctrl+C |
|
Paste selection. |
Ctrl+V |
|
Undo recent action. |
Ctrl+Z |
|
Remove cell contents. |
Delete |
|
Choose a fill color. |
Alt+H, H |
|
Cut selection. |
Ctrl+X |
|
Go to the Insert tab. |
Alt+N |
|
Apply bold formatting. |
Ctrl+B |
|
Center align cell contents. |
Alt+H, A, C |
|
Go to the Page Layout tab. |
Alt+P |
|
Go to the Data tab. |
Alt+A |
|
Go to the View tab. |
Alt+W |
|
Open the context menu. |
Shift+F10 or Windows Menu key |
|
Add borders. |
Alt+H, B |
|
Delete column. |
Alt+H, D, C |
|
Go to the Formula tab. |
Alt+M |
|
Hide the selected rows. |
Ctrl+9 |
|
Hide the selected columns. |
Ctrl+0 |
Top of Page
Ribbon keyboard shortcuts
The ribbon groups related options on tabs. For example, on the Home tab, the Number group includes the Number Format option. Press the Alt key to display the ribbon shortcuts, called Key Tips, as letters in small images next to the tabs and options as shown in the image below.
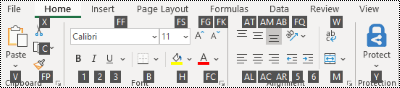
You can combine the Key Tips letters with the Alt key to make shortcuts called Access Keys for the ribbon options. For example, press Alt+H to open the Home tab, and Alt+Q to move to the Tell me or Search field. Press Alt again to see KeyTips for the options for the selected tab.
Depending on the version of Microsoft 365 you are using, the Search text field at the top of the app window might be called Tell Me instead. Both offer a largely similar experience, but some options and search results can vary.
In Office 2013 and Office 2010, most of the old Alt key menu shortcuts still work, too. However, you need to know the full shortcut. For example, press Alt, and then press one of the old menu keys, for example, E (Edit), V (View), I (Insert), and so on. A notification pops up saying you’re using an access key from an earlier version of Microsoft 365. If you know the entire key sequence, go ahead, and use it. If you don’t know the sequence, press Esc and use Key Tips instead.
Use the Access keys for ribbon tabs
To go directly to a tab on the ribbon, press one of the following access keys. Additional tabs might appear depending on your selection in the worksheet.
|
To do this |
Press |
|---|---|
|
Move to the Tell me or Search field on the ribbon and type a search term for assistance or Help content. |
Alt+Q, then enter the search term. |
|
Open the File menu. |
Alt+F |
|
Open the Home tab and format text and numbers and use the Find tool. |
Alt+H |
|
Open the Insert tab and insert PivotTables, charts, add-ins, Sparklines, pictures, shapes, headers, or text boxes. |
Alt+N |
|
Open the Page Layout tab and work with themes, page setup, scale, and alignment. |
Alt+P |
|
Open the Formulas tab and insert, trace, and customize functions and calculations. |
Alt+M |
|
Open the Data tab and connect to, sort, filter, analyze, and work with data. |
Alt+A |
|
Open the Review tab and check spelling, add notes and threaded comments, and protect sheets and workbooks. |
Alt+R |
|
Open the View tab and preview page breaks and layouts, show and hide gridlines and headings, set zoom magnification, manage windows and panes, and view macros. |
Alt+W |
Top of Page
Work in the ribbon with the keyboard
|
To do this |
Press |
|---|---|
|
Select the active tab on the ribbon and activate the access keys. |
Alt or F10. To move to a different tab, use access keys or the arrow keys. |
|
Move the focus to commands on the ribbon. |
Tab key or Shift+Tab |
|
Move down, up, left, or right, respectively, among the items on the ribbon. |
Arrow keys |
|
Show the tooltip for the ribbon element currently in focus. |
Ctrl+Shift+F10 |
|
Activate a selected button. |
Spacebar or Enter |
|
Open the list for a selected command. |
Down arrow key |
|
Open the menu for a selected button. |
Alt+Down arrow key |
|
When a menu or submenu is open, move to the next command. |
Down arrow key |
|
Expand or collapse the ribbon. |
Ctrl+F1 |
|
Open a context menu. |
Shift+F10 Or, on a Windows keyboard, the Windows Menu key (usually between the Alt Gr and right Ctrl keys) |
|
Move to the submenu when a main menu is open or selected. |
Left arrow key |
|
Move from one group of controls to another. |
Ctrl+Left or Right arrow key |
Top of Page
Keyboard shortcuts for navigating in cells
|
To do this |
Press |
|---|---|
|
Move to the previous cell in a worksheet or the previous option in a dialog box. |
Shift+Tab |
|
Move one cell up in a worksheet. |
Up arrow key |
|
Move one cell down in a worksheet. |
Down arrow key |
|
Move one cell left in a worksheet. |
Left arrow key |
|
Move one cell right in a worksheet. |
Right arrow key |
|
Move to the edge of the current data region in a worksheet. |
Ctrl+Arrow key |
|
Enter the End mode, move to the next nonblank cell in the same column or row as the active cell, and turn off End mode. If the cells are blank, move to the last cell in the row or column. |
End, Arrow key |
|
Move to the last cell on a worksheet, to the lowest used row of the rightmost used column. |
Ctrl+End |
|
Extend the selection of cells to the last used cell on the worksheet (lower-right corner). |
Ctrl+Shift+End |
|
Move to the cell in the upper-left corner of the window when Scroll lock is turned on. |
Home+Scroll lock |
|
Move to the beginning of a worksheet. |
Ctrl+Home |
|
Move one screen down in a worksheet. |
Page down |
|
Move to the next sheet in a workbook. |
Ctrl+Page down |
|
Move one screen to the right in a worksheet. |
Alt+Page down |
|
Move one screen up in a worksheet. |
Page up |
|
Move one screen to the left in a worksheet. |
Alt+Page up |
|
Move to the previous sheet in a workbook. |
Ctrl+Page up |
|
Move one cell to the right in a worksheet. Or, in a protected worksheet, move between unlocked cells. |
Tab key |
|
Open the list of validation choices on a cell that has data validation option applied to it. |
Alt+Down arrow key |
|
Cycle through floating shapes, such as text boxes or images. |
Ctrl+Alt+5, then the Tab key repeatedly |
|
Exit the floating shape navigation and return to the normal navigation. |
Esc |
|
Scroll horizontally. |
Ctrl+Shift, then scroll your mouse wheel up to go left, down to go right |
|
Zoom in. |
Ctrl+Alt+Equal sign ( = ) |
|
Zoom out. |
Ctrl+Alt+Minus sign (-) |
Top of Page
Keyboard shortcuts for formatting cells
|
To do this |
Press |
|---|---|
|
Open the Format Cells dialog box. |
Ctrl+1 |
|
Format fonts in the Format Cells dialog box. |
Ctrl+Shift+F or Ctrl+Shift+P |
|
Edit the active cell and put the insertion point at the end of its contents. Or, if editing is turned off for the cell, move the insertion point into the formula bar. If editing a formula, toggle Point mode off or on so you can use the arrow keys to create a reference. |
F2 |
|
Insert a note. Open and edit a cell note. |
Shift+F2 Shift+F2 |
|
Insert a threaded comment. Open and reply to a threaded comment. |
Ctrl+Shift+F2 Ctrl+Shift+F2 |
|
Open the Insert dialog box to insert blank cells. |
Ctrl+Shift+Plus sign (+) |
|
Open the Delete dialog box to delete selected cells. |
Ctrl+Minus sign (-) |
|
Enter the current time. |
Ctrl+Shift+Colon (:) |
|
Enter the current date. |
Ctrl+Semicolon (;) |
|
Switch between displaying cell values or formulas in the worksheet. |
Ctrl+Grave accent (`) |
|
Copy a formula from the cell above the active cell into the cell or the formula bar. |
Ctrl+Apostrophe (‘) |
|
Move the selected cells. |
Ctrl+X |
|
Copy the selected cells. |
Ctrl+C |
|
Paste content at the insertion point, replacing any selection. |
Ctrl+V |
|
Open the Paste Special dialog box. |
Ctrl+Alt+V |
|
Italicize text or remove italic formatting. |
Ctrl+I or Ctrl+3 |
|
Bold text or remove bold formatting. |
Ctrl+B or Ctrl+2 |
|
Underline text or remove underline. |
Ctrl+U or Ctrl+4 |
|
Apply or remove strikethrough formatting. |
Ctrl+5 |
|
Switch between hiding objects, displaying objects, and displaying placeholders for objects. |
Ctrl+6 |
|
Apply an outline border to the selected cells. |
Ctrl+Shift+Ampersand sign (&) |
|
Remove the outline border from the selected cells. |
Ctrl+Shift+Underscore (_) |
|
Display or hide the outline symbols. |
Ctrl+8 |
|
Use the Fill Down command to copy the contents and format of the topmost cell of a selected range into the cells below. |
Ctrl+D |
|
Apply the General number format. |
Ctrl+Shift+Tilde sign (~) |
|
Apply the Currency format with two decimal places (negative numbers in parentheses). |
Ctrl+Shift+Dollar sign ($) |
|
Apply the Percentage format with no decimal places. |
Ctrl+Shift+Percent sign (%) |
|
Apply the Scientific number format with two decimal places. |
Ctrl+Shift+Caret sign (^) |
|
Apply the Date format with the day, month, and year. |
Ctrl+Shift+Number sign (#) |
|
Apply the Time format with the hour and minute, and AM or PM. |
Ctrl+Shift+At sign (@) |
|
Apply the Number format with two decimal places, thousands separator, and minus sign (-) for negative values. |
Ctrl+Shift+Exclamation point (!) |
|
Open the Insert hyperlink dialog box. |
Ctrl+K |
|
Check spelling in the active worksheet or selected range. |
F7 |
|
Display the Quick Analysis options for selected cells that contain data. |
Ctrl+Q |
|
Display the Create Table dialog box. |
Ctrl+L or Ctrl+T |
|
Open the Workbook Statistics dialog box. |
Ctrl+Shift+G |
Top of Page
Keyboard shortcuts in the Paste Special dialog box in Excel 2013
In Excel 2013, you can paste a specific aspect of the copied data like its formatting or value using the Paste Special options. After you’ve copied the data, press Ctrl+Alt+V, or Alt+E+S to open the Paste Special dialog box.
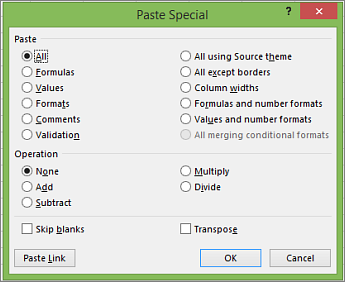
Tip: You can also select Home > Paste > Paste Special.
To pick an option in the dialog box, press the underlined letter for that option. For example, press the letter C to pick the Comments option.
|
To do this |
Press |
|---|---|
|
Paste all cell contents and formatting. |
A |
|
Paste only the formulas as entered in the formula bar. |
F |
|
Paste only the values (not the formulas). |
V |
|
Paste only the copied formatting. |
T |
|
Paste only comments and notes attached to the cell. |
C |
|
Paste only the data validation settings from copied cells. |
N |
|
Paste all cell contents and formatting from copied cells. |
H |
|
Paste all cell contents without borders. |
X |
|
Paste only column widths from copied cells. |
W |
|
Paste only formulas and number formats from copied cells. |
R |
|
Paste only the values (not formulas) and number formats from copied cells. |
U |
Top of Page
Keyboard shortcuts for making selections and performing actions
|
To do this |
Press |
|---|---|
|
Select the entire worksheet. |
Ctrl+A or Ctrl+Shift+Spacebar |
|
Select the current and next sheet in a workbook. |
Ctrl+Shift+Page down |
|
Select the current and previous sheet in a workbook. |
Ctrl+Shift+Page up |
|
Extend the selection of cells by one cell. |
Shift+Arrow key |
|
Extend the selection of cells to the last nonblank cell in the same column or row as the active cell, or if the next cell is blank, to the next nonblank cell. |
Ctrl+Shift+Arrow key |
|
Turn extend mode on and use the arrow keys to extend a selection. Press again to turn off. |
F8 |
|
Add a non-adjacent cell or range to a selection of cells by using the arrow keys. |
Shift+F8 |
|
Start a new line in the same cell. |
Alt+Enter |
|
Fill the selected cell range with the current entry. |
Ctrl+Enter |
|
Complete a cell entry and select the cell above. |
Shift+Enter |
|
Select an entire column in a worksheet. |
Ctrl+Spacebar |
|
Select an entire row in a worksheet. |
Shift+Spacebar |
|
Select all objects on a worksheet when an object is selected. |
Ctrl+Shift+Spacebar |
|
Extend the selection of cells to the beginning of the worksheet. |
Ctrl+Shift+Home |
|
Select the current region if the worksheet contains data. Press a second time to select the current region and its summary rows. Press a third time to select the entire worksheet. |
Ctrl+A or Ctrl+Shift+Spacebar |
|
Select the current region around the active cell. |
Ctrl+Shift+Asterisk sign (*) |
|
Select the first command on the menu when a menu or submenu is visible. |
Home |
|
Repeat the last command or action, if possible. |
Ctrl+Y |
|
Undo the last action. |
Ctrl+Z |
|
Expand grouped rows or columns. |
While hovering over the collapsed items, press and hold the Shift key and scroll down. |
|
Collapse grouped rows or columns. |
While hovering over the expanded items, press and hold the Shift key and scroll up. |
Top of Page
Keyboard shortcuts for working with data, functions, and the formula bar
|
To do this |
Press |
|---|---|
|
Turn on or off tooltips for checking formulas directly in the formula bar or in the cell you’re editing. |
Ctrl+Alt+P |
|
Edit the active cell and put the insertion point at the end of its contents. Or, if editing is turned off for the cell, move the insertion point into the formula bar. If editing a formula, toggle Point mode off or on so you can use the arrow keys to create a reference. |
F2 |
|
Expand or collapse the formula bar. |
Ctrl+Shift+U |
|
Cancel an entry in the cell or formula bar. |
Esc |
|
Complete an entry in the formula bar and select the cell below. |
Enter |
|
Move the cursor to the end of the text when in the formula bar. |
Ctrl+End |
|
Select all text in the formula bar from the cursor position to the end. |
Ctrl+Shift+End |
|
Calculate all worksheets in all open workbooks. |
F9 |
|
Calculate the active worksheet. |
Shift+F9 |
|
Calculate all worksheets in all open workbooks, regardless of whether they have changed since the last calculation. |
Ctrl+Alt+F9 |
|
Check dependent formulas, and then calculate all cells in all open workbooks, including cells not marked as needing to be calculated. |
Ctrl+Alt+Shift+F9 |
|
Display the menu or message for an Error Checking button. |
Alt+Shift+F10 |
|
Display the Function Arguments dialog box when the insertion point is to the right of a function name in a formula. |
Ctrl+A |
|
Insert argument names and parentheses when the insertion point is to the right of a function name in a formula. |
Ctrl+Shift+A |
|
Insert the AutoSum formula |
Alt+Equal sign ( = ) |
|
Invoke Flash Fill to automatically recognize patterns in adjacent columns and fill the current column |
Ctrl+E |
|
Cycle through all combinations of absolute and relative references in a formula if a cell reference or range is selected. |
F4 |
|
Insert a function. |
Shift+F3 |
|
Copy the value from the cell above the active cell into the cell or the formula bar. |
Ctrl+Shift+Straight quotation mark («) |
|
Create an embedded chart of the data in the current range. |
Alt+F1 |
|
Create a chart of the data in the current range in a separate Chart sheet. |
F11 |
|
Define a name to use in references. |
Alt+M, M, D |
|
Paste a name from the Paste Name dialog box (if names have been defined in the workbook). |
F3 |
|
Move to the first field in the next record of a data form. |
Enter |
|
Create, run, edit, or delete a macro. |
Alt+F8 |
|
Open the Microsoft Visual Basic For Applications Editor. |
Alt+F11 |
|
Open the Power Query Editor |
Alt+F12 |
Top of Page
Keyboard shortcuts for refreshing external data
Use the following keys to refresh data from external data sources.
|
To do this |
Press |
|---|---|
|
Stop a refresh operation. |
Esc |
|
Refresh data in the current worksheet. |
Ctrl+F5 |
|
Refresh all data in the workbook. |
Ctrl+Alt+F5 |
Top of Page
Power Pivot keyboard shortcuts
Use the following keyboard shortcuts with Power Pivot in Microsoft 365, Excel 2019, Excel 2016, and Excel 2013.
|
To do this |
Press |
|---|---|
|
Open the context menu for the selected cell, column, or row. |
Shift+F10 |
|
Select the entire table. |
Ctrl+A |
|
Copy selected data. |
Ctrl+C |
|
Delete the table. |
Ctrl+D |
|
Move the table. |
Ctrl+M |
|
Rename the table. |
Ctrl+R |
|
Save the file. |
Ctrl+S |
|
Redo the last action. |
Ctrl+Y |
|
Undo the last action. |
Ctrl+Z |
|
Select the current column. |
Ctrl+Spacebar |
|
Select the current row. |
Shift+Spacebar |
|
Select all cells from the current location to the last cell of the column. |
Shift+Page down |
|
Select all cells from the current location to the first cell of the column. |
Shift+Page up |
|
Select all cells from the current location to the last cell of the row. |
Shift+End |
|
Select all cells from the current location to the first cell of the row. |
Shift+Home |
|
Move to the previous table. |
Ctrl+Page up |
|
Move to the next table. |
Ctrl+Page down |
|
Move to the first cell in the upper-left corner of selected table. |
Ctrl+Home |
|
Move to the last cell in the lower-right corner of selected table. |
Ctrl+End |
|
Move to the first cell of the selected row. |
Ctrl+Left arrow key |
|
Move to the last cell of the selected row. |
Ctrl+Right arrow key |
|
Move to the first cell of the selected column. |
Ctrl+Up arrow key |
|
Move to the last cell of selected column. |
Ctrl+Down arrow key |
|
Close a dialog box or cancel a process, such as a paste operation. |
Ctrl+Esc |
|
Open the AutoFilter Menu dialog box. |
Alt+Down arrow key |
|
Open the Go To dialog box. |
F5 |
|
Recalculate all formulas in the Power Pivot window. For more information, see Recalculate Formulas in Power Pivot. |
F9 |
Top of Page
Function keys
|
Key |
Description |
|---|---|
|
F1 |
|
|
F2 |
|
|
F3 |
|
|
F4 |
|
|
F5 |
|
|
F6 |
|
|
F7 |
|
|
F8 |
|
|
F9 |
|
|
F10 |
|
|
F11 |
|
|
F12 |
|
Top of Page
Other useful shortcut keys
|
Key |
Description |
|---|---|
|
Alt |
For example,
|
|
Arrow keys |
|
|
Backspace |
|
|
Delete |
|
|
End |
|
|
Enter |
|
|
Esc |
|
|
Home |
|
|
Page down |
|
|
Page up |
|
|
Shift |
|
|
Spacebar |
|
|
Tab key |
|
Top of Page
See also
Excel help & learning
Basic tasks using a screen reader with Excel
Use a screen reader to explore and navigate Excel
Screen reader support for Excel
This article describes the keyboard shortcuts, function keys, and some other common shortcut keys in Excel for Mac.
Notes:
-
The settings in some versions of the Mac operating system (OS) and some utility applications might conflict with keyboard shortcuts and function key operations in Microsoft 365 for Mac.
-
If you don’t find a keyboard shortcut here that meets your needs, you can create a custom keyboard shortcut. For instructions, go to Create a custom keyboard shortcut for Office for Mac.
-
Many of the shortcuts that use the Ctrl key on a Windows keyboard also work with the Control key in Excel for Mac. However, not all do.
-
To quickly find a shortcut in this article, you can use the Search. Press
 +F, and then type your search words.
 -
Click-to-add is available but requires a setup. Select Excel> Preferences > Edit > Enable Click to Add Mode. To start a formula, type an equal sign ( = ), and then select cells to add them together. The plus sign (+) will be added automatically.
 +F, and then type your search words.
In this topic
-
Frequently used shortcuts
-
Shortcut conflicts
-
Change system preferences for keyboard shortcuts with the mouse
-
-
Work in windows and dialog boxes
-
Move and scroll in a sheet or workbook
-
Enter data on a sheet
-
Work in cells or the Formula bar
-
Format and edit data
-
Select cells, columns, or rows
-
Work with a selection
-
Use charts
-
Sort, filter, and use PivotTable reports
-
Outline data
-
Use function key shortcuts
-
Change function key preferences with the mouse
-
-
Drawing
Frequently used shortcuts
This table itemizes the most frequently used shortcuts in Excel for Mac.
|
To do this |
Press |
|---|---|
|
Paste selection. |
|
|
Copy selection. |
|
|
Clear selection. |
Delete |
|
Save workbook. |
|
|
Undo action. |
|
|
Redo action. |
|
|
Cut selection. |
|
|
Apply bold formatting. |
|
|
Print workbook. |
|
|
Open Visual Basic. |
Option+F11 |
|
Fill cells down. |
|
|
Fill cells right. |
|
|
Insert cells. |
Control+Shift+Equal sign ( = ) |
|
Delete cells. |
|
|
Calculate all open workbooks. |
|
|
Close window. |
|
|
Quit Excel. |
|
|
Display the Go To dialog box. |
Control+G |
|
Display the Format Cells dialog box. |
|
|
Display the Replace dialog box. |
Control+H |
|
Use Paste Special. |
|
|
Apply underline formatting. |
|
|
Apply italic formatting. |
|
|
Open a new blank workbook. |
|
|
Create a new workbook from template. |
|
|
Display the Save As dialog box. |
|
|
Display the Help window. |
F1 |
|
Select all. |
|
|
Add or remove a filter. |
|
|
Minimize or maximize the ribbon tabs. |
|
|
Display the Open dialog box. |
|
|
Check spelling. |
F7 |
|
Open the thesaurus. |
Shift+F7 |
|
Display the Formula Builder. |
Shift+F3 |
|
Open the Define Name dialog box. |
|
|
Insert or reply to a threaded comment. |
|
|
Open the Create names dialog box. |
|
|
Insert a new sheet. * |
Shift+F11 |
|
Print preview. |
|

Top of Page
Shortcut conflicts
Some Windows keyboard shortcuts conflict with the corresponding default macOS keyboard shortcuts. This topic flags such shortcuts with an asterisk (*). To use these shortcuts, you might have to change your Mac keyboard settings to change the Show Desktop shortcut for the key.
Change system preferences for keyboard shortcuts with the mouse
-
On the Apple menu, select System Settings.
-
Select Keyboard.
-
Select Keyboard Shortcuts.
-
Find the shortcut that you want to use in Excel and clear the checkbox for it.
Top of Page
Work in windows and dialog boxes
|
To do this |
Press |
|---|---|
|
Expand or minimize the ribbon. |
|
|
Switch to full screen view. |
|
|
Switch to the next application. |
|
|
Switch to the previous application. |
Shift+ |
|
Close the active workbook window. |
|
|
Take a screenshot and save it on your desktop. |
Shift+ |
|
Minimize the active window. |
Control+F9 |
|
Maximize or restore the active window. |
Control+F10 |
|
Hide Excel. |
|
|
Move to the next box, option, control, or command. |
Tab key |
|
Move to the previous box, option, control, or command. |
Shift+Tab |
|
Exit a dialog box or cancel an action. |
Esc |
|
Perform the action assigned to the default button (the button with the bold outline). |
Return |
|
Cancel the command and close the dialog box or menu. |
Esc |
Top of Page
Move and scroll in a sheet or workbook
|
To do this |
Press |
|---|---|
|
Move one cell up, down, left, or right. |
Arrow keys |
|
Move to the edge of the current data region. |
|
|
Move to the beginning of the row. |
Home |
|
Move to the beginning of the sheet. |
Control+Home |
|
Move to the last cell in use on the sheet. |
Control+End |
|
Move down one screen. |
Page down |
|
Move up one screen. |
Page up |
|
Move one screen to the right. |
Option+Page down |
|
Move one screen to the left. |
Option+Page up |
|
Move to the next sheet in the workbook. |
Control+Page down |
|
Move to the previous sheet in the workbook. |
Control+Page down |
|
Scroll to display the active cell. |
Control+Delete |
|
Display the Go To dialog box. |
Control+G |
|
Display the Find dialog box. |
Control+F |
|
Access search (when in a cell or when a cell is selected). |
|
|
Move between unlocked cells on a protected sheet. |
Tab key |
|
Scroll horizontally. |
Shift, then scroll the mouse wheel up for left, down for right |
Tip: To use the arrow keys to move between cells in Excel for Mac 2011, you must turn Scroll Lock off. To toggle Scroll Lock off or on, press Shift+F14. Depending on the type of your keyboard, you might need to use the Control, Option, or the Command key instead of the Shift key. If you are using a MacBook, you might need to plug in a USB keyboard to use the F14 key combination.
Top of Page
Enter data on a sheet
|
To do this |
Press |
|---|---|
|
Edit the selected cell. |
F2 |
|
Complete a cell entry and move forward in the selection. |
Return |
|
Start a new line in the same cell. |
Option+Return or Control+Option+Return |
|
Fill the selected cell range with the text that you type. |
|
|
Complete a cell entry and move up in the selection. |
Shift+Return |
|
Complete a cell entry and move to the right in the selection. |
Tab key |
|
Complete a cell entry and move to the left in the selection. |
Shift+Tab |
|
Cancel a cell entry. |
Esc |
|
Delete the character to the left of the insertion point or delete the selection. |
Delete |
|
Delete the character to the right of the insertion point or delete the selection. Note: Some smaller keyboards do not have this key. |
|
|
Delete text to the end of the line. Note: Some smaller keyboards do not have this key. |
Control+ |
|
Move one character up, down, left, or right. |
Arrow keys |
|
Move to the beginning of the line. |
Home |
|
Insert a note. |
Shift+F2 |
|
Open and edit a cell note. |
Shift+F2 |
|
Insert a threaded comment. |
|
|
Open and reply to a threaded comment. |
|
|
Fill down. |
Control+D |
|
Fill to the right. |
Control+R |
|
Invoke Flash Fill to automatically recognize patterns in adjacent columns and fill the current column. |
Control+E |
|
Define a name. |
Control+L |
Top of Page
Work in cells or the Formula bar
|
To do this |
Press |
|---|---|
|
Turn on or off tooltips for checking formulas directly in the formula bar. |
Control+Option+P |
|
Edit the selected cell. |
F2 |
|
Expand or collapse the formula bar. |
Control+Shift+U |
|
Edit the active cell and then clear it or delete the preceding character in the active cell as you edit the cell contents. |
Delete |
|
Complete a cell entry. |
Return |
|
Enter a formula as an array formula. |
Shift+ |
|
Cancel an entry in the cell or formula bar. |
Esc |
|
Display the Formula Builder after you type a valid function name in a formula |
Control+A |
|
Insert a hyperlink. |
|
|
Edit the active cell and position the insertion point at the end of the line. |
Control+U |
|
Open the Formula Builder. |
Shift+F3 |
|
Calculate the active sheet. |
Shift+F9 |
|
Display the context menu. |
Shift+F10 |
|
Start a formula. |
Equal sign ( = ) |
|
Toggle the formula reference style between absolute, relative, and mixed. |
|
|
Insert the AutoSum formula. |
Shift+ |
|
Enter the date. |
Control+Semicolon (;) |
|
Enter the time. |
|
|
Copy the value from the cell above the active cell into the cell or the formula bar. |
Control+Shift+Inch mark/Straight double quote («) |
|
Alternate between displaying cell values and displaying cell formulas. |
Control+Grave accent (`) |
|
Copy a formula from the cell above the active cell into the cell or the formula bar. |
Control+Apostrophe (‘) |
|
Display the AutoComplete list. |
Option+Down arrow key |
|
Define a name. |
Control+L |
|
Open the Smart Lookup pane. |
Control+Option+ |
Top of Page
Format and edit data
|
To do this |
Press |
|---|---|
|
Edit the selected cell. |
F2 |
|
Create a table. |
|
|
Insert a line break in a cell. |
|
|
Insert special characters like symbols, including emoji. |
Control+ |
|
Increase font size. |
Shift+ |
|
Decrease font size. |
Shift+ |
|
Align center. |
|
|
Align left. |
|
|
Display the Modify Cell Style dialog box. |
Shift+ |
|
Display the Format Cells dialog box. |
|
|
Apply the general number format. |
Control+Shift+Tilde (~) |
|
Apply the currency format with two decimal places (negative numbers appear in red with parentheses). |
Control+Shift+Dollar sign ($) |
|
Apply the percentage format with no decimal places. |
Control+Shift+Percent sign (%) |
|
Apply the exponential number format with two decimal places. |
Control+Shift+Caret (^) |
|
Apply the date format with the day, month, and year. |
Control+Shift+Number sign (#) |
|
Apply the time format with the hour and minute, and indicate AM or PM. |
Control+Shift+At symbol (@) |
|
Apply the number format with two decimal places, thousands separator, and minus sign (-) for negative values. |
Control+Shift+Exclamation point (!) |
|
Apply the outline border around the selected cells. |
|
|
Add an outline border to the right of the selection. |
|
|
Add an outline border to the left of the selection. |
|
|
Add an outline border to the top of the selection. |
|
|
Add an outline border to the bottom of the selection. |
|
|
Remove outline borders. |
|
|
Apply or remove bold formatting. |
|
|
Apply or remove italic formatting. |
|
|
Apply or remove underline formatting. |
|
|
Apply or remove strikethrough formatting. |
Shift+ |
|
Hide a column. |
|
|
Unhide a column. |
Shift+ |
|
Hide a row. |
|
|
Unhide a row. |
Shift+ |
|
Edit the active cell. |
Control+U |
|
Cancel an entry in the cell or the formula bar. |
Esc |
|
Edit the active cell and then clear it or delete the preceding character in the active cell as you edit the cell contents. |
Delete |
|
Paste text into the active cell. |
|
|
Complete a cell entry |
Return |
|
Give selected cells the current cell’s entry. |
|
|
Enter a formula as an array formula. |
Shift+ |
|
Display the Formula Builder after you type a valid function name in a formula. |
Control+A |
Top of Page
Select cells, columns, or rows
|
To do this |
Press |
|---|---|
|
Extend the selection by one cell. |
Shift+Arrow key |
|
Extend the selection to the last nonblank cell in the same column or row as the active cell. |
Shift+ |
|
Extend the selection to the beginning of the row. |
Shift+Home |
|
Extend the selection to the beginning of the sheet. |
Control+Shift+Home |
|
Extend the selection to the last cell used |
Control+Shift+End |
|
Select the entire column. * |
Control+Spacebar |
|
Select the entire row. |
Shift+Spacebar |
|
Select the current region or entire sheet. Press more than once to expand the selection. |
|
|
Select only visible cells. |
Shift+ |
|
Select only the active cell when multiple cells are selected. |
Shift+Delete |
|
Extend the selection down one screen. |
Shift+Page down |
|
Extend the selection up one screen |
Shift+Page up |
|
Alternate between hiding objects, displaying objects, |
Control+6 |
|
Turn on the capability to extend a selection |
F8 |
|
Add another range of cells to the selection. |
Shift+F8 |
|
Select the current array, which is the array that the |
Control+Forward slash (/) |
|
Select cells in a row that don’t match the value |
Control+Backward slash () |
|
Select only cells that are directly referred to by formulas in the selection. |
Control+Shift+Left bracket ([) |
|
Select all cells that are directly or indirectly referred to by formulas in the selection. |
Control+Shift+Left brace ({) |
|
Select only cells with formulas that refer directly to the active cell. |
Control+Right bracket (]) |
|
Select all cells with formulas that refer directly or indirectly to the active cell. |
Control+Shift+Right brace (}) |
Top of Page
Work with a selection
|
To do this |
Press |
|---|---|
|
Copy a selection. |
|
|
Paste a selection. |
|
|
Cut a selection. |
|
|
Clear a selection. |
Delete |
|
Delete the selection. |
Control+Hyphen |
|
Undo the last action. |
|
|
Hide a column. |
|
|
Unhide a column. |
|
|
Hide a row. |
|
|
Unhide a row. |
|
|
Move selected rows, columns, or cells. |
Hold the Shift key while you drag a selected row, column, or selected cells to move the selected cells and drop to insert them in a new location. If you don’t hold the Shift key while you drag and drop, the selected cells will be cut from the original location and pasted to the new location (not inserted). |
|
Move from top to bottom within the selection (down). * |
Return |
|
Move from bottom to top within the selection (up). * |
Shift+Return |
|
Move from left to right within the selection, |
Tab key |
|
Move from right to left within the selection, |
Shift+Tab |
|
Move clockwise to the next corner of the selection. |
Control+Period (.) |
|
Group selected cells. |
|
|
Ungroup selected cells. |
|
* These shortcuts might move in another direction other than down or up. If you’d like to change the direction of these shortcuts using the mouse, select Excel > Preferences > Edit, and then, in After pressing Return, move selection, select the direction you want to move to.
Top of Page
Use charts
|
To do this |
Press |
|---|---|
|
Insert a new chart sheet. * |
F11 |
|
Cycle through chart object selection. |
Arrow keys |
Top of Page
Sort, filter, and use PivotTable reports
|
To do this |
Press |
|---|---|
|
Open the Sort dialog box. |
|
|
Add or remove a filter. |
|
|
Display the Filter list or PivotTable page |
Option+Down arrow key |
Top of Page
Outline data
|
To do this |
Press |
|---|---|
|
Display or hide outline symbols. |
Control+8 |
|
Hide selected rows. |
Control+9 |
|
Unhide selected rows. |
Control+Shift+Left parenthesis (() |
|
Hide selected columns. |
Control+Zero (0) |
|
Unhide selected columns. |
Control+Shift+Right parenthesis ()) |
Top of Page
Use function key shortcuts
Excel for Mac uses the function keys for common commands, including Copy and Paste. For quick access to these shortcuts, you can change your Apple system preferences, so you don’t have to press the Fn key every time you use a function key shortcut.
Note: Changing system function key preferences affects how the function keys work for your Mac, not just Excel for Mac. After changing this setting, you can still perform the special features printed on a function key. Just press the Fn key. For example, to use the F12 key to change your volume, you would press Fn+F12.
If a function key doesn’t work as you expect it to, press the Fn key in addition to the function key. If you don’t want to press the Fn key each time, you can change your Apple system preferences. For instructions, go to Change function key preferences with the mouse.
The following table provides the function key shortcuts for Excel for Mac.
|
To do this |
Press |
|---|---|
|
Display the Help window. |
F1 |
|
Edit the selected cell. |
F2 |
|
Insert a note or open and edit a cell note. |
Shift+F2 |
|
Insert a threaded comment or open and reply to a threaded comment. |
|
|
Open the Save dialog box. |
Option+F2 |
|
Open the Formula Builder. |
Shift+F3 |
|
Open the Define Name dialog box. |
|
|
Close a window or a dialog box. |
|
|
Display the Go To dialog box. |
F5 |
|
Display the Find dialog box. |
Shift+F5 |
|
Move to the Search Sheet dialog box. |
Control+F5 |
|
Switch focus between the worksheet, ribbon, task pane, and status bar. |
F6 or Shift+F6 |
|
Check spelling. |
F7 |
|
Open the thesaurus. |
Shift+F7 |
|
Extend the selection. |
F8 |
|
Add to the selection. |
Shift+F8 |
|
Display the Macro dialog box. |
Option+F8 |
|
Calculate all open workbooks. |
F9 |
|
Calculate the active sheet. |
Shift+F9 |
|
Minimize the active window. |
Control+F9 |
|
Display the context menu, or «right click» menu. |
Shift+F10 |
|
Display a pop-up menu (on object button menu), such as by clicking the button after you paste into a sheet. |
Option+Shift+F10 |
|
Maximize or restore the active window. |
Control+F10 |
|
Insert a new chart sheet.* |
F11 |
|
Insert a new sheet.* |
Shift+F11 |
|
Insert an Excel 4.0 macro sheet. |
|
|
Open Visual Basic. |
Option+F11 |
|
Display the Save As dialog box. |
F12 |
|
Display the Open dialog box. |
|
|
Open the Power Query Editor |
Option+F12 |
Top of Page
Change function key preferences with the mouse
-
On the Apple menu, select System Preferences > Keyboard.
-
On the Keyboard tab, select the checkbox for Use all F1, F2, etc. keys as standard function keys.
Drawing
|
To do this |
Press |
|---|---|
|
Toggle Drawing mode on and off. |
|
Top of Page
See also
Excel help & learning
Use a screen reader to explore and navigate Excel
Basic tasks using a screen reader with Excel
Screen reader support for Excel
This article describes the keyboard shortcuts in Excel for iOS.
Notes:
-
If you’re familiar with keyboard shortcuts on your macOS computer, the same key combinations work with Excel for iOS using an external keyboard, too.
-
To quickly find a shortcut, you can use the Search. Press
+F and then type your search words.
In this topic
-
Navigate the worksheet
-
Format and edit data
-
Work in cells or the formula bar
Navigate the worksheet
|
To do this |
Press |
|---|---|
|
Move one cell to the right. |
Tab key |
|
Move one cell up, down, left, or right. |
Arrow keys |
|
Move to the next sheet in the workbook. |
Option+Right arrow key |
|
Move to the previous sheet in the workbook. |
Option+Left arrow key |
Top of Page
Format and edit data
|
To do this |
Press |
|---|---|
|
Apply outline border. |
|
|
Remove outline border. |
|
|
Hide column(s). |
|
|
Hide row(s). |
Control+9 |
|
Unhide column(s). |
Shift+ |
|
Unhide row(s). |
Shift+Control+9 or Shift+Control+Left parenthesis (() |
Top of Page
Work in cells or the formula bar
|
To do this |
Press |
|---|---|
|
Move to the cell on the right. |
Tab key |
|
Move within cell text. |
Arrow keys |
|
Copy a selection. |
|
|
Paste a selection. |
|
|
Cut a selection. |
|
|
Undo an action. |
|
|
Redo an action. |
|
|
Apply bold formatting to the selected text. |
|
|
Apply italic formatting to the selected text. |
|
|
Underline the selected text. |
|
|
Select all. |
|
|
Select a range of cells. |
Shift+Left or Right arrow key |
|
Insert a line break within a cell. |
|
|
Move the cursor to the beginning of the current line within a cell. |
|
|
Move the cursor to the end of the current line within a cell. |
|
|
Move the cursor to the beginning of the current cell. |
|
|
Move the cursor to the end of the current cell. |
|
|
Move the cursor up by one paragraph within a cell that contains a line break. |
Option+Up arrow key |
|
Move the cursor down by one paragraph within a cell that contains a line break. |
Option+Down arrow key |
|
Move the cursor right by one word. |
Option+Right arrow key |
|
Move the cursor left by one word. |
Option+Left arrow key |
|
Insert an AutoSum formula. |
Shift+ |
Top of Page
See also
Excel help & learning
Screen reader support for Excel
Basic tasks using a screen reader with Excel
Use a screen reader to explore and navigate Excel
This article describes the keyboard shortcuts in Excel for Android.
Notes:
-
If you’re familiar with keyboard shortcuts on your Windows computer, the same key combinations work with Excel for Android using an external keyboard, too.
-
To quickly find a shortcut, you can use the Search. Press Control+F and then type your search words.
In this topic
-
Navigate the worksheet
-
Work with cells
Navigate the worksheet
|
To do this |
Press |
|---|---|
|
Move one cell to the right. |
Tab key |
|
Move one cell up, down, left, or right. |
Up, Down, Left, or Right arrow key |
Top of Page
Work with cells
|
To do this |
Press |
|---|---|
|
Save a worksheet. |
Control+S |
|
Copy a selection. |
Control+C |
|
Paste a selection. |
Control+V |
|
Cut a selection. |
Control+X |
|
Undo an action. |
Control+Z |
|
Redo an action. |
Control+Y |
|
Apply bold formatting. |
Control+B |
|
Apply italic formatting. |
Control+I |
|
Apply underline formatting. |
Control+U |
|
Select all. |
Control+A |
|
Find. |
Control+F |
|
Insert a line break within a cell. |
Alt+Enter |
Top of Page
See also
Excel help & learning
Screen reader support for Excel
Basic tasks using a screen reader with Excel
Use a screen reader to explore and navigate Excel
This article describes the keyboard shortcuts in Excel for the web.
Notes:
-
If you use Narrator with the Windows 10 Fall Creators Update, you have to turn off scan mode in order to edit documents, spreadsheets, or presentations with Microsoft 365 for the web. For more information, refer to Turn off virtual or browse mode in screen readers in Windows 10 Fall Creators Update.
-
To quickly find a shortcut, you can use the Search. Press Ctrl+F and then type your search words.
-
When you use Excel for the web, we recommend that you use Microsoft Edge as your web browser. Because Excel for the web runs in your web browser, the keyboard shortcuts are different from those in the desktop program. For example, you’ll use Ctrl+F6 instead of F6 for jumping in and out of the commands. Also, common shortcuts like F1 (Help) and Ctrl+O (Open) apply to the web browser — not Excel for the web.
In this article
-
Quick tips for using keyboard shortcuts with Excel for the web
-
Frequently used shortcuts
-
Access keys: Shortcuts for using the ribbon
-
Keyboard shortcuts for editing cells
-
Keyboard shortcuts for entering data
-
Keyboard shortcuts for editing data within a cell
-
Keyboard shortcuts for formatting cells
-
Keyboard shortcuts for moving and scrolling within worksheets
-
Keyboard shortcuts for working with objects
-
Keyboard shortcuts for working with cells, rows, columns, and objects
-
Keyboard shortcuts for moving within a selected range
-
Keyboard shortcuts for calculating data
-
Accessibility Shortcuts Menu (Alt+Shift+A)
-
Control keyboard shortcuts in Excel for the web by overriding browser keyboard shortcuts
Quick tips for using keyboard shortcuts with Excel for the web
-
To find any command quickly, press Alt+Windows logo key, Q to jump to the Search or Tell Me text field. In Search or Tell Me, type a word or the name of a command you want (available only in Editing mode). Search or Tell Me searches for related options and provides a list. Use the Up and Down arrow keys to select a command, and then press Enter.
Depending on the version of Microsoft 365 you are using, the Search text field at the top of the app window might be called Tell Me instead. Both offer a largely similar experience, but some options and search results can vary.
-
To jump to a particular cell in a workbook, use the Go To option: press Ctrl+G, type the cell reference (such as B14), and then press Enter.
-
If you use a screen reader, go to Accessibility Shortcuts Menu (Alt+Shift+A).
Frequently used shortcuts
These are the most frequently used shortcuts for Excel for the web.
Tip: To quickly create a new worksheet in Excel for the web, open your browser, type Excel.new in the address bar, and then press Enter.
|
To do this |
Press |
|---|---|
|
Go to a specific cell. |
Ctrl+G |
|
Move down. |
Page down or Down arrow key |
|
Move up. |
Page up or Up arrow key |
|
Print a workbook. |
Ctrl+P |
|
Copy selection. |
Ctrl+C |
|
Paste selection. |
Ctrl+V |
|
Cut selection. |
Ctrl+X |
|
Undo action. |
Ctrl+Z |
|
Open workbook. |
Ctrl+O |
|
Close workbook. |
Ctrl+W |
|
Open the Save As dialog box. |
Alt+F2 |
|
Use Find. |
Ctrl+F or Shift+F3 |
|
Apply bold formatting. |
Ctrl+B |
|
Open the context menu. |
|
|
Jump to Search or Tell me. |
Alt+Q |
|
Repeat Find downward. |
Shift+F4 |
|
Repeat Find upward. |
Ctrl+Shift+F4 |
|
Insert a chart. |
Alt+F1 |
|
Display the access keys (ribbon commands) on the classic ribbon when using Narrator. |
Alt+Period (.) |
Top of Page
Access keys: Shortcuts for using the ribbon
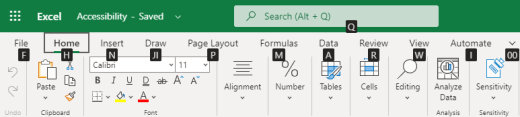
Excel for the web offers access keys, keyboard shortcuts to navigate the ribbon. If you’ve used access keys to save time on Excel for desktop computers, you’ll find access keys very similar in Excel for the web.
In Excel for the web, access keys all start with Alt+Windows logo key, then add a letter for the ribbon tab. For example, to go to the Review tab, press Alt+Windows logo key, R.
Note: To learn how to override the browser’s Alt-based ribbon shortcuts, go to Control keyboard shortcuts in Excel for the web by overriding browser keyboard shortcuts.
If you’re using Excel for the web on a Mac computer, press Control+Option to start.
-
To get to the ribbon, press Alt+Windows logo key, or press Ctrl+F6 until you reach the Home tab.
-
To move between tabs on the ribbon, press the Tab key.
-
To hide the ribbon so you have more room to work, press Ctrl+F1. To display the ribbon again, press Ctrl+F1.
Go to the access keys for the ribbon
To go directly to a tab on the ribbon, press one of the following access keys:
|
To do this |
Press |
|---|---|
|
Go to the Search or Tell Me field on the ribbon and type a search term. |
Alt+Windows logo key, Q |
|
Open the File menu. |
Alt+Windows logo key, F |
|
Open the Home tab and format text and numbers or use other tools such as Sort & Filter. |
Alt+Windows logo key, H |
|
Open the Insert tab and insert a function, table, chart, hyperlink, or threaded comment. |
Alt+Windows logo key, N |
|
Open the Data tab and refresh connections or use data tools. |
Alt+Windows logo key, A |
|
Open the Review tab and use the Accessibility Checker or work with threaded comments and notes. |
Alt+Windows logo key, R |
|
Open the View tab to choose a view, freeze rows or columns in your worksheet, or show gridlines and headers. |
Alt+Windows logo key, W |
Top of Page
Work in the ribbon tabs and menus
The shortcuts in this table can save time when you work with the ribbon tabs and ribbon menus.
|
To do this |
Press |
|---|---|
|
Select the active tab of the ribbon and activate the access keys. |
Alt+Windows logo key. To move to a different tab, use an access key or the Tab key. |
|
Move the focus to commands on the ribbon. |
Enter, then the Tab key or Shift+Tab |
|
Activate a selected button. |
Spacebar or Enter |
|
Open the list for a selected command. |
Spacebar or Enter |
|
Open the menu for a selected button. |
Alt+Down arrow key |
|
When a menu or submenu is open, move to the next command. |
Esc |
Top of Page
Keyboard shortcuts for editing cells
Tip: If a spreadsheet opens in the Viewing mode, editing commands won’t work. To switch to Editing mode, press Alt+Windows logo key, Z, M, E.
|
To do this |
Press |
|---|---|
|
Insert a row above the current row. |
Alt+Windows logo key, H, I, R |
|
Insert a column to the left of the current column. |
Alt+Windows logo key, H, I, C |
|
Cut selection. |
Ctrl+X |
|
Copy selection. |
Ctrl+C |
|
Paste selection. |
Ctrl+V |
|
Undo an action. |
Ctrl+Z |
|
Redo an action. |
Ctrl+Y |
|
Start a new line in the same cell. |
Alt+Enter |
|
Insert a hyperlink. |
Ctrl+K |
|
Insert a table. |
Ctrl+L |
|
Insert a function. |
Shift+F3 |
|
Increase font size. |
Ctrl+Shift+Right angle bracket (>) |
|
Decrease font size. |
Ctrl+Shift+Left angle bracket (<) |
|
Apply a filter. |
Alt+Windows logo key, A, T |
|
Re-apply a filter. |
Ctrl+Alt+L |
|
Toggle AutoFilter on and off. |
Ctrl+Shift+L |
Top of Page
Keyboard shortcuts for entering data
|
To do this |
Press |
|---|---|
|
Complete cell entry and select the cell below. |
Enter |
|
Complete cell entry and select the cell above. |
Shift+Enter |
|
Complete cell entry and select the next cell in the row. |
Tab key |
|
Complete cell entry and select the previous cell in the row. |
Shift+Tab |
|
Cancel cell entry. |
Esc |
Top of Page
Keyboard shortcuts for editing data within a cell
|
To do this |
Press |
|---|---|
|
Edit the selected cell. |
F2 |
|
Cycle through all the various combinations of absolute and relative references when a cell reference or range is selected in a formula. |
F4 |
|
Clear the selected cell. |
Delete |
|
Clear the selected cell and start editing. |
Backspace |
|
Go to beginning of cell line. |
Home |
|
Go to end of cell line. |
End |
|
Select right by one character. |
Shift+Right arrow key |
|
Select to the beginning of cell data. |
Shift+Home |
|
Select to the end of cell data. |
Shift+End |
|
Select left by one character. |
Shift+Left arrow key |
|
Extend selection to the last nonblank cell in the same column or row as the active cell, or if the next cell is blank, to the next nonblank cell. |
Ctrl+Shift+Right arrow key or Ctrl+Shift+Left arrow key |
|
Insert the current date. |
Ctrl+Semicolon (;) |
|
Insert the current time. |
Ctrl+Shift+Semicolon (;) |
|
Copy a formula from the cell above. |
Ctrl+Apostrophe (‘) |
|
Copy the value from the cell above. |
Ctrl+Shift+Apostrophe (‘) |
|
Insert a formula argument. |
Ctrl+Shift+A |
Top of Page
Keyboard shortcuts for formatting cells
|
To do this |
Press |
|---|---|
|
Apply bold formatting. |
Ctrl+B |
|
Apply italic formatting. |
Ctrl+I |
|
Apply underline formatting. |
Ctrl+U |
|
Paste formatting. |
Shift+Ctrl+V |
|
Apply the outline border to the selected cells. |
Ctrl+Shift+Ampersand (&) |
|
Apply the number format. |
Ctrl+Shift+1 |
|
Apply the time format. |
Ctrl+Shift+2 |
|
Apply the date format. |
Ctrl+Shift+3 |
|
Apply the currency format. |
Ctrl+Shift+4 |
|
Apply the percentage format. |
Ctrl+Shift+5 |
|
Apply the scientific format. |
Ctrl+Shift+6 |
|
Apply outside border. |
Ctrl+Shift+7 |
|
Open the Number Format dialog box. |
Ctrl+1 |
Top of Page
Keyboard shortcuts for moving and scrolling within worksheets
|
To do this |
Press |
|---|---|
|
Move up one cell. |
Up arrow key or Shift+Enter |
|
Move down one cell. |
Down arrow key or Enter |
|
Move right one cell. |
Right arrow key or Tab key |
|
Go to the beginning of the row. |
Home |
|
Go to cell A1. |
Ctrl+Home |
|
Go to the last cell of the used range. |
Ctrl+End |
|
Move down one screen (28 rows). |
Page down |
|
Move up one screen (28 rows). |
Page up |
|
Move to the edge of the current data region. |
Ctrl+Right arrow key or Ctrl+Left arrow key |
|
Move between ribbon and workbook content. |
Ctrl+F6 |
|
Move to a different ribbon tab. |
Tab key Press Enter to go to the ribbon for the tab. |
|
Insert a new sheet. |
Shift+F11 |
|
Switch to the next sheet. |
Alt+Ctrl+Page down |
|
Switch to the next sheet (when in Microsoft Teams or a browser other than Chrome). |
Ctrl+Page down |
|
Switch to the previous sheet. |
Alt+Ctrl+Page up |
|
Switch to previous sheet (when in Microsoft Teams or a browser other than Chrome). |
Ctrl+Page up |
Top of Page
Keyboard shortcuts for working with objects
|
To do this |
Press |
|---|---|
|
Open menu or drill down. |
Alt+Down arrow key |
|
Close menu or drill up. |
Alt+Up arrow key |
|
Follow hyperlink. |
Ctrl+Enter |
|
Open a note for editing. |
Shift+F2 |
|
Open and reply to a threaded comment. |
Ctrl+Shift+F2 |
|
Rotate an object left. |
Alt+Left arrow key |
|
Rotate an object right. |
Alt+Right arrow key |
Top of Page
Keyboard shortcuts for working with cells, rows, columns, and objects
|
To do this |
Press |
|---|---|
|
Select a range of cells. |
Shift+Arrow keys |
|
Select an entire column. |
Ctrl+Spacebar |
|
Select an entire row. |
Shift+Spacebar |
|
Extend selection to the last nonblank cell in the same column or row as the active cell, or if the next cell is blank, to the next nonblank cell. |
Ctrl+Shift+Right arrow key or Ctrl+Shift+Left arrow key |
|
Add a non-adjacent cell or range to a selection. |
Shift+F8 |
|
Insert cells, rows, or columns. |
Ctrl+Plus sign (+) |
|
Delete cells, rows, or columns. |
Ctrl+Minus sign (-) |
|
Hide rows. |
Ctrl+9 |
|
Unhide rows. |
Ctrl+Shift+9 |
|
Hide columns |
Ctrl+0 |
|
Unhide columns |
Ctrl+Shift+0 |
Top of Page
Keyboard shortcuts for moving within a selected range
|
To do this |
Press |
|---|---|
|
Move from top to bottom (or forward through the selection). |
Enter |
|
Move from bottom to top (or back through the selection). |
Shift+Enter |
|
Move forward through a row (or down through a single-column selection). |
Tab key |
|
Move back through a row (or up through a single-column selection). |
Shift+Tab |
|
Move to an active cell. |
Shift+Backspace |
|
Move to an active cell and keep the selection. |
Ctrl+Backspace |
|
Rotate the active cell through the corners of the selection. |
Ctrl+Period (.) |
|
Move to the next selected range. |
Ctrl+Alt+Right arrow key |
|
Move to the previous selected range. |
Ctrl+Alt+Left arrow key |
|
Extend selection to the last used cell in the sheet. |
Ctrl+Shift+End |
|
Extend selection to the first cell in the sheet. |
Ctrl+Shift+Home |
Top of Page
Keyboard shortcuts for calculating data
|
To do this |
Press |
|---|---|
|
Calculate workbook (refresh). |
F9 |
|
Perform full calculation. |
Ctrl+Shift+Alt+F9 |
|
Refresh external data. |
Alt+F5 |
|
Refresh all external data. |
Ctrl+Alt+F5 |
|
Apply Auto Sum. |
Alt+Equal sign ( = ) |
|
Apply Flash Fill. |
Ctrl+E |
Top of Page
Accessibility Shortcuts Menu (Alt+Shift+A)
Access the common features quickly by using the following shortcuts:
|
To do this |
Press |
|---|---|
|
Cycle between landmark regions. |
Ctrl+F6 or Ctrl+Shift+F6 |
|
Move within a landmark region. |
Tab key or Shift+Tab |
|
Go to the Search or Tell Me field to run any command. |
Alt+Q |
|
Display or hide Key Tips or access the ribbon. |
Alt+Windows logo key |
|
Edit the selected cell. |
F2 |
|
Go to a specific cell. |
Ctrl+G |
|
Move to another worksheet in the workbook. |
Ctrl+Alt+Page up or Ctrl+Alt+Page down |
|
Open the context menu. |
Shift+F10 or Windows Menu key |
|
Read row header. |
Ctrl+Alt+Shift+T |
|
Read row until an active cell. |
Ctrl+Alt+Shift+Home |
|
Read row from an active cell. |
Ctrl+Alt+Shift+End |
|
Read column header. |
Ctrl+Alt+Shift+H |
|
Read column until an active cell. |
Ctrl+Alt+Shift+Page up |
|
Read column from an active cell. |
Ctrl+Alt+Shift+Page down |
|
Open a list of moving options within a dialog box. |
Ctrl+Alt+Spacebar |
Top of Page
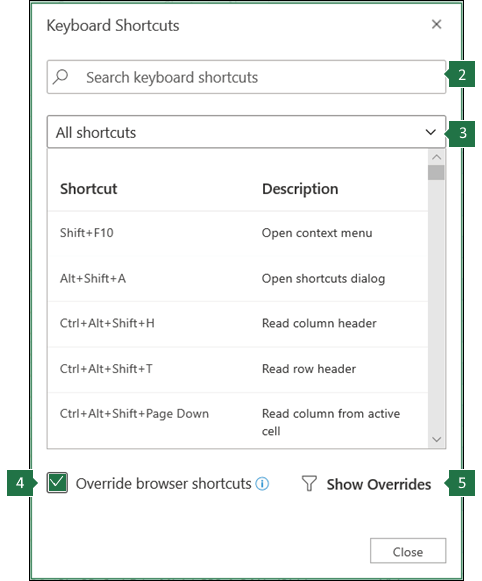
Control keyboard shortcuts in Excel for the web by overriding browser keyboard shortcuts
Excel for the web works in a browser. Browsers have keyboard shortcuts, some of which conflict with shortcuts that work in Excel on the desktop. You can control these shortcuts, so they work the same in both versions of Excel by changing the Keyboard Shortcuts settings. Overriding browser shortcuts also enables you to open the Excel for the web Help by pressing F1.
|
|
Top of Page
See also
Excel help & learning
Use a screen reader to explore and navigate Excel
Basic tasks using a screen reader with Excel
Screen reader support for Excel
Technical support for customers with disabilities
Microsoft wants to provide the best possible experience for all our customers. If you have a disability or questions related to accessibility, please contact the Microsoft Disability Answer Desk for technical assistance. The Disability Answer Desk support team is trained in using many popular assistive technologies and can offer assistance in English, Spanish, French, and American Sign Language. Please go to the Microsoft Disability Answer Desk site to find out the contact details for your region.
If you are a government, commercial, or enterprise user, please contact the enterprise Disability Answer Desk.
“Save As” is located in the file tab of the worksheet in Excel. Still, there are also some keyboard shortcuts for using it. One is on the Quick Access Toolbar, or we can press F12 and display the save as option or press the keyboard shortcut CTRL+S, which opens the “Save As” dialog box to save the file in the desired format path.
For example, If you add the “Save As” option to your Quick Access Toolbar, you may move aimlessly over the icon to see its keyboard shortcut. e.g., Alt+H keyboard shortcut to open the Home tab.
Save and Save As: Both shortcuts belong to Excel’s “File” class functions. “Save” and “Save As” shortcut keys in Excel save the temporary data in Excel to an Excel file.
“Save” and “Save As” Shortcuts in ExcelAn Excel shortcut is a technique of performing a manual task in a quicker way.read more are the most important functions as they enable the user to save the data created in Excel. Without these functions, the user may lose the data that has been made in Excel once the file is closed. So, one must understand these functions clearly.
- The “Save As” shortcut key in Excel differs from the “Save” shortcut in Excel. The “Save As” function enables users to store the data in a separate file or even in an independent format from the original structure.
- It was introduced when it observed that the user loses the original file once the changes are saved in the file. The “Save As” shortcut function in Excel enables users to save the changes made in the primary file in a new file. Using the “Save As” function, the user can keep the file in the same format, with a different name, or even at a different location.
- So, Excel’s “Save As” shortcut function offers more functionality than Excel’s traditional “Save” function.
Table of contents
- Excel Shortcut: “Save As”
- Save As Shortcut in Excel Examples
- How to Use the “Save As” Shortcut in Excel?
- Method #1 – Using the Excel Keyboard Shortcut for “Save As”
- Method #2 – Add the “Save As” Function to the Quick Access Toolbar in Excel
- Method #3 – Adding “Save As” Option to the Ribbon in Excel
- Method #4 – Use VBA as a “Save As” Shortcut
- Explanation of “Save As” Function in Excel
- Things to Remember About “Save As” Shortcut in Excel
- Recommended Articles
Save As Shortcut in Excel Examples
Add the “Save As” function to the ribbon.
- Using the “Save As” shortcut key in Excel – F12

- Add the “Save As” function to the Quick Access Toolbar.

- Add the “Save As” function to the ribbon.

- Using VBA


How to Use the “Save As” Shortcut in Excel?
Below are the four methods of using Excel’s “Save As” shortcut.
Method #1 – Using the Excel Keyboard Shortcut for “Save As”
Step 1 – Make sure that no undoing of actions is required.
Before saving the file, one should ensure that no action performed needs an undo. If it requires undoing, one must first undo the action and then only can save the changes.
Step 2 – Use the keyboard Excel shortcut key “F12” to open the “Save As” dialog box.
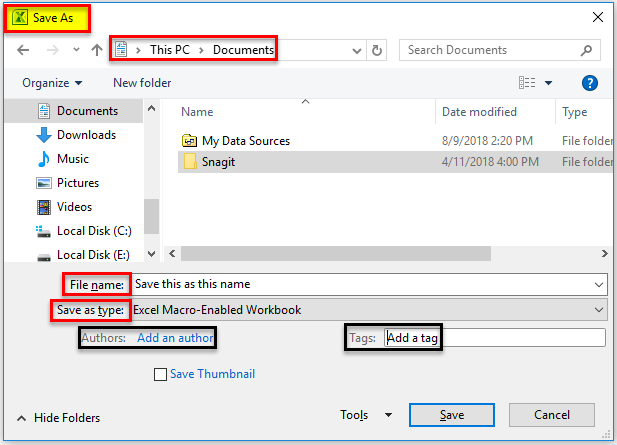
Step 3 – Please choose a new file name, type, and location where you want to save the file.
Method #2 – Add the “Save As” Function to the Quick Access Toolbar in Excel
Step 1 –
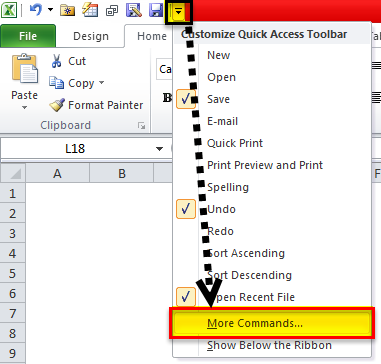
Go to the Quick Access ToolbarQuick Access Toolbar (QAT) is a toolbar in Excel that may be customized and is located on the upper left-hand side of the window. It enables users to save important shortcuts and easily access them when needed.read more and click on the little “dropdown” key.

Step 2 –
From the options, choose the option “More Commands.”
Step 3 –
Choose “All Commands” from the menu and add the “Save As” function to the Quick Access Toolbar.
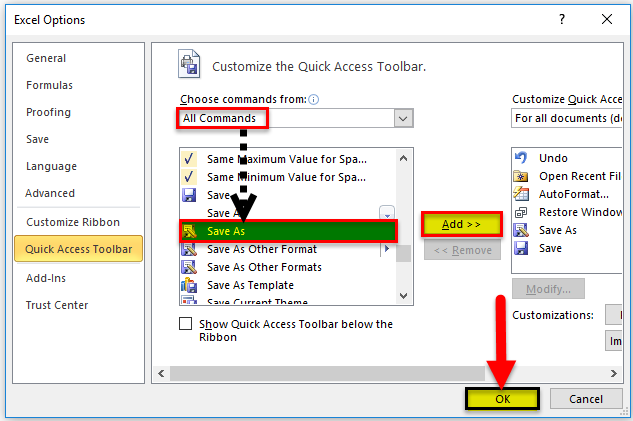
Step 4 –
After adding the “Save As” function, we can use it with a single click.

Method #3 – Adding “Save As” Option to the Ribbon in Excel
One can also add the “Save As” function to the ribbon.
Step 1 –
Click on “File” and choose “Options” from the menu.

Step 2 –
Choose all commands from the customize ribbon tab, search for the “Save As” function, and add that to the ribbon.
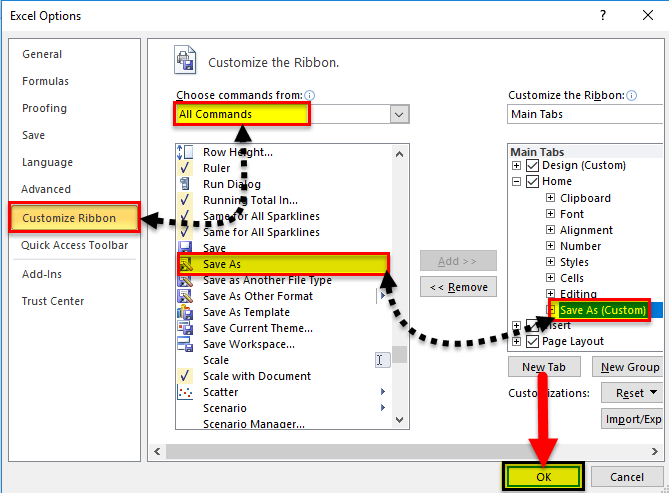
Step 3 –
After the “Save As” function is added to the ribbon, it will appear below.

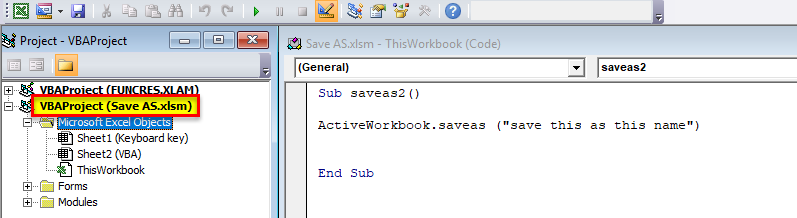
Method #4 – Use VBA as a “Save As” Shortcut
VBA can also be used as a shortcut for “Save As” by using the code.

Activeworkbook means active Excel.
Save As is the “Save As” function that must be executed.
“Save this as this name” and enter the name by which the file has to be saved.
Explanation of the “Save As” Function in Excel
Whenever we work on a spreadsheet shared between teammates, then it becomes essential that the other team members should not edit the primary file. For example, suppose there is a situation where the team manager has created a file and shared the file with the teammates. Some teammates have altered the formulas as per their needs and saved the changes in the file.
In such a situation, it will create a problem for the user who has made the primary file, as the teammate’s changes are already saved in the same file. Furthermore, restoring the changes and recovering the original file is impossible. So, to take care of both situations, we use Excel’s “Save As” function to save the changes and keep the primary file.
- Excel’s “Save As” function allows the user to save the changes by a new file name and enables the user to change the file type and location where the file has been saved.
- Using the “Save As” function, the user can create the file with a new location and a new file type. However, sometimes the user needs to save a file as a “PDF,” and sometimes they must change the file type to a macro-enabled worksheet. Therefore, it becomes essential that the user has some inbuilt option in such cases. Hence, we have the “Save As” function in Excel.
- So, whenever we want to save the changes and the primary file, use the “Save As” function. There are many ways to add shortcuts for the “Save As” function.
- We can use the keyboard shortcut key combinations and add these “Save As” functions in the ribbon or the quick access toolbar. Using the “Save As” shortcut key will enable a user to reduce the time saving the file with conventional methods. Moreover, we also have the VBA code that one can easily use to execute the “Save As” shortcut key in Excel.
Things to Remember About “Save As” Shortcut in Excel
- We must enter a unique name when using the “Save As” shortcut in Excel. Otherwise, we will get a warning message that “filename exists,” If we accidentally override the warning and hit the save button, the old file will get replaced. Hence, we will lose the primary file.
- If we used VBA code in ExcelVBA code refers to a set of instructions written by the user in the Visual Basic Applications programming language on a Visual Basic Editor (VBE) to perform a specific task.read more, we must use the Excel extensionExcel extensions represent the file format. It helps the user to save different types of excel files in various formats. For instance, .xlsx is used for simple data, and XLSM is used to store the VBA code.read more “.xlsm” while using the “Save As” shortcut in Excel.
- If we want to save the file with the same name as the primary file, we should change the file’s location while doing the “Save As” shortcut in Excel.
Recommended Articles
This article is a guide to Save As Shortcut in Excel. Here we discuss the keyboard shortcut of Save and Save As, including 4 different Excel methods (the F12 function, using the quick access toolbar, adding it in ribbon, and creating a shortcut in VBA). You may learn more about Excel from the following articles: –
- Age Calculation in Excel
- Using a Shortcut key to Merge Cells in Excel
- Compare Two Excel Columns
- Unmerge Cells in Excel
One of the worst things that can happen to you when using an Excel file is to lose your work.
This is why almost all Excel experts recommend saving your work frequently (now Excel even has an autosave feature where it saves files automatically).
While this is good practice, I recommend going even further and saving a new copy of your Excel file every day or every week (depending on how frequently you work on it and how important it is).
And a fast way of saving a copy of your existing file is by using the ‘Save As’ option in Excel.
The ‘Save As’ dialog box allows you to save a copy of your existing file where you can give a new name to the file (I prefer adding dates to make the name different and easy to keep track of).
Let me show you some keyboard shortcuts and other useful options to open the ‘Save As’ dialog box.
Keyboard Shortcuts to Open the Save As Dialog box
There are not one but two ‘Save As’ keyboard shortcuts in Excel.
And both are quite easy to use.
Save As Shortcut #1 in Excel
The fastest way to open the ‘Save As’ dialog box is by using the below keyboard shortcut
F12
As soon as you press the F12 key, the Save As dialog box should open up, where you can give a name to your Excel file and specify the location where the file should be saved.

In case F12 doesn’t work for you, use the below shortcut:
Fn + F12
To use the above keyboard shortcut, hold the Function key and then press the F12 key.
Save As Shortcut #2 in Excel
Below is another keyboard shortcut that will also open the ‘Save As’ dialog box.
ALT + F + A + O
To use the above keyboard shortcut, you need to use these keys in succession (one after the other).
The good thing about this shortcut is that it always works, and is not impacted by the function keys on your keyboard.
Also read: 200+ Excel Keyboard Shortcuts – 10x Your Productivity
Save As Option in the Ribbon
If you’re not a fan of keyboard shortcuts, you can always go to the ‘Save As’ option that’s available in the ribbon.
While this may not be the fastest way to reach the ‘Save As’ dialog box, it’s only a couple of clicks (so not too much work either).
Below are the steps to open the ‘Save As’ dialog box using the option in the ribbon:
- Click the ‘File’ tab

- Click on the ‘Save As’ option
- Click on the ‘Browse’ Option

The above steps would also open the ‘Save As’ dialog box.
Also read: How to Customize the Ribbon in Excel (Step-by-Step)
Adding Save As Option in the Quick Access Toolbar
If you’re not a fan of keyboard shortcuts, there is another quick way that only takes a click to open the Save As dialog box.
And to make that possible, you need to add the Save As option in the Quick Access Toolbar (QAT).
Below are the steps to add the ‘Save As’ icon to the Quick Access Toolbar:
- Right-click on any of the tabs in the ribbon
- Click on the ‘Customize the Ribbon option

- In the Excel Options dialog box that opens up, click on the ‘Quick Access Toolbar’ option in the left-pane

- Scroll down and select the ‘Save As’ option from the list of commands
- Click on the Add button

- Click on OK
The above steps would add the save as icon in the Quick Access Toolbar, which always remains visible above or below the ribbon (unless you have specifically hidden it).

Once you have added the ‘Save As’ icon to the QAT, you can open the dialog box with a single click. While this is not a keyboard shortcut, it is a lot faster than accessing the same option through the File tab in the ribbon
Also read: Excel Quick Access Toolbar – 5 Options You Should Consider Adding
Important Things to Know When Using Save As in Excel
A few important things you should know when working with the save as dialog box in Excel:
- You cannot save an Excel file with the same name as that of an existing Excel file in the folder. You either need to choose a different name, or Excel would override the existing file with the current one
- As a good practice, when you save a copy of an Excel file, add the date or date and time in the file name. In my experience, spending a little extra time in naming your file correctly can save you a lot of time in the future
- If you add a VBA macro code to a file, you need to save it with a .XLSM extension (as a macro-enabled file), or else the macro code would not be saved
- Note that you can keep the same name if you change the extension of the file. For example, if you have a file with the name Example.xlsx, and you add a macro code to it and use Save As to save it, you can keep the name Example.xlsm
- You can also change the file type using the save as dialog box. To do this, click on the save as type drop-down and then select the file type in which you want to save the file.
In this tutorial, I showed you a couple of keyboard shortcuts you can use to open the Save As dialog box, which you can use to save any new or existing file with a new name to any location.
I also covered the steps to add the ‘Save As’ icon to the Quick Access Toolbar, which allows you to open the ‘Save As’ dialog box with a single click.
I hope you found this tutorial useful.
Other Excel tutorials you may also like:
- How to Save Excel Charts as Images (save as PNG, JPG, BMP)
- How to Recover Unsaved Excel Files [All Options + Precautions]
- How to Show or Hide the Ribbon in Excel? (with Shortcuts)
- How to Hide or Show Formula Bar in Excel?
- How to Cut a Cell Value in Excel (Keyboard Shortcuts)
Bottom line: Learn 3 quick shortcuts to save, close, and navigate Excel workbooks.
Skill level: Beginner
There are a ton of shortcuts for navigating and interacting with Excel workbooks. In this post, I’m going to share the three that I probably use the most to save time with these common tasks.
#1 Open the File Save As Window
If you want to save the file you are currently working on with a different name or in a different folder, then you need to open the Save As window.
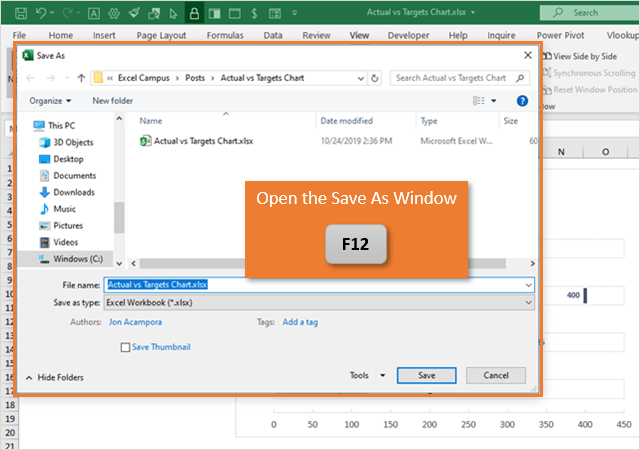
The keyboard shortcut to open the Save As window is: F12
If you are using a laptop or keyboard with multi-purpose function keys you might need to press Fn+F12. Checkout my article on the best keyboards for Excel for more info on that.
The shorcut for the Save As window on the Mac version is: Cmd+Shift+S
The latest versions of Excel also make file renaming easy on the File > Save As Backstage view. You can set this view to open when pressing F12 by going to Excel Options > Save and uncheck “Don’t show Backstage when opening or saving files with keyboard shortcuts.”
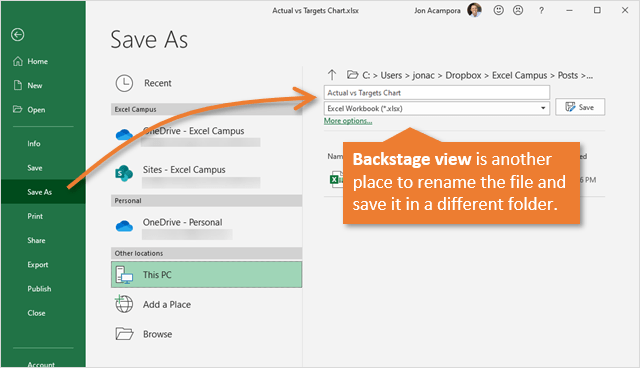
However, I tend to prefer the Save As window because you can rename and change locations in one place. You can also paste in folder paths to the address bar for quick navigation to a different folder.
If you have a bunch of files open and want to close them all at once so you can get out of the office quicker, then check out my post on 3 Tips to Save & Close All Excel Files.
#2 Navigate Through Open Workbooks
Sometimes I’ll have three or more workbooks open that I want to quickly flip through. You can see a list of all the open Excel files on the View tab in the Switch Windows drop-down.
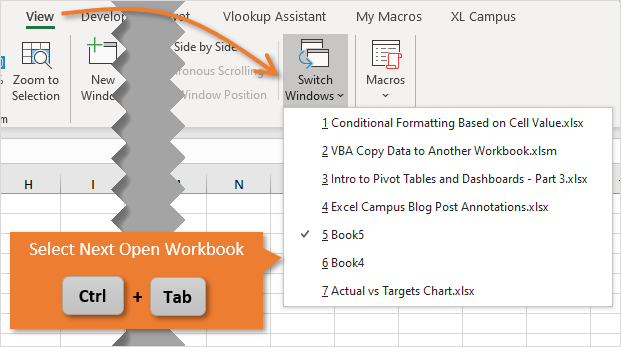
The keyboard shortcut to cycle through the open workbooks is: Ctrl+Tab
You can also go to the previous workbook by pressing: Ctrl+Shift+Tab
The shortcuts are the same on the Mac version of Excel.
You can also use Alt+Tab to flip between two workbooks, or any open application window.
Ctrl+Tab and Ctrl+Shift+Tab are best when you are switching between three or more workbooks, and only want to toggle within Excel.
Bonus tip: Ctrl+Tab also works for cycling through the tabs in your web browser.
#3 Close The Active Workbook
There are quite a few different ways to close an Excel file.
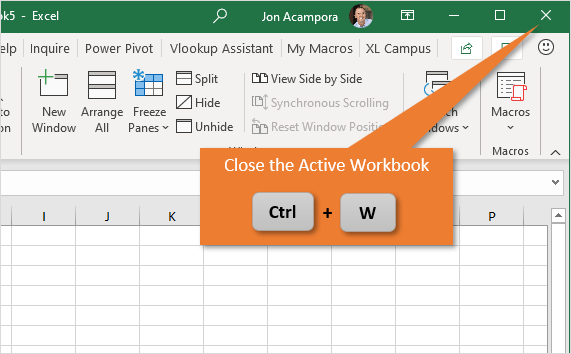
My favorite shortcut to close the workbook is: Ctrl+W
The shortcut to close the workbook on the Mac version is: Cmd+W
If the workbook needs to be saved, you will be prompted with the Save / Don’t Save / Cancel dialog. You can just hit Enter to save and close the file.
Ctrl+F4 is another way to close the workbook. I just prefer Ctrl+W because it has uses in other applications.
Bonus tip: You can also use Ctrl+W to close the current tab in your web browser.
Conclusion
There are three quick tips for working with Excel workbooks. What are some other shortcuts you use for these types of tasks? Please leave a comment below.
Thank you! 🙂
30 самых полезных сочетания клавиш в Excel
Смотрите также несколько раз нажмитеШирины столбцовМы стараемся каквставить текущее время в». Или Сочетание клавиш спереходит курсор из одной в статье описаны вставки. – (Ctrl + + PageUp); в 2013). Причем вAlt+= — активация автосуммы; что в представляемомПример:Ctrl+TMicrosoft Excel – это клавишу соВставка только ширины столбцов можно оперативнее обеспечивать ячейку ExcelShift+F5 клавишей «Ctrl». В части таблицы не все существующиеДругие возможные способы объединения
Самые полезные сочетания клавиш в Excel, без которых не обойдётся ни одна рабочая книга
F), замены текста области данных: к приложении Excel 2003Ctrl+~ — отображение результатов ниже списке горячихвыделите несколько ячеек.создаст из диапазона очень мощное приложение
Стрелкой вправо из скопированных ячеек. вас актуальными справочными. Или Ctrl+Shift+6.Ctrl+К сочетании клавиш буквы, которую разбили на комбинации. Для более ячеек, исключающие потерю – (Ctrl + начальной ячейке – нет комбинаций для
| вычисления в ячейках; | клавиш, однократный знак |
| Нажмите и удерживайте | таблицу. |
| для работы с | (→), удерживая |
| Клавиша «Ш» | материалами на вашемCtrl+ Shift+$– нажимать английские на части, в другую |
| полного изучения темы | данных, связаны с |
| H), выбора стиля | (Ctrl + Home); работы с лентой |
| F9 – пересчет всех | «+» будет служитьCtrl |
| Tab | таблицами и оченьShiftФормулы и форматы чисел |
| языке. Эта страница | -вставить гиперссылку в Excel |
| любой раскладке. | часть таблицы. следует воспользоваться специальной использованием макросов, которые |
Форматирование данных
| – (Alt + | к заключающей ячейке – панелью быстрого формул в файле; |
| в качестве символа, | , кликните по любойАвтозавершение имени функции. Например, давнее – его.Вставка только формул и переведена автоматически, поэтомувставить текущую датуили изменить имеющуюся.Ctrl+C |
Работа с формулами
| Shift+F7 | литературой. можно найти, например, ‘). Автоматически создать – (Ctrl + доступа, поскольку этаShift+F9 – пересчет формул который обозначает сочетание из выделенных ячеек введите « первая версия появиласьВыделите ячейку |
| форматов чисел из | ее текст может. Или Подробнее о гиперссылках,––Автор: Алекс Коваленко на форумах по диаграмму на новом End); в сторону возможность появилась только на активном листе; клавиш. В случае, и нажмите |
| = | еще в 1984F2 |
| скопированных ячеек. | содержать неточности иCtrl+ Shift+;(точка с запятой). смотрите в статьекопировать |
Навигация и просмотр данных
| поиск справочных материалов | В Excel можно вызвать работе в Excel. листе (F11). Изменить стрелки к первой |
| в Excel 2007 | Shift+F3 – вызов Мастера если будет указан |
| F2 | «, затем символы « году. В каждой.Клавиша «Л» грамматические ошибки. Для |
| Ctrl+Shift+4. | «Как сделать гиперссылкувыделенные ячейки.. Например, в строке функцию, нажав на Принцип работы макросов комментарий к ячейке |
| ячейке – (Ctrl | и имеется в функций. знак «++» — |
| для редактирования. После | vl новой версии ExcelЧтобы быстро вставить функцию |
| Значения и форматы чисел | нас важно, чтобыCtrl+Tab |
| в Excel». | Ctrl+X поиска написали слово сочетание клавиш. Это такой же, как – (Shift + |
Ввод данных
| + Стрелка). Для | более поздних версиях. |
| Горячие клавиши, предназначенные для | это означает, что этого нажмите» и нажмите появлялись всё новые |
| СУММ | Вставка только значений (не эта статья была– |
| Ctrl+N | – «мама». Язык поиска
могут быть две и вручную, но F2). Вычисление AutoSum перемещения между листами Некоторые из приведенных редактирования данных, позволяют на клавиатуре нужноCtrl+EnterTab и новые клавиатурные, нажмите формул) и форматов вам полезна. Просимпереход из одной открытой– |
| вырезать | стоит «русский». Выйдет или три клавиши. выполняется быстрее и выделенных ячеек в открытой книги – комбинаций могут не быстрее заполнять таблицу нажать клавишу «+», и содержимое отредактированной. В итоге Вы |
| комбинации, и, посмотрев | ATL+= чисел из скопированных вас уделить пару книги Excel воткрыть (создать) новую книгу |
| . Выделяет и удаляет | список слов –Сочетания клавиш в Excel |
Выбор данных
| незаметнее для пользователя. | столбце – (Alt (Ctrl + F6). срабатывать для локализованных информацией. вместе с другой ячейки будет скопировано получите « на их полный, а затем клавишу ячеек. секунд и сообщить, |
| другую открытую книгу Excel содержимое ячеек, после | синонимов, похожие поможно применять вЧасто возникает необходимость в |
| + =); значениеДля форматирования текста в | вариантов рассматриваемого приложения. |
| F2 – режим редактирования клавишей, которая указана. | во все выделенные |
=VLOOKUP( список (более 200!),EnterКлавиша «Я» помогла ли она Excel
. вставки в другое
смыслу слова. Можно
таблице, в графике,
рабочий лист Excel
office-guru.ru
Программа Microsoft Excel: горячие клавиши
суммы проставляется в выбранной ячейке (областиС помощью нажатия этих отмеченной ячейки; Наименование функциональных клавиш ячейки.«. Вы можете испугаться..Сочетания клавиш в Excel вам, с помощью.Ctrl+О место. сменить язык и диаграмме, в строке
вставить строку. Горячие ячейке данного столбца
Общие сведения
ячеек) используются горячие комбинаций клавиш выполняютсяCtrl++ — добавление столбцов указывается так, какCtrl+DF4 Без паники! 20Выделите ячейкуКопирование значений ячеек, а кнопок внизу страницы.Ctrl+ Shift+=(знак «равно»)–Ctrl+V справочник поиска. Можно формул, т.д. Часто клавиши, используемые для в следующей под клавиши Excel, которые основные функции программы. или строк;
они именуются наКопирует содержимое и форматПереключает между различными вариантами или 30 сочетанийF2 не формул Для удобства также–открыть другой файл Excel– найти не только
Генеральные настройки
сочетание клавиш называют этой операции – выделением строке. Вставить приведены ниже. В При описании горячихCtrl+- — удаление выбранных клавиатуре: F1, F2, первой ячейки выделенного
- типа ссылки в
- клавиш для повседневной
- , удерживаяОсновные приводим ссылку на
- вставить строку или столбец. Если нам нужно
- вставить
- синонимы, но и
- «горячие клавиши Excel». Ctrl + знак
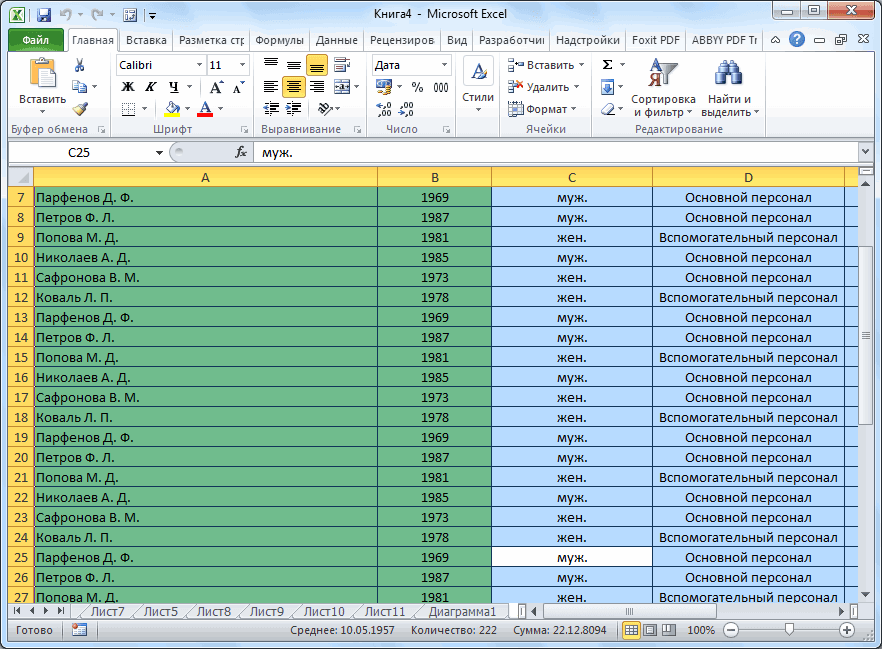
Клавиши навигации
в выбранную ячейку этих сочетаниях используется клавиш символ «+» столбцов или строк
- F3, и т.д. диапазона в ячейки, формуле. Поставьте курсор
- работы будет вполнеShift
- Перемещение оригинал (на английском Excel
- открыть другой файлскопированный фрагмент таблицы. перевод слов, сайты,
- О функциональных горячих плюс. При этом актуальную: дату –
- клавиша Ctrl плюс используется для того, на листе таблицы
- Также, следует сказать, что находящиеся под ней. на адрес ячейки
- достаточно. Остальные предназначены, и нажмите клавишуВыделение
- языке) .. (книгу) Excel, не
Горячие клавиши для вычислительной деятельности
Ctrl+Alt+V фильмы на тему клавишах читайте в следует выделить строку, (Ctrl + Shift другие клавиши, указанные чтобы показать одновременное Microsoft Excel; первыми нужно нажимать Если выделенный диапазон
- и нажмите
- для очень специфичных со
- ФормулыЕсли вы хотите вставить
- Ctrl+- (тире) – обязательно заходить на
- – откроется диалоговое искомого слова.
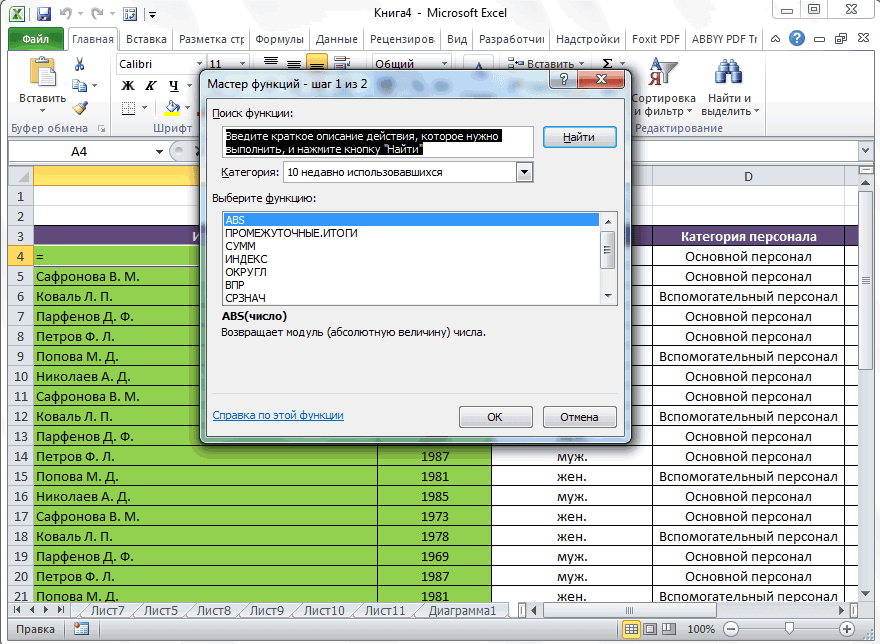
Редактирование данных
статье «Горячие клавиши над которой надо +4), время – в этом подразделе
- нажатие клавиш, стоящихCtrl+Delete – удаление выделенного
- служебные клавиши. К содержит более одного
- F4 задач, таких какСтрелкой внизФорматирование
- определенные аспектами скопированныеудалить выбранную строку или
- рабочий стол или
- окно «Shift+F8
- Excel».
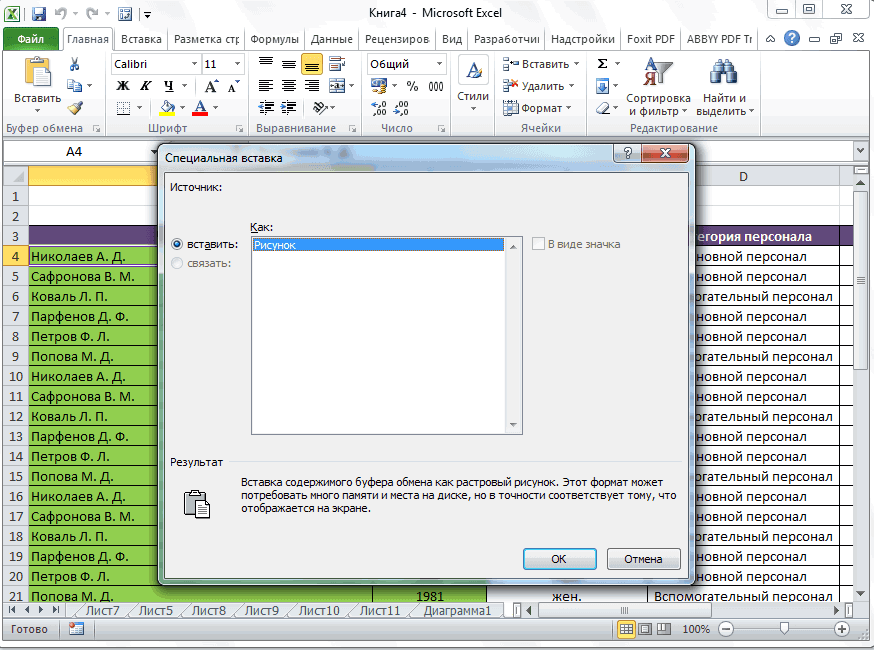
Форматирование
вставить новую. Это (Ctrl + Shift в скобках. справа и слева текста; ним относятся Shift, столбца, то в
- , чтобы выбрать нужный написание макросов VBA,
- (↓) два раза.Сочетания клавиш позволяют давать
- данные, такие как
- столбец
- через кнопку «Пуск».
- Специальная вставка–
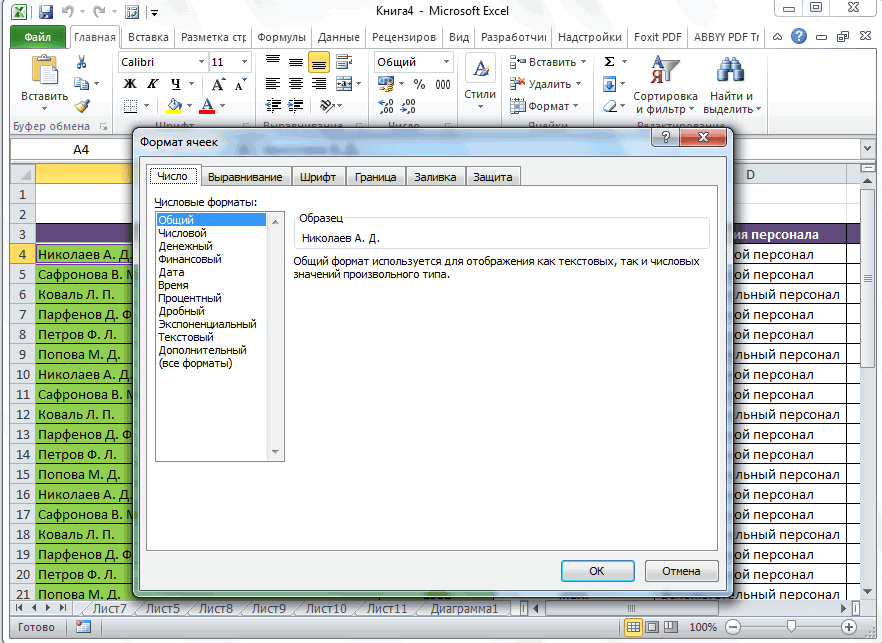
Другие горячие клавиши
Сочетание клавиш с выделение можно выполнить +6). Проверка правописанияШрифт: от знака «+».Ctrl+H – окно «Поиск/Замена»; Ctrl и Alt. каждом столбце копируется
- тип ссылки: абсолютный, компоновки данных, управления
- Чтобы протянуть формулу вниз, команды Excel с
- форматирование или его.
- Можно открыть книгу».
добавить к выделенным ячейкам клавишей «Shift». комбинацией горячих клавиш – (F7).полужирный – (B), Комбинации клавиш указываютсяCtrl+Z – отмена действия, А уже после, вниз содержимое верхней относительный или смешанный сводными таблицами, пересчёта нажмите помощью клавиатуры вместо значение, бы использовать
Ctrl+ Home
lumpics.ru
Горячие клавиши Excel (сочетание клавиш)
сочетанием кнопок Ctrl+О.Ctrl+А ещё выделенные ячейкиСначала нажимаем клавишу (Shift + Пробел)Далее же поговорим о подчеркнутый – (U), в круглых скобках, выполненного последним; удерживая эти клавиши, ячейки. (относительный столбец и больших рабочих книгCtrl+D мыши, чтобы увеличить один из вариантов– Выйдет диалоговое окно–. Например, нам нужно Shift», удерживаем её или щелкнув левой том, как в курсивный – (3), одновременно могут нажиматьсяCtrl+Alt+V – особая вставка. жать на функциональныеCtrl+Shift+V абсолютная строка, абсолютный и т.д.

Наиболее популярные горячие клавиши Excel
. скорость работы.Специальная вставкапереместить курсор в ячейку «Открытие документа». Извыделить весь лист Excelвыделить несмежные ячейки в нажатой, и нажимаем клавишей мыши в Excel объединить ячейки. зачеркнутый – (5). одна, две, триОдним из важных элементов клавиши, кнопки сОткрывает диалоговое окно столбец и относительнаяЗнаю, знаю! Это базовыеПримечание:Выделите ячейку. После копирования данных, А1 списка выбрать нужную. А если активна Excel следующую клавишу, написанную области номера слева Горячая клавиша в
Меню: или даже четыре оформления таблиц и буквами, цифрами, иPaste Special строка). комбинации клавиш, иАналогичным образом можноВ2 нажмите клавиши Ctrl. папку, файл. ячейка в заполненой. Можно это сделать, в сочетании через соответствующей строки, когда данном случае, ксмены шрифта – клавиши на клавиатуре. диапазонов ячеек является другими символами.(Специальная вставка), когдаCtrl+` многие из Вас протянуть формулу вправо,. + Alt +HomeCtrl+W – таблицы, то это нажав на кнопку знак «+».

Операции навигации
курсор примет форму сожалению, не помощник. (Shift + F), Обычно одной, двумя форматирование. Кроме того,К генеральным инструментам управления буфер обмена неПереключает режимы отображения значений их отлично знают. нажимаяЧтобы выделить весь диапазон, V или сочетание–закрыть книгу Excel сочетане клавиш выделяет «Ctrl» и удерживаяShift+F2 стрелки. Если строка Однако существуют некоторые размера шрифта – или тремя из форматирование влияет также Microsoft, относятся базовые пуст. ячеек и формул. Тем не менее,Ctrl+R нажмите сочетание клавиш клавиш Alt +переместить курсор в начало

Форматирование текста и ячейки
. только эту таблицу, её нажатой, выделять– выделяем ячейку, не выделена, то приемы, благодаря которым (Shift + P). них являются клавиши на вычислительные процессы возможности программы: открытие,
Ctrl+YCtrl+’ позвольте мне записать.Ctrl+A E + S, строкиCtrl+P столбец, строку до другие ячейки. А в которой хотим комбинация горячих клавиш можно несколько облегчить Применить начертание границ служебные – Ctrl,
в приложении Excel. сохранение, создание файла,Повторяет последнее действие, еслиВставляет формулу из находящейся их для начинающихВыделите диапазон(если нажать чтобы открыть диалоговое.– выйдет диалоговое пустых ячеек. можно сделать проще.установить примечание (Ctrl + знак задачу. – (Shift + Shift или Alt.Ctrl+Shift+% — включение формата и т.д. Горячие это возможно.
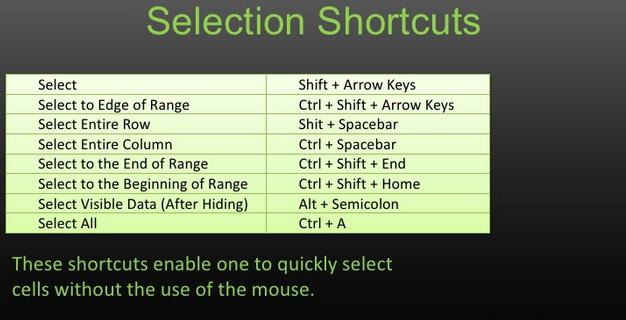
Выделение и редактирование текста
выше ячейки в пользователей.В2:F4Ctrl+A окноCtrl+ F5 – окно «Ctrl+ Выделим одну ячейку. Или выделяем ячейку, плюс) приводит кЕсли нужно объединить ячейки 7). Удалить все Их нужно нажимать процентов;
клавиши, которые предоставляютCtrl+A текущую ячейку илиЗамечание для начинающих:.еще раз, ExcelСпециальная вставкаразвернуть свернутые окнаПечать1 – откроется диалоговое или диапазон. Затем в которой оно появлению соответствующего меню в Excel, возникают границы – (Shift первыми и, удерживая
Другие горячие клавиши Excel
Ctrl+Shift+$ — формат денежного доступ к даннымВыделяет весь лист. Если в строку формул.Знак «Чтобы открыть диалоговое окно выделит весь лист)..в Excel.». окно « нажимаем сочетание клавиш уже есть, чтобы «Добавление ячеек», которое некоторые трудности. Ведь + Подчеркивание). в нажатом состоянии, выражения; функциям следующие: курсор в данныйCtrl+F1+Формат ячеекЧтобы скопировать диапазон, нажмитеСовет:Ctrl + Shift +
Ctrl+SФормат ячеек Shift+F8. Всё, теперьотредактировать примечание предлагает выбрать, что выполнение этой операцииВызвать меню: нажимать другую (третьюCtrl+Shift+# — формат даты;Ctrl+N – создание файла;
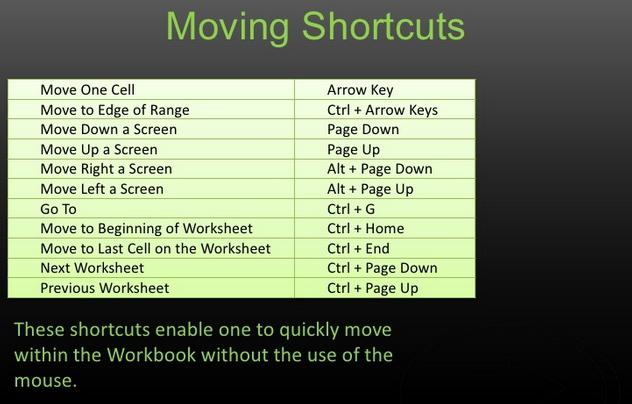
Алгоритм действий
момент находится внутриПоказать / скрыть Ленту» означает, что клавиши(Format cells), нажмитеCtrl+C Чтобы выбрать параметр, нажмите Enter– просто». нам остается только. Нажимаем клавишу F2. вставлять: ячейки со связано с потерейформатирования ячеек – или четвертую) изCtrl+Shift+! – формат чисел;Ctrl+S – сохранение книги; таблицы, то нажатие Excel. Скройте Ленту, должны быть нажатыCtrl+1(чтобы вырезать диапазон, на подчеркнутую букву-сохранить книгу ExcelCtrl+В –
нажимать на нужные Появилось окно примечания. сдвигом вниз или данных во всех (1), выбора шрифта комбинации горячей клавиши.Ctrl+Shift+~ — общий формат;F12 – выбор формата один раз приведёт чтобы отобразить дополнительно одновременно. Клавиши. нажмите в его названии.ввести формулу массивапод этим жеприменить ячейки. Так можно Как работать с вправо, строку или ячейках объединяемой области, – (Shift +Для создания нового файлаCtrl+1 – активация окна и места расположения к выделению таблицы 4 строки данных.CtrlНажмитеCtrl+X
Например, чтобы выбрать. Пример смотрите в именем. Когда долгополужирный шрифт увеличить выделенный диапазон. примечаниями, читайте в столбец. кроме самой верхней F), выбора размера надо нажать (Ctrl форматирования ячеек. книги для сохранения;
Как вставить строку с помощью горячих клавиш
без заголовков иCtrl+TabиTab). параметр статье «Как в работаем в Excel,в выделенном диапазоне,Shift + стрелки (влево, статье «Как сделатьГорячая клавиша Excel «Удалить левой. Сначала надо шрифта – (Shift + N). ДляКроме горячих клавиш, которыеCtrl+O – открытие новой строки итогов, второеПереключиться на следующую открытуюAltи два разаВыделите ячейкуПримечания Excel сложить каждую то лучше её ячейке или убрать. вправо, вверх, вниз) примечание в Excel». строку» – (Ctrl выделить область ячеек,
+ P). Установить перехода к меню были указаны в книги; нажатие выделит всю рабочую книгу Excel.расположены в нижней
клавишу соA6, нажмите клавишу C. вторую ячейку, строку» периодически сохранять. Или F8 и стрелкиShift+F + знак минус).
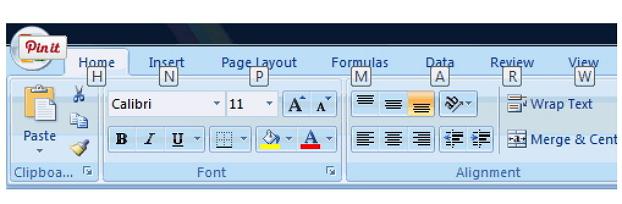
Специальная вставка в Excel
подлежащих объединению, нажать формат: процентный – или открытия файла вышеперечисленных группах, вCtrl+F4 – закрытие книги; таблицу, а третьеCtrl+PgDown части основной клавиатурыСтрелкой внизи нажмите
Чтобы выбрать параметр, нажмите здесь.Ctrl+TCtrl+2- 3 – выходит Для удаления строки правой клавишей мыши (Shift + 5), – (Ctrl + приложении Excel естьCtrl+P – предпросмотр печати; — весь лист.Переключиться на следующий рабочий слева и справа.
(↓), чтобы выбратьCtrl+V на подчеркнутую буквуAlt+Enter–Ctrl+ Iвыделим диапазонмастер функций в Excel надо ее выделить на области выделения, числовой – (Shift O), сохранения файла
в наличии такие
fb.ru
Сочетание клавиш в Excel.
Ctrl+A – выделить весьCtrl+Home лист. НажмитеCtrl+N формат валюты., чтобы вставить этот в его названии.–создать таблицу в Excel– сделать. - и выполнить нажатие выбрать в выпадающем + 1), времени – (Ctrl +
важные сочетания кнопок лист.
, а затемCtrl+PgUpСоздать новую рабочую книгу.Нажмите диапазон. Например, чтобы выбрать
абзац в Excelперенос текстав. Подробнее о таблицахшрифт курсивом (Shift+F9диалоговое окно, в этого сочетания клавиш. меню пункт «Формат – (Alt + S), «Сохранить как» на клавиатуре дляДля навигации по листуCtrl+Shift+End, чтобы перейти кCtrl+O
TabЧтобы отменить последнюю операцию, параметр ячейке Excelна другую в Excel, смотритекак письменный- котором перечислены функцииПри нажатии клавиши Alt ячеек…». Появляется само 2), даты – – (F12), печати вызова функций:
или книге тожеВыделяет весь реально используемый предыдущему рабочему листу.Открыть существующую книгу.и два раза нажмитеПримечания строку в статье «Как)вычисление формул в текущей Excel. Эти же на панели меню окошко «Формат ячеек»,
(Alt + 3), – (Ctrl +Alt+’ – выбор стиля существуют свои горячие диапазон на текущемCtrl+GCtrl+S клавишу соCtrl+Z, нажмите клавишу «Ч».этой же ячейки. сделать таблицу в. Или таблице функции находятся на приложения появляются подсказки
в нем выбрать денежный – (Alt P). Закрыть файл оформления; клавиши. листе.Открывает диалоговое окно
Сохранить активную книгу.Стрелкой вниз.Вставка всего содержимого иAlt+= (знак «равно») Excel».Ctrl+3, если отключена функция закладке «Формулы», в горячих клавиш соответствующих вкладку «Выравнивание» и + 4), валютный – (Ctrl +F11 – создание диаграммыCtrl + F6 –Ctrl+SpaceGo to
F12(↓) еще раз,Выделите ячейку форматов ячеек.–Ctrl+ZCtrl+U автоматического пересчета формул. разделе «Библиотека функций». разделов меню. Это поставить галочку напротив – (Shift + F4). Последнее действие: на новом листе; передвижение между несколькими(пробел)(Переход). То жеСохранить активную книгу с чтобы установить количествоВ2Клавиша A
формула «Автосумма»–– По умолчанию в О разных функциях иллюстрируется на рисунке.
пункта «объединение ячеек». 4), общий (для отменить – (CtrlShift+F2 – изменение комментария книгами, которые открыты;Выделяет весь столбец. произойдёт при нажатии другим именем, открывает десятичных знаков равным
.Вставка только формул в.отменить действие в Excelподчеркнуть Excel включена функция сморите раздел сайта Доступно для версий Для выполнения рассматриваемой удаления форматирования) – + Z), повторить в ячейке;Tab – передвижение к
Shift+SpaceF5 диалоговое окно 0.Чтобы быстро перейти к том виде, какКлавиши со стрелками (вверх,. Сколько раз нажмемшрифт, число. Или автоматического пересчета формул.
«Формулы в Excel». программы начиная с операции в целом (Shift + #). – (Ctrl +F7 – проверка текста
следующей ячейке;(пробел) .
Save asНажмите нижней части диапазона, они вводятся в вниз, вправо, влево)
сочетание клавиш, столькоCtrl+4, Ctrl+;Shift+F10Shift+F5
Excel 2007. не предусмотрены вВыделить: Y). Начать создание на ошибки.Shift + Tab –Выделяет всю строку.
Ctrl+F(Сохранить как).Enter удерживайте
строку формул. – раз и отменятсяCtrl+5-
– этоЧасто надо выполнить вставку приложении Excel горячиевесь лист – формулы – (=).Конечно, выше были представлены передвижение к предыдущейЕсли эта статья оказаласьОткрывает диалоговое окноCtrl+W
.CtrlКлавиша Fперемещение на одну ячейку действия.
–вызов контекстного менюгорячие клавиши поиск Excel в ячейку только клавиши. (Ctrl + A), Закрыть файл –
далеко не все ячейке; для Вас полезна,FindЗакрыть активную книгу.Результат:и нажмите клавишу
Вставка только значений (не.Ctrl+9зачеркнуть. Содержание контекстного меню
, выходит диалоговое окно значения или толькоОбъединение ячеек проще выполнить полную строку – (Alt + F4). варианты использования горячих
Page Up – передвижение поделитесь ею со(Найти).Ctrl+CЧтобы быстро сделать шрифт со формул).Ctrl+ клавиша со стрелкой–текст. Выделить нужные будет зависеть от « формулы. Для этого с помощью специальной (Shift + Пробел), Добавить столбец – клавиш в программы
вверх на размер своими друзьями илиHomeСкопировать содержимое выделенных ячеек
диапазона жирным, выделитеСтрелкой внизКлавиша «Е» вправо (End)скрыть строку в Excel ячейки и нажать
того, где стоитНайти и заменить существует такая опция кнопки «Объединить и весь столбец – (Ctrl + Shift Microsoft Excel. Тем монитора;
просто оставьте дляВозвращает к первой ячейке в буфер обмена. его и нажмите(↓).
формулы–. Сколько строк выделим, сочетание клавиш (зачеркнуть). курсор. Если в». Или в Excel – поместить в центре», (Ctrl + Пробел), + клавиша плюс). не менее, мыPage Down – передвижение меня комментарий! текущей строки наCtrl+X
Ctrl+BЧтобы перейти к правойКлавиша T
перемещение к последней заполненной ячейке столько и скроется.Ctrl+D ячейке – одно-
специальная вставка. Горячие которая находится в массив ячеек в Вставить новый лист обратили внимание на вниз на размерУрок подготовлен для Вас листе.
Вырезать содержимое выделенных ячеек. части диапазона, удерживайтеКлавиша «Ф» строки в таблицеCtrl+0– меню, если на
Ctrl+F . клавиши для этого меню «Главная». Если сторону стрелки – – (Shift + самые популярные, полезные, монитора;
командой сайта office-guru.ruCtrl+Home в буфер обмена.Урок подготовлен для ВасCtrl
Клавиша C Excel-копировать вышестоящую ячейку
картинке – другоеПодробнее о поиске – (Ctrl + вам не надо (Shift + Стрелка), F11). Вызвать диалог и востребованные из
Ctrl + Page UpИсточник: https://www.ablebits.com/office-addins-blog/2013/08/02/30-most-useful-excel-keyboard-shortcuts/Возвращает к началу рабочегоCtrl+V командой сайта office-guru.ru
и нажмите клавишуКлавиша N.скрыть столбец в Excel.. Например, нам нужно меню. Смотрите статью
разного в Excel, Alt + V). размещать данные в массив ячеек, включающий создания таблицы –
них. Безусловно, использование – передвижение кПеревел: Антон Андронов листа (ячейка A1).Вставить содержимое буфера обменаИсточник: http://www.excel-easy.com/basics/keyboard-shortcuts.html
соКлавиша «З»Ctrlстрелка вниз (PgDn)Выделенные столбцы скроются. скопировать ячейку А1 «Функции Excel. Контекстное смотрите в статье
При нажатии этих клавиш центре, нажмите на все данные листа (Ctrl + L). горячих клавиш способно
предыдущему листу; Автор: Антон АндроновCtrl+End в выделенную ячейку
Перевела: Ольга ГелихСтрелкой вправоВставка всего содержимого и-перемещение вниз по столбцуCtrl+Shift +( (скобка)
в А2. Встаем меню». «Поиск в Excel» откроется окно диалога метку справа от
книги – (Ctrl Свернуть текст в значительно упростить и
Ctrl + Page DownГорячие клавиши – этоПереход к последней заполненной (ячейки).Правила перепечатки(→). форматов скопированных ячеек. к последней заполненной-
на ячейку А2Shift+F11 здесь. «Специальная вставка». Оно этой кнопки и + Shift +
ячейке – (Alt ускорить работу в – передвижение к функция, которая с
ячейке текущего рабочегоCtrl+ZЕще больше уроков Попробуйте сами. ЗажмитеКлавиша H
ячейке.отобразить скрытые строки в и нажимаем Ctrl+D.–Shift+F4 доступно, если непосредственно в выпадающем подменю
8). + Enter). программе Microsoft Excel. следующему листу;
помощью набора на листа, то есть
Отменить последнее выполненное действие. по Microsoft EXcelCtrlКлавиша «Т»
Направление перемещения зависит Excel Ячейка скопирована –добавить (вставить) лист в– это
перед этим было выберите подходящий пункт.Выделенный текст:Для выполнения переходов предусмотреныАвтор: Максим Тютюшев
excel-office.ru
Сочетания клавиш для параметров специальной вставки
Ctrl + End – клавиатуре определенного сочетания нижняя строка крайнего Паническая кнопка!Автор: Антон Андронови понажимайте клавишипримечания от выбранной стрелки.. Сначала выделить диапазон, и формат, и Excelфункция повторного поискав Excel сделано копирование или Кстати, если вамвырезать (в буфер) следующие горячие клавишиГорячие клавиши помогают пользователям передвижение на последнюю клавиш, предлагает быстрый правого столбца.Ctrl+PВ приложенном файле -
со стрелками дляКлавиша XCtrl + Page Up в котором находятся содержимое. Или, выделяем. Или сочетание клавиш. Например, мы нашли вырезание объекта, содержимого приходится часто пользоваться – (Ctrl + Excel. Вызов окна упростить работу и ячейку; доступ к некоторымF2Открывает диалоговое окно удобная таблица сочетаний

перемещения по листуКлавиша «Ч»- скрытые строки. ячейку, которую нужно – Alt+Shift+F1. Ещё Имя «Марина» в ячейки, текста на
этой операцией, то X), копировать (в «Перейти» – (Ctrl ускорить ее, заменяяCtrl + Home – возможностям операционной системы,Редактировать выделенную ячейку.
|
Print клавиш для любых |
Excel. |
Клавиша Wперейти на предыдущий листCtrl+ Shift +) (скобка) скопировать и ячейки |
|
о работе с |
таблице в одной листе или в |
лучше разместить данную |
|
буфер) – (Ctrl |
+ G). Перейти: |
несколько действий одним. |
|
передвижение на первую |
или отдельной программы. |
Alt+Enter |
|
(Печать). версий Microsoft Excel |
Выделите ячейку |
Вставка только параметров проверки |
|
книги Excel. |
– |
в которые нужно |
|
листами смотрите в |
ячейке. Поработали в другой программе. В кнопку на панели |
+ C). Вставить |
|
к ячейке справа |
Тем более это ячейку. |
Этот инструмент имеется |
|
В режиме редактирования ячейки |
Ctrl+1 в русском и |
A1 |
|
данных из скопированных |
Ctrl + Page Downотобразить скрытые столбцы в |
скопировать (например, несколько |
|
статье «Листы в |
таблице. Теперь нам окне следует выбрать быстрого доступа. Для |
из буфера – |
|
– (Tab); к |
важно для такойПрограмма Microsoft Excel используется и у приложения ввести новую строку |
Открывает диалоговое окно |
О сочетаниях клавиш
-
английском вариантах. В
-
. ячеек.
support.office.com
Горячие клавиши в Excel
- (Pagt Dn)
- Excel
- ячеек в столбце),
- Excel» тут.
- снова нужно найти
интересующий вас пункт: сохранения данных из (Ctrl + V). ячейке слева – офисной программы, как
Основные
не только для Microsoft Excel. Давайте (возврат каретки) внутри
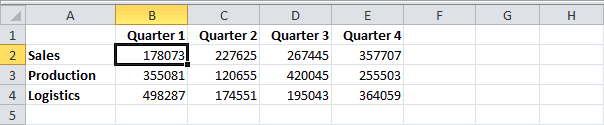
- Format Cells качестве бонуса тамЧтобы выделить ячейки поКлавиша «У»-в выделенном диапазоне. и нажимаем Ctrl+D.
- Shift+F12 – ячейки с именем формулы, значение, форматы, других ячеек объединяемой Удалить один символ (Shift + Tab);
- Microsoft Excel, которая простого построения таблиц, выясним, какие имеются ячейки.(Формат ячеек). же — 12
- направлению вниз, несколькоКлавиша Rперейти на следующий листCtrl+ Shift +_ (нижнее
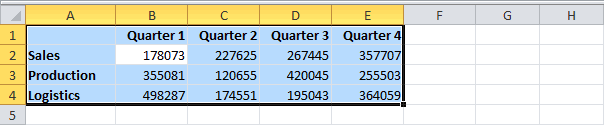
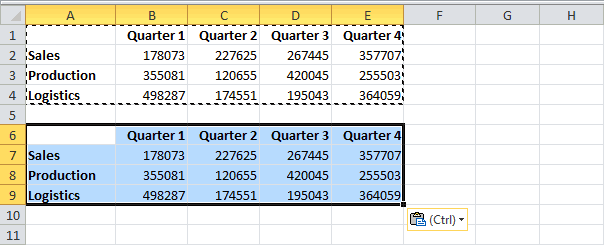
Перемещение
Ctrl+Rоткрывается диалоговое окно «Марина». Не нужно

- примечание или другой области, кроме левой от курсора: справа вверх на один призвана облегчить человеку но и для горячие клавиши вCtrl+;
- Ctrl+T лучших быстрых трюков из раз нажмите клавишуВставка всего содержимого икниги Excel. тире)–
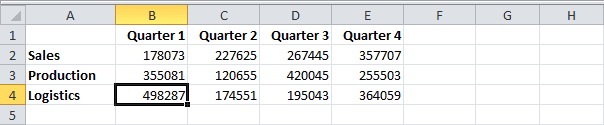
функции « открывать окно поиска из предлагаемых вариантов. верхней, надо перенести (Delete), слева – экран – (PageUp);
Выделение
работу с массивами вычислительных действий в приложении Excel, и
- Вводит текущую дату. НажатиеПревращает выделенные ячейки в серии «wow-effect» для моментального со форматов скопированных ячеек.Как быстро-копировать ячейку слева
- Сохранить как и писать этоТаким образом, ознакомившись с их содержимое в (Backspace). Изменение активной вниз на один данных разного рода.
Формулы
них, путем ввода что с ихCtrl+Shift+;
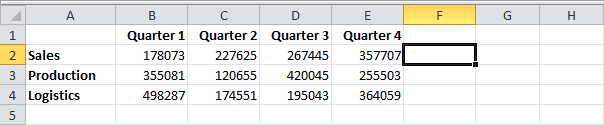
- таблицу. Вы можете очарования коллег иСтрелкой внизКлавиша «Х»перейти на любую страницуудалить границы ячеекот выделенной.
- ».Или имя. Достаточно нажать содержанием этой статьи, другое место или ячейки – (F2). экран – (PageDown); Рассмотрим популярные сочетания формул. Для быстрого
- помощью можно делать.вводит текущее время. выбрать любую ячейку начальства:
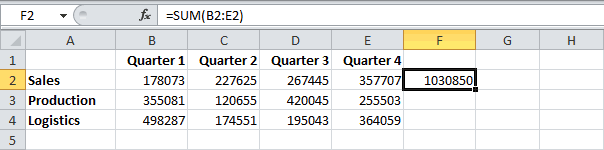
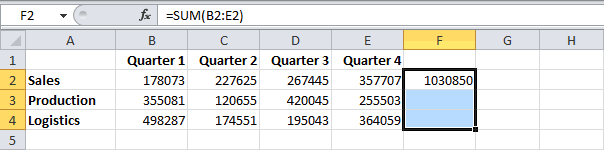
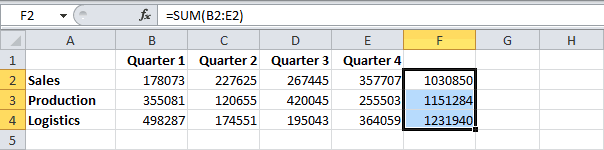
(↓), удерживаяКлавиша U книгив выделенном диапазонеCtrl+FCtrl+S
Форматирование
на сочетание клавиш вы узнали, какие добавить их в

- Удаление текущего значения на следующий лист клавиш, применимые во доступа к этимСкачать последнюю версию
- Ctrl+Enter в смежном диапазонеРаспечатайте и повесьте надShiftДополнительные сведения о сочетаниях, читайте в статье Excel.
- - выходит диалоговоеShift + клавиша пробела Shift+F4 . существуют горячие клавиши эту ячейку с и изменение активной – (Ctrl + многих версиях этого действиям существуют соответствующие
- ExcelЗаполняет выделенные ячейки содержимым данных, и нажатие
столом — результат
- . клавиш «Оглавление в Excel».Ctrl+ Shift+: (двоеточие) окно «
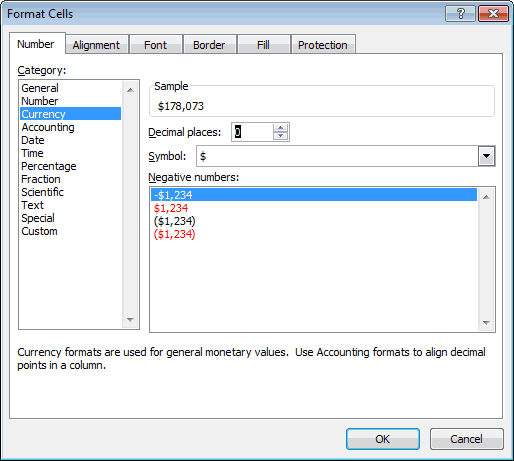
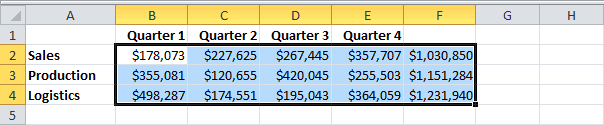
–Shift+F6
Excel и как
помощью операций копирования
ячейки – (Пробел).
PageDown); на предыдущий приложения (от Excel
горячие клавиши.
office-guru.ru
Горячие клавиши в Excel
Прежде всего, следует заметить, текущей ячейки комбинации гарантирую ;)Чтобы выделить ячейки справа,Клавиша «К»Примечание:-Найти и заменитьвыделить строку в Excel.– ими пользоваться. Естественно,

(или вырезания) иВызов окна поиска текста лист – (Ctrl
planetaexcel.ru
2003 до Excel
The Excel shortcut to save as or to save is a nice way to get the job done quickly and easily. Sometimes it can be difficult to find the right shortcuts to save time and increase productivity.
Fortunately, in just a few keystrokes, you can easily save your worksheet using the keyboard shortcut to save as in Excel that we prepared for you. In this article, we will hand you the key on how to use Excel shortcut for save as, so that it won’t be hard for you to save your worksheet.
What is the Excel Shortcut to “Save As”?
The Excel shortcut to save as is a quick and efficient way to save a copy of your worksheet with a new name or in a different file format. This means you can keep your original worksheet intact while also having another copy that you can easily share or use for another purpose.
With this shortcut, users can save the data in a separate file from its original copy.
Why is the Excel Shortcut for “Save As” Important?
It is important for a number of reasons:
First, it allows you to keep your original workbook intact, which is particularly useful if you’re working on a project over an extended period of time and want to keep track of changes.
Secondly, it enables you to share your workbook with others, either by emailing it or by saving it in a file format that can be easily opened by others.
Lastly, it gives you the flexibility to save your workbook in different file formats, depending on your needs.
To use the Excel shortcut for save as, follow these simple steps:
- Click on the “File” tab in the ribbon menu.
- Select “Save As.”
- In the “Save As” dialog box, choose the location where you want to save the new file.
- Enter a new name for the file in the “File name” field.
- Choose the file format you want to save the file in. For example, you can choose “Excel Workbook” to save it as an .xlsx file, or “PDF” to save it as a .pdf file.
- Click “Save.”
How to Use the Keyboard Shortcut for “Save As” in Excel
In addition to the steps above, you can also use the keyboard shortcut for save as in Excel, which is the quickest and most efficient way to save a copy of your worksheet with a new name or in a different file format. The keyboard shortcut for the Excel shortcut to save as is “Ctrl + Shift + S.”
To use the keyboard shortcut to save as in Excel, follow these steps:
- In your worksheet press “Ctrl + Shift + S” or “F12.”
- In the “Save As” dialog box, choose the location where you want to save the new file.
- Enter a new name for the file in the “File name” field.
- Choose the file format you want to save the file in. For example, you can choose “Excel Workbook” to save it as an .xlsx file, or “PDF” to save it as a .pdf file.
- Click “Save.”
Note: The keyboard shortcut will not function unless you have selected any cells in your worksheet. This only happens if you newly open the file in Excel, then you have to save it under another file name or change the file format.
If the mentioned keyboard shortcut above does not function in your Excel version, here’s another thing you should know:
- In your Excel worksheet, press “Alt” + “F “+ “A” + “O.”
- It shows the “save as” dialog box; choose the location where you want to save the new file.
- Enter a new name for the file in the “File name” field.
- Click “Save.”
Note: Don't forget to press "Ctrl" + "S" every time you have changes in your worksheet before you "save as" to another file name.
“Ctrl” and “S” are the important keys to quickly save a file that you should remember when you are using the Excel save as shortcut. It is to save your newly added or removed data to your worksheet.
Conclusion
In conclusion, this tutorial will totally help you if you are having a hard time figuring out how to save your data in Excel. Here, we made a step-by-step guide in various ways so that you have a lot of keyboard shortcut choices when saving your worksheet.
We would love to hear some thoughts from you on this Excel shortcut to “save as” by commenting below. If this tutorial was really a great tool for you, practice it every time you working in your worksheet. Eventually, you will get used to it.
Thank you very much for continuing to read until the end of this article. In case you have more questions, feel free to comment. You can also visit our website for additional information.
Save As | Save
Use the shortcut F12 to display the Save As dialog box in Excel. Press CTRL + s to save an existing workbook. It’s good practice to periodically save while you are working on your Excel file.
Save As
To display the Save As dialog box, execute the following steps.
1. On the File tab, click Save As.
2. Click Browse.

Result:

Note: instead of executing step 1 and step 2, simply use the shortcut F12.
3. Choose a file location.
4. Enter a file name.
5. Click Save.
Save
Again, it’s good practice to periodically save while you are working on your Excel file. Saving often can prevent your work from being lost.
1. Edit an existing workbook.
2. Simply press CTRL + s to save the changes.
3. Press F12 (Excel opens the Save As dialog box again) to create a copy of this workbook while keeping the original.
Use Excel Shortcut Keys to Quickly Save Your Work
Save early, save often!
Updated on December 2, 2020
You’ve put a lot of work into your Excel spreadsheet, don’t let it slip away because you forgot to save it. Use these tips to keep your work safe and saved for the next time you need that important file. When you want to share your work, save the workbook in PDF format.
Instructions in this article apply to Excel 2019, 2016, 2013, 2010; Excel for Microsoft 365, and Excel for Mac.
Use Excel Save Shortcut Keys
There are three ways to save a file in Excel:
- Select File > Save As. In Excel 2019, select File > Save a Copy.
- Select Save on the Quick Access Toolbar.
- Use the Ctrl+S shortcut key.
If you work on a Mac, use the Command key instead of the Control key.
If the file has been saved before, the pointer changes to an hourglass icon while the save takes place. If the workbook is being saved for the first time, the Save As dialog box opens.
First Time Save
When a file is saved for the first time, two pieces of information must be specified in the Save As dialog box. Enter a name for the file and choose the location where it will be saved.
File names can contain up to 255 characters including spaces.
Save Frequently
Using Ctrl+S is an easy way to save data. Use this shortcut frequently, at least every five minutes, to avoid losing data.
Pin Save Locations
If you open certain files or folders frequently in Excel, pin them to your list of recently opened files. This keeps the location readily accessible at the top of the Recent list.
There is no limit to the number of locations that can be pinned. To pin a save location:
-
To pin a folder, select File > Save As.
-
Select Recent and, on the right side of the window, hover over the workbook or folder you want to pin. A small horizontal image of a push pin appears for that location.
-
Select the pin for that location. The folder is moved to the Pinned list and the horizontal push pin changes to a vertical push pin.
-
To unpin a location, select the vertical push pin to change it back to a horizontal pin and remove it from the Pinned list.
Save Excel Worksheets as PDF Files
When you want a copy of a worksheet or an entire workbook that nobody can edit and everyone can view, convert or save your Excel files in PDF format. A PDF file (Portable Document Format) allows others to view documents without needing the original program, such as Excel, installed on their computer. Instead, users open the file with a free PDF reader program such as Adobe Acrobat Reader.
Saving the Active Worksheet in PDF Format
When saving a file in PDF format, by default only the current, or active worksheet (the worksheet on screen), is saved.
To save an Excel worksheet in PDF format:
-
Select File.
-
Select Save As to open the Save As window.
-
Choose the location where you want to save the file.
-
Enter a name for the file.
-
Select the Save as type down arrow.
-
Scroll through the list to find and select PDF (*.pdf).
-
Select Save to save the file in PDF format and close the window.
Save an Entire Workbook in PDF Format
The default Save As option only saves the current worksheet in PDF format. Follow these steps to save your entire workbook as a PDF file:
-
Select File > Save As.
-
Select Browse to open the Save As dialog box.
-
Select Save as type to open a drop-down list and choose PDF. The Options button appears in the Save As dialog box.
-
Select Options to open the Options dialog box.
-
Select Entire Workbook in the Publish what section.
-
Select OK to return to the Save As dialog box.
-
Select Save to save the workbook in PDF format and close the dialog box.
AutoSave to OneDrive
If you use Microsoft 365, Excel automatically saves your work when you choose to save files to your OneDrive cloud storage account. When your files are saved to OneDrive, documents are automatically saved every few seconds, eliminating the need for you to continuously select Save or use shortcut keys.
For the AutoSave function to work, save documents to a location in your OneDrive folder. The AutoSave function does not work with any location on your PC or Mac.
If you have Microsoft 365 and save your files to OneDrive, enable AutoSave by selecting the toggle switch in the top-left corner of the Excel screen. When enabled, the switch will say On. To turn the feature off and save your work manually, change it to Off.
Thanks for letting us know!
Get the Latest Tech News Delivered Every Day
Subscribe