
Wrap text around a picture in Word

-
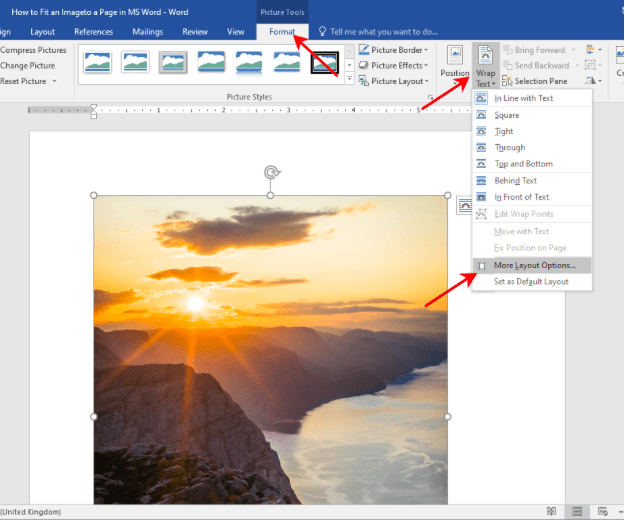
Select the picture.
-
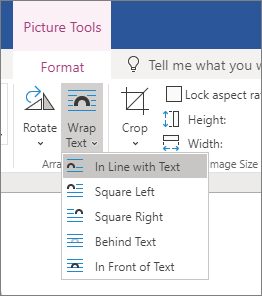
Select Layout Options.

-
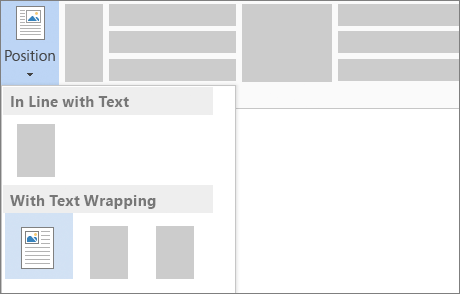
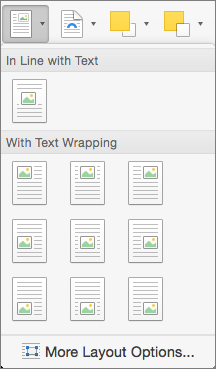
Select the layout you want.
Tip:
In Line with Text puts the picture in a paragraph, just as if it were text. The picture will change position as text is added or removed. The other choices let you move the picture around on the page, with text flowing around it.

For more info on text wrap options and wrap points, see Text wrapping options.
You can add a picture in the top left corner of a document and have the text flow around it.

-
Select a picture.
-
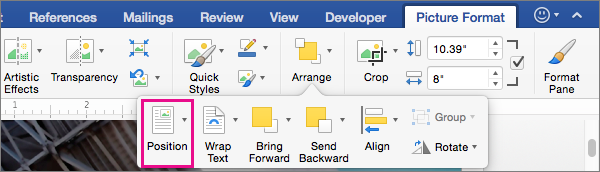
Go to Picture Format or Format > Position, and under Format with Text Wrapping, select Top Left.
Tip: You can drag the image around the document and align it any way you like. Make custom changes to word wrapping by selecting Format > Wrap Text > More Layout Options.
You can add a picture in the center of a document and have the text flow around it.

-
Select a picture.
-
Go to Picture Format or Format > Wrap Text > Square.
-
Select Position > More Layout Options.
-
On the Position tab, select Alignment, and change the drop-down field to Centered.
-
Next to relative to, choose Page, and select OK.
Note: You can drag the image around the document and align it any way you like. Make custom changes to word wrapping by clicking Format > Wrap Text > More Layout Options.

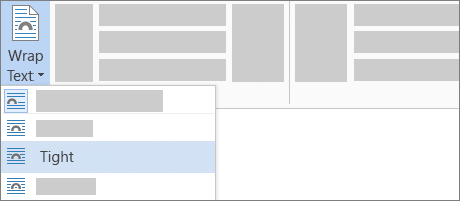
You can add an image in your document and make the text flow around it in a way that follows the shape of the image.
Tip: For best results, use a picture with a transparent, white, or solid colored background.

-
Select a picture and drag it to the middle of the page, or wherever you want it.
-
Go to Picture Format or Format > Wrap Text > Tight.
-
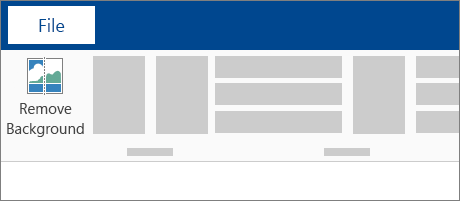
On the Format tab, select Remove Background.
Note: You cannot remove the background from vector images.
-
Select anywhere outside the image to see how the text has wrapped around the image.
Fine-tune text wrapping
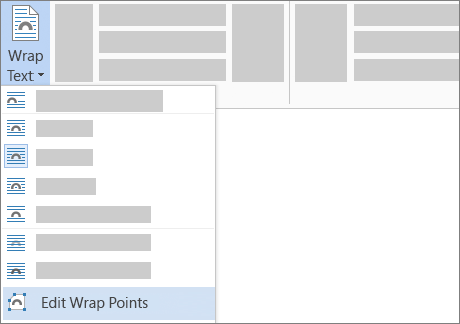
If there’s too much space between the text and your image, you can set the wrap points manually.
-
Select the picture, and go to Picture Format or Format and select Wrap Text > Edit Wrap Points.
-
Drag the black wrap points closer or farther away from your picture until you’re happy with its appearance. Drag the red line to create additional wrap points.
For more info on text wrap options and wrap points, see Text wrapping options.
Pictures inserted in line are tied to the place within the text where they were inserted and are treated like any text character—»in line with text.» They automatically move with the surrounding text.
-
Select a picture.
-
Go to Picture Format or Format and select Wrap Text > In Line with Text.
You can make sure that your picture stays in place as text is added or deleted.
-
Select a picture.
-
Go to Picture Format or Format and select Wrap Text > Fix Position on Page.
Configure text wrapping around a picture or drawing object
-
Select the picture or object.
-
Go to Picture Format or Shape Format and select Arrange > Wrap Text.
If the window is wide enough, Word displays Wrap Text directly on the Picture Format tab.
-
Choose the wrapping options that you want to apply.
For example, In Line with Text, Top and Bottom, and Behind Text.

Change the position of a picture or drawing object relative to the text
-
Select the picture or drawing object.
-
Go to Picture Format or Shape Format and select Arrange > Position.
If the window is wide enough, Word displays Position directly on the Picture Format tab.
-
On the Position menu, choose the type of positioning that you want, or select More Layout Options to choose advanced layout options.
Configure text wrapping around a table
-
Control + Click the table, and then select Table Properties.
If you don’t see Table Properties on the shortcut menu, Control + Click in a different part of the table.
-
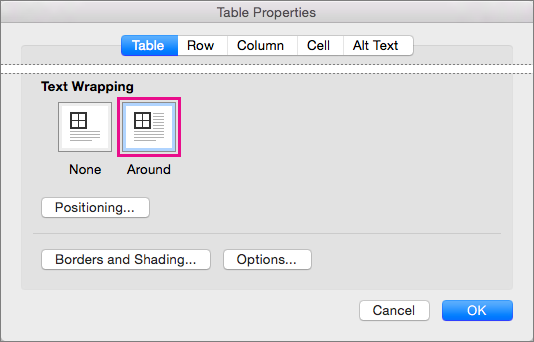
In Table Properties, under Text Wrapping, select Around.
-
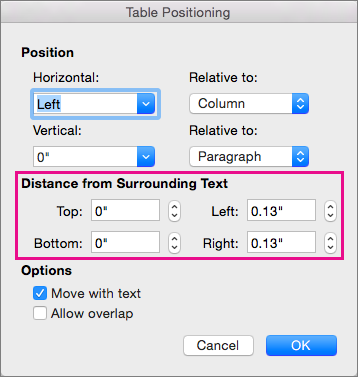
To change the distance of the table from surrounding text, select Positioning, and then in Table Positioning, set measurements under Distance from Surrounding Text.
Wrap text around a picture or drawing object
-
Select the picture or object.
-
Select Format and then under Arrange, select Wrap Text.
-
Choose the wrapping option that you want to apply.
Tip: To change a picture or drawing object’s position on the page relative to the text, select the picture or object, select Format > Position, and then select the position that you want.
Wrap text around a table
-
Click the table.
-
Click the Table Layout tab, and then under Settings, click Properties.
-
Under Text Wrapping, click Around.
-
To set the horizontal and vertical position of the table, the distance from surrounding text, and other options, under Text Wrapping, click Positioning, and then choose the options that you want.
Tip: When you use the Draw tool to create a table (located on the Tables tab, under Draw Borders), you can automatically apply text wrapping by holding down OPTION while you draw the table.
There are a limited group of text wrapping options for images with Word for the Web.
-
Insert and select a picture.
-
Go to Picture Tools > Format > Wrap Text.
-
Choose a layout.
If you inserted a picture into your document while using Word for the web, you can cut and paste it to move it within a document, and you can apply paragraph formatting, like vertical spacing and centering, to it. However, you cannot move a picture that was inserted while using the desktop version of Word if the picture has text wrapping or a fixed position on the page.
If you find that you cannot make changes to a picture, and you have the desktop version of Word, select Open in Word to open your document in Word and make changes to its layout.
When you are done, press Ctrl+S to save your document to its original location. You can then open the document again in Word for the web, and continue editing. Word for the web will retain the layout settings that you applied in the desktop version of Word.
Need more help?
To keep the picture and its caption together you have a couple of options. In both cases you want to use the “Keep with next” and “Keep together” paragraph attributes. Select both the caption and picture, right click, select “Paragraph”, select “Line and Page Breaks” tab, turn on both those options.
How do I repeat the same text in Word?
Authors simply double-click the text field to open the Text Form Field Options dialog, enter the text they want to repeat in the “Default text” box, and click OK. After they save and reopen the document, that text will appear in the text box as well as all bookmarked locations in the document.
How do I save AutoText in Word?
Note: To save a selection as AutoText, on the Insert tab, in the Text group, click Quick Parts > AutoText > Save Selection to AutoText Gallery.
Where are AutoText entries stored?
Unformatted entries are stored in AutoCorrect List files in a folder on the computer, and entries that have formatting are stored in the program’s Normal template, which contains your chosen default styles and other preferences for the Word documents you create.
How do I recover AutoText?
You can restore your AutoText entries by using the old default template.
- Close Microsoft Word 2013.
- Launch File Explorer from the taskbar in desktop view.
- Click the address bar in File Explorer, and then enter “C:%appdata%MicrosoftTemplates”, not including the quotation marks.
- Rename the “Normal.
How do you create AutoText?
To use the text, go to Insert > Quick Parts, > AutoText, and choose the entry you want….Create and use an AutoText entry
- In your document, select the text that you want to make into a reusable snippet.
- Press Alt+F3.
- Fill out the information in the Create New Building Block dialog box.
What is the purpose of AutoText?
AutoText is a way to store parts of a Word document for re-use. You can, for example, create a library of boilerplate paragraphs for business letters, or keep a handy selection of headers and footers. An AutoText entry can store anything a Word document can contain, such as formatted text, pictures, and fields.
What is the difference between AutoCorrect and AutoText?
Usually, AutoCorrect is used to automatically correct spelling or other typing errors such as forgetting to start a sentence with a capital, whilst AutoText holds abbreviations of longer phrases or sentences.
How do you remove AutoText in Word?
To remove AutoText entries, follow these steps:
- Display the Insert tab of the ribbon.
- Click the Quick Parts tool in the Text group.
- Choose Building Blocks Organizer.
- Select the name of your AutoText entry from the name list.
- Click on the Delete button and your entry vanishes after you confirm you want to delete it.
How do I unlink subdocuments in Word 2016?
Make sure your subdocuments are expanded. Word displays each subdocument with a box around it and an icon at the top left of the box. Position the insertion pointer somewhere within the subdocument whose status you wish to change. Click on the Remove Subdocument tool on the Outline toolbar.
How do you remove blocks in Word?
To delete a building block, follow these steps:
- From the Insert tab, choose Quick Parts, Building Blocks Organizer. The Building Blocks Organizer dialog box appears.
- Click the item to delete.
- Click the Delete button.
- When you are finished deleting blocks, click Close.
How do I edit a data source in Word?
Just click one of the “Edit recipient list” links in the Mail Merge task pane or wizard to display the Mail Merge Recipients dialog box, and then click the Edit button to display the data-source dialog box (which is named according to the data-source file).
How do I sort data source in Word?
To sort the data source file, click the Sort Records tab. You can sort by up to three fields. If you only want to sort by one field, like PostalCode, click on the “Sort by” window and choose that field from the drop down list. Check the button on the right to choose between ascending and descending sorts.
How do I filter data source in Word?
Click the down-pointing arrow on the City field’s column header and choose (All). The complete list of all four records reappears. Click the down-pointing arrow on the City field’s column header and choose (Advanced). The Filter and Sort dialog box opens with the Filter Records tab displayed.
How do I change the data link properties in Word 2010?
If you are using Word 2010 or a later version, follow these steps, instead:
- Display the Info option of the File tab of the ribbon.
- Near the bottom of the right side of the Info screen click Edit Links to Files.
- Select the link you want to change.
- Click on Change Source.
How do I change file properties?
Click the File tab. Click Info to view the document properties. To add or change properties, hover your pointer over the property you want to update and enter the information. Note that for some metadata, such as Author, you’ll have to right-click on the property and choose Remove or Edit.
How do I open data link properties in Windows 10?
Right-click the TrendDBTest. udl file and choose Properties to open the Data Link Properties dialog box. On the Data Link Properties, select the Provider tab. From the list of OLE DB Provider(s), select Microsoft OLE DB for SQL Server.
Which of the following is an example of a document property?
Document properties are strings of meta data containing information about a document. The Author, Title, and Created Date are examples of document properties.
What tool helps you detect and remove private or confidential information from a document?
Document inspector
Which word displays document text so it is easy to read on screen?
Read Mode
Everybody does things differently. Here’s how I keep my captions with my
pictures.
In Line With Text
First, I always place my pictures as Inline with Text. I realize this might
be impossible for some layouts, but I do it as much as I possibly can. To
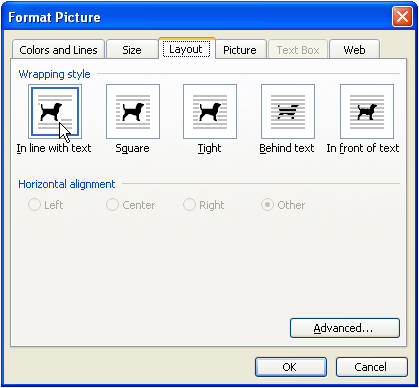
accomplish this, right-click the picture and choose Format Picture.
On the Layout tab, choose Inline with Text.
Once that is done, you can apply a style to the picture.
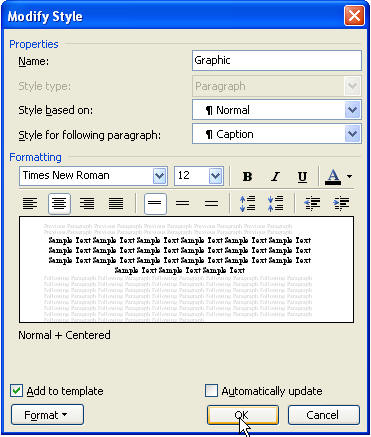
Create a Style
Almost everyone who has purchased a Word template from me has a template with
a style called Graphic. I format it using Keep with Next under Format Paragraph,
Line and Page Breaks tab. I also choose Caption as the Style for following
paragraph, but I rarely need it because I usually insert a caption from the
menu, which automatically applies the style Caption to the caption.
When You Can’t Use In Line With Text
If you absolutely can’t use In Line With Text on your picture, then you need
to get out the old frame. I say old because frames were what we
used before text boxes became much more popular. But a caption in a text box
won’t show up in an Table of Figures field.
You can insert a Frame using the button on the Forms toolbar (View Toolbars,
Forms). Then copy your picture and caption into the frame.


- Using a Text Wrapping Style
- Inserting a Text Box
- Inserting a WordArt
Method 1: Place Text Over Image Using Text Wrapping Style
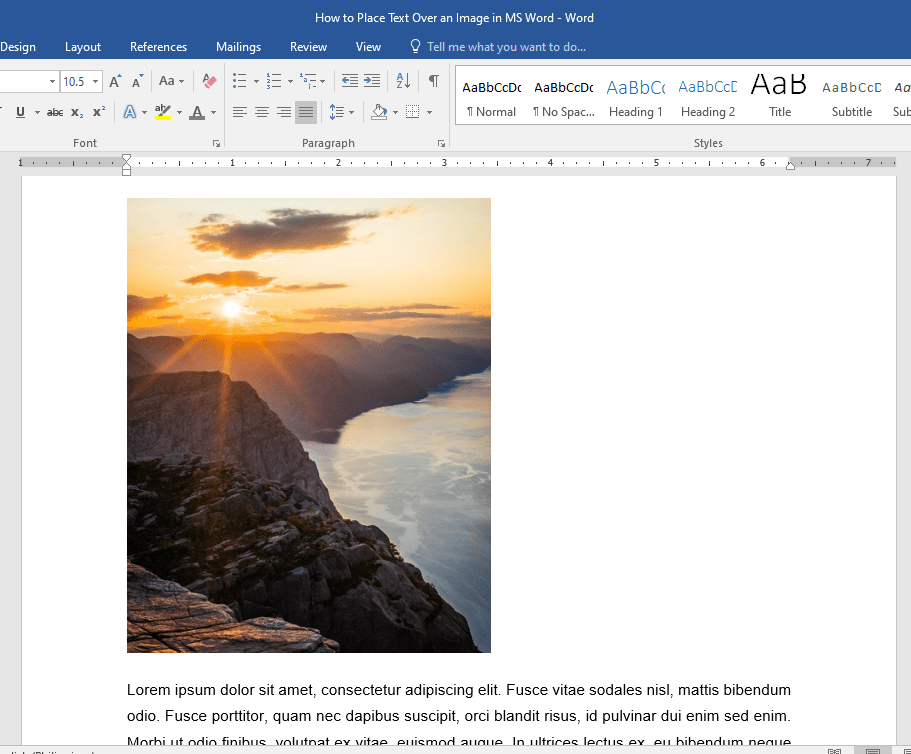
If you have a long chunk of text and you just want to put a background image or a watermark on a document, then this method is best for you.
Step 1: Open up a Word document.

Step 2: Set the image as background.
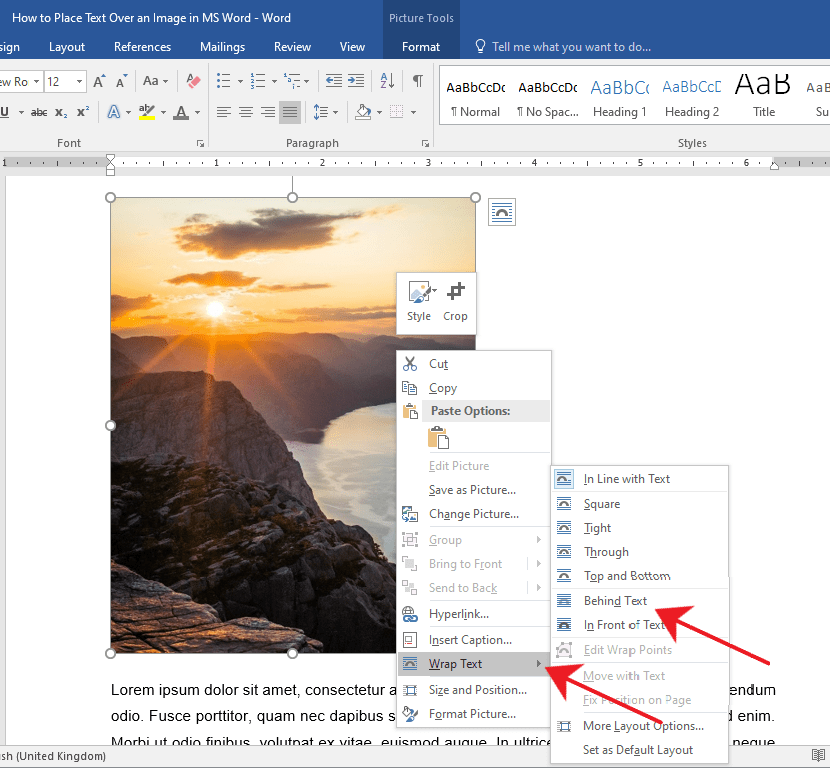
Right-click on the image and select the Wrap Text option.
This will display a horizontal drop-down menu on the right. Once you see the drop-down menu, select Behind Text.
You’ll notice the images and text will rearrange automatically as you hover over the text wrapping options.
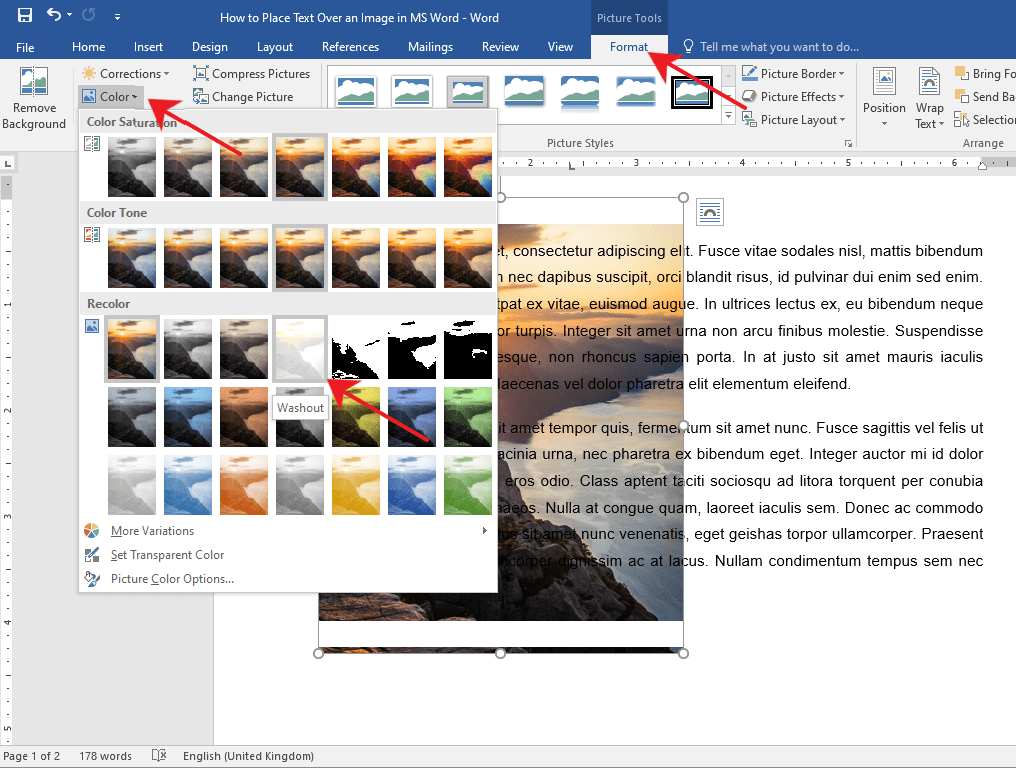
If after you’ve inserted a background image and the text becomes unreadable, you can change the image’s opacity or color.
Simply double-click on the image to activate the Format tab in the Ribbon.
After that, click on the Color drop-down menu and select Washout under the Recolor group.
You can also get creative and explore other options to suit your needs.
Method 2: Place Text Over Image Using a Text Box
Step 1: Open up a Word document.
Step 2: Insert a text box.
Go to the Insert tab on the Ribbon.
Now, navigate to the right side of the Ribbon and click on the Text Box drop-down menu.
Then, select a text box style of your preference. For this example, we’ll use the Simple Text Box.
Step 3: Type in the text.
Type in the text that you want to put on top of your image.

Step 4: Set the text wrapping style of the text box.
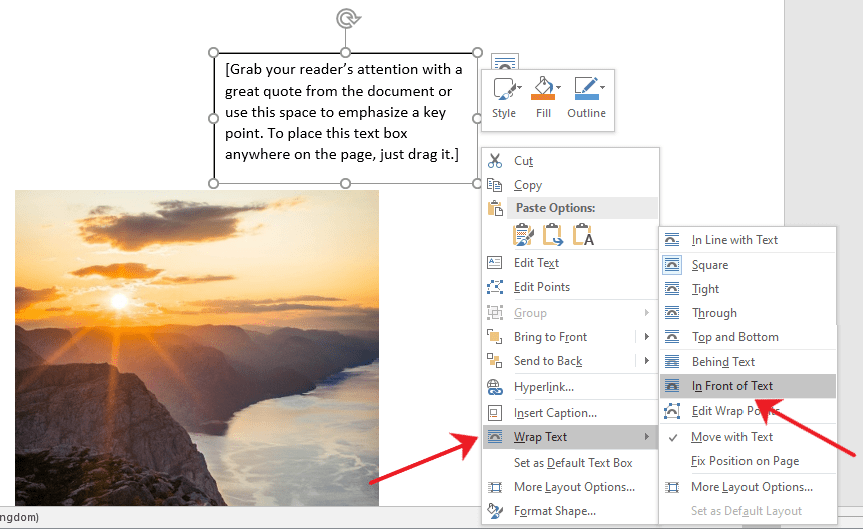
Select the text box and click the Layout button found at the upper right-hand corner of the text box.
Then, select the In Front of Text option.
Step 5: Place the text box over the image.
Click and drag the text box to place it over your image. You’ll notice that your text box has a background color by default and is covering a part of the image.

You can change your text box’s background and border color by accessing the Format tab.
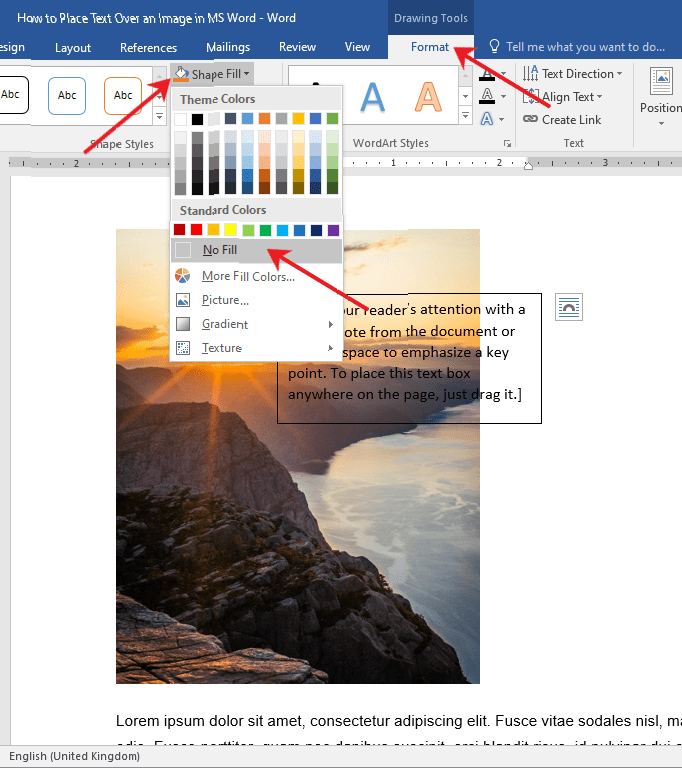
This way, only the text will be visible on top of your image. Now, Double-click the text box and go to the Format tab.
From there, click on the Shape Fill drop-down menu and choose No Fill.
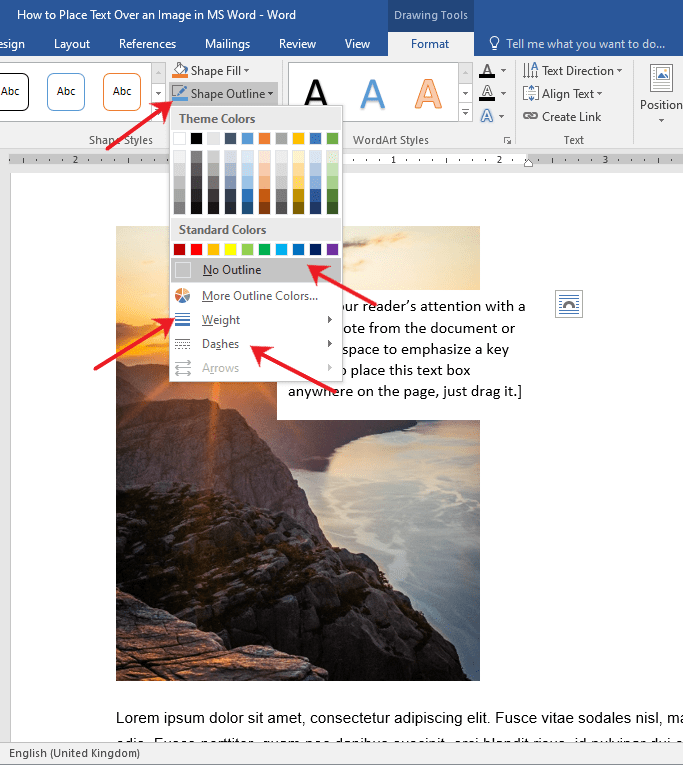
To change the border color, select the Shape Outline drop-down menu and choose No Outline.
You can also change the border’s weight and design by exploring the Dashes and Weight options.
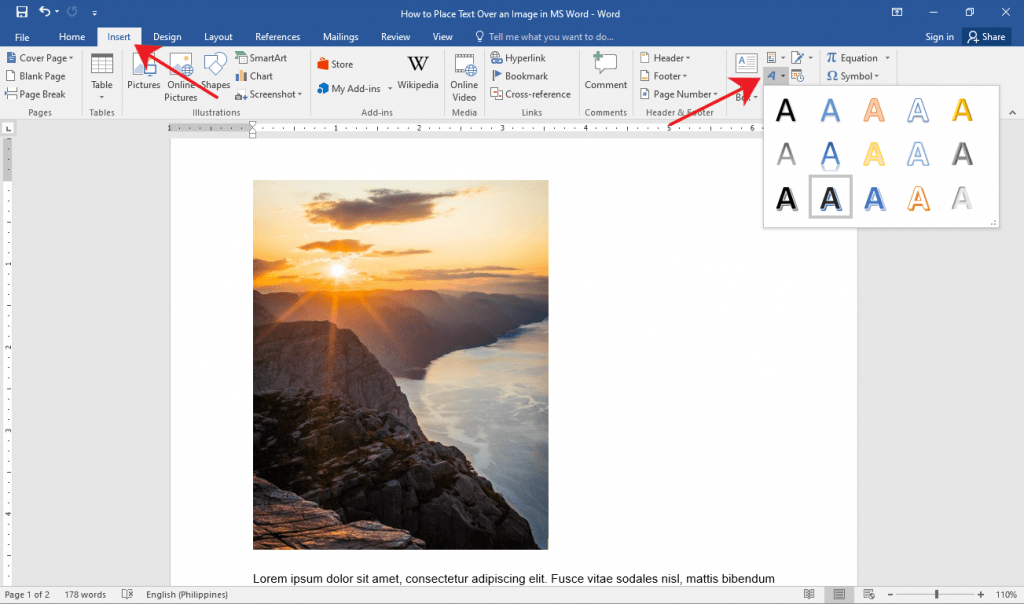
Method 3: Place Text Over Image Using Word Art
If you find yourself needing to put a title, a name, or a couple of words over an image, then this method has got you covered.
Step 1: Open up a Word file.

Step 2: Insert the WordArt
Click the Insert tab on the Ribbon.
Now, click the WordArt button found at the right side of your screen.
It’s the slanted letter A icon under the Text group. After that, choose a WordArt that suits the style of your document.
Step 3: Place the WordArt over the image.
Click on the WordArt and type in the text you want.
From there, select and drag the WordArt to easily move it around to the perfect location on your document.
You can also resize the WordArt like any other text box by grabbing either one of its corners.

Tip: If you’re using a pen or touch-enabled computer, you can directly write text over an image using the Draw option.
Editing and Deleting Text Over an Image
If you used Method 1, simply select the erroneous text and edit or delete it just as you would with any other text.
For Methods 2 and 3, click on the inside of the text box or the WordArt and start editing.
If you want to delete the entire text box or WordArt, click on any of the borders of the text box or WordArt and hit the Delete button on your keyboard.
Conclusion
That’s the rest of it. We hope you’ve found this article helpful!

There are several reasons why you may want place text over an image in a Word document. Perhaps you want to place your company logo in the background of a document you’re writing for work, or maybe you need a “confidential” watermark on a document containing sensitive information. No matter the reason, you can do it easily in Microsoft Word.
Placing an Illustration Behind Regular Text
An illustration in Word refers to any of the objects you can insert from the “Illustrations” group on Word’s “Insert” tab. We’re going to be using a simple picture in our example here, but the same technique applies to any of these illustration types.

To get text to appear on top of an illustration, you change the text wrapping option on the illustration so that it appears behind your text.
RELATED: How to Wrap Text Around Pictures and Other Illustrations in Microsoft Word
If you haven’t already inserted your object into your Word document, go ahead and do that now. When you insert most of those illustration types—pictures, icons, SmartArt, charts, and screenshots—that object is placed in line with your text by default. The exceptions to this are 3D models and shapes, which are placed in front of text by default.
It doesn’t much matter since you’re going to be changing from that default to get the object behind your text, but do be aware that things might look a bit different to start with depending on what you’re inserting.
After inserting your object, click it to select it. You’ll notice a small icon at the top right corner.
This is the “Layout Options” icon. Go ahead and click that to pop up a small list of layout options. Select the “Behind Text” button under the “With Text Wrapping” section. Once you do, any text on the Word document that got moved around when inserting the image will go back to its original position.
Notice that when you select “Behind Text,” two more options become available. The “Move with text” option allows your graphic to move on the page as you add or delete text. The “Fix position on page” option keeps your graphic in the same place on the page as you add or delete text. It can be a little confusing how this works, but we’ve got a guide on positioning images and other objects in Word if you want to learn more.
RELATED: How to Position Images and Other Objects in Microsoft Word
At any rate, now that you’ve got that “Behind Text” option enabled, all your regular paragraph text appears in front of your object.
Inserting a Text Box Over an Image
There’s also another way to get text to appear in front of a picture or other object—a text box. When you create a text box, it works like any other illustration object. You can drag it around and have it show up in front of another object like an image. This technique is handy when you want to use anything other than regular paragraph text.
Go ahead and get your image or other illustration inserted first. To insert a text box, switch to the “Insert” tab and click the “Text Box” button. On the drop-down menu, choose the type of the text box you want. Here, we’re going with the “Simple Text Box” option.
After insertion, the text box is selected automatically so you can go ahead and type in your text. Then, drag it over your image. You’ll end up with something like this:
You’ll notice that there is a border around the box and the background of the text box is solid white. Let’s go ahead and remove the border and background fill.
Click the border of the text box. You’ll notice a new “Format” tab appears. Go ahead and click that tab. There are two options in the “Shape Style” section that we’re going to be using—“Shape Fill” and “Shape Outline.”
When you click the “Shape Fill” button, a drop-down menu with different colors and theme options appears. Click the “No Fill” option.
The background of your text box is now gone.
Next, click the “Shape Outline” button and choose the “No Outline” option from that drop-down menu.
Now, you’ll see that the border has been removed.
That’s all there is to it. The big advantage to this method is that you drag that text box around however you want to get your text lined up just right with your image.
READ NEXT
- › How to Mirror an Image in Microsoft Word
- › How to Add Blur or Transparency to an Image in Microsoft Word
- › How to Overlay Images in Microsoft Word
- › How to Put Borders Around Images in Microsoft Word
- › How to Place Images Behind or in Front of Text in Google Slides
- › This New Google TV Streaming Device Costs Just $20
- › HoloLens Now Has Windows 11 and Incredible 3D Ink Features
- › How to Adjust and Change Discord Fonts