
Home / VBA / VBA Insert Column (Single and Multiple)
In this tutorial, we will look at how to insert a column using a VBA code in Excel. We will also explore what are the different ways to write a macro for this.
To insert a column using a VBA code, you need to use the “Entire Column” property with the “Insert” method. With the entire column property, you can refer to the entire column using a cell and then insert a new column. By default, it will insert a column before the cell that you have mentioned.

- First, specify a cell using the range object.
- Now, enter a dot (.) to get the list of properties and methods.
- After that, select the “Entire Column” property or type it.
- In the end, again enter a dot (.) and select the “Insert” method or type it.
Range("A1").EntireColumn.InsertYour code is ready here to insert a column. Now when you run this code, it will instantly insert a new column before the column A.
Insert Multiple Columns
There are two ways to insert multiple columns in a worksheet that I have found. The first is the same insert method that we have used in the above example. With this, you need to specify a range of columns whose count is equal to the count of the column you want to insert.
Now let’s say you want to insert 5 columns after column C in the case you can use a code like the following.

Range("C:G").EntireColumn.InsertTo be honest, I haven’t found this method quite useful because you need to change the range if you want to change the code itself. So, here’s the second method.
'variables to use in the code
Dim iCol As Long
Dim iCount As Long
Dim i As Long

'to get the number of columns that you want to insert with an input box
iCount = InputBox(Prompt:="How many column you want to add?")

'to get the column number where you want to insert the new column
iCol = InputBox _
(Prompt:= _
"After which column you want to add new column? (Enter the column number)")

'loop to insert new column(s)
For i = 1 To iCount
    Columns(iCol).EntireColumn.Insert
Next i
When you run this code, it asks you to enter the number of columns that you want to add and then the column number where you want to add all those new columns. It uses a FOR LOOP (For Next) to enter the number of columns that you have mentioned.
Insert Columns Based on the Cell Values
If you want to insert columns based on a cell value, then you can use the following code.
Dim iCol As Long
Dim iCount As Long
Dim i As Long

iCount = Range("A1").Value
iCol = Range("B1").Value

For i = 1 To iCount
    Columns(iCol).EntireColumn.Insert
Next i
When you run this macro, it takes count of columns from the cell A1 and the column where you want to add columns from the cell B1.
Insert a Column without Formatting
When you insert a column where the above column has some specific formatting, in that case, the column will also have that formatting automatically. And the simplest way to deal with this thing is to use clear formats. Consider the following code.
Columns(7).EntireColumn.Insert
Columns(7).ClearFormats
When you run the above code, it inserts a new column before the 7th column. Now, what happens, when you insert a column before the 7th column that new column becomes the 7th column, and then the second line of code clear the formats from it.
Insert Copied Column
You can also use the same method to copy a column and then insert it somewhere else. See the following code.
Application.CutCopyMode = False

With Worksheets("Data")
.Columns(5).Copy
.Columns(9).Insert Shift:=xlShiftDown
End With

Application.CutCopyMode = True
More Tutorials
- Count Rows using VBA in Excel
- Excel VBA Font (Color, Size, Type, and Bold)
- Excel VBA Hide and Unhide a Column or a Row
- Excel VBA Range – Working with Range and Cells in VBA
- Apply Borders on a Cell using VBA in Excel
- Find Last Row, Column, and Cell using VBA in Excel
- Insert a Row using VBA in Excel
- Merge Cells in Excel using a VBA Code
- Select a Range/Cell using VBA in Excel
- SELECT ALL the Cells in a Worksheet using a VBA Code
- ActiveCell in VBA in Excel
- Special Cells Method in VBA in Excel
- UsedRange Property in VBA in Excel
- VBA AutoFit (Rows, Column, or the Entire Worksheet)
- VBA ClearContents (from a Cell, Range, or Entire Worksheet)
- VBA Copy Range to Another Sheet + Workbook
- VBA Enter Value in a Cell (Set, Get and Change)
- VBA Named Range | (Static + from Selection + Dynamic)
- VBA Range Offset
- VBA Sort Range | (Descending, Multiple Columns, Sort Orientation
- VBA Wrap Text (Cell, Range, and Entire Worksheet)
- VBA Check IF a Cell is Empty + Multiple Cells
⇠ Back to What is VBA in Excel
Helpful Links – Developer Tab – Visual Basic Editor – Run a Macro – Personal Macro Workbook – Excel Macro Recorder – VBA Interview Questions – VBA Codes
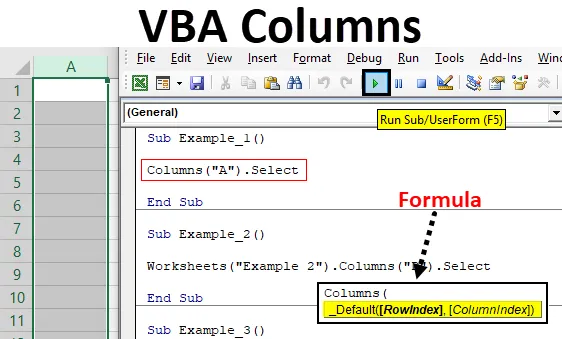
Excel VBA Columns Property
VBA Columns property is used to refer to columns in the worksheet. Using this property we can use any column in the specified worksheet and work with it.
When we want to refer to the cell, we use either the Range object or Cells property. Similarly, how do you refer to columns in VBA? We can refer to columns by using the “Columns” property. Look at the syntax of COLUMNS property.
Table of contents
- Excel VBA Columns Property
- Examples
- Example #1
- Example #2 – Select Column Based on Variable Value
- Example #3 – Select Column Based on Cell Value
- Example #4 – Combination of Range & Column Property
- Example #5 – Select Multiple Columns with Range Object
- Recommended Articles
- Examples
![]()
We need to mention the column number or header alphabet to reference the column.
For example, if we want to refer to the second column, we can write the code in three ways.
Columns (2)
Columns(“B:B”)
Range (“B:B”)
Examples
You can download this VBA Columns Excel Template here – VBA Columns Excel Template
Example #1
If you want to select the second column in the worksheet, then first, we need to mention the column number we need to select.
Code:
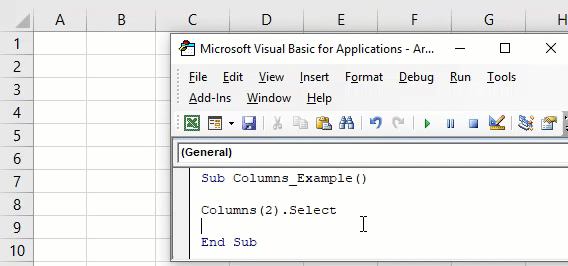
Sub Columns_Example()

  Columns (2)

End Sub
Now, put a dot (.) to choose the “Select” method.
One of the problems with this property is we do not get to see the IntelliSense list of VBA.
Code:
Sub Columns_Example()

  Columns(2).Select

End Sub
So, the above VBA codeVBA code refers to a set of instructions written by the user in the Visual Basic Applications programming language on a Visual Basic Editor (VBE) to perform a specific task.read more will select the second column of the worksheet.
Instead of mentioning the column number, we can use the column header alphabet “B” to select the second column.
Code:
Sub Columns_Example()

  Columns("B").Select
  Columns("B:B").Select

End Sub
The above codes will select column B, i.e., the second column.
Example #2 – Select Column Based on Variable Value
We can also use the variable to select the column number. For example, look at the below code now.
Code:
Sub Columns_Example()

  Dim ColNum As Integer
  ColNum = 4
  Columns(ColNum).Select

End Sub
In the above, we have declared the variable as “Integer” and assigned the value of 4 to this variable.
We have supplied this variable instead of the column number for the Column’s property. Since the variable holds the value of 4, it will select the 4th column.
Example #3 – Select Column Based on Cell Value
We have seen how to select the column based on variable value now. Next, we will see how we can select the column based on the cell value number. For example, in cell A1 we have entered the number 3.

The code below will select the column based on the number in cell A1.
Code:
Sub Columns_Example()

  Dim ColNum As Integer
  ColNum = Range("A1").Value
  Columns(ColNum).Select

End Sub
The above code is the same as the previous one. Still, the only thing we have changed here is instead of assigning the direct number to the variable. Instead, we gave a variable value as “whatever the number is in cell A1.”
Since we have a value of 3 in cell A1, it will select the third column.
Example #4 – Combination of Range & Column Property
We can also use the Columns property with the Range object. Using the Range object, we can specify the specific range. For example, look at the below code.
Code:
Sub Columns_Example1()

  Range("C1:D5").Columns(2).Select

End Sub
In the above example, we have specified the range of cells as C1 to D5. Then, using the columns property, we have specified the column number as 2 to select.
Now, in general, our second column is B. So the code has to select the “B” column but see what happens when we run the code.

It has selected the cells from D1 to D5.
In our perception, it should have selected the second column, i.e., column B. But now, it has selected the cells from D1 to D5.
It has selected these cells because before using the COLUMNS property, we have specified the range using the RANGE object as C1 to D5. Now, the property thinks within this range as the columns and selects the second column in the range C1 to D5. Therefore, D is the second column, and specified cells are D1 to D5.
Example #5 – Select Multiple Columns with Range Object
Using the Range object and Columns property, we can select multiple columns. For example, look at the below code.
Code:
Sub Columns_Example1()

  Range(Columns(2), Columns(5)).Select

End Sub
The code will select the column from the second column to the fifth column, i.e., from column B to E.

We can also write the code in this way.
Code:
Sub Columns_Example1()

  Range(Columns(B), Columns(E)).Select

End Sub
The above is the same as the previous one and selects the columns from B to E.
Like this, we can use the COLUMNS property to work with the worksheet.
Recommended Articles
This article has been a guide to VBA Columns. Here, we discuss examples of the column property in Excel VBA and select multiple columns with the range object and downloadable Excel templates. Below are some useful articles related to VBA: –
- DateSerial Function in Excel VBA
- Hide Columns in VBA
- Insert Columns in VBA
- Delete Column in VBA
- VBA Variable Types
I know the thread is old, but I must point out that the most upvoted answer here is risky and can get you in a serious trouble. I don’t know if it depends Excel version — I use Excel’16.
Let’s consider table containing columns: col A, col B and col C.

We use «The Dudes» one-liner code and want to name our new column «Col B». It already exists but check what happens:
Sub theDude()

  Dim Table As ListObject
  Set Table = ActiveSheet.ListObjects(1)

  With Table

    ' adding column on the second place
    ' and trying to force its header to "Col B"
    .ListColumns.Add(2).Name = "Col B"

    'fill "Col B" with value
    .ListColumns("Col B").DataBodyRange = "test"

  End With

End Sub
And what we get? In result we have 4 columns:
- Col A
- New inserted Column1 or another DEFAULT NAME of Table’s column (1)
- Col B — the «old» B column filled with «test» string
- Col C

(1) it depends on yours language version- mine is called Kolumna1 and it’s given by Excel automatically
The worst thing is our data in Col B is lost after macro run. So I would suggest instead one-liner (methods chaining) use @stenci’s step by step solution, or even better add some error handling e.g.:
Sub AddingColumn()

  Dim Table As ListObject
  ' ActiveSheet just for test
  Set Table = ActiveSheet.ListObjects(1)

  Dim newColName As Variant     ' or string / long
      newColName = "Col B"

  If headerExists(newColName, Table) Then

    Dim tit As String:  tit = "Error"
    Dim txt As String
        txt = "Header " & newColName & " already exists. Macro will be interrupted"

        MsgBox txt, vbOKOnly, tit
        Exit Sub

  Else

    ' main code goes here *********************
    With Table
      ' adding column on the second place
      ' and trying to force its header to "Col B"
        .ListColumns.Add(2).Name = newColName
      'fill "Col B" with value
        .ListColumns("Col B").DataBodyRange = "test"
    End With

  End If

End Sub

Function headerExists(ByVal findHeader As String, ByVal tbl As ListObject) As Boolean

    Dim pos As Variant     ' position
        pos = Application.Match(findHeader, tbl.HeaderRowRange, 0)

        headerExists = Not IsError(pos)

End Function
Вставка пустой строки или пустого столбца в указанное место на рабочем листе из кода VBA Excel, чтобы расширить заполненную таблицу изнутри или снаружи.
Вставка пустой строки или пустого столбца используется для добавления пропущенной или новой информации внутри заполненного диапазона (таблицы) или для расширения таблицы по строкам или столбцам с сохранением форматирования.
Вставка пустой строки
Вставка пустой строки в VBA Excel осуществляется с помощью метода Range.Insert. Указанная строка сдвигается вниз, на ее место вставляется пустая строка, а форматы, по умолчанию, копируются в новую строку из строки выше.
Вставка одной пустой строки над 10 строкой:
|
Rows(10).Insert Range(«A10»).EntireRow.Insert |
Вставка семи пустых строк над 5 строкой:
|
Rows(«5:11»).Insert Range(«A5:A11»).EntireRow.Insert |
Добавление десяти пустых строк над активной ячейкой с помощью цикла:
|
Sub Test() Dim i As Long For i = 1 To 10 ActiveCell.EntireRow.Insert Next End Sub |
Вставка пустого столбца
Вставка пустого столбца в VBA Excel, как и пустой строки, осуществляется с помощью метода Range.Insert. Указанный столбец сдвигается вправо, на его место вставляется пустой столбец, а форматы, по умолчанию, копируются в новый столбец из столбца слева.
Вставка одного пустого столбца слева от 5 столбца:
|
Columns(5).Insert Columns(«E»).Insert Range(«E6»).EntireColumn.Insert |
Вставка пяти пустых столбцов слева от 4 столбца:
|
Columns(«D:H»).Insert Range(«D6:H20»).EntireColumn.Insert |
Обратите внимание, что запись вида Columns("5:11").Insert не работает.
Добавление шести пустых столбцов слева от активной ячейки с помощью цикла:
|
Sub Test1() Dim i As Long For i = 1 To 6 ActiveCell.EntireColumn.Insert Next End Sub |
- Свойство столбцов Excel VBA
Свойство столбцов Excel VBA
Нам всем хорошо известен тот факт, что рабочая таблица Excel организована в столбцы и строки, и каждое пересечение строк и столбцов рассматривается как ячейка. Всякий раз, когда мы хотим сослаться на ячейку в Excel через VBA, мы можем использовать свойства Range или Cells. Что если мы хотим сослаться на столбцы из таблицы Excel? Есть ли какая-либо функция, которую мы можем использовать для ссылки на то же самое? Ответ большой ДА!
Да, в VBA есть свойство под названием «Столбцы», которое помогает вам ссылаться, а также возвращать столбец из данной таблицы Excel. Мы можем ссылаться на любой столбец на листе, используя это свойство, и можем манипулировать им.
Синтаксис столбцов VBA:
Синтаксис для свойства столбцов VBA показан ниже:

Где,
- RowIndex — представляет номер строки, из которой должны быть получены ячейки.
- ColumnIndex — представляет номер столбца, который находится на пересечении с соответствующими строками и ячейками.
Очевидно, какой столбец необходимо включить / использовать для дальнейшего разбирательства, используется этими двумя аргументами. Оба являются необязательными и, если они не предоставлены по умолчанию, будут рассматриваться как первая строка и первый столбец.
Как использовать свойство столбцов в Excel VBA?
Ниже приведены различные примеры использования свойства столбцов в Excel с использованием кода VBA.
Вы можете скачать этот шаблон Excel столбцов VBA здесь — Шаблон Excel столбцов VBA
Пример # 1 — Выбор столбца с использованием свойства столбцов VBA
Мы увидим, как можно выбрать столбец на листе, используя свойство VBA Columns. Для этого выполните следующие шаги:
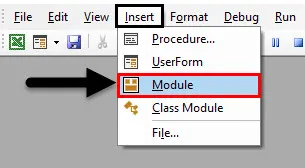
Шаг 1: Вставьте новый модуль в Visual Basic Editor (VBE), где вы можете написать блок кодов. Нажмите на вкладку « Вставка » и выберите « Модуль» на панели VBA.
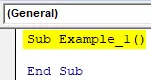
Шаг 2: Определите новую подпроцедуру, которая может содержать макрос, который вы собираетесь написать.
Код:
Sub Example_1 () End Sub
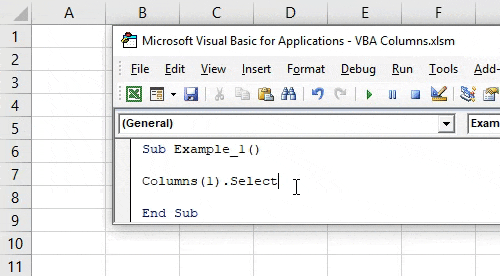
Шаг 3: Используйте свойство Columns.Select из VBA, чтобы выбрать первый столбец на рабочем листе. Это на самом деле по-разному, вы можете использовать Columns (1). Выберите изначально. Смотрите скриншот ниже:
Код:
Sub Example_1 () Столбцы (1). Выберите End Sub
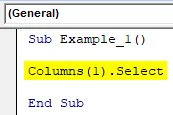
Свойство Columns в этом небольшом фрагменте кода указывает номер столбца, а свойство Select позволяет VBA выбирать столбец. Поэтому в этом коде столбец 1 выбран на основе заданных входных данных.
Шаг 4: Нажмите F5 или нажмите кнопку «Выполнить», чтобы запустить этот код и увидеть результат. Вы можете видеть, что столбец 1 будет выбран в вашем листе Excel.
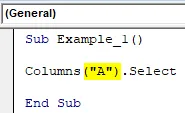
Это один из способов использования свойства столбцов для выбора столбца на листе. Мы также можем использовать имена столбцов вместо номеров столбцов в коде. Ниже код также дает тот же результат.
Код:
Sub Example_1 () Столбцы ("A"). Выберите End Sub
Пример № 2 — столбцы VBA как функция рабочего листа
Если мы используем свойство Columns без какого-либо спецификатора, оно будет работать только на всех активных рабочих листах, присутствующих в рабочей книге. Однако, чтобы сделать код более безопасным, мы можем использовать спецификатор рабочего листа со столбцами и сделать наш код более безопасным. Следуйте инструкциям ниже:
Шаг 1: Определите новую подпроцедуру, которая может содержать макрос под модулем.
Код:
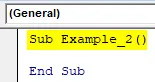
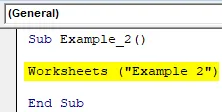
Sub Example_2 () End Sub
Теперь мы будем использовать свойство Worksheets.Columns для выбора столбца из указанного листа.
Шаг 2: Начните вводить квалификатор Worksheets под данным макросом. Этому классификатору нужно имя листа, укажите имя листа как « Пример 2 » (не забудьте добавить скобки). Это позволит системе получить доступ к рабочему листу с именем Пример 2 из текущей рабочей книги.
Код:
Sub Example_2 () Рабочие таблицы («Пример 2») End Sub
Шаг 3: Теперь используйте свойство Columns, которое позволит вам выполнять различные операции над столбцами на выбранном листе. Я выберу 4- й столбец. Я могу выбрать его, написав индекс как 4 или указав алфавит столбца «D».
Код:
Sub Example_2 () Рабочие таблицы («Пример 2»). Столбцы («D») End Sub
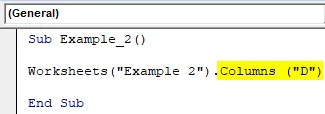
На данный момент мы выбрали рабочий лист с именем Пример 2 и получили доступ к столбцу D из него. Теперь нам нужно выполнить некоторые операции со столбцом, к которому осуществляется доступ.
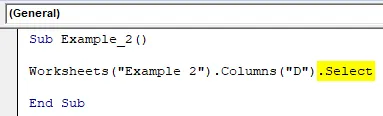
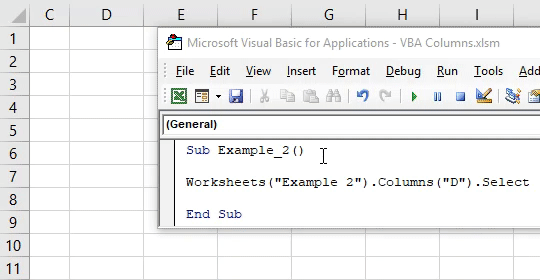
Шаг 4. Используйте свойство Выбрать после столбцов, чтобы выбрать столбец, указанный в текущем рабочем листе.
Код:
Sub Example_2 () Рабочие таблицы («Пример 2»). Столбцы («D»). Выберите End Sub
Шаг 5: Запустите код, нажав клавишу F5 или нажав кнопку воспроизведения.
Пример # 3 — свойство столбцов VBA для выбора диапазона ячеек
Предположим, мы хотим выбрать диапазон ячеек в разных столбцах. Мы можем комбинировать свойство Range и Columns для этого. Следуйте инструкциям ниже:
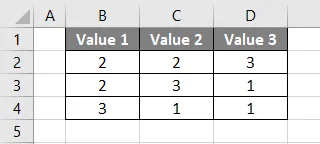
Предположим, что у нас есть данные, распределенные между B1 и D4 на листе, как показано ниже:
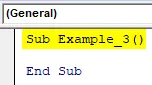
Шаг 1: Определите новую подпроцедуру для хранения макроса.
Код:
Sub Example_3 () End Sub
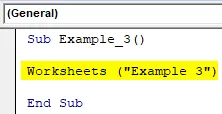
Шаг 2: Используйте квалификатор « Рабочие листы», чтобы получить доступ к рабочему листу с именем « Пример 3 », где у нас есть данные, показанные на снимке экрана выше.
Код:
Sub Example_3 () Рабочие таблицы («Пример 3») End Sub
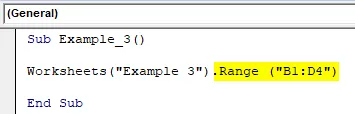
Шаг 3: Используйте свойство Range, чтобы установить диапазон для этого кода от B1 до D4. Используйте следующий диапазон кодов («B1: D4») для того же.
Код:
Sub Example_3 () Рабочие листы («Пример 3»). Диапазон («B1: D4») End Sub
Шаг 4: Используйте свойство Columns для доступа ко второму столбцу из выбора. Используйте код как Столбцы (2) для доступа ко второму столбцу из доступного диапазона.
Код:
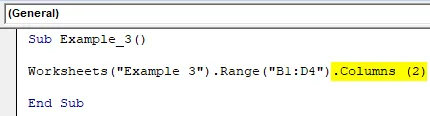
Sub Example_3 () Рабочие таблицы («Пример 3»). Диапазон («B1: D4»). Столбцы (2) End Sub
Шаг 5: Теперь самая важная часть. Мы получили доступ к рабочему листу, диапазону и столбцу. Однако, чтобы выбрать доступный контент, нам нужно использовать свойство Select в VBA. Смотрите скриншот ниже для макета кода.
Код:
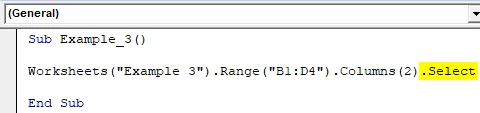
Sub Example_3 () Рабочие таблицы («Пример 3»). Диапазон («B1: D4»). Столбцы (2). Выберите End Sub
Шаг 6: Запустите этот код, нажав F5 или кнопку Run, и посмотрите результат.
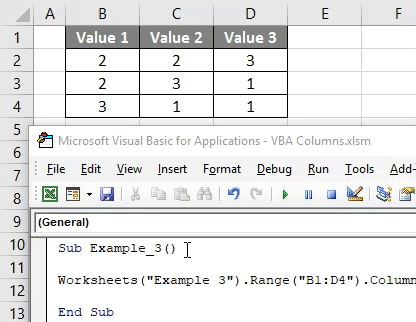
Вы можете видеть, что код выбрал Столбец C на листе Excel, хотя вы установили значение столбца как 2 (что означает второй столбец). Причина этого в том, что мы выбрали диапазон B1: D4 в этом коде. Который состоит из трех столбцов B, C, D. Во время выполнения столбец B считается первым столбцом, C — вторым, а D — третьим столбцом вместо их фактических положений. Функция диапазона уменьшила область действия этой функции только для B1: D4.
То, что нужно запомнить
- Мы не видим список свойств IntelliSense, когда работаем над столбцами VBA.
- Это свойство относится к категории свойства листа в VBA.
Рекомендуемые статьи
Это руководство к колонкам VBA. Здесь мы обсудим, как использовать свойство столбцов в Excel с помощью кода VBA, а также на практических примерах и загружаемом шаблоне Excel. Вы также можете просмотреть наши другие предлагаемые статьи —
- VBA Вставить столбец
- Группировка столбцов в Excel
- VBA Удалить столбец
- Переключение столбцов в Excel