
In this Article
- Delete Entire Row or Column
- Delete Multiple Rows or Columns
- Delete Blank / Empty Rows
- Delete Row if Cell is Blank
- Delete Row Based on Cell Value
- More Delete Row and Column Examples
- Delete Duplicate Rows
- Delete Table Rows
- Delete Filtered Rows
- Delete Rows in Range
- Delete Selected Rows
- Delete Last Row
- Delete Columns by Number
This tutorial will demonstrate different ways to delete rows and columns in Excel using VBA.
Delete Entire Row or Column
To delete an entire row in VBA use this line of code:
Rows(1).DeleteNotice we use the Delete method to delete a row.
Instead of referencing the Rows Object, you can reference rows based on their Range Object with EntireRow:
Range("a1").EntireRow.DeleteSimilarly to delete an entire column, use these lines of code:
Columns(1).DeleteRange("a1").EntireColumn.DeleteDelete Multiple Rows or Columns
Using the same logic, you can also delete multiple rows at once:
Rows("1:3").Deleteor columns:
Columns("A:C").DeleteNotice here we reference the specific row and column numbers / letters surrounded by quotations.
Of course, you can also reference the EntireRow of a range:
Range("a1:a10").EntireRow.DeleteNote: The examples below only demonstrate deleting rows, however as you can see above, the syntax is virtually identically to delete columns.
Delete Blank / Empty Rows
This example will delete a row if the entire row is blank:
Sub DeleteRows_EntireRowBlank()

Dim cell As Range

For Each cell In Range("b2:b20")
    If Application.WorksheetFunction.CountA(cell.EntireRow) = 0 Then
        cell.EntireRow.Delete
    End If
Next cell

End Sub
It makes use of the Excel worksheet function: COUNTA.
Delete Row if Cell is Blank
This will delete a row if specific column in that row is blank (in this case column B):
Range("b3:b20").SpecialCells(xlCellTypeBlanks).EntireRow.DeleteDelete Row Based on Cell Value
This will loop through a range, and delete rows if a certain cell value in that row says “delete”.
Sub DeleteRowswithSpecificValue()

Dim cell As Range

For Each cell In Range("b2:b20")
    If cell.Value = "delete" Then
        cell.EntireRow.Delete
    End If
Next cell

End Sub
More Delete Row and Column Examples
VBA Coding Made Easy
Stop searching for VBA code online. Learn more about AutoMacro — A VBA Code Builder that allows beginners to code procedures from scratch with minimal coding knowledge and with many time-saving features for all users!

Learn More
Delete Duplicate Rows
This code will delete all duplicate rows in a range:
Range("b2:c100").RemoveDuplicates Columns:=2Notice we set Columns:=2. This tells VBA to check both the first two columns of data when considering if rows are duplicates. A duplicate is only found when both columns have duplicate values.
If we had set this to 1, only the first row would’ve been checked for duplicate values.
Delete Table Rows
This code will delete the second row in a Table by referencing ListObjects.
ThisWorkbook.Sheets("Sheet1").ListObjects("list1").ListRows(2).DeleteDelete Filtered Rows
To delete only rows that are visible after filtering:
Range("b3:b20").SpecialCells(xlCellTypeVisible).EntireRow.DeleteVBA Programming | Code Generator does work for you!
Delete Rows in Range
This code will delete all rows in range:
Range("a1:a10").EntireRow.DeleteDelete Selected Rows
This code will delete all selected rows:
Selection.EntireRow.DeleteDelete Last Row
This will delete the last used row in column B:
Cells(Rows.Count, 2).End(xlUp).EntireRow.DeleteBy changing 2 to 1, you can delete the last used row in column A, etc.:
Cells(Rows.Count, 1).End(xlUp).EntireRow.DeleteDelete Columns by Number
To delete a column by it’s number, use a code like this:
Columns (2).Delete|
hk1209 Пользователь Сообщений: 271 |
#1 30.01.2014 11:39:19 всем доброго времени суток
спасибо за потраченное драгоценное время Изменено: hk1209 — 30.01.2014 20:05:32 |
||
|
Hugo Пользователь Сообщений: 23253 |
Чтож Вы с строкой сравниваете дату? Или там тоже строка, а не дата? |
|
hk1209 Пользователь Сообщений: 271 |
|
|
wowick Пользователь Сообщений: 972 |
А сравниваете вы ее с ТЕКСТОМ «20.11.2013»… В экселе, как и во-многих других средах программирования в кавычках подразумевает текстовый формат. Если автоматизировать бардак, то получится автоматизированный бардак. |
|
Sanja Пользователь Сообщений: 14838 |
#5 30.01.2014 11:51:07 Попробуйте так
Согласие есть продукт при полном непротивлении сторон. |
||
|
Hugo Пользователь Сообщений: 23253 |
То что там дата — это ещё не факт. Видали мы всяких дат… Пока не докажете — не поверю |
|
hk1209 Пользователь Сообщений: 271 |
#7 30.01.2014 12:32:37 Sanja спасибо за подсказку
долго выполняется |
||
|
Sanja Пользователь Сообщений: 14838 |
#8 30.01.2014 12:44:02 Для ускорения выполнения кода отключите автоматический пересчет:
в конце процедуры включить:
так определяется
номер последней строки с данными в 9-м столбце:
Изменено: Sanja — 30.01.2014 12:45:13 Согласие есть продукт при полном непротивлении сторон. |
||||||
|
Hugo Пользователь Сообщений: 23253 |
4. Обрабатывать массивы, а не ячейки — на листе только удалять строки, да и тут можно это делать один раз сразу с группой. P.S.Упустил — Dim rw As Date — это ошибка! Изменено: Hugo — 30.01.2014 12:57:32 |
|
hk1209 Пользователь Сообщений: 271 |
#10 30.01.2014 13:52:19 Sanja & Hugo спасибо за подсказку и потраченное драгоценное время
Знаю что там не правильно, но не могу понять где именно Изменено: hk1209 — 30.01.2014 20:06:26 |
||
|
The_Prist  Пользователь Сообщений: 14182 Профессиональная разработка приложений для MS Office |
#11 30.01.2014 14:02:46 Cells(Rows.Count, 9).End(xlUp).Row < CDate(«20.11.2013») Hugo совсем иное советовал..
И уже в цикле:
С массивами чуть сложнее в понимании, но на Вашем примере было бы так:
P.S. И оформляйте коды тегами. Значок «<…>» среди кнопок вверху при создании сообщения. Даже самый простой вопрос можно превратить в огромную проблему. Достаточно не уметь формулировать вопросы… |
||||||
|
Hugo Пользователь Сообщений: 23253 |
Супербыстрое удаление строк от ZVI есть тут: http://www.sql.ru/forum/actualthread.aspx?tid=722758 Можно использовать и в этой задаче. |
|
hk1209 Пользователь Сообщений: 271 |
#13 30.01.2014 14:24:29 The_Prist спасибо за потраченное драгоценное время и советы (включая код) |
Adding and deleting rows is part of everyday common tasks when working with Excel.
While you can do this easily from the worksheet itself, sometimes you may want to use the VBA route to delete rows in Excel. These could be deleting a specific row, multiple rows in the selection, deleting alternate rows or those that have a specific value in it.
In this tutorial, I will show you how to delete rows in Excel using VBA (multiple scenarios).
So let’s get started!
Delete an Entire Row using VBA
To delete an entire row in Excel using VBA, you need to use the EntireRow.Delete method.
For example, if you want to delete the entire first row in a worksheet, you can use the below code:
Sub DeleteEntireRow()
Rows(1).EntireRow.Delete
End Sub
The above code first specifies the row that needs to be deleted (which is done by specifying the number in bracket) and then uses the EntireRow.Delete method to delete it.
You can also delete multiple rows by specifying these rows in the code.
For example, the below code will delete row number 1, 5 and 9 in the worksheet:
Sub DeleteEntireRow()
Rows(9).EntireRow.Delete
Rows(5).EntireRow.Delete
Rows(1).EntireRow.Delete
End Sub
The above code uses the same logic, where it specifies the row numbers and Excel will delete these rows one by one.
IMPORTANT: When you’re deleting rows with something similar to the above code, remember to start deleting from the bottom and then go up. For example, in case you start at the top and delete row 1 first, all the rows below it would be shifted one row up and the numbering would be off (as row 5 would become row 4 and so on)
Delete All Rows in the Selection
In case you want to delete all the rows in a selected range of cells, you can use the VBA macro code below:
Sub DeleteEntireRow()
Selection.EntireRow.Delete
End Sub
The above code applies to the EntireRow.Delete method to the entire selection.
Delete Alternate rows (or Delete Every Third/Fourth/Nth Row)
Sometimes, you may get a data dump where every second row (or third, fourth or Nth rows) is useless and needs to be deleted.
I used to work with financial data where every second row was empty and had to be deleted.
This is the type of scenario where VBA really shines.
Below is the VBA code that will go through all the rows in the selection and delete every second row:
Sub DeleteAlternateRows()
RCount = Selection.Rows.Count
For i = RCount To 1 Step -2
    Selection.Rows(i).EntireRow.Delete
Next i
End Sub
Let me explain how this VBA code works.
First, I have used a variable RCount to get the total number of rows in the selection.
Then I have used a For Next loop to run this as many times as many rows are there. For example, if there are 12 rows, this loop will run from 12 to 1 (i.e., 12 times). It’s important to run this from the last row in the selection to the first as we don’t want the row numbers to change when a row is deleted.
Also, Step -2 is used since we need to delete every other row (from bottom to top). In case you want to delete every third row, you can use -3.
Within the VBA loop, I have used the Selection.Rows(i).EntireRow.Delete method to delete every alternate row.
Delete Blank Rows with VBA
You can also use the EntireRow.Delete method to delete all blank rows.
Below is the VBA code that will select blank cells in the selected dataset and delete the entire row.
Sub DeleteBlankRows()
Selection.SpecialCells(xlCellTypeBlanks).EntireRow.Delete
End Sub
The above code uses the SpecialCells property to select and delete all the cells that are blank. This is the same method that also allows us to use ‘Go To Special’ dialog box to select all blank cells.
Once these blank cells are identified using SpecialCell, these are then deleted using the EntireRow.Delete method.
Note: This method selects cells that are blank and don’t check whether the entire row is blank or not. So if anyone cell is empty in a row, this would still delete the entire row.
Delete Rows with a Specific Word/Value
You can also use a simple VBA code to go through each cell in the selected range and delete all the rows where a cell contains a specific text or value.
For example, suppose you have a dataset and I want to delete all cells that have the text Printer in column 2 of the selection.

Below is the code that will do this:
Sub DeleteRowswithSpecificValue()
For i = Selection.Rows.Count To 1 Step -1
If Cells(i, 2).Value = "Printer" Then
Cells(i, 2).EntireRow.Delete
End If
Next i
End Sub
The above code first counts the total number of rows in the selection. This will make sure the loop is run only these many times. It then uses the ‘For Next loop’ to go through all the cells in Column 2.
The IF THEN ELSE statement is then used to check the value in each cell in column 2. And in case the value/text matches the specified text (which is ‘Printer’ in this example).
In this example, I have checked whether the text matches a specific string or not. You can also do this with values. For example, you can delete all rows where the sale value is less than 1000 or more than 1000.
Note: An important thing to note here is that the loop runs from Selection.Rows.Count To 1 to make sure when a row is deleted, it doesn’t impact the rows above it.
How to Use This VBA Code
Now let me show you how to use all the codes mentioned in this tutorial to delete the entire row.
You need to copy and paste these codes in a module in Excel VB Editor. Once you have these codes copied, you can then run the macro codes.
Below are the steps to copy and paste these VBA codes in a module:
- Hold the ALT key and press the F11 key (or Function + Option + F11 in Mac). This will open the VB Editor
- In the VB Editor, you will have the project explorer on the left. If you don’t see it, go to the View option and then click on Project Explorer.

- Right-click on any object in the Project Explorer (for the workbook in which you want to run the code).

- Go to Insert and then click on Module. This will insert a new Module for the workbook

- Copy and Paste the above codes in the module.


And to run these codes, you can place the cursor anywhere in the code (that you want to run) and hit the F5 key (or click on the green triangle in the VBA toolbar).
I have also written a detailed tutorial on different ways to run VBA macro codes in Excel.
In case you need to use any of these codes quite often, you can also consider adding these to the Personal Macro Workbook and then to the QAT. This way, the code will be available to you in any of your workbooks with a single click.
So these were some VBA codes that you can use to delete entire rows in Excel (in different scenarios). The same logic can also be applied in case you want to delete columns instead of rows (with the corresponding adjustment in the code examples).
Hope you found this tutorial useful!
You may also like the following Excel tutorials:
- Excel VBA Autofilter: A Complete Guide with Examples
- Delete Rows Based on a Cell Value (or Condition) in Excel
- Insert a Blank Row after Every Row in Excel (or Every Nth Row)
- How to Quickly Unhide COLUMNS in Excel
In this VBA Tutorial, you learn how to use Excel VBA to delete rows based on a variety of criteria.
This VBA Tutorial is accompanied by Excel workbooks containing the data and macros I use in the examples below. You can get immediate free access to these example workbooks by subscribing to the Power Spreadsheets Newsletter.
Use the following Table of Contents to navigate to the section you’re interested in.
Related VBA and Macro Tutorials
The following VBA and Macro Tutorials may help you better understand and implement the contents below.
- General VBA constructs and structures:
- Learn about using variables here.
- Learn about VBA data types here.
- Learn about R1C1 style-references here.
- Learn about using worksheet functions in VBA here.
- Practical VBA applications and macro examples:
- Learn how to work with worksheets here.
- Learn how to insert rows here.
- Learn how to delete columns here.
- Learn how to find the last column in a worksheet here.
You can find additional VBA and Macro Tutorials in the Archives.
VBA Code to Delete a Row
To delete a row using VBA, use a statement with the following structure:
Worksheets.Rows(Row#).Delete
Process Followed by VBA Code

VBA Statement Explanation
Worksheets.Rows(Row#).Delete
- Item: Worksheets.
- VBA Construct: Workbook.Worksheets property.
- Description: Returns a Worksheet object representing the worksheet you work with.
- Item: Rows(Row#).
- VBA Construct: Worksheet.Rows property.
- Description: Returns a Range object representing row number Row# of the worksheet returned by item #1 above.
If you explicitly declare a variable to represent Row#, use the Long data type.
- Item: Delete.
- VBA Construct: Range.Delete method.
- Description: Deletes the Range object returned by item #2 above.
Macro Example
The following macro deletes row 6 of the worksheet named “Delete row”.
Sub deleteRow()

    'Source: https://powerspreadsheets.com/
    'For further information: https://powerspreadsheets.com/excel-vba-delete-row/

    Worksheets("Delete row").Rows(6).Delete

End Sub
Effects of Executing Macro Example
The following GIF illustrates the results of executing this macro example. As expected, VBA deletes row 6 of the worksheet.

#2: Delete a Row and Shift Up
VBA Code to Delete a Row and Shift Up
To delete a row and explicitly shift cells up to replace the deleted row, use a statement with the following structure:
Worksheet.Rows(Row#).Delete Shift:=xlShiftUp
Process Followed by VBA Code

VBA Statement Explanation
Worksheet.Rows(Row#).Delete Shift:=xlShiftUp
- Item: Worksheet.
- VBA Construct: Workbook.Worksheets property.
- Description: Returns a Worksheet object representing the worksheet you work with.
- Item: Rows(Row#).
- VBA Construct: Worksheet.Rows property.
- Description: Returns a Range object representing row number Row# of the worksheet returned by item #1 above.
If you explicitly declare a variable to represent Row#, use the Long data type.
- Item: Delete.
- VBA Construct: Range.Delete method.
- Description: Deletes the Range object returned by item #2 above.
- Item: Shift:=xlShiftUp.
- VBA Construct: Shift parameter of the Range.Delete method.
- Description:
- Shifts rows up (xlShiftUp) to replace the deleted row.
- You can usually omit this parameter. By default, VBA decides how to shift the cells based on the range’s shape. When deleting a row, this generally results in Excel shifting the cells up.
Macro Example
The following macro deletes row 10 of the worksheet named “Delete row” and explicitly specifies to shift cells up to replace the deleted row.
Sub deleteRowShiftUp()

    'Source: https://powerspreadsheets.com/
    'For further information: https://powerspreadsheets.com/excel-vba-delete-row/

    Worksheets("Delete row").Rows(10).Delete Shift:=xlShiftUp

End Sub
Effects of Executing Macro Example
The following GIF illustrates the results of executing this macro example. As expected, VBA deletes row 10 of the worksheet and shifts cells up to replace the deleted row.

#3: Delete Multiple Rows
VBA Code to Delete Multiple Rows
To delete multiple rows, use a statement with the following structure:
Worksheet.Rows("FirstRow#:LastRow#").Delete
Process Followed by VBA Code

VBA Statement Explanation
Worksheet.Rows(“FirstRow#:LastRow#”).Delete
- Item: Worksheet.
- VBA Construct: Workbook.Worksheets property.
- Description: Returns a Worksheet object representing the worksheet you work with.
- Item: Rows(“FirstRow#:LastRow#”).
- VBA Construct: Worksheet.Rows property.
- Description: Returns a Range object representing rows number FirstRow# through LastRow# of the worksheet returned by item #1 above.
- Item: Delete.
- VBA Construct: Range.Delete method.
- Description: Deletes the Range object returned by item #2 above.
Macro Example
The following macro deletes rows 14 to 18 of the worksheet named “Delete row”.
Sub deleteMultipleRows()

    'Source: https://powerspreadsheets.com/
    'For further information: https://powerspreadsheets.com/excel-vba-delete-row/

    Worksheets("Delete row").Rows("14:18").Delete

End Sub
Effects of Executing Macro Example
The following GIF illustrates the results of executing this macro example. As expected, VBA deletes rows 14 to 18 of the worksheet.

#4: Delete Selected Row
VBA Code to Delete Selected Row
To delete the selected row (the row containing the active cell), use the following statement:
ActiveCell.EntireRow.Delete
Process Followed by VBA Code

VBA Statement Explanation
ActiveCell.EntireRow.Delete
- Item: ActiveCell.
- VBA Construct: Application.ActiveCell property.
- Description: Returns a Range object representing the active cell.
- Item: EntireRow.
- VBA Construct: Range.EntireRow property.
- Description: Returns a Range object representing the entire row containing the cell range returned by item #1 above.
- Item: Delete.
- VBA Construct: Range.Delete method.
- Description: Deletes the Range object returned by item #2 above.
Macro Example
The following macro deletes the selected row (the row containing the active cell):
Sub deleteSelectedRow()

    'Source: https://powerspreadsheets.com/
    'For further information: https://powerspreadsheets.com/excel-vba-delete-row/

    ActiveCell.EntireRow.Delete

End Sub
Effects of Executing Macro Example
The following GIF illustrates the results of executing this macro example. When I execute the macro, the active cell is B20. As expected, Excel deletes the selected row.

#5: Delete Multiple Selected Rows
VBA Code to Delete Multiple Selected Rows
To delete multiple selected rows, use the following statement:
Selection.EntireRow.Delete
Process Followed by VBA Code

VBA Statement Explanation
Selection.EntireRow.Delete
- Item: Selection.
- VBA Construct: Application.Selection property.
- Description: Returns a Range object representing the current cell range selection.
- Item: EntireRow.
- VBA Construct: Range.EntireRow property.
- Description: Returns a Range object representing the entire row containing the Range object returned by item #1 above.
- Item: Delete.
- VBA Construct: Range.Delete method.
- Description: Deletes the Range object returned by item #2 above.
Macro Example
The following macro deletes the (multiple) selected rows.
Sub deleteSelectedRows()

    'Source: https://powerspreadsheets.com/
    'For further information: https://powerspreadsheets.com/excel-vba-delete-row/

    Selection.EntireRow.Delete

End Sub
Effects of Executing Macro Example
The following GIF illustrates the results of executing this macro example. When I execute the macro, the selected cells are B24 to B28. As expected, Excel deletes the selected rows.

#6: Delete Blank Rows
VBA Code to Delete Blank Rows
To delete blank rows, use a macro with the following statement structure:
With Worksheet
    For Counter = LastRow To FirstRow Step -1
        If WorksheetFunction.CountA(.Rows(Counter)) = 0 Then
            If Not BlankRows Is Nothing Then
                Set BlankRows = Union(BlankRows, .Rows(Counter))
            Else
                Set BlankRows = .Rows(Counter)
            End If
        End If
    Next Counter
End With
If Not BlankRows Is Nothing Then BlankRows.Delete
Process Followed by VBA Code

VBA Statement Explanation
Lines #1 and #11: With Worksheet | End With
- Item: With… End With.
- VBA Construct: With… End With statement.
- Description: Statements within the With… End With statement (lines #2 through #10 below) are executed on the worksheet returned by item #2 below.
- Item: Worksheet.
- VBA Construct: Workbook.Worksheets property.
- Description: Returns a Worksheet object representing the worksheet you work with.
Lines #2 and #10: For Counter = LastRow To FirstRow Step -1 | Next Counter
- Item: For… Next Counter.
- VBA Construct: For… Next statement.
- Description: Repeats the statements within the loop (lines #3 through #9 below) for each row between (and including) FirstRow (item #4 below) and LastRow (item #3 below).
- Item: Counter.
- VBA Construct: Counter of For… Next statement.
- Description: Loop counter. If you explicitly declare a variable to represent the loop counter, use the Long data type.
- Item: LastRow.
- VBA Construct: Counter Start of For… Next statement.
- Description: Number of the last row (further down the worksheet) you want the macro to consider when identifying blank rows. The number of the last row is also the initial value of Counter (item #2 above).
If you explicitly declare a variable to represent the number of the last row to consider, use the Long data type.
- Item: FirstRow.
- VBA Construct: Counter End of For… Next statement.
- Description: Number of the first row (closer to the top of the worksheet) you want the macro to consider when identifying blank rows. The number of the first row is also the final value of Counter (item (#2 above).
If you explicitly declare a variable to represent the number of the first row to consider, use the Long data type.
- Item: Step -1.
- VBA Construct: Step of For… Next statement.
- Description: Amount by which Counter (item #2 above) changes every time a loop iteration occurs.
In this scenario, you loop backwards: from LastRow (item #3 above) to FirstRow (item #4 above). Therefore, step is -1.
Line #3: If WorksheetFunction.CountA(.Rows(Counter)) = 0 Then
- Item: If… Then.
- VBA Construct: Opening line of If… Then… Else statement.
- Description: Conditionally executes the statements within the If… Then block (lines #4 through #8 below) if the condition specified by item #4 below is met.
- Item: WorksheetFunction.CountA.
- VBA Construct: WorksheetFunction.CountA method.
- Description: Counts the number of cells that aren’t empty in the range returned by item #3 below.
Since the range returned by item #3 below represents the row through which the macro is currently looping, Worksheet.CountA counts the number of cells that aren’t empty in that row.
- Item: .Rows(Counter).
- VBA Construct: Worksheet.Rows property.
- Description: Returns a Range object representing the row through which the macro is currently looping.
- Item: WorksheetFunction.CountA(.Rows(Counter)) = 0.
- VBA Construct: Condition of If… Then… Else statement.
- Description: This condition is a numeric expression that evaluates to True or False, as follows:
- True: When the WorksheetFunction.CountA method (item #2 above) returns 0. This happens when the row through which the macro is currently looping (item #3 above) is empty and, therefore, the number of non-empty cells is 0.
- False: When WorksheetFunction.CountA returns a number other than 0. This happens when the row through which the macro is currently looping isn’t empty and, therefore, the number of non-empty cells isn’t 0.
Line #4: If Not BlankRows Is Nothing Then
- Item: If… Then.
- VBA Construct: Opening line of If… Then… Else statement.
- Description: Conditionally executes the statement within the If… Then… Else block (line #5 below) if the condition specified by item #6 below is met.
- Item: Not.
- VBA Construct: Not operator.
- Description: Carries out a logical negation on item #3 below. In other words, if item #3 returns:
- True, the result is False.
- False, the result is True.
- Item: BlankRows.
- VBA Construct: Object (Range) variable.
- Description: Holds a Range object representing the empty rows found by the macro.
- Item: Is.
- VBA Construct: Is Operator.
- Description: Compares 2 object reference variables: (i) Not BlankRows (items #2 and #3 above) vs. (ii) Nothing (item #5 below).
If both object references refer to the same object, the Is operator returns True. If they refer to different objects, Is returns False.
- Item: Nothing.
- Description: The default value for a data type. In the case of an object variable (such as BlankRows), a null reference.
- Item: Not BlankRows Is Nothing.
- VBA Construct: Condition of If… Then… Else statement.
- Description: The condition is an expression that evaluates to True or False, as follows:
- True: When “Not BlankRows” (items #2 and #3 above) refers to the same object as Nothing (item #5 above). This happens when BlankRows is “something”.
Since BlankRows holds a Range object representing cell ranges within the empty rows found by the macro, BlankRows is something if the macro finds at least one such row.
- False: When “Not BlankRows” refers to a different object from Nothing. This happens when BlankRows itself is Nothing. This occurs prior to the macro finding the first empty row. This is because BlankRows isn’t assigned to anything prior to that moment.
- True: When “Not BlankRows” (items #2 and #3 above) refers to the same object as Nothing (item #5 above). This happens when BlankRows is “something”.
Line #5: Set BlankRows = Union(BlankRows, .Rows(Counter))
- Item: Set… =.
- VBA Construct: Set statement.
- Description: Assigns the object reference returned by item #6 below to BlankRows (item #2 below).
- Item: BlankRows.
- VBA Construct: Object (Range) variable of Set statement.
- Description:
- Holds a Range object representing the empty rows found by the macro.
- BlankRows is included twice in the statement. In the first mention (Set BlankRows), BlankRows is the object variable to which an object reference is assigned.
- Item: Union.
- VBA Construct: Application.Union method.
- Description: Returns a Range object representing the union of the Range objects returned by items #4 and #5 below.
- Item: BlankRows.
- VBA Construct: Object (Range) variable.
- Description:
- Holds a Range object representing the empty rows found by the macro.
- BlankRows is included twice in the statement. In the second mention (Union(BlankRows, .Rows(Counter)), BlankRows is one of the parameters of the Application.Union method.
- Item: .Rows(Counter).
- VBA Construct: Worksheet.Rows property.
- Description: Returns a Range object representing the row through which the macro is currently looping.
- Item: Union(BlankRows, .Rows(Counter).
- VBA Construct: Object expression of Set statement.
- Description: Returns the new Range object reference assigned to the BlankRows object variable (item #2 above). This is the union of the following 2 Range objects:
- Prior to the Set statement, BlankRows represents cell ranges within the empty rows found by the macro prior to the row through which it’s currently looping.
- “.Rows(Counter)” represents the row through which the macro is currently looping.
Graphically, this looks as follows:
")
In other words, any empty row the macro finds is “added” to BlankRows.
")
Line #6: Else
- Item: Else.
- VBA Construct: Else clause of If… Then… Else statement.
- Description: The statement following the Else clause (line #7 below) is executed if the condition tested in the opening line of the If… Then… Else statement (line #4 above) isn’t met and returns False.
Line #7: Set BlankRows = .Rows(Counter)
- Item: Set… =.
- VBA Construct: Set statement.
- Description: Assigns the object reference returned by item #3 below to BlankRows (item #2 below).
- Item: BlankRows.
- VBA Construct: Object (Range) variable of Set statement.
- Description: Holds a Range object representing the empty rows found by the macro.
- Item: .Rows(Counter).
- VBA Construct: Worksheet.Rows property.
- Description: Returns a Range object representing the row through which the macro is currently looping.
Lines #8 and #9: End If | End If
- Item: End If.
- VBA Construct: Closing lines of If… Then… Else statements.
- Description: Ends the If… Then… Else statements that began in lines #3 and #4 above.
Line #12: If Not BlankRows Is Nothing Then BlankRows.Delete
- Item: If… Then.
- VBA Construct: If… Then… Else statement.
- Description: Conditionally executes the statement at the end of the line (items #7 and #8 below) if the condition specified by item #6 below is met.
- Item: Not.
- VBA Construct: Not operator.
- Description: Carries out a logical negation on item #3 below. In other words, if item #3 returns:
- True, the result is False.
- False, the result is True.
- Item: BlankRows.
- VBA Construct: Object (Range) variable.
- Description: Holds a Range object representing the empty rows found by the macro.
- Item: Is.
- VBA Construct: Is Operator.
- Description: Compares 2 object reference variables: (i) Not BlankRows (items #2 and #3 above) vs. (ii) Nothing (item #5 below).
If both object references refer to the same object, the Is operator returns True. If they refer to different objects, Is returns False.
- Item: Nothing.
- Description: The default value for a data type. In the case of an object variable (such as BlankRows), a null reference.
- Item: Not BlankRows Is Nothing.
- VBA Construct: Condition of If… Then… Else statement.
- Description: The condition is an expression that evaluates to True or False, as follows:
- True: When “Not BlankRows” (items #2 and #3 above) refers to the same object as Nothing (item #5 above). This happens when BlankRows is “something”.
Since BlankRows holds a Range object representing cell ranges within the empty rows found by the macro, BlankRows is something if the macro has found at least 1 empty row.
- False: When “Not BlankRows” refers to a different object from Nothing. This happens when BlankRows itself is Nothing. This, in turn, occurs when the macro founds no empty rows.
- True: When “Not BlankRows” (items #2 and #3 above) refers to the same object as Nothing (item #5 above). This happens when BlankRows is “something”.
- Item: BlankRows.
- VBA Construct: Object (Range) variable.
- Description: Holds a Range object representing the empty rows found by the macro.
- Item: Delete.
- VBA Construct: Range.Delete method.
- Description: Deletes the Range object returned by item #7 above.
Macro Example
The following macro deletes all blank rows between rows number myFirstRow and LastRow.
- myFirstRow is set to 6.
- myLastRow is set to the number of the last row with data in the worksheet named “Delete empty rows”. The constructs used by the statement that finds the last row with data in the worksheet are the Worksheet.Cells property, the Range.Find method, and the Range.Row property.
Sub deleteEmptyRows()

    'Source: https://powerspreadsheets.com/
    'For further information: https://powerspreadsheets.com/excel-vba-delete-row/

    Dim myFirstRow As Long
    Dim myLastRow As Long
    Dim myWorksheet As Worksheet
    Dim iCounter As Long
    Dim myBlankRows As Range

    myFirstRow = 6

    Set myWorksheet = Worksheets("Delete empty rows")

    With myWorksheet
        myLastRow = .Cells.Find(What:="*", LookIn:=xlFormulas, LookAt:=xlPart, SearchOrder:=xlByRows, SearchDirection:=xlPrevious).Row
        For iCounter = myLastRow To myFirstRow Step -1
            If WorksheetFunction.CountA(.Rows(iCounter)) = 0 Then
                If Not myBlankRows Is Nothing Then
                    Set myBlankRows = Union(myBlankRows, .Rows(iCounter))
                Else
                    Set myBlankRows = .Rows(iCounter)
                End If
            End If
        Next iCounter
    End With

    If Not myBlankRows Is Nothing Then myBlankRows.Delete

End Sub
Effects of Executing Macro Example
The following GIF illustrates the results of executing this macro example. As expected, VBA deletes all blank rows between row 6 and the last row with data on the worksheet.

#7: Delete Rows with Blank Cells
VBA Code to Delete Rows with Blank Cells
To delete rows with blank cells using VBA, use a macro with the following statement structure:
With Worksheet
    Set RangeForCriteria = .Range(.Cells(FirstRow, FirstColumn), .Cells(LastRow, LastColumn))
End With
On Error Resume Next
RangeForCriteria.SpecialCells(xlCellTypeBlanks).EntireRow.Delete
Process Followed by VBA Code

VBA Statement Explanation
Lines #1 and #3: With Worksheet | End With
- Item: With… End With.
- VBA Construct: With… End With statement.
- Description: The statement within the With… End With statement (line #2 below) is executed on the worksheet returned by item #2 below.
- Item: Worksheet.
- VBA Construct: Workbook.Worksheets property.
- Description: Returns a Worksheet object representing the worksheet you work with.
Line #2: Set RangeForCriteria = .Range(.Cells(FirstRow, FirstColumn), .Cells(LastRow, LastColumn))
- Item: Set… =.
- VBA Construct: Set statement.
- Description: Assigns the object reference returned by items #3 through #5 below to RangeForCriteria (item #2 below).
- Item: RangeForCriteria.
- VBA Construct: Object (Range) variable.
- Description: Holds a Range object representing the cell range you want the macro to search for blank cells.
- Item: .Range.
- VBA Construct: Worksheet.Range property.
- Description: Returns a Range object representing a cell range specified as follows:
- Upper-left corner cell: Range object returned by item #4 below.
- Lower-right corner cell: Range object returned by item #5 below.
- Item: .Cells(FirstRow, FirstColumn).
- VBA Construct: Worksheet.Cells property and Range.Item property.
- Description: Returns a Range object representing the cell at the intersection of row number FirstRow and column number FirstColumn.
FirstRow and FirstColumn are the number of, respectively, the first row and first column in the cell range you want the macro to search for blank cells. If you explicitly declare a variable to represent FirstRow or FirstColumn, use the Long data type.
- Item: .Cells(LastRow, LastColumn).
- VBA Construct: Worksheet.Cells property and Range.Item property.
- Description: Returns a Range object representing the cell at the intersection of row number LastRow and column number LastColumn.
LastRow and LastColumn are the number of, respectively, the last row and last column in the cell range you want the macro to search for blank cells. If you explicitly declare a variable to represent LastRow or LastColumn, use the Long data type.
Line #4: On Error Resume Next
- Item: On Error Resume Next.
- VBA Construct: On Error Resume Next statement.
- Description: Specifies that, when a run-time error occurs, control goes to the statement following the statement where the error occurs.
The error-handler in this line #4 is necessary because, if the cell range you want the macro to search for blank cells doesn’t contain any such cells, line #5 below generates a run-time error.
Line #5: RangeForCriteria.SpecialCells(xlCellTypeBlanks).EntireRow.Delete
- Item: RangeForCriteria.
- VBA Construct: Object (Range) variable.
- Description: Holds a Range object representing the cell range you want the macro to search for blank cells.
- Item: SpecialCells(xlCellTypeBlanks).
- VBA Construct: Range.SpecialCells method and Type parameter of Range.SpecialCells method.
- Description: Returns a Range object representing all empty cells within the cell range returned by RangeForCriteria (item #1 above).
- Item: EntireRow.
- VBA Construct: Range.EntireRow property.
- Description: Returns a Range object representing the entire rows containing the Range object returned by item #2 above.
- Item: Delete.
- VBA Construct: Range.Delete method.
- Description: Deletes the Range object returned by item #3 above.
Macro Example
The following macro deletes all rows with blank cells between:
- Rows number myFirstRow and myLastRow.
- Columns number myFirstColumn and myLastColumn.
In this example:
- myFirstRow is set to 6.
- myFirstColumn is set to 2.
- myLastRow is set to the number of the last row with data in the worksheet named “Delete row with blank cells”. The constructs used by the statement that finds the last row with data in the worksheet are the Worksheet.Cells property, the Range.Find method, and the Range.Row property.
- myLastColumn is set to the number of the last column with data in the same worksheet. The constructs used by the statement that finds the last column with data in the worksheet are the Worksheet.Cells property, the Range.Find method, and the Range.Column property.
Sub deleteRowBlankCells()

    'Source: https://powerspreadsheets.com/
    'For further information: https://powerspreadsheets.com/excel-vba-delete-row/

    Dim myFirstRow As Long
    Dim myLastRow As Long
    Dim myFirstColumn As Long
    Dim myLastColumn As Long
    Dim myWorksheet As Worksheet
    Dim myRange As Range

    myFirstRow = 6
    myFirstColumn = 2

    Set myWorksheet = Worksheets("Delete row with blank cells")

    With myWorksheet
        With .Cells
            myLastRow = .Find(What:="*", LookIn:=xlFormulas, LookAt:=xlPart, SearchOrder:=xlByRows, SearchDirection:=xlPrevious).Row
            myLastColumn = .Find(What:="*", LookIn:=xlFormulas, LookAt:=xlPart, SearchOrder:=xlByColumns, SearchDirection:=xlPrevious).Column
        End With
        Set myRange = .Range(.Cells(myFirstRow, myFirstColumn), .Cells(myLastRow, myLastColumn))
    End With

    On Error Resume Next
    myRange.SpecialCells(xlCellTypeBlanks).EntireRow.Delete

End Sub
Effects of Executing Macro Example
The following GIF illustrates the results of executing this macro example. As expected, VBA deletes all rows with blank cells between (i) row 6 and the last row with data on the worksheet, and (ii) column 2 and the last column with data on the worksheet.

#8: Delete Rows with Blank Cells in a Specific Column
VBA Code to Delete Rows with Blank Cells in a Specific Column
To delete rows with blank cells in a specific column using VBA, use a macro with the following statement structure:
With Worksheet
    With .Range(.Cells(FirstRow, FirstColumn), .Cells(LastRow, LastColumn))
        .AutoFilter Field:=CriteriaField, Criteria1:="="
        On Error Resume Next
        .Offset(RowOffset:=1).Resize(RowSize:=(.Rows.Count - 1)).SpecialCells(xlCellTypeVisible).EntireRow.Delete
    End With
    .AutoFilterMode = False
End With
Process Followed by VBA Code

VBA Statement Explanation
Lines #1 and #8: With Worksheet | End With
- Item: With… End With.
- VBA Construct: With… End With statement.
- Description: Statements within the With… End With statement (lines #2 through #7 below) are executed on the worksheet returned by item #2 below.
- Item: Worksheet.
- VBA Construct: Workbook.Worksheets property.
- Description: Returns a Worksheet object representing the worksheet you work with.
Lines #2 and #6: With .Range(.Cells(FirstRow, FirstColumn), .Cells(LastRow, LastColumn)) | End With
- Item: With… End With.
- VBA Construct: With… End With statement.
- Description: Statements within the With… End With statement (lines #3 through #6 below) are executed on the range object returned by items #2 through #4 below.
- Item: .Range.
- VBA Construct: Worksheet.Range property.
- Description: Returns a Range object representing a cell range specified as follows:
- Upper-left corner cell: Range object returned by item #3 below.
- Lower-right corner cell: Range object returned by item #4 below.
- Item: .Cells(FirstRow, FirstColumn).
- VBA Construct: Worksheet.Cells property and Range.Item property.
- Description: Returns a Range object representing the cell at the intersection of row number FirstRow and column number FirstColumn.
FirstRow and FirstColumn are the number of, respectively, the first row and first column in the cell range you work with. If you explicitly declare a variable to represent FirstRow or FirstColumn, use the Long data type.
- Item: .Cells(LastRow, LastColumn).
- VBA Construct: Worksheet.Cells property and Range.Item property.
- Description: Returns a Range object representing the cell at the intersection of row number LastRow and column number LastColumn.
LastRow and LastColumn are the number of, respectively, the last row and last column in the cell range you work with. If you explicitly declare a variable to represent LastRow or LastColumn, use the Long data type.
Line #3: .AutoFilter Field:=CriteriaField, Criteria1:=”=”
- Item: .AutoFilter.
- VBA Construct: Range.AutoFilter method.
- Description: Filter the data within the range you work with using the AutoFilter and according to the parameters specified by items #2 and #3 below.
- Item: Field:=CriteriaField.
- VBA Construct: Field parameter of Range.AutoFilter method.
- Description: Specifies the field on which you want to base the filter. The leftmost field of the range you work with is Field 1. The rightmost field is the number of fields in the cell range you work with.
If you explicitly declare a variable to represent CriteriaField, use the Long data type.
- Item: Criteria1:=”=”.
- VBA Construct: Criteria1 parameter of Range.AutoFilter method.
- Description: Specifies the filtering criteria. “=” finds blank cells.
Line #4: On Error Resume Next
- Item: On Error Resume Next.
- VBA Construct: On Error Resume Next statement.
- Description: Specifies that, when a run-time error occurs, control goes to the statement following the statement where the error occurs.
The error-handler in this line #4 is necessary because, if the field you filter by (line #3 above) doesn’t contain blank cells, line #5 below generates a run-time error.
Line #5: .Offset(RowOffset:=1).Resize(RowSize:=(.Rows.Count – 1)).SpecialCells(xlCellTypeVisible).EntireRow.Delete
- Item: Offset.
- VBA Construct: Range.Offset property.
- Description: Returns a Range object a number of rows above or below the cell range it works with, as returned by line #2 above.
- Item: RowOffset:=1.
- VBA Construct: RowOffset parameter of Range.Offset property.
- Description: Specifies that the cell range returned by Range.Offset (item #1 above) is 1 row below the range specified in line #2 above.
Line #2 above specifies the cell range you work with. Therefore, the Range object that Range.Offset returns has the same size but is 1 row below the cell range you work with. This results in the following:
- The headers of the cell range you work with are excluded from the Range object.
- The first empty row below the last row with data (LastRow in line #2 above) is included. This extra line is handled by item #7 below.
- Item: Resize.
- VBA Construct: Range.Resize property.
- Description: Resizes the cell range returned by items #1 and #2 above.
- Item: RowSize.
- VBA Construct: RowSize parameter of Range.Resize property.
- Description: Specifies the number of rows in the new cell range returned by Range.Resize (item #3 above).
- Item: Rows.
- VBA Construct: Range.Rows property.
- Description: Returns a Range object representing the rows in the cell range it works with, as returned by line #2 above.
- Item: Count.
- VBA Construct: Range.Count property.
- Description: Returns the number of rows within the Range object returned by item #5 above.
- Item: Resize(RowSize:=(.Rows.Count – 1)).
- VBA Construct: Range.Resize property.
- Description: Resizes the cell range returned by items #1 and #2 above to reduce it by one row. The number of rows in the new range is obtained by subtracting 1 from the number of rows returned by line #2, as counted by items #5 and #6 above.
This results in a cell range that excludes the first empty row below the last row with data that the Range.Offset property (items #1 and #2 above) included.
- Item: SpecialCells(xlCellTypeVisible).
- VBA Construct: Range.SpecialCells method and Type parameter of Range.SpecialCells method.
- Description: Returns a Range object representing all visible cells within the cell range you work with, excluding the headers (as required by item #2 above).
Since line #3 above filters the data according to the criteria you specify, the visible cells returned by Range.SpecialCells are those containing blank cells in the column (field) you specify.
- Item: EntireRow.
- VBA Construct: Range.EntireRow property.
- Description: Returns a Range object representing the entire rows containing the Range object returned by item #8 above.
- Item: Delete.
- VBA Construct: Range.Delete method.
- Description: Deletes the Range object returned by item #10 above.
Line #7: .AutoFilterMode = False
- Item: .AutoFilterMode = False.
- VBA Construct: Worksheet.AutoFilterMode property.
- Description: Specifies that the AutoFilter drop-down arrows aren’t displayed on the worksheet.
Macro Example
The following macro deletes all rows that meet the following conditions:
- Are between:
- Rows number (myFirstRow + 1) and myLastrow.
- Columns number myFirstColumn and myLastColumn.
- Contain a blank cell in field number myCriteriaField.
In this example:
- myFirstRow is set to 5.
- myFirstColumn is set to 2.
- myCriteriaField is set to 1.
- myLastRow is set to the number of the last row with data in the worksheet named “Delete row if cell is blank”. The constructs used by the statement that finds the last row with data in the worksheet are the Worksheet.Cells property, the Range.Find method, and the Range.Row property.
- myLastColumn is set to the number of the last column with data in the same worksheet. The constructs used by the statement that finds the last column with data in the worksheet are the Worksheet.Cells property, the Range.Find method, and the Range.Column property.
Sub deleteRowBlankCell()

    'Source: https://powerspreadsheets.com/
    'For further information: https://powerspreadsheets.com/excel-vba-delete-row/

    Dim myFirstRow As Long
    Dim myLastRow As Long
    Dim myFirstColumn As Long
    Dim myLastColumn As Long
    Dim myCriteriaField As Long
    Dim myWorksheet As Worksheet

    myFirstRow = 5
    myFirstColumn = 2
    myCriteriaField = 1

    Set myWorksheet = Worksheets("Delete row if cell is blank")

    With myWorksheet
        With .Cells
            myLastRow = .Find(What:="*", LookIn:=xlFormulas, LookAt:=xlPart, SearchOrder:=xlByRows, SearchDirection:=xlPrevious).Row
            myLastColumn = .Find(What:="*", LookIn:=xlFormulas, LookAt:=xlPart, SearchOrder:=xlByColumns, SearchDirection:=xlPrevious).Column
        End With
        With .Range(.Cells(myFirstRow, myFirstColumn), .Cells(myLastRow, myLastColumn))
            .AutoFilter Field:=myCriteriaField, Criteria1:="="
            On Error Resume Next
            .Offset(RowOffset:=1).Resize(RowSize:=(.Rows.Count - 1)).SpecialCells(xlCellTypeVisible).EntireRow.Delete
        End With
        .AutoFilterMode = False
    End With

End Sub
Effects of Executing Macro Example
The following GIF illustrates the results of executing this macro example. As expected, VBA deletes the rows containing blank cells in myCriteriaField (1).

#9: Delete Rows Containing Strings
VBA Code to Delete Rows Containing Strings
To delete rows containing strings using VBA, use a macro with the following statement structure:
With Worksheet
    Set RangeForCriteria = .Range(.Cells(FirstRow, FirstColumn), .Cells(LastRow, LastColumn))
End With
On Error Resume Next
RangeForCriteria.SpecialCells(xlCellTypeConstants, xlTextValues).EntireRow.Delete
Process Followed by VBA Code

VBA Statement Explanation
Lines #1 and #3: With Worksheet | End With
- Item: With… End With.
- VBA Construct: With… End With statement.
- Description: The statement within the With… End With statement (line #2 below) is executed on the worksheet returned by item #2 below.
- Item: Worksheet.
- VBA Construct: Workbook.Worksheets property.
- Description: Returns a Worksheet object representing the worksheet you work with.
Line #2: Set RangeForCriteria = .Range(.Cells(FirstRow, FirstColumn), .Cells(LastRow, LastColumn))
- Item: Set… =.
- VBA Construct: Set statement.
- Description: Assigns the object reference returned by items #3 through #5 below to RangeForCriteria (item #2 below).
- Item: RangeForCriteria.
- VBA Construct: Object (Range) variable.
- Description: Holds a Range object representing the cell range you want the macro to search for cells containing strings.
- Item: .Range.
- VBA Construct: Worksheet.Range property.
- Description: Returns a Range object representing a cell range specified as follows:
- Upper-left corner cell: Range object returned by item #4 below.
- Lower-right corner cell: Range object returned by item #5 below.
- Item: .Cells(FirstRow, FirstColumn).
- VBA Construct: Worksheet.Cells property and Range.Item property.
- Description: Returns a Range object representing the cell at the intersection of row number FirstRow and column number FirstColumn.
FirstRow and FirstColumn are the number of, respectively, the first row and first column in the cell range you want the macro to search for cells containing strings. If you explicitly declare a variable to represent FirstRow or FirstColumn, use the Long data type.
- Item: .Cells(LastRow, LastColumn).
- VBA Construct: Worksheet.Cells property and Range.Item property.
- Description: Returns a Range object representing the cell at the intersection of row number LastRow and column number LastColumn.
LastRow and LastColumn are the number of, respectively, the last row and last column in the cell range you want the macro to search for cells containing strings. If you explicitly declare a variable to represent LastRow or LastColumn, use the Long data type.
Line #4: On Error Resume Next
- Item: On Error Resume Next.
- VBA Construct: On Error Resume Next statement.
- Description: Specifies that, when a run-time error occurs, control goes to the statement following the statement where the error occurs.
The error-handler in this line #4 is necessary because, if the cell range you want the macro to search for cells containing strings doesn’t contain any such cells, line #5 below generates a run-time error.
Line #5: RangeForCriteria.SpecialCells(xlCellTypeConstants, xlTextValues).EntireRow.Delete
- Item: RangeForCriteria.
- VBA Construct: Object (Range) variable.
- Description: Holds a Range object representing the cell range you want the macro to search for cells containing strings.
- Item: SpecialCells(xlCellTypeConstants, xlTextValues).
- VBA Construct: Range.SpecialCells method, Type and Value parameters of Range.SpecialCells method.
- Description: Returns a Range object representing all cells containing constant (xlCellTypeConstants) text values (xlTextValues) within the cell range returned by RangeForCriteria (item #1 above). Those are the cells containing strings.
- Item: EntireRow.
- VBA Construct: Range.EntireRow property.
- Description: Returns a Range object representing the entire rows containing the Range object returned by item #2 above.
- Item: Delete.
- VBA Construct: Range.Delete method.
- Description: Deletes the Range object returned by item #3 above.
Macro Example
The following macro deletes all rows containing strings between:
- Rows number myFirstRow and myLastRow.
- Columns number myFirstColumn and myLastColumn.
In this example:
- myFirstRow is set to 6.
- myFirstColumn is set to 2.
- myLastRow is set to the number of the last row with data in the worksheet named “Delete rows containing strings”. The constructs used by the statement that finds the last row with data in the worksheet are the Worksheet.Cells property, the Range.Find method, and the Range.Row property.
- myLastColumn is set to the number of the last column with data in the same worksheet. The constructs used by the statement that finds the last column with data in the worksheet are the Worksheet.Cells property, the Range.Find method, and the Range.Column property.
Sub deleteRowContainingStrings()

    'Source: https://powerspreadsheets.com/
    'For further information: https://powerspreadsheets.com/excel-vba-delete-row/

    Dim myFirstRow As Long
    Dim myLastRow As Long
    Dim myFirstColumn As Long
    Dim myLastColumn As Long
    Dim myWorksheet As Worksheet
    Dim myRange As Range

    myFirstRow = 6
    myFirstColumn = 2

    Set myWorksheet = Worksheets("Delete rows containing strings")

    With myWorksheet
        With .Cells
            myLastRow = .Find(What:="*", LookIn:=xlFormulas, LookAt:=xlPart, SearchOrder:=xlByRows, SearchDirection:=xlPrevious).Row
            myLastColumn = .Find(What:="*", LookIn:=xlFormulas, LookAt:=xlPart, SearchOrder:=xlByColumns, SearchDirection:=xlPrevious).Column
        End With
        Set myRange = .Range(.Cells(myFirstRow, myFirstColumn), .Cells(myLastRow, myLastColumn))
    End With

    On Error Resume Next
    myRange.SpecialCells(xlCellTypeConstants, xlTextValues).EntireRow.Delete

End Sub
Effects of Executing Macro Example
The following GIF illustrates the results of executing this macro example. As expected, VBA deletes all rows containing strings between (i) row 6 and the last row with data on the worksheet, and (ii) column 2 and the last column with data on the worksheet.

#10: Delete Row Based on Cell Value
VBA Code to Delete Row Based on Cell Value
To delete rows based on the value in a specific cell using VBA, use a macro with the following statement structure:
With Worksheet
    With .Range(.Cells(FirstRow, FirstColumn), .Cells(LastRow, LastColumn))
        .AutoFilter Field:=CriteriaField, Criteria1:=Value
        On Error Resume Next
        .Offset(RowOffset:=1).Resize(RowSize:=(.Rows.Count - 1)).SpecialCells(xlCellTypeVisible).EntireRow.Delete
    End With
    .AutoFilterMode = False
End With
Process Followed by VBA Code

VBA Statement Explanation
Lines #1 and #8: With Worksheet | End With
- Item: With… End With.
- VBA Construct: With… End With statement.
- Description: Statements within the With… End With statement (lines #2 through #7 below) are executed on the worksheet returned by item #2 below.
- Item: Worksheet.
- VBA Construct: Workbook.Worksheets property.
- Description: Returns a Worksheet object representing the worksheet you work with.
Lines #2 and #6: With .Range(.Cells(FirstRow, FirstColumn), .Cells(LastRow, LastColumn)) | End With
- Item: With… End With.
- VBA Construct: With… End With statement.
- Description: Statements within the With… End With statement (lines #3 through #6 below) are executed on the range object returned by items #2 through #4 below.
- Item: .Range.
- VBA Construct: Worksheet.Range property.
- Description: Returns a Range object representing a cell range specified as follows:
- Upper-left corner cell: Range object returned by item #3 below.
- Lower-right corner cell: Range object returned by item #4 below.
- Item: .Cells(FirstRow, FirstColumn).
- VBA Construct: Worksheet.Cells property and Range.Item property.
- Description: Returns a Range object representing the cell at the intersection of row number FirstRow and column number FirstColumn.
FirstRow and FirstColumn are the number of, respectively, the first row and first column in the cell range you work with. If you explicitly declare a variable to represent FirstRow or FirstColumn, use the Long data type.
- Item: .Cells(LastRow, LastColumn).
- VBA Construct: Worksheet.Cells property and Range.Item property.
- Description: Returns a Range object representing the cell at the intersection of row number LastRow and column number LastColumn.
LastRow and LastColumn are the number of, respectively, the last row and last column in the cell range you work with. If you explicitly declare a variable to represent LastRow or LastColumn, use the Long data type.
Line #3: .AutoFilter Field:=CriteriaField, Criteria1:=Value
- Item: .AutoFilter.
- VBA Construct: Range.AutoFilter method.
- Description: Filter the data within the range you work with using the AutoFilter and according to the parameters specified by items #2 and #3 below.
- Item: Field:=CriteriaField.
- VBA Construct: Field parameter of Range.AutoFilter method.
- Description: Specifies the field on which you want to base the filter. The leftmost field of the range you work with is Field 1. The rightmost field is the number of fields in the cell range you work with.
If you explicitly declare a variable to represent CriteriaField, use the Long data type.
- Item: Criteria1:=Value.
- VBA Construct: Criteria1 parameter of Range.AutoFilter method.
- Description: Specifies the filtering criteria. If you explicitly declare a variable to represent Value, ensure that the data type you use can handle the value you use as criteria.
Line #4: On Error Resume Next
- Item: On Error Resume Next.
- VBA Construct: On Error Resume Next statement.
- Description: Specifies that, when a run-time error occurs, control goes to the statement following the statement where the error occurs.
The error-handler in this line #4 is necessary because, if the field you filter by (line #3 above) doesn’t contain cells with the value you use as criteria, line #5 below generates a run-time error.
Line #5: .Offset(RowOffset:=1).Resize(RowSize:=(.Rows.Count – 1)).SpecialCells(xlCellTypeVisible).EntireRow.Delete
- Item: Offset.
- VBA Construct: Range.Offset property.
- Description: Returns a Range object a number of rows above or below the cell range it works with, as returned by line #2 above.
- Item: RowOffset:=1.
- VBA Construct: RowOffset parameter of Range.Offset property.
- Description: Specifies that the cell range returned by Range.Offset (item #1 above) is 1 row below the range specified in line #2 above.
Line #2 above specifies the cell range you work with. Therefore, the Range object that Range.Offset returns has the same size but is 1 row below the cell range you work with. This results in the following:
- The headers of the cell range you work with are excluded from the Range object.
- The first empty row below the last row with data (LastRow in line #2 above) is included. This extra line is handled by item #7 below.
- Item: Resize.
- VBA Construct: Range.Resize property.
- Description: Resizes the cell range returned by items #1 and #2 above.
- Item: RowSize.
- VBA Construct: RowSize parameter of Range.Resize property.
- Description: Specifies the number of rows in the new cell range returned by Range.Resize (item #3 above).
- Item: Rows.
- VBA Construct: Range.Rows property.
- Description: Returns a Range object representing the rows in the cell range it works with, as returned by line #2 above.
- Item: Count.
- VBA Construct: Range.Count property.
- Description: Returns the number of rows within the Range object returned by item #5 above.
- Item: Resize(RowSize:=(.Rows.Count – 1)).
- VBA Construct: Range.Resize property.
- Description: Resizes the cell range returned by items #1 and #2 above to reduce it by one row. The number of rows in the new range is obtained by subtracting 1 from the number of rows returned by line #2, as counted by items #5 and #6 above.
This results in a cell range that excludes the first empty row below the last row with data that the Range.Offset property (items #1 and #2 above) included.
- Item: SpecialCells(xlCellTypeVisible).
- VBA Construct: Range.SpecialCells method and Type parameter of Range.SpecialCells method.
- Description: Returns a Range object representing all visible cells within the cell range you work with, excluding the headers (as required by item #2 above).
Since line #3 above filters the data according to the criteria you specify, the visible cells returned by Range.SpecialCells are those containing the value you’re looking for in the column (field) you specify.
- Item: EntireRow.
- VBA Construct: Range.EntireRow property.
- Description: Returns a Range object representing the entire rows containing the Range object returned by item #8 above.
- Item: Delete.
- VBA Construct: Range.Delete method.
- Description: Deletes the Range object returned by item #10 above.
Line #7: .AutoFilterMode = False
- Item: .AutoFilterMode = False.
- VBA Construct: Worksheet.AutoFilterMode property.
- Description: Specifies that the AutoFilter drop-down arrows aren’t displayed on the worksheet.
Macro Example
The following macro deletes all rows that meet the following conditions:
- Are between:
- Rows number (myFirstRow + 1) and myLastRow.
- Columns number myFirstColumn and myLastColumn.
- Contain the value myValue in field number myCriteriaField.
In this example:
- myFirstRow is set to 5.
- myFirstColumn is set to 2.
- myCriteriaField is set to 1.
- myValue is set to 5.
- myLastRow is set to the number of the last row with data in the worksheet named “Delete row based on value”. The constructs used by the statement that finds the last row with data in the worksheet are the Worksheet.Cells property, the Range.Find method, and the Range.Row property.
- myLastColumn is set to the number of the last column with data in the same worksheet. The constructs used by the statement that finds the last column with data in the worksheet are the Worksheet.Cells property, the Range.Find method, and the Range.Column property.
Sub deleteRowBasedOnValue()

    'Source: https://powerspreadsheets.com/
    'For further information: https://powerspreadsheets.com/excel-vba-delete-row/

    Dim myFirstRow As Long
    Dim myLastRow As Long
    Dim myFirstColumn As Long
    Dim myLastColumn As Long
    Dim myCriteriaField As Long
    Dim myValue As Double
    Dim myWorksheet As Worksheet

    myFirstRow = 5
    myFirstColumn = 2
    myCriteriaField = 1
    myValue = 5

    Set myWorksheet = Worksheets("Delete row based on value")

    With myWorksheet
        With .Cells
            myLastRow = .Find(What:="*", LookIn:=xlFormulas, LookAt:=xlPart, SearchOrder:=xlByRows, SearchDirection:=xlPrevious).Row
            myLastColumn = .Find(What:="*", LookIn:=xlFormulas, LookAt:=xlPart, SearchOrder:=xlByColumns, SearchDirection:=xlPrevious).Column
        End With
        With .Range(.Cells(myFirstRow, myFirstColumn), .Cells(myLastRow, myLastColumn))
            .AutoFilter Field:=myCriteriaField, Criteria1:=myValue
            On Error Resume Next
            .Offset(RowOffset:=1).Resize(RowSize:=(.Rows.Count - 1)).SpecialCells(xlCellTypeVisible).EntireRow.Delete
        End With
        .AutoFilterMode = False
    End With

End Sub
Effects of Executing Macro Example
The following GIF illustrates the results of executing this macro example. As expected, VBA deletes the rows containing myValue (5) in myCriteriaField (1).

#11: Delete Row Based on Date
VBA Code to Delete Row Based on Date
To delete rows based on the date in a specific cell using VBA, use a macro with the following statement structure:
With Worksheet
    For Counter = LastRow To FirstRow Step -1
        With .Cells(Counter, CriteriaColumn)
            If .Value = Date Then
                If Not RowsWithDate Is Nothing Then
                    Set RowsWithDate = Union(RowsWithDate, .Cells)
                Else
                    Set RowsWithDate = .Cells
                End If
            End If
        End With
    Next Counter
End With
If Not RowsWithDate Is Nothing Then RowsWithDate.EntireRow.Delete
Process Followed by VBA Code

VBA Statement Explanation
Lines #1 and #13: With Worksheet | End With
- Item: With… End With.
- VBA Construct: With… End With statement.
- Description: Statements within the With… End With statement (lines #2 through #12 below) are executed on the worksheet returned by item #2 below.
- Item: Worksheet.
- VBA Construct: Workbook.Worksheets property.
- Description: Returns a Worksheet object representing the worksheet you work with.
Lines #2 and #12: For Counter = LastRow To FirstRow Step -1 | Next Counter
- Item: For… Next Counter.
- VBA Construct: For… Next statement.
- Description: Repeats the statements within the loop (lines #3 through #11 below) for each row between (and including FirstRow (item #4 below) and LastRow (item #3 below).
- Item: Counter.
- VBA Construct: Counter of For… Next statement.
- Description: Loop counter. If you explicitly declare a variable to represent the loop counter, use the Long data type.
- Item: LastRow.
- VBA Construct: Counter Start of For… Next statement.
- Description: Number of the last row (further down the worksheet) you want the macro to consider when identifying blank rows. The number of the last row is also the initial value of Counter (item #2 above).
If you explicitly declare a variable to represent the number of the last row to consider, use the Long data type.
- Item: FirstRow.
- VBA Construct: Counter End of For… Next statement.
- Description: Number of the first row (closer to the top of the worksheet) you want the macro to consider when identifying blank rows. The number of the first row is also the final value of Counter (item (#2 above).
If you explicitly declare a variable to represent the number of the first row to consider, use the Long data type.
- Item: Step -1.
- VBA Construct: Step of For… Next statement.
- Description: Amount by which Counter (item #2 above) changes every time a loop iteration occurs.
In this scenario, you loop backwards: from LastRow (item #3 above) to FirstRow (item #4 above). Therefore, step is -1.
Lines #3 and #11: With .Cells(Counter, CriteriaColumn) | End With
- Item: With… End With.
- VBA Construct: With… End With statement.
- Description: Statements within the With… End With statement (lines #4 through #10 below) are executed on the cell returned by item #2 below.
- Item: .Cells(Counter, CriteriaColumn).
- VBA Construct: Worksheet.Cells property and Range.Item property.
- Description: Returns a Range object representing the cell at the intersection of row number Counter and column number CriteriaColumn.
At any given time, the value of the loop counter (Counter) is the same as that of the row through which the macro is currently looping. CriteriaColumn is the number of the column containing the cells with dates you consider.
Line #4: If .Value = Date Then
- Item: If… Then.
- VBA Construct: Opening line of If… Then… Else statement.
- Description: Conditionally executes the statements within the If… Then block (lines #5 through #9 below) if the condition specified by item #3 below is met.
- Item: .Value.
- VBA Construct: Range.Value property.
- Description: Returns the value of the cell represented by the Range object returned by line #3 above (.Cells(Counter, CriteriaColumn)). This is the value of the cell at the intersection of the row through which the macro is currently looping and the column containing the cells with dates you consider.
- Item: .Value = Date.
- VBA Construct: Condition of If… Then… Else statement.
- Description: This condition is a numeric expression that evaluates to True or False, as follows:
- True: When the value of the cell at the intersection of the row through which the macro is currently looping and the column containing the cells with dates you consider is equal to the date you specify (Date).
- False: When the value of the cell at the intersection of the row through which the macro is currently looping and the column containing the cells with dates you consider isn’t equal to the date you specify (Date).
If you explicitly declare a variable to represent Date, ensure that the data type you use can handle the value you use as criteria. Consider, for example, using the Date data type.
When specifying the date you use as criteria, ensure that you specify the date as a value as required by VBA. For these purposes, you can use VBA constructs such as the DateValue or DateSerial Functions.
Line #5: If Not RowsWithDate Is Nothing Then
- Item: If… Then.
- VBA Construct: Opening line of If… Then… Else statement.
- Description: Conditionally executes the statement within the If… Then… Else block (line #6 below) if the condition specified by item #6 below is met.
- Item: Not.
- VBA Construct: Not operator.
- Description: Carries out a logical negation on item #3 below. In other words, if item #3 returns:
- True, the result is False.
- False, the result is True.
- Item: RowsWithDate.
- VBA Construct: Object (Range) variable.
- Description: Holds a Range object representing the cells in the column you specify (CriteriaColumn in line #3 above) containing the date you use as criteria.
- Item: Is.
- VBA Construct: Is Operator.
- Description: Compares 2 object reference variables: (i) Not RowsWithDate (items #2 and #3 above) vs. (ii) Nothing (item #5 below).
If both object references refer to the same object, the Is operator returns True. If they refer to different objects, Is returns False.
- Item: Nothing.
- Description: The default value for a data type. In the case of an object variable (such as RowsWithDate), a null reference.
- Item: Not RowsWithDate Is Nothing.
- VBA Construct: Condition of If… Then… Else statement.
- Description: The condition is an expression that evaluates to True or False, as follows:
- True: When “Not RowsWithDate” (items #2 and #3 above) refers to the same object as Nothing (item #5 above). This happens when RowsWithDate is “something”.
Since RowsWithDate holds a Range object representing the cells with the criteria date found by the macro in a specific column (CriteriaColumn in line #3 above), RowsWithDate is something after the macro finds the first such cell.
- False: When “Not RowsWithDate” refers to a different object from Nothing. This happens when RowsWithDate itself is Nothing. This occurs prior to the macro finding the first cell with the criteria date. This is because RowsWithDate isn’t assigned to anything prior to that moment.
- True: When “Not RowsWithDate” (items #2 and #3 above) refers to the same object as Nothing (item #5 above). This happens when RowsWithDate is “something”.
Line #6: Set RowsWithDate = Union(RowsWithDate, .Cells)
- Item: Set… =.
- VBA Construct: Set statement.
- Description: Assigns the object reference returned by item #6 below to RowsWithDate (item #2 below).
- Item: RowsWithDate.
- VBA Construct: Object (Range) variable of Set statement.
- Description:
- Holds a Range object representing the cells in the column you specify (CriteriaColumn in line #3 above) containing the date you use as criteria.
- RowsWithDate is included twice in the statement. In the first mention (Set RowsWithDate), RowsWithDate is the object variable to which an object reference is assigned.
- Item: Union.
- VBA Construct: Application.Union method.
- Description: Returns a Range object representing the union of the Range objects returned by items #4 and #5 below.
- Item: RowsWithDate.
- VBA Construct: Object (Range) variable.
- Description:
- Holds a Range object representing the cells in the column you specify (CriteriaColumn in line #3 above) containing the date you use as criteria.
- RowsWithDate is included twice in the statement. In the second mention (Union(RowsWithDate, .Cells), RowsWithDate is one of the parameters of the Application.Union method.
- Item: .Cells.
- VBA Construct: Range.Cells property.
- Description: Returns a Range object representing the cell represented by the Range object returned by line #3 above (.Cells(Counter, CriteriaColumn)). This is the cell at the intersection of the row through which the macro is currently looping and the column containing the cells with dates you consider.
- Item: Union(RowsWithDate, .Cells).
- VBA Construct: Object expression of Set statement.
- Description: Returns the new Range object reference assigned to the RowsWithDate object variable (item #2 above). This is the union of the following 2 Range objects:
- Prior to the Set statement, RowsWithDate represents cells in the column you specify containing the date you use as criteria found by the macro prior to the row through which it’s currently looping.
- “.Cells” represents the cell at the intersection of the row through which the macro is currently looping and the column containing the cells with dates you consider.
Graphically, this looks as follows:
In other words, any cell containing the criteria date the macro finds is “added” to RowsWithDate.

Line #7: Else
- Item: Else.
- VBA Construct: Else clause of If… Then… Else statement.
- Description: The statement following the Else clause (line #8 below) is executed if the condition tested in the opening line of the If… Then… Else statement (line #5 above) isn’t met and returns False.
Line #8: Set RowsWithDate = .Cells
- Item: Set… =.
- VBA Construct: Set statement.
- Description: Assigns the object reference returned by item #3 below to RowsWithDate (item #2 below).
- Item: RowsWithDate.
- VBA Construct: Object (Range) variable of Set statement.
- Description: Holds a Range object representing the cells in the column you specify (CriteriaColumn in line #3 above) containing the date you use as criteria.
- Item: .Cells.
- VBA Construct: Range.Cells property.
- Description: Returns a Range object representing the cell represented by the Range object returned by line #3 above (.Cells(Counter, CriteriaColumn)). This is the cell at the intersection of the row through which the macro is currently looping and the column containing the cells with dates you consider.
Lines #9 and #10: End If | End If
- Item: End If.
- VBA Construct: Closing lines of If… Then… Else statements.
- Description: Ends the If… Then… Else statements that began in lines #4 and #5 above.
Line #14: If Not RowsWithDate Is Nothing Then RowsWithDate.EntireRow.Delete
- Item: If… Then.
- VBA Construct: If… Then… Else statement.
- Description: Conditionally executes the statement within at the end of the line (items #7 through #9 below) if the condition specified by item #6 below is met.
- Item: Not.
- VBA Construct: Not operator.
- Description: Carries out a logical negation on item #3 below. In other words, if item #3 returns:
- True, the result is False.
- False, the result is True.
- Item: RowsWithDate.
- VBA Construct: Object (Range) variable.
- Description: Holds a Range object representing the cells in the column you specify (CriteriaColumn in line #3 above) containing the date you use as criteria.
- Item: Is.
- VBA Construct: Is Operator.
- Description: Compares 2 object reference variables: (i) Not RowsWithDate (items #2 and #3 above) vs. (ii) Nothing (item #5 below).
If both object references refer to the same object, the Is operator returns True. If they refer to different objects, Is returns False.
- Item: Nothing.
- Description: The default value for a data type. In the case of an object variable (such as RowsWithDate), a null reference.
- Item: Not RowsWithDate Is Nothing.
- VBA Construct: Condition of If… Then… Else statement.
- Description: The condition is an expression that evaluates to True or False, as follows:
- True: When “Not RowsWithDate” (items #2 and #3 above) refers to the same object as Nothing (item #5 above). This happens when RowsWithDate is “something”.
Since RowsWithDate holds a Range object representing the cells with the criteria date found by the macro in a specific column (CriteriaColumn in line #3 above), RowsWithDate is something if the macro finds at least one such cell.
- False: When “Not RowsWithDate” refers to a different object from Nothing. This happens when RowsWithDate itself is Nothing. This, in turn, occurs when the macro founds no cells with the criteria date within the specified column.
- True: When “Not RowsWithDate” (items #2 and #3 above) refers to the same object as Nothing (item #5 above). This happens when RowsWithDate is “something”.
- Item: RowsWithDate.
- VBA Construct: Object (Range) variable.
- Description: Holds a Range object representing the cells in the column you specify (CriteriaColumn in line #3 above) containing the date you use as criteria.
- Item: EntireRow.
- VBA Construct: Range.EntireRow property.
- Description: Returns a Range object representing the entire row containing the cell range returned by item #7 above.
- Item: Delete.
- VBA Construct: Range.Delete method.
- Description: Deletes the Range object returned by item #8 above.
Macro Example
The following macro deletes all rows that meet the following conditions:
- Are between rows number myFirstRow and myLastRow.
- Contain the date myDate in column number myCriteriaColumn.
In this example:
- myFirstRow is set to 5.
- myDate is set to the serial number representing June 15, 2017. For purposes of obtaining the appropriate serial number, I use the DateValue Function.
- myCriteriaColumn is set to 2.
- myLastRow is set to the number of the last row with data in the worksheet named “Delete row based on date”. The constructs used by the statement that finds the last row with data in the worksheet are the Worksheet.Cells property, the Range.Find method, and the Range.Row property.
Sub deleteRowBasedOnDate()

    'Source: https://powerspreadsheets.com/
    'For further information: https://powerspreadsheets.com/excel-vba-delete-row/

    Dim myFirstRow As Long
    Dim myLastRow As Long
    Dim myCriteriaColumn As Long
    Dim myDate As Date
    Dim myWorksheet As Worksheet
    Dim iCounter As Long
    Dim myRowsWithDate As Range

    myFirstRow = 6
    myCriteriaColumn = 2
    myDate = DateValue("June 15, 2017")

    Set myWorksheet = Worksheets("Delete row based on date")

    With myWorksheet
        myLastRow = .Cells.Find(What:="*", LookIn:=xlFormulas, LookAt:=xlPart, SearchOrder:=xlByRows, SearchDirection:=xlPrevious).Row
        For iCounter = myLastRow To myFirstRow Step -1
            With .Cells(iCounter, myCriteriaColumn)
                If .Value = myDate Then
                    If Not myRowsWithDate Is Nothing Then
                        Set myRowsWithDate = Union(myRowsWithDate, .Cells)
                    Else
                        Set myRowsWithDate = .Cells
                    End If
                End If
            End With
        Next iCounter
    End With

    If Not myRowsWithDate Is Nothing Then myRowsWithDate.EntireRow.Delete

End Sub
Effects of Executing Macro Example
The following GIF illustrates the results of executing this macro example. As expected, VBA deletes the rows containing myDate (June 15, 2017) in myCriteriaColumn (2).

#12: Delete Row Based on String Criteria
VBA Code to Delete Row Based on String Criteria
To delete rows based on the string in a specific cell using VBA, use a macro with the following statement structure:
With Worksheet
    With .Range(.Cells(FirstRow, FirstColumn), .Cells(LastRow, LastColumn))
        .AutoFilter Field:=CriteriaField, Criteria1:=String
        On Error Resume Next
        .Offset(RowOffset:=1).Resize(RowSize:=(.Rows.Count - 1)).SpecialCells(xlCellTypeVisible).EntireRow.Delete
    End With
    .AutoFilterMode = False
End With
Process Followed by VBA Code

VBA Statement Explanation
Lines #1 and #8: With Worksheet | End With
- Item: With… End With.
- VBA Construct: With… End With statement.
- Description: Statements within the With… End With statement (lines #2 through #7 below) are executed on the worksheet returned by item #2 below.
- Item: Worksheet.
- VBA Construct: Workbook.Worksheets property.
- Description: Returns a Worksheet object representing the worksheet you work with.
Lines #2 and #6: With .Range(.Cells(FirstRow, FirstColumn), .Cells(LastRow, LastColumn)) | End With
- Item: With… End With.
- VBA Construct: With… End With statement.
- Description: Statements within the With… End With statement (lines #3 through #6 below) are executed on the range object returned by items #2 through #4 below.
- Item: .Range.
- VBA Construct: Worksheet.Range property.
- Description: Returns a Range object representing a cell range specified as follows:
- Upper-left corner cell: Range object returned by item #3 below.
- Lower-right corner cell: Range object returned by item #4 below.
- Item: .Cells(FirstRow, FirstColumn).
- VBA Construct: Worksheet.Cells property and Range.Item property.
- Description: Returns a Range object representing the cell at the intersection of row number FirstRow and column number FirstColumn.
FirstRow and FirstColumn are the number of, respectively, the first row and first column in the cell range you work with. If you explicitly declare a variable to represent FirstRow or FirstColumn, use the Long data type.
- Item: .Cells(LastRow, LastColumn).
- VBA Construct: Worksheet.Cells property and Range.Item property.
- Description: Returns a Range object representing the cell at the intersection of row number LastRow and column number LastColumn.
LastRow and LastColumn are the number of, respectively, the last row and last column in the cell range you work with. If you explicitly declare a variable to represent LastRow or LastColumn, use the Long data type.
Line #3: .AutoFilter Field:=CriteriaField, Criteria1:=String
- Item: .AutoFilter.
- VBA Construct: Range.AutoFilter method.
- Description: Filter the data within the range you work with using the AutoFilter and according to the parameters specified by items #2 and #3 below.
- Item: Field:=CriteriaField.
- VBA Construct: Field parameter of Range.AutoFilter method.
- Description: Specifies the field on which you want to base the filter. The leftmost field of the range you work with is Field 1. The rightmost field is the number of fields in the cell range you work with.
If you explicitly declare a variable to represent CriteriaField, use the Long data type.
- Item: Criteria1:=String.
- VBA Construct: Criteria1 parameter of Range.AutoFilter method.
- Description: Specifies the filtering criteria. If you explicitly declare a variable to represent String, use the String data type.
Line #4: On Error Resume Next
- Item: On Error Resume Next.
- VBA Construct: On Error Resume Next statement.
- Description: Specifies that, when a run-time error occurs, control goes to the statement following the statement where the error occurs.
The error-handler in this line #4 is necessary because, if the field you filter by (line #3 above) doesn’t contain cells with the string you use as criteria, line #5 below generates a run-time error.
Line #5: .Offset(RowOffset:=1).Resize(RowSize:=(.Rows.Count – 1)).SpecialCells(xlCellTypeVisible).EntireRow.Delete
- Item: Offset.
- VBA Construct: Range.Offset property.
- Description: Returns a Range object a number of rows above or below the cell range it works with, as returned by line #2 above.
- Item: RowOffset:=1.
- VBA Construct: RowOffset parameter of Range.Offset property.
- Description: Specifies that the cell range returned by Range.Offset (item #1 above) is 1 row below the range specified in line #2 above.
Line #2 above specifies the cell range you work with. Therefore, the Range object that Range.Offset returns has the same size but is 1 row below the cell range you work with. This results in the following:
- The headers of the cell range you work with are excluded from the Range object.
- The first empty row below the last row with data (LastRow in line #2 above) is included. This extra line is handled by item #7 below.
- Item: Resize.
- VBA Construct: Range.Resize property.
- Description: Resizes the cell range returned by items #1 and #2 above.
- Item: RowSize.
- VBA Construct: RowSize parameter of Range.Resize property.
- Description: Specifies the number of rows in the new cell range returned by Range.Resize (item #3 above).
- Item: Rows.
- VBA Construct: Range.Rows property.
- Description: Returns a Range object representing the rows in the cell range it works with, as returned by line #2 above.
- Item: Count.
- VBA Construct: Range.Count property.
- Description: Returns the number of rows within the Range object returned by item #5 above.
- Item: Resize(RowSize:=(.Rows.Count – 1)).
- VBA Construct: Range.Resize property.
- Description: Resizes the cell range returned by items #1 and #2 above to reduce it by one row. The number of rows in the new range is obtained by subtracting 1 from the number of rows returned by line #2, as counted by items #5 and #6 above.
This results in a cell range that excludes the first empty row below the last row with data that the Range.Offset property (items #1 and #2 above) included.
- Item: SpecialCells(xlCellTypeVisible).
- VBA Construct: Range.SpecialCells method and Type parameter of Range.SpecialCells method.
- Description: Returns a Range object representing all visible cells within the cell range you work with, excluding the headers (as required by item #2 above).
Since line #3 above filters the data according to the criteria you specify, the visible cells returned by Range.SpecialCells are those containing the string you’re looking for in the column (field) you specify.
- Item: EntireRow.
- VBA Construct: Range.EntireRow property.
- Description: Returns a Range object representing the entire rows containing the Range object returned by item #8 above.
- Item: Delete.
- VBA Construct: Range.Delete method.
- Description: Deletes the Range object returned by item #10 above.
Line #7: .AutoFilterMode = False
- Item: .AutoFilterMode = False.
- VBA Construct: Worksheet.AutoFilterMode property.
- Description: Specifies that the AutoFilter drop-down arrows aren’t displayed on the worksheet.
Macro Example
The following macro deletes all rows that meet the following conditions:
- Are between:
- Rows number (myFirstRow + 1) and myLastRow.
- Columns number myFirstColumn and myLastColumn.
- Contain the string myString in field number myCriteriaField.
In this example:
- myFirstRow is set to 5.
- myFirstColumn is set to 2.
- myCriteriaField is set to 1.
- myString is set to “*to delete*”.
The asterisks at the beginning and end of the string act as wildcards representing any number of characters. Therefore, myString includes any strings that contain “to delete”, regardless of the text before or after it.
For example, in the example below, I use this macro to delete rows where the cell in the first column contains the string “Rows to delete now”. “to delete” is between the strings “Rows ” and ” now”, both of which are covered by the asterisk wildcard.
- myLastRow is set to the number of the last row with data in the worksheet named “Delete row based on string”. The constructs used by the statement that finds the last row with data in the worksheet are the Worksheet.Cells property, the Range.Find method, and the Range.Row property.
- myLastColumn is set to the number of the last column with data in the same worksheet. The constructs used by the statement that finds the last column with data in the worksheet are the Worksheet.Cells property, the Range.Find method, and the Range.Column property.
Sub deleteRowBasedOnString()

    'Source: https://powerspreadsheets.com/
    'For further information: https://powerspreadsheets.com/excel-vba-delete-row/

    Dim myFirstRow As Long
    Dim myLastRow As Long
    Dim myFirstColumn As Long
    Dim myLastColumn As Long
    Dim myCriteriaField As Long
    Dim myString As String
    Dim myWorksheet As Worksheet

    myFirstRow = 5
    myFirstColumn = 2
    myCriteriaField = 1
    myString = "*to delete*"

    Set myWorksheet = Worksheets("Delete row based on string")

    With myWorksheet
        With .Cells
            myLastRow = .Find(What:="*", LookIn:=xlFormulas, LookAt:=xlPart, SearchOrder:=xlByRows, SearchDirection:=xlPrevious).Row
            myLastColumn = .Find(What:="*", LookIn:=xlFormulas, LookAt:=xlPart, SearchOrder:=xlByColumns, SearchDirection:=xlPrevious).Column
        End With
        With .Range(.Cells(myFirstRow, myFirstColumn), .Cells(myLastRow, myLastColumn))
            .AutoFilter Field:=myCriteriaField, Criteria1:=myString
            On Error Resume Next
            .Offset(RowOffset:=1).Resize(RowSize:=(.Rows.Count - 1)).SpecialCells(xlCellTypeVisible).EntireRow.Delete
        End With
        .AutoFilterMode = False
    End With

End Sub
Effects of Executing Macro Example
The following GIF illustrates the results of executing this macro example. As expected, VBA deletes the rows containing myString (“*to delete*”) in myCriteriaField (1).

References to VBA Constructs Used in this VBA Tutorial
Use the following links to visit the appropriate webpage within the Microsoft Office Dev Center:
- Identify the worksheet you work with:
- Workbook.Worksheets property.
- Find last row and last column with data in a worksheet and count number of rows in a cell range:
- Range.Find method.
- Range.Count property.
- Return Range objects:
- Application.ActiveCell property.
- Worksheet.Cells property.
- Range.Cells property.
- Range.Offset property.
- Range.Resize property.
- Application.Union method.
- Return Range objects representing rows:
- Worksheet.Rows property.
- Range.Rows property.
- Range.EntireRow property.
- Loop through rows:
- For… Next statement.
- Specify criteria for row deletion:
- DateSerial Function.
- DateValue Function.
- Range.Value property.
- Test if (i) rows meet criteria for deletion, or (ii) the macro has found rows or cells meeting the criteria for deletion:
- If… Then… Else statement.
- Range.AutoFilter method.
- Range.SpecialCells method.
- WorksheetFunction.CountA method.
- Not operator.
- Is operator.
- Delete rows.
- Range.Delete method.
- Work with variables:
- Dim statement.
- Set statement.
- Data types:
- Data data type.
- Double data type.
- Long data type.
- Object data type.
- String data type.
- Variant data type.
- Simplify object references:
- With… End With statement.
- Handle errors:
- On Error statement.
- Remove AutoFilter drop-down arrows:
- Worksheet.AutoFilterMode property.
Chris Nielsen’s solution is simple and will work well. A slightly shorter option would be…
ws.Rows(Rand).Delete
…note there is no need to specify a Shift when deleting a row as, by definition, it’s not possible to shift left
Incidentally, my preferred method for deleting rows is to use…
ws.Rows(Rand) = ""
…in the initial loop. I then use a Sort function to push these rows to the bottom of the data. The main reason for this is because deleting single rows can be a very slow procedure (if you are deleting >100). It also ensures nothing gets missed as per Robert Ilbrink’s comment
You can learn the code for sorting by recording a macro and reducing the code as demonstrated in this expert Excel video. I have a suspicion that the neatest method (Range(«A1:Z10»).Sort Key1:=Range(«A1»), Order1:=xlSortAscending/Descending, Header:=xlYes/No) can only be discovered on pre-2007 versions of Excel…but you can always reduce the 2007/2010 equivalent code
Couple more points…if your list is not already sorted by a column and you wish to retain the order, you can stick the row number ‘Rand’ in a spare column to the right of each row as you loop through. You would then sort by that comment and eliminate it
If your data rows contain formatting, you may wish to find the end of the new data range and delete the rows that you cleared earlier. That’s to keep the file size down. Note that a single large delete at the end of the procedure will not impair your code’s performance in the same way that deleting single rows does
Содержание
- Удалить всю строку с помощью VBA
- Удалить все строки в выделенном фрагменте
- Удалить альтернативные строки (или удалить каждую третью / четвертую / N-ю строку)
- Удалить пустые строки с помощью VBA
- Удалить строки с определенным словом / значением
- Как использовать этот код VBA
Добавление и удаление строк — часть повседневных задач при работе с Excel.
Хотя вы можете легко сделать это из самого рабочего листа, иногда вы можете использовать маршрут VBA для удаления строк в Excel. Это может быть удаление определенной строки, нескольких строк в выделенном фрагменте, удаление альтернативных строк или строк, в которых есть определенное значение.
В этом руководстве я покажу вам, как удалять строки в Excel с помощью VBA (несколько сценариев).
Итак, приступим!
Чтобы удалить всю строку в Excel с помощью VBA, вам необходимо использовать метод CompleteRow.Delete.
Например, если вы хотите удалить всю первую строку на листе, вы можете использовать следующий код:
Sub DeleteEntireRow () Rows (1) .EntireRow.Delete End Sub
В приведенном выше коде сначала указывается строка, которую необходимо удалить (что делается путем указания числа в скобках), а затем для ее удаления используется метод CompleteRow.Delete.
Вы также можете удалить несколько строк, указав эти строки в коде.
Например, приведенный ниже код удалит строки с номерами 1, 5 и 9 на листе:
Sub DeleteEntireRow () Rows (9) .EntireRow.Delete Rows (5) .EntireRow.Delete Rows (1) .EntireRow.Delete End Sub
В приведенном выше коде используется та же логика, где указываются номера строк, и Excel удаляет эти строки одну за другой.
ВАЖНО: Когда вы удаляете строки с чем-то похожим на приведенный выше код, не забудьте начать удаление снизу, а затем подниматься вверх. Например, если вы начинаете сверху и сначала удаляете строку 1, все строки под ней будут сдвинуты на одну строку вверх и нумерация будет отключена (поскольку строка 5 станет строкой 4 и т. Д.)
Удалить все строки в выделенном фрагменте
Если вы хотите удалить все строки в выбранном диапазоне ячеек, вы можете использовать приведенный ниже код макроса VBA:
Sub DeleteEntireRow () Selection.EntireRow.Delete End Sub
Приведенный выше код применяется к методу CompleteRow.Delete для всего выделения.
Удалить альтернативные строки (или удалить каждую третью / четвертую / N-ю строку)
Иногда вы можете получить дамп данных, где каждая вторая строка (или третья, четвертая или N-я строки) бесполезна и должна быть удалена.
Раньше я работал с финансовыми данными, где каждая вторая строка была пустой и ее нужно было удалить.
Это тот тип сценария, в котором действительно проявляется VBA.
Ниже приведен код VBA, который пройдет по всем выделенным строкам и удалит каждую вторую строку:
Sub DeleteAlternateRows () RCount = Selection.Rows.Count For i = RCount To 1 Step -2 Selection.Rows (i) .EntireRow.Delete Next i End Sub
Позвольте мне объяснить, как работает этот код VBA.
Сначала я использовал переменную RCount чтобы получить общее количество строк в выделении.
Затем я использовал цикл For Next, чтобы запустить его столько раз, сколько строк есть. Например, если имеется 12 строк, этот цикл будет выполняться от 12 до 1 (т. Е. 12 раз). Важно запускать это с последней строки в выделенном фрагменте до первой, поскольку мы не хотим, чтобы номера строк изменялись при удалении строки.
Кроме того, используется шаг -2, поскольку нам нужно удалить все остальные строки (снизу вверх). Если вы хотите удалить каждую третью строку, вы можете использовать -3.
В цикле VBA я использовал метод Selection.Rows (i) .EntireRow.Delete для удаления каждой альтернативной строки.
Удалить пустые строки с помощью VBA
Вы также можете использовать метод CompleteRow.Delete для удаления всех пустых строк.
Ниже приведен код VBA, который выберет пустые ячейки в выбранном наборе данных и удалит всю строку.
Sub DeleteBlankRows () Selection.SpecialCells (xlCellTypeBlanks) .EntireRow.Delete End Sub
В приведенном выше коде используется свойство SpecialCells для выбора и удаления всех пустых ячеек. Это тот же метод, который также позволяет нам использовать диалоговое окно «Перейти к специальному» для выбора всех пустых ячеек.
После того, как эти пустые ячейки идентифицированы с помощью SpecialCell, они затем удаляются с помощью метода CompleteRow.Delete.
Примечание. Этот метод выбирает пустые ячейки и не проверяет, пуста ли вся строка. Таким образом, если какая-либо ячейка в строке пуста, это все равно приведет к удалению всей строки.
Удалить строки с определенным словом / значением
Вы также можете использовать простой код VBA, чтобы пройти по каждой ячейке в выбранном диапазоне и удалить все строки, в которых ячейка содержит определенный текст или значение.
Например, предположим, что у вас есть набор данных, и я хочу удалить все ячейки с текстом «Принтер» в столбце 2 выделения.

Ниже приведен код, который это сделает:
Sub DeleteRowswithSpecificValue () For i = Selection.Rows.Count To 1 Step -1 If Cells (i, 2) .Value = "Printer" Then Cells (i, 2) .EntireRow.Delete End If Next i End Sub
Приведенный выше код сначала подсчитывает общее количество строк в выделенном фрагменте. Это обеспечит выполнение цикла только такое количество раз. Затем он использует цикл For Next для просмотра всех ячеек в столбце 2.
Затем оператор IF THEN ELSE используется для проверки значения в каждой ячейке в столбце 2. И в случае, если значение / текст соответствует указанному тексту (которым в данном примере является «Принтер»).
В этом примере я проверил, соответствует ли текст определенной строке или нет. Вы также можете сделать это со значениями. Например, вы можете удалить все строки, в которых стоимость продажи меньше 1000 или больше 1000.
Примечание. Здесь важно отметить, что цикл запускается из Selection.Rows.Count To 1 чтобы убедиться, что удаление строки не повлияет на строки над ней.
Как использовать этот код VBA
Теперь позвольте мне показать вам, как использовать все коды, упомянутые в этом руководстве, для удаления всей строки.
Вам необходимо скопировать и вставить эти коды в модуль редактора Excel VB. После того, как вы скопировали эти коды, вы можете запустить макрокоды.
Ниже приведены шаги по копированию и вставке этих кодов VBA в модуль:
- Удерживая клавишу ALT, нажмите клавишу F11 (или Function + Option + F11 в Mac). Это откроет редактор VB
- В редакторе VB слева у вас будет проводник проекта. Если вы его не видите, перейдите к параметру «Просмотр» и нажмите «Обозреватель проектов».

- Щелкните правой кнопкой мыши любой объект в Project Explorer (для книги, в которой вы хотите запустить код).
- Перейдите во вкладку «Вставить» и нажмите «Модуль». Это вставит новый модуль для книги
- Скопируйте и вставьте приведенные выше коды в модуль.


И чтобы запустить эти коды, вы можете поместить курсор в любое место кода (который вы хотите запустить) и нажать клавишу F5 (или щелкнуть зеленый треугольник на панели инструментов VBA).
Я также написал подробное руководство о различных способах запуска кодов макросов VBA в Excel.
Если вам нужно использовать какой-либо из этих кодов довольно часто, вы также можете рассмотреть возможность добавления их в личную книгу макросов, а затем в QAT. Таким образом, код будет доступен вам в любой из ваших книг одним щелчком мыши.
Итак, это были некоторые коды VBA, которые вы можете использовать для удаления целых строк в Excel (в разных сценариях). Ту же логику можно применить и в случае, если вы хотите удалить столбцы вместо строк (с соответствующей корректировкой в примерах кода).
Надеюсь, вы нашли этот урок полезным!
 At times, when you’re working with multiple spreadsheets, you may want to delete some rows because they are blank, duplicate or otherwise no longer required. Excel VBA is a powerful programming language that enables us to delete rows efficiently with ease. Or that matter, automate any repetitive task with ease. We will walk you through how to automate deleting rows in Excel using VBA. We assume you are familiar with the basics of MS Excel VBA.
If you’re new to Excel VBA we suggest that you first take this basic course on Excel VBA, or perhaps, brush up basic concepts with this VBA tutorial.
For all the examples we use in this tutorial, here are some generic instructions:
- First open an existing Excel workbook which has data.
- Press Alt+F11 simultaneously which will open the VBA editor.
- Then insert a module using Insert menu.
- To try these examples, copy and paste the code given in this tutorial into the code window. Alternatively, you can manually type in the code.
- Finally, save the file as macro.
To execute the code press the F5 function key. Now lets move on to the practical aspect of deleting rows in Excel.
Deleting a specific row using Excel VBA
Sub DeleteRow1()
Rows(10).Delete
End Sub
In this program, the 10th row is completely deleted from the active worksheet. Name of the subroutine is DeleteRow1(). Rows(10) refers to row number 10. It has an associated function delete, which when executed deletes the relevant row completely.
Deleting Multiple Rows Using Excel VBA
Sub
DeleteRow2()
Rows("10:20").Delete
End Sub
This code is written to delete multiple rows from row number 10 to 20. Rows(“10:20”) refers to the row range starting from row number 10 to 20. Next let’s move to more advanced programs using if conditional statement and loops.
Deleting Rows Based on Certain Condition Using Excel VBA
Sub
Deleterow3()
Dim lRow
lRow = 100
Do While lRow >= 1
If Cells(lRow,1) Mod 3 = 0 Then Rows(lRow).Delete
lRow = lRow - 1
Loop
End Sub
In this program, we use the Dim keyword to declare the variable lRow, to refer to the last row. lRow is assigned the value 100. Then we use the ‘Do While’ loop to iterate through the rows starting from row number 100 backwards to row number 1. In each loop, the value at cell with row number equal to lRow and Column 1 is divided by 3. If it’s completely divisible by three, that row is entirely deleted. Next we decrement lRow by 1. We loop on this till the condition evaluates to false.
Delete Entire Rows Where the Cell Type is a String
Sub DeleteRow4 ()
Dim rng As Range, cell_search As Range, del As Range
Set rng = Intersect(Range("A1:C20"), ActiveSheet.UsedRange)
For Each cell_search In rng
If (cell_search.Value) = "Apple"
Then
If del Is Nothing Then
Set del = cell_search
Else: Set del = Union(del, cell_search)
End If
End If
Next cell_search
On Error Resume Next
del.EntireRow.Delete
End Sub
In this program, we declare three variables of data type Range. Here Range(“A1:C20”), returns the selected range of cells. ActiveSheet.UsedRange refers to the selected worksheet. The intersect function returns the range object that is stored in the variable rng. We use the “for loop” to iterate through the cells. In this program we have assigned del as the cell object when the cell value is equal to “Apple”. If the value is not equal to “Apple”, then the union function is used to unite del with cell_search. Del.EntireRow.Delete will delete the row which has the del object.
Delete Every Third Row in a Worksheet Using VBA in Excel
Sub DeleteRow5()
Dim X,Y
X = 1
Y = 1
Set Rng1 = Selection
For xCounter = 1 To Rng1.Rows.Count
If Y = 3 Then
Rng1.Cells(x).EntireRow.Delete
Y = 1
Else
X = X + 1
Y = Y + 1
End If
Next xCounter
In this program, we declare two variables X and Y. Value 1 is assigned to both the variables. The ‘for’ loop goes from the value 1 to the total number of rows in the spreadsheet selection. X and Y are incremented by 1 whenever, Y is not equal to 3. When Y is equal to 3, the current row is deleted and Y is reset to 1. This process goes on till the last row of the selection is reached.
How to Delete Duplicate Rows Using VBA in Excel
Now we move on to a more complex program which takes large amount of data. Note that you need to be familiar with the application objects, and its important functions and data members. The knowledge of member data and member functions is necessary to master this code. If that sounds like Latin, take a break and hop over to our Ultimate VBA course to learn more about this.
Sub DeleteDuplicateRows6()
Dim R1 As Long
Dim N1 As Long
Dim V1 As Variant
Dim Rng1 As Range
On Error GoTo EndMacro
Application.ScreenUpdating = False
Application.Calculation = xlCalculationManual
Set Rng1 = Application.Intersect(ActiveSheet.UsedRange, _ ActiveSheet.Columns(ActiveCell.Column))
Application.StatusBar = "Processing Row: " & Format(Rng.Row, "#,##0")
N1 = 0
For R1 = Rng1.Rows.Count To 2 Step -1
If R1 Mod 500 = 0 Then
Application.StatusBar = "Processing Row: " & Format(R1, "#,##0")
End If
V1 = Rng1.Cells(R1, 1).Value
If V1 = vbNullString Then
If Application.WorksheetFunction.CountIf(Rng1.Columns(1), vbNullString) > 1 Then
Rng1.Rows(R1).EntireRow.Delete
N 1= N1 + 1
End If
Else
If Application.WorksheetFunction.CountIf(Rng1.Columns(1), V1) > 1 Then
Rng1.Rows(R1).EntireRow.Delete
N1 = N1 + 1
End If
End If
Next R1
EndMacro:
Application.StatusBar = False
Application.ScreenUpdating = True
Application.Calculation = xlCalculationAutomatic
MsgBox "Duplicate Rows Deleted: " & CStr (N1)
End Sub
In this program, we declared R1, N1, V1 and rng1 as variables. The calculation mode is set to manual and the ScreenUpdating status is set to false. vbNullString constant represents a null pointer to a string. It stands for empty string. If the count of the rows which have the same content is more than one, in other words, if we have duplicate rows then one row is deleted. N1 is incremented by 1 and the row is also incremented. This loop is executed till all the duplicate rows are deleted. The MsgBox() is used to return the number of duplicate rows deleted which is stored in the variable N1. Cstr() converts a value to a string. Note that at the end of the program the calculation mode is set back to automatic and the ScreenUpdating status is set to true.
VBA is fun to play with, provided you know the basics. Hopefully this tutorial gave you a good background on that. At any time, if you’d like to learn more, do feel free to flex some VBA muscle with MrExcel, or delve deeper into the Excel VBA world with this two part course (basic and advanced).
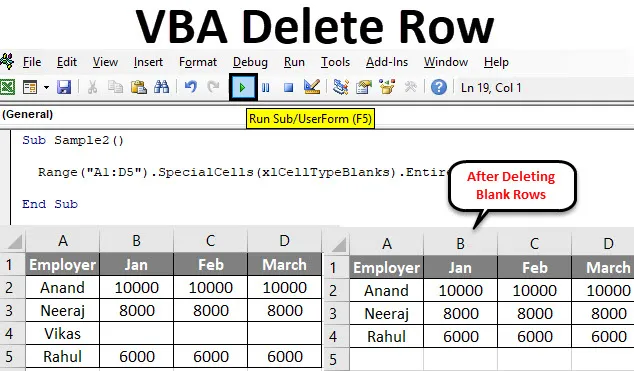
- VBA Удалить строку
VBA Удалить строку
В Excel, чтобы удалить любую строку, у нас есть сочетание клавиш CTRL + — или мы можем выбрать строку и щелкнуть по ней правой кнопкой мыши и удалить ее. Но в VBA мы сделали это, написав код для этого. Метод удаления строки в VBA заключается в том, что сначала нам нужно определить, какую строку удалить, а затем мы можем ее удалить. В этой статье мы узнаем о различных иллюстрациях о том, как удалить строку в VBA.
В VBA Удалить строку используется для удаления либо набора строк, либо отдельной строки в зависимости от ситуации. Подобно листу Excel, мы можем использовать макросы или VBA для удаления строк в листе Excel. Это помогает, когда у нас много данных, и мы не можем сделать это вручную.
Синтаксис для удаления строки в Excel VBA
Синтаксис для удаления строки в Excel, как показано ниже.
Worksheets.Rows (Row #). Удалить
Есть также другие методы удаления строк с использованием VBA, такие как следующие.
Range ( «Cell»). EntireRow.Delete
То, что будет делать вышеприведенный оператор, — это удаление строки для данной строки. Например, если мы напишем Range («A1»). FullRow.Delete, то первая строка будет удалена, так как ячейка A1 принадлежит первой строке.
Также мы можем использовать Rows (row_num) .delete для удаления строки.
Как удалить строку в Excel, используя VBA?
Ниже приведены некоторые примеры того, как удалить строку в Excel с помощью VBA.
Вы можете скачать этот шаблон VBA Удалить строку Excel здесь — VBA Удалить шаблон Excel строку
VBA Delete Row — Пример № 1
Давайте используем первый простой метод для удаления строк. Для демонстрации я введу случайное значение в ячейки A1 и B1. Посмотрите на это ниже.
Что я хочу видеть, так это то, что если я буду использовать код, написанный выше, вся строка будет удалена или будет удалена одна ячейка.
Примечание. Для использования Excel VBA необходимо включить вкладку разработчика на вкладке «Файлы» в разделе параметров.
Выполните следующие шаги, чтобы удалить строку в Excel с помощью VBA.
Шаг 1. Перейдите на вкладку разработчика, щелкните Visual Basic, чтобы открыть редактор VBA.
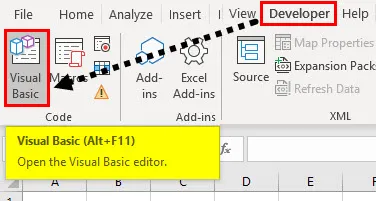
Шаг 2: В сегменте кода объявите подфункцию, чтобы начать писать код.
Код:
Sub Sample () End Sub
Шаг 3: Теперь напишите следующий код, чтобы удалить строку.
Код:
Диапазон Sub Sample () ("A1"). CompleteRow.Delete End Sub
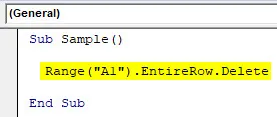
Шаг 4: Запустите этот код, нажав F5 или кнопку Run, и посмотрите результат.
Запустив код, мы увидим, что значения из ячеек A1 и B1 удаляются, поскольку вся первая строка была удалена.
VBA Delete Row — Пример № 2
Ранее в первом примере я удалил только одну строку. Но что делать, если нам нужно удалить несколько строк? Для демонстрации, у меня есть следующие данные, как показано ниже,

Я хочу удалить все первые пять строк. Выполните следующие шаги, чтобы удалить строку в Excel с помощью VBA.
Шаг 1. На вкладке разработчика щелкните Visual Basic, чтобы открыть редактор VBA.
Шаг 2: В коде объявите подфункцию, чтобы начать писать код,
Код:
Sub Sample1 () End Sub
Шаг 3: Напишите следующий код, показанный ниже, чтобы удалить все пять строк.
Код:
Диапазон Sub Sample1 () ("A1: B5"). CompleteRow.Delete End Sub
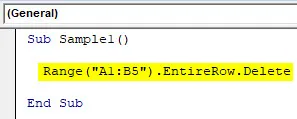
Шаг 4: Запустите этот код, нажав F5 или кнопку Run, и посмотрите результат.

Как только мы запустим код, мы увидим следующий результат: все данные были удалены, что означает, что первые пять строк были удалены, поскольку у нас были данные в первых пяти строках.
Примечание: я вставлю данные обратно в образец листа Excel для демонстрации.
VBA Delete Row — Пример № 3
Теперь у нас есть данные о сотрудниках, и их продажи осуществляются за три месяца: январь, февраль и март. Один из сотрудников был в отпуске и не мог заниматься продажей в течение трех месяцев, поэтому камеры для него пусты. Наша цель — найти эту пустую строку и удалить ее из данных.
Посмотрите на данные ниже,
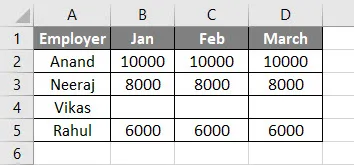
Выполните следующие шаги, чтобы удалить строку в Excel с помощью VBA.
Шаг 1. На вкладке разработчика щелкните Visual Basic, чтобы открыть редактор Visual Basic.
Шаг 2: Объявите подфункцию в окне кода, чтобы начать писать код,
Код:
Sub Sample2 () End Sub
Шаг 3: Напишите следующий код, чтобы удалить строки с пустыми ячейками.
Код:
Диапазон Sub Sample2 () ("A1: D5"). SpecialCells (xlCellTypeBlanks) .EntireRow.Delete End Sub
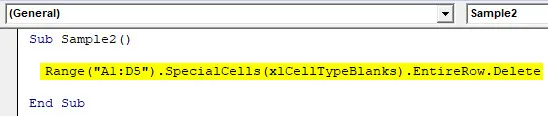
SpecialCells — это функция в VBA, которая возвращает нам все ячейки, которые соответствуют нашим условиям, и нашим условием были пустые ячейки в этом диапазоне, поэтому мы использовали функцию xlCellTypeBlanks.
Шаг 4: Запустите этот код, нажав F5 или кнопку Run, и посмотрите результат.
Запустив код, мы увидим, что строка с пустыми ячейками была удалена.
Примечание: я снова вставлю данные в образец листа Excel для демонстрации.
VBA Delete Row — Пример № 4
Существуют и другие подобные методы удаления строк, например, использование строк и функция удаления. Например, у нас есть данные в строке 4, и я хочу удалить строку 4. Мы можем дать команду Excel для удаления 4- й строки в данных. Посмотрите на скриншот ниже. У меня есть случайные данные в строке 4 в первой ячейке.
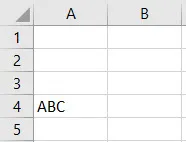
Выполните следующие шаги, чтобы удалить строку в Excel с помощью VBA.
Шаг 1. Откройте редактор VBA, щелкнув Visual Basic на вкладке разработчика.
Шаг 2: Объявите подфункцию, чтобы начать писать код.
Код:
Sub Sample3 () End Sub
Шаг 3: Напишите следующий код для удаления 4-й строки.
Код:
Sub Sample3 () Строки (4). Удалить End Sub

Шаг 4: Запустите этот код, нажав F5 или кнопку Run, и посмотрите результат.

Данные были удалены, так как 4- я строка была удалена сама.
VBA Delete Row — Пример № 5
В приведенном выше коде мы дали диапазон или строку для удаления в самом коде. Теперь давайте примем ввод от пользователя, и он может удалить строку из заданных данных. Например, у меня есть данные о сотрудниках и продажах, как показано ниже, и я хочу, чтобы пользователь выбрал диапазон, из которого пользователь хочет удалить строки с пустыми ячейками. Посмотрите на данные ниже,
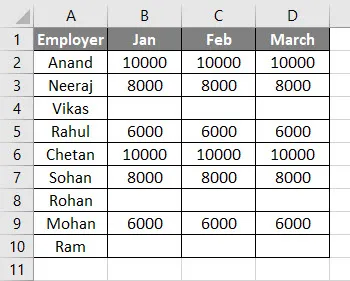
Выполните следующие шаги, чтобы удалить строку в Excel с помощью VBA.
Шаг 1: Откройте VB Editor, нажав Visual Basic на вкладке разработчика,
Шаг 2: Объявите подфункцию, чтобы начать писать код.
Код:
Sub Sample4 () End Sub
Шаг 2: Объявите две переменные как диапазон, A и B.
Код:
Sub Sample4 () Dim A как диапазон Dim B как конец диапазона Sub
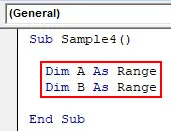
Шаг 3: Чтобы принять ввод от пользователя для выбора диапазона, который нужно удалить, мы будем использовать функцию поля ввода и сохраним этот ввод в переменной, определенной выше.
Код:
Sub Sample4 () Dim A в качестве диапазона Dim B в качестве набора диапазонов A = Application.InputBox («Выбрать данные», «Образец макроса», Тип: = 8) End Sub
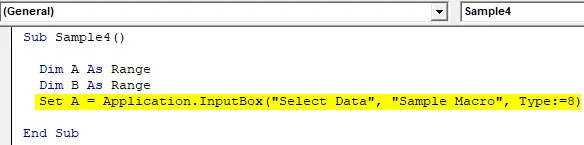
Шаг 4: Установите B = A, чтобы ввод от пользователя можно было сохранить в диапазоне B.
Код:
Sub Sample4 () Dim A в качестве диапазона Dim B в качестве диапазона Set A = Application.InputBox («Выбор данных», «Sample Macro», Тип: = 8) Set B = A End Sub
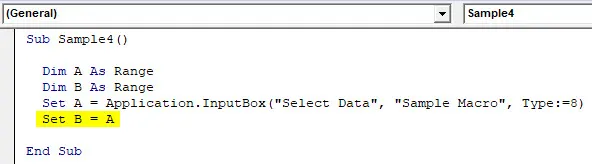
Шаг 5: Теперь мы удалим данные с пустыми ячейками из диапазона, выбранного пользователем.
Код:
Sub Sample4 () Dim A в качестве диапазона Dim B в качестве диапазона Set A = Application.InputBox («Выбрать данные», «Sample Macro», Type: = 8) Set B = A A.SpecialCells (xlCellTypeBlanks) .EntireRow.Delete End Sub
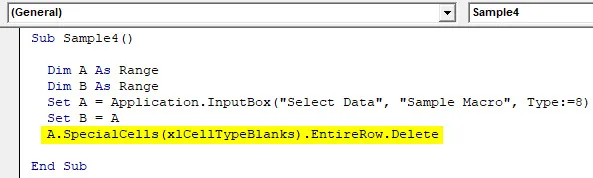
Шаг 6: Теперь запустите код с помощью кнопки запуска.
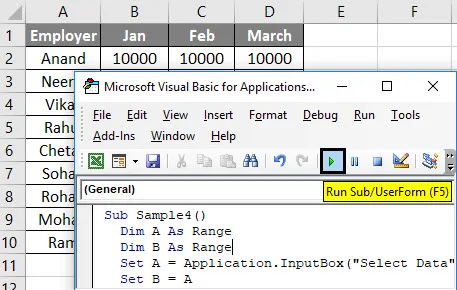
Шаг 6: Появляется поле ввода.
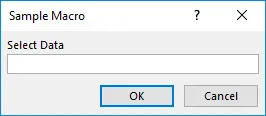
Шаг 7: Выберите диапазон от A1: D8 в этом примере. Нажмите OK, чтобы увидеть результат.
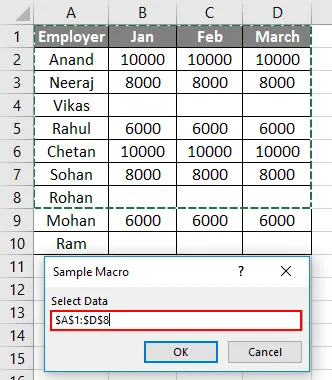
Данные с пустыми ячейками были удалены.
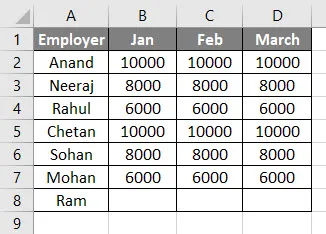
То, что нужно запомнить
Есть несколько вещей, которые мы должны помнить об удалении строки в Excel VBA:
- Мы можем удалить строку на основе одной ячейки.
- Мы можем удалить несколько строк, задав диапазон ячеек.
- Мы также можем удалять строки, принимая данные от пользователя.
Рекомендуемые статьи
Это был путеводитель по VBA Delete Row. Здесь мы обсудили, как удалить строку в Excel VBA вместе с практическими примерами и загружаемым шаблоном Excel. Вы также можете просмотреть наши другие предлагаемые статьи —
- Как использовать функцию замены в VBA?
- Excel Удалить строку ярлык
- VBA Case | Excel Tricks
- Ярлык строки вставки Excel
- Как суммировать несколько строк в Excel?