
В материале рассказывается о методах модуля openpyxl, которые позволяют вставлять и удалять строки и столбцы листа электронной таблицы, а так же перемещать диапазоны ячеек.
Содержание:
- Вставка строк и столбцов.
- Удаление строк и столбцов.
- Перемещение диапазона ячеек.
Вставка строк и столбцов.
Модуль openpyxl поддерживает вставку строк или столбцов. Что бы произвести указанные действия, необходимо использовать соответствующие методы экземпляра рабочего листа Worksheet:
Worksheet.insert_cols(idx, amount=1): вставляет столбец или столбцы передcol==idx. Аргументamount— количество добавляемых столбцов.Worksheet.insert_rows(idx, amount=1): вставляет строку или строки передrow==idx. Аргументamount— количество добавляемых строк.
По умолчанию вставляется одна строка или столбец. Например, чтобы вставить одну строку перед существующей 7-ой строкой необходимо вызвать ws.insert_rows(7).
Пример:
>>> from openpyxl import Workbook
>>> wb = Workbook()
>>> ws = wb.active
# создадим произвольные данные
>>> data = [[row*col for col in range(1, 16)] for row in range(1, 31)]
# добавляем данные на активный лист
>>> for row in data:
...     ws.append(row)
...
# вставим 3 новые строки перед
# существующей 7-ой строкой
>>> ws.insert_rows(7, 3)
# сохраняем и смотрим
>>> wb.save('test.xlsx')
Удаление строк и столбцов.
Что бы удалить строки или столбцы, используйте следующие методы экземпляра рабочего листа Worksheet:
Worksheet.delete_cols(): удаляет столбец или столбцы, начиная сcol==idx. Аргументamount— количество удаляемых столбцов.Worksheet.delete_rows(): удаляет строку или строки, начиная сrow==idx. Аргументamount— количество удаляемых строк.
По умолчанию удаляется одна строка или столбец. Например, чтобы удалить столбцы в диапазоне F:H необходимо вызвать ws.delete_cols(6, 3).
Пример — продолжение предыдущего:
# удалим 3 столбцы в диапазоне `F:H`
>>> ws.delete_cols(6, 3)
# сохраняемся и открываем файл
>>> wb.save('test.xlsx')
Примечание. При вставке или удалении строк или столбцов модуль openpyxl не управляет зависимостями, такими как формулы, таблицы, диаграммы и т.д. Считается, что это выходит за рамки библиотеки, которая фокусируется на управлении форматом файла. В общем, клиентский код должен реализовывать необходимую функциональность в любом конкретном случае.
Перемещение диапазона ячеек.
Модуль openpyxl обеспечивает перемещение диапазонов ячеек внутри листа методом:
Worksheet.move_range(cell_range, rows=0, cols=0, translate=False).
Этот метод перемещает диапазон ячеек cell_range на количество строк rows и/или столбцов cols:
- вниз, если
rows > 0, и вверх, еслиrows < 0, - вправо, если
cols > 0, и влево, еслиcols < 0.
Существующие ячейки будут перезаписаны. Формулы и ссылки обновляться не будут.
Пример:
>>> ws.move_range("D4:F10", rows=-1, cols=2)
Это приведет к перемещению ячеек в диапазоне ячеек D4:F10 вверх на одну строку и вправо на два столбца. Ячейки будут перезаписаны всеми существующими ячейками.
Если ячейки содержат формулы, то openpyxl может транслировать их, но, поскольку это не всегда то, что нужно, по этому этот функционал умолчанию отключен. Кроме того, будут транслированы только формулы в самих ячейках. Ссылки на ячейки из других ячеек или определенные имена обновляться не будут. Для этого можно использовать переводчик формул синтаксического анализа:
>>> ws.move_range("G4:H10", rows=1, cols=1, translate=True)
Это приведет к перемещению относительных ссылок в формулах в диапазоне на одну строку и один столбец.
Deleting rows and columns
To delete the columns F:H:
Note
Openpyxl does not manage dependencies, such as formulae, tables, charts,
etc., when rows or columns are inserted or deleted. This is considered to
be out of scope for a library that focuses on managing the file format.
As a result, client code must implement the functionality required in
any particular use case.
Moving ranges of cells
You can also move ranges of cells within a worksheet:
>>> ws.move_range("D4:F10", rows=-1, cols=2)
This will move the cells in the range D4:F10 up one row, and right two
columns. The cells will overwrite any existing cells.
If cells contain formulae you can let openpyxl translate these for you, but
as this is not always what you want it is disabled by default. Also only the
formulae in the cells themselves will be translated. References to the cells
from other cells or defined names will not be updated; you can use the
Parsing Formulas translator to do this:
>>> ws.move_range("G4:H10", rows=1, cols=1, translate=True)
This will move the relative references in formulae in the range by one row and one column.
Merge / Unmerge cells
When you merge cells all cells but the top-left one are removed from the
worksheet. To carry the border-information of the merged cell, the boundary cells of the
merged cell are created as MergeCells which always have the value None.
See Styling Merged Cells for information on formatting merged cells.
>>> from openpyxl.workbook import Workbook
>>>
>>> wb = Workbook()
>>> ws = wb.active
>>>
>>> ws.merge_cells('A2:D2')
>>> ws.unmerge_cells('A2:D2')
>>>
>>> # or equivalently
>>> ws.merge_cells(start_row=2, start_column=1, end_row=4, end_column=4)
>>> ws.unmerge_cells(start_row=2, start_column=1, end_row=4, end_column=4)
== Updated to a fully functional version, based on feedback here: groups.google.com/forum/#!topic/openpyxl-users/wHGecdQg3Iw. ==
As the others have pointed out, openpyxl does not provide this functionality, but I have extended the Worksheet class as follows to implement inserting rows. Hope this proves useful to others.
def insert_rows(self, row_idx, cnt, above=False, copy_style=True, fill_formulae=True):
    """Inserts new (empty) rows into worksheet at specified row index.

    :param row_idx: Row index specifying where to insert new rows.
    :param cnt: Number of rows to insert.
    :param above: Set True to insert rows above specified row index.
    :param copy_style: Set True if new rows should copy style of immediately above row.
    :param fill_formulae: Set True if new rows should take on formula from immediately above row, filled with references new to rows.

    Usage:

    * insert_rows(2, 10, above=True, copy_style=False)

    """
    CELL_RE  = re.compile("(?P<col>$?[A-Z]+)(?P<row>$?d+)")

    row_idx = row_idx - 1 if above else row_idx

    def replace(m):
        row = m.group('row')
        prefix = "$" if row.find("$") != -1 else ""
        row = int(row.replace("$",""))
        row += cnt if row > row_idx else 0
        return m.group('col') + prefix + str(row)

    # First, we shift all cells down cnt rows...
    old_cells = set()
    old_fas   = set()
    new_cells = dict()
    new_fas   = dict()
    for c in self._cells.values():

        old_coor = c.coordinate

        # Shift all references to anything below row_idx
        if c.data_type == Cell.TYPE_FORMULA:
            c.value = CELL_RE.sub(
                replace,
                c.value
            )
            # Here, we need to properly update the formula references to reflect new row indices
            if old_coor in self.formula_attributes and 'ref' in self.formula_attributes[old_coor]:
                self.formula_attributes[old_coor]['ref'] = CELL_RE.sub(
                    replace,
                    self.formula_attributes[old_coor]['ref']
                )

        # Do the magic to set up our actual shift
        if c.row > row_idx:
            old_coor = c.coordinate
            old_cells.add((c.row,c.col_idx))
            c.row += cnt
            new_cells[(c.row,c.col_idx)] = c
            if old_coor in self.formula_attributes:
                old_fas.add(old_coor)
                fa = self.formula_attributes[old_coor].copy()
                new_fas[c.coordinate] = fa

    for coor in old_cells:
        del self._cells[coor]
    self._cells.update(new_cells)

    for fa in old_fas:
        del self.formula_attributes[fa]
    self.formula_attributes.update(new_fas)

    # Next, we need to shift all the Row Dimensions below our new rows down by cnt...
    for row in range(len(self.row_dimensions)-1+cnt,row_idx+cnt,-1):
        new_rd = copy.copy(self.row_dimensions[row-cnt])
        new_rd.index = row
        self.row_dimensions[row] = new_rd
        del self.row_dimensions[row-cnt]

    # Now, create our new rows, with all the pretty cells
    row_idx += 1
    for row in range(row_idx,row_idx+cnt):
        # Create a Row Dimension for our new row
        new_rd = copy.copy(self.row_dimensions[row-1])
        new_rd.index = row
        self.row_dimensions[row] = new_rd
        for col in range(1,self.max_column):
            col = get_column_letter(col)
            cell = self.cell('%s%d'%(col,row))
            cell.value = None
            source = self.cell('%s%d'%(col,row-1))
            if copy_style:
                cell.number_format = source.number_format
                cell.font      = source.font.copy()
                cell.alignment = source.alignment.copy()
                cell.border    = source.border.copy()
                cell.fill      = source.fill.copy()
            if fill_formulae and source.data_type == Cell.TYPE_FORMULA:
                s_coor = source.coordinate
                if s_coor in self.formula_attributes and 'ref' not in self.formula_attributes[s_coor]:
                    fa = self.formula_attributes[s_coor].copy()
                    self.formula_attributes[cell.coordinate] = fa
                # print("Copying formula from cell %s%d to %s%d"%(col,row-1,col,row))
                cell.value = re.sub(
                    "($?[A-Z]{1,3}$?)%d"%(row - 1),
                    lambda m: m.group(1) + str(row),
                    source.value
                )
                cell.data_type = Cell.TYPE_FORMULA

    # Check for Merged Cell Ranges that need to be expanded to contain new cells
    for cr_idx, cr in enumerate(self.merged_cell_ranges):
        self.merged_cell_ranges[cr_idx] = CELL_RE.sub(
            replace,
            cr
        )

Worksheet.insert_rows = insert_rows
answered Jun 15, 2015 at 7:20
![]()
DallasDallas
8783 gold badges10 silver badges23 bronze badges
6
Adding an answer applicable to more recent releases, v2.5+, of openpyxl:
There’s now an insert_rows() and insert_cols().
insert_rows(idx, amount=1)Insert row or rows before row==idx
![]()
answered Mar 24, 2018 at 9:21
![]()
aneroidaneroid
12.8k3 gold badges39 silver badges64 bronze badges
1
Answering this with the code that I’m now using to achieve the desired result. Note that I am manually inserting the row at position 1, but that should be easy enough to adjust for specific needs. You could also easily tweak this to insert more than one row, and simply populate the rest of the data starting at the relevant position.
Also, note that due to downstream dependencies, we are manually specifying data from ‘Sheet1’, and the data is getting copied to a new sheet which is inserted at the beginning of the workbook, whilst renaming the original worksheet to ‘Sheet1.5’.
EDIT: I’ve also added (later on) a change to the format_code to fix issues where the default copy operation here removes all formatting: new_cell.style.number_format.format_code = 'mm/dd/yyyy'. I couldn’t find any documentation that this was settable, it was more of a case of trial and error!
Lastly, don’t forget this example is saving over the original. You can change the save path where applicable to avoid this.
    import openpyxl

    wb = openpyxl.load_workbook(file)
    old_sheet = wb.get_sheet_by_name('Sheet1')
    old_sheet.title = 'Sheet1.5'
    max_row = old_sheet.get_highest_row()
    max_col = old_sheet.get_highest_column()
    wb.create_sheet(0, 'Sheet1')

    new_sheet = wb.get_sheet_by_name('Sheet1')

    # Do the header.
    for col_num in range(0, max_col):
        new_sheet.cell(row=0, column=col_num).value = old_sheet.cell(row=0, column=col_num).value

    # The row to be inserted. We're manually populating each cell.
    new_sheet.cell(row=1, column=0).value = 'DUMMY'
    new_sheet.cell(row=1, column=1).value = 'DUMMY'

    # Now do the rest of it. Note the row offset.
    for row_num in range(1, max_row):
        for col_num in range (0, max_col):
            new_sheet.cell(row = (row_num + 1), column = col_num).value = old_sheet.cell(row = row_num, column = col_num).value

    wb.save(file)
answered Jun 26, 2013 at 14:31
![]()
NickNick
2,2852 gold badges14 silver badges26 bronze badges
1
Openpyxl Worksheets have limited functionality when it comes to doing row or column level operations. The only properties a Worksheet has that relates to rows/columns are the properties row_dimensions and column_dimensions, which store «RowDimensions» and «ColumnDimensions» objects for each row and column, respectively. These dictionaries are also used in function like get_highest_row() and get_highest_column().
Everything else operates on a cell level, with Cell objects being tracked in the dictionary, _cells (and their style tracked in the dictionary _styles). Most functions that look like they’re doing anything on a row or column level are actually operating on a range of cells (such as the aforementioned append()).
The simplest thing to do would be what you suggested: create a new sheet, append your header row, append your new data rows, append your old data rows, delete the old sheet, then rename your new sheet to the old one. Problems that may be presented with this method is the loss of row/column dimensions attributes and cell styles, unless you specifically copy them, too.
Alternatively, you could create your own functions that insert rows or columns.
I had a large number of very simple worksheets that I needed to delete columns from. Since you asked for explicit examples, I’ll provide the function I quickly threw together to do this:
from openpyxl.cell import get_column_letter

def ws_delete_column(sheet, del_column):

    for row_num in range(1, sheet.get_highest_row()+1):
        for col_num in range(del_column, sheet.get_highest_column()+1):

            coordinate = '%s%s' % (get_column_letter(col_num),
                                   row_num)
            adj_coordinate = '%s%s' % (get_column_letter(col_num + 1),
                                       row_num)

            # Handle Styles.
            # This is important to do if you have any differing
            # 'types' of data being stored, as you may otherwise get
            # an output Worksheet that's got improperly formatted cells.
            # Or worse, an error gets thrown because you tried to copy
            # a string value into a cell that's styled as a date.

            if adj_coordinate in sheet._styles:
                sheet._styles[coordinate] = sheet._styles[adj_coordinate]
                sheet._styles.pop(adj_coordinate, None)
            else:
                sheet._styles.pop(coordinate, None)

            if adj_coordinate in sheet._cells:
                sheet._cells[coordinate] = sheet._cells[adj_coordinate]
                sheet._cells[coordinate].column = get_column_letter(col_num)
                sheet._cells[coordinate].row = row_num
                sheet._cells[coordinate].coordinate = coordinate

                sheet._cells.pop(adj_coordinate, None)
            else:
                sheet._cells.pop(coordinate, None)

        # sheet.garbage_collect()
I pass it the worksheet that I’m working with, and the column number I want deleted, and away it goes. I know it isn’t exactly what you wanted, but I hope this information helped!
EDIT: Noticed someone gave this another vote, and figured I should update it. The co-ordinate system in Openpyxl experienced some changes sometime in the passed couple years, introducing a coordinate attribute for items in _cell. This needs to be edited, too, or the rows will be left blank (instead of deleted), and Excel will throw an error about problems with the file. This works for Openpyxl 2.2.3 (untested with later versions)
answered Jun 25, 2013 at 20:04
![]()
RejectedRejected
4,4152 gold badges25 silver badges42 bronze badges
0
As of openpyxl 1.5 you can now use .insert_rows(idx, row_qty)
from openpyxl import load_workbook
wb = load_workbook('excel_template.xlsx')
ws = wb.active
ws.insert_rows(14, 10)
It will not pick up the formatting of the idx row as it would if you did this manually in Excel. you will have apply the correct formatting i.e. cell color afterwards.
answered Aug 7, 2018 at 9:39
![]()
PrestonDocksPrestonDocks
4,6739 gold badges47 silver badges80 bronze badges
0
To insert row into Excel spreadsheet using openpyxl in Python
Below code can help you :-
import openpyxl

file = "xyz.xlsx"
#loading XL sheet bassed on file name provided by user
book = openpyxl.load_workbook(file)
#opening sheet whose index no is 0
sheet = book.worksheets[0]

#insert_rows(idx, amount=1) Insert row or rows before row==idx, amount will be no of
#rows you want to add and it's optional
sheet.insert_rows(13)
For inserting column also openpyxl have similar function i.e.insert_cols(idx, amount=1)
answered Oct 12, 2018 at 8:47
![]()
yugal sinhayugal sinha
3542 silver badges4 bronze badges
I’ve written a function which will both insert an entire row anywhere you want in a spreadsheet, or an entire 2D table, with openpyxl.
Every row of the function is explained with a comment but if you want to just insert a single row, just make your row equal to [row]. i.e. if row = [1,2,3,4,5] then set your input to [[1,2,3,4,5]]. If you want this row to be inserted into the top row of your spreadsheet (A1) then Start = [1,1].
You can indeed overwrite the file name as see you can with my example at the bottom.
def InputList(Start, List): #This function is to input an array/list from a input start point; len(Start) must equal 2, where Start = [1,1] is cell 1A. List must be a two dimensional array; if you wish to input a single row then this can be done where len(List) == 1, e.g. List = [[1,2,3,4]]
    x = 0 #Sets up a veriable to go through List columns
    y = 0 #Sets up a veriable to go through List rows
    l = 0 #Sets up a veriable to count addional columns against Start[1] to allow for column reset on each new row
    for row in List: #For every row in List
        l = 0 #Set additonal columns to zero
        for cell in row: #For every cell in row
            ws.cell(row=Start[0], column=Start[1]).value = List[y][x] #Set value for current cell
            x = x + 1 #Move to next data input (List) column
            Start[1] = Start[1] + 1 #Move to next Excel column
            l = l + 1 #Count addional row length
        y = y + 1 #Move to next Excel row
        Start[0] = Start[0] + 1 #Move to next Excel row
        x = 0 #Move back to first column of input data (ready for next row)
        Start[1] = Start[1] - l #Reset Excel column back to orignal start column, ready to write next row
Example with single row being inserted at start of row 7:
from openpyxl import load_workbook
wb = load_workbook('New3.xlsx')
ws = wb.active

def InputList(Start, List): #This function is to input an array/list from a input start point; len(Start) must equal 2, where Start = [1,1] is cell 1A. List must be a two dimensional array; if you wish to input a single row then this can be done where len(List) == 1, e.g. List = [[1,2,3,4]]
    x = 0 #Sets up a veriable to go through List columns
    y = 0 #Sets up a veriable to go through List rows
    l = 0 #Sets up a veriable to count addional columns against Start[1] to allow for column reset on each new row
    for row in List: #For every row in List
        l = 0 #Set additonal columns to zero
        for cell in row: #For every cell in row
            ws.cell(row=Start[0], column=Start[1]).value = List[y][x] #Set value for current cell
            x = x + 1 #Move to next data input (List) column
            Start[1] = Start[1] + 1 #Move to next Excel column
            l = l + 1 #Count addional row length
        y = y + 1 #Move to next Excel row
        Start[0] = Start[0] + 1 #Move to next Excel row
        x = 0 #Move back to first column of input data (ready for next row)
        Start[1] = Start[1] - l #Reset Excel column back to orignal start column, ready to write next row

test = [[1,2,3,4]]
InputList([7,1], test)

wb.save('New3.xlsx')
answered Jan 6, 2020 at 18:05
![]()
I took Dallas solution and added support for merged cells:
    def insert_rows(self, row_idx, cnt, above=False, copy_style=True, fill_formulae=True):
        skip_list = []
        try:
            idx = row_idx - 1 if above else row_idx
            for (new, old) in zip(range(self.max_row+cnt,idx+cnt,-1),range(self.max_row,idx,-1)):
                for c_idx in range(1,self.max_column):
                  col = self.cell(row=1, column=c_idx).column #get_column_letter(c_idx)
                  print("Copying %s%d to %s%d."%(col,old,col,new))
                  source = self["%s%d"%(col,old)]
                  target = self["%s%d"%(col,new)]
                  if source.coordinate in skip_list:
                      continue

                  if source.coordinate in self.merged_cells:
                      # This is a merged cell
                      for _range in self.merged_cell_ranges:
                          merged_cells_list = [x for x in cells_from_range(_range)][0]
                          if source.coordinate in merged_cells_list:
                              skip_list = merged_cells_list
                              self.unmerge_cells(_range)
                              new_range = re.sub(str(old),str(new),_range)
                              self.merge_cells(new_range)
                              break

                  if source.data_type == Cell.TYPE_FORMULA:
                    target.value = re.sub(
                      "($?[A-Z]{1,3})%d"%(old),
                      lambda m: m.group(1) + str(new),
                      source.value
                    )
                  else:
                    target.value = source.value
                  target.number_format = source.number_format
                  target.font   = source.font.copy()
                  target.alignment = source.alignment.copy()
                  target.border = source.border.copy()
                  target.fill   = source.fill.copy()
            idx = idx + 1
            for row in range(idx,idx+cnt):
                for c_idx in range(1,self.max_column):
                  col = self.cell(row=1, column=c_idx).column #get_column_letter(c_idx)
                  #print("Clearing value in cell %s%d"%(col,row))
                  cell = self["%s%d"%(col,row)]
                  cell.value = None
                  source = self["%s%d"%(col,row-1)]
                  if copy_style:
                    cell.number_format = source.number_format
                    cell.font      = source.font.copy()
                    cell.alignment = source.alignment.copy()
                    cell.border    = source.border.copy()
                    cell.fill      = source.fill.copy()
                  if fill_formulae and source.data_type == Cell.TYPE_FORMULA:
                    #print("Copying formula from cell %s%d to %s%d"%(col,row-1,col,row))
                    cell.value = re.sub(
                      "($?[A-Z]{1,3})%d"%(row - 1),
                      lambda m: m.group(1) + str(row),
                      source.value
                    )
answered Aug 9, 2015 at 10:12
![]()
Ran SRan S
1059 bronze badges
1
Edited Nick’s solution, this version takes a starting row, the number of rows to insert, and a filename, and inserts the necessary number of blank rows.
#! python 3

import openpyxl, sys

my_start = int(sys.argv[1])
my_rows = int(sys.argv[2])
str_wb = str(sys.argv[3])

wb = openpyxl.load_workbook(str_wb)
old_sheet = wb.get_sheet_by_name('Sheet')
mcol = old_sheet.max_column
mrow = old_sheet.max_row
old_sheet.title = 'Sheet1.5'
wb.create_sheet(index=0, title='Sheet')

new_sheet = wb.get_sheet_by_name('Sheet')

for row_num in range(1, my_start):
    for col_num in range(1, mcol + 1):
        new_sheet.cell(row = row_num, column = col_num).value = old_sheet.cell(row = row_num, column = col_num).value

for row_num in range(my_start + my_rows, mrow + my_rows):
    for col_num in range(1, mcol + 1):
        new_sheet.cell(row = (row_num + my_rows), column = col_num).value = old_sheet.cell(row = row_num, column = col_num).value

wb.save(str_wb)
answered Dec 30, 2016 at 19:00
![]()
mut3mut3
544 bronze badges
I’ve managed to successfully use Dallas’s answer, albeit with a few modifications for openpyxl 3.0.9. I’m posting the code here for anyone else wondering how to do it in 2022.
The differences are in:
- Adding the imports
- Changing
Cell.TYPE_FORMULAtoTYPE_FORMULA - Adding type conversion using
str()orint()where the required - Updating definedNames
I’m new to Python so feel free to suggest any changes for this, but it’s how I made it work.
import copy
import re
from openpyxl.utils import get_column_letter
from openpyxl.cell.cell import TYPE_FORMULA

#https://stackoverflow.com/questions/17299364/insert-row-into-excel-spreadsheet-using-openpyxl-in-python#71195832
def insert_rows(self, row_idx, cnt, above=True, copy_style=True, fill_formulae=True):
    """Inserts new (empty) rows into worksheet at specified row index.

    :param self: Worksheet
    :param row_idx: Row index specifying where to insert new rows.
    :param cnt: Number of rows to insert.
    :param above: Set True to insert rows above specified row index.
    :param copy_style: Set True if new rows should copy style of immediately above row.
    :param fill_formulae: Set True if new rows should take on formula from immediately above row, filled with references new to rows.

    Usage:

    * insert_rows(2, 10, above=True, copy_style=False)

    """
    CELL_RE  = re.compile("(?P<col>$?[A-Z]+)(?P<row>$?d+)")

    row_idx = row_idx - 1 if above else row_idx

    def replace(m):
        row = m.group('row')
        prefix = "$" if row.find("$") != -1 else ""
        row = int(row.replace("$",""))
        row += cnt if row > row_idx else 0
        return m.group('col') + prefix + str(row)

    # First, we shift all cells down cnt rows...
    old_cells = set()
    old_fas   = set()
    new_cells = dict()
    new_fas   = dict()
    for c in self._cells.values():

        old_coor = c.coordinate

        # Shift all references to anything below row_idx
        if c.data_type == TYPE_FORMULA:
            c.value = CELL_RE.sub(
                replace,
                c.value
            )
            # Here, we need to properly update the formula references to reflect new row indices
            if old_coor in self.formula_attributes and 'ref' in self.formula_attributes[old_coor]:
                self.formula_attributes[old_coor]['ref'] = CELL_RE.sub(
                    replace,
                    self.formula_attributes[old_coor]['ref']
                )

        # Do the magic to set up our actual shift
        if c.row > row_idx:
            old_coor = c.coordinate
            old_cells.add((c.row,c.column))
            c.row += cnt
            new_cells[(c.row,c.column)] = c
            if old_coor in self.formula_attributes:
                old_fas.add(old_coor)
                fa = self.formula_attributes[old_coor].copy()
                new_fas[c.coordinate] = fa

    for coor in old_cells:
        del self._cells[coor]
    self._cells.update(new_cells)

    for fa in old_fas:
        del self.formula_attributes[fa]
    self.formula_attributes.update(new_fas)

    # Next, we need to shift all the Row Dimensions below our new rows down by cnt...
    for row in range(len(self.row_dimensions)-1+cnt,row_idx+cnt,-1):
        new_rd = copy.copy(self.row_dimensions[row-cnt])
        new_rd.index = row
        self.row_dimensions[row] = new_rd
        del self.row_dimensions[row-cnt]

    # Now, create our new rows, with all the pretty cells
    row_idx += 1
    for row in range(row_idx,row_idx+cnt):
        # Create a Row Dimension for our new row
        new_rd = copy.copy(self.row_dimensions[row-1])
        new_rd.index = row
        self.row_dimensions[row] = new_rd
        for col in range(1,self.max_column):
            col = get_column_letter(col)
            cell = self[str(col)+str(row)]
            cell.value = None
            source = self[str(col)+str(row-1)]
            if copy_style:
                cell.number_format = source.number_format
                cell.font      = copy.copy(source.font)
                cell.alignment = copy.copy(source.alignment)
                cell.border    = copy.copy(source.border)
                cell.fill      = copy.copy(source.fill)
            if fill_formulae and source.data_type == TYPE_FORMULA:
                s_coor = source.coordinate
                if s_coor in self.formula_attributes and 'ref' not in self.formula_attributes[s_coor]:
                    fa = self.formula_attributes[s_coor].copy()
                    self.formula_attributes[cell.coordinate] = fa
                # print("Copying formula from cell %s%d to %s%d"%(col,row-1,col,row))
                cell.value = re.sub(
                    "($?[A-Z]{1,3}$?)%d"%(row - 1),
                    lambda m: m.group(1) + str(row),
                    source.value
                )
                cell.data_type = TYPE_FORMULA

    # Check for Merged Cell Ranges that need to be expanded to contain new cells
    for cr_idx, cr in enumerate(self.merged_cells.ranges):
        self.merged_cells.ranges[cr_idx] = CELL_RE.sub(
            replace,
            str(cr)
        )

    # Update all defined names
    wb :Workbook = self.parent
    for definedName in wb.defined_names.definedName:
        ref :str = definedName.attr_text
        parts = ref.split("!")
        if parts[0].strip("'") == self.title:
            definedName.attr_text = CELL_RE.sub(replace, ref)
![]()
answered Feb 20, 2022 at 15:23
![]()
NemoNemo
396 bronze badges
Unfortunately there isn’t really a better way to do in that read in the file, and use a library like xlwt to write out a new excel file (with your new row inserted at the top). Excel doesn’t work like a database that you can read and and append to. You unfortunately just have to read in the information and manipulate in memory and write out to what is essentially a new file.
answered Jun 25, 2013 at 19:02
![]()
sedavidwsedavidw
10.9k13 gold badges59 silver badges94 bronze badges
Last Updated on July 14, 2022 by
This tutorial will show you how to use the Python openpyxl library to insert rows, columns and merge cells in an Excel workbook. Formatting an Excel file can be a tedious and time-consuming task, so it’s a good task to automate away!
Library
We are going to use openpyxl library to build a simple budgeting Excel spreadsheet. To install the library, type the following into a command prompt window:
pip install openpyxlMock-up Data
The below code creates an Excel file named “formatting.xlsx” with some data inside. Copy and run the following code if you want to follow along:
from openpyxl import Workbook

wb = Workbook()
ws = wb.active
ws.title = 'formatting'

income = [('Income', ''),
          ('Salary', 1000),
          ('Investment', 500),
          ('Side hustle', 500),
          ('Total', 2000)]

expense = [('Expense',''),
           ('Housing', 1200),
           ('Insurance', 200),
           ('Grocery', 500),
           ('Entertainment', 500),
           ('Total', 2400)]

for row in income+expense:
    ws.append(row)

wb.save('formatting.xslx')
You should get an unformatted Excel file that looks like this:

Let’s start formatting by moving the cells (with data) around to make the workbook look a little nicer. Add the following code after the for loop block, but before saving the file:
ws.insert_rows(1,6)
ws.insert_cols(1)
ws.move_range("B12:C17", rows = 2, cols = 0)

##Add more stuff
ws['B2'] = 'Monthly Budget'
ws['E7'] = 'Income'
ws['F7'] = '=sum(C8:C10)'
ws['E9'] = 'Expense'
ws['F9'] = '=sum(C15:C18)'
ws['E11'] = 'Net'
ws['F11'] = '=F7-F9'
ws['E13'] = 'Exp/Income Ratio'
ws['F13'] = '=F9/F7'
The above code block did the following:
- The 1st line – Insert 6 rows, from row 1-6
- The 2nd line – Insert 1 column at column A (1)
- And the 3rd line – Moved the Expense section (with the previous 2 steps, this section is now at B12:C17) down by 2 rows
- Rest of the code – added a bunch of other things in B2, and cells around E7:F13

Merge Cells using openpyxl
Continue with the above, add the following right after the previous code block. The below code merges several cells together. Note the two ways of merging cells using ws.merge_cell() method:
- Using the normal Excel range notation, e.g. ‘B2:F2’
- Use 4 arguments to select boundaries for the cells to be merged
ws.merge_cells('B2:F2')

ws.merge_cells('E7:E8')
ws.merge_cells('F7:F8')

for r in range(9,14,2):
    for c in range(5,7):
        ws.merge_cells(start_row = r, start_column = c, end_row=r+1, end_column = c)

Additional Resources
How to Use Python to Read Excel Formula
How to Work with Excel Named Range in Python
Work with Excel Named Range in Python
Write Data to Excel using Python
You all must have worked with Excel at some time in your life and must have felt the need for automating some repetitive or tedious task. Don’t worry in this tutorial we are going to learn about how to work with Excel using Python, or automating Excel using Python. We will be covering this with the help of the Openpyxl module.
Getting Started
Openpyxl is a Python library that provides various methods to interact with Excel Files using Python. It allows operations like reading, writing, arithmetic operations, plotting graphs, etc.
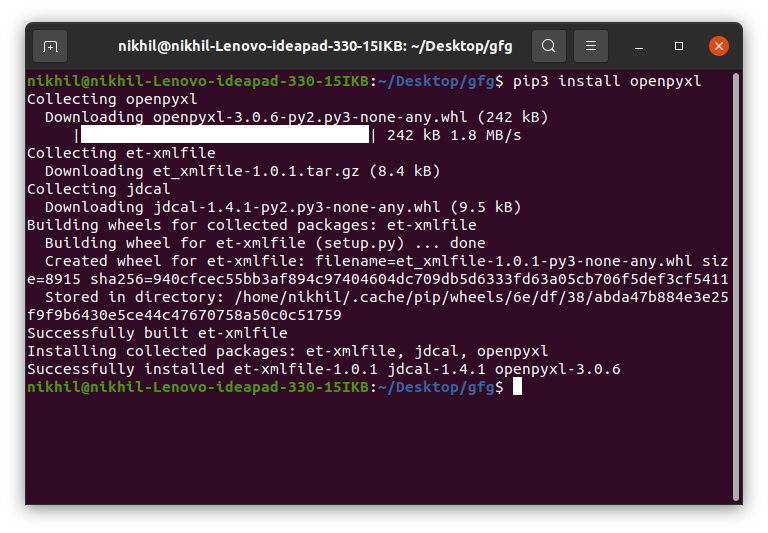
This module does not come in-built with Python. To install this type the below command in the terminal.
pip install openpyxl
Reading from Spreadsheets
To read an Excel file you have to open the spreadsheet using the load_workbook() method. After that, you can use the active to select the first sheet available and the cell attribute to select the cell by passing the row and column parameter. The value attribute prints the value of the particular cell. See the below example to get a better understanding.
Note: The first row or column integer is 1, not 0.
Dataset Used: It can be downloaded from here.
Example:
Python3
import openpyxl
path = "gfg.xlsx"
wb_obj = openpyxl.load_workbook(path)
sheet_obj = wb_obj.active
cell_obj = sheet_obj.cell(row = 1, column = 1)
print(cell_obj.value)
Output:
Name
Reading from Multiple Cells
There can be two ways of reading from multiple cells.
Method 1: We can get the count of the total rows and columns using the max_row and max_column respectively. We can use these values inside the for loop to get the value of the desired row or column or any cell depending upon the situation. Let’s see how to get the value of the first column and first row.
Example:
Python3
import openpyxl
path = "gfg.xlsx"
wb_obj = openpyxl.load_workbook(path)
sheet_obj = wb_obj.active
row = sheet_obj.max_row
column = sheet_obj.max_column
print("Total Rows:", row)
print("Total Columns:", column)
print("nValue of first column")
for i in range(1, row + 1):
cell_obj = sheet_obj.cell(row = i, column = 1)
print(cell_obj.value)
print("nValue of first row")
for i in range(1, column + 1):
cell_obj = sheet_obj.cell(row = 2, column = i)
print(cell_obj.value, end = " ")
Output:
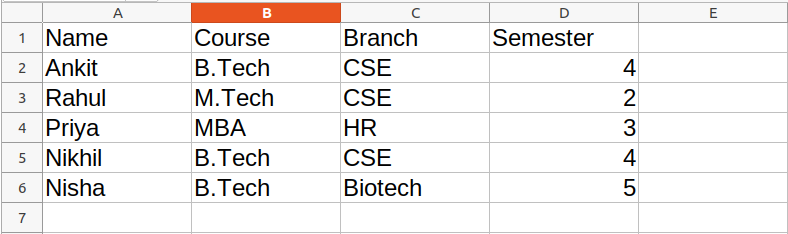
Total Rows: 6
Total Columns: 4

Value of first column
Name
Ankit
Rahul
Priya
Nikhil
Nisha

Value of first row
Ankit  B.Tech CSE 4
Method 2: We can also read from multiple cells using the cell name. This can be seen as the list slicing of Python.
Python3
import openpyxl
path = "gfg.xlsx"
wb_obj = openpyxl.load_workbook(path)
sheet_obj = wb_obj.active
cell_obj = sheet_obj['A1': 'B6']
for cell1, cell2 in cell_obj:
print(cell1.value, cell2.value)
Output:
Name Course
Ankit  B.Tech
Rahul M.Tech
Priya MBA
Nikhil B.Tech
Nisha B.Tech
Refer to the below article to get detailed information about reading excel files using openpyxl.
- Reading an excel file using Python openpyxl module
Writing to Spreadsheets
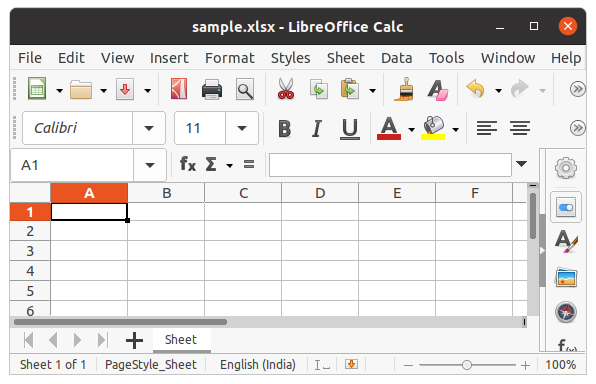
First, let’s create a new spreadsheet, and then we will write some data to the newly created file. An empty spreadsheet can be created using the Workbook() method. Let’s see the below example.
Example:
Python3
from openpyxl import Workbook
workbook = Workbook()
workbook.save(filename="sample.xlsx")
Output:
After creating an empty file, let’s see how to add some data to it using Python. To add data first we need to select the active sheet and then using the cell() method we can select any particular cell by passing the row and column number as its parameter. We can also write using cell names. See the below example for a better understanding.
Example:
Python3
import openpyxl
wb = openpyxl.Workbook()
sheet = wb.active
c1 = sheet.cell(row = 1, column = 1)
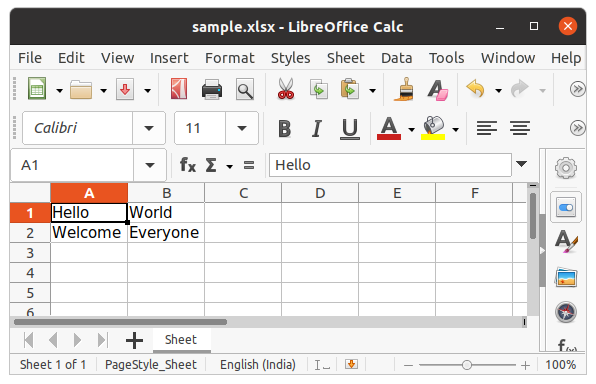
c1.value = "Hello"
c2 = sheet.cell(row= 1 , column = 2)
c2.value = "World"
c3 = sheet['A2']
c3.value = "Welcome"
c4 = sheet['B2']
c4.value = "Everyone"
wb.save("sample.xlsx")
Output:
Refer to the below article to get detailed information about writing to excel.
- Writing to an excel file using openpyxl module
Appending to the Spreadsheet
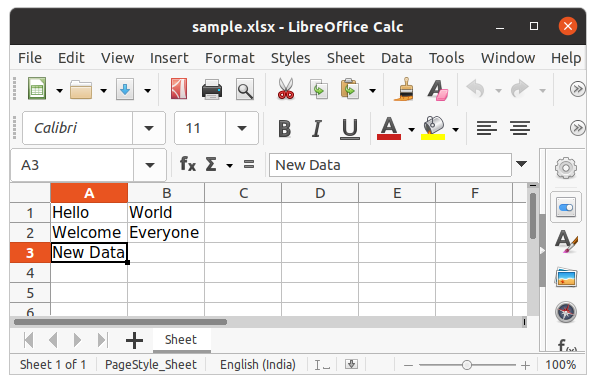
In the above example, you will see that every time you try to write to a spreadsheet the existing data gets overwritten, and the file is saved as a new file. This happens because the Workbook() method always creates a new workbook file object. To write to an existing workbook you must open the file with the load_workbook() method. We will use the above-created workbook.
Example:
Python3
import openpyxl
wb = openpyxl.load_workbook("sample.xlsx")
sheet = wb.active
c = sheet['A3']
c.value = "New Data"
wb.save("sample.xlsx")
Output:
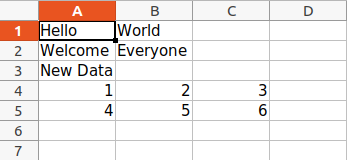
We can also use the append() method to append multiple data at the end of the sheet.
Example:
Python3
import openpyxl
wb = openpyxl.load_workbook("sample.xlsx")
sheet = wb.active
data = (
(1, 2, 3),
(4, 5, 6)
)
for row in data:
sheet.append(row)
wb.save('sample.xlsx')
Output:
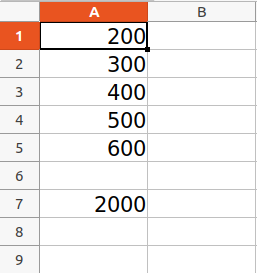
Arithmetic Operation on Spreadsheet
Arithmetic operations can be performed by typing the formula in a particular cell of the spreadsheet. For example, if we want to find the sum then =Sum() formula of the excel file is used.
Example:
Python3
import openpyxl
wb = openpyxl.Workbook()
sheet = wb.active
sheet['A1'] = 200
sheet['A2'] = 300
sheet['A3'] = 400
sheet['A4'] = 500
sheet['A5'] = 600
sheet['A7'] = '= SUM(A1:A5)'
wb.save("sum.xlsx")
Output:
Refer to the below article to get detailed information about the Arithmetic operations on Spreadsheet.
- Arithmetic operations in excel file using openpyxl
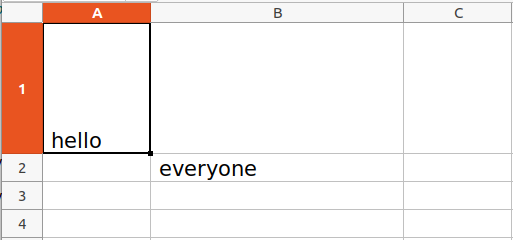
Adjusting Rows and Column
Worksheet objects have row_dimensions and column_dimensions attributes that control row heights and column widths. A sheet’s row_dimensions and column_dimensions are dictionary-like values; row_dimensions contains RowDimension objects and column_dimensions contains ColumnDimension objects. In row_dimensions, one can access one of the objects using the number of the row (in this case, 1 or 2). In column_dimensions, one can access one of the objects using the letter of the column (in this case, A or B).
Example:
Python3
import openpyxl
wb = openpyxl.Workbook()
sheet = wb.active
sheet.cell(row = 1, column = 1).value = ' hello '
sheet.cell(row = 2, column = 2).value = ' everyone '
sheet.row_dimensions[1].height = 70
sheet.column_dimensions['B'].width = 20
wb.save('sample.xlsx')
Output:
Merging Cells
A rectangular area of cells can be merged into a single cell with the merge_cells() sheet method. The argument to merge_cells() is a single string of the top-left and bottom-right cells of the rectangular area to be merged.
Example:
Python3
import openpyxl
wb = openpyxl.Workbook()
sheet = wb.active
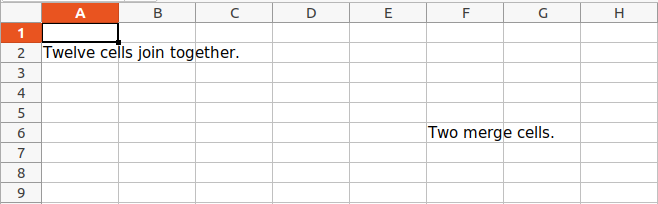
sheet.merge_cells('A2:D4')
sheet.cell(row = 2, column = 1).value = 'Twelve cells join together.'
sheet.merge_cells('C6:D6')
sheet.cell(row = 6, column = 6).value = 'Two merge cells.'
wb.save('sample.xlsx')
Output:

Unmerging Cells
To unmerge cells, call the unmerge_cells() sheet method.
Example:
Python3
import openpyxl
wb = openpyxl.load_workbook('sample.xlsx')
sheet = wb.active
sheet.unmerge_cells('A2:D4')
sheet.unmerge_cells('C6:D6')
wb.save('sample.xlsx')
Output:
Setting Font Style
To customize font styles in cells, important, import the Font() function from the openpyxl.styles module.
Example:
Python3
import openpyxl
from openpyxl.styles import Font
wb = openpyxl.Workbook()
sheet = wb.active
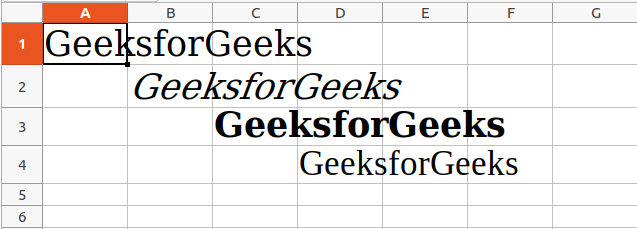
sheet.cell(row = 1, column = 1).value = "GeeksforGeeks"
sheet.cell(row = 1, column = 1).font = Font(size = 24 )
sheet.cell(row = 2, column = 2).value = "GeeksforGeeks"
sheet.cell(row = 2, column = 2).font = Font(size = 24, italic = True)
sheet.cell(row = 3, column = 3).value = "GeeksforGeeks"
sheet.cell(row = 3, column = 3).font = Font(size = 24, bold = True)
sheet.cell(row = 4, column = 4).value = "GeeksforGeeks"
sheet.cell(row = 4, column = 4).font = Font(size = 24, name = 'Times New Roman')
wb.save('sample.xlsx')
Output:
Refer to the below article to get detailed information about adjusting rows and columns.
- Adjusting rows and columns of an excel file using openpyxl module
Plotting Charts
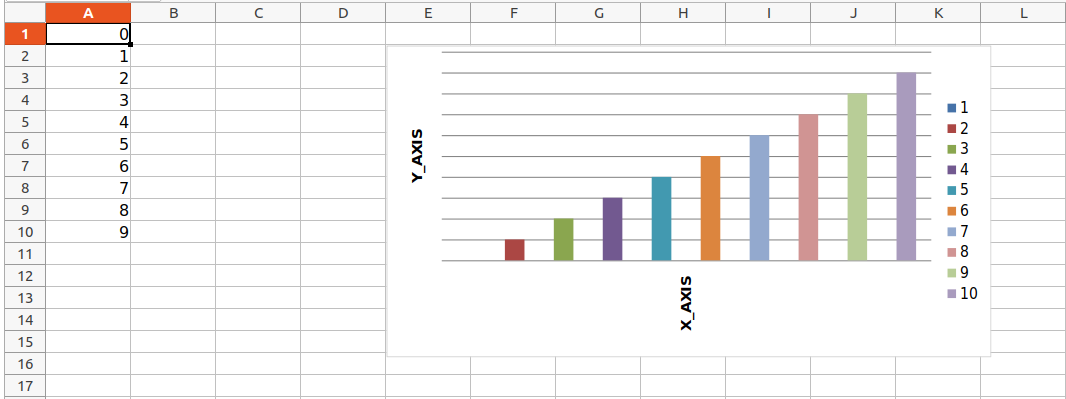
Charts are composed of at least one series of one or more data points. Series themselves are comprised of references to cell ranges. For plotting the charts on an excel sheet, firstly, create chart objects of specific chart class( i.e BarChart, LineChart, etc.). After creating chart objects, insert data in it, and lastly, add that chart object in the sheet object.
Example 1:
Python3
import openpyxl
from openpyxl.chart import BarChart, Reference
wb = openpyxl.Workbook()
sheet = wb.active
for i in range(10):
sheet.append([i])
values = Reference(sheet, min_col=1, min_row=1,
max_col=1, max_row=10)
chart = BarChart()
chart.add_data(values)
chart.title = " BAR-CHART "
chart.x_axis.title = " X_AXIS "
chart.y_axis.title = " Y_AXIS "
sheet.add_chart(chart, "E2")
wb.save("sample.xlsx")
Output:
Example 2:
Python3
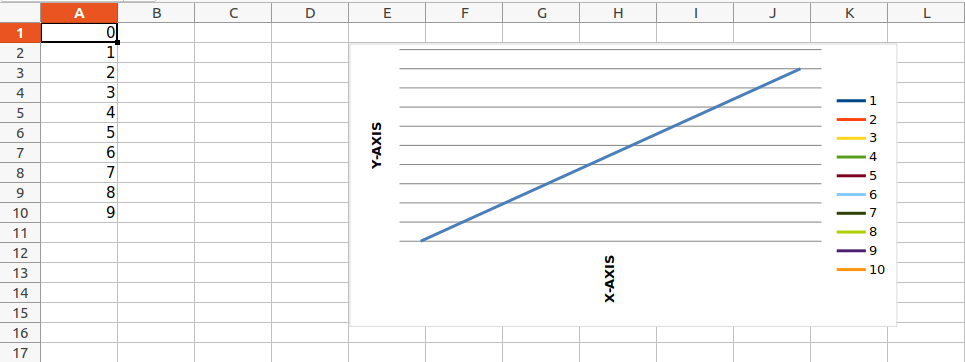
import openpyxl
from openpyxl.chart import LineChart, Reference
wb = openpyxl.Workbook()
sheet = wb.active
for i in range(10):
sheet.append([i])
values = Reference(sheet, min_col=1, min_row=1,
max_col=1, max_row=10)
chart = LineChart()
chart.add_data(values)
chart.title = " LINE-CHART "
chart.x_axis.title = " X-AXIS "
chart.y_axis.title = " Y-AXIS "
sheet.add_chart(chart, "E2")
wb.save("sample.xlsx")
Output:
Refer to the below articles to get detailed information about plotting in excel using Python.
- Plotting charts in excel sheet using openpyxl module | Set 1
- Plotting charts in excel sheet using openpyxl module | Set 2
- Plotting charts in excel sheet using openpyxl module | Set 3
Adding Images
For the purpose of importing images inside our worksheet, we would be using openpyxl.drawing.image.Image. The method is a wrapper over PIL.Image method found in PIL (pillow) library. Due to which it is necessary for the PIL (pillow) library to be installed in order to use this method.
Image Used:

Example:
Python3
import openpyxl
from openpyxl.drawing.image import Image
wb = openpyxl.Workbook()
sheet = wb.active
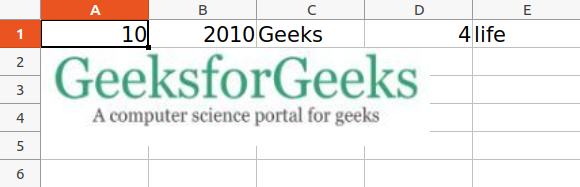
sheet.append([10, 2010, "Geeks", 4, "life"])
img = Image("geek.jpg")
sheet.add_image(img, 'A2')
wb.save('sample.xlsx')
Output:
Refer to the below article to get detailed information about adding images.
- Openpyxl – Adding Image
Some More Functionality of Excel using Python
- How to delete one or more rows in excel using Openpyxl?
- Trigonometric operations in excel file using openpyxl
- How to copy data from one excel sheet to another
- How to Automate an Excel Sheet in Python?
This python tutorial help to insert and delete rows and columns into an excel file using openpyxl. openpyxl is a Python Library developed by Eric Gazoni and Charlie Clark to read and write Excel xlsx/xlsm/xltm/xltx files without using the Excel software. It is an open source excel libs and the most widely used library for excel operation. The openpyxl is the default reader for Python Pandas.
You can also checkout other python excel tutorials:
- Popular Python excel Library
- Reading Excel Using Python Pandas
- Popular Python excel Library
- Inserting & Deleting rows/columns using openpyxl
Excel is a very powerful and popular software for spreadsheets. The python excel libs helps in reading and modifying excel spreadsheet files through python programs.
I have already shared tutorial How To Read & Update Excel File Using Python.
The openpyxl providing a set of methods to the sheet class, that help to add and delete rows/columns from the excel sheet. I’m going to load the workbook, and then grab that active sheet and perform add/delete operations.
How To Install openpyxl Library
This module does not come built-in with Python 3. You can install this package into your python application by running of the following command into the terminal.
pip3 install openpyxl
I am just extending the previous tutorial and adding functionality to insert and delete rows with columns.
How To Insert a Row into Excel File
You can insert rows using an excel file using the insert_rows() worksheet methods. The default is one row to insert into an excel file. The syntax is as follows:
insert_rows(idx, amount=1)
Whereas: The first parameter represents row number and the second parameter represents a number of rows.
The sample python code to Inserting row into excel:
path = "C:employee.xlsx"
wb_obj = openpyxl.load_workbook(path.strip())
sheet_obj = wb_obj.active
print("Maximum rows before inserting:", sheet_obj.max_row)
#insert 2 rows starting on the first row
sheet_obj.insert_rows(idx=3)

#insert multiple rows at once
#insert 3 rows starting on the six row
sheet_obj.insert_rows(6,3)

print("Maximum rows after inserting:", sheet_obj.max_row)

# save the file to the path
path = './employee.xlsx'
sheet_obj.save(path)
How To Insert a Column into Excel File
You can insert columns into the excel file using the insert_cols() worksheet methods. The default is one column to insert into excel file. The syntax is as follows:insert_cols(idx, amount=1)
Whereas : The first parameter represents column number and the second parameter represents the number of columns to add
The sample python code to Inserting Column into excel:
path = "C:employee.xlsx"
wb_obj = openpyxl.load_workbook(path.strip())
sheet_obj = wb_obj.active
print("Maximum column before inserting:", sheet_obj.max_column)
#insert a column before first column A
sheet_obj.insert_cols(idx=1)

print("Maximum column after inserting:", sheet_obj.max_column)

# save the file to the path
path = './employee.xlsx'
sheet_obj.save(path)
How To Delete a Row From Excel File
You can delete a row from the excel file using the delete_rows() worksheet methods. The default is one row to delete from the excel file. The syntax is as follows:
delete_rows(idx, amount=1)
Whereas: The first parameter represents row number and the second parameter represents the number of rows to delete
Sample Python Code to Delete Row from Excel:
path = "C:employee.xlsx"
wb_obj = openpyxl.load_workbook(path.strip())
//sheet = employee['sheet1']
sheet_obj = wb_obj.active
print("Maximum rows before removing:", sheet_obj.max_row)
# delete 2 rows starting on the third row
sheet_obj.delete_rows(idx=3, amount=2)

print("Maximum rows after removing:", sheet_obj.max_row)

# save the file to the path
path = './employee.xlsx'
sheet_obj.save(path)
How To Delete a Column From Excel File
You can delete a column from an excel file using the delete_cols() worksheet methods. The default is one column to delete from the excel file. The syntax is as follows:
delete_cols(idx, amount=1)
Sample Python Code to Delete Column from Excel:
path = "C:employee.xlsx"
wb_obj = openpyxl.load_workbook(path.strip())
sheet_obj = wb_obj.active
print("Maximum rows before removing:", sheet_obj.max_column)
#Delete column A
sheet_obj.delete_cols(idx=1)

print("Maximum cols after removing:", sheet_obj.max_column)

# save the file to the path
path = './employee.xlsx'
sheet_obj.save(path)
Conclusion
We have learned to insert a row of data into the existing excel file and insert a column into the existing excel file. Also, deleted a row and column from the excel file using openpyxl. There are a lots of Popular Python excel Library.
Despite the various Python Excel-manipulation libraries and resources, I am unable to find a specific solution.
Right now, I have a template Excel file where a table exists. I would like to write a Python program in order to populate this table. Is this possible with any of the existing Excel libraries? The template Excel file has a sheet with an empty table (1st screenshot). I want to programmatically populate the table with some data from elsewhere. e.g.

data = [("TS0001", "1.0 Administration", "Root", "vdouk", "15/09/19", 8.0, "example 1"),
        ("TS0002", "1.0 Administration", "Root", "vdouk", "16/09/19", 3.0, "example 2"),
        ("TS0003", "4.0 Simulations", "Root", "vdouk", "16/09/19", 5.0, "example 3")]
Thus, I want finally to look like the 2nd screenshot. The total entries and subtotals are computed automatically from appropriate excel cell functions (already defined). Finally, note that this table is referenced from other parts of the workbook, meaning that it is a named data source (seen in the Excel name manager), so defining a new table will cause problems elsewhere.
Can someone direct me to the most appropriate solution?

Here’s the working logic.
- Open an existing excel file.
- Do not change any formatting.
- Do not delete any existing data.
- Update the excel file with new rows:
- Insert all new rows just below the header row.
- Make sure this puts new rows as part of the existing table.
- Save and close the excel file.
Update
Right now, I am using openpyxl. The workaround I do is to edit the template .xlsx and add empty rows to the table. Then I write as many rows as my data tuples are by using openpyxl. The table totals seem to work, however some other excel macros seem to be breaking.