
Word for Microsoft 365 Word 2021 Word 2019 Word 2016 More…Less
Page through a document like a book using the Side to Side command

-
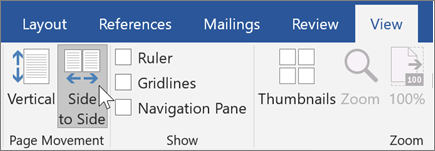
On the View tab, select
 Side to Side.
 -
Flip through pages with your finger if you have a touch screen, or use the horizontal scroll bar or mouse wheel to move through the pages.
 Side to Side.
Note: Side-to-side page movement switches off the ability to pick a zoom setting. Select Vertical page movement to be able to zoom again.
Jump quickly to the page you want
Thumbnails give you a quick peek of all the pages so you can jump to the page you want.
-
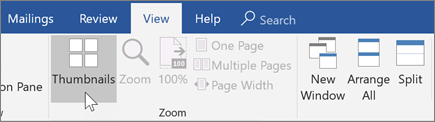
While using Side to Side page view, choose Thumbnails in the Zoom group.
-
Select a thumbnail to jump directly to that page.
If you’re using the Vertical page view
-
On the View tab, select Navigation Pane in the Show group
-
Select the Pages tab to see thumbnails.
Tip: To quickly switch between viewing a page and viewing thumbnails hold down Ctrl and use your mouse wheel. On a touch screen, pinch to zoom out to thumbnails.
Need more help?
Want more options?
Explore subscription benefits, browse training courses, learn how to secure your device, and more.
Communities help you ask and answer questions, give feedback, and hear from experts with rich knowledge.
 Please Note:
This article is written for users of the following Microsoft Word versions: 97, 2000, 2002, and 2003. If you are using a later version (Word 2007 or later), this tip may not work for you. For a version of this tip written specifically for later versions of Word, click here: Jumping to a Specific Page.
![]()
Written by Allen Wyatt (last updated May 31, 2014)
This tip applies to Word 97, 2000, 2002, and 2003
Word allows you to move the insertion point to any page in your document by using the Go To command. To take advantage of this feature, follow these steps:
- Choose the Go To option from the Edit menu, or simply press F5. Word displays the Go To tab of the Find and Replace dialog box. (See Figure 1.)
- On the left side of the dialog box, make sure that you indicate you want to go to a page (this should be the default choice).
- Enter the page number to which you want to move.
- Click on Go To, or press Enter.

Figure 1. The Go To tab of the Find and Replace dialog box.
If, instead of entering a page number (step 3), you simply click on the Next button, Word moves to the next page in the document.
WordTips is your source for cost-effective Microsoft Word training.
(Microsoft Word is the most popular word processing software in the world.)
This tip (27) applies to Microsoft Word 97, 2000, 2002, and 2003. You can find a version of this tip for the ribbon interface of Word (Word 2007 and later) here: Jumping to a Specific Page.
Author Bio
With more than 50 non-fiction books and numerous magazine articles to his credit, Allen Wyatt is an internationally recognized author. He is president of Sharon Parq Associates, a computer and publishing services company. Learn more about Allen…
MORE FROM ALLEN
Creating a List
You can format both numbered and bulleted lists very easily in Word. The tools available on the Formatting toolbar make …
Discover More
Using ASCII and ANSI Characters
Word natively supports several types of character sets. The most common characters sets are known as ASCII and ANSI …
Discover More
Template Changing On Its Own
When you attach a template to a document, you expect that template to stay attached. When you share the document with …
Discover More
More WordTips (menu)
Speeding Up Cursor Movement
If you use the arrow keys to move the insertion point through the document, you may have noticed that it can be slow …
Discover More
What Line Am I On?
At the bottom of your document, on the status bar, you can see the line on which your insertion point is located. It is …
Discover More
Jumping to a Relative Page
When you are navigating around your document, you may find it helpful to jump a certain number of pages either toward the …
Discover More
You may, at some point or the other, come upon a situation where you need to create Page Jumps in Microsoft Office Word. I have previously written an article in which I talk about creating a Page Jump in WordPress. The effect that you wish to achieve using Word is the same. In fact, most of the articles that I create on this blog are first written using Word. The unfortunate part is that there does not seem to be compatibility between Page Jumps in WordPress and the ones that are created using Microsoft Office Word. The moment I transfer my posts to my InterServer hosted WordPress blog, I am left with nothing but dead links.
Click on this link to jump to the section where I really explain how to create Page Jumps in Microsoft Office Word.
What are Page Jumps
A Page Jump is an instance in an article where a link points to another point on the same article. If you have been following my articles, you will have read this post in which I talk about links. Although they have no SEO value, Page Jumps offer a lot of functional value.
They allow your readers to skip all the drivel that you may have included in an article in order to satisfy the whims of the Yoast Plugin, which states that an article has to be over 300 words in length, if it is to have any chance of being ranked well by Search Engines.
You will notice that there is a Page Jump after the first paragraph of this article. You can click on it to jump to the next section; where I cut all the nonsense and begin to actually talk about how to create page jumps in Microsoft Office Word.
Creating a Page Jump in Word

To create Page Jumps in Microsoft Office Word, all that you need to do is the following;
- Go to the point on the Word document where you wish to take your readers.
- Either highlight some text (I like to highlight a subheading) where your wish the jump point to be, or simply click on an empty point on your Word Document.
- Go to the top and choose the “Insert,” tab.
- Under “Insert,” choose “Bookmark.” This will bring up the box that’s in the image above.
- Name your Bookmark and click “Add”.
- Afterwards, click on the “Close,” button.
- The next thing that you need to do in order to create page jumps in Microsoft Office Word is go to the place where you wish your link to be.
- Highlight and right click on the text that you wish to use as the link text.
- Choose the “Hyperlink,” option.
- In the Window that appears, choose “Bookmarks.”
- Under “Bookmarks,” select the bookmark that you created earlier.
- Click on “Okay,” and the selected text will now contain a link to your bookmarked position.
- Your readers can jump to this position by simply clicking and holding the “Ctrl” key on their keyboards, while clicking on the link text.
Conclusion
As already mentioned, inserting a Page Jump allows your readers to skip to the core of your content. The link that I placed after the first paragraph of this document allows readers to jump to the section where I really begin to explain how to create Page Jumps. If you are a blogger or web developer, feel free to also read this article in which I talk about some of the tools that you can use to check out your site’s up and down times.
There are many ways to quickly move around a Word document, here are 12 suggestions and shortcuts to let you navigate a doc faster. Word has many ways to navigate a document, most of which are hidden away and not obvious to the casual users.
Once a document gets past a few pages, you need options for moving around that document quickly. Jumping from place to place as you refine your prose into something worth your name. Here’s some tips and shortcuts for moving quickly around a document – large or small.
- Hold down the Ctrl key
- Go Back
- Last Edit Points
- Vertical scroll bar
- Navigation pane
- Open where you left off
- Find | Find Next
- Find highlighted text
- Move between comments
- Move between changes
- Jump between Word documents
Hold down the Ctrl key
Simply holding down the control key while using the arrow keys will speed up cursor movements.
When you press the left / right arrows you move a single character – we all know that. Hold down the Ctrl key then a left/right arrow moves a whole word at a time.
Ctrl and the up/down arrows move a paragraph at a time. Alt + up/down arrow also jumps a paragraph at a time.
Ctrl + Home jumps to the start of the document.
Ctrl + End jumps to the end of the document.
Go Back
Always useful is the ‘Go Back’ shortcut – Ctrl + Alt + Z or Command + Z on a Mac.
This takes you to the last edited point in the document. Press again to jump to the next to last edit point.
It’s useful when you’ve skipped to look at some other place in the document and want to jump back to the last place you were typing.
Last Edit Points
Similar to ‘Go Back’ is Shift + F5 which takes you through the last three edit points in the document.
Vertical scroll bar
If you drag the Vertical scroll block up and down, recent version of Word will show the page number and headings in a tooltip as you move down the page.

By Headings, Word means using the ‘Heading’ styles or a style with an outline level.
Navigation pane
For a ‘tree’ view of your document by headings switch on View | Show | Navigation Pane or in Word 2007 and before View | Document Map

Click on a heading to move to that heading in the document. Click on the wedges to the left of headings to expand/collapse the sub-headings. It’s also possible to select a heading and move it up/down the list which will move that heading and content in the document itself.
Right-click on a navigation pane heading to see various options like Promote/Demote to adjust heading levels.
For viewing and navigation note the ‘Show Heading Levels’ at the bottom which lets you see which heading levels appear in the Navigation Pane.

Open where you left off
Word will prompt you to ‘Pick up where you left off’, in other words where you were last looking or editing the document before saving.
On the right-side is a prompt like this to click on:

As you move your mouse away from the vertical scroll bar the prompt changes to something smaller.

Find | Find Next
There’s always the Find command. Enter the search terms and they’ll appear as a list on the left. The list can appear as Results, highlighted Headings or Pages.

That’s for recent versions of Word. All versions have the Find dialog box which can remain open while you move through the document. Press Ctrl + F to open Find. In recent versions of Word that opens the Navigation Pane and you have to choose Advanced Find to get the familiar Find dialog with all the options. Home | Editing | Find | Advanced Find. Found! Word shortcut to the Advanced Find dialog
The Find dialog box looks like this.

Reading highlight is a handy innovation in the latest releases of Word. It will highlight all the Find results in the document itself.
Find Next is an old favorite. It lets you jump to each Find result without closing the Find dialog box. For example, use it to make changes that a Replace command can’t cope with. Click on ‘Find Next’, click in the document and make the necessary changes then ‘Find Next’ again to jump to the next location.
Find highlighted text
It’s very common for people to highlight some text that they need to return to later … a link to be fixed, fact to be checked or sentence to be refined.
In a Word savvy world we’d all use Comments for these situations but in practice it’s often highlighting instead.
You can scroll through a document looking for highlighted text or use Find to jump between each highlighted item.
Go to Advanced Find, click More then Format | Highlight. Leave ‘Find What’ blank (i.e. find all text) then Find Next.
Word will move to the next highlighted text. You can click in the document (leaving the Find dialog open on the side)

If there are comments in a document you can move between them from the Review tab | Comments | Previous or Next.

Move between changes
Similarly, you can skip between shared edits in a document if ‘Track Changes’ has been set on while editing.

A reminder that while Track Changes and Comments is designed for document collaboration among many people, it can be very useful for individuals working on a document.
Jump between Word documents
The only reliable way to jump between Word documents is Ctrl + F6 or Ctrl + Shift + F6 in reverse order.
For reasons passing human understanding, Microsoft has disabled the Ctrl + Tab option for moving between documents. How to quickly switch between Word and Office windows
You can do this until you have it all. Press Control (Ctrl) + X to cut the text you selected. Move your cursor to the spot where you want the page moved to and press Control (Ctrl) + V to move the page. Word does all the rest.
Contents
- 1 Can I rearrange the pages in Word?
- 2 How do I move a page number down in Word?
- 3 How do you move to the top of a Word document?
- 4 How do I change the page order in Word 2013?
- 5 How do I move a page in Word Mac?
- 6 How do I rearrange pages in Pages?
- 7 How do you put page numbers outside the border in Word?
- 8 How do I change page numbers and margins in Word?
- 9 How do you go back to the top of a page in a Word document with a hyperlink?
- 10 How do you scroll a page in Word?
- 11 How do I change my page from vertical to moving?
- 12 How do I change the first page in Word?
- 13 Can you move pages around in pages?
- 14 How do you move pages around in Word 2007?
- 15 How do you move text in pages?
- 16 How do you make a 0.2 hanging indent?
- 17 How do I fix the layout of a Word document?
- 18 How do I drag margins in Word?
- 19 How do I change the top and bottom margins in Word?
- 20 How do you move to the top of a Word document on a Mac?
Can I rearrange the pages in Word?
Word doesn’t offer an easy, built-in option to easily rearrange pages if you don’t use headings. The only way to do it is to cut and paste the text and manually rearrange it instead.Using your mouse or trackpad, drag your cursor down to select the text you want to move.
How do I move a page number down in Word?
Move one page’s order/number down in Word
- Enable the Navigation Pane by checking the Navigation Pane option on the View tab.
- In the Navigation Pane, please click the Pages tab, and then click the specified page you will move to end.
- Now the cursor jumps to the beginning of the specified page.
How do you move to the top of a Word document?
Go to beginning of a document: [Ctrl]+[Home] Go to the bottom of a screen: [Ctrl]+[Page Down] Go to the top of a screen: [Ctrl]+[Page Up] Go to a specified location (page, bookmark, section): [Ctrl]+G or [F5]
How do I change the page order in Word 2013?
Step 1: Open your document in Word 2013.
- Step 2: Click before the first character of the first word on the page that you want to move.
- Step 3: Use the scroll bar on the right side of the window to adjust the page view so that the bottom of the page is visible.
How do I move a page in Word Mac?
Click and hold the mouse and slide it up or down the outline wherever you’d like that section to go. You’ll see a line appear where the section will go once you release the mouse. Release the mouse to drop that entire section in the new location. On a Mac, it looks a bit different, but it’s the same principle.
How do I rearrange pages in Pages?
Rearrange pages or sections
Click View in the toolbar, choose Show Page Thumbnails, select the page or section thumbnail, then drag it to where you want it in the page hierarchy.
How do you put page numbers outside the border in Word?
Double-click at the top or bottom of your doc or go Insert>Header or Insert>Footer. Then insert your page number at “the current location”. If you have to, you can play with the Header/Footer position and move the numbering outside your borders.
How do I change page numbers and margins in Word?
Change default margins
- Select Layout > Margins > Custom Margins.
- Set your margins.
- Select Set As Default.
- Confirm your selection.
How do you go back to the top of a page in a Word document with a hyperlink?
Scroll to the bottom of the page or to the spot where you want to insert the hyperlink. Type in a short phrase, such as “Back to Top,” indicating that you will jump to the top of the page by clicking on the text.
How do you scroll a page in Word?
To move page by page, you can hold down the Ctrl key and press Page Up or Page Down. You can also use View>Navigation Pane and click on the page icons to move a page at a time.
How do I change my page from vertical to moving?
For instance, if you’re viewing pages one and two and scroll down, you’ll then see pages two and three. To return to a one-page view in Word, select the View tab and in the Page Movement section of the ribbon, click Vertical.
How do I change the first page in Word?
Start page numbering later in your document
- Go to Insert > Header or Footer > Edit Header or Edit Footer.
- Select Different First Page.
- In the header or footer area, you should see a label on the first page that says First Page Header.
- Select Close Header and Footer or press Esc to exit.
Can you move pages around in pages?
Move a section or page: In the sidebar, select the section (in a word-processing document) or page (in a page layout document) you want to move, then drag it to where you want it in the document. You can move multiple pages at a time, but only one section at a time.
How do you move pages around in Word 2007?
Go to the page to move and click at the very top of the page. Hold down the “Shift” key and arrow down to the bottom of the page. You can also press the “PageDown” key, which selects one screen at a time. Release the key at the end of the page you need to move.
How do you move text in pages?
To drag and drop text
- Select the text you want to move . click here to view image.
- Move the cursor over the selected text.
- Click and hold your mouse button over the selected text, and drag it to its new location, releasing the mouse button when the cursor is where you want the text .
How do you make a 0.2 hanging indent?
Create a hanging indent
- Select the text where you want to add a hanging indent.
- Go to Home > Paragraph dialog launcher. > Indents and Spacing.
- Under Special, select Hanging. You can adjust the depth of the indent using the By field.
- Select OK.
How do I fix the layout of a Word document?
Change the default layout
- Open the template or a document based on the template whose default settings you want to change.
- On the Format menu, click Document, and then click the Layout tab.
- Make any changes that you want, and then click Default.
How do I drag margins in Word?
Hold your mouse over the line separating the white and gray area. You’ll see the pointer turn to a double arrow and will likely see a tooltip letting you know you’re point at the margin. Now, just click and drag that line left or right to adjust that margin.
How do I change the top and bottom margins in Word?
Set Margins for a Section of Your Document
- Select the section in the document where you want a different margin size.
- Select Layout > Margins > Custom Margins.
- Type new values for the Top, Bottom, Right, and Left margins.
- From the Apply to list, select This Section.
- Select OK when you’re done.
How do you move to the top of a Word document on a Mac?
To the top of the next page: Command + Page Down or Command + Fn + Down arrow. To the top of the previous page: Command + Page Up or Command + Fn + Up arrow. To the beginning of the document: Command + Home or Command + Fn + Left arrow. To the end of the document: Command + End or Command + Fn + Right arrow.