
| title | description | ms.date | ms.prod | ms.localizationpriority |
|---|---|---|---|---|
|
Word add-in tutorial |
In this tutorial, you’ll build a Word add-in that inserts (and replaces) text ranges, paragraphs, images, HTML, tables, and content controls. You’ll also learn how to format text and how to insert (and replace) content in content controls. |
03/14/2023 |
word |
high |
Tutorial: Create a Word task pane add-in
In this tutorial, you’ll create a Word task pane add-in that:
[!div class=»checklist»]
- Inserts a range of text
- Formats text
- Replaces text and inserts text in various locations
- Inserts images, HTML, and tables
- Creates and updates content controls
[!TIP]
If you’ve already completed the Build your first Word task pane add-in quick start, and want to use that project as a starting point for this tutorial, go directly to the Insert a range of text section to start this tutorial.
Prerequisites
[!includeYeoman generator prerequisites]
-
Office connected to a Microsoft 365 subscription (including Office on the web).
[!NOTE]
If you don’t already have Office, you can join the Microsoft 365 developer program to get a free, 90-day renewable Microsoft 365 subscription to use during development.
Create your add-in project
[!includeYeoman generator create project guidance]
- Choose a project type:
Office Add-in Task Pane project - Choose a script type:
JavaScript - What do you want to name your add-in?
My Office Add-in - Which Office client application would you like to support?
Word

After you complete the wizard, the generator creates the project and installs supporting Node components.
[!includeYeoman generator next steps]
Insert a range of text
In this step of the tutorial, you’ll programmatically test that your add-in supports the user’s current version of Word, and then insert a paragraph into the document.
Code the add-in
-
Open the project in your code editor.
-
Open the file ./src/taskpane/taskpane.html. This file contains the HTML markup for the task pane.
-
Locate the
<main>element and delete all lines that appear after the opening<main>tag and before the closing</main>tag. -
Add the following markup immediately after the opening
<main>tag.<button class="ms-Button" id="insert-paragraph">Insert Paragraph</button><br/><br/>
-
Open the file ./src/taskpane/taskpane.js. This file contains the Office JavaScript API code that facilitates interaction between the task pane and the Office client application.
-
Remove all references to the
runbutton and therun()function by doing the following:-
Locate and delete the line
document.getElementById("run").onclick = run;. -
Locate and delete the entire
run()function.
-
-
Within the
Office.onReadyfunction call, locate the lineif (info.host === Office.HostType.Word) {and add the following code immediately after that line. Note:- This code adds an event handler for the
insert-paragraphbutton. - The
insertParagraphfunction is wrapped in a call totryCatch(both functions will be added in the next step). This allows any errors generated by the Office JavaScript API layer to be handled separately from your service code.
// Assign event handlers and other initialization logic.
document.getElementById("insert-paragraph").onclick = () => tryCatch(insertParagraph);
- This code adds an event handler for the
-
Add the following functions to the end of the file. Note:
-
Your Word.js business logic will be added to the function passed to
Word.run. This logic doesn’t execute immediately. Instead, it’s added to a queue of pending commands. -
The
context.syncmethod sends all queued commands to Word for execution. -
The
tryCatchfunction will be used by all the functions interacting with the workbook from the task pane. Catching Office JavaScript errors in this fashion is a convenient way to generically handle uncaught errors.
async function insertParagraph() {
    await Word.run(async (context) => {

        // TODO1: Queue commands to insert a paragraph into the document.

        await context.sync();
    });
}

/** Default helper for invoking an action and handling errors. */
async function tryCatch(callback) {
    try {
        await callback();
    } catch (error) {
        // Note: In a production add-in, you'd want to notify the user through your add-in's UI.
        console.error(error);
    }
}
-
-
Within the
insertParagraph()function, replaceTODO1with the following code. Note:-
The first parameter to the
insertParagraphmethod is the text for the new paragraph. -
The second parameter is the location within the body where the paragraph will be inserted. Other options for insert paragraph, when the parent object is the body, are «End» and «Replace».
const docBody = context.document.body;
docBody.insertParagraph("Office has several versions, including Office 2016, Microsoft 365 subscription, and Office on the web.",
                        Word.InsertLocation.start);
-
-
Save all your changes to the project.
Test the add-in
-
Complete the following steps to start the local web server and sideload your add-in.
[!INCLUDE alert use https]
[!TIP]
If you’re testing your add-in on Mac, run the following command in the root directory of your project before proceeding. When you run this command, the local web server starts.-
To test your add-in in Word, run the following command in the root directory of your project. This starts the local web server (if it isn’t already running) and opens Word with your add-in loaded.
-
To test your add-in in Word on the web, run the following command in the root directory of your project. When you run this command, the local web server starts. Replace «{url}» with the URL of a Word document on your OneDrive or a SharePoint library to which you have permissions.
[!INCLUDE npm start:web command syntax]
-
-
In Word, if the «My Office Add-in» task pane isn’t already open, choose the Home tab, and then choose the Show Taskpane button in the ribbon to open the add-in task pane.

-
In the task pane, choose the Insert Paragraph button.
-
Make a change in the paragraph.
-
Choose the Insert Paragraph button again. Note that the new paragraph appears above the previous one because the
insertParagraphmethod is inserting at the start of the document’s body.


Format text
In this step of the tutorial, you’ll apply a built-in style to text, apply a custom style to text, and change the font of text.
Apply a built-in style to text
-
Open the file ./src/taskpane/taskpane.html.
-
Locate the
<button>element for theinsert-paragraphbutton, and add the following markup after that line.<button class="ms-Button" id="apply-style">Apply Style</button><br/><br/>
-
Open the file ./src/taskpane/taskpane.js.
-
Within the
Office.onReadyfunction call, locate the line that assigns a click handler to theinsert-paragraphbutton, and add the following code after that line.document.getElementById("apply-style").onclick = () => tryCatch(applyStyle);
-
Add the following function to the end of the file.
async function applyStyle() {
    await Word.run(async (context) => {

        // TODO1: Queue commands to style text.

        await context.sync();
    });
}
-
Within the
applyStyle()function, replaceTODO1with the following code. Note that the code applies a style to a paragraph, but styles can also be applied to ranges of text.const firstParagraph = context.document.body.paragraphs.getFirst(); firstParagraph.styleBuiltIn = Word.Style.intenseReference;
Apply a custom style to text
-
Open the file ./src/taskpane/taskpane.html.
-
Locate the
<button>element for theapply-stylebutton, and add the following markup after that line.<button class="ms-Button" id="apply-custom-style">Apply Custom Style</button><br/><br/>
-
Open the file ./src/taskpane/taskpane.js.
-
Within the
Office.onReadyfunction call, locate the line that assigns a click handler to theapply-stylebutton, and add the following code after that line.document.getElementById("apply-custom-style").onclick = () => tryCatch(applyCustomStyle);
-
Add the following function to the end of the file.
async function applyCustomStyle() {
    await Word.run(async (context) => {

        // TODO1: Queue commands to apply the custom style.

        await context.sync();
    });
}
-
Within the
applyCustomStyle()function, replaceTODO1with the following code. Note that the code applies a custom style that does not exist yet. You’ll create a style with the name MyCustomStyle in the Test the add-in step.const lastParagraph = context.document.body.paragraphs.getLast(); lastParagraph.style = "MyCustomStyle";
-
Save all your changes to the project.
Change the font of text
-
Open the file ./src/taskpane/taskpane.html.
-
Locate the
<button>element for theapply-custom-stylebutton, and add the following markup after that line.<button class="ms-Button" id="change-font">Change Font</button><br/><br/>
-
Open the file ./src/taskpane/taskpane.js.
-
Within the
Office.onReadyfunction call, locate the line that assigns a click handler to theapply-custom-stylebutton, and add the following code after that line.document.getElementById("change-font").onclick = () => tryCatch(changeFont);
-
Add the following function to the end of the file.
async function changeFont() {
    await Word.run(async (context) => {

        // TODO1: Queue commands to apply a different font.

        await context.sync();
    });
}
-
Within the
changeFont()function, replaceTODO1with the following code. Note that the code gets a reference to the second paragraph by using theParagraphCollection.getFirstmethod chained to theParagraph.getNextmethod.const secondParagraph = context.document.body.paragraphs.getFirst().getNext(); secondParagraph.font.set({ name: "Courier New", bold: true, size: 18 });
-
Save all your changes to the project.
Test the add-in
-
[!includeStart server and sideload add-in instructions]
-
If the add-in task pane isn’t already open in Word, go to the Home tab and choose the Show Taskpane button in the ribbon to open it.
-
Be sure there are at least three paragraphs in the document. You can choose the Insert Paragraph button three times. Check carefully that there’s no blank paragraph at the end of the document. If there is, delete it.
-
In Word, create a custom style named «MyCustomStyle». It can have any formatting that you want.
-
Choose the Apply Style button. The first paragraph will be styled with the built-in style Intense Reference.
-
Choose the Apply Custom Style button. The last paragraph will be styled with your custom style. (If nothing seems to happen, the last paragraph might be blank. If so, add some text to it.)
-
Choose the Change Font button. The font of the second paragraph changes to 18 pt., bold, Courier New.

Replace text and insert text
In this step of the tutorial, you’ll add text inside and outside of selected ranges of text, and replace the text of a selected range.
Add text inside a range
-
Open the file ./src/taskpane/taskpane.html.
-
Locate the
<button>element for thechange-fontbutton, and add the following markup after that line.<button class="ms-Button" id="insert-text-into-range">Insert Abbreviation</button><br/><br/>
-
Open the file ./src/taskpane/taskpane.js.
-
Within the
Office.onReadyfunction call, locate the line that assigns a click handler to thechange-fontbutton, and add the following code after that line.document.getElementById("insert-text-into-range").onclick = () => tryCatch(insertTextIntoRange);
-
Add the following function to the end of the file.
async function insertTextIntoRange() {
    await Word.run(async (context) => {

        // TODO1: Queue commands to insert text into a selected range.

        // TODO2: Load the text of the range and sync so that the
        //        current range text can be read.

        // TODO3: Queue commands to repeat the text of the original
        //        range at the end of the document.

        await context.sync();
    });
}
-
Within the
insertTextIntoRange()function, replaceTODO1with the following code. Note:-
The function is intended to insert the abbreviation [«(M365)»] into the end of the Range whose text is «Microsoft 365». It makes a simplifying assumption that the string is present and the user has selected it.
-
The first parameter of the
Range.insertTextmethod is the string to insert into theRangeobject. -
The second parameter specifies where in the range the additional text should be inserted. Besides «End», the other possible options are «Start», «Before», «After», and «Replace».
-
The difference between «End» and «After» is that «End» inserts the new text inside the end of the existing range, but «After» creates a new range with the string and inserts the new range after the existing range. Similarly, «Start» inserts text inside the beginning of the existing range and «Before» inserts a new range. «Replace» replaces the text of the existing range with the string in the first parameter.
-
You saw in an earlier stage of the tutorial that the
insert*methods of the body object don’t have the «Before» and «After» options. This is because you can’t put content outside of the document’s body.
const doc = context.document;
const originalRange = doc.getSelection();
originalRange.insertText(" (M365)", Word.InsertLocation.end);
-
-
We’ll skip over
TODO2until the next section. Within theinsertTextIntoRange()function, replaceTODO3with the following code. This code is similar to the code you created in the first stage of the tutorial, except that now you are inserting a new paragraph at the end of the document instead of at the start. This new paragraph will demonstrate that the new text is now part of the original range.doc.body.insertParagraph("Original range: " + originalRange.text, Word.InsertLocation.end);
Add code to fetch document properties into the task pane’s script objects
In all previous functions in this tutorial, you queued commands to write to the Office document. Each function ended with a call to the context.sync() method which sends the queued commands to the document to be executed. But the code you added in the last step calls the originalRange.text property, and this is a significant difference from the earlier functions you wrote, because the originalRange object is only a proxy object that exists in your task pane’s script. It doesn’t know what the actual text of the range in the document is, so its text property can’t have a real value. It’s necessary to first fetch the text value of the range from the document and use it to set the value of originalRange.text. Only then can originalRange.text be called without causing an exception to be thrown. This fetching process has three steps.
-
Queue a command to load (that is, fetch) the properties that your code needs to read.
-
Call the context object’s
syncmethod to send the queued command to the document for execution and return the requested information. -
Because the
syncmethod is asynchronous, ensure that it has completed before your code calls the properties that were fetched.
The following step must be completed whenever your code needs to read information from the Office document.
-
Within the
insertTextIntoRange()function, replaceTODO2with the following code.originalRange.load("text"); await context.sync();
When you’re done, the entire function should look like the following:
async function insertTextIntoRange() {
    await Word.run(async (context) => {

        const doc = context.document;
        const originalRange = doc.getSelection();
        originalRange.insertText(" (M365)", Word.InsertLocation.end);

        originalRange.load("text");
        await context.sync();

        doc.body.insertParagraph("Original range: " + originalRange.text, Word.InsertLocation.end);

        await context.sync();
    });
}
Add text between ranges
-
Open the file ./src/taskpane/taskpane.html.
-
Locate the
<button>element for theinsert-text-into-rangebutton, and add the following markup after that line.<button class="ms-Button" id="insert-text-outside-range">Add Version Info</button><br/><br/>
-
Open the file ./src/taskpane/taskpane.js.
-
Within the
Office.onReadyfunction call, locate the line that assigns a click handler to theinsert-text-into-rangebutton, and add the following code after that line.document.getElementById("insert-text-outside-range").onclick = () => tryCatch(insertTextBeforeRange);
-
Add the following function to the end of the file.
async function insertTextBeforeRange() {
    await Word.run(async (context) => {

        // TODO1: Queue commands to insert a new range before the
        //        selected range.

        // TODO2: Load the text of the original range and sync so that the
        //        range text can be read and inserted.

    });
}
-
Within the
insertTextBeforeRange()function, replaceTODO1with the following code. Note:-
The function is intended to add a range whose text is «Office 2019, » before the range with text «Microsoft 365». It makes an assumption that the string is present and the user has selected it.
-
The first parameter of the
Range.insertTextmethod is the string to add. -
The second parameter specifies where in the range the additional text should be inserted. For more details about the location options, see the previous discussion of the
insertTextIntoRangefunction.
const doc = context.document;
const originalRange = doc.getSelection();
originalRange.insertText("Office 2019, ", Word.InsertLocation.before);
-
-
Within the
insertTextBeforeRange()function, replaceTODO2with the following code.originalRange.load("text"); await context.sync(); // TODO3: Queue commands to insert the original range as a // paragraph at the end of the document. // TODO4: Make a final call of context.sync here and ensure // that it runs after the insertParagraph has been queued.
-
Replace
TODO3with the following code. This new paragraph will demonstrate the fact that the new text is not part of the original selected range. The original range still has only the text it had when it was selected.doc.body.insertParagraph("Current text of original range: " + originalRange.text, Word.InsertLocation.end);
-
Replace
TODO4with the following code.
Replace the text of a range
-
Open the file ./src/taskpane/taskpane.html.
-
Locate the
<button>element for theinsert-text-outside-rangebutton, and add the following markup after that line.<button class="ms-Button" id="replace-text">Change Quantity Term</button><br/><br/>
-
Open the file ./src/taskpane/taskpane.js.
-
Within the
Office.onReadyfunction call, locate the line that assigns a click handler to theinsert-text-outside-rangebutton, and add the following code after that line.document.getElementById("replace-text").onclick = () => tryCatch(replaceText);
-
Add the following function to the end of the file.
async function replaceText() {
    await Word.run(async (context) => {

        // TODO1: Queue commands to replace the text.

        await context.sync();
    });
}
-
Within the
replaceText()function, replaceTODO1with the following code. Note that the function is intended to replace the string «several» with the string «many». It makes a simplifying assumption that the string is present and the user has selected it.const doc = context.document; const originalRange = doc.getSelection(); originalRange.insertText("many", Word.InsertLocation.replace);
-
Save all your changes to the project.
Test the add-in
-
[!includeStart server and sideload add-in instructions]
-
If the add-in task pane isn’t already open in Word, go to the Home tab and choose the Show Taskpane button in the ribbon to open it.
-
In the task pane, choose the Insert Paragraph button to ensure that there’s a paragraph at the start of the document.
-
Within the document, select the phrase «Microsoft 365 subscription». Be careful not to include the preceding space or following comma in the selection.
-
Choose the Insert Abbreviation button. Note that » (M365)» is added. Note also that at the bottom of the document a new paragraph is added with the entire expanded text because the new string was added to the existing range.
-
Within the document, select the phrase «Microsoft 365». Be careful not to include the preceding or following space in the selection.
-
Choose the Add Version Info button. Note that «Office 2019, » is inserted between «Office 2016» and «Microsoft 365». Note also that at the bottom of the document a new paragraph is added but it contains only the originally selected text because the new string became a new range rather than being added to the original range.
-
Within the document, select the word «several». Be careful not to include the preceding or following space in the selection.
-
Choose the Change Quantity Term button. Note that «many» replaces the selected text.

Insert images, HTML, and tables
In this step of the tutorial, you’ll learn how to insert images, HTML, and tables into the document.
Define an image
Complete the following steps to define the image that you’ll insert into the document in the next part of this tutorial.
-
In the root of the project, create a new file named base64Image.js.
-
Open the file base64Image.js and add the following code to specify the Base64-encoded string that represents an image.
export const base64Image =
    "iVBORw0KGgoAAAANSUhEUgAAAZAAAAEFCAIAAABCdiZrAAAACXBIWXMAAAsSAAALEgHS3X78AAAgAElEQVR42u2dzW9bV3rGn0w5wLBTRpSACAUDmDRowGoj1DdAtBA6suksZmtmV3Qj+i8w3XUB00X3pv8CX68Gswq96aKLhI5bCKiM+gpVphIa1qQBcQbyQB/hTJlpOHUXlyEvD885vLxfvCSfH7KIJVuUrnif+z7nPOd933v37h0IIWQe+BEvASGEgkUIIRQsQggFixBCKFiEEELBIoRQsAghhIJFCCEULEIIBYsQQihYhBBCwSKEULAIIYSCRQghFCxCCAWLEEIoWIQQQsEihCwQCV4CEgDdJvYM9C77f9x8gkyJV4UEznvs6U780rvAfgGdg5EPbr9CyuC1IbSEJGa8KopqBWC/gI7Fa0MoWCROHJZw/lxWdl3isITeBa8QoWCRyOk2JR9sVdF+qvwnnQPsF+SaRSEjFCwSCr0LNCo4rYkfb5s4vj/h33YOcFSWy59VlIsgIRQs4pHTGvYMdJvIjupOx5Ir0Tjtp5K/mTKwXsSLq2hUWG0R93CXkKg9oL0+ldnFpil+yhlicIM06NA2cXgXySyuV7Fe5CUnFCziyQO2qmg8BIDUDWzVkUiPfHY8xOCGT77EWkH84FEZbx4DwOotbJpI5nj5CQWLTOMBj8votuRqBWDP8KJWABIr2KpLwlmHpeHKff4BsmXxFQmhYBGlBxzoy7YlljxOcfFAMottS6JH+4Xh69IhEgoWcesBNdVQozLyd7whrdrGbSYdIqFgkQkecMD4epO9QB4I46v4tmbtGeK3QYdIKFhE7gEHjO/odSzsfRzkS1+5h42q+MGOhf2CuPlIh0goWPSAogcccP2RJHI1riP+kQYdVK9Fh0goWPSAk82a5xCDG4zPJaWTxnvSIVKwKFj0gEq1go8QgxtUQQeNZtEhUrB4FZbaA9pIN+98hhhcatbNpqRoGgRKpdAhUrDIMnpAjVrpJSNApK/uRi7pEClYZIk84KDGGQ+IBhhicMP6HRg1ycedgVI6RELBWl4POFCr8VWkszpe3o76G1aFs9ws+dMhUrDIInvAAeMB0ZBCDG6QBh2kgVI6RAoWWRYPqBEI9+oQEtKgg3sNpUOkYJGF8oADxgOioUauXKIKOkxV99EhUrDIgnhAG+mCUQQhBpeaNb4JgOn3AegQKVhkvj2gjXRLLrIQgxtUQYdpNYsOkYJF5tUDarQg4hCDS1u3VZd83IOw0iFSsMiceUCNWp3WYH0Wx59R6ls9W1c6RAoWmQ8PaCNdz55hiMEN4zsDNhMDpXSIFCwylx5Qo1a9C3yVi69a2ajCWZ43NOkQKVgkph5wwHi+KQ4hBs9SC9+RMTpEChaJlwfUFylWEafP5uMKqIIOPv0sHSIFi8TFAzpLiXxF/KCbdetEGutFUSa6TXQsdKypv42UgZQhfrWOhbO6q8nPqqCD/zU4OkQKFpm9B7SRbrTpQwzJHNaL/VHyiRVF0dfC2xpOzMnKlUgjW0amhGRW/ZM+w5sqzuqTNWtb9nKBZDLoEClYZGYe0EYaENWHGDaquHJv5CPnz/H9BToWkjmsFkTdOX0GS22p1ovYNEdUr9vCeR3dJlIG1gojn2o8RKPiRX+D0iw6RAoWmYEH1HioiQZqq47VW32dalUlfi1fQf7ByEdUQpMpYfOJ46UPcFweKaMSaWyaWL8z/Mibxzgqe3G4CC6pT4dIwSLReUCNWrkJMdjh8sMSuk1d3bReRGb3hy97iS/SEl+5bQ0LqM4B9gvytaptC6kbwz++vD3ZG0r3EBDoWUg6RAoWCd0D9isXReTKTYghZbhdUB/UYlKV2TSHitZtYc9QrqynDGy/GnGg+4XJr779ShJ0gNdAKR3i/PAjXoIZe8BGBS+uhqtWAF4VXUWu3G//ORVqdVRiEumhWgFoVHT7gB1LnFAvVaJxYZJ+qx/XRuo1X0+RFqzPsF/QFZuEgrVcHnDPCGbFylnajN/wAZZvqgpR8IzO275tTvjnwl/4sORC6C9xWJLoYCKNrbpuR3Jazp/jxdUJmksoWIvvAfcLsD4LuLfn5hOJhWlVQ+lyNZDFcUl636GY5/Wpyzo3FRZ+WBeT1JhpGDVlIMMbjYfYM3Ba4zuXgkUPGBD5B5Kl6LaJ4/uh/CCDTvDjW4ROxZm4gj7+dwZLY24067AkF9OtesCaRYdIwaIHDIzMrmSzv2NNTgl4fLlSXw6kjs8pWN+FfHu3n8p/xpSBjWrwL0eHSMGiB/TL+h1JnNJ+xTA6MawXh1ogTWA5S5tvLS8vMVUM6s1j+TKZEASjQ6RgkVl6wH4pcUM+zs8qBq9WyRyMGozP+5J0/nzygrrLSkS4ONPmNg/vyr1npiQG9+kQKVhkBh5woFbSI8EuQwxTkS1j2xoG0zsHeBVcRsl/RNMqyoMOG9WRjAUd4pzD4GhoHjDsMIEqchX48JuUgU1zJN+kSa4D+LnjHfXiqqsa5Oejb8J/fs9TAZjFtiXXvgADpaqXZsqUFRY94NRq1agErFbrRWzVR9Tq9JlOrWy75NncCf982n+o+sYCDJTSIVKw6AGnRhoQbZsBv3S+MlyxAtC7xPF9WMUJDsi5M+gmVCWImpvolorOgXzTMPBAKR0iBWvuPWB4+4CiWj2Rz3MPcFSXHb90NmawbWDLRVZAc2pHZTkF2fWDKugQRqBUCvcQKVj0gI6qRxYQtfvGBIUdvHQ2fmk/VR7fk5Q5jr+2fmfygrpTfM+fu8qa6lEFHcIIlGocolWkQwwcLrr79oBB9YRxg7SDXbDjJISue71LHJWnrno+vRh+BX2Xq2QOO6+Hf3TTXsYl43M3BhVcZFNjEyvIluUNvAgrrIX1gINqRdpvM0C1EhatbBvowaM5neOVe/L2VX176/jip88CUysAhyV5SRheoFRSfV+i8RAvckH+XKyweBW8qNWeEelEP1XkKqgQw3j/T3sxyNv6cSKNm02xA3KrOvLV1gq4Xh1u3vUusWcE7KESK7jZlHvSoDqU+q/4CAUrItomWtUoRvup1KpRCWxb0KiNqFXvcoreWCem/ETh+ILRYJnvJzlxz+7wrt/l9qkuHUIIrMk9bxaZEjIltl2mYMWDjoVWFae1sAouVeQq2LUYZwfRaVG1dR9PnKp802EpxG016TCOgZsOb6tk9RayZVZVFKwZ8cff4b/+Htcq8sd17wInJt5UA17SUqnVWR0vbwf5Qn5KgPO6bo0mU0K2LJetbgtvqjgxQw8uqcbthDH+OrHS/5FV19MuJDXreoSCFQC9C3yxisQK8hVk1dteZ3W8qQY2VFm68OF/emj0JNJ430DKQCKN3gU6FrrNSHf9VaMrfI68F+ynXVKpkhxndRyX0TlQzv4hFKyABWuwMPGROWxiJ6kdmmibaJu+7gTpPRbgDbZsqJa9/T8AMrvIlnWx/m4Tx+XhY4yC5RXGGjzRbeHlbd3ZsWQO+Qp2mth84nFtSBoQtS0M1cobqqCD50BpMovrj/Dpufyk1OBXZueKgyq6KVjEI/bZMf3ef6aErTp2XiOzO8UtIe0gCuCoHMWm5MLWyJfK09HTdihdvwPjc+w0J4wvbJv4KhfF2VIKFnHLm8f4KjfhkF0yh00TN5vYfDJ510wVED0qR7ENv7Sa5SZQmlhB/gF2XsOoTdj+O6tjz8Dh3Tlbaow9XMNy/153rGGpDIJ+Ycv5bm6bcvVR5YaiPFCy8Kze6s+4lj4VpIHS1Vv4sORqa09YrlL5fa5hUbBmLFiDd/am6Soi0LtAqzqyMK9Sq8BDDEQVdMBooDSxgvXihAV14RfqxgBSsChYcREsmyv3lImtcU5raJs4q8sjV/MYYpgLrj9SxlP2C/iuiXxFl1EYL4GPym5/TRQsCla8BKu/3qFNbLl80a9yVKuwUIWzpmKQrnIPBcsrXHQPT+AucXzf70l91lahclT2FV7tNmEV8fI2t24jI8FLEC52Ysv9wpbAtsVLGNNy2+VyFWGFNX+4SWyReYHpKgrWUuAmsUXiDNNVFKwlsxJBLGyRGVh7LlfFAq5hzeTd38LL27oo0ABpnykSIG766pzWYH3GS0XBWvJr7yLg8/1F1J18l4pk1lXuhM1CaQkJPixN/jvXKlGMpVpa8u7CvSkj9CGshIIV92e7tOvxeBXGhGFIrN6Sp0ZPa5Jw1gfsdEzBWmbGb4BuE4d3JbdKtszHe1jllZTjsqTBvJtymFCwFpbxpRM77nAouzE+MnnBAiazK++rYZ9Flw4B4mODgrWkpG5I1nHf1gDFrPa1gveRNmQc+5jnOL2L/pDqzoGkN2mArpChFgrWXD3eS5J38KDJjDTKsMG4aaDlrXTjr1UdJkJPTLpCChYBAEmzSqcHOX8utySZXV65AFBFGezjgULBS1dIwaIflDzehVVeVZHFiIN/VFEGoZtVtyUxbtwrpGDNDb3fheUH26Z4Nq3bkhw5TKT9dtciqihDtynpWN2mK6RgzS/vemH5QemU9kZF0tohX6Er8VteSTmWPQlOZa5w4gwRQsFaZD/Yu5APLOhdyvs6XOfqu+faVhFlOKsrfwXjRRZHzFOwlumeKbkqr2xaVUmOdL3IiEPA5ZXmhPn4b2edy1gUrOVh/O2uaY/Vu2TEITi1eiCPMrRNnD9XC9Yz0Zgnc3SFFKxl9YPd5oT+Su2nkgQjIw7TklhR7ldMbOBzQldIwVpOxu+Z8SWScY7K8iKLEQf3bFTlUYZWdZjXVT4zTLrCGD16eAlm6QfdCJZ9WEdYLbYjDmG3FU/mRqoJD90EV3+Ga//o5aUPS77m2QiFrbQm6l24+ok6B+g2R0pj2xWy9SgFa6HV6o74kO9Ykx/vNsdlyficfGVkanRIgpV/4Euw3v/E4xZBMheYYKn2VZ0HcfS0quK6YaaE4/t8U9MSLlN55X4aRedAXouxVZab54Q0ytBtTnH933KvkIJFwdIEGsaRVjeZEiMOHsurRmWKyTfdlrj1wb1CCtZy+cHT2nSjorotuWbFvMj6w6/xhxN81xL/G/zsvY7ks384wfdBDHBURRmkB3EmukIBHpOaBVzDmlF55Wa5ffyeyZZF4VsrILM79e0XGb/5JX7zS8nHt+r92rDz79gvhPPWVkcZpF0S9cgTpHf51maFtQSCpTqOo0d1WCfPQRUyVFGGs7ouKaq5+IJmJdJYv8PLTMFaDj/ojcZDyd5ZMkd7IqKKMsDHqEcGsihYS+oHT0zvX016v3FQhYBqrV1/EGeCKxw7pkPBomAtGokV8W3dbXq/Z6A4rMNpYE5Wb8mjDPA9SZuucOb3Ey9B6OVVUH5wwFEZW3Xxg5kSTkxfUmjj/MrCdz7+ovpvclxYo2HTVKqVz5xtqyo6zfWil+VIQsGaGz/4xnevBelhHQD5Cl7eDqA88fCpcX6cns0Fv3JPHmUQWrZ7Y/yYDvcKaQkX2Q+6P46j5+uS5IN2xCEO9C7xrTWbC36toiyOpgq+KS25SVfICmtpyqsTM5ivbA/7HN8Iy1emjqQKOGu0lIHrj+SfEhD+5mFJ0t85AlQDJrrNwA6Kt01xuZCukIK1sILlIS+qolGRLJDZEQc/N6dmxqfmU85dufbTANbpPKCa3wXfa+3Co6JjIWX4coWzWt2jJSRT+EGftc/4nSNdlMmWo86R5ivDg3XdlryBVwR8ZCrVIdiTACdjrnBaJx7g24CCRcIqrwKvO1pVifNKpCPtoZwyRlrQfD0jM6iJMgQuoEyQUrAWX7B6F8ELVu8S38jMTqYUXS8BZ4ag8VBnGyP7NgQb6z/qMX7ZhV/lepGnoyhYMeP/vouRHxzw5rG80V0008CcZrBzEORS0VSoogxQDBz0D6fpULAWSrAi8IPDukYmE2uF0LfbBTPooQVCIGiiDG0zrEbG7ac8pkPBWiCEwEG3GeLOd/up3IiFXWQ5Xdjx/ZntfKmiDEC4FR9dIQVrQUhmxQXgsLf5pXem0JE9PDN4/jyAELnnS62JMoTa8P7EpCukYC0EH4QZv5JiH9YZJ6SIg9MM9i5nZgY1VWQgB3EmXnNh9ZCCRcGaSz4cvYE7VhQjoaSHdUKKODjNYIDzuKZl9ZZSI76pRJF1oiukYC2CH3TGoBHccRw99mGdcQKPODjN4Omz2YTabVRa3G3izeMovoHxc+wssihYc+8H30Z1Szcq8tBmgKvv8TGDmV3xweC8DtEwPk2HgkXBmm8/eFoLd+lXuH+kCzcBRhycZtAqzibUDiCxoiyvzuqRjuQQyuf1Ilu/UrDm2Q9G7Jikh3WCKrKcZvDN41BC7X/+NzBq+Nk3yurJZnx6UPTllap8/oBFFgVrfv1gxILVu5QfnUvmcOWe3y8+CBB0DuRHgvyI1F//Cp9+i7/6Bdbv4E/zuv5/yayyH3QYB3EmVrXCr/jDEu8DCtZ8+sG2OYNz+e2n8m27a76ngQ3+eYDtrlZv9UXqp3+BRMrVP9FUi1/PQiwEwUoZdIUULPrBaZAeoAtqUEXj4SzbOWmiDG0zuuVC4bcsyDddIQVrDhCO43iblhrMLfRMmSP1+fCP4ITz//4WHUuZ7dpQJ0VndfR6vHkDXSEFa/4E68Sc5Tejuns/Mn3dmVY4tUOvg9//J379C/zbTdQ/wN7HcsHSRBla1dmUV3SFFKy5JHVD7HAS9nEcPefP5YZ0rTDd8BtBBIMKtf/oJwDwP/+N869w/Hf44n3861/iP/4WFy+U/0QTZfB/EGe9qOyo5bKkFa4MXWE4sKd7OOVVtxnFcRw9x2X5cs+miRdXXX2Fb62RwRMB5hga/4Df/2o6+dNEGfwfxLle7ddEnqOwp7WRY9gfliJK27PCIh4f0YJDmTmqwzruIw69C5zVh/8FyG//aTq10nRl8H8QJ1/pq1VmVzKIyCXCpaYrpGDNkx98W4vFN3ZUlucPrlXm7JhueE2vEukRKfS8kdo5EDdPPWsfoWBF6gfP6gEvAKcM5Cv9/zIl5a0rKZEu5bVeUBGHaFi9pbz5/R/E2aiOaHcy611oTkwKVti89+7dO14Fd49QC3sfyz+183qkwjosBXacba2AfEVcJrdlSHUKR9SmFdxsyjXuRW6WO2vu+eRL5USc/YKvaHvKwPYriZV+kfPy1ZJZ7Iz63D1DuZT5c953rLBi4gcDyYsmc9g08cmXkk29xAryD3CzqbyNBXVTzbnyE3GIrnrdVf6YpzW/B3Gc247dVl++PRdZ3Za40qf5OrM6N07Boh8U7yKfO1a2VO28njCeM7GCT750dWupDuv4iThEQ2JFZ119TsRZL478+F+Xhsthnv2ysPSu6TbzLYc/U7BmgvCm9Bm/ShnYtiRS1TlA4yEaD3H+fEQQN5+46imq2q3fqMb62mbLyvld/g/iOM8k2mcDBl/Tc5ElFNfJXHQDIilYxIVa3Rm5o3wex0kZ2KqL+3ftp3hxFXsGGhU0Ktgv4Is0Xt4eytaVe5MrAlXT95Qx9Zj1yNBEGXoXk+c5pwydZR5EGWzXPCjWfBZZvUvxicWldwrWbHjXm1xe+Vy92jRH1KpzgL2P5U3Tz+ojp2TyD5SVyADV9r+wTRYfNFGGVnWC706kYdTwyZfYqktkS4gytKrDKzxw9EEVWexBSsGaDb3fTRYsP3lRofl65wD7BV1fBGFH302RJbWrwt0bEzRRBjcHca79UECt3pLIllOju60RKXd+cW9F1umzkQV1ukIKVoz8oLME8Hkcx6l9vUvsFyZvJDnv29XC5JdQFVlOfxSf8krFUXlCeZXMiWLnlC3BBY+30BqUb56LrBO6QgpWHAUr0OV2Z49NVUJdoGMNb103iqNq+o7wx0RPV2yqowzd5uSMW7eJPUOymDiQLWc1NL6057/Icr9XSChY8ypYmnUQvWYNcBPLUk3WEfb4Z0ggUYZuE1YR1meSWmxgBp1r7SrF8VZkdQ5Glh2TubjHRyhYS+cHO5bfXXan9LhPFTrvBDfHiVWHdRCbiIMmynBWn24T9rSGr3LKo9HfXygX9Z11nLciS7jIbOlHwYpXeeW/PcP3DpHSz4xRlVQu+x84N8WcxCHikFjR7QB4OOdsByBe3pYsLyaz2H6FTVOuj4PX8lZkveVeIQUrzoI10cQl0hNaxDkrLDfbdon0yMKT+0Mqvcv4Rhw2qsqqx89BnLM69gx5CZzZxc5ryev6LLKEGauJdGCjISlYxK8fnHgcZ72Im01dh1+MtsfL7E7OVW1UR/bLT8wpvn/VYZ3ZRhxSN3S1jM+DOGuF4b6EcFoAwJV7uNkUk1+DqtlbkSUU3SyyKFhzU14Zn/crF826eO9iZP9r09S1kcmWR+zb6bOpl/xVh3VmGHHQ7FT6b9k+qJJ6l3hVxJ4h7jYOjpQPtKljDWs6D0UWE6QUrFiQWBl53gpCI7d7Pyyg6B/UDUer39Vb2KpLNCuRxkYV1x+NfHEPjX1Vh3Uwo4jD+h2lmvufiOM85m235ek2cVjCy9uizUysYPMJdn6QLT8rWcI0HbpCCtZ8lFdOd5C6oSuy7LvIaZGcD/y1AjIlbFsjDY57l97HmqpM1kwiDvryymcDDLuNcrclbpKe1bFfwOFd8esns9h80k9s+SmyGMgKGjbwc81ZvT+Rwfh85J3npodcIo2bzb4rPH+O/cIEQRQOFWqe4frjOxPZfCIvHAY/bDTkHyjlwE6BBjVAO5nTLd7lH8i+gdbQIx/endp6f3o+LJN7F/hitf//mq6EhBVWkH7QqVbdpqutK2d4WjO7eFCyfZVD4+GEgz7+1QrqoMBaIbqIw8QoQ1BqBXXyw3adL65KfpvOFT2fK1l0hRSsOfCD475m05zwdLXvnz0DL66i8VByx3YOsGcEMDJeOPo7UvVENahCE2VwcxAnQLpN7Bfw8rZygd/DShb3CilYMRKsN67Xp3sXw/Upu1mopn2KfXzXqGHnNfIPROGwTWVQM01VveGTuSgiDvoog+cpgT69/4scju8HU9kJx3TWi3M2ryhmcA1rmvexVcSnjntbM5ZCxaY5YrXsjaSOhY6FRBopA8kcUoauIUnjod8tM0kxpVhC6l0o85ZBoVnKiXgdTeJV09iojvy+vM2nEC6vPaOEa1gUrNAFq22OpNWPyl5GeAqa5Z7z52hUAh5oOkAY/DOgbeLwbmjl6h0Yak/tcyJOYDWggY1qf9vUw6I7xqbpnNZgfUbBoiWM3A96a89wWJrabpw+w8vb2C+EpVZQr75nSiFGHDRRhrYZC7Wy6+j9AqzPvKRzB3WZc7WRrpAVVhRc/AvSPxOfk37sxnoRawUkc0ikJR6w28J5HWd1nNYiGgm1/Up+cigka3blnq4/xLzMTPT2wx6WkCmxwqJghcnvj/DTDXElItgVk/cNAPjWms3QOjtbr6oKA/5h1eNdAbSqOL6/UG+exMrI6udpDYk0BYuCFSZ//B3+5M/6/9+7wFe5IPNBMUG1sBJsehPA9Ue6iTgLeW2FvHHHcttEiDjgGpZrBmqFIKalxhPVYZ1gIw6a+V0I4iBOPBEie1QrCtbM3nwLQ+dAua6cLQfWxeEjU/mpbhONh4t5bdtPOZ6egjULuk1f01JjjqrpeyLtfYC7k9VburWbwCNmfM5RsFheLbQcqyfrCJMTvaFpu9qxIj2IEz0nJu8eClb0tf2iv+1Uh3Xgu1XWlXu6TqpH5QW/sOfPAztQRcEiruhYvqalzgW9S3yjsGZrBe/9BhIruKZ2fGf1uCRFWZ5TsFjVzxlvHitrAc9FluawN3y3bGd5TsEiEt4uzRNStf6dzMkb3enRRxna5uLXrf0K/SCApkAULOK2nl+k8yITaoGnyqOL2fLUp+E+Mr2II4t0QsHyJVhLhUpH7L4r7pkYZViex8BSFekULApWpGgm60wVcdCom7N59JLQbXHp3TMJXgK3vOvBqKF3gY6FbhPdJr5rLn5p8HVppJeTk+tVV10c9ONjF/UgzshNtoKUgR+nkTKGbRqJJ3j42f8Ds4luEx2rr2XfX6BjLdRNqJqsA8AqTgj967sydJt4cXWh3gypG8M2DKsFAGzJQMGaE2wzdV7v/3/vYl43wpJZbFty0ZmoOJr5XQiha02U1+QnOSRz/ZbWdmsgTWiDULDmkt5Fv93VfPlKje40KsrjykJr4HFBn23Lds9ujoaOgkVfGWtfqXF2mvZVQgcogZi0bKebo2CRBfSVmo7G0gahmv6lsy2v6OYoWMuL7ewiftPPyleqJutA1oJd1SFe9fcXz83ZD5vvmlPPXiUUrBBpm8Pooz1gZmAr7LtlYXylZiqXUDFldnVtZAIfHTZbN6e67IkVZMvIllm+UbDiR6uKRkWuDs5HfTI39CPz6Cs10/QGa1L6KIOf4ayzdXNTFbaZXWxUKVUUrBhjh7bdJyHt289pW+LvKzUrU4OIgz7KoNlVjJub8ybxmV3kK9xJpGDNj2wdlX3Fi2LuKzV7f0dlvK3pogzjW4rxdHOef3H5CvcWKVhzSLeJ43KQrd/j4yuTOeUqsl21ae7YjoXT2tyUk1N51Y9MShUFa845q6NRCTdtNFtfGc9rjgiDIMks8hXuA1KwFojTGo7LUcfZZ+srI3Nz3/3g6aKP2nITkIK1yLRNHJVnHF6fua/06eZsVYrDYaYr93CtQqmiYC00024jRkZMfKUtSQM3B8RxLAU3ASlYSydb31Tw5vEcfKsh+cqZuznPV2OjyhHzFKylpNtEozKXzVXc+8p4ujkPpG7gepWbgBSspSeCbcRoGA+LzkX3GDdmmZuAsXpc8hLMkrUC1uo4q+Pr0nINYpiLQjJb1kX2ySzgEIp4yNZOE5tPkMzyYsSlYLzZpFpRsIiaTAnbFvIPph75R4L8Lexi5/WEIdWEgkUAIJFGvoKbTS+jlYlPVm9h5zU2TUYWKFhketnaeY3MLi9GRFL1yZfYqlOqKFjEK8kcNk1sv+qHoUgoFzmLzSfYqjOyQMEiQZAysFXHJ19OMWaZuCpjV3D9EXbYv5iCRQJnrYBti9uIgUmVvYzBIcUAAAIqSURBVAmYLfNiULBIaGRK2GlyG9HfNdzFtsVNQAoWiYrBNiJlayq4CUjBIjMyNWnkK9i2uI3oVqq4CUjBIjPG3kbcec1tRPUlysL4nJuAFCwSJ9mytxEpWyNF6Ao2n2CnqZyXQShYZGasFbBV5zZiX6rsTUDmFShYJNbY24jXHy3venxmt39omZuAFCwyH2TLy7iNuH6nvwlIqaJgkXmzRcu0jWhvAho1bgJSsMg8M9hGXL+zoD9gtp9X4CYgBYssjmwZtUXbRrQPLe80KVUULLKI2NuIxudzv41obwJuW9wEpGCRRWe92O/FPKfr8VfucROQgkWWjExp/rYR7c7FG1VKFQWLLB+DXszx30a0NwF5aJlQsChb/W3EeMpW6gY3AQkFi4xipx9itY1obwJuW5QqIj5keQkIEJuRrhxfSlhhkSlka4YjXTm+lFCwyNREP9KV40sJBYv4sGY/bCNeuRfuC63ewvYrbgISChYJQrY2qmFtIw46F6cMXmlCwSIBEfhIV44vJRQsEi6BjHTl+FJCwSLR4XmkK8eXEgoWmQ3TjnTl+FJCwSIzZjDSVQPHl5JAee/du3e8CsQX3Sa6Y730pB8khIJFCKElJIQQChYhhFCwCCEULEIIoWARQggFixBCwSKEEAoWIYRQsAghFCxCCKFgEUIIBYsQQsEihBAKFiGEULAIIRQsQgihYBFCCAWLEELBIoQQChYhhILFS0AIoWARQkjA/D87uqZQTj7xTgAAAABJRU5ErkJggg==";
Insert an image
-
Open the file ./src/taskpane/taskpane.html.
-
Locate the
<button>element for thereplace-textbutton, and add the following markup after that line.<button class="ms-Button" id="insert-image">Insert Image</button><br/><br/>
-
Open the file ./src/taskpane/taskpane.js.
-
Locate the
Office.onReadyfunction call near the top of the file and add the following code immediately before that line. This code imports the variable that you defined previously in the file ./base64Image.js.import { base64Image } from "../../base64Image";
-
Within the
Office.onReadyfunction call, locate the line that assigns a click handler to thereplace-textbutton, and add the following code after that line.document.getElementById("insert-image").onclick = () => tryCatch(insertImage);
-
Add the following function to the end of the file.
async function insertImage() {
    await Word.run(async (context) => {

        // TODO1: Queue commands to insert an image.

        await context.sync();
    });
}
-
Within the
insertImage()function, replaceTODO1with the following code. Note that this line inserts the Base64-encoded image at the end of the document. (TheParagraphobject also has aninsertInlinePictureFromBase64method and otherinsert*methods. See the following «Insert HTML» section for an example.)context.document.body.insertInlinePictureFromBase64(base64Image, Word.InsertLocation.end);
Insert HTML
-
Open the file ./src/taskpane/taskpane.html.
-
Locate the
<button>element for theinsert-imagebutton, and add the following markup after that line.<button class="ms-Button" id="insert-html">Insert HTML</button><br/><br/>
-
Open the file ./src/taskpane/taskpane.js.
-
Within the
Office.onReadyfunction call, locate the line that assigns a click handler to theinsert-imagebutton, and add the following code after that line.document.getElementById("insert-html").onclick = () => tryCatch(insertHTML);
-
Add the following function to the end of the file.
async function insertHTML() {
    await Word.run(async (context) => {

        // TODO1: Queue commands to insert a string of HTML.

        await context.sync();
    });
}
-
Within the
insertHTML()function, replaceTODO1with the following code. Note:-
The first line adds a blank paragraph to the end of the document.
-
The second line inserts a string of HTML at the end of the paragraph; specifically two paragraphs, one formatted with the Verdana font, the other with the default styling of the Word document. (As you saw in the
insertImagemethod earlier, thecontext.document.bodyobject also has theinsert*methods.)
const blankParagraph = context.document.body.paragraphs.getLast().insertParagraph("", Word.InsertLocation.after);
blankParagraph.insertHtml('<p style="font-family: verdana;">Inserted HTML.</p><p>Another paragraph</p>', Word.InsertLocation.end);
-
Insert a table
-
Open the file ./src/taskpane/taskpane.html.
-
Locate the
<button>element for theinsert-htmlbutton, and add the following markup after that line.<button class="ms-Button" id="insert-table">Insert Table</button><br/><br/>
-
Open the file ./src/taskpane/taskpane.js.
-
Within the
Office.onReadyfunction call, locate the line that assigns a click handler to theinsert-htmlbutton, and add the following code after that line.document.getElementById("insert-table").onclick = () => tryCatch(insertTable);
-
Add the following function to the end of the file.
async function insertTable() {
    await Word.run(async (context) => {

        // TODO1: Queue commands to get a reference to the paragraph
        //        that will precede the table.

        // TODO2: Queue commands to create a table and populate it with data.

        await context.sync();
    });
}
-
Within the
insertTable()function, replaceTODO1with the following code. Note that this line uses theParagraphCollection.getFirstmethod to get a reference to the first paragraph and then uses theParagraph.getNextmethod to get a reference to the second paragraph.const secondParagraph = context.document.body.paragraphs.getFirst().getNext();
-
Within the
insertTable()function, replaceTODO2with the following code. Note:-
The first two parameters of the
insertTablemethod specify the number of rows and columns. -
The third parameter specifies where to insert the table, in this case after the paragraph.
-
The fourth parameter is a two-dimensional array that sets the values of the table cells.
-
The table will have plain default styling, but the
insertTablemethod returns aTableobject with many members, some of which are used to style the table.
const tableData = [
        ["Name", "ID", "Birth City"],
        ["Bob", "434", "Chicago"],
        ["Sue", "719", "Havana"],
    ];
secondParagraph.insertTable(3, 3, Word.InsertLocation.after, tableData);
-
-
Save all your changes to the project.
Test the add-in
-
[!includeStart server and sideload add-in instructions]
-
If the add-in task pane isn’t already open in Word, go to the Home tab and choose the Show Taskpane button in the ribbon to open it.
-
In the task pane, choose the Insert Paragraph button at least three times to ensure that there are a few paragraphs in the document.
-
Choose the Insert Image button and note that an image is inserted at the end of the document.
-
Choose the Insert HTML button and note that two paragraphs are inserted at the end of the document, and that the first one has the Verdana font.
-
Choose the Insert Table button and note that a table is inserted after the second paragraph.

Create and update content controls
In this step of the tutorial, you’ll learn how to create Rich Text content controls in the document, and then how to insert and replace content in the controls.
[!NOTE]
There are several types of content controls that can be added to a Word document through the UI, but currently only Rich Text content controls are supported by Word.js.Before you start this step of the tutorial, we recommend that you create and manipulate Rich Text content controls through the Word UI, so you can be familiar with the controls and their properties. For details, see Create forms that users complete or print in Word.
Create a content control
-
Open the file ./src/taskpane/taskpane.html.
-
Locate the
<button>element for theinsert-tablebutton, and add the following markup after that line.<button class="ms-Button" id="create-content-control">Create Content Control</button><br/><br/>
-
Open the file ./src/taskpane/taskpane.js.
-
Within the
Office.onReadyfunction call, locate the line that assigns a click handler to theinsert-tablebutton, and add the following code after that line.document.getElementById("create-content-control").onclick = () => tryCatch(createContentControl);
-
Add the following function to the end of the file.
async function createContentControl() {
    await Word.run(async (context) => {

        // TODO1: Queue commands to create a content control.

        await context.sync();
    });
}
-
Within the
createContentControl()function, replaceTODO1with the following code. Note:-
This code is intended to wrap the phrase «Microsoft 365» in a content control. It makes a simplifying assumption that the string is present and the user has selected it.
-
The
ContentControl.titleproperty specifies the visible title of the content control. -
The
ContentControl.tagproperty specifies an tag that can be used to get a reference to a content control using theContentControlCollection.getByTagmethod, which you’ll use in a later function. -
The
ContentControl.appearanceproperty specifies the visual look of the control. Using the value «Tags» means that the control will be wrapped in opening and closing tags, and the opening tag will have the content control’s title. Other possible values are «BoundingBox» and «None». -
The
ContentControl.colorproperty specifies the color of the tags or the border of the bounding box.
const serviceNameRange = context.document.getSelection();
const serviceNameContentControl = serviceNameRange.insertContentControl();
serviceNameContentControl.title = "Service Name";
serviceNameContentControl.tag = "serviceName";
serviceNameContentControl.appearance = "Tags";
serviceNameContentControl.color = "blue";
-
Replace the content of the content control
-
Open the file ./src/taskpane/taskpane.html.
-
Locate the
<button>element for thecreate-content-controlbutton, and add the following markup after that line.<button class="ms-Button" id="replace-content-in-control">Rename Service</button><br/><br/>
-
Open the file ./src/taskpane/taskpane.js.
-
Within the
Office.onReadyfunction call, locate the line that assigns a click handler to thecreate-content-controlbutton, and add the following code after that line.document.getElementById("replace-content-in-control").onclick = () => tryCatch(replaceContentInControl);
-
Add the following function to the end of the file.
async function replaceContentInControl() {
    await Word.run(async (context) => {

        // TODO1: Queue commands to replace the text in the Service Name
        //        content control.

        await context.sync();
    });
}
-
Within the
replaceContentInControl()function, replaceTODO1with the following code. Note:- The
ContentControlCollection.getByTagmethod returns aContentControlCollectionof all content controls of the specified tag. We usegetFirstto get a reference to the desired control.
const serviceNameContentControl = context.document.contentControls.getByTag("serviceName").getFirst();
serviceNameContentControl.insertText("Fabrikam Online Productivity Suite", Word.InsertLocation.replace);
- The
-
Save all your changes to the project.
Test the add-in
-
[!includeStart server and sideload add-in instructions]
-
If the add-in task pane isn’t already open in Word, go to the Home tab and choose the Show Taskpane button in the ribbon to open it.
-
In the task pane, choose the Insert Paragraph button to ensure that there’s a paragraph with «Microsoft 365» at the top of the document.
-
In the document, select the text «Microsoft 365» and then choose the Create Content Control button. Note that the phrase is wrapped in tags labelled «Service Name».
-
Choose the Rename Service button and note that the text of the content control changes to «Fabrikam Online Productivity Suite».

Next steps
In this tutorial, you’ve created a Word task pane add-in that inserts and replaces text, images, and other content in a Word document. To learn more about building Word add-ins, continue to the following article.
[!div class=»nextstepaction»]
Word add-ins overview
See also
- Office Add-ins platform overview
- Develop Office Add-ins
Introduction
Word documents are everywhere and are used for countless tasks so you may have a requirement to support their generation from within your web application or webpage, this could include downloading a C.V from your personal site to the generation of a report based on data from within your web application that can be printed out or emailed by your client.
Goals
Create and save a Word document using only client-side vanilla/plain JavaScript.
Prerequisites
In order to complete this example you should have some basic knowledge of HTML and JavaScript.
Step 1 — Setup project
In order to concentrate on the job in hand and to get up and running as quickly as possible we are going to use CodeSandbox and their vanilla starter project.
A new CodeSandbox project can be created by opening the following link vanilla JavaScript project.
Step 2 — Install dependencies needed to create a Word document
With the project setup we can now install the two modules/dependencies needed to successfully create and save a Word document. The first package (docx) allows you to build your Word document and the second package (file-saver) gives the ability to save the document locally.
Add the two packages using the «Add Dependency» button.

Step 3 — Add a button to create our Word document
Before we start writing the code required to generate our Word documents lets add a button to the index.html file. We can then use this button to fire off the actions needed to generate the Word document.
<!DOCTYPE html>
<html>
  <head>
    <title>Parcel Sandbox</title>
    <meta charset="UTF-8" />
  </head>

  <body>
    <div id="app"></div>
    <button id="generate">Generate Word Document</button>
    <script src="src/index.js"></script>
  </body>
</html>
Enter fullscreen mode
Exit fullscreen mode
Step 4 — Create a blank Word document
From now one we will be working solely within the index.js JavaScript file, lets start by deleting everything that is currently there as this is not need.
All we will need to create a blank word document is the Document and Packer features from the docx module and the saveAs feature from file-saver module.
import { Document, Packer } from "docx"
import { saveAs } from "file-saver"
Enter fullscreen mode
Exit fullscreen mode
Next add an event listener that is listening for clicks on the button we created in Step 3.
// Listen for clicks on Generate Word Document button
document.getElementById("generate").addEventListener(
  "click",
  function(event) {
    generateWordDocument(event)
  },
  false
)
Enter fullscreen mode
Exit fullscreen mode
Once the event listener is triggered we will call a function that will create a new instance of Document from the docx module and send this instance to a saveDocumentToFile function.
function generateWordDocument(event) {
  event.preventDefault()
  // Create a new instance of Document for the docx module
  let doc = new Document()
  // Call saveDocumentToFile with the document instance and a filename
  saveDocumentToFile(doc, "New Document.docx")
}
Enter fullscreen mode
Exit fullscreen mode
The saveDocumentToFile function creates a new instance of Packer from the docx modules, Packers in docx are used to turn your JavaScript code into a .docx file. We then send our document instance to Packers toBlob function which in turn converts our instance of Document into a Blob object, a mimeType is added to the Blob and finally the Blob is sent to saveAs feature of the file-saver module which will create the file and prompt you to save or open.
function saveDocumentToFile(doc, fileName) {
  // Create new instance of Packer for the docx module
  const packer = new Packer()
  // Create a mime type that will associate the new file with Microsoft Word
  const mimeType =
    "application/vnd.openxmlformats-officedocument.wordprocessingml.document"
  // Create a Blob containing the Document instance and the mimeType
  packer.toBlob(doc).then(blob => {
    const docblob = blob.slice(0, blob.size, mimeType)
    // Save the file using saveAs from the file-saver package
    saveAs(docblob, fileName)
  })
}
Enter fullscreen mode
Exit fullscreen mode
Clicking the ‘Generate Word Document’ button will now create and save a blank Word document.
Step 5 — Create content of the Word document
We can now start adding some content to the Word document. We will simply add a title, subtitle, two headings and a long paragraph as this will make it easier to understand once we come to start styling the document.
function generateWordDocument(event) {
  event.preventDefault()
  let doc = new Document()
  doc.createParagraph("Title")
  doc.createParagraph("Subtitle")
  doc.createParagraph("Heading 1")
  doc.createParagraph("Heading 2")
  doc.createParagraph(
    "Aliquam gravida quam sapien, quis dapibus eros malesuada vel. Praesent tempor aliquam iaculis. Nam ut neque ex. Curabitur pretium laoreet nunc, ut ornare augue aliquet sed. Pellentesque laoreet sem risus. Cras sodales libero convallis, convallis ex sed, ultrices neque. Sed quis ullamcorper mi. Ut a leo consectetur, scelerisque nibh sit amet, egestas mauris. Donec augue sapien, vestibulum in urna et, cursus feugiat enim. Ut sit amet placerat quam, id tincidunt nulla. Cras et lorem nibh. Suspendisse posuere orci nec ligula mattis vestibulum. Suspendisse in vestibulum urna, non imperdiet enim. Vestibulum vel dolor eget neque iaculis ultrices."
  )
  saveDocumentToFile(doc, "New Document.docx")
}
Enter fullscreen mode
Exit fullscreen mode
The Word document will now look something like this

Step 6 — Style the Word document
Now that we have some content we can look at styling the document.
Firstly we will create a theme object that will hold all the information about which fonts and colours we want to use.
function generateWordDocument(event) {
  event.preventDefault()
  // Create new instance of Document for the docx module
  let doc = new Document()
  doc.theme = {
    font: {
      normal: {
        family: "Calibri",
        color: "303856",
      },
      header: { family: "Calibri Light" },
    },
    title: {
      color: "4ABDAC",
    },
    headings: {
      one: {
        color: "FC4A1A",
      },
      two: {
        color: "F7B733",
      },
    },
  }
  ...
  ...
  // Call saveDocumentToFile withe the document instance and a filename
  saveDocumentToFile(doc, "New Document.docx")
}
Enter fullscreen mode
Exit fullscreen mode
After creating the theme object we can start creating our styles. We will create 5 styles
- Custom Heading 1
- Custom Heading 2
- Custom Title
- Custom Subtitle
- Custom Normal
These should tie up nicely to the content that we created in Step 5.
You can learn more about styles in Microsoft Word here
function generateWordDocument(event) {
  event.preventDefault()
  // Create new instance of Document for the docx module
  let doc = new Document()
  ...
  ...
  doc.Styles.createParagraphStyle("customHeading1", "Custom Heading 1")
    .basedOn("Heading 1")
    .next("Normal")
    .quickFormat()
    .font(doc.theme.font.header.family)
    .size(32)
    .bold()
    .color(doc.theme.headings.one.color)
    .spacing({ after: 250 })

  doc.Styles.createParagraphStyle("customHeading2", "Custom Heading 2")
    .basedOn("Heading 2")
    .next("Normal")
    .quickFormat()
    .font(doc.theme.font.header.family)
    .size(26)
    .bold()
    .color(doc.theme.headings.two.color)
    .spacing({ after: 150 })

  doc.Styles.createParagraphStyle("customTitle", "Custom Title")
    .basedOn("Title")
    .next("Normal")
    .quickFormat()
    .font(doc.theme.font.header.family)
    .size(56)
    .bold()
    .color(doc.theme.font.normal.color)
    .spacing({ after: 250 })

  doc.Styles.createParagraphStyle("customSubtitle", "Custom Subtitle")
    .basedOn("Subtitle")
    .next("Normal")
    .quickFormat()
    .font(doc.theme.font.header.family)
    .size(22)
    .color(doc.theme.font.normal.color)
    .spacing({ after: 150 })

  doc.Styles.createParagraphStyle("customNormal", "Custom Normal")
    .basedOn("Normal")
    .quickFormat()
    .font(doc.theme.font.normal.family)
    .size(20)
    .color(doc.theme.font.normal.color)
    .spacing({ after: 150 })
  ...
  ...
  // Call saveDocumentToFile withe the document instance and a filename
  saveDocumentToFile(doc, "New Document.docx")
}
Enter fullscreen mode
Exit fullscreen mode
With our styles in place we can apply them to our content.
function generateWordDocument(event) {
  event.preventDefault()
  // Create new instance of Document for the docx module
  let doc = new Document()
  ...
  ...
  doc.createParagraph("Title").style("customTitle")
  doc.createParagraph("Subtitle").style("customSubtitle")
  doc.createParagraph("Heading 1").style("customHeading1")
  doc.createParagraph("Heading 2").style("customHeading2")
  doc
    .createParagraph(
      "Aliquam gravida quam sapien, quis dapibus eros malesuada vel. Praesent tempor aliquam iaculis. Nam ut neque ex. Curabitur pretium laoreet nunc, ut ornare augue aliquet sed. Pellentesque laoreet sem risus. Cras sodales libero convallis, convallis ex sed, ultrices neque. Sed quis ullamcorper mi. Ut a leo consectetur, scelerisque nibh sit amet, egestas mauris. Donec augue sapien, vestibulum in urna et, cursus feugiat enim. Ut sit amet placerat quam, id tincidunt nulla. Cras et lorem nibh. Suspendisse posuere orci nec ligula mattis vestibulum. Suspendisse in vestibulum urna, non imperdiet enim. Vestibulum vel dolor eget neque iaculis ultrices."
    )
    .style("customNormal")
  // Call saveDocumentToFile withe the document instance and a filename
  saveDocumentToFile(doc, "New Document.docx")
}
Enter fullscreen mode
Exit fullscreen mode
Clicking the ‘Generate Word Document’ button now will create a Word document that look something like this

Conclusion
With the use of a couple of great packages we can easily create a nice looking Word document using solely client side JavaScript. Docx is very powerful and this article only covers the basics to get you up and running with a simple Word document.
Complete Example
A complete example of the code can be found here
![]()
Easily generate .docx files with JS/TS. Works for Node and on the Browser.
![]()

![]()
![]()

![]()
![]()

Demo
Browser
Here are examples of docx being used with basic HTML/JS in a browser environment:
- https://codepen.io/dolanmiu/pen/RwNeObg
- https://jsfiddle.net/dolanmiu/onadx1gu/
Here are examples of docx working in Angular:
- https://stackblitz.com/edit/angular-docx
- https://stackblitz.com/edit/angular-wmd6k3
Here are examples of docx working in React:
- https://stackblitz.com/edit/react-docx
- https://stackblitz.com/edit/react-docx-images (adding images to Word Document)
Here is an example of docx working in Vue.js:
- https://stackblitz.com/edit/vuejs-docx
Node
Press endpoint on the RunKit website:

- https://runkit.com/dolanmiu/docx-demo1 — Simple paragraph and text
- https://runkit.com/dolanmiu/docx-demo2 — Advanced Paragraphs and text
- https://runkit.com/dolanmiu/docx-demo3 — Bullet points
- https://runkit.com/dolanmiu/docx-demo4 — Simple table
- https://runkit.com/dolanmiu/docx-demo5 — Images
- https://runkit.com/dolanmiu/docx-demo6 — Margins
- https://runkit.com/dolanmiu/docx-demo7 — Landscape
- https://runkit.com/dolanmiu/docx-demo8 — Header and Footer
- https://runkit.com/dolanmiu/docx-demo10 — My CV generated with docx
More here
How to use & Documentation
Please refer to the documentation at https://docx.js.org/ for details on how to use this library, examples and much more!
Examples
Check the demo folder for examples.
Contributing
Read the contribution guidelines here.
Used by


…and many more!


Made with 💖
В этой статье мы создадим приложение, которое позволит пользователям вводить свой данные в текстовом редакторе и генерировать из него документ Word. Мы будем использовать Express для внутреннего интерфейса и React для внешнего интерфейса.
Back End
Мы начнем с серверной части. Для начала мы создадим папку проекта с папкой backendbackendnpx express-generatornpm i
Мы устанавливаем все это, выполнив:
npm i @babel/cli @babel/core @babel/node @babel/preset-env cors html-docx-js sequelize sqlite3 multerПосле этого мы изменим package.json start и babel-node:
"start": "nodemon --exec npm run babel-node - ./bin/www",
"babel-node": "babel-node"
Таким образом мы запускаем наше приложение с Babel вместо обычной среды выполнения Node.
Затем создайте файл .babelrcbackend
{
    "presets": [
        "@babel/preset-env"
    ]
}
чтобы указать, что мы запускаем наше приложение с последней версией JavaScript.
Далее мы добавляем код нашей базы данных. Запустите npx sequelize-cli init backend
В config.js
{
  "development": {
    "dialect": "sqlite",
    "storage": "development.db"
  },
  "test": {
    "dialect": "sqlite",
    "storage": "test.db"
  },
  "production": {
    "dialect": "sqlite",
    "storage": "production.db"
  }
}
Затем создайте нашу модель и выполните миграцию, запустив:
npx sequelize-cli model:create --name Document --attributes name:string,document:text,documentPath:string
создать модель DocumentDocuments
Затем мы запускаем:
npx sequelize-cli db:migrate
Далее мы создаем наши маршруты. Создайте файл document.jsroutes
var express = require("express");
const models = require("../models");
var multer = require("multer");
const fs = require("fs");
var router = express.Router();
const htmlDocx = require("html-docx-js");
const storage = multer.diskStorage({
  destination: (req, file, cb) => {
    cb(null, "./files");
  },
  filename: (req, file, cb) => {
    cb(null, `${file.fieldname}_${+new Date()}.jpg`);
  }
});
const upload = multer({
  storage
});
router.get("/", async (req, res, next) => {
  const documents = await models.Document.findAll();
  res.json(documents);
});
router.post("/", async (req, res, next) => {
  const document = await models.Document.create(req.body);
  res.json(document);
});
router.put("/:id", async (req, res, next) => {
  const id = req.params.id;
  const { name, document } = req.body;
  const doc = await models.Document.update(
    { name, document },
    { where: { id } }
  );
  res.json(doc);
});
router.delete("/:id", async (req, res, next) => {
  const id = req.params.id;
  await models.Document.destroy({ where: { id } });
  res.json({});
});
router.get("/generate/:id", async (req, res, next) => {
  const id = req.params.id;
  const documents = await models.Document.findAll({ where: { id } });
  const document = documents[0];
  const converted = htmlDocx.asBlob(document.document);
  const fileName = `${+new Date()}.docx`;
  const documentPath = `${__dirname}/../files/${fileName}`;
  await new Promise((resolve, reject) => {
    fs.writeFile(documentPath, converted, err => {
      if (err) {
        reject(err);
        return;
      }
      resolve();
    });
  });
  const doc = await models.Document.update(
    { documentPath: fileName },
    { where: { id } }
  );
  res.json(doc);
});
router.post("/uploadImage", upload.single("upload"), async (req, res, next) => {
  res.json({
    uploaded: true,
    url: `${process.env.BASE_URL}/${req.file.filename}`
  });
});
module.exports = router;
Мы выполняем стандартные операции CRUD для таблицы DocumentsDocumentsDocumentDocumentDocumentdocument
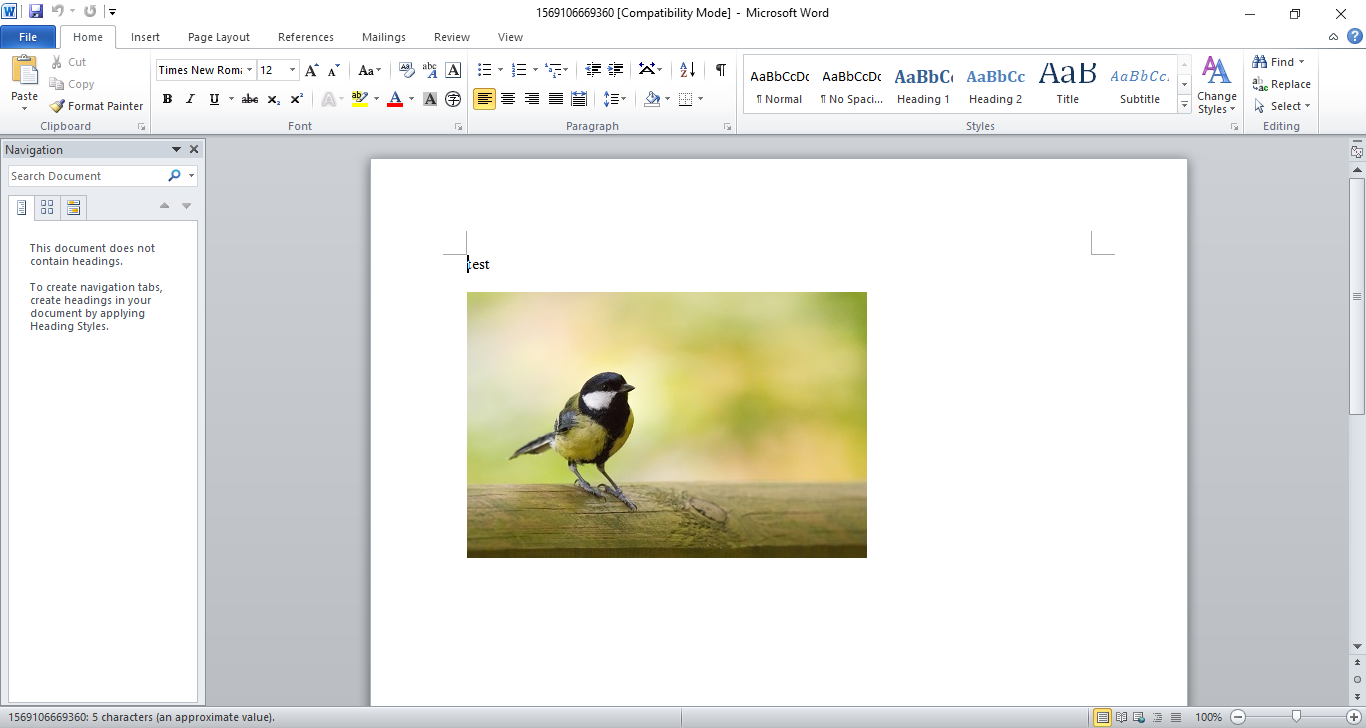
Маршрут generate для создания документа Word. Мы получаем идентификатор из URL, а затем используем пакет HTML-DOCX-JS для создания документа Word. Мы генерируем документ Word путем преобразования документа HTML в объект файлового потока с помощью пакета HTML-DOCX-JS, а затем записываем поток в файл и сохраняем путь к файлу в Document
У нас также есть маршрут uploadImageuploadedurl
Затем нам нужно добавить папку filesbackend
Далее в app.js
require("dotenv").config();
var createError = require("http-errors");
var express = require("express");
var path = require("path");
var cookieParser = require("cookie-parser");
var logger = require("morgan");
var cors = require("cors");
var indexRouter = require("./routes/index");
var documentRouter = require("./routes/document");
var app = express();
// view engine setup
app.set("views", path.join(__dirname, "views"));
app.set("view engine", "jade");
app.use(logger("dev"));
app.use(express.json());
app.use(express.urlencoded({ extended: false }));
app.use(cookieParser());
app.use(express.static(path.join(__dirname, "public")));
app.use(express.static(path.join(__dirname, "files")));
app.use(cors());
app.use("/", indexRouter);
app.use("/document", documentRouter);
// catch 404 and forward to error handler
app.use(function(req, res, next) {
  next(createError(404));
});
// error handler
app.use(function(err, req, res, next) {
  // set locals, only providing error in development
  res.locals.message = err.message;
  res.locals.error = req.app.get("env") === "development" ? err : {};
// render the error page
  res.status(err.status || 500);
  res.render("error");
});
module.exports = app;
Мы открываем папку с файлом:
app.use(express.static(path.join(__dirname, "files")));
и устанавливаем маршрут document
var documentRouter = require("./routes/document");
app.use("/document", documentRouter);
Внешний интерфейс
Теперь наше API готово, мы можем перейти к работе с интерфейсом. Создайте приложение React с помощью команды «Create React App». Запускаем npx create-react-app frontend
Затем мы устанавливаем наши пакеты. Мы будем использовать CKEditor для нашего текстового редактора, Axios для выполнения HTTP-запросов, Bootstrap для стилей, MobX для простого управления состоянием, React Router для маршрутизации URL-адресов к компонентам, а также Formik и Yup для обработки значений формы и проверки формы соответственно.
Установите все пакеты, запустив:
npm i @ckeditor/ckeditor5-build-classic @ckeditor/ckeditor5-react axios bootstrap formik mobx mobx-react react-bootstrap react-router-dom yupПосле установки пакетов мы можем заменить существующий код в App.js
import React from "react";
import HomePage from "./HomePage";
import { Router, Route } from "react-router-dom";
import { createBrowserHistory as createHistory } from "history";
import TopBar from "./TopBar";
import { DocumentStore } from "./store";
import "./App.css";
const history = createHistory();
const documentStore = new DocumentStore();
function App() {
  return (


         (

          )}
        />


  );
}
export default App;
добавить наш верхний бар и маршрут к домашней странице.
В App.css
.page {
  padding: 20px;
}
.content-invalid-feedback {
  width: 100%;
  margin-top: 0.25rem;
  font-size: 80%;
  color: #dc3545;
}
nav.navbar {
  background-color: green !important;
}
добавить некоторые отступы на нашу страницу и стилизовать сообщение проверки для редактора Rich text, а также изменить цвет navbar
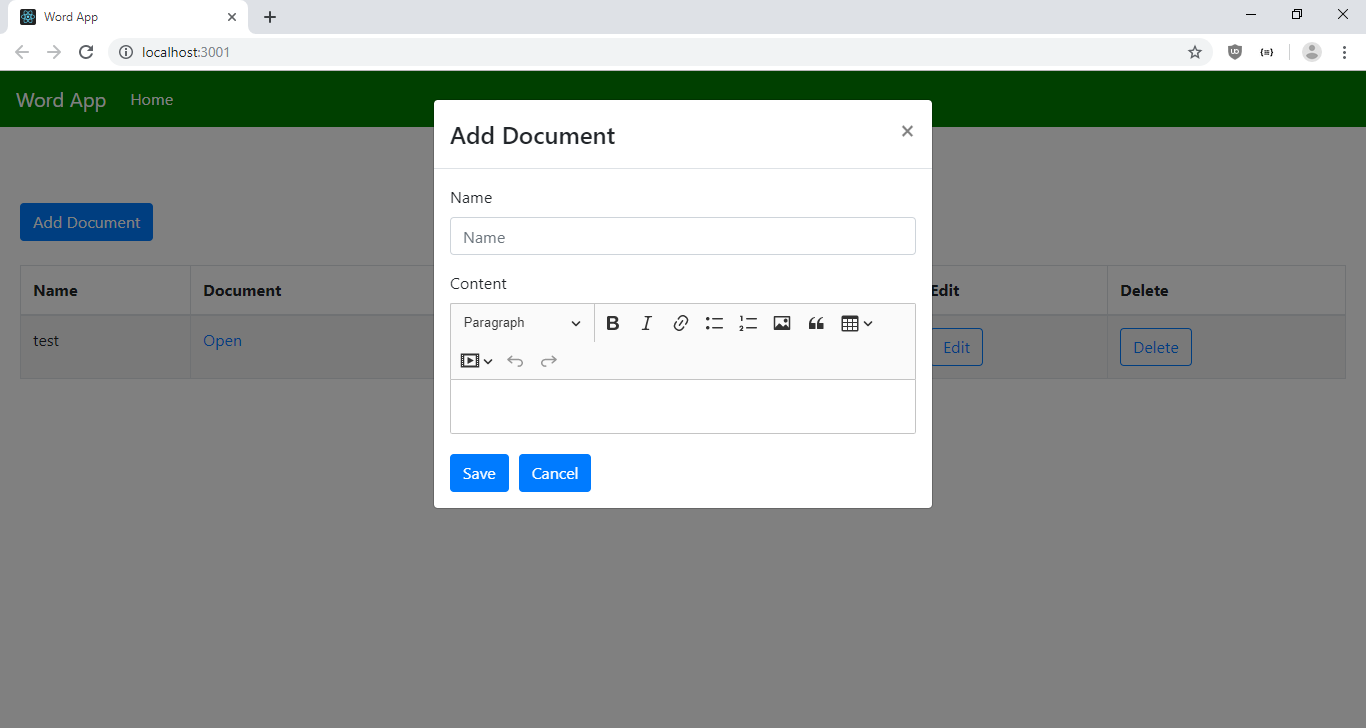
Далее мы создаем форму для добавления и редактирования документов. Создайте файл DocumentForm.js src
import React from "react";
import * as yup from "yup";
import Form from "react-bootstrap/Form";
import Col from "react-bootstrap/Col";
import Button from "react-bootstrap/Button";
import { observer } from "mobx-react";
import { Formik, Field } from "formik";
import { addDocument, editDocument, getDocuments, APIURL } from "./request";
import CKEditor from "@ckeditor/ckeditor5-react";
import ClassicEditor from "@ckeditor/ckeditor5-build-classic";
const schema = yup.object({
  name: yup.string().required("Name is required")
});
function DocumentForm({ documentStore, edit, onSave, doc }) {
  const [content, setContent] = React.useState("");
  const [dirty, setDirty] = React.useState(false);
  const handleSubmit = async evt => {
    const isValid = await schema.validate(evt);
    if (!isValid || !content) {
      return;
    }
    const data = { ...evt, document: content };
    if (!edit) {
      await addDocument(data);
    } else {
      await editDocument(data);
    }
    getAllDocuments();
  };
  const getAllDocuments = async () => {
    const response = await getDocuments();
    documentStore.setDocuments(response.data);
    onSave();
  };
  return (
    <>

        {({
          handleSubmit,
          handleChange,
          handleBlur,
          values,
          touched,
          isInvalid,
          errors
        }) => (


                Name


                  {errors.name}


                Content
                 {
                    if (edit) {
                      setContent(doc.document);
                    }
                  }}
                  onChange={(event, editor) => {
                    const data = editor.getData();
                    setContent(data);
                    setDirty(true);
                  }}
                  config={{
                    ckfinder: {
                      uploadUrl:
                        `${APIURL}/document/uploadImage`
                    }
                  }}
                />

                  {dirty && !content ? "Content is required" : null}


        )}


  );
}
export default observer(DocumentForm);
Мы обертываем нашу React Bootstrap Form в компоненту Formik, чтобы получить функцию обработки формы от Formik, которую мы используем непосредственно в полях формы React Bootstrap. Мы не можем сделать то же самое с CKEditor, поэтому мы пишем свои собственные обработчики форм для редактора форматированного текста. Мы устанавливаем data в, CKEditor чтобы установить значение ввода редактора форматированного текста. Эта функция onInit используется, когда пользователи пытаются редактировать существующий документ, поскольку мы должны установить параметр data с помощью редактора, который инициализируется при запуске setContent(doc.document);. Метод onChange является функция обработчика для установки content всякий раз, когда он обновляется, так что параметр data будет иметь последнее значение, которое мы будем представлять, когда пользователь нажимает кнопку Сохранить.
Мы используем плагин CKFinder для загрузки изображений. Чтобы это работало, мы устанавливаем URL загрузки изображения на URL маршрута загрузки в нашем бэкэнде.
Схема проверки формы предоставляется объектом Yup schema, который мы создаем в верхней части кода. Мы проверяем, заполнено ли поле name.
Функция handleSubmit предназначена для обработки представления данных в заднюю часть. Мы проверяем оба объекта content и evt, чтобы проверить оба поля, поскольку мы не можем включить обработчики форм Formik непосредственно в CKEditor компонент.
Если все верно, то мы добавляем новый документ или обновляем его в зависимости от того, является ли реквизит верным или нет.
Затем, когда сохранение getAllDocuments прошло успешно, мы вызываем, чтобы заполнить последние документы в нашем хранилище MobX, запустив documentStore.setDocuments(response.data);.
Далее мы делаем нашу домашнюю страницу, создав HomePage.js в папке src и добавив:
import React, { useState, useEffect } from "react";
import { withRouter } from "react-router-dom";
import DocumentForm from "./DocumentForm";
import Modal from "react-bootstrap/Modal";
import ButtonToolbar from "react-bootstrap/ButtonToolbar";
import Button from "react-bootstrap/Button";
import Table from "react-bootstrap/Table";
import { observer } from "mobx-react";
import { getDocuments, deleteDocument, generateDocument, APIURL } from "./request";
function HomePage({ documentStore, history }) {
const [openAddModal, setOpenAddModal] = useState(false);
const [openEditModal, setOpenEditModal] = useState(false);
const [initialized, setInitialized] = useState(false);
const [doc, setDoc] = useState([]);
const openAddTemplateModal = () => {
setOpenAddModal(true);
};
const closeAddModal = () => {
setOpenAddModal(false);
setOpenEditModal(false);
};
const cancelAddModal = () => {
setOpenAddModal(false);
};
const cancelEditModal = () => {
setOpenEditModal(false);
};
const getAllDocuments = async () => {
const response = await getDocuments();
documentStore.setDocuments(response.data);
setInitialized(true);
};
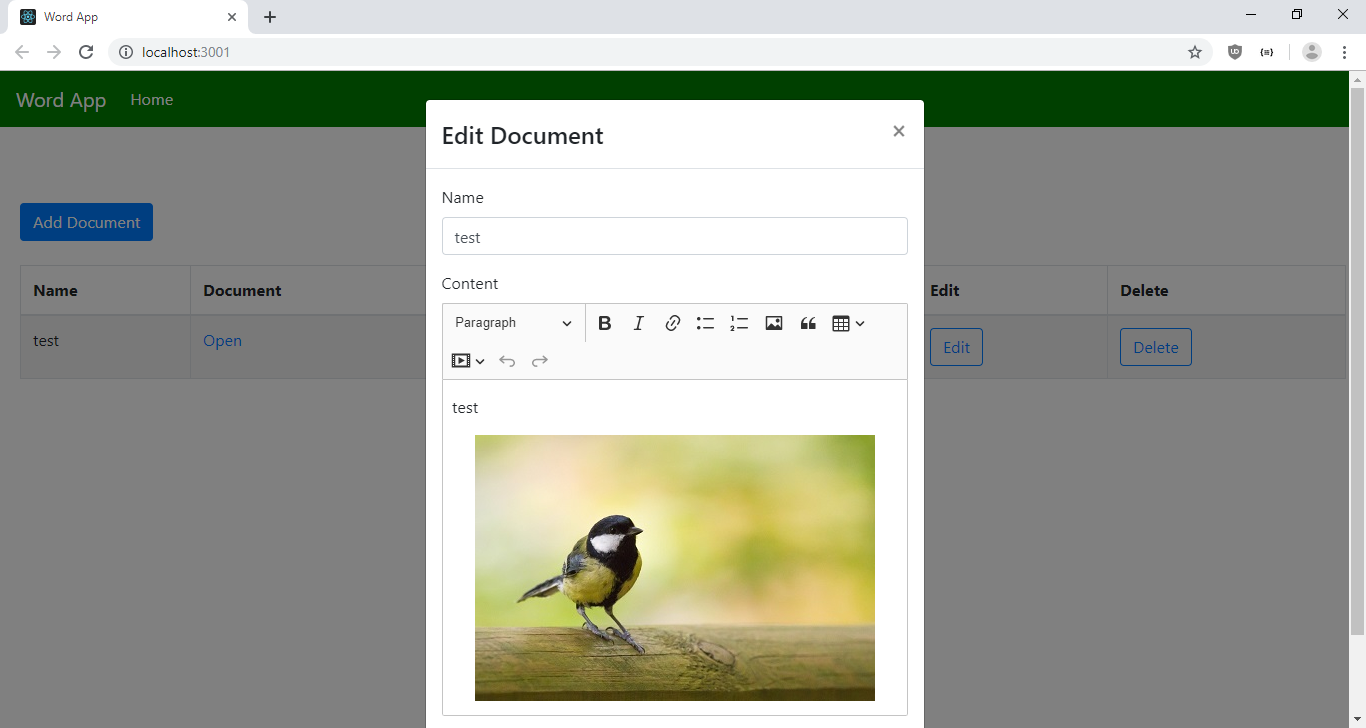
const editDocument = d => {
setDoc(d);
setOpenEditModal(true);
};
const onSave = () => {
cancelAddModal();
cancelEditModal();
};
const deleteSingleDocument = async id => {
await deleteDocument(id);
getAllDocuments();
};
const generateSingleDocument = async id => {
await generateDocument(id);
alert("Document Generated");
getAllDocuments();
};
useEffect(() => {
if (!initialized) {
getAllDocuments();
}
});
return (
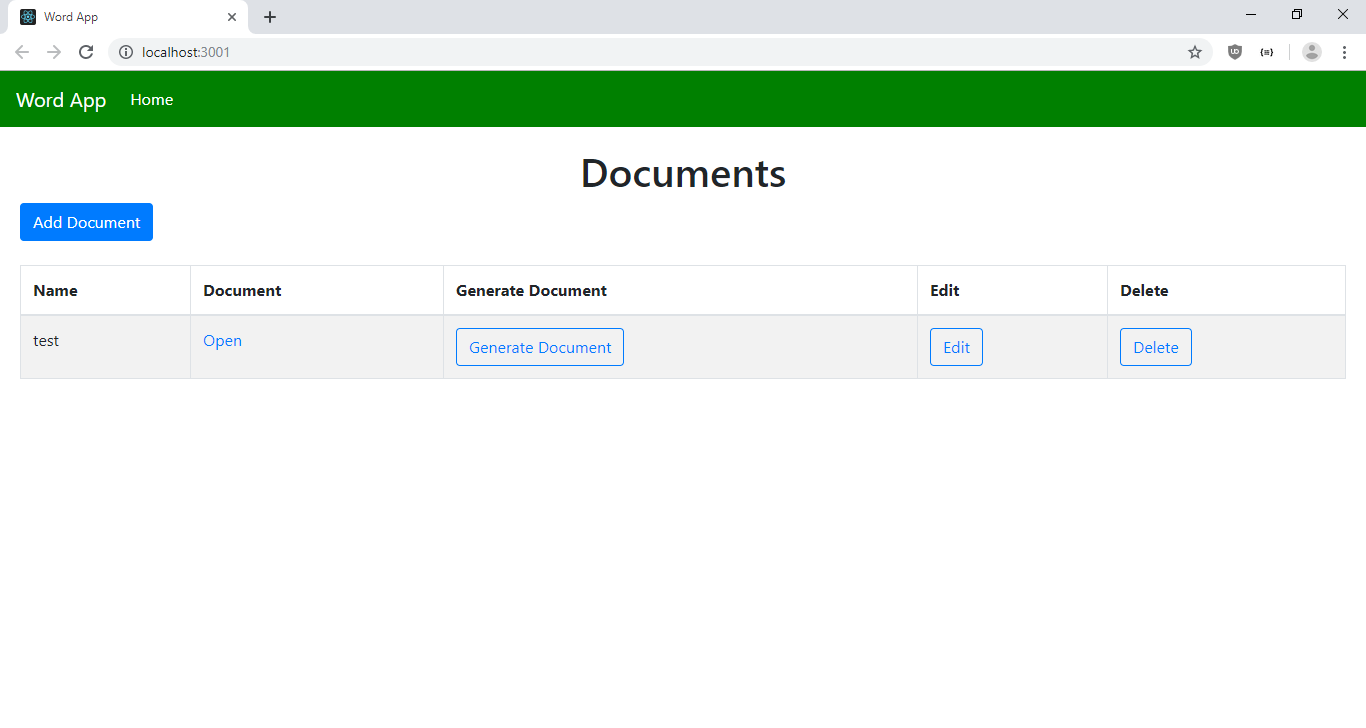
Documents
Add Document
Edit Document
{documentStore.documents.map(d => {
return (
);
})}
Name
Document
Generate Document
Edit
Delete
{d.name}
Open
);
}
export default withRouter(observer(HomePage));
У нас есть таблица React Bootstrap для перечисления документов с кнопками для редактирования, удаления документов и создания документа Word. Кроме того, в каждой строке есть ссылка Open для открытия документа Word. У нас есть кнопка создания в верхней части таблицы.
Когда страница загружается, мы вызываем getAllDocuments и заполняем их в хранилище MobX.
Далее создайте request.js в папке src и добавьте:
export const APIURL = "http://localhost:3000";
const axios = require("axios");

export const getDocuments = () => axios.get(`${APIURL}/document`);

export const addDocument = data => axios.post(`${APIURL}/document`, data);
export const editDocument = data => axios.put(`${APIURL}/document/${data.id}`, data);

export const deleteDocument = id => axios.delete(`${APIURL}/document/${id}`);
export const generateDocument = id => axios.get(`${APIURL}/document/generate/${id}`);
Добавив функции для отправки запросов к нашим маршрутам в серверной части.
Затем мы создаем наше хранилище MobX. Создайте store.js в папке src и добавьте:
import { observable, action, decorate } from "mobx";

class DocumentStore {
  documents = [];
  setDocuments(documents) {
    this.documents = documents;
  }
}

DocumentStore = decorate(DocumentStore, {
  documents: observable,
  setDocuments: action
});

export { DocumentStore };
Мы имеем функцию, setDocuments чтобы поместить данные в хранилище, который мы использовали в HomePageDocumentForm и мы инстанцировали его перед экспортом , так что мы должны сделать это только в одном месте.
Этот блок:
DocumentStore = decorate(DocumentStore, {
  documents: observable,
  setDocuments: action
});
обозначает массив documents в DocumentStore в качестве объекта, который может отслеживаться компонентами на предмет изменений. setDocuments обозначается как функция , которая может быть использована для установки массива documents в хранилище.
Затем мы создаем верхнюю панель, создав файл TopBar.js в папке src и добавив:
import React from "react";
import Navbar from "react-bootstrap/Navbar";
import Nav from "react-bootstrap/Nav";
import { withRouter } from "react-router-dom";
function TopBar({ location }) {
return (
Word App
);
}
export default withRouter(TopBar);
Это содержит Reac Bootstrap Navbar чтобы показать верхнюю панель со ссылкой на главную страницу и имя приложения. Мы показываем ее только если существует token. Также мы проверяем pathname чтобы выделить правильные ссылки, установив параметр active.
Далее в index.html мы заменим существующий код на:
После написания всего этого кода мы можем запустить наше приложение. Прежде чем что-либо запускать, установите nodemon, запустив, npm i -g nodemon чтобы нам не приходилось перезагружать сервер при изменении файлов.
Затем запустите back end, запустив команду npm start в папке backend и npm start в папке frontend, затем выберите «yes», если вас попросят запустить его с другого порта.
Тогда вы получите:
In this guide we’ll look at how to create a docx template and fill out that document using JavaScript. We’ll do this by using the docxtemplater package. This works in both NodeJS and React.
- Installing Requirements
- The Code
- Filling out the Template with JavaScript
- Direct Values
- Styling
- Lists
- Table Rows
- Conditional Rendering
- Helpful Tips
- Too Much Spacing
- Error Finding 1
- Error Finding 2
- Tag Names
Installing Requirements
Install the docxtemplater & pizzip packages using the following command:
1 |
npm i docxtemplater pizzip |
The Code
The main code for all the below examples will stay the same. The only thing that will be changing is the dataToAdd Object (line 14). All other lines will stay the same.
1 2 3 4 5 6 7 8 9 10 11 12 13 14 15 16 17 18 19 20 21 22 23 24 25 26 27 28 29 30 31 32 33 34 35 36 |
const fs = require('fs'); const path = require('path'); const PizZip = require('pizzip'); const Docxtemplater = require('docxtemplater'); // Load the templated docx file const templateFile = fs.readFileSync(path.resolve(__dirname, 'template.docx'), 'binary'); const zip = new PizZip(templateFile); try { // Attempt to read all the templated tags let outputDocument = new Docxtemplater(zip); const dataToAdd = {}; // Set the data we wish to add to the document outputDocument.setData(dataToAdd); try { // Attempt to render the document (Add data to the template) outputDocument.render() // Create a buffer to store the output data let outputDocumentBuffer = outputDocument.getZip().generate({ type: 'nodebuffer' }); // Save the buffer to a file fs.writeFileSync(path.resolve(__dirname, 'OUTPUT.docx'), outputDocumentBuffer); } catch (error) { console.error(`ERROR Filling out Template:`); console.error(error) } } catch(error) { console.error(`ERROR Loading Template:`); console.error(error); } |
Filling out the Template with JavaScript
All of the data that will be added to the template will be contained within a single Object called dataToAdd.
Each key in the dataToAdd Object refers to a tag that was placed in the docx file. Let’s see how to do this:
Direct Values
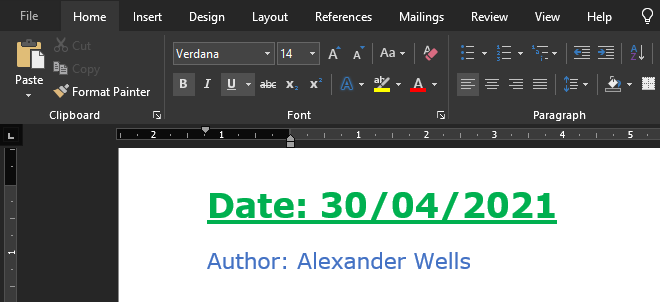
Direct values simply mean static values that we wish to insert into the document. Some examples would be the date, author, title. Simple text values you wish to add that may change with each document.
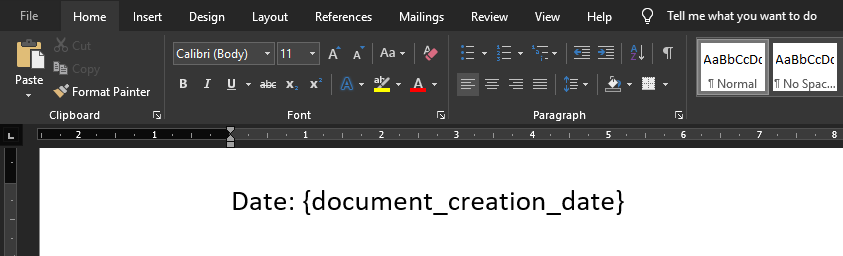
Docx File
The Code
1 2 3 |
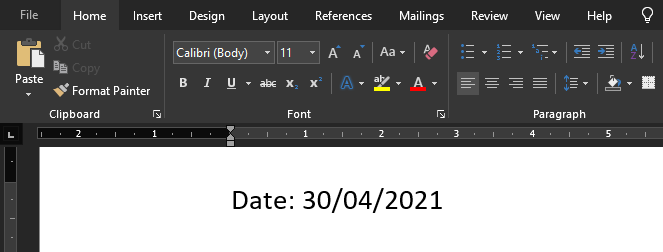
const dataToAdd = { document_creation_date: (new Date()).toLocaleDateString() }; |
Results
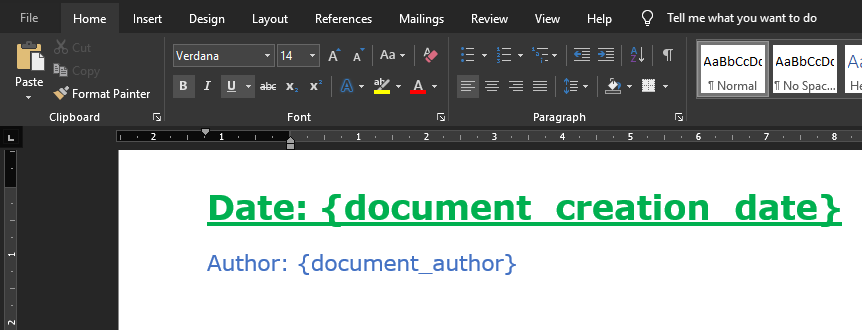
Styling
The style that is applied to the tag in the document will be inherited by the value that is inserted:
Docx File
The Code
1 2 3 4 |
const dataToAdd = { document_creation_date: (new Date()).toLocaleDateString(), document_author: 'Alexander Wells', }; |
Results
Lists
A very useful feature is to be able to template repetitive sections. Perhaps the document is suppose to contain the profiles of some employees. Let’s see how we can use lists to do this:
Docx File
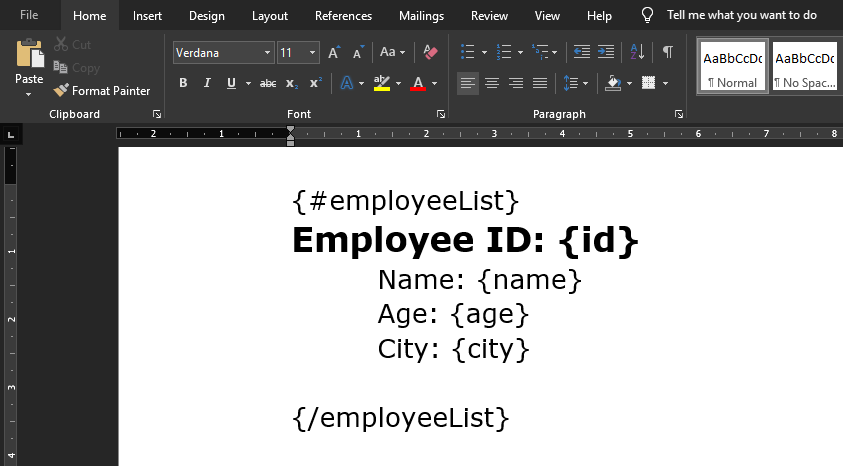
- Lists are prefixed with the
#character to start the list scope, and the/character to end the list scope.
The Code
1 2 3 4 5 6 |
const dataToAdd = { employeeList: [ { id: 28521, name: 'Frank', age: 34, city: 'Melbourne' }, { id: 84973, name: 'Chloe', age: 28, city: 'Perth' }, ] }; |
- When using lists, the value should be a list of Objects.
- The keys of each Object will refer to the tags used inside the List in the docx file (id, name, age, city).
Results
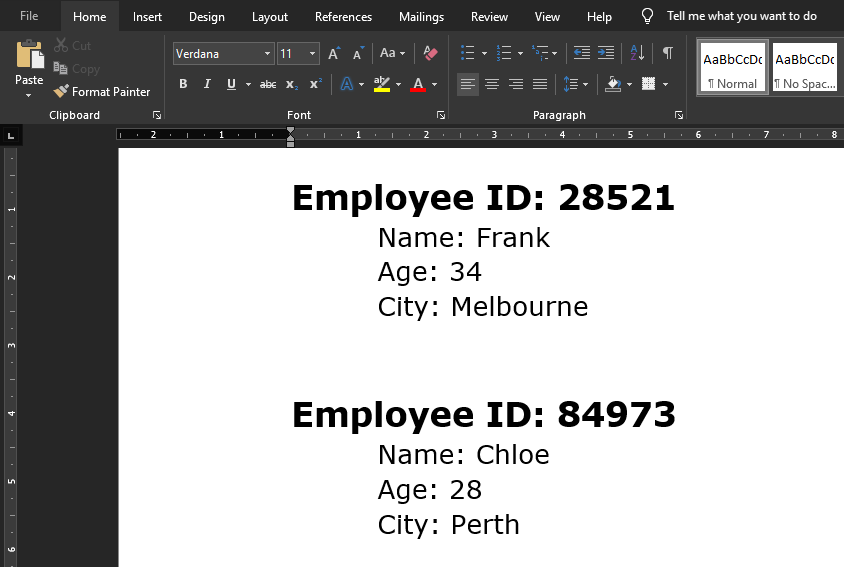
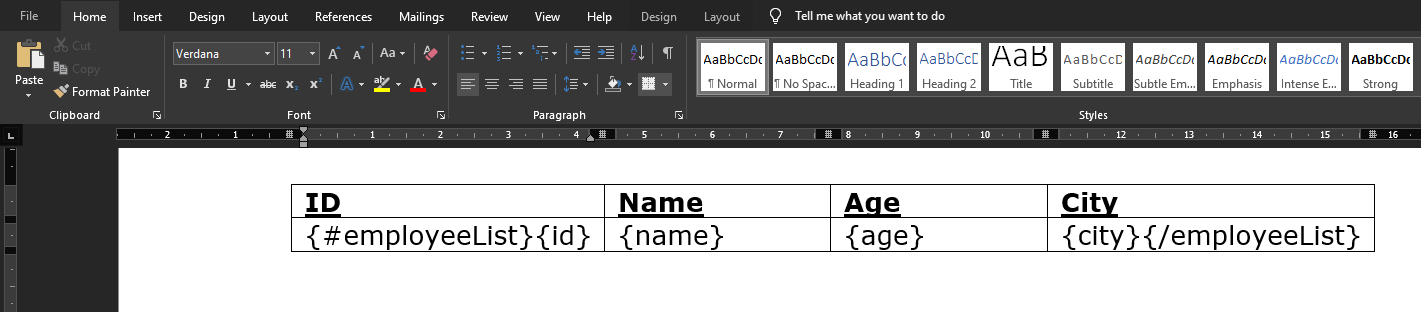
Table Rows
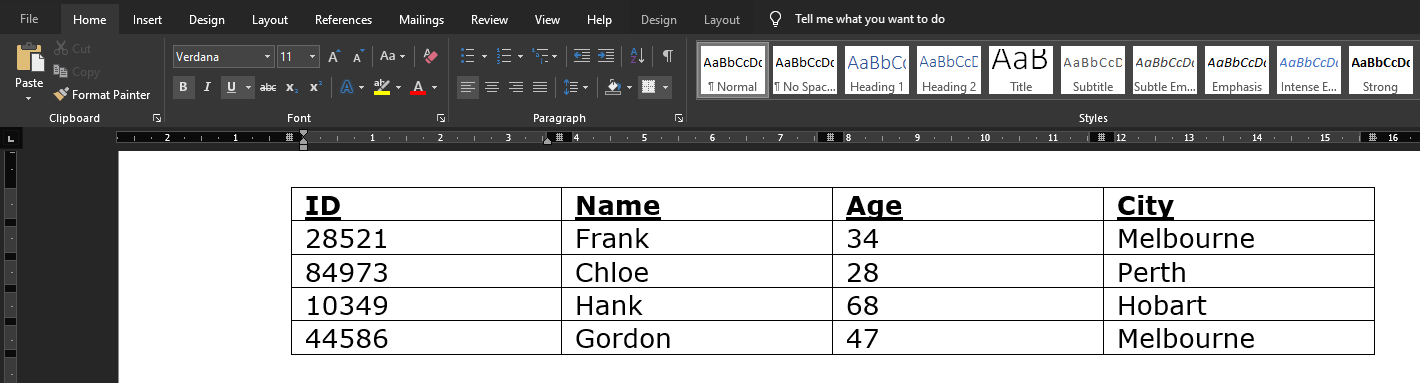
We can also use lists to create additional rows of a table. Let’s use the employee example again, but this time let’s use a table to represent the data:
Docx File
The Code
1 2 3 4 5 6 7 8 |
const dataToAdd = { employeeList: [ { id: 28521, name: 'Frank', age: 34, city: 'Melbourne' }, { id: 84973, name: 'Chloe', age: 28, city: 'Perth' }, { id: 10349, name: 'Hank', age: 68, city: 'Hobart' }, { id: 44586, name: 'Gordon', age: 47, city: 'Melbourne' }, ] }; |
Results
Conditional Rendering
Docx File
Another useful feature would be if we could only render certain things if a condition is met. Let’s see how we can do that:
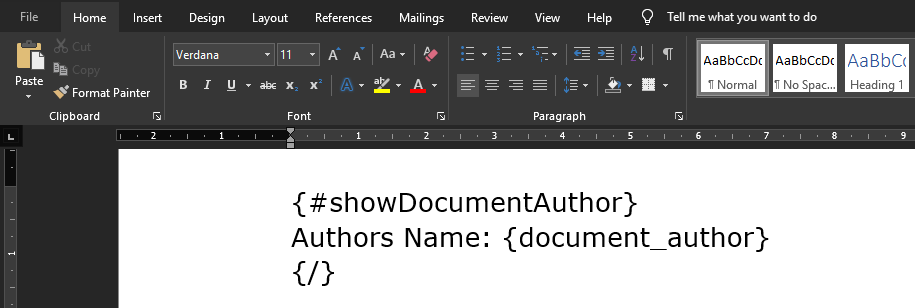
The Code
1 2 3 4 |
const dataToAdd = { showDocumentAuthor: true, document_author: 'Alexander Wells', }; |
Results
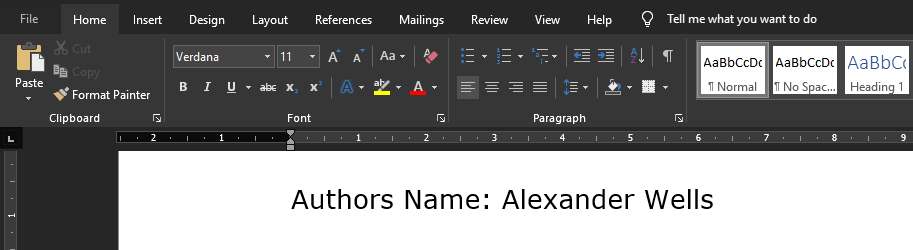
Changing showDocumentAuthor to false means the data inside the conditional statement won’t be rendered.
Helpful Tips
Too Much Spacing
You may notice if you use loops that extra spacing gets added where you don’t want. Let’s look at an example where this is very clear:

1 2 3 4 5 6 7 |
const dataToAdd = { groceryList: [ { item: 'Eggs' }, { item: 'Steak' }, { item: 'Apples' } ], }; |
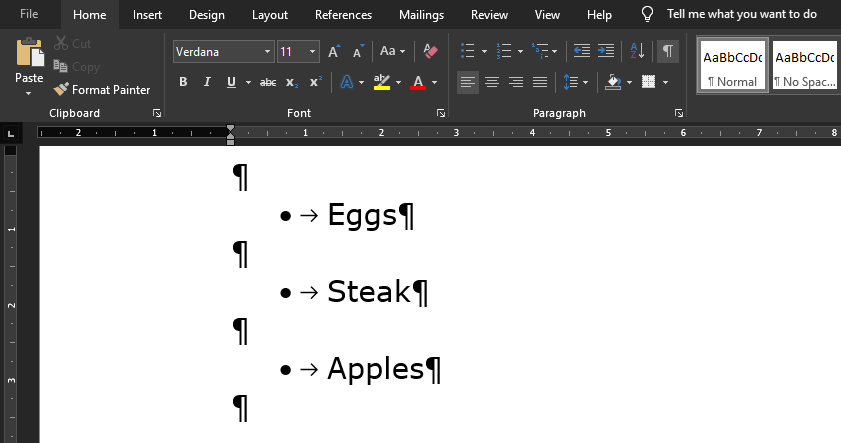
- With visible formatting enabled we can see the issue.
- An extra line has been inserted between each list element.
We can fix this by enabling by enabling paragraphLoop option when creating our output document:
1 |
let outputDocument = new Docxtemplater(zip, { paragraphLoop: true }); |
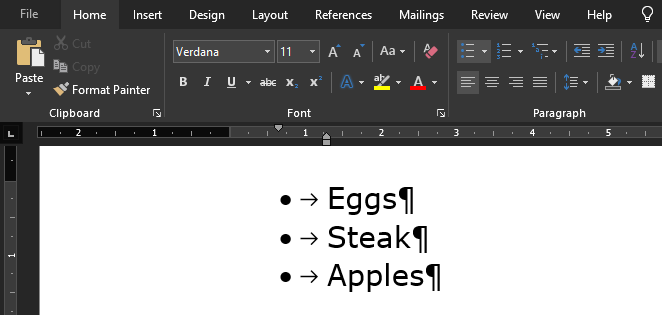
Error Finding 1
- One downside of this library is that error locations is actually a paid feature (yes I’m serious), look here.
- This is an inconvenience and nothing more.
- I STRONGLY suggest that you do templating in small batches. Add a few tags, test, add a few more, then test again.
- Please do not spend hours (or even an hour) templating before testing. It will save you a massive headache when the program just says
error, and you have to hunt through your document to find the issue.
Error Finding 2
- Ensure that your tags in the docx file do not contain spaces at the start or end.
- If you have a list tag called
{#employeeList}, ensure there is no whitespace like this{#employeeList }, as this can cause the program to fail. - Microsoft Word can automatically add spaces so be aware of that.
Tag Names
- USE GOOD TAG NAMES!
- Just like when programming you try and use good variable names, same goes here.
- A large document may have dozens or hundreds of tags. Using
datefor a tag name is BAD! - Using
document_creation_dateis much better as it’s clear exactly what date it’s referring to.