
Microsoft Editor runs in Word for Microsoft 365 to analyze your document and offer suggestions for spelling, grammar, and stylistic issues, like making sentences more concise, choosing simpler words, or writing with more formality.
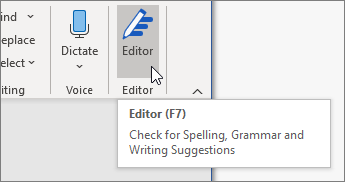
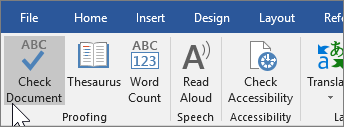
To use Editor, on the Home tab choose Editor.
Reviewing suggestions
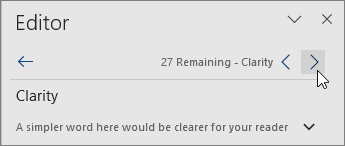
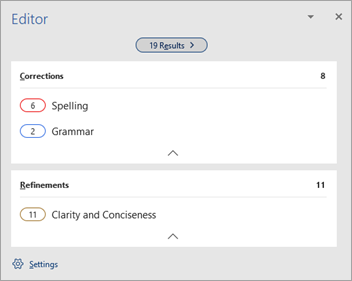
To focus on the issues you care most about, choose a correction or refinement type, like Grammar or Clarity. Then, use the arrows near the top of the pane to step through each of that type of issue.
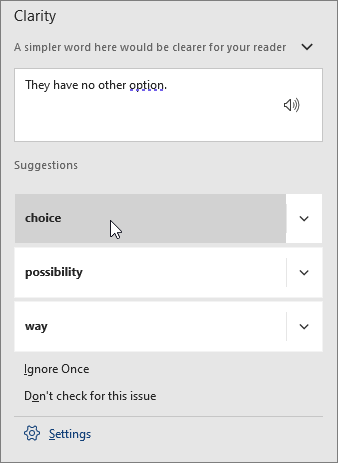
Choose a suggestion to incorporate it into your document. If you don’t like the suggestion, choose Ignore Once. Or, if you never want this type of suggestion, choose Don’t check for this issue.

Note: If you change your mind about an issue you ignored, close and reopen the document, and go back to Editor. Editor will find the issue again.
Tailor what Editor checks for
By default, Editor checks for several categories of issues, and the suggestions may or may not suit your writing style. To finely tune Editor for suggestions you want, do the following:
-
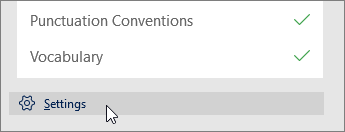
In the Editor pane, choose Settings.

-
In the Word Options dialog box, next to Grammar & Refinements, choose Settings.
-
Scroll through the list of options. Select issues you want Editor to check, and clear the issues you want Editor to ignore.
Note: Choosing Reset All returns to the default settings.
-
Choose OK.
Tip: Editor is designed to empower you to bring out the best in your writing. We are continually making updates to its suggestions and experimenting to learn which suggestions are most welcome. If you have feedback for us, choose Help Improve Office? at the top of the Word window to open the Feedback pane.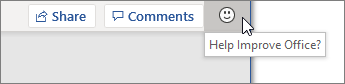
You might notice Editor’s red, blue, and purple underlines in your document even when the Editor pane is closed. That’s because Editor is always running in the background, checking for spelling, grammar, and some style issues.
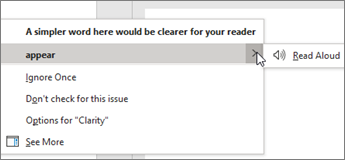
Right-click the underlined text to see the suggestion. Use context menu to:
-
Listen to the suggestion by clicking the arrow next to the suggestion and then choosing Read Aloud.
-
Skip this instance of the issue by choosing Ignore Once.
-
Tell Editor to stop checking for this issue by choosing Don’t check for this issue.
-
Fine tune the settings for this type of issue by choosing the Options link.
-
Get more information about the issue by choosing See More.
Your document might be written in more than one language, or you might want to switch to another language for Editor to check. If you are set up to use multiple authoring languages (File > Options > Language), Word detects the language you’re writing in, and Editor will check for issues in that language.
However, you might be writing in a language that Word doesn’t detect automatically. In that case, you can get Editor to check text in that language by selecting the text and going to Review > Language > Set Proofing Language, and then choose your language.

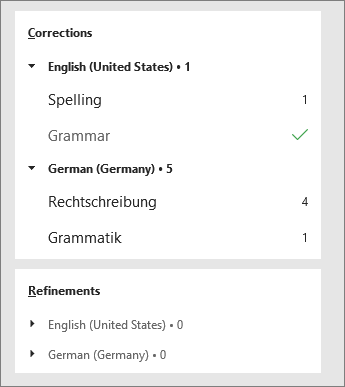
When Editor is checking more than one language, the Editor pane lists corrections and refinements for each language in the document.
For information about the issues that Editor checks in various languages, see Editor’s spelling, grammar, and refinement availability by language.
When you work on documents in Word on the web, Editor provides a rich set of features that are coming soon to Word for Windows. Even when you’re not using Word, the Editor browser extension helps you with writing on websites like LinkedIn, Twitter, Facebook, and Gmail.
Word marks spelling, grammar, and stylistic issues with an underline. Right-click the underlined word, and then choose the suggestion you want, or learn more about the error and how to correct it.
Or, open the Editor pane to address issues by category.
-
On the Review tab, select Check Document.
-
The Editor pane categorizes spelling, grammar, and stylistic issues.
-
Click each category to address the issues.
Note: For keyboard shortcuts in the Editor pane, there’s no need to press Alt. Just use the underlined letter to select the command (like i for Ignore Once, g for Ignore All, etc) .
-
In the Editor pane, click Settings.
-
Under When correcting spelling and grammar in Word, select Settings
-
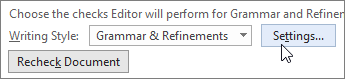
For Writing Style, select Grammar & Refinements .
-
Scroll down to see all of the options available, and select or clear the rules you want. The settings apply to all the documents that you edit, not just the current one.
Requirements and availability of the Editor pane include the following:
-
Internet connection: Make sure your connection is working.
-
Intelligent Services switched on: Go to File > Options > General and turn on Office Intelligence Services.
-
Language availability: For information about the issues that Word checks for in various languages, see Editor’s spelling, grammar, and refinement availability by language.
Word marks spelling, grammar, and stylistic issues with an underline. Control-click the word or phrase and choose one of the options.
If Word incorrectly underlined a word as misspelled and you want to add that word to your dictionary so that Word will properly recognize it in the future, see Add or edit words in a spell check dictionary.
If spelling or grammatical errors aren’t underlined, you might need to turn on automatic spelling and grammar checking, as follows.
Turn on (or off) automatic spelling and grammar checking
-
On the Word menu, click Preferences > Spelling & Grammar.
-
In the Spelling & Grammar dialog box, under Spelling, check or clear the Check spelling as you type box.
-
Under Grammar, check or clear the Check grammar as you type box.
-
Close the dialog box to save your changes.
-
On the Review tab, click Spelling & Grammar.
-
Word displays the issues it finds in the Spelling & Grammar dialog box.
-
To address an issue, do one of the following:
-
Type the correction in the box and then click Change.
-
Under Suggestions, click the word you want to use, and then click Change.
To skip the error, do one of the following:
-
Click Ignore Once to skip only that instance of the error.
-
Click Ignore All to skip all instances of the error.
-
For a grammatical error, click Next Sentence to skip that instance of the error and move to the next error.
To skip a misspelled word in all documents, click Add to add it to the dictionary. This only works for spelling. You can’t add custom grammar to the dictionary.
-
-
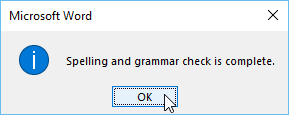
After you correct, ignore, or skip an issue, Word moves to the next one. When Word finishes reviewing the document, you’ll see a message that the spelling and grammar check is complete.
-
Click OK to return to your document.
You can clear or reset the list of Ignored Words and Grammar so Word will check for spelling and grammar issues you previously told it to ignore.
Note: When you reset the list of Ignored Words and Grammar, the list is cleared only for the currently open document. Any spelling or grammar issues you told Word to ignore in other documents won’t be affected.
-
Open the document that needs to be checked.
-
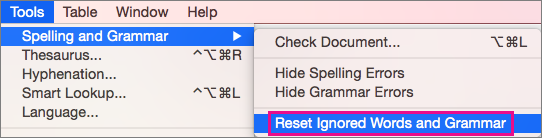
On the Tools menu, point to Spelling and Grammar, and then click Reset Ignored Words and Grammar.
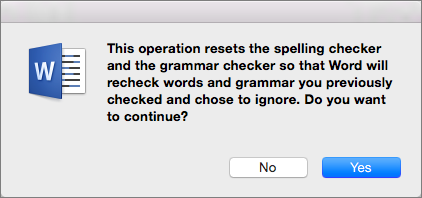
Word displays a warning about the operation resetting the spelling checker and the grammar checker.
-
Click Yes to proceed.
-
Click the Review tab, and then click Spelling & Grammar to check spelling and grammar.
Word marks potential spelling errors with a red squiggly line, and potential grammatical errors are marked with a blue squiggly line.
Right-click on the underlined word or phrase and choose a correction, or ignore the suggestion.
Note: If Word is flagging words as misspelled but you have it spelled the way you want it, select Add to Dictionary to teach Word not to flag that word as misspelled in the future. For more information on this see: Add or edit words in a spell check dictionary.
If you don’t want Office to mark potential errors with squiggly lines while you are working, you can turn automatic spelling and grammar checking off:
-
On the File menu, click Options, and then click Proofing.
-
Select or clear the Check spelling as you type and Mark grammar errors as you type check boxes.
Note: You can turn the spelling checker on or off for the document you’re working with or for all new documents. Select an option in the Exceptions for list, and then select or clear the Hide spelling errors in this document only and Hide grammar errors in this document only check boxes.
If you don’t want Word to check grammar at all (either when running a spell check or automatically as you type), you can turn it off:
-
On the File menu, click Options, and then click Proofing.
-
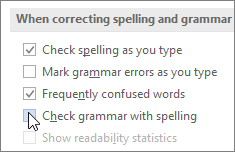
Clear the Mark grammar errors as you type and Check grammar with spelling check boxes.
-
On the File menu, click Options > Proofing> Recheck Document.
-
Click Yes when you see the warning message about resetting the spelling and grammar checker.
-
Click OK in the dialog box to get back to the document, and then run the spelling and grammar checker again.
See also
For more information about Microsoft Editor, see Microsoft Editor checks grammar and more in documents, mail, and the web.
For more topics on spelling and grammar, see Spelling and grammar in Word.
To try Microsoft Editor for yourself, download the Editor in Word Tutorial.
All Microsoft Office programs can check spelling, and most can check grammar.
Using Microsoft 365? You may be interested in checking out the powerful new Editor feature in Word! See Editor — your writing assistant for more information.
Run the spelling and grammar checker
To start a check of the spelling and grammar in your document, just press F7.
Click a heading below for more information
Most Office programs automatically check for potential spelling and grammatical errors as you type, so you don’t need to do anything to show errors while you work.
Notes:
-
Automatic spelling and grammar checking is not available in Access, Excel, or Project. You can manually start a spell check by pressing F7.
-
Automatic grammar checking is available only in Outlook, Word, and PowerPoint 2013 (or newer).
Office marks potential spelling errors with a red squiggly line, and potential grammatical errors are marked with a blue squiggly line.
If spelling or grammatical errors aren’t marked, automatic checking might be turned off. You can turn on the automatic spelling and grammar checker.
When you see a spelling or grammatical error that you want assistance fixing, right-click on the underlined word or phrase and choose one of the options to fix the error.
If Office is flagging words as misspelled but you have it spelled the way you want it, select Add to Dictionary to teach Office not to flag that word as misspelled in the future. For more information on this see: Add or edit words in a spell check dictionary.
If you don’t want Office to mark potential errors with squiggly lines while you are working, you can turn automatic spelling and grammar checking off:
-
Open the spelling and grammar options:
-
In OneNote, PowerPoint, Publisher, Visio, and Word: On the File menu, click Options, and then click Proofing.
-
In InfoPath: On the Home tab, click the arrow next to or under Spelling, and then click Spelling Options.
-
In Outlook: On the File menu, click Options, and click Mail, and then click Spelling and Autocorrect.
-
-
Select or clear the Check spelling as you type check box. In programs that have automatic grammar checking, you may also select or clear the Mark grammar errors as you type check box.
Note: In Word, you can turn the spelling checker on or off for only the document you’re currently working with or for all new documents. Select an option in the Exceptions for list, and then select or clear the Hide spelling errors in this document only and Hide grammar errors in this document only check boxes.
If you don’t want Office to check grammar at all (either when running a spell check or automatically as you type), you can turn it off:
-
Open the spelling and grammar options:
-
In OneNote, PowerPoint, Publisher, Visio, and Word: On the File menu, click Options, and then click Proofing.
-
In InfoPath: On the Home tab, click the arrow next to or under Spelling, and then click Spelling Options.
-
In Outlook: On the File menu, click Options, and click Mail, and then click Spelling and Autocorrect.
-
-
Clear the Mark grammar errors as you type and Check grammar with spelling check boxes.
Note: Not every Office program will have both of these options.
In Word, Outlook, PowerPoint 2013 (or newer), you can force a recheck of the words and grammar that you previously skipped by doing the following:
-
Open the document or item that you want to check.
-
On the File menu, click Options > Proofing> Recheck Document. In Outlook you’ll find this under File > Options > Mail > Spelling and Autocorrect
-
Click Yes when you see the warning message about resetting the spelling and grammar checker.
-
Click OK in the dialog box to get back to the document, and then run the spelling and grammar checker again.
See Also
Check spelling and grammar in a different language.
Test your document’s readability
The spelling and grammar checker isn’t working as expected
Select grammar and writing style options in Office 2013 and earlier
Add words to your spell check dictionary
The spelling or grammar checker isn’t checking words in a different language correctly
Choose AutoCorrect options for capitalization, spelling, and symbols
Check spelling before sending a message in Outlook
Learn how to get more from Editor with Microsoft 365
Office for Mac applications automatically check for potential spelling and grammatical errors as you type. If you’d rather wait to check spelling and grammar until you’re done writing, you can turn off automatic checking, or you can check spelling and grammar all at once.
Word
Check spelling and grammar automatically as you type
Word marks potential spelling errors with a red squiggly line, and potential grammatical errors are marked with a green squiggly line.
Tip: If spelling or grammatical errors aren’t marked, you might need to turn on automatic spelling and grammar checking, which is explained in the next procedure.
When you see a spelling or grammatical error, Control click the word or phrase and choose one of the options.
If Word has incorrectly flagged a word as misspelled and you want to add that word to your dictionary so that Word will properly recognize it in the future see Add or edit words in a spell check dictionary
-
On the Word menu, click Preferences > Spelling & Grammar.
-
In the Spelling & Grammar dialog box, under Spelling, check or clear the Check spelling as you type box.
-
Under Grammar, check or clear the Check grammar as you type box.
-
Close the dialog box to save your changes.
-
On the Review tab, click Spelling & Grammar.
-
If Word finds a potential error, the Spelling & Grammar dialog box will open, spelling errors will be shown as red text, and grammatical errors will be shown as green text.
-
To fix an error, do one of the following:
-
Type the correction in the box and then click Change.
-
Under Suggestions, click the word you want to use, and then click Change.
To skip the error, do one of the following:
-
Click Ignore to skip only that instance of the error.
-
Click Ignore All to skip all instances of the error.
-
For a grammatical error, click Next Sentence to skip that instance of the error and move to the next error.
To skip a misspelled word in all documents, click Add to add it to the dictionary. This only works for misspelled words. You can’t add custom grammar to the dictionary.
-
-
After you correct, ignore, or skip an error, Word moves to the next one. When Word finishes reviewing the document, you’ll see a message that the spelling and grammar check is complete.
-
Click OK to return to your document.
You can clear or reset the list of Ignored Words and Grammar so Word will check for spelling and grammar issues you previously told it to ignore.
Note: When you reset the list of Ignored Words and Grammar, the list is cleared only for the currently open document. Any spelling or grammar issues you told Word to ignore in other documents won’t be affected.
-
Open the document that needs to be checked.
-
On the Tools menu, point to Spelling and Grammar, and then click Reset Ignored Words and Grammar.
Word displays a warning about the operation resetting the spelling checker and the grammar checker.
-
Click Yes to proceed.
-
Click the Review tab, and then click Spelling & Grammar to check spelling and grammar.
Outlook
Check spelling and grammar automatically as you type
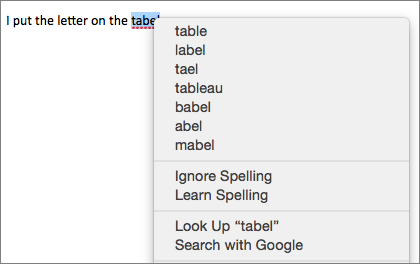
By default, Outlook checks for spelling errors as you type. Outlook uses a dashed red underline to indicate possible spelling errors and a dashed green line to indicate possible grammatical errors.
-
When you see a word with a dashed underline, Control click the word or phrase and choose one of the options.
-
On the shortcut menu, do one of the following:
-
Click one of the guesses at the top of the shortcut menu.
-
Click Ignore Spelling to ignore one instance of the word.
-
Click Learn Spelling to add the word to the spelling dictionary.
-
After opening an email message:
-
To have Outlook correct spelling mistakes automatically, on the Outlook menu, click Preferences. Click on Spelling and Grammar under Personal Settings. Click box next to Checkspelling as you type.
-
To turn automatic grammar checking on or off, on the Outlook menu, click Preferences. Click on Spelling and Grammar under Personal Settings. Click box next to Check grammar as you type.

You can correct all the spelling and grammar issues at the same time after you finish composing a message or other items.
-
On the Edit menu, point to Spelling and Grammar, and then click Spelling and Grammar…
-
Do any of the following:
-
In the list of suggestions, click the word that you want to use, or enter a new spelling in the box at the top, and then click Change.
-
Click Ignore to ignore this word and move on to the next misspelled word.
-
Click Add to add the word to the spelling dictionary.
-
Tip: The keyboard shortcut for skipping to the next spelling or grammar error is  + ; .
+ ; .
PowerPoint
You can check spelling in PowerPoint, but you can’t check grammar.
Check spelling automatically as you type
PowerPoint automatically checks for and marks potential spelling errors with a wavy, red underline.
Tip: If spelling errors aren’t marked, you might need to turn on automatic spell checking, which is explained in the next procedure.
When you see a spelling error, Ctrl+click or right-click the word or phrase and choose one of the suggested options.
-
On the PowerPoint menu, click Preferences > Spelling.
-
In the Spelling dialog box, select or clear the Check spelling as you type box.
-
On the Review tab, click Spelling.
-
If PowerPoint finds a potential error, the Spelling pane opens and spelling errors are shown.
-
To fix an error, do one of the following:
-
Correct the error on your slide.
-
Click one of the suggested words in the Spelling pane, and then click Change.
To skip the error, do one of the following:
-
Click Ignore to skip only that instance of the error.
-
Click Ignore All to skip all instances of the error.
-
click Add to skip a misspelled word in all documents and add it to the dictionary.
-
-
After you correct, ignore, or skip an error, PowerPoint moves to the next one. When PowerPoint finishes reviewing the presentation, you’ll see a message that the spelling check is complete.
-
Click OK to return to your presentation.
Excel
You can check spelling in Excel, but you can’t check grammar.
Check spelling all at once
-
On the Review tab, click Spelling.
Note: The Spelling dialog box will not open if no spelling errors are detected, or if the word you are trying to add already exists in the dictionary.
-
Do any of the following.
To
Do this
Change the word
Under Suggestions, click the word that you want to use, and then click Change.
Change every occurrence of this word in this document
Under Suggestions, click the word that you want to use, and then click Change All.
Ignore this word and move on to the next misspelled word
Click Ignore Once.
Ignore every occurrence of this word in this document and move on to the next misspelled word
Click Ignore All.
See also
Check spelling and grammar in a different language
Write Confidently
Become a Word Wonder
No matter what you write, LanguageTool ensures flawless and stylistically superior writing to help you communicate your message clearly and effortlessly.
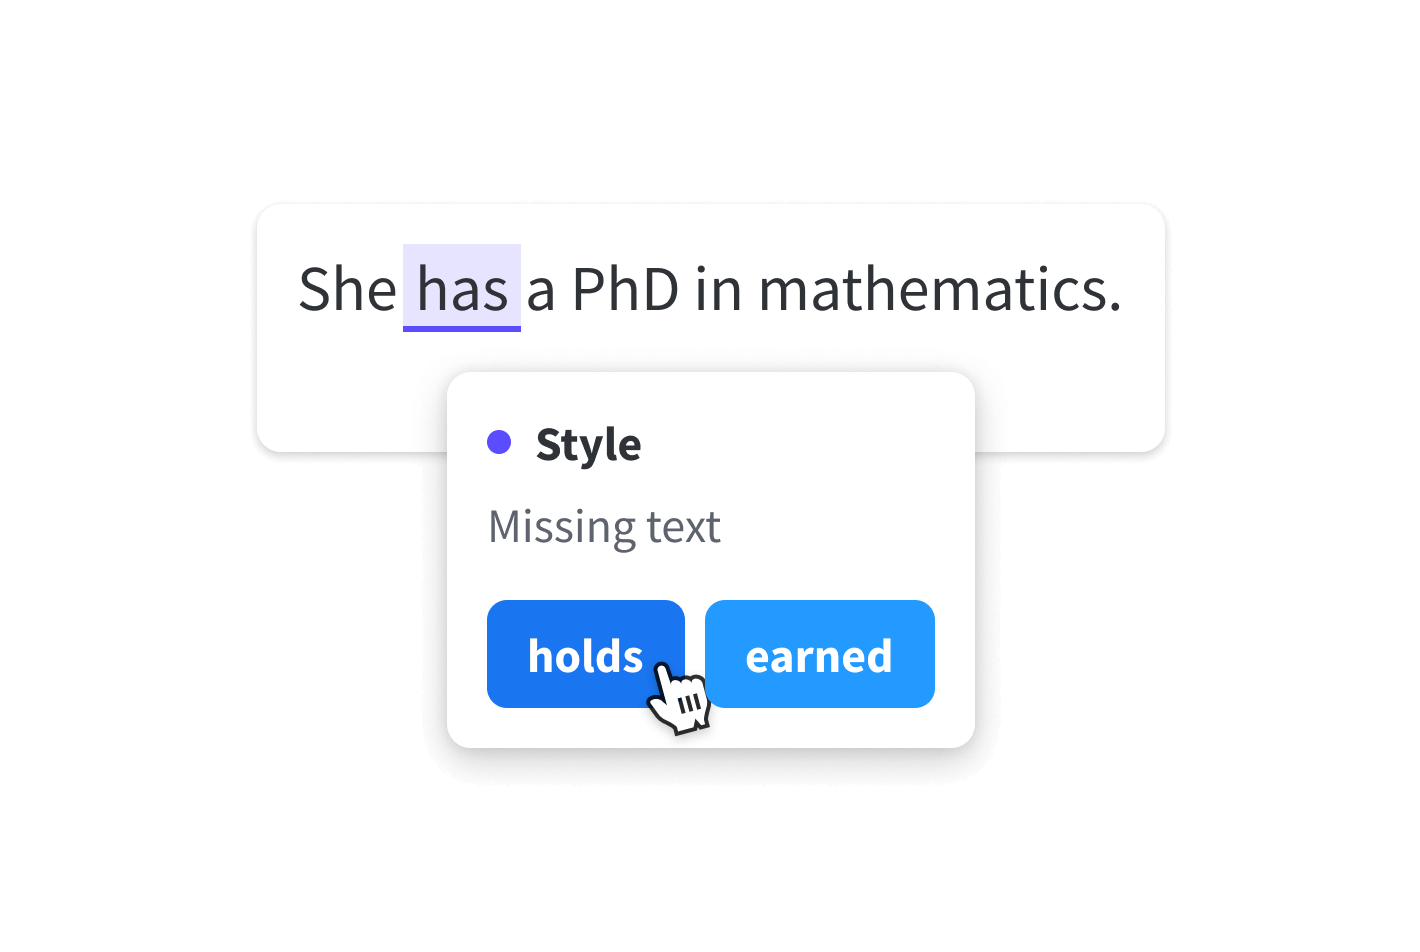
Style Suggestions
Style That Will Wow Your Audience
LanguageTool refines your writing style by suggesting improvements that’ll enhance your tone, voice, and word choice, making your writing more effective.
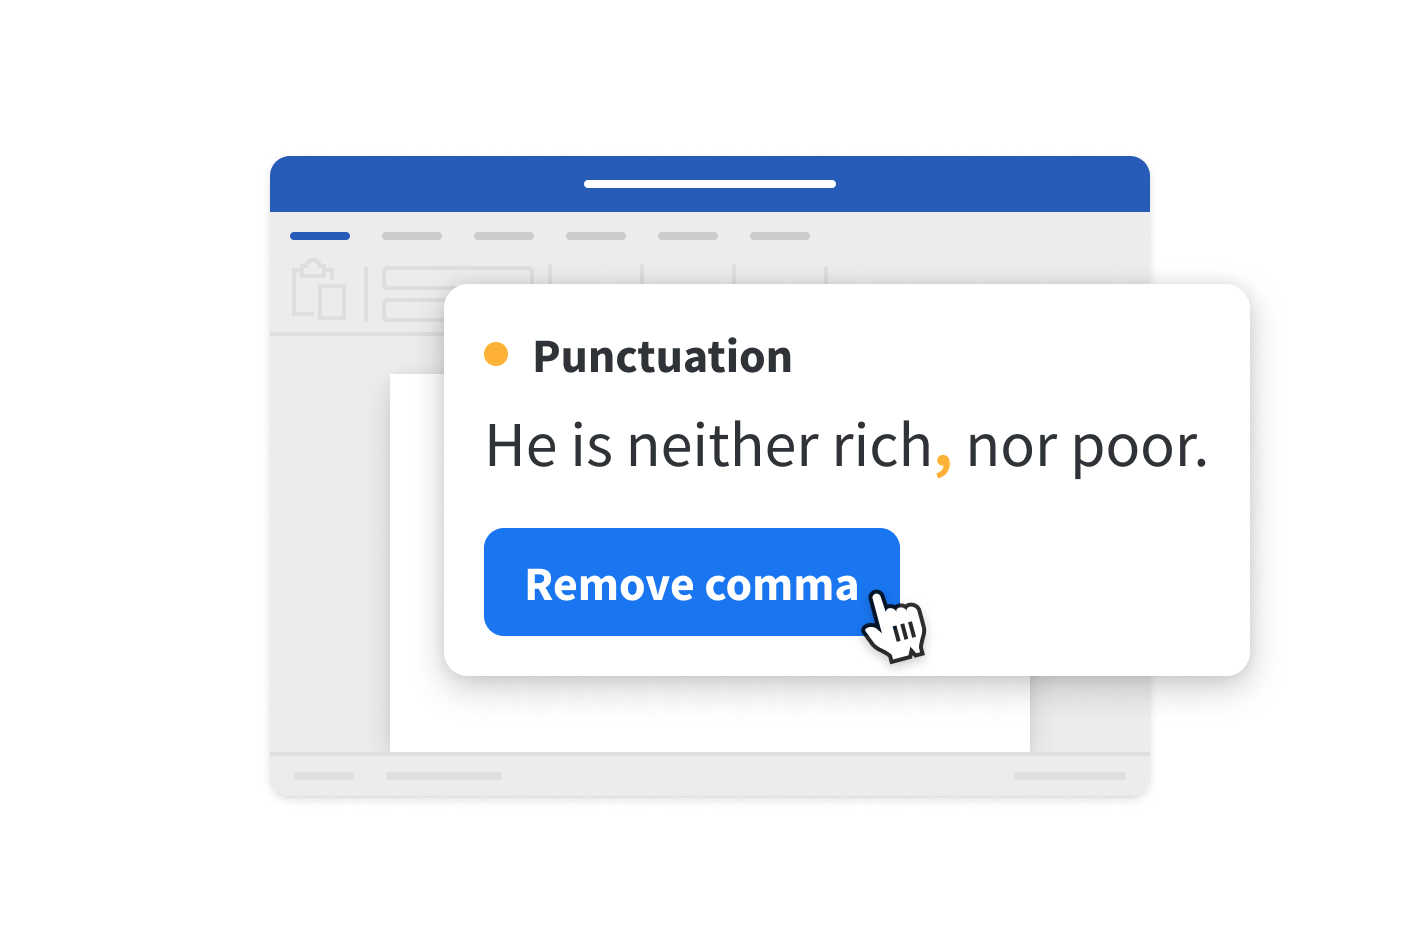
Grammar, Spelling, and Punctuation
Crystal-Clear Communication
Say goodbye to spelling, grammar, and punctuation errors and hello to clarity. With LanguageTool, there’s need to worry about typos and mistakes slipping into your writing.
Multilingual Support
Worldly Writing in 30+ Languages
LanguageTool supports more than thirty languages and dialects, meaning your text will be perfecto, regardless of which language you’re writing in.
Write Wonderfully
Wherever, Whenever
Whether you’re using the add-in or integrated LanguageTool with Word on the Mac app, you can rest assured that your text will leave a lasting impression with every word you write.
Lesson 25: Checking Spelling and Grammar
/en/word2016/charts/content/
Introduction
Worried about making mistakes when you type? Don’t be. Word provides you with several proofing features—including the Spelling and Grammar tool—that can help you produce professional, error-free documents.
Optional: Download our practice document.
Watch the video below to learn more about using the Spelling and Grammar tool.
To run a Spelling and Grammar check:
- From the Review tab, click the Spelling & Grammar command.
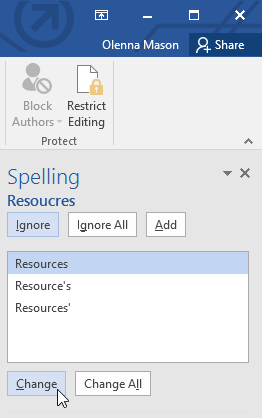
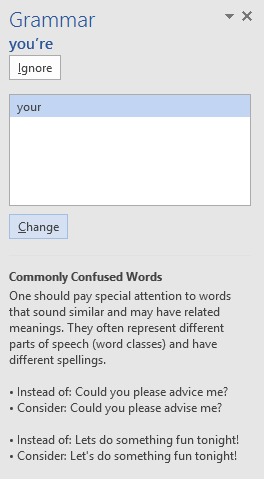
- The Spelling and Grammar pane will appear on the right. For each error in your document, Word will try to offer one or more suggestions. You can select a suggestion and click Change to correct the error.
- Word will move through each error until you have reviewed all of them. After the last error has been reviewed, a dialog box will appear confirming that the spelling and grammar check is complete. Click OK.
If no suggestions are given, you can manually type the correct spelling in your document.
Ignoring «errors»
The spelling and grammar check is not always correct. Particularly with grammar, there are many errors Word will not notice. There are also times when the spelling and grammar check will say something is an error when it’s actually not. This often happens with names and other proper nouns, which may not be in the dictionary.
If Word says something is an error, you can choose not to change it. Depending on whether it’s a spelling or grammatical error, you can choose from several options.
For spelling «errors»:
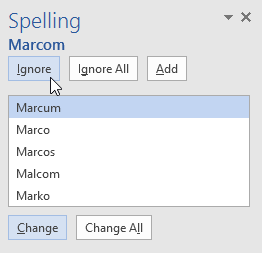
- Ignore: This will skip the word without changing it.
- Ignore All: This will skip the word without changing it, and it will also skip all other instances of the word in the document.
- Add: This adds the word to the dictionary so it will never come up as an error. Make sure the word is spelled correctly before choosing this option.
For grammar «errors»:
- Ignore: This will skip the word or phrase without changing it.
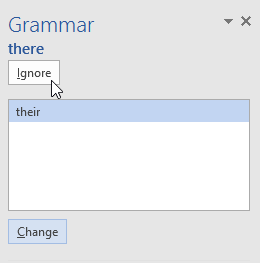
For some grammatical errors, Word will provide an explanation for why it thinks something is incorrect. This can help you determine whether you want to change or ignore it.
Automatic spelling and grammar checking
By default, Word automatically checks your document for spelling and grammar errors, so you may not even need to run a separate check. These errors are indicated by colored wavy lines.
- The red line indicates a misspelled word.
- The blue line indicates a grammatical error, including misused words.
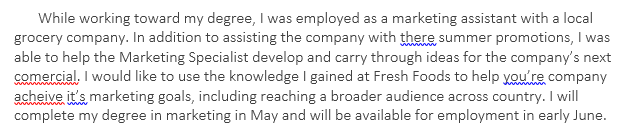
A misused word—also known as a contextual spelling error—occurs when a word is spelled correctly but used incorrectly. For example, if you used the phrase Deer Mr. Theodore at the beginning of a letter, deer would be a contextual spelling error. Deer is spelled correctly, but it is used incorrectly in the letter. The correct word is Dear.
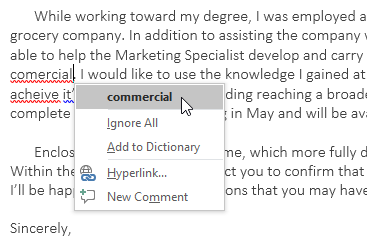
To correct spelling errors:
- Right-click the underlined word, then select the correct spelling from the list of suggestions.
- The corrected word will appear in the document.
You can also choose to Ignore All instances of an underlined word or add it to the dictionary.
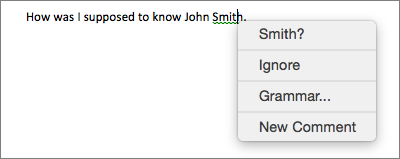
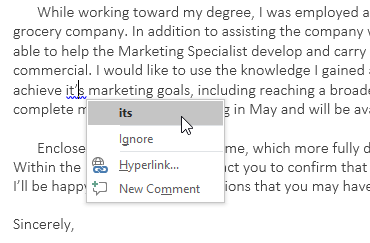
To correct grammar errors:
- Right-click the underlined word or phrase, then select the correct spelling or phrase from the list of suggestions.
- The corrected phrase will appear in the document.
To change the automatic spelling and grammar check settings:
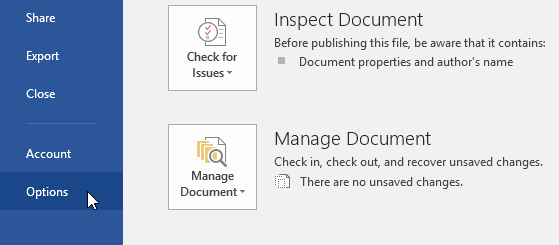
- Click the File tab to access Backstage view, then click Options.
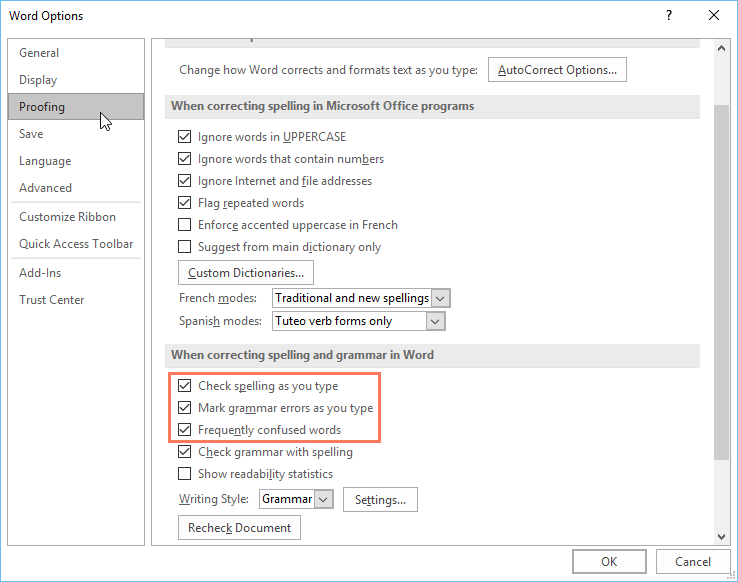
- A dialog box will appear. On the left side of the dialog box, select Proofing. From here, you have several options to choose from. For example, if you don’t want Word to mark spelling errors, grammar errors, or frequently confused words automatically, simply uncheck the desired option.
If you’ve turned off the automatic spelling and/or grammar checks, you can still go to the Review tab and click the Spelling & Grammar command to run a new check.
To hide spelling and grammar errors in a document:
If you’re sharing a document like a resume with someone, you might not want that person to see the red and blue lines. Turning off the automatic spelling and grammar checks only applies to your computer, so the lines may still show up when someone else views your document. Fortunately, Word allows you to hide spelling and grammar errors so the lines will not show up on any computer.
- Click the File tab to go to Backstage view, then click Options.
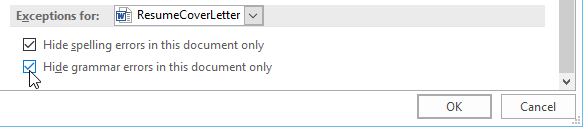
- A dialog box will appear. Select Proofing, then check the box next to Hide spelling errors in this document only and Hide grammar errors in this document only, then click OK.
- The lines in the document will be hidden.
Challenge!
- Open our practice document. If you already downloaded our practice document in order to follow along with the lesson, be sure to download a fresh copy by clicking the link in this step.
- Run a Spelling & Grammar check.
- Ignore the spelling of names like Marcom.
- Correct all other spelling and grammar mistakes.
- When you’re finished, your document should look like this:


/en/word2016/track-changes-and-comments/content/
Do you often make grammar mistakes when you write, and it’s affecting your grades on papers or your job performance?
One way that you can improve the grammar in your writing is with the help of the spelling and grammar checker tool in Microsoft Word.
Our article below will show you how to check your grammar in Word using the tool built into the application.
How to Do a Grammar Check in Word 2010
- Open the document.
- Click the Review tab.
- Click Spelling & Grammar.
- Accept or ignore changes.
Our guide continues below with more information on checking spelling and grammar in a Microsoft Word document, including pictures of these steps.
Having the ability to scan a document and look for spelling or grammatical mistakes can save you a lot of hassle? But if you are asking the question “how do I do a grammar check on Word?” then it’s very likely that you are having trouble finding that tool within the application.
Word 2010 is a powerful word-processing program not only because of the different ways that you can customize a document but also because of the utilities that you can use to check the contents of that document.
You might be aware of the spell-check feature, which has become a common part of most data-entry programs, but you might not be aware that Word can also check the grammar of the text in your documents.
You can have Word check grammar automatically and check spelling automatically by opening your document, selecting the Review tab, clicking Spelling & Grammar, then choosing what to do with the mistakes it has found.
This can be a particularly helpful tool if you are prone to making common grammatical mistakes or if you are submitting the document to a client or teacher who may be grading the quality of your work.
Continue reading to learn how to do a grammar check in Word 2010.
How to Run the Spelling & Grammar Tool in Word 2010 (Guide with Pictures)
One of the best parts of the spelling and grammar checker in Word 2010 is the level to which it can be customized.
While the tool itself is run directly within the Word 2010 interface, you actually need to open the Word Options menu from the File tab to configure the grammar settings.
After we show you how to perform a grammar check in Word 2010, we will then show you where to go to configure the grammar options as well.
These steps will show you how to do a grammar check in Word using a tool found within the program.
Step 1: Open the document on which you wish to run the grammar check.
Open your document in Microsoft Word.
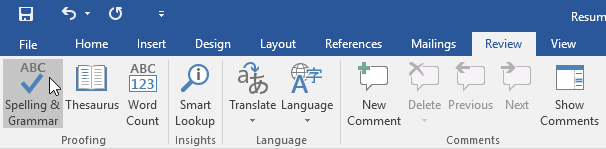
Step 2: Click the Review tab at the top of the window.
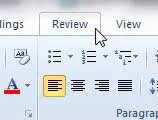
Select the Review tab.
Step 3: Click the Spelling & Grammar button in the Proofing section of the ribbon at the top of the window.
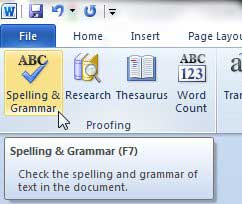
Select the Spelling & Grammar button.
Step 4: Click the button that corresponds with the change that you want to make to the identified mistake.

Choose the fix for the mistake.
You can also elect to ignore the mistake if you so choose.
Now that you know how ot use the spelling and grammar checker in Microsoft Word you will be able to scan the documents that you write and fix any mistakes that you find.
Note the Options button at the bottom of the window. If Word finds a mistake in your document, then you can click this button to set the options for the utility. Otherwise, you will need to follow the directions below to configure the grammar checker.
Changing the Grammar Checker Settings in Word 2010
While the spelling and grammar check in Microsoft Word will be able to find spelling errors and grammatical errors become you make any changes to the settings, it’s likely that you will discover it is either catching or missing some grammar errors.
Fortunately, you can adjust the grammar checking for the application with the following steps.
Step 1: Click the File tab at the top of the window.
Step 2: Click Options in the column at the left side of the window.

Step 3: Click Proofing in the column at the left side of the Word Options window.

Step 4: Locate the When correcting spelling and grammar in Word section.
Step 5: Click the Settings button to the right of Writing Style, then check the items for which you want the grammar utility to check.

Step 6: Click the OK button at the bottom of the Grammar Settings window, then click the OK button at the bottom of the Word Options window.
Our tutorial continues below with more information on how you can change the way that Microsoft Word will find and mark grammar errors in your document.
More Information on Using the Microsoft Word Grammar and Spelling Checker to Find Spelling or Grammar Issues
When you have configured Word to perform automatic spelling and grammar checking, you will start to see an underlined word with a red squiggly line when it has found a spelling error or a grammar error. You can then click on that underlined word and use one of the suggested words to replace the misspelled word or make an adjustment to correct the grammatical error.
If the document is going to be submitted in an official capacity, such as to your school or for work, then you might want to hide spelling errors and hide grammar errors that the automatic spell checking tool has found. This assumes that you have either chosen not to act on the suggestions from the tool, or you are going to be waiting until later to fix them.
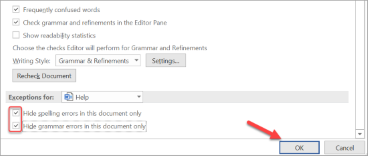
You can go to File > Options > Proofing > then go to the Exceptions for section and check the boxes next to Hide grammar errors in this document only and Hide spelling errors in this document only if you don’t want Word to highlight any potential spelling errors or potential grammatical errors when someone is viewing the file.
When you click the Review tab at the top of the window you will see the option to check spelling and turn automatic spelling and automatic grammar checking on, but you will also find ways to work with comments and change tracking. These are other editing options that you can find useful when collaborating on a document with a group, as it can otherwise be difficult to identify the changes that someone makes.
Frequently Asked Questions About How to Check Grammar and Spelling in Word
Is there a way to change the grammar mistakes that Word checks for?
You can modify the settings that Microsoft Word uses when it runs the spelling and grammar checker.
Click the File tab, then select the Options button at the bottom-left of the window.
Select the Proofing tab on the Word Options window, then adjust the settings and options on that menu.
If you click the Settings button next to the Writing Style dropdown menu in the When correcting spelling and grammar in Word section you will find dozens of different options that you can adjust.
This Grammar Settings dialog box can be really useful, especially if there is a particular type of mistake you always make and want to ensure that Word includes it when it checks your documents.
Why is Microsoft Word only checking spelling?
If you would like Word to scan your document for spelling and grammar mistakes, but it’s currently only scanning for spelling mistakes, then you can make a quick adjustment.
Go to the Review tab, then click the down arrow to the right of Spelling and Grammar. You can then click the Spelling and Grammar option to choose that type of scan.
How do I turn on grammar checker in Word?
You can enable or disable this option by going to File > Options > then selecting the Proofing tab.
You can then check the boxes to the left of:
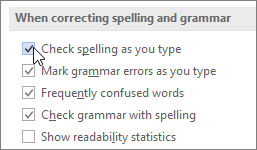
– Check spelling as you type
– Mark grammar errors as you type
In the When correcting spelling and grammar in Word section.
Conclusion
Hopefully, this article has provided you with more information on how you can check spelling and grammar in your documents.
Familiarizing yourself with the grammar dialog box so that you can change how Word detects grammar mistakes and chooses to correct spelling will give you more control over how the program handles potential errors.
Not everyone needs the same thing from the editing tools, and your field or situation could dictate a different set of proofreading rules that you can customize in your Word installation.
Additional Sources

Matthew Burleigh has been writing tech tutorials since 2008. His writing has appeared on dozens of different websites and been read over 50 million times.
After receiving his Bachelor’s and Master’s degrees in Computer Science he spent several years working in IT management for small businesses. However, he now works full time writing content online and creating websites.
His main writing topics include iPhones, Microsoft Office, Google Apps, Android, and Photoshop, but he has also written about many other tech topics as well.
Read his full bio here.