
Word 2016 is designed to help you create professional-quality documents. Word can also help you organize and write documents more efficiently.
When you create a document in Word, you can choose to start from a blank document or let a template do much of the work for you. From then on, the basic steps in creating and sharing documents are the same. And Word’s powerful editing and reviewing tools can help you work with others to make your document great.
Start a document
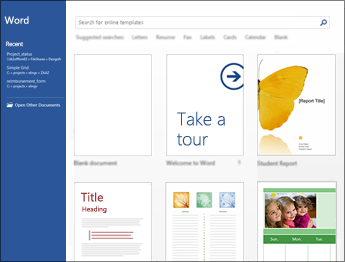
It’s often easier to create a new document using a template instead of starting with a blank page. Word templates come ready-to-use with pre-set themes and styles. All you need to do is add your content.
Each time you start Word, you can choose a template from the gallery, click a category to see more templates, or search for more templates online.
For a closer look at any template, click it to open a large preview.
If you’d rather not use a template, click Blank document.
Open a document
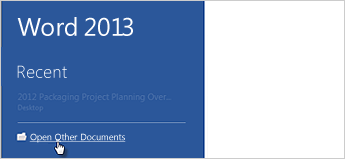
Every time you start Word, you’ll see a list of your most recently used documents in the left column. If the document you’re looking for isn’t there, click Open Other Documents.

If you’re already in Word, click File > Open and then browse to the file’s location.
When you open a document that was created in earlier versions of Word, you see Compatibility Mode in the title bar of the document window. You can work in compatibility more or you can upgrade the document to use Word 2016.
Save a document
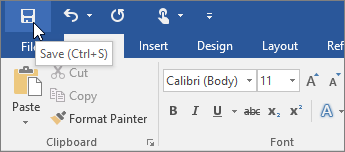
To save a document for the first time, do the following:
-
On the File tab, click Save As.
-
Browse to the location where you’d like to save your document.
Note: To save the document on your computer, choose a folder under This PC or click Browse. To save your document online, choose an online location under Save As or click Add a Place. When your files are online, you can share, give feedback and work together on them in real time.
-
Click Save.
Note: Word automatically saves files in the .docx file format. To save your document in a format other than .docx, click the Save as type list, and then select the file format that you want.
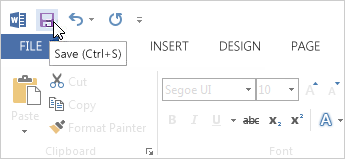
To save your document as you continue to work on it, click Save in the Quick Access Toolbar.
Read documents
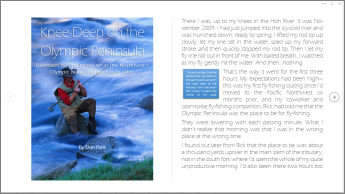
Open your document in Read Mode to hide most of the buttons and tools so you can get absorbed in your reading without distractions.
-
Open the document you want to read.
Note: Some documents open in Read Mode automatically, such as protected documents or attachments.
-
Click View > Read Mode.
-
To move from page to page in a document, do one of the following:
-
Click the arrows on the left and right sides of the pages.
-
Press page down and page up or the spacebar and backspace on the keyboard. You can also use the arrow keys or the scroll wheel on your mouse.
-
If you’re on a touch device, swipe left or right with your finger.
Tip: Click View > Edit Document to edit the document again.
-
Track changes
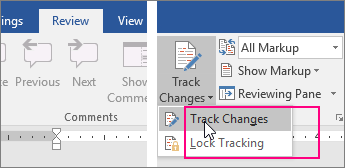
When you’re working on a document with other people or editing a document yourself, turn on Track Changes to see every change. Word marks all additions, deletions, moves, and formatting changes.
-
Open the document to be reviewed.
-
Click Review and then on the Track Changes button, select Track Changes.

Read Track changes to learn more.
Print your document
All in one place, you can see how your document will look when printed, set your print options, and print the file.
-
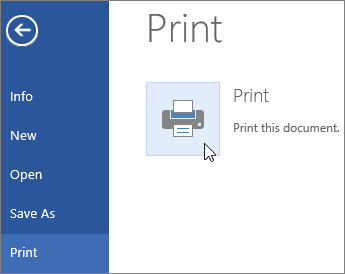
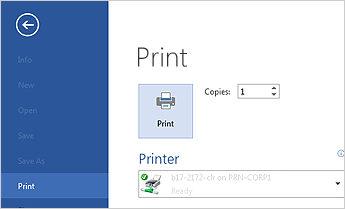
On the File tab, click Print.
-
Do the following:
-
Under Print, in the Copies box, enter the number of copies you want.
-
Under Printer, make sure the printer you want is selected.
-
Under Settings, the default print settings for your printer are selected for you. If you want to change a setting, just click the setting you want to change and then select a new setting.
-
-
When you’re satisfied with the settings, click Print.
For details, see Print a document.
Beyond the basics
For more on the fundamentals of using Word, see What’s new in Word 2016.
Top of Page
With Word for the web, you use your web browser to create, view, and edit the personal documents that you store on OneDrive. If your organization or college has a Microsoft 365 plan or SharePoint site, start using Word for the web by creating or storing documents in libraries on your site.Save changes
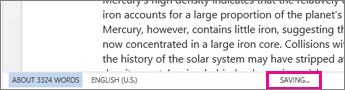
Word saves your changes automatically. Look on the status bar at the bottom left corner of Word for the web. It will either show Saved or Saving.
Share documents online
Because your document is online, you can share it by sending a link instead of an email attachment. People can read it in their web browser or mobile device.
Click File > Share > Share with People.

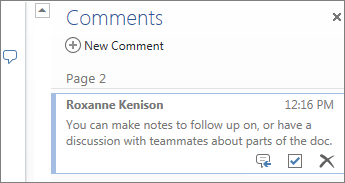
Comment in the browser
A comment balloon shows where comments have been made in the doc.

Reply to comments, and check off items you’ve addressed.
Edit in the browser
If you try to type in the document and nothing happens, you’re probably in Reading view. Switch to Editing view: click Edit Document > Edit in Word for the web.

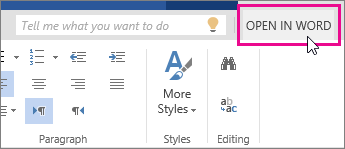
Type and format text, add pictures, adjust the layout of the page, and more. For more advanced editing, click Open in Word.
Work together on the same doc
To work together in Word for the web, you edit a document as you normally would. If others are also editing it, Word for the web alerts you to their presence. You can see everyone who is currently working in the document by clicking in the ribbon.

Clicking on an author’s name jumps you to where they’re working in the doc. And you’ll see the changes they make as they’re happening. They can be working in Word for the web, Word 2010 or later, or Word for Mac 2011.
Add a header or footer
Go to Insert > Header & Footer to add headers and footers to your document.
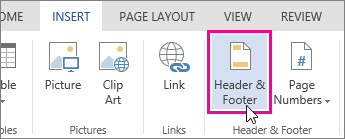
Click Options to choose how you’d like them to appear.

Add page numbers
Click Insert > Page Numbers and then choose from the gallery where you’d like the page numbers to appear.
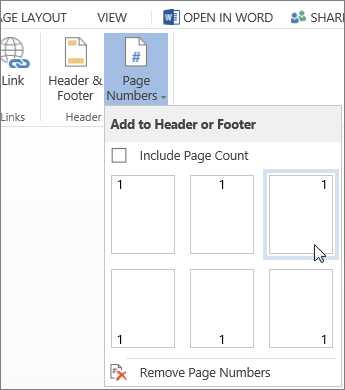
Select Include Page Count to show the current page number along with the total number of pages (page X of Y).
Find and replace text
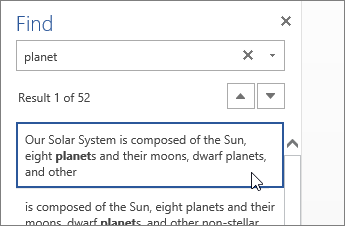
Quickly search for every occurrence of a specific word or phrase in your document by clicking Home > Find (or type Ctrl+F). Results appear next to your document so you can see the term in context. Clicking on a search result jumps you to that occurrence.
Click Replace (or type Ctrl+H) to find and replace text.
Print in Word for the web
Go to File > Print. Word for the web creates a PDF preview of your document that keeps all the layout and formatting of your document. Send the PDF to your printer and it will print the way you expect.
Microsoft Word 2013 is a word-processing program designed to help you create professional-quality documents. Word helps you organize and write your documents more efficiently.
Your first step in creating a document in Word 2013 is to choose whether to start from a blank document or to let a template do much of the work for you. From then on, the basic steps in creating and sharing documents are the same. Powerful editing and reviewing tools help you work with others to make your document perfect.
Choose a template
It’s often easier to create a new document using a template instead of starting with a blank page. Word templates are ready to use with themes and styles. All you need to do is add your content.
Each time you start Word 2013, you can choose a template from the gallery, click a category to see the templates it contains, or search for more templates online. (If you’d rather not use a template, just click the Blank document.)
For a closer look at any template, just click it to open a large preview.
Top of Page
Open a document
Every time you start Word, you’ll see a list of your most recently used documents in the left column. If the document you’re looking for isn’t there, click Open Other Documents.
If you’re already in Word, click File > Open and then browse to the file’s location.
When you open a document that was created in earlier versions of Word, you see Compatibility Mode in the title bar of the document window. You can work in compatibility more or you can upgrade the document to use features that are new or enhanced in Word 2013.
Top of Page
Save a document
To save a document for the first time, do the following:
-
Click the File tab.
-
Click Save As.
-
Browse to the location where you’d like to save your document.
Note: To save the document on your computer, choose a folder under Computer or click Browse. To save your document online, choose a location under Places or Add a Location. When your files are online, you can share, give feedback and work together on them in real time.
-
Click Save.
Note: Word automatically saves files in the .docx file format. To save your document in a format other than .docx, click the Save as type list, and then select the file format that you want.
To save your document as you continue to work on it, click Save in the Quick Access Toolbar.
Top of Page
Read documents
Open your document in Read Mode to hide most of the buttons and tools so you can get absorbed in your reading without distractions.
-
Open the document you want to read.
Note: Some documents open in Read Mode automatically, such as protected documents or attachments.
-
Click View > Read Mode.
-
To move from page to page in a document, do one of the following:
-
Click the arrows on the left and right sides of the pages.
-
Press page down and page up or the spacebar and backspace on the keyboard. You can also use the arrow keys or the scroll wheel on your mouse.
-
If you’re on a touch device, swipe left or right with your finger.
Tip: Click View > Edit Document to edit the document again.
-
Top of Page
Track changes
When you’re working on a document with other people or editing a document yourself, turn on Track Changes to see every change. Word marks all additions, deletions, moves, and formatting changes.
-
Open the document to be reviewed.
-
Click Review and then on the Track Changes button, select Track Changes.

Read Track changes to learn more.
Top of Page
Print your document
All in one place, you can see how your document will look when printed, set your print options, and print the file.
-
Click the File tab and then click Print.
-
Do the following:
-
Under Print, in the Copies box, enter the number of copies you want.
-
Under Printer, make sure the printer you want is selected.
-
Under Settings, the default print settings for your printer are selected for you. If you want to change a setting, just click the setting you want to change and then select a new setting.
-
-
When you’re satisfied with the settings, click Print.
For details, see Print and preview documents.
Beyond the basics
Go beyond the basics with your documents by creating a table of contents or saving a document as a template.
Top of Page
Important:
Office 2010 is no longer supported. Upgrade to Microsoft 365 to work anywhere from any device and continue to receive support.
Upgrade now
In this article
-
What is Word?
-
Find and apply a template
-
Create a new document
-
Open a document
-
Save a document
-
Read documents
-
Track changes and insert comments
-
Print your document
What is Word?
Microsoft Word 2010 is a word-processing program, designed to help you create professional-quality documents. With the finest document-formatting tools, Word helps you organize and write your documents more efficiently. Word also includes powerful editing and revising tools so that you can collaborate with others easily.
Top of Page
Find and apply a template
Word 2010 allows you to apply built-in templates, to apply your own custom templates, and to search from a variety of templates available on the web.
To find and apply a template in Word, do the following:
-
On the File tab, click New.
-
Under Available Templates, do one of the following:
-
To use one of the built-in templates, click Sample Templates, click the template that you want, and then click Create.
-
To reuse a template that you’ve recently used, click Recent Templates, click the template that you want, and then click Create.
-
To use your own template that you previously created, click My Templates, click the template that you want, and then click OK.
-
To find a template on Office.com, under Office.com Templates, click the template category that you want, click the template that you want, and click Download to download the template from Office.com to your computer.
-
Note: You can also search for templates on Office.com from within Word. In the Search Office.com for templates box, type one or more search terms, and then click the arrow button to search.
Top of Page
Create a new document
-
Click the File tab and then click New.
-
Under Available Templates, click Blank Document.
-
Click Create.
For more information about how to create a new document, see Create a document.
Top of Page
Open a document
-
Click the File tab, and then click Open.
-
In the left pane of the Open dialog box, click the drive or folder that contains the document.
-
In the right pane of the Open dialog box, open the folder that contains the drawing that you want.
-
Click the document and then click Open.
Top of Page
Save a document
To save a document in the format used by Word 2010 and Word 2007, do the following:
-
Click the File tab.
-
Click Save As.
-
In the File name box, enter a name for your document.
-
Click Save.
To save a document so that it is compatible with Word 2003 or earlier, do the following:
-
Open the document that you want to be used in Word 2003 or earlier.
-
Click the File tab.
-
Click Save As.
-
In the Save as type list, click Word 97-2003 Document. This changes the file format to .doc.
-
In the File name box, type a name for the document.
-
Click Save.
For more information about how to create a document that is compatible with Word 2003 or earlier versions, see Create a document to be used by previous versions of Word.
Top of Page
Read documents
-
Open the document that you want to read.
-
On the View tab, in the Document Views group, click Full Screen Reading
-
To move from page to page in a document, do one of the following:
-
Click the arrows in the lower corners of the pages.
-
Press PAGE DOWN and PAGE UP or SPACEBAR and BACKSPACE on the keyboard.
-
Click the navigation arrows at the top center of the screen.
Tip: Click View Options, and then click Show Two Pages
to view two pages, or screens, at a time.
-
 to view two pages, or screens, at a time.
For more information about how to view documents, see Read documents in Word.
Top of Page
Track changes and insert comments
-
To turn on change tracking, on the Review tab, in the Tracking group, click Track Changes.
-
To insert a comment, on the Review tab, in the Comments group, click New Comment.
For more information about how to track changes made while revising, see Track changes and insert comments.
Top of Page
Print your document
-
Click the File tab and then click Print.
-
Do the following:
-
Under Print, in the Copies box, enter the number of copies that you want to print.
-
Under Printer, make sure that the printer that you want is selected.
-
Under Settings, the default print settings for your printer are selected for you. If you want to change a setting, click the setting you want to change and then select the setting that you want.
-
-
When you are satisfied with the settings, click Print.
For more information about how to print a file, see Preview and print a file.
Top of Page
– Equipment Or Concept? Essay, Research Paper
WORD PROCESSING-EQUIPMENT OR CONCEPT?
Introduction
Increasing administrative costs in recent years have made the
production of business communications a major expense and one that
will continue to rise. One way to help control the cost of business
communications is to make the processing of documents more
effective and efficient through the use of current technology. Word
processing equipment has been around for more than twenty years.
However, during the last decade it has really made an impact on the
business world.
There are two major contributing factors to this increased
impact. The first is technological advances made in the area of
equipment manufacturing. The second, and just as important, is the
acceptance of the concept of word processing as a system rather
than just a piece of hardware.
Background
Word processing first appeared in the business environment on a
widely distributed basis in 1964. Since that time, the question,
?What is word processing?? has been heard all over the country.
When this question is asked, it is usually aimed primarily at
hardware. But word processing should not be thought of as a piece
of equipment; rather it is a concept for improving the efficiency
of producing business communications. Equipment is but one of
several tools used in the construction of a word processing system.
Word processing is now being accepted as the capability to
transform ideas into written word by employing procedures,
equipment, and people. These three ingredients make word processing
a viable solution to increasing the efficiency and reducing the
cost of producing business communications.
The next question is usually, ?How does word processing actually
work?? Very simply stated, text material can be stored and
retrieved later for manipulation during revision cycles. This
process eliminates the need for lengthy rekeying due to errors or
changes in the document. This process is ideal for long documents
or any document that goes through several revision cycles. Accuracy
and quality are increased because you are only rekeying changed
portions of the document. Processing time is greatly reduced for
all work produced on word processing equipment.
This simple explanation has discussed the benefits available
through word processing. Reductions of processing or keyboarding
time and increases in quality and accuracy are the most important
benefits to be gained from word processing. These benefits can only
be gained, however, by using the three tools discussed earlier to
build your word processing system.
Procedures
Procedures are the backbone of any word processing system.
Automation is not a panacea in itself. However, procedures to
dictate what, how, and when this equipment should be used will
remove many of your administrative burdens. Procedures should be
implemented whether you are employing a centralized or
decentralized processing environment. There should be two sets of
procedures: one for the personnel submitting work to be processed
and another for the operators.
Author?s manual
The author?s manual should include a detailed system
description, along with instructions on how to submit work and what
can be expected of the system. When writing these procedures, keep
in mind that they are not cast in concrete. Procedures should be
reviewed every six months and, as circumstances change, revised and
rewritten. The following items should be considered for inclusion
in the author?s manual:
Goals of the word processing system
System descriptions
Word flow diagrams
Services offered
Dictation guidelines
Transmittal slips
Priorities
Turnaround times
Media retention
Special projection scheduling
Proofreading marks
Corrections
Additional services; e.g., communications, telex, facsimiles
This manual is intended to inform the author or word originator
how to effectively utilize the resources available. If these
guidelines are followed, your authors should know what to submit,
how to submit it, and what to expect in terms of output. With this
accomplished, you have taken a giant stride toward ensuring the
effectiveness of your word processing system.
Operator?s manual
The operator?s manual should include equipment, system, and
document information as well as office standards.
This manual
should be a comprehensive guide outlining exactly what is expected
and who is responsible. The following items should be considered
for the inclusion in the operator?s manual:
System description
Equipment description
Equipment maintenance instructions (on and off instructions,
etc.)
Work flow diagrams
Distribution of work
Priorities
Recordkeeping instructions and forms
Document and machine set-ups (include samples)
Explanation of company standards
This guide is not only informative for full-time employees, but
it is especially helpful in training temporaries and part-time
employees. This manual should contain information necessary to
accomplish all functions of the job other than training to use the
equipment.
Procedures really are the foundation that our system will be
built on. The advances in technology in word processing have been
phenomenal in the last ten years. Because of increases technology,
it is very important to control this area, and the only way to do
that is through a systematic procedural approach.
Equipment
Selecting equipment for a word processing installation is
without a doubt a difficult task. Technical information about
hardware and software is readily available through sources like
trade journals, vendors, consumer reports, consulting firms, and
word processing associations. The problem arises in applying the
information you have compiled to the needs of your organization.
Theses needs are the foundation on which you design your system and
should be the basis on which you make your equipment selection.
The first step in evaluating the type of equipment needed is to
ascertain the types of work performed in your organization. You
should break down by percentages the instances of short and long
letters and memos, repetitive letter, reports, statistical work,
forms, printing applications, and communications use. The
complexity of text editing and manipulation should be determined
for each of these categories. With this information, you should be
able to decide on a category of equipment to fit your needs. Every
organization?s needs and applications for word processing equipment
are different. No single type of equipment, therefore, is the best
for all situations. But one of the types available will fit into
and meet your word processing needs.
Staffing
Personnel is the last building block in constructing your word
processing system. It is not listed last because of order of
importance, however, A well-qualified staff will mean the
difference between success and failure. The traditional methods of
producing documents in the office have changed. The qualifications
needed for a good word processor can be broken down into tangible
and intangible key factors. In the tangible area there are seven
basic background skills that are necessary:
Fast and accurate keyboarding
Transcription of dictation
Proofreading
Grammatical skills
Use of resource materials
Mathematics
Concepts and theory of word processing
Intangible personality traits represent a large area of
qualifications that are just as necessary:
A service attitude-proffesional, businesslike, cooperative, and
positive
A sense of humor
Aptitude for machines
Ability to concentrate
Good logical problem-solving skills
Stability
Responsibility, sense of pride in work
Good team attitude, respect for standard procedures
This formula is not foolproof; an individual with these
qualifications still may not make a good word processing operator.
However, an individual possessing these skills is certainly a
well-qualified applicant for word processing positions and could be
an asset to your word processing system.
Conclusion
The answer to the question, ?What is word processing?? is that
it is a concept. This concept is based on three ingredients
Procedures dictate what, how, and when paperwork will be
produced.
The equipment is the tool to accomplish the result.
Word processing personnel actually produce the result, using
procedures and the equipment.
By employing all three ingredients you should be able to greatly
increase the efficiency of processing paperwork in your office.
cn
?Venice? Encyclopedia of Britannica Online. [Accessed January 3
2000]
Holt, Rinehart, and Winston. World Geography Today. Austin TX:
Harcourt Brace & Company, 1997
![]()
Ash Manor School
Computing Department
Word processing
Word processing is the creation, editing and publication of digital artefacts which are based on formatted text. We use a word porcessor in school to write up assignments, essays, magazine articles, letters, plays and many other uses. In this unit we will also introduce you to the file system, and how to use this to your advantage.
Aims
This is an introduction to Word processing, and file operations. We will be focusing on the theme «Employment»
By the end of this unit you will learn:
- Level 3
- (IT) Organises files in a folder structure
- (IT) creates digital content to achieve a goal
- (IT) Combines digital packages (imports pictures, and spreadsheets into a word document)
- (IT) Makes appropriate improvements to digital content based on feedback
- Level 4
- (IT) Makes judgements about digital artefacts produced.
- (IT) Recognises audience when producing digital artefacts.
- (IT) Uses criteria provided to evaluate the quality of digital artefacts
- (IT) independantly identifies improvements to digital content, and makes appropriate improvements
- Level 5
- (IT) Designs criteria to evaluate the quality of digital artefacts
- (IT) Uses criteria to identify appropriate improvements to digital content, and carries out these improvements
- (IT) Uses styles appropriately.
- Level 6
- (IT) Justifies choice of software and independantly combines resources to produce a digital artefact.
- (IT) Designs digital artefacts for wider, or remote audience.
- (IT) Designs criteria for users to evaluate the quality of digital artefacts
- (IT) Uses feedback from users to refine solution, or make recommendations for refinements.
Activity 1
Learning aims:
- Creates digital content to achieve a goal — L3
- Combines digital packages (import pictures into a word document) L3
- Uses styles appropriately
Starter
A newspaper classified sales clerk notes down this advertisement over the phone:
Laptop for sale, Intel Pentium M 760 Processor 2.0 GHz, 512MB memory, 80GB hard disk. £225. Excellent condition. Phone John Smith 417639.
Describe five different features of a Word Processing package you could use to improve this advert.
Save your answer in a word document as «Starter» and upload to here.
Task 1
HOW DO YOU COMMUNICATE WITH THE COMPUTER?
In the windows environment you can communicate with the computer using a Graphical User Interface (GUI -pronounced Gooey). This means you give instructions to the computer by using a mouse to click on icons, tabs and buttons. In Microsoft Word there is a ribbon which goes across the window. This is where you can find a set of tabs, a series of buttons, icons and controls called commands.

Do you know your icons?
An icon is a small symbol or picture that represents a series of instructions or programs.
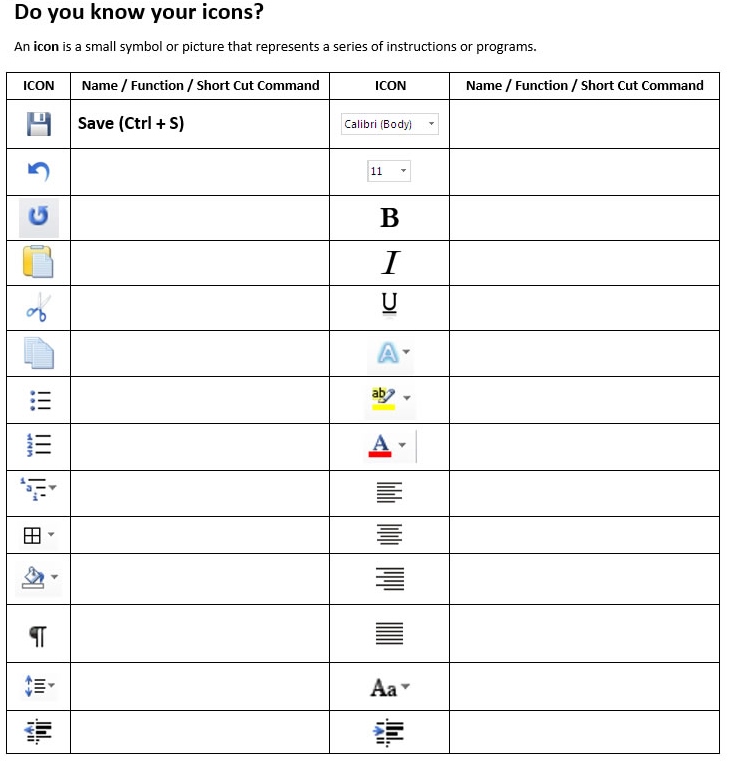
Complete the table
and upload your saved document here
Activity 2
Applying for a Job!
You have been asked to research and apply for a job. In order to apply, you need to produce a CV and covering letter. Job can be any choice of yours.
Learning aims:
- Uses styles appropriately — L5
Task 1 — Writing your CV
Here are a few simple guidelines:
- keep it short (1-4 pages)
- put your best skills first
- use simple language and short sentences
- be positive and enthusiastic
- don’t staple lots of things to it
- make it look good – and always type it
- check your spelling and grammar (get someone else to check it too)
What should my CV say?
Here are the main things you need to include:
Personal details.
Give your full name, and an address and phone number where the employer can contact you. Age and family details are optional.
Career or personal objective.
Say what you want to achieve in your working future. This helps the employer relate your skills to the job.
Work experience.
List the jobs you’ve had, starting with the most recent and working backwards. Give the job title, the employer’s name, the date you started and finished, and a brief description.
Skills and abilities.
List your work-related skills and abilities. Some of these might be skills you learnt outside work. So include unpaid, community or family work and say how these skills might suit the job you are applying for.
Education and training.
Include your schooling and other training. Give details of technical and trade certificates, and any study or courses you’ve done (even if you haven’t completed them).
Other things.
Give brief details of your hobbies and interests. Include anything else you think is important such as driver’s licence or your state of health.
Referees.
Include at least 2 people who can talk about how well you’ve worked in the past. Give their name, position, and phone number. But check with them first. Let them know they may be contacted and ask what they will say about you.
Create your CV using a word processor and click here to upload your CV
You can use the CV Template
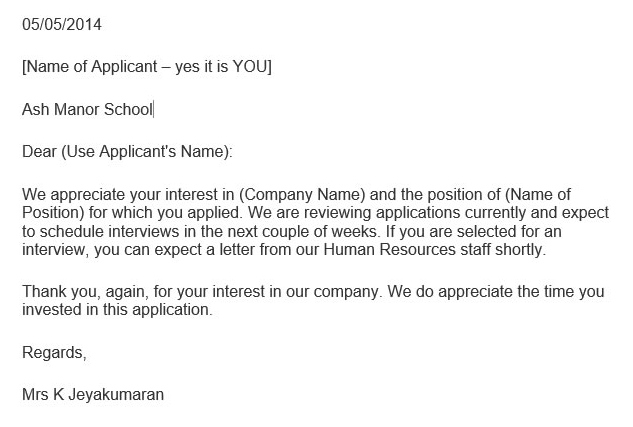
Task 2 — Writting a covering letter for a Job
Cover Letter Tips:
The basics
Always send a cover letter as part of any job application.
Be neat and tidy: type your letter on unmarked, white A4 paper.
Keep it concise: ideally just one page.
Attention to detail: ensure there are no spelling or grammatical mistakes (especially the correct job title and name of who you are writing to).
Make sure you include your contact phone and address details.
Be professional, positive and confident.
Bullet points are great to describe your key skills / achievements but remember you are writing a formal letter. Most of your letter should be written in full sentences and split into relevant paragraphs.
What to say
- Include where you saw the job advertised and the vacancy reference number if applicable.
- Describe why you are interested in this job.
- Include highlights or key achievements from your background but remember you don’t need to repeat lists of responsibilities from your CV.
- Make it relevant to the job you’re applying for: you need to show how your skills, experience, and qualifications match what they are looking for. (Refer back to their job advertisement or job description).
- Don’t forget that any skills gained through education, training, work experience, voluntary work and/or community activities might also be relevant.
- Cover off any other details as applicable: for example, your willingness to relocate if you live in a different town from where the job is based.
- Confirm you would appreciate the opportunity to be interviewed. Say if you are going to be unavailable during the likely interview process timeframe.
Click here for a formal letter template.
Use the template to complete your covering letter. Click here to send your letter.
Activity 3
«Congratulation, you are through to next level»
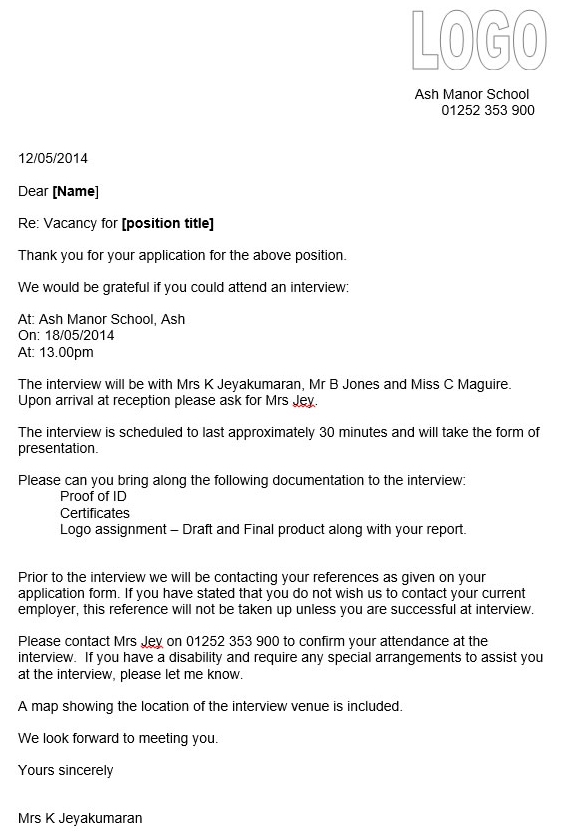
Once again Congratulations! Tou have been short listed for an interview.
Part of the process is to produce a company logo. You may use other software to produce your design. However you need to justify the choice of software and combined resources to produce a logo. You must import your logo into word document as we might not support other software.
We expect to see progression as to how you deliver your final product.
We expect the following from you:
- Logo (import to word processing) – Your first attempt
- Logo (import to word processing) –Your second attempt showing improvements
- Logo (import to word processing) – Your final design, following feedback
- Report – Word document explaining/justifying your decisions step by step.
Learning aims:
- Creates digital content to achieve a goal — L3
- Recognises audience when producing digital artefacts. L4
Task 1 — Logo for the Company (Create a Logo)
Import your logo into a word documents and save as «Logo_YOURNAME»
Click here to upload your Logo version 1
Activity 4
Visual Literacy exercise.
Learning aims:
- Makes judgements about digital artefacts produced. L4
- Designs criteria to evaluate the quality of digital artefacts — L5
- Independantly identifies improvements to digital content, and makes appropriate improvements — L4
Task 2 — Develop your Logo
Self Mark your design — Independently identified improvement to your logo, and make appropriate improvements.
Import your logo into a word documents and save as «Logo1.YOUERNAME»
Click here to upload your Logo version 2
Activity 5
Visual Literacy exercise.
Learning aims:
- Makes appropriate improvements to digital content based on feedback — L3
- Uses feedback from users to refine solution, or make recommendations for refinements.L6
Task 3 — Review your Design
Peer Mark — Make appropriate improvements to your desgin based on feedback.
Import your logo into a word documents and save as «Logo_Final.YOUERNAME»
Click here to upload your final Logo
Activity 6
Visual Literacy exercise.
Learning aims:
- Justifies choice of software and independantly combines resources to produce a digital artefact. L6
- Organises files in a folder structure — L3 — Task 2
Task 1 — Justify your design
Produce a report using word document explaining/justifying your decisions step by step.
Save your report as «Report_YOURNAME»
Click here to upload your report
Task 2 — Organisation Skill
Produce a word document showing screen shots of your files in a folder structure.
Save your document as «Folder_YOURNAME» and upload it here