
You can use Object Linking and Embedding (OLE) to include content from other programs, such as Word or Excel.
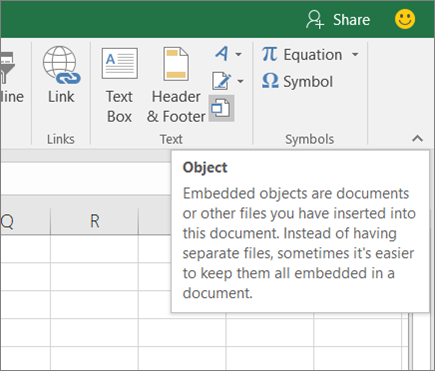
OLE is supported by many different programs, and OLE is used to make content that is created in one program available in another program. For example, you can insert an Office Word document in an Office Excel workbook. To see what types of content that you can insert, click Object in the Text group on the Insert tab. Only programs that are installed on your computer and that support OLE objects appear in the Object type box.
If you copy information between Excel or any program that supports OLE, such as Word, you can copy the information as either a linked object or an embedded object. The main differences between linked objects and embedded objects are where the data is stored and how the object is updated after you place it in the destination file. Embedded objects are stored in the workbook that they are inserted in, and they are not updated. Linked objects remain as separate files, and they can be updated.
Linked and embedded objects in a document
1. An embedded object has no connection to the source file.
2. A linked object is linked to the source file.
3. The source file updates the linked object.
When to use linked objects
If you want the information in your destination file to be updated when the data in the source file changes, use linked objects.
With a linked object, the original information remains stored in the source file. The destination file displays a representation of the linked information but stores only the location of the original data (and the size if the object is an Excel chart object). The source file must remain available on your computer or network to maintain the link to the original data.
The linked information can be updated automatically if you change the original data in the source file. For example, if you select a paragraph in a Word document and then paste the paragraph as a linked object in an Excel workbook, the information can be updated in Excel if you change the information in your Word document.
When to use embedded objects
If you don’t want to update the copied data when it changes in the source file, use an embedded object. The version of the source is embedded entirely in the workbook. If you copy information as an embedded object, the destination file requires more disk space than if you link the information.
When a user opens the file on another computer, he can view the embedded object without having access to the original data. Because an embedded object has no links to the source file, the object is not updated if you change the original data. To change an embedded object, double-click the object to open and edit it in the source program. The source program (or another program capable of editing the object) must be installed on your computer.
Changing the way that an OLE object is displayed
You can display a linked object or embedded object in a workbook exactly as it appears in the source program or as an icon. If the workbook will be viewed online, and you don’t intend to print the workbook, you can display the object as an icon. This minimizes the amount of display space that the object occupies. Viewers who want to display the information can double-click the icon.
Embed an object in a worksheet
-
Click inside the cell of the spreadsheet where you want to insert the object.
-
On the Insert tab, in the Text group, click Object
 .
. -
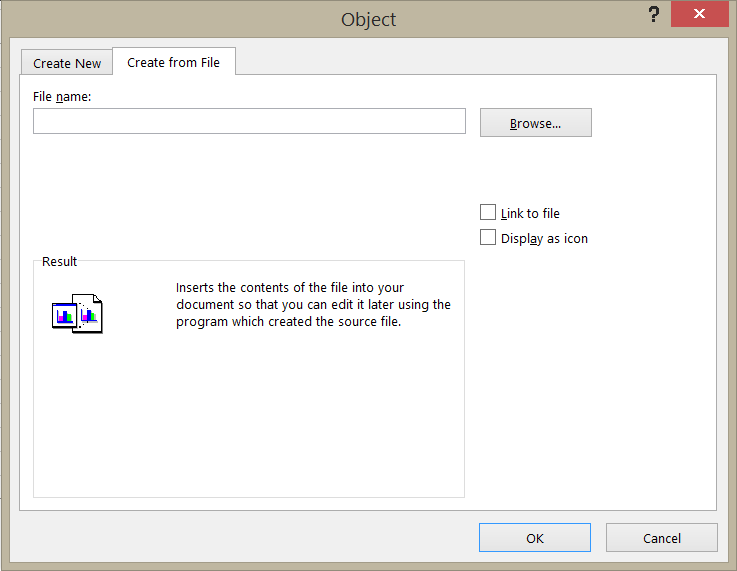
In the Object dialog box, click the Create from File tab.
-
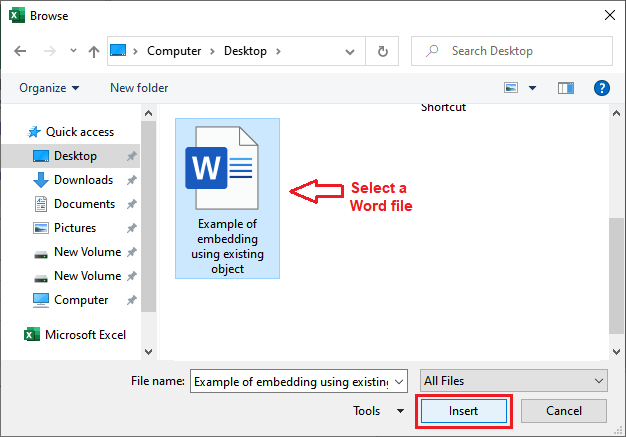
Click Browse, and select the file you want to insert.
-
If you want to insert an icon into the spreadsheet instead of show the contents of the file, select the Display as icon check box. If you don’t select any check boxes, Excel shows the first page of the file. In both cases, the complete file opens with a double click. Click OK.
Note: After you add the icon or file, you can drag and drop it anywhere on the worksheet. You can also resize the icon or file by using the resizing handles. To find the handles, click the file or icon one time.
 .
.
Insert a link to a file
You might want to just add a link to the object rather than fully embedding it. You can do that if your workbook and the object you want to add are both stored on a SharePoint site, a shared network drive, or a similar location, and if the location of the files will remain the same. This is handy if the linked object undergoes changes because the link always opens the most up-to-date document.
Note: If you move the linked file to another location, the link won’t work anymore.
-
Click inside the cell of the spreadsheet where you want to insert the object.
-
On the Insert tab, in the Text group, click Object
. -
Click the Create from File tab.
-
Click Browse, and then select the file you want to link.
-
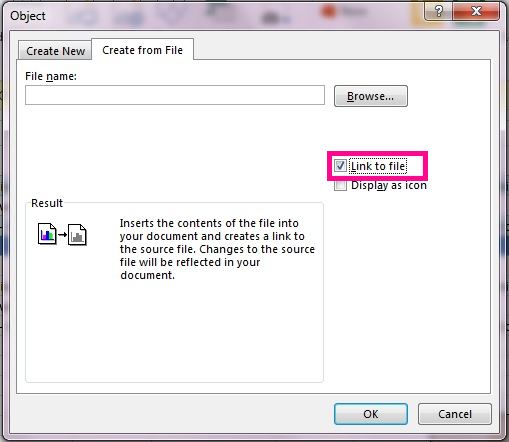
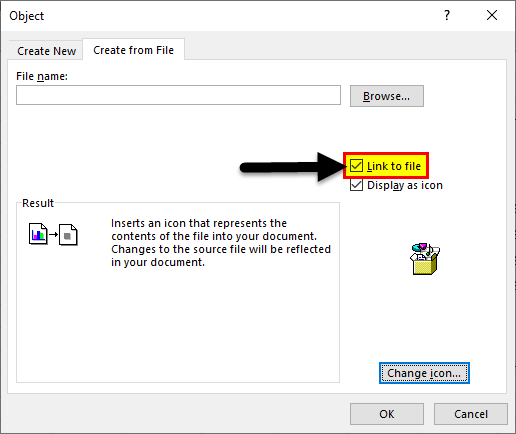
Select the Link to file check box, and click OK.
Create a new object from inside Excel
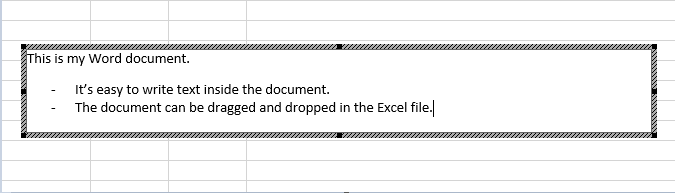
You can create an entirely new object based on another program without leaving your workbook. For example, if you want to add a more detailed explanation to your chart or table, you can create an embedded document, such as a Word or PowerPoint file, in Excel. You can either set your object to be displayed right in a worksheet or add an icon that opens the file.
-
Click inside the cell of the spreadsheet where you want to insert the object.
-
On the Insert tab, in the Text group, click Object
. -
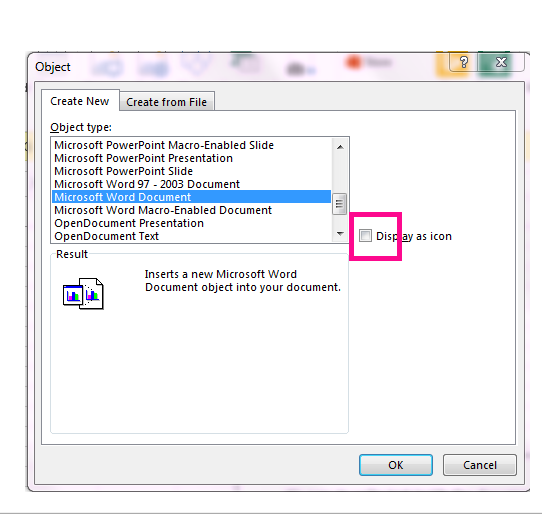
On the Create New tab, select the type of object you want to insert from the list presented. If you want to insert an icon into the spreadsheet instead of the object itself, select the Display as icon check box.
-
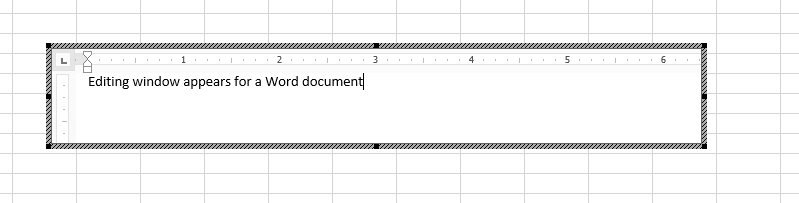
Click OK. Depending on the type of file you are inserting, either a new program window opens or an editing window appears within Excel.
-
Create the new object you want to insert.
When you’re done, if Excel opened a new program window in which you created the object, you can work directly within it.
When you’re done with your work in the window, you can do other tasks without saving the embedded object. When you close the workbook your new objects will be saved automatically.
Note: After you add the object, you can drag and drop it anywhere on your Excel worksheet. You can also resize the object by using the resizing handles. To find the handles, click the object one time.
Embed an object in a worksheet
-
Click inside the cell of the spreadsheet where you want to insert the object.
-
On the Insert tab, in the Text group, click Object.
-
Click the Create from File tab.
-
Click Browse, and select the file you want to insert.
-
If you want to insert an icon into the spreadsheet instead of show the contents of the file, select the Display as icon check box. If you don’t select any check boxes, Excel shows the first page of the file. In both cases, the complete file opens with a double click. Click OK.
Note: After you add the icon or file, you can drag and drop it anywhere on the worksheet. You can also resize the icon or file by using the resizing handles. To find the handles, click the file or icon one time.
Insert a link to a file
You might want to just add a link to the object rather than fully embedding it. You can do that if your workbook and the object you want to add are both stored on a SharePoint site, a shared network drive, or a similar location, and if the location of the files will remain the same. This is handy if the linked object undergoes changes because the link always opens the most up-to-date document.
Note: If you move the linked file to another location, the link won’t work anymore.
-
Click inside the cell of the spreadsheet where you want to insert the object.
-
On the Insert tab, in the Text group, click Object.
-
Click the Create from File tab.
-
Click Browse, and then select the file you want to link.
-
Select the Link to file check box, and click OK.
Create a new object from inside Excel
You can create an entirely new object based on another program without leaving your workbook. For example, if you want to add a more detailed explanation to your chart or table, you can create an embedded document, such as a Word or PowerPoint file, in Excel. You can either set your object to be displayed right in a worksheet or add an icon that opens the file.
-
Click inside the cell of the spreadsheet where you want to insert the object.
-
On the Insert tab, in the Text group, click Object.
-
On the Create New tab, select the type of object you want to insert from the list presented. If you want to insert an icon into the spreadsheet instead of the object itself, select the Display as icon check box.
-
Click OK. Depending on the type of file you are inserting, either a new program window opens or an editing window appears within Excel.
-
Create the new object you want to insert.
When you’re done, if Excel opened a new program window in which you created the object, you can work directly within it.
When you’re done with your work in the window, you can do other tasks without saving the embedded object. When you close the workbook your new objects will be saved automatically.
Note: After you add the object, you can drag and drop it anywhere on your Excel worksheet. You can also resize the object by using the resizing handles. To find the handles, click the object one time.
Link or embed content from another program by using OLE
You can link or embed all or part of the content from another program.
Create a link to content from another program
-
Click in the worksheet where you want to place the linked object.
-
On the Insert tab, in the Text group, click Object.
-
Click the Create from File tab.
-
In the File name box, type the name of the file, or click Browse to select from a list.
-
Select the Link to file check box.
-
Do one of the following:
-
To display the content, clear the Display as icon check box.
-
To display an icon, select the Display as icon check box. Optionally, to change the default icon image or label, click Change Icon, and then click the icon that you want from the Icon list, or type a label in the Caption box.
Note: You cannot use the Object command to insert graphics and certain types of files. To insert a graphic or file, on the Insert tab, in the Illustrations group, click Picture.
-
Embed content from another program
-
Click in the worksheet where you want to place the embedded object.
-
On the Insert tab, in the Text group, click Object.
-
If the document does not already exist, click the Create New tab. In the Object type box, click the type of object that you want to create.
If the document already exists, click the Create from File tab. In the File name box, type the name of the file, or click Browse to select from a list.
-
Clear the Link to file check box.
-
Do one of the following:
-
To display the content, clear the Display as icon check box.
-
To display an icon, select the Display as icon check box. To change the default icon image or label, click Change Icon, and then click the icon that you want from the Icon list, or type a label in the Caption box.
-
Link or embed partial content from another program
-
From a program other than Excel, select the information that you want to copy as a linked or embedded object.
-
On the Home tab, in the Clipboard group, click Copy.
-
Switch to the worksheet that you want to place the information in, and then click where you want the information to appear.
-
On the Home tab, in the Clipboard group, click the arrow below Paste, and then click Paste Special.
-
Do one of the following:
-
To paste the information as a linked object, click Paste link.
-
To paste the information as an embedded object, click Paste. In the As box, click the entry with the word «object» in its name. For example, if you copied the information from a Word document, click Microsoft Word Document Object.
-

Change the way that an OLE object is displayed
-
Right-click the icon or object, point to object typeObject (for example, Document Object), and then click Convert.
-
Do one of the following:
-
To display the content, clear the Display as icon check box.
-
To display an icon, select the Display as icon check box. Optionally, you can change the default icon image or label. To do that, click Change Icon, and then click the icon that you want from the Icon list, or type a label in the Caption box.
-
Control updates to linked objects
You can set links to other programs to be updated in the following ways: automatically, when you open the destination file; manually, when you want to see the previous data before updating with the new data from the source file; or when you specifically request the update, regardless of whether automatic or manual updating is turned on.
Set a link to another program to be updated manually
-
On the Data tab, in the Connections group, click Edit Links.
Note: The Edit Links command is unavailable if your file does not contain links to other files.
-
In the Source list, click the linked object that you want to update. An A in the Update column means that the link is automatic, and an M in the Update column means that the link is set to Manual update.
Tip: To select multiple linked objects, hold down CTRL and click each linked object. To select all linked objects, press CTRL+A.
-
To update a linked object only when you click Update Values, click Manual.
Set a link to another program to be updated automatically
-
On the Data tab, in the Connections group, click Edit Links.
Note: The Edit Links command is unavailable if your file does not contain links to other files.
-
In the Source list, click the linked object that you want to update. An A in the Update column means that the link will update automatically, and an M in the Update column means that the link must be updated manually.
Tip: To select multiple linked objects, hold down CTRL and click each linked object. To select all linked objects, press CTRL+A.
-
Click OK.
Issue: I can’t update the automatic links on my worksheet
The Automatic option can be overridden by the Update links to other documents Excel option.
To ensure that automatic links to OLE objects can be automatically updated:
-
Click the Microsoft Office Button
, click Excel Options, and then click the Advanced category. -
Under When calculating this workbook, make sure that the Update links to other documents check box is selected.
 , click Excel Options, and then click the Advanced category.
Update a link to another program now
-
On the Data tab, in the Connections group, click Edit Links.
Note: The Edit Links command is unavailable if your file does not contain linked information.
-
In the Source list, click the linked object that you want to update.
Tip: To select multiple linked objects, hold down CTRL and click each linked object. To select all linked objects, press CTRL+A.
-
Click Update Values.
Edit content from an OLE program
While you are in Excel, you can change the content linked or embedded from another program.
Edit a linked object in the source program
-
On the Data tab, in the Connections group, click Edit Links.
Note: The Edit Links command is unavailable if your file does not contain linked information.
-
In the Source file list, click the source for the linked object, and then click Open Source.
-
Make the changes that you want to the linked object.
-
Exit the source program to return to the destination file.
Edit an embedded object in the source program
-
Double-click the embedded object to open it.
-
Make the changes that you want to the object.
-
If you are editing the object in place within the open program, click anywhere outside of the object to return to the destination file.
If you edit the embedded object in the source program in a separate window, exit the source program to return to the destination file.
Note: Double-clicking certain embedded objects, such as video and sound clips, plays the object instead of opening a program. To edit one of these embedded objects, right-click the icon or object, point to object typeObject (for example, Media Clip Object), and then click Edit.
Edit an embedded object in a program other than the source program
-
Select the embedded object that you want to edit.
-
Right-click the icon or object, point to object typeObject (for example, Document Object), and then click Convert.
-
Do one of the following:
-
To convert the embedded object to the type that you specify in the list, click Convert to.
-
To open the embedded object as the type that you specify in the list without changing the embedded object type, click Activate.
-
Select an OLE object by using the keyboard
-
Press CTRL+G to display the Go To dialog box.
-
Click Special, select Objects, and then click OK.
-
Press TAB until the object that you want is selected.
-
Press SHIFT+F10.
-
Point to Object or Chart Object, and then click Edit.
Issue: When I double-click a linked or embedded object, a «cannot edit» message appears
This message appears when the source file or source program can’t be opened.
Make sure that the source program is available If the source program is not installed on your computer, convert the object to the file format of a program that you do have installed.
Ensure that memory is adequate Make sure that you have enough memory to run the source program. Close other programs to free up memory, if necessary.
Close all dialog boxes If the source program is running, make sure that it doesn’t have any open dialog boxes. Switch to the source program, and close any open dialog boxes.
Close the source file If the source file is a linked object, make sure that another user doesn’t have it open.
Ensure that the source file name has not changed If the source file that you want to edit is a linked object, make sure that it has the same name as it did when you created the link and that it has not been moved. Select the linked object, and then click the Edit Links command in the Connections group on the Data tab to see the name of the source file. If the source file has been renamed or moved, use the Change Source button in the Edit Links dialog box to locate the source file and reconnect the link.
Need more help?
You can always ask an expert in the Excel Tech Community or get support in the Answers community.
You can use Object Linking and Embedding (OLE) to include content from other programs, such as Word or Excel.
OLE is supported by many different programs, and OLE is used to make content that is created in one program available in another program. For example, you can insert an Office Word document in an Office Excel workbook. To see what types of content that you can insert, click Object in the Text group on the Insert tab. Only programs that are installed on your computer and that support OLE objects appear in the Object type box.
If you copy information between Excel or any program that supports OLE, such as Word, you can copy the information as either a linked object or an embedded object. The main differences between linked objects and embedded objects are where the data is stored and how the object is updated after you place it in the destination file. Embedded objects are stored in the workbook that they are inserted in, and they are not updated. Linked objects remain as separate files, and they can be updated.
Linked and embedded objects in a document
1. An embedded object has no connection to the source file.
2. A linked object is linked to the source file.
3. The source file updates the linked object.
When to use linked objects
If you want the information in your destination file to be updated when the data in the source file changes, use linked objects.
With a linked object, the original information remains stored in the source file. The destination file displays a representation of the linked information but stores only the location of the original data (and the size if the object is an Excel chart object). The source file must remain available on your computer or network to maintain the link to the original data.
The linked information can be updated automatically if you change the original data in the source file. For example, if you select a paragraph in a Word document and then paste the paragraph as a linked object in an Excel workbook, the information can be updated in Excel if you change the information in your Word document.
When to use embedded objects
If you don’t want to update the copied data when it changes in the source file, use an embedded object. The version of the source is embedded entirely in the workbook. If you copy information as an embedded object, the destination file requires more disk space than if you link the information.
When a user opens the file on another computer, he can view the embedded object without having access to the original data. Because an embedded object has no links to the source file, the object is not updated if you change the original data. To change an embedded object, double-click the object to open and edit it in the source program. The source program (or another program capable of editing the object) must be installed on your computer.
Changing the way that an OLE object is displayed
You can display a linked object or embedded object in a workbook exactly as it appears in the source program or as an icon. If the workbook will be viewed online, and you don’t intend to print the workbook, you can display the object as an icon. This minimizes the amount of display space that the object occupies. Viewers who want to display the information can double-click the icon.
Embed an object in a worksheet
-
Click inside the cell of the spreadsheet where you want to insert the object.
-
On the Insert tab, in the Text group, click Object
. -
In the Object dialog box, click the Create from File tab.
-
Click Browse, and select the file you want to insert.
-
If you want to insert an icon into the spreadsheet instead of show the contents of the file, select the Display as icon check box. If you don’t select any check boxes, Excel shows the first page of the file. In both cases, the complete file opens with a double click. Click OK.
Note: After you add the icon or file, you can drag and drop it anywhere on the worksheet. You can also resize the icon or file by using the resizing handles. To find the handles, click the file or icon one time.
Insert a link to a file
You might want to just add a link to the object rather than fully embedding it. You can do that if your workbook and the object you want to add are both stored on a SharePoint site, a shared network drive, or a similar location, and if the location of the files will remain the same. This is handy if the linked object undergoes changes because the link always opens the most up-to-date document.
Note: If you move the linked file to another location, the link won’t work anymore.
-
Click inside the cell of the spreadsheet where you want to insert the object.
-
On the Insert tab, in the Text group, click Object
. -
Click the Create from File tab.
-
Click Browse, and then select the file you want to link.
-
Select the Link to file check box, and click OK.
Create a new object from inside Excel
You can create an entirely new object based on another program without leaving your workbook. For example, if you want to add a more detailed explanation to your chart or table, you can create an embedded document, such as a Word or PowerPoint file, in Excel. You can either set your object to be displayed right in a worksheet or add an icon that opens the file.
-
Click inside the cell of the spreadsheet where you want to insert the object.
-
On the Insert tab, in the Text group, click Object
. -
On the Create New tab, select the type of object you want to insert from the list presented. If you want to insert an icon into the spreadsheet instead of the object itself, select the Display as icon check box.
-
Click OK. Depending on the type of file you are inserting, either a new program window opens or an editing window appears within Excel.
-
Create the new object you want to insert.
When you’re done, if Excel opened a new program window in which you created the object, you can work directly within it.
When you’re done with your work in the window, you can do other tasks without saving the embedded object. When you close the workbook your new objects will be saved automatically.
Note: After you add the object, you can drag and drop it anywhere on your Excel worksheet. You can also resize the object by using the resizing handles. To find the handles, click the object one time.
Embed an object in a worksheet
-
Click inside the cell of the spreadsheet where you want to insert the object.
-
On the Insert tab, in the Text group, click Object.
-
Click the Create from File tab.
-
Click Browse, and select the file you want to insert.
-
If you want to insert an icon into the spreadsheet instead of show the contents of the file, select the Display as icon check box. If you don’t select any check boxes, Excel shows the first page of the file. In both cases, the complete file opens with a double click. Click OK.
Note: After you add the icon or file, you can drag and drop it anywhere on the worksheet. You can also resize the icon or file by using the resizing handles. To find the handles, click the file or icon one time.
Insert a link to a file
You might want to just add a link to the object rather than fully embedding it. You can do that if your workbook and the object you want to add are both stored on a SharePoint site, a shared network drive, or a similar location, and if the location of the files will remain the same. This is handy if the linked object undergoes changes because the link always opens the most up-to-date document.
Note: If you move the linked file to another location, the link won’t work anymore.
-
Click inside the cell of the spreadsheet where you want to insert the object.
-
On the Insert tab, in the Text group, click Object.
-
Click the Create from File tab.
-
Click Browse, and then select the file you want to link.
-
Select the Link to file check box, and click OK.
Create a new object from inside Excel
You can create an entirely new object based on another program without leaving your workbook. For example, if you want to add a more detailed explanation to your chart or table, you can create an embedded document, such as a Word or PowerPoint file, in Excel. You can either set your object to be displayed right in a worksheet or add an icon that opens the file.
-
Click inside the cell of the spreadsheet where you want to insert the object.
-
On the Insert tab, in the Text group, click Object.
-
On the Create New tab, select the type of object you want to insert from the list presented. If you want to insert an icon into the spreadsheet instead of the object itself, select the Display as icon check box.
-
Click OK. Depending on the type of file you are inserting, either a new program window opens or an editing window appears within Excel.
-
Create the new object you want to insert.
When you’re done, if Excel opened a new program window in which you created the object, you can work directly within it.
When you’re done with your work in the window, you can do other tasks without saving the embedded object. When you close the workbook your new objects will be saved automatically.
Note: After you add the object, you can drag and drop it anywhere on your Excel worksheet. You can also resize the object by using the resizing handles. To find the handles, click the object one time.
Link or embed content from another program by using OLE
You can link or embed all or part of the content from another program.
Create a link to content from another program
-
Click in the worksheet where you want to place the linked object.
-
On the Insert tab, in the Text group, click Object.
-
Click the Create from File tab.
-
In the File name box, type the name of the file, or click Browse to select from a list.
-
Select the Link to file check box.
-
Do one of the following:
-
To display the content, clear the Display as icon check box.
-
To display an icon, select the Display as icon check box. Optionally, to change the default icon image or label, click Change Icon, and then click the icon that you want from the Icon list, or type a label in the Caption box.
Note: You cannot use the Object command to insert graphics and certain types of files. To insert a graphic or file, on the Insert tab, in the Illustrations group, click Picture.
-
Embed content from another program
-
Click in the worksheet where you want to place the embedded object.
-
On the Insert tab, in the Text group, click Object.
-
If the document does not already exist, click the Create New tab. In the Object type box, click the type of object that you want to create.
If the document already exists, click the Create from File tab. In the File name box, type the name of the file, or click Browse to select from a list.
-
Clear the Link to file check box.
-
Do one of the following:
-
To display the content, clear the Display as icon check box.
-
To display an icon, select the Display as icon check box. To change the default icon image or label, click Change Icon, and then click the icon that you want from the Icon list, or type a label in the Caption box.
-
Link or embed partial content from another program
-
From a program other than Excel, select the information that you want to copy as a linked or embedded object.
-
On the Home tab, in the Clipboard group, click Copy.
-
Switch to the worksheet that you want to place the information in, and then click where you want the information to appear.
-
On the Home tab, in the Clipboard group, click the arrow below Paste, and then click Paste Special.
-
Do one of the following:
-
To paste the information as a linked object, click Paste link.
-
To paste the information as an embedded object, click Paste. In the As box, click the entry with the word «object» in its name. For example, if you copied the information from a Word document, click Microsoft Word Document Object.
-
Change the way that an OLE object is displayed
-
Right-click the icon or object, point to object typeObject (for example, Document Object), and then click Convert.
-
Do one of the following:
-
To display the content, clear the Display as icon check box.
-
To display an icon, select the Display as icon check box. Optionally, you can change the default icon image or label. To do that, click Change Icon, and then click the icon that you want from the Icon list, or type a label in the Caption box.
-
Control updates to linked objects
You can set links to other programs to be updated in the following ways: automatically, when you open the destination file; manually, when you want to see the previous data before updating with the new data from the source file; or when you specifically request the update, regardless of whether automatic or manual updating is turned on.
Set a link to another program to be updated manually
-
On the Data tab, in the Connections group, click Edit Links.
Note: The Edit Links command is unavailable if your file does not contain links to other files.
-
In the Source list, click the linked object that you want to update. An A in the Update column means that the link is automatic, and an M in the Update column means that the link is set to Manual update.
Tip: To select multiple linked objects, hold down CTRL and click each linked object. To select all linked objects, press CTRL+A.
-
To update a linked object only when you click Update Values, click Manual.
Set a link to another program to be updated automatically
-
On the Data tab, in the Connections group, click Edit Links.
Note: The Edit Links command is unavailable if your file does not contain links to other files.
-
In the Source list, click the linked object that you want to update. An A in the Update column means that the link will update automatically, and an M in the Update column means that the link must be updated manually.
Tip: To select multiple linked objects, hold down CTRL and click each linked object. To select all linked objects, press CTRL+A.
-
Click OK.
Issue: I can’t update the automatic links on my worksheet
The Automatic option can be overridden by the Update links to other documents Excel option.
To ensure that automatic links to OLE objects can be automatically updated:
-
Click the Microsoft Office Button
, click Excel Options, and then click the Advanced category. -
Under When calculating this workbook, make sure that the Update links to other documents check box is selected.
Update a link to another program now
-
On the Data tab, in the Connections group, click Edit Links.
Note: The Edit Links command is unavailable if your file does not contain linked information.
-
In the Source list, click the linked object that you want to update.
Tip: To select multiple linked objects, hold down CTRL and click each linked object. To select all linked objects, press CTRL+A.
-
Click Update Values.
Edit content from an OLE program
While you are in Excel, you can change the content linked or embedded from another program.
Edit a linked object in the source program
-
On the Data tab, in the Connections group, click Edit Links.
Note: The Edit Links command is unavailable if your file does not contain linked information.
-
In the Source file list, click the source for the linked object, and then click Open Source.
-
Make the changes that you want to the linked object.
-
Exit the source program to return to the destination file.
Edit an embedded object in the source program
-
Double-click the embedded object to open it.
-
Make the changes that you want to the object.
-
If you are editing the object in place within the open program, click anywhere outside of the object to return to the destination file.
If you edit the embedded object in the source program in a separate window, exit the source program to return to the destination file.
Note: Double-clicking certain embedded objects, such as video and sound clips, plays the object instead of opening a program. To edit one of these embedded objects, right-click the icon or object, point to object typeObject (for example, Media Clip Object), and then click Edit.
Edit an embedded object in a program other than the source program
-
Select the embedded object that you want to edit.
-
Right-click the icon or object, point to object typeObject (for example, Document Object), and then click Convert.
-
Do one of the following:
-
To convert the embedded object to the type that you specify in the list, click Convert to.
-
To open the embedded object as the type that you specify in the list without changing the embedded object type, click Activate.
-
Select an OLE object by using the keyboard
-
Press CTRL+G to display the Go To dialog box.
-
Click Special, select Objects, and then click OK.
-
Press TAB until the object that you want is selected.
-
Press SHIFT+F10.
-
Point to Object or Chart Object, and then click Edit.
Issue: When I double-click a linked or embedded object, a «cannot edit» message appears
This message appears when the source file or source program can’t be opened.
Make sure that the source program is available If the source program is not installed on your computer, convert the object to the file format of a program that you do have installed.
Ensure that memory is adequate Make sure that you have enough memory to run the source program. Close other programs to free up memory, if necessary.
Close all dialog boxes If the source program is running, make sure that it doesn’t have any open dialog boxes. Switch to the source program, and close any open dialog boxes.
Close the source file If the source file is a linked object, make sure that another user doesn’t have it open.
Ensure that the source file name has not changed If the source file that you want to edit is a linked object, make sure that it has the same name as it did when you created the link and that it has not been moved. Select the linked object, and then click the Edit Links command in the Connections group on the Data tab to see the name of the source file. If the source file has been renamed or moved, use the Change Source button in the Edit Links dialog box to locate the source file and reconnect the link.
Need more help?
You can always ask an expert in the Excel Tech Community or get support in the Answers community.
![]()
Download Article
![]()
Download Article
- Inserting a File
- Inserting an Image
|
Microsoft Excel allows you to include other files, such as Word documents and PDFs, into a spreadsheet. This wikiHow will show you how to insert a file as an object into an Excel project using OLE (object linking and embedding).
-
1
Open your project in Excel. You can open your project within Excel by clicking Open from the File tab, or you can right-click on the file in a file browser and click Open With and Excel.
- This method works for newer versions of Excel on either PC or Mac.
-
2
Click the cell in which you want to insert the object. Whenever people view this cell, they will find the embedded document.
Advertisement
-
3
Click the Insert tab. You’ll find this in the ribbon above the document editor or at the top of your screen.
-
4
Click the icon that looks like a program window on a sheet of paper. This is the «Object» icon and can be found in the «Text» group. A box will pop up.
-
5
Click the Create from File tab. The tab will switch from «Create New.»
-
6
Click Browse. Your file browser will open.
-
7
Navigate to and double-click your file. Only compatible files will show up in the browser, like PowerPoints, PDFs, and Word documents.
-
8
Choose to select «Display as icon.« If you select «Display as icon,» you’ll see the icon of the document appear in the cell; if you don’t choose «Display as icon,» the full first page of the document will appear. Regardless of your choice, both embedded documents will link to the full document.
-
9
Click OK. You’ll see this at the bottom right of the pop-up window. The document you selected will appear in the cell either as the full first-page document or icon.[1]


Advertisement
-
1
Open your project in Excel. You can open your project within Excel by clicking Open from the File tab, or you can right-click on the file in a file browser and click Open With and Excel.
- This method works for newer versions of Excel on either PC or Mac.
-
2
Click the cell you want to insert the object.
-
3
Click the Insert tab. You’ll find this in the ribbon above the document editor or at the top of your screen.
-
4
Click the Pictures icon. You’ll find this in the «Illustrations» group. A file browser will pop up.
-
5
Navigate to and double-click on your image. The list of compatible file types is long, but all the common file types are accepted like GIF, JPG, and PNG.
- The image is inserted into your document. You can edit the image using the Picture Tools tab.[2]
- The image is inserted into your document. You can edit the image using the Picture Tools tab.[2]


Advertisement
Ask a Question
200 characters left
Include your email address to get a message when this question is answered.
Submit
Advertisement
Thanks for submitting a tip for review!
References
About This Article
Article SummaryX
1. Open your project in Excel.
2. Click the cell you want to insert the object.
3. Click the Object icon in the Insert tab.
4. Click the Create from File tab.
5. Click Browse and navigate to and double-click the file.
6. Choose to «Display as icon» or not.
7. Click OK.
Did this summary help you?
Thanks to all authors for creating a page that has been read 28,976 times.
Is this article up to date?
In Microsoft Excel, the “Object Insert” option allows a user to insert an external object into a worksheet. Embedding generally means inserting an object from another software (Word, PDF, etc.) into an Excel worksheet. This option is useful for direct access to files related to your worksheet data from within your worksheet space. In addition, the inserted object works as a ready information source or reference for a dataset in an Excel worksheet.
Table of contents
- Insert and Embed an Object in Excel
- How to Insert (Embed) an Object in Excel?
- #1 – Insert (Embed) a New Object in Excel
- #2 – Embedding (inserting) an Existing Object in Excel
- #3 – Link to Object vs. Embedded Object
- Why we need Embedded Object in Excel?
- Things to Remember about Inserting Object in Excel
- Recommended Articles
- How to Insert (Embed) an Object in Excel?
How to Insert (Embed) an Object in Excel?
Here, we will discuss how to embed a new object in Excel.
You can download this Embed File Excel Template here – Embed File Excel Template
#1 – Insert (Embed) a New Object in Excel
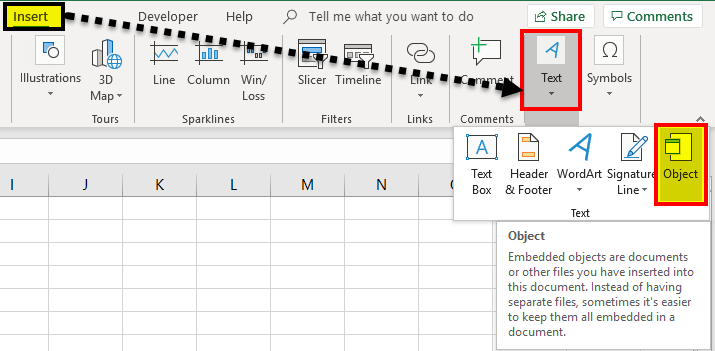
- We must first select “Text” from the “Insert” tab and then click “Object.”

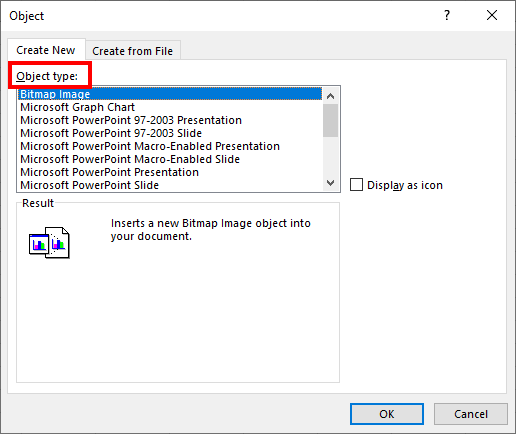
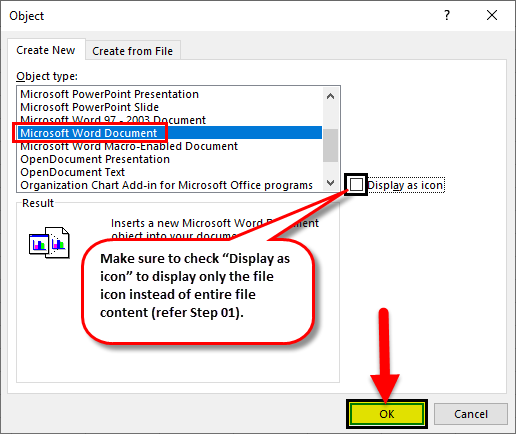
- Then, select “Create New” to embed a new blank file. Remember, only file types are shown in “Object type” that can be embedded in the Excel worksheet.

- Now, choose a file type to embed. For example, we have selected a “Microsoft Word Document,” now click “OK.”
#2 – Embedding (inserting) an Existing Object in Excel
Step 1: Select “Text” from the “Insert” tab and click “Object.”
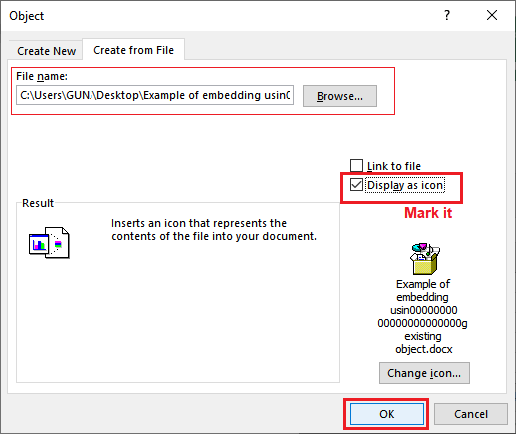
Step 2: Select “Create from File” and click “Browse” to embed an existing file into the worksheet. Remember, only file types are shown in “Object Type” that can be embedded in the Excel worksheet.

Step 3: Now click “OK.” The file icon will be displayed on the worksheet.
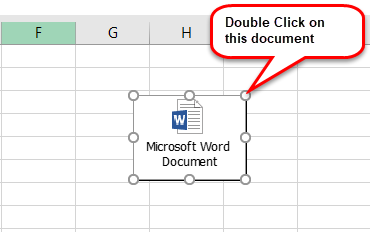
NOTE: If we do not check the “Display as icon” option, it will show the embedded file’s content instead of the icon. We can double-click on the embedded file icon or content to edit the content of the embedded file.
#3 – Link to Object vs. Embedded Object
When you insert an object into an Excel worksheet, the object becomes part of the Excel file. Therefore, any changes made to the source file do not impact the embedded file. However, we may want to keep the file separate from the Excel file. In that case, we need to check the “Link to file” option.
A linked file is just a link to the source file, which we can edit only by editing the source file. When we double-click the link, the source file will open.
NOTE: If we change the location/ path of the source file, the link to the file in the worksheet will not work.
Why do we need Embedded Objects in Excel?
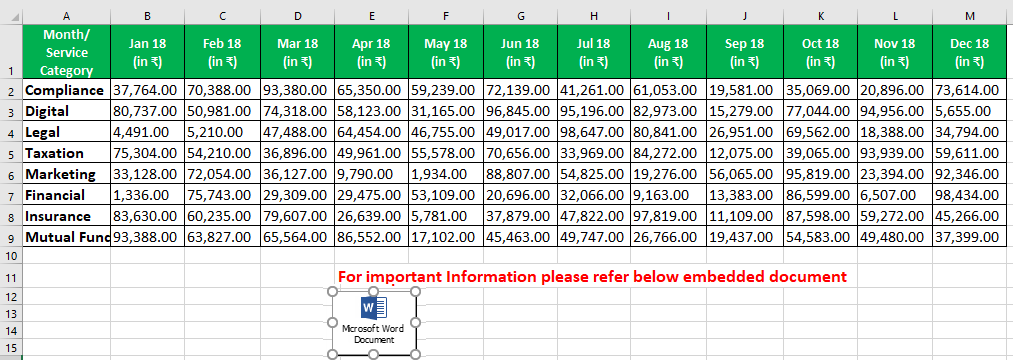
- When we want to add large comments or notes to a dataset in Excel Worksheet, we can embed a Word or text file instead of writing text in worksheet cells.
- Excel is generally used for data tables/ charts. Suppose we want to use big text bodies to explain the data tables in a worksheet. In that case, we can create a separate embedded file within the worksheet instead of creating a particular file or writing a large amount of text in an Excel worksheet.
- Embedded files keep the worksheet presentation limited to required data only. We can keep any additional comments, notes, or information within the embedded file, allowing users to focus on the key information. Other data can be seen only by accessing the embedded file.
4. Embedded files are the preferred option compared to the link to file option when we need to send the worksheet to someone working on a different computer/ laptop since the link to file will only work if the source file is saved on the same device as the worksheet itself since embedded files are saved within the Excel file.
Things to Remember about Inserting Object in Excel
- We can only embed certain file types into an Excel worksheet. We can see the list of file types accepted by going to “Insert” > “Text” > “Object” > “Create New” > “Object type.”
- Select the “Display as icon” checkbox to display only the embedded file’s icon. Otherwise, it will show the file content in the worksheet, which takes more space and is not recommended for presentation purposes.
NOTE: If we intend to print the worksheet, then it is recommended to display the content of the embedded file as it will not publish the embedded file’s content if the only icon is displayed.
- As soon as we insert an object in Excel, its connection to the source file is lost, so make sure to make all required changes to the original file before embedding it. However, you can also update the embedded file’s content by double-clicking the file icon or embedded content.
- When sending an embedded file to someone else, ensure that the recipient’s computer/ laptop has the required software installed, supporting the embedded file type to view or change its content.
- Inserting an object in Excel increases the source Excel file size. If we do not want to make the Excel file heavy, we can use the “Link to file” option. However, the “Link to file” option only works if we use the same device where the linked source file is stored, and the source file’s location/ path is not changed.
Recommended Articles
This article is a guide to Embed and Insert Object in Excel. We discuss inserting an object in an Excel worksheet, practical examples, and a downloadable excel template. You may learn more about Excel from the following articles:-
- VBA Insert RowTo insert rows we use worksheet method with the insert command to insert a row, we also provide a row reference where we want to insert another row similar to the columns.read more
- Insert Button in ExcelButtons in excel are single-click commands inserted to perform specific tasks. Buttons are used in macros and can be inserted by enabling the developer’s tab; in the insert form, we can find a button to insert and draw it to the worksheet.read more
- Insert Comment in ExcelIn Excel, Insert Comment is a feature used to share tips or details with different users working within the same spreadsheet. You can either right-click on the required cell, click on “Insert Comment” & type the comment, use the shortcut key, i.e., Shift+F2, or click on the Review Tab & select “New Comment”. read more
- Insert Hyperlinks in ExcelTo insert a hyperlink, right-click on the cell, click on hyperlink, and then choose the last option, which will open a wizard box to insert a hyperlink. Then, in the field for an address, type the hyperlink’s URL.read more
- Themes in ExcelThemes in Excel are used to format the entire document or workbook; we can use the themes provided by Excel or customize it to our likingread more
Reader Interactions
Содержание
- Insert an object in your Excel spreadsheet
- Insert (Embed) an Object in Excel
- Insert and Embed an Object in Excel
- How to Insert (Embed) an Object in Excel?
- #1 – Insert (Embed) a New Object in Excel
- #2 – Embedding (inserting) an Existing Object in Excel
- #3 – Link to Object vs. Embedded Object
- Why do we need Embedded Objects in Excel?
- Things to Remember about Inserting Object in Excel
- Recommended Articles
- Insert object in Excel
- What do you understand by object?
- Need to embed object
- Insert a new object into an Excel sheet
- Insert an existing object into an Excel sheet
- Note: Remember only the file type you have selected in Object type can be embedded.
- What if not mark Display as icon?
- Link an object to an Excel sheet
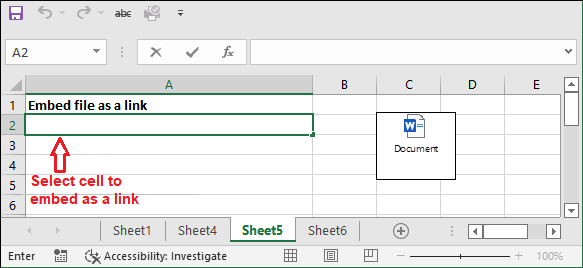
- Insert a file as a link to Excel sheet
- Link to object vs Embed to object
Insert an object in your Excel spreadsheet
You can use Object Linking and Embedding (OLE) to include content from other programs, such as Word or Excel.
OLE is supported by many different programs, and OLE is used to make content that is created in one program available in another program. For example, you can insert an Office Word document in an Office Excel workbook. To see what types of content that you can insert, click Object in the Text group on the Insert tab. Only programs that are installed on your computer and that support OLE objects appear in the Object type box.
If you copy information between Excel or any program that supports OLE, such as Word, you can copy the information as either a linked object or an embedded object. The main differences between linked objects and embedded objects are where the data is stored and how the object is updated after you place it in the destination file. Embedded objects are stored in the workbook that they are inserted in, and they are not updated. Linked objects remain as separate files, and they can be updated.
Linked and embedded objects in a document
1. An embedded object has no connection to the source file.
2. A linked object is linked to the source file.
3. The source file updates the linked object.
When to use linked objects
If you want the information in your destination file to be updated when the data in the source file changes, use linked objects.
With a linked object, the original information remains stored in the source file. The destination file displays a representation of the linked information but stores only the location of the original data (and the size if the object is an Excel chart object). The source file must remain available on your computer or network to maintain the link to the original data.
The linked information can be updated automatically if you change the original data in the source file. For example, if you select a paragraph in a Word document and then paste the paragraph as a linked object in an Excel workbook, the information can be updated in Excel if you change the information in your Word document.
When to use embedded objects
If you don’t want to update the copied data when it changes in the source file, use an embedded object. The version of the source is embedded entirely in the workbook. If you copy information as an embedded object, the destination file requires more disk space than if you link the information.
When a user opens the file on another computer, he can view the embedded object without having access to the original data. Because an embedded object has no links to the source file, the object is not updated if you change the original data. To change an embedded object, double-click the object to open and edit it in the source program. The source program (or another program capable of editing the object) must be installed on your computer.
Changing the way that an OLE object is displayed
You can display a linked object or embedded object in a workbook exactly as it appears in the source program or as an icon. If the workbook will be viewed online, and you don’t intend to print the workbook, you can display the object as an icon. This minimizes the amount of display space that the object occupies. Viewers who want to display the information can double-click the icon.
Источник
Insert (Embed) an Object in Excel


Insert and Embed an Object in Excel
In Microsoft Excel, the “Object Insert” option allows a user to insert an external object into a worksheet. Embedding generally means inserting an object from another software (Word, PDF, etc.) into an Excel worksheet. This option is useful for direct access to files related to your worksheet data from within your worksheet space. In addition, the inserted object works as a ready information source or reference for a dataset in an Excel worksheet.
Table of contents
How to Insert (Embed) an Object in Excel?
Here, we will discuss how to embed a new object in Excel.
#1 – Insert (Embed) a New Object in Excel
- We must first select “Text” from the “Insert” tab and then click “Object.”
Then, select “Create New” to embed a new blank file. Remember, only file types are shown in “Object type” that can be embedded in the Excel worksheet.
Now, choose a file type to embed. For example, we have selected a “Microsoft Word Document,” now click “OK.”
#2 – Embedding (inserting) an Existing Object in Excel
Step 1: Select “Text” from the “Insert” tab and click “Object.”
Step 2: Select “Create from File” and click “Browse” to embed an existing file into the worksheet. Remember, only file types are shown in “Object Type” that can be embedded in the Excel worksheet.
Step 3: Now click “OK.” The file icon will be displayed on the worksheet.
NOTE: If we do not check the “Display as icon” option, it will show the embedded file’s content instead of the icon. We can double-click on the embedded file icon or content to edit the content of the embedded file.
#3 – Link to Object vs. Embedded Object
When you insert an object into an Excel worksheet, the object becomes part of the Excel file. Therefore, any changes made to the source file do not impact the embedded file. However, we may want to keep the file separate from the Excel file. In that case, we need to check the “Link to file” option.
A linked file is just a link to the source file, which we can edit only by editing the source file. When we double-click the link, the source file will open.
NOTE: If we change the location/ path of the source file, the link to the file in the worksheet will not work.
Why do we need Embedded Objects in Excel?
- When we want to add large comments or notes to a dataset in Excel Worksheet, we can embed a Word or text file instead of writing text in worksheet cells.
- Excel is generally used for data tables/ charts. Suppose we want to use big text bodies to explain the data tables in a worksheet. In that case, we can create a separate embedded file within the worksheet instead of creating a particular file or writing a large amount of text in an Excel worksheet.
- Embedded files keep the worksheet presentation limited to required data only. We can keep any additional comments, notes, or information within the embedded file, allowing users to focus on the key information. Other data can be seen only by accessing the embedded file.
4. Embedded files are the preferred option compared to the link to file option when we need to send the worksheet to someone working on a different computer/ laptop since the link to file will only work if the source file is saved on the same device as the worksheet itself since embedded files are saved within the Excel file.
Things to Remember about Inserting Object in Excel
- We can only embed certain file types into an Excel worksheet. We can see the list of file types accepted by going to “Insert” >“Text” >“Object” >“Create New” > “Object type.”
- Select the “Display as icon” checkbox to display only the embedded file’s icon. Otherwise, it will show the file content in the worksheet, which takes more space and is not recommended for presentation purposes.
NOTE: If we intend to print the worksheet, then it is recommended to display the content of the embedded file as it will not publish the embedded file’s content if the only icon is displayed.
- As soon as we insert an object in Excel, its connection to the source file is lost, so make sure to make all required changes to the original file before embedding it. However, you can also update the embedded file’s content by double-clicking the file icon or embedded content.
- When sending an embedded file to someone else, ensure that the recipient’s computer/ laptop has the required software installed, supporting the embedded file type to view or change its content.
- Inserting an object in Excel increases the source Excel file size. If we do not want to make the Excel file heavy, we can use the “Link to file” option. However, the “Link to file” option only works if we use the same device where the linked source file is stored, and the source file’s location/ path is not changed.
Recommended Articles
This article is a guide to Embed and Insert Object in Excel. We discuss inserting an object in an Excel worksheet, practical examples, and a downloadable excel template. You may learn more about Excel from the following articles:-
Источник
Insert object in Excel
MS Excel provides support to OLI and object is a part of it. OLI refers to the Object Linking and Embedding that is used to include content from other applications, such as Word or PDF documents.
Generally, Excel users insert an image, table, chart, or import data from JSON or CSV files to an Excel sheet. But now you see to insert an object in an Excel sheet. Here, object refers to an external file whose data is inserted into the Excel sheet through Object option.
Excel provides direct access to that source file when you insert the content from another application to an Excel sheet.

By taking the help of this chapter, you will learn to insert an object into an Excel sheet and how it works after inserting. So, now you see to insert an object in Excel to link and embed the source file.
What do you understand by object?
Excel provides an option named Object that is available inside the Insert tab. Basically, this option in MS Excel allows its users to insert the external content to the Excel sheet. This inserted object works as a direct reference to the data source for the dataset in Excel. It means the external file embed to the Excel sheet.
You can understand Embedding as inserting the data from an external program, like Word and PDF to an Excel sheet through an object. It provides direct access to the source files inserted into your worksheet.
We are discussed the following methods to insert an object:
Need to embed object
In MS Excel, large calculations are performed on data. Sometimes, the users do not remember the calculation and data when they reuse the file after a long time. Generally, the users use comments or notes along with the data. These comments can be large sometimes. In such cases, Excel users use a Word or Text file for large comments by inserting them as an object instead of writing inside cells.
- Excel users can embed objects (Text files) to Excel sheets to insert large comments or detailed information about some data.
- Users also insert data tables and charts to the sheet. To explain the chart or this data table, you can embed object to the Excel sheet by creating a file within the worksheet.
- By embedding the file from another application program to an Excel sheet keeps the worksheet presentation very clear and the data does not get congested. Only the most required data is directly visible to the user.
- The Excel users can focus only on key information. If the user wants to access the embedded object, double-tap to open this file.
- Embedded file is a better option than link to file option. When you share the worksheet with someone working on a different computer system, embedding an object is the preferable option. Link to file option only works when the source file is saved on the same system. In contrast, the source files are saved within the Excel sheet.
Insert a new object into an Excel sheet
The Insert Object resides inside the Insert tab of the Excel menu bar. From here, you can insert an object and embed/link an external file data to an Excel sheet. Follow the steps to learn the process of inserting a new object to an Excel sheet.
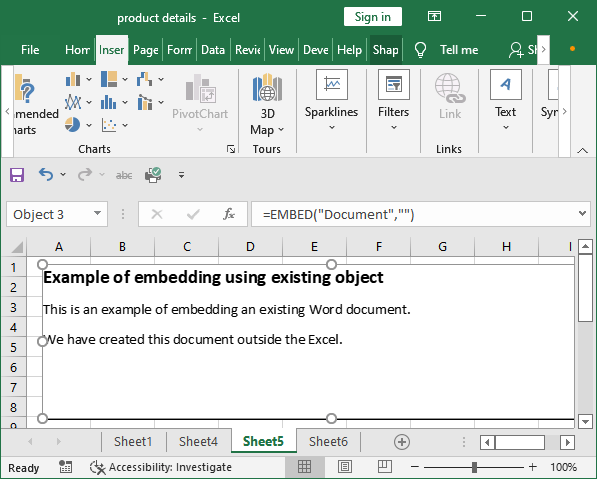
Step 1: Open a new Excel sheet on which navigate to the Insert tab of the Excel bar.
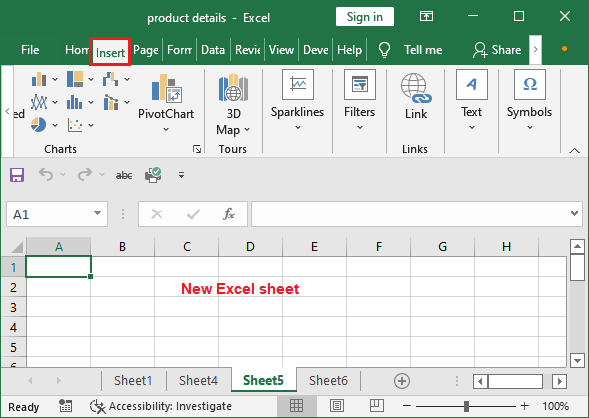
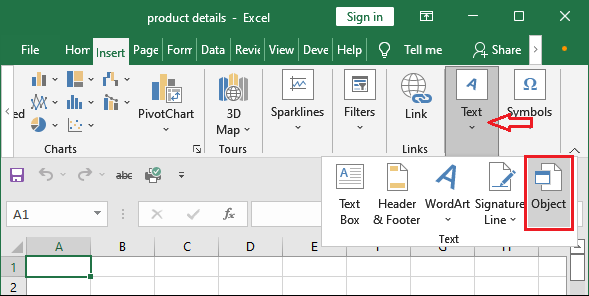
Step 2: Here, select the Text dropdown option and click the Object in the list.
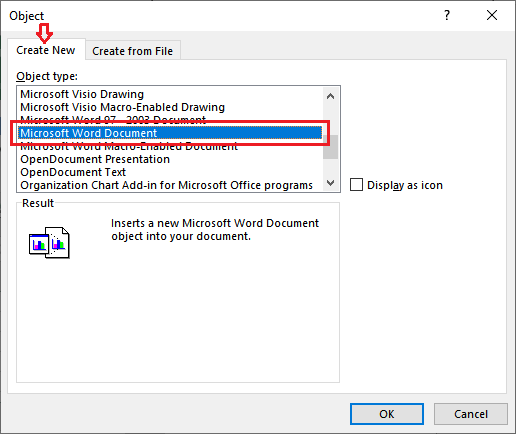
A panel for creating a new object will open. Remember that — only the file type offered inside the Create New tab can be embedded in an Excel sheet.
Step 3: Inside the Create New tab, choose a file type. We have chosen the Microsoft Word Document from the Object Type list.
Step 4: Mark the Display as icon so that only the embed file icon will display instead of entire file. Now, click OK to close it.
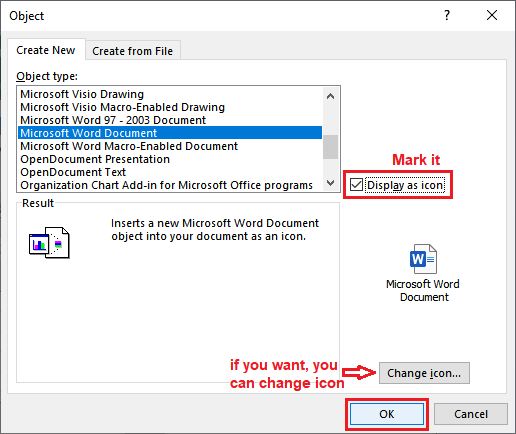
«You can also change the icon by clicking the Change icon button.»
Step 5: A new Word document will create automatically. Enter the data here, whatever you want to put and press the Ctrl+S key to save the file.
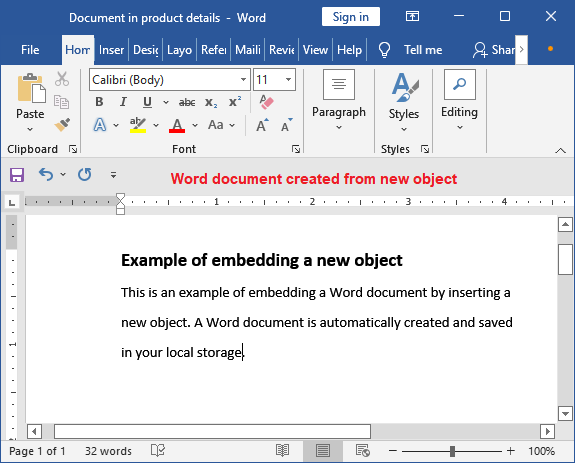
The Word document is saved as Document in product details. Here, product details is the name of the Excel file for which this document is created.
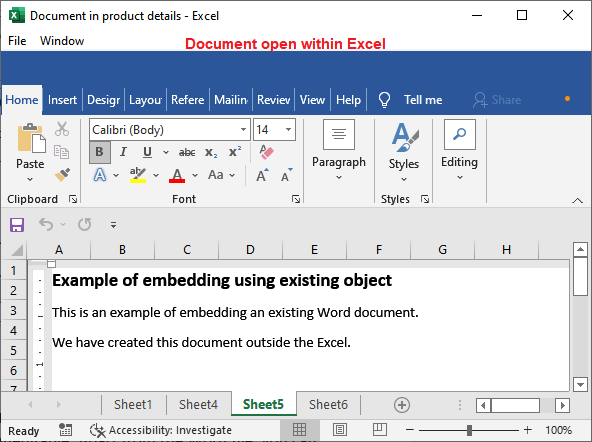
Step 6: Now, close the embedded Word file and go back to the Excel sheet. You see an icon has been inserted to the Excel file for the created document.
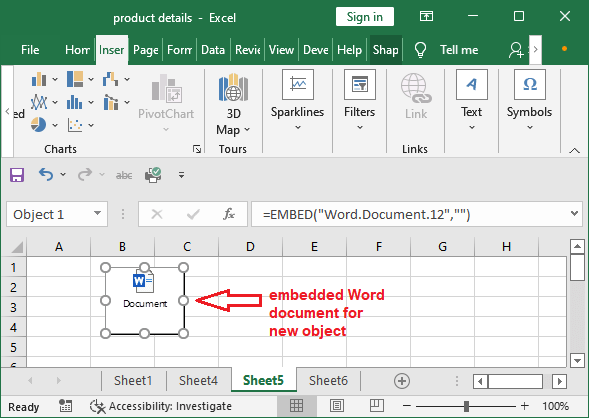
Now, double-tap this icon to directly open the linked/embedded word file to it from here. After that, one can make changes to it. This Word document is not available outside this Excel file. It is only for this Excel file. So, you cannot access this file directly without open the Excel file in which the Word file is embedded.
Insert an existing object into an Excel sheet
In the previous method, we have inserted (embedded) a new object of Word document type into an Excel sheet. This time, we have an existing object created earlier. So, we will insert an existing object to an Excel sheet.
Follow the steps to learn the method to insert an existing object to an Excel sheet.
Step 1: Open a new Excel sheet on which navigate to the Insert tab of the Excel bar.
Step 2: Here, select the Text dropdown option and click the Object in the list.
Step 3: This time, switch to the Create From File tab and click the Browse button on it to insert an existing file to the sheet.
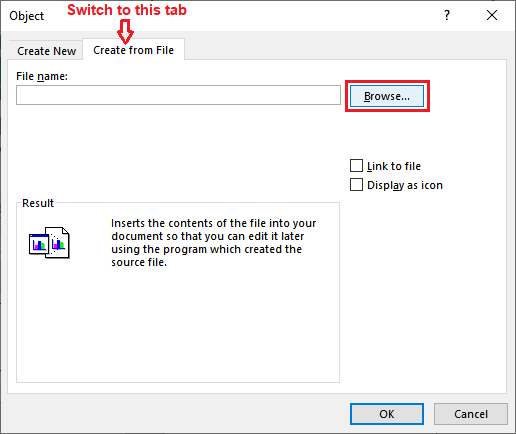
Note: Remember only the file type you have selected in Object type can be embedded.
Step 4: Browse a Microsoft Word file in your local storage and select it, then click Insert.
Insert as an icon
Step 5: The selected file link has been inserted. Now, mark the Display as icon and click OK to close the panel.
Step 6: Your selected file has been embedded to the Excel file that is displaying as an icon right now.
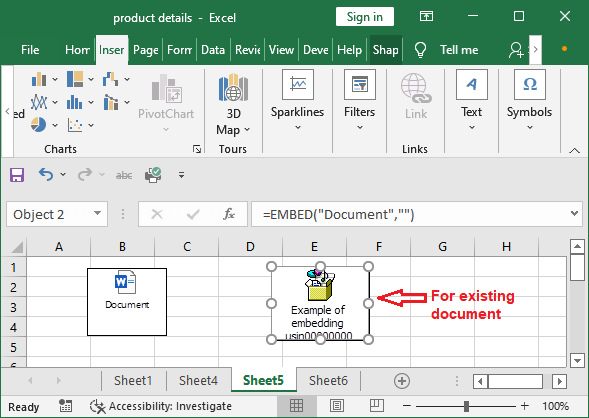
Step 7: To see the content of the embedded file, double-tap on the icon to open it. The embedded document will open and show you as like below.
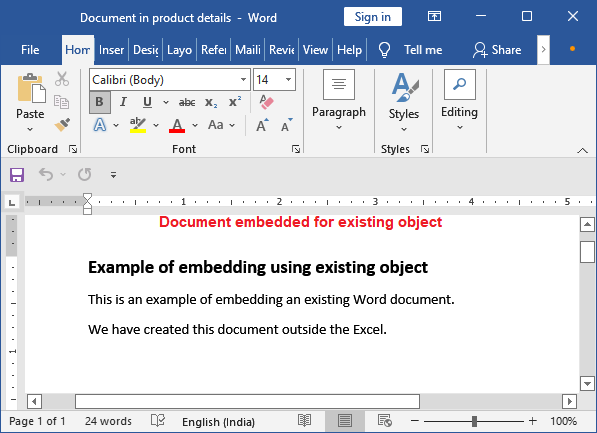
When you insert a document using object, Excel provides direct access to that file. You can open the file directly from the Excel sheet and even edit the content inside that source file (embedded file).
What if not mark Display as icon?
If you do not mark the Display as icon field, the entire content of the selected file will be inserted to the Excel sheet. You can see the entire data of the inserted file is showing instead of icon.
If you tap on the inserted content of the file, the embedded document will open within the Excel file. It will show as like below:
You can modify the embedded document even after inserting it to the Excel sheet. The document cannot be PDF type which is uneditable. Apart from the Word file, you can insert PDF, PPT, or another Excel file.
You have seen that we have inserted the file displaying as an icon. The users can also embed a file as a link to the Excel sheet. The embedded file must remain on your system.
Link an object to an Excel sheet
Embedding the Excel sheet keeps the inserted document separate. Changes in the source file do not reflect inside the embedded object in the Excel sheet. If you want to reflect the source file changes inside the object inserted into the Excel sheet, use the Link to file option.
Note that link to file requires the inserted document at the same place. It means the inserted document should not be deleted or changed location. Steps are almost the same for linking the file to an Excel sheet with one extra step.
See the steps to learn to link the file to an Excel sheet:
Step 1: Open a new Excel sheet on which navigate to the Insert tab of the Excel bar.
Step 2: Here, select the Text dropdown option and click the Object in the list.

Step 3: This time, switch to the Create From File tab and click the Browse button on it to insert an existing file to the sheet.
Step 5: Now, mark the Display as icon to display the file as an icon and Link to file checkbox to link the file with Excel. Click OK to close the panel.
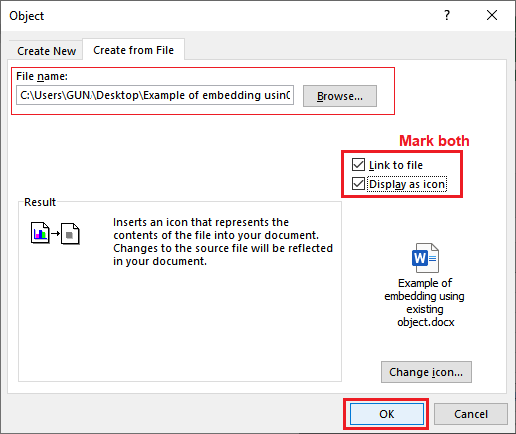
Step 6: Your select file has been embedded to the Excel file that is displaying as an icon right now.
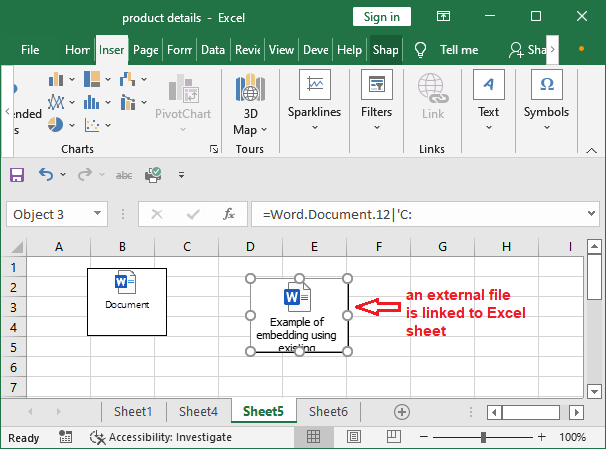
Now, if any changes are made in the source file (linked document) they will reflect in the document inserted inside the Excel sheet as it is linked rather than embedded.
Insert a file as a link to Excel sheet
In previous methods, you have learned to embed the other applications data into an Excel sheet. The embedded files are displayed as an icon on the Excel sheet. By hitting the icon, you can access the embedded file. Besides this, we have also shown a demo of inserting the entire content instead of the source file icon.
Now, we will embed the data of other applications as a link. Follow the steps to insert the data of another application as a link of the file.
Step 1: In an Excel sheet, click inside a cell in which you want to embed a file data as a link.
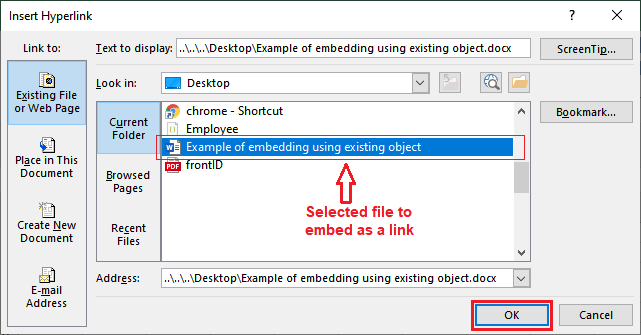
Step 2: Switch to the Insert tab in the Excel menu bar and click the Link option.
Step 3: A panel will open to choose a file/data. Select a file you want to embed with an Excel sheet and click Insert on this panel.
Step 4: Our selected document has been inserted along with its location in the selected cell.
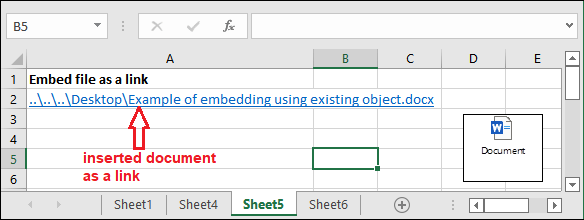
So, the embedded document will open when you tap on this link.
Link to object vs Embed to object
The is a big difference between linking and embedding an object to an Excel sheet. When an object is inserted into the Excel sheet, the inserted object becomes part of the Excel sheet.
If you make any of the changes in the source file, this will not impact the embedded file in Excel. This is because the file is only embedded to the Excel sheet, but it is not linked yet. So, the changes in source file do not reflect in Excel embedded document. It means the embedded document is separate from Excel.
The Excel user has to mark the «Link to file» while inserting an object in Excel to link the object to Excel sheet. Now, the source file changes will reflect in the object inside the Excel sheet.
Remember that the linked file must not be deleted and will be on the same location from where you have inserted it to the Excel sheet as an object. Otherwise, link to file will not work. You can edit the linked file either from Excel by double-tapping on it or from its original location.

If the Excel users share the worksheet having objects (other application data inserted to a sheet), Embed an object is preferable over the link to file.
Link to file requires the source file to be stored on the same system. On the other hand, the source file resides within the Excel sheet when you embed an object.
Источник