
Insert the current date and time in a cell
Excel for Microsoft 365 Excel for Microsoft 365 for Mac Excel for the web Excel 2021 Excel 2021 for Mac Excel 2019 Excel 2019 for Mac Excel 2016 Excel 2016 for Mac Excel 2013 Excel 2010 Excel 2007 Excel for Mac 2011 More…Less
Let’s say that you want to easily enter the current date and time while making a time log of activities. Or perhaps you want to display the current date and time automatically in a cell every time formulas are recalculated. There are several ways to insert the current date and time in a cell.
Insert a static date or time into an Excel cell
A static value in a worksheet is one that doesn’t change when the worksheet is recalculated or opened. When you press a key combination such as Ctrl+; to insert the current date in a cell, Excel “takes a snapshot” of the current date and then inserts the date in the cell. Because that cell’s value doesn’t change, it’s considered static.
-
On a worksheet, select the cell into which you want to insert the current date or time.
-
Do one of the following:
-
To insert the current date, press Ctrl+; (semi-colon).
-
To insert the current time, press Ctrl+Shift+; (semi-colon).
-
To insert the current date and time, press Ctrl+; (semi-colon), then press Space, and then press Ctrl+Shift+; (semi-colon).
-
Change the date or time format
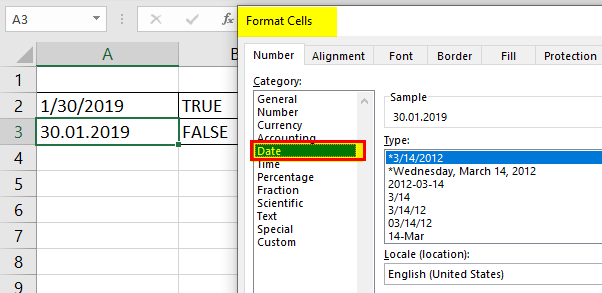
To change the date or time format, right-click on a cell, and select Format Cells. Then, on the Format Cells dialog box, in the Number tab, under Category, click Date or Time and in the Type list, select a type, and click OK.
Insert a static date or time into an Excel cell
A static value in a worksheet is one that doesn’t change when the worksheet is recalculated or opened. When you press a key combination such as Ctrl+; to insert the current date in a cell, Excel “takes a snapshot” of the current date and then inserts the date in the cell. Because that cell’s value doesn’t change, it’s considered static.
-
On a worksheet, select the cell into which you want to insert the current date or time.
-
Do one of the following:
-
To insert the current date, press Ctrl+; (semi-colon).
-
To insert the current time, press
 + ; (semi-colon).
 -
To insert the current date and time, press Ctrl+; (semi-colon), then press Space, and then press
+ ; (semi-colon).
-
 + ; (semi-colon).
Change the date or time format
To change the date or time format, right-click on a cell, and select Format Cells. Then, on the Format Cells dialog box, in the Number tab, under Category, click Date or Time and in the Type list, select a type, and click OK.
Insert a static date or time into an Excel cell
A static value in a worksheet is one that doesn’t change when the worksheet is recalculated or opened. When you press a key combination such as Ctrl+; to insert the current date in a cell, Excel “takes a snapshot” of the current date and then inserts the date in the cell. Because that cell’s value doesn’t change, it’s considered static.
-
On a worksheet, select the cell into which you want to insert the current date or time.
-
Do one of the following:
-
To insert the date, type the date (like 2/2), and then click Home > Number Format dropdown (in the Number tab) >Short Date or Long Date.
-
To insert the time, type the time, and then click Home > Number Format dropdown (in the Number tab) >Time.
-
Change the date or time format
To change the date or time format, right-click on a cell, and select Number Format. Then, on the Number Format dialog box, under Category, click Date or Time and in the Type list, select a type, and click OK.
Insert a date or time whose value is updated
A date or time that updates when the worksheet is recalculated or the workbook is opened is considered “dynamic” instead of static. In a worksheet, the most common way to return a dynamic date or time in a cell is by using a worksheet function.
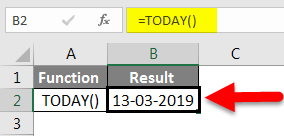
To insert the current date or time so that it is updatable, use the TODAY and NOW functions, as shown in the following example. For more information about how to use these functions, see TODAY function and NOW function.
For example:
|
Formula |
Description (Result) |
|
=TODAY() |
Current date (varies) |
|
=NOW() |
Current date and time (varies) |
-
Select the text in the table shown above, and then press Ctrl+C.
-
In the blank worksheet, click once in cell A1, and then press Ctrl+V. If you are working in Excel for the web, repeat copying and pasting for each cell in the example.
Important: For the example to work properly, you must paste it into cell A1 of the worksheet.
-
To switch between viewing the results and viewing the formulas that return the results, press Ctrl+` (grave accent), or on the Formulas tab, in the Formula Auditing group, click the Show Formulas button.
After you copy the example to a blank worksheet, you can adapt it to suit your needs.
Note: The results of the TODAY and NOW functions change only when the worksheet is calculated or when a macro that contains the function is run. Cells that contain these functions are not updated continuously. The date and time that are used are taken from the computer’s system clock.
Need more help?
You can always ask an expert in the Excel Tech Community or get support in the Answers community.
Need more help?
Want more options?
Explore subscription benefits, browse training courses, learn how to secure your device, and more.
Communities help you ask and answer questions, give feedback, and hear from experts with rich knowledge.
In Excel, every valid date is stored as a form of the number. One important thing to be aware of in Excel is that we have a cut-off date of “31-Dec-1899”. Therefore, every date we insert in Excel will be counted from “01-Jan-1900 (including this date)” and stored as a number.
Table of contents
- How to Insert Date in Excel?
- Examples
- Example #1 – Date Stored as a Number
- Example #2 – Inserting Specific Date in Excel
- Example #3 – Changing the Inserted Date Format in Excel
- Example #4 – Insert List of Sequential Dates in Excel?
- Example #5 – Insert Dates with NOW() and TODAY() Excel Function
- Example #6 – How to Extract Selective Information from the Inserted Excel Date Values.
- Example #7 – Using TEXT() for Inserting Dates in Excel
- How to Change the Format of the Inserted Date in Excel?
- Things to Remember
- Recommended Articles
- Examples
Examples
Here, we will learn how to insert a date in Excel with the help of the examples below.
Example #1 – Date Stored as a Number
In the Excel sheet, let us take 50, 100, and today’s date, 30/01/2019.

Now, we can observe how data is stored in Excel when we change the formatting of the above data to date and accounting format.
50 – Change format to short date
100 – Change format to short date
30/01/2019 – Change format to accounting as it already in date format
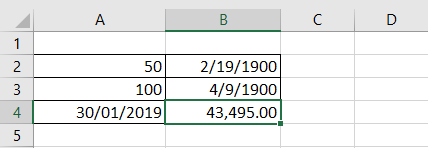
If we observe the number 50 has been changed to date. It displayed exactly 50 days from 01/01/1900 (including this date in the count). Similarly, for the number 100, the date indicated in the exact count from 01/01/1900. And the third observation, which is already in date format and we changed to number format, displays “43,495.” So, today, 30/01/2019 is 43,495 days away from the cut-off date.
Example #2 – Inserting Specific Date in Excel
To insert a specific valid date in Excel, we must use DATE()The date function in excel is a date and time function representing the number provided as arguments in a date and time code. The result displayed is in date format, but the arguments are supplied as integers.read more.
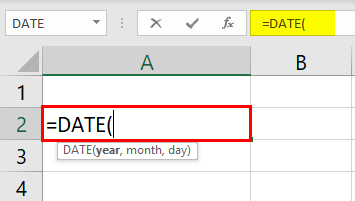
In the above function, we can observe that DATE asks to provide “year,” “month,” and “day” values. As we give the details of it, then this displays the date in default format as below:
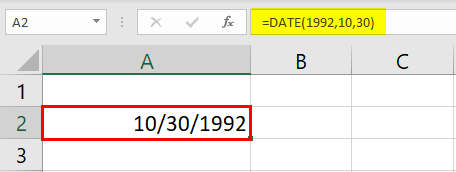
In the above example, we had given the “year” as 1992, “month” as 10, and “day” as 30. But, the output is displayed as per the default format.
Example #3 – Changing the Inserted Date Format in Excel
As seen in our earlier examples, we have displayed the date in a pre-defined format. To change the date format, we should go to “Format Cells.” Let us see how we can do it:
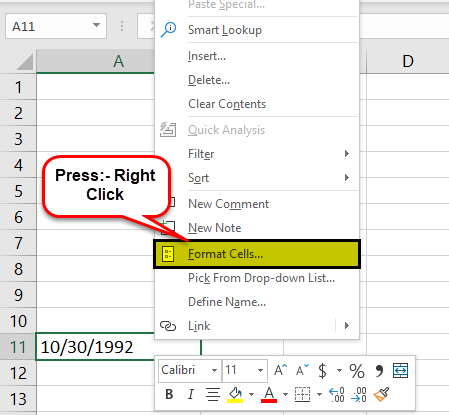
To access the “Format Cells,” we should right-click on the “Date” cell. Then, the above list of operations will pop out. Here, we must select the “Format Cells,” which may take us to the “Format Cells” window.
We got the list in a different format for the date as above. So, let us select one of the formats and see how the format got changed as below.

It is an important formatting feature that helps select dates as per their required format for different organizations.
Example #4 – Insert List of Sequential Dates in Excel?
If we want to list out of the sequential dates, we can select the start date, dragging it down until we reach the end date as per your requirement.
We must insert the date manually (do not use DATE()).
And drag it down as below.
Here we got the list of dates in a sequence from the starting date.
Example #5 – Insert Dates with NOW() and TODAY() Excel Function
To get the present-day date, we can use TODAY()Today function is a date and time function that is used to find out the current system date and time in excel. This function does not take any arguments and auto-updates anytime the worksheet is reopened. This function just reflects the current system date, not the time.read more and get the present day and the current time. Then, we should go with the NOW() FunctionIn an excel worksheet, the NOW function is used to display the current system date and time. The syntax for using this function is quite simple =NOW ().read more. Let us see the example below:

We also got a keyboard shortcut instead of the formulas.
We should use the “Alt +” shortcut instead of the TODAY() Excel function to get the present date.
We should use the “Alt + Shift + ” shortcut instead of the NOW() Excel function to get the present date along with the time.
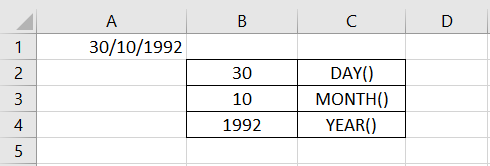
There are three important functions in Excel that help us extract the specific information from the date. They are:
- DAY()In Excel, the DAY function calculates the day value from a given date. This function accepts a date as an argument and returns a two-digit numeric value as an integer value representing the given date’s day. The formula to use this function is =Edate(serial number).read more
- MONTH()The Month Function is a date function that determines the month for a given date in date format. It takes an argument in a date format and displays the result in integer format.read more
- YEAR()The year function in excel is a date function to calculate the year from a given date. This function takes a serial number as an argument and returns a four-digit numeric value representing the year of the given date, formula = year (serial number)read more
Example #7 – Using TEXT() for Inserting Dates in Excel
TEXT() is one of the very important formulas for the presentation of data into a certain desired custom format.
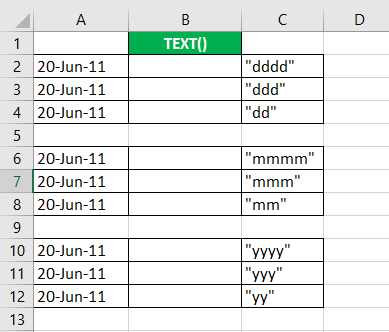
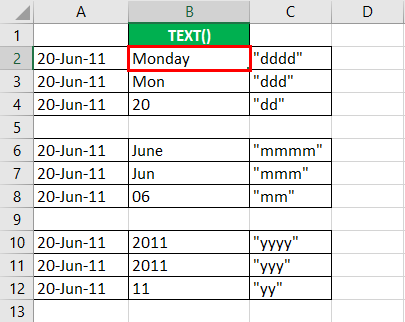
Let us assume the dates as per the above example. We can get the day, month, year, and per the formats mentioned in the third column.
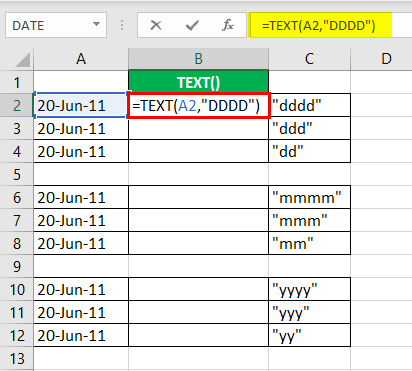
Using the TEXT() as above, we can derive as per the format required.
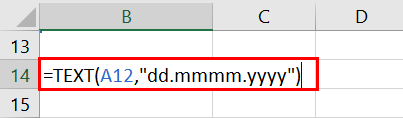
We can also use the TEXT() in changing the date format as per our requirement. We can avoid going to “Format Cells” and changing the format. It will also reduce the time consumption when changing the format.
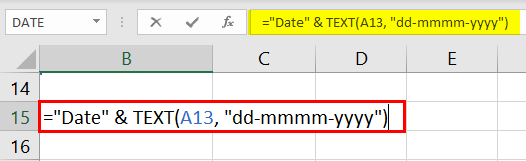
Let us see how we can change the format using the TEXT().
TEXT() will also help us in concatenating with a dateTo concatenate a date with other values in Excel, we can use the & operator or the built-in concatenate function. For example, if we use =»ABC»&NOW(), the output will be ABC14/09/2019.read more.
However, when we try to concatenate without using the TEXT() then, it may display the number instead of the date as below:
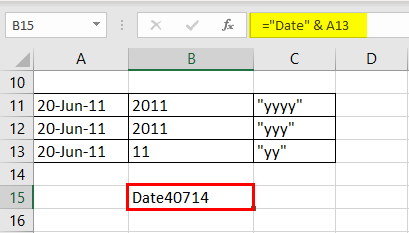
By using the TEXT(), we can concatenate with an actual date as below:
How to Change the Format of the Inserted Date in Excel?
If we observe from the above example, the date is in the form of MM/DD/YYYY. Suppose we want to change the format, then we can do it as per below:
We should go to the “Control Panel” and select ” Ease of Access.” Then, we can visualize the option of the clock, language, and region.
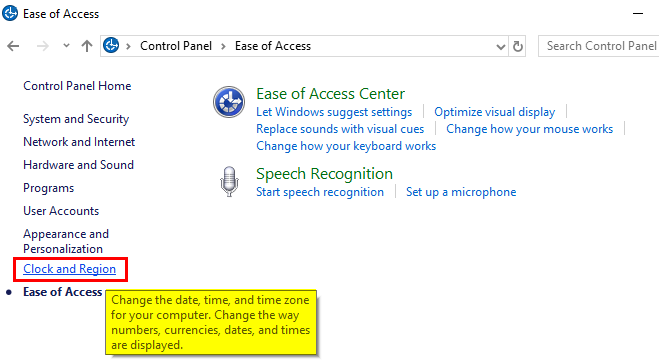
Click on the above option. It will pop out to other windows where we can get a choice of the region and go on that.
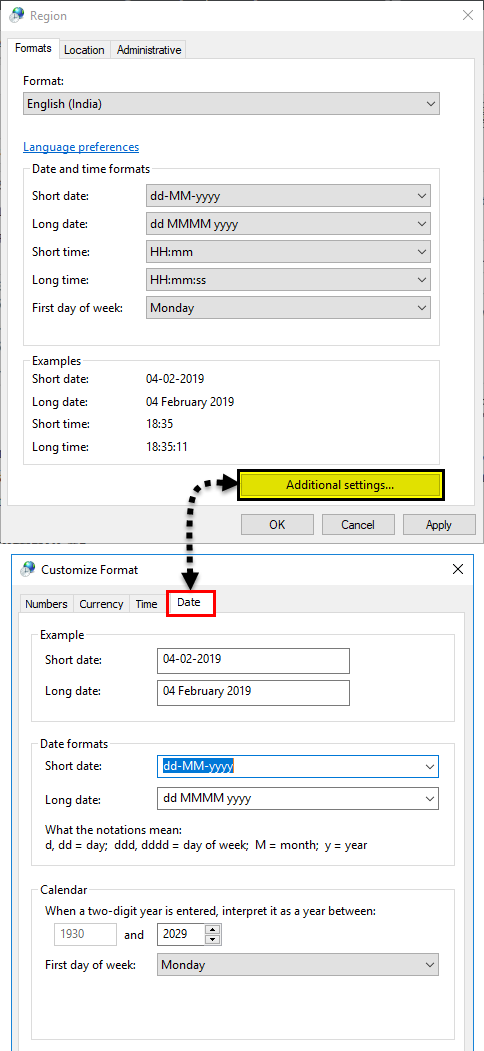
Here, we can select the date format as per our requirement, short date or long date. It will be the default setting of the date once we apply it. If we want to go to the previous format, we can reset it on the window.
Things to Remember
Inserting a valid date in excel should always be stored as a number. We can verify this condition by using ISNUMBER()ISNUMBER function in excel is an information function that checks if the referred cell value is numeric or non-numeric.read more.
Let us take the date in two different formats, as shown above. Inserting a valid date in Excel should always be stored in the number format, so we need to verify the same.
As we check for the number using the ISNUMBER()ISNUMBER function in excel is an information function that checks if the referred cell value is numeric or non-numeric.read more, function, the date which is stored in the form of the number and a valid date will be “TRUE” or else “FALSE.”
In our example above :
- 30/01/2019 – This is TRUE as it is stored in the form of a number, and this date is valid
- 30.01.2019 – This is FALSE, as it is not stored in the form of the number, and it is not valid.
Recommended Articles
This article is a guide to Insert Date in Excel. Here, we discuss how to insert dates in excel along with the top 7 examples using a combination of the DATE(), NOW(), TODAY(), and TEXT() functions. You may also look at these useful functions in Excel: –
- VBA DATEVALUE Function
- EOMONTH Function in Excel
- Date to Text in Excel
- EDATE Function in Excel
See all How-To Articles
This tutorial covers how to insert dates in Excel.
The Date Format
Like numbers, currency, time and others, the date is a quintessential number format in Excel.
Though Excel tries its best to auto-recognize data types, it doesn’t always succeed. To manually apply the date format to a cell or group of cells, select the HOME menu, expand the Number dropdown and choose short or long date.
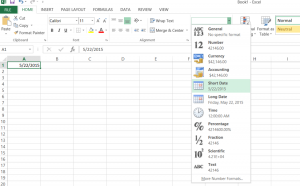
The difference between short and long date formats is that the latter includes the weekday.
Warning! Applying the date format to inappropriate data will give unexpected results!
If you would like to change the default format of the date, with the order of month, day and year, select “More Number Formats..” under the Number dropdown.

At the bottom of the dropdown, More Number Formats allows you to customize the order of the elements in the date. You can also choose a particular date format based on your location.

Note: The location options must be compatible with the language of your machine.
Today’s Date
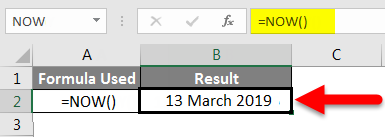
To insert today’s date, there are two primary functions: NOW() and TODAY(). The former also includes the current time.

To change the order of the resulting date, follow the steps mentioned earlier to customize the format.
Shortcut: You can also use shortcut “CTRL + ; “ for TODAY() and “CTRL + SHIFT + ;” for NOW().
Auto Populate Dates
Excel treats dates and numbers in almost the same way. Because dates are implemented as serial numbers, you can perform arithmetic operations with them such as auto-populating.
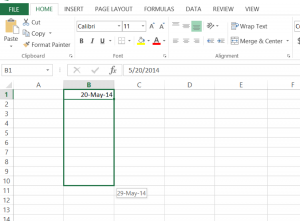
Just as you would auto-populate cells with numbers, select a cell with a date and drag the fill handle through the cells you want to fill.
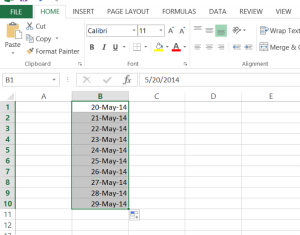
The example demonstrates how to fill cells by day increments, but you can also increment by week, month and year. Just follow the same steps that you would to fill cells by day increments, and then select the icon at the bottom right next to the fill handle. On the dropdown list, choose your increment.


Fill Dates by Custom Interval
You might want to fill dates and increment by an amount other than one unit of time.
To fill cells with dates by every N number of days, first perform the steps as you would to autofill dates normally. Then in the editing section of the HOME menu, click Fill then Series.

In the dialog box, select “Linear” and under “Step value”, provide the desired increment.

Result: The dates will be auto filled every three days.

Create a Date from Separate Columns
If you happen to work with Excel data where the year, month and day are in separate columns, you can use the DATE function to merge them into one date.
DATE(YEAR, MONTH, DAY)

Note: Months have to be in numeric form.
In Microsoft Excel, the date can be inserted in a variety of ways, including using a built-in function formula or manually entering the date, such as 22/03/2021, 22-Mar-21, 22-Mar, or March 22, 2021. These date functions are typically used for cash flows in accounting and financial analysis.
In Excel, there is a built-in function called TODAY() that will insert the exact today’s date and will give the updated date whenever the workbook is opened. The NOW() built-in function can also be used to insert the current date and time, and this function will be kept up to date if we open the workbook multiple times.
Inserting the date:
In the Formula tab, the built-in TODAY is categorized under the DATE/TIME function.
Alternate to insert the date in Excel the below keyboard shortcut can be used:
CTRL+;
It will insert the current date.
To insert the current date and time we can use the following shortcut keys:
CTRL+; <space key> CTRL+SHIFT+;
It returns the current date and time to us.
1. Inserting specific date in Excel:
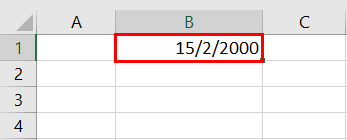
We have to use DATE() to insert a specific valid date in Excel. We can notice in the above function that the DATE requests to provide Year, Month, Day values. If we provide the details, the default date will be shown as below:
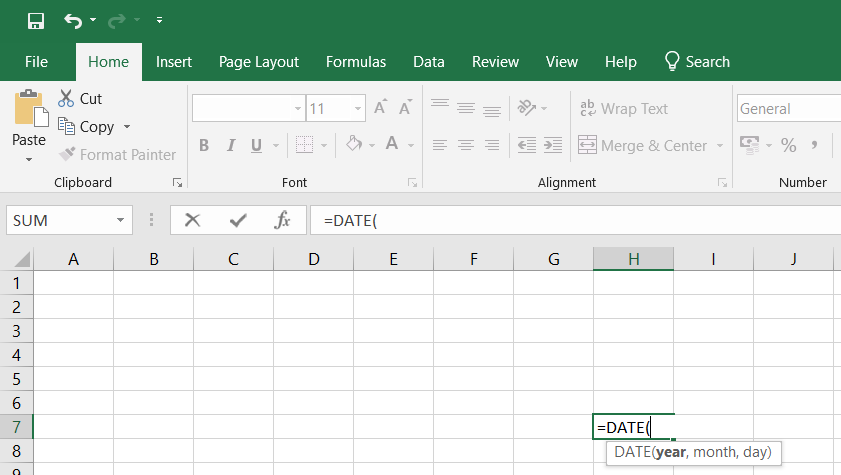
Image 1.1

Image 1.2
2. Inserting static date and time:
A static value in a sheet does not change if the sheet is recalculated or opened. To do so follow the below steps:
Step 1: Select the cell in which the current date or time will be inserted on a table.
Step 2: Do one of the next:
- Press Ctrl+;(semi-colon) to insert your current date.
- Press the Ctrl+Shift+;(semi-colon) to insert the current time.
- Press Ctrl+;(semi-column) to insert the current date and time then press Space, and press Ctrl+Shift+; (semi-colon).
Static date and time
3. Inserting a date in Excel via a drop-down calendar:
It may be a good idea to include a down calendar in your worksheet if you set up a table for other users and want to make sure that the dates enter correctly. You can fill in the dates with a mouse click and be 100% confident that all dates are entered in a suitable format. You can use Microsoft Date Picker control when you use a 32-bit version of Excel. Microsoft Date Picker Control will not work when you are using a 64-bit Excel 2016, Excel 2013 version.
4. Inserting an automatically updatable today’s date and current time:
If you want to keep your Excel date up-to-date today, use one of the following Excel date functions:
=TODAY() -> inserts in a cell the current date.
=NOW() -> inserts in a cell the current and current date.
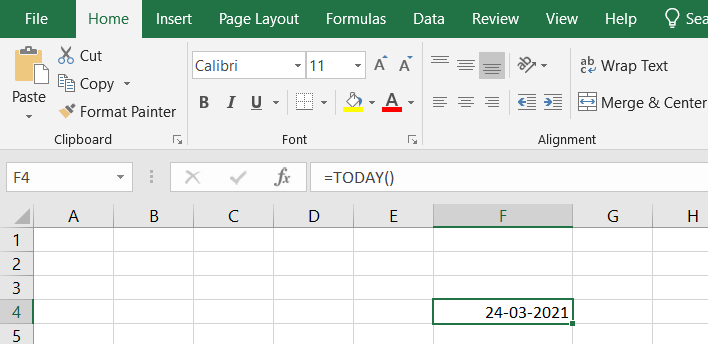
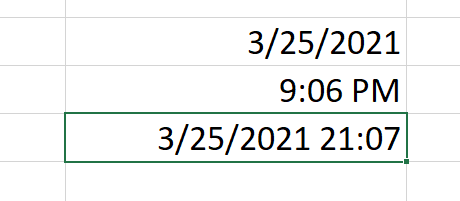
=TODAY example
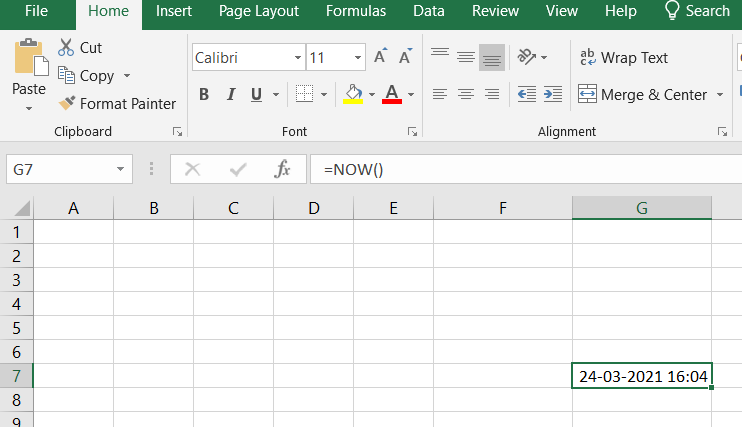
=NOW example
Please remember that when using the Excel date functions:
- The date and the time returned will not be refreshed on an ongoing basis, but only when the chain is reopened or re-calculated.
- The functions take the current system clock date and time.
5. Auto-populate dates in Excel
To autofill a series of dates in which one day is incremented, you can use the Excel AutoFill function. It is a common way to automatically fill a column or row. To do so follow the below steps:
- Enter the original date in the first cell.
- Click the first date on your cell and then drag the fill handle to or from the cells you want Excel to add dates.
Autofill weekdays, months, or years:
There are two ways of automatically adding weekdays, months, or years to the selected range of cells. To so follow the below steps:
- You can use the above-mentioned Excel AutoFill options. Click the AutoFill Options icon and choose the option you want when the range is populated by sequential dates.
- Another way to enter your first date will be to right-click the fill handle and drag and release the fill handle through the cells you automatically want to fill with dates. Excel displays a context menu and selects the appropriate option.
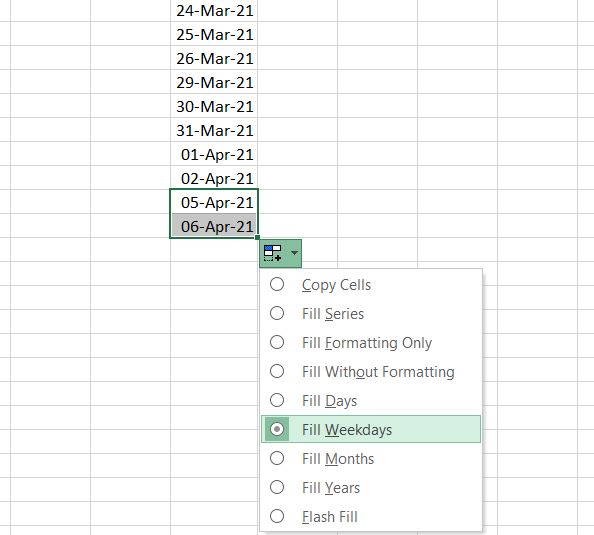
Auto-populate dates
Excel Insert Date (Table of Contents)
- Insert Date in Excel
- How to Insert Date in Excel?
Insert Date in Excel
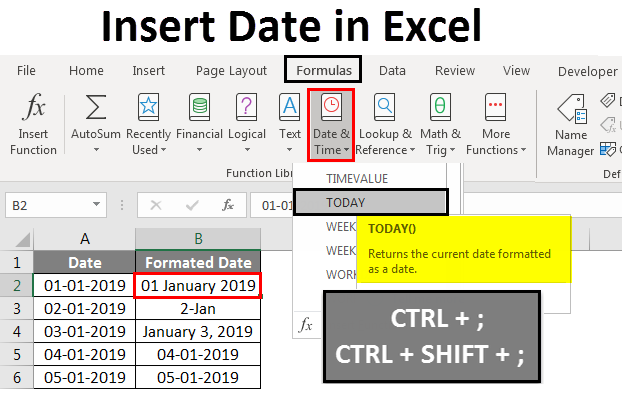
In Microsoft Excel, we can insert the date in various ways either by using built-in function formula or by inserting the date manually like 1/02/2019, or 01-Feb-19, or 01-Feb, or February 1, 2019. These date functions are normally used in accounting and financial analysis for cash flows.
In Excel, for inserting the date, we have a built-in function called TODAY () which will insert the exact today’s date, and this function will give you the updated date whenever we open the workbook. We can also use the NOW () built-in function, which inserts the current date and time, and this function also will be kept on getting updated when we open the workbook for multiple times.
How to Insert?
TODAY built-in function is categorized under the DATE/TIME function in the Formula tab.
We can use the alternative ways to insert the date in excel by using the keyboard shortcut key listed below.
- CTRL+; (Semicolon), which will insert the current date.

To insert the current date and time we can use the below shortcut key as follows.
- CTRL+; and then CTRL+SHIFT+; which will give us the current date and time.
Let’s understand How to Insert Date in Excel by different methods along with some examples.
Insert Date in Excel – Example #1
Insert date automatically in Excel Using TODAY Function:
You can download this Insert Date Excel Template here – Insert Date Excel Template
In this example, we will see how to automatically insert the date using the TODAY built-in function by following the below steps.
Step 1 – Open a new workbook.
Step 2 – Go to the Formulas tab.
Step 3 – Select the DATE & TIME so that we will get the list of function as shown below.
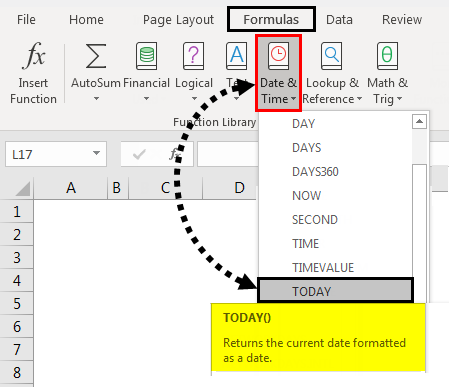
Step 4 – Select the TODAY function.
Step 5 – Once we click on the today function, we will get the dialog box for Function Arguments. Then Click on OK.
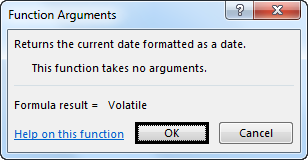
Excel will insert the current data as shown below.
Step 6 – We can type the function directly as TODAY, then press the Enter key to get the current date in the sheet, shown below.
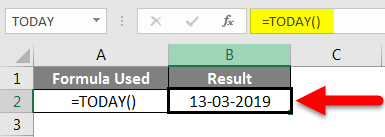
Alternatively, we can also use the shortcut key for inserting the date as CTRL + ;
Insert Date in Excel – Example #2
Insert date automatically in Excel Using NOW Function:
In this example, we will see how to use the NOW function to insert date in excel by following the below steps.
Step 1 – First, open a new sheet.
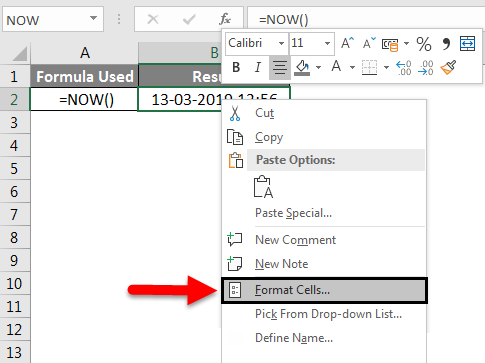
Step 2 – Type =NOW() function in the worksheet. Then press the Enter key so that we will get the current date and time as shown below.

Step 3 – We can format the date and time by right-clicking the cells to get the format cells to the option shown below.
Step 4 – Once we click on the Format Cells we will get the below dialog box. Then choose the desired format that we need to display here in this example.
We will choose the date format of the second option, i.e. Date/Month/Year, as shown below.
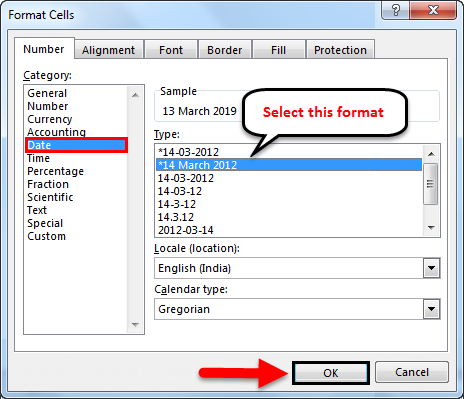
Step 5 – Click OK so that we will get the date in the desired format, as shown below.
Insert Date in Excel – Example #3
Manually Insert a date in Excel:
In this example, we will learn how to insert date manually with the below example
In excel if we enter the normal data by default, Excel will convert the number to date format, in rare cases if we import the sheet from other sources excel will not recognize the format. In such a case, we need to enter the date manually and change it to date format.
Follow the below steps to insert the date
Step 1 – Open a new workbook.
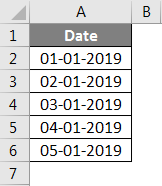
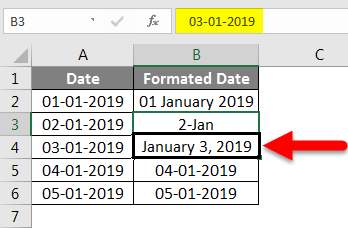
Step 2 – Insert the various date manually as 01-01-19, 01-02-19,03-03-19, which is shown below.
Step 3 – We can change the date format by selecting the format option which is shown below.
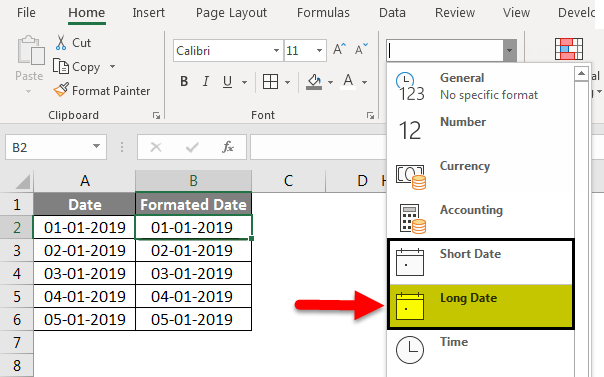
In the above screenshot, we can see the date format as Short Date and Long Date.
Step 4 – Click on the Long Date so that we will get the date in the desired format, as shown below.
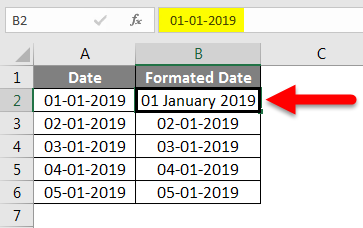
We can insert the date in various formats by formatting the date as follows
Step 5 – Click on cell B3 and right-click on the cell to get the format cells to the option shown below.
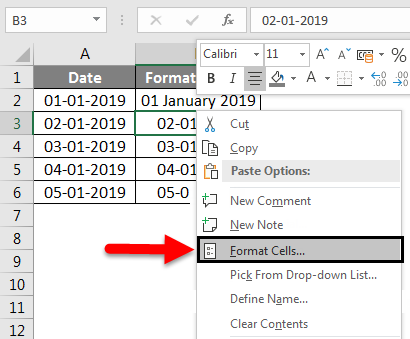
Step 6 – Click on the format cells so that we will get the format option dialog box which is shown below.
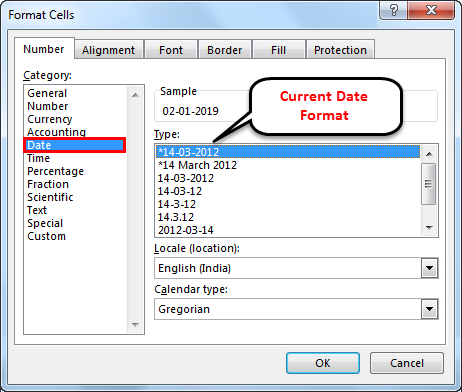
The above format option by default excel will show the * (Asterisk)mark, which means the current date format.
Step 7 – Select the other date format as 14-Mar, which means Date- Month, which is shown below.
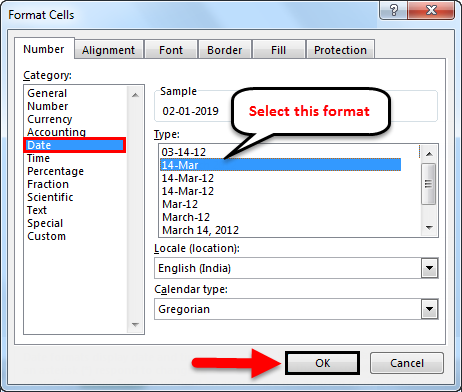
Step 8 – Now click OK so that we will get the desired date output as follows.
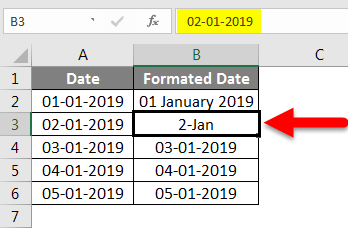
We can change the third date also in a different date format by applying the formatting option as above where we have selected the below option as Month, Date, Year.

Step 9 – Click OK so that we will get the final output which is shown below.
In the below screenshot, we have inserted the date in a different format using the formatting option.
Insert Date in Excel – Example #4
Insert dates automatically by dragging the cells:
In excel, we can simply insert the date and drag the cell automatically by following the below steps.
Step 1 – Open a new workbook and Type the date as 01-Jan-19, which is shown below.
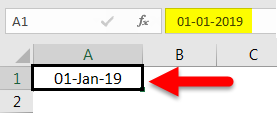
Step 2 – Now drag down the cells using the mouse as shown below.
Once we drag down the mouse, Excel will display the auto-increment date in the below cell.
Step 3 – Drag down the cells up to 05-Jan-19, as shown below.
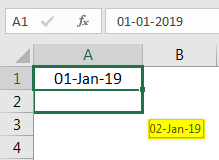
We have inserted the date by just dragging the cells and we can notice that there is a + (Plus) sign symbol which allows us to auto-fill the date.
Once we click on the + sign symbol, we will get the below options like Fill Days. Fill Weekdays, Fill Months, Fill Years.
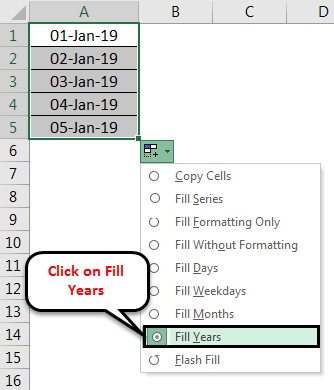
Step 4 – Now, just click on the option Fill years so that excel will insert the years automatically, as shown below.
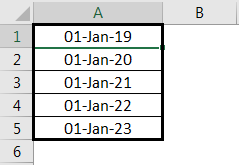
Now we can see the difference that auto-fill has changed the date by incrementing only the years and keeping them all the date as a common number.
Things to Remember
- We have to be very careful if we use TODAY built-in function in excel because today function will always return the current date, for example, if we apply the today function in the report yesterday and if you try to open the same report we will not get yesterday’s date and today function will update only the current date.
- We can insert the date using auto-fill options but make sure that we are inserting correct dates in the excel because autofill will change the date for the entire cell.
Recommended Articles
This has been a guide to Insert Date in Excel. Here we discussed Insert Date in Excel and How to Insert Date using different methods in Excel along with practical examples and downloadable excel template. You can also go through our other suggested articles–
- Insert Calendar In Excel
- Date Formula in Excel
- EDATE Excel Function
- Excel Add Months to Dates