

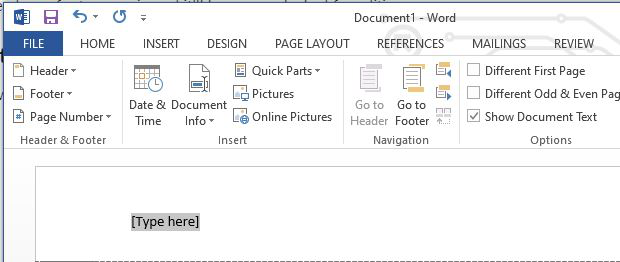
Try it!
Use headers and footers to add a title, date, or page numbers to every page in a document.
Insert a header or footer
-
Select Insert > Header or Footer.
-
Select one of the built in designs.
-
Type the text you want in the header or footer.
-
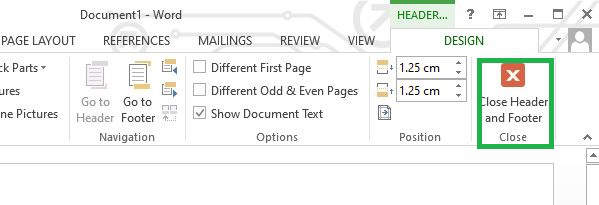
Select Close Header and Footer when you’re done.
Note: To edit any existing header or footer, open the Header & Footer Tools by double-clicking inside the header or footer area.
Different first page
-
Edit an existing header or footer by double-clicking inside the header or footer area.
-
In the Header & Footer Tools, select Design and then Different First Page.
Remove header or footer
-
Select Insert > Header or Footer.
-
Select Remove Header or Remove Footer.
Want more?
Add a header or footer
Remove all headers and footers
Delete or change a header or footer on a single page
Discover more Word training at LinkedIn Learning
Need more help?
Things You Should Know
- Adding a header in Microsoft Word will add text to the top of your pages.
- When adding a header, you can choose between pre-made templates or blank.
- In Header settings, you can toggle «Different First Page» and «Header Position».
-

1
Open Microsoft Word. It’s a blue app with a white «W» on it.
- You can also open an existing document by double-clicking it.
-
2
Click Blank Document. This will open a new document in Word.
Advertisement
-
3
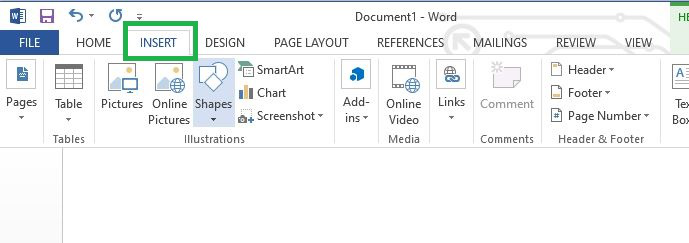
Click the Insert tab. You’ll see it near the top of the Word window, directly to the right of the Home tab.
-
4
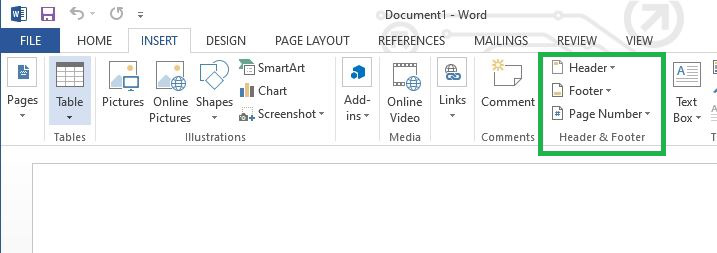
Click Header. It’s in the «Header & Footer» section that’s on the right side of the row of options near the top of the screen. You’ll see a list of header options in a drop-down menu.
- These options will vary depending on your Office subscription type and version of Word.
-
5
Click a header option. In most cases, you’ll just click the Blank option, since it will apply to the majority of Word documents necessitating a header. Selecting an option will add it to your document.
-
6
Type in your header’s text. This is the text that will appear at the top of every page.
-
7
Click Close Header and Footer. Doing so will apply it to your document; you’ll see your header text at the top of each page.


Advertisement
-
1
Double-click your header text. Doing so will open the Header options menu in the bar near the top of the Word window.
-
2
Review the header’s basic settings. There are a couple of aspects of the header that you can edit in the «Options» and «Position» sections:
- Different First Page — Check this box to customize your document’s first page’s header. It will appear different than the header on the rest of the pages.
- Header Position — Change the number in the «Header from Top» box to raise or lower the header’s position on the page.
-
3
Click and drag your cursor across the header text. This will select it, which will allow you to modify it as needed.
- If you’re using the «Different First Page» option, you’ll need to do this on a page other than the first for your changes to apply across your document (first page aside).
-
4
Click the Home tab. Doing so will allow you to edit the header by using options in the following sections:
- Font — Edit your text’s font, size, color, and general formatting (e.g., bolding or underlining).
- Paragraph — Change your header’s orientation (e.g., centered).
-
5
Double-click the «Header» tab. It’s below your header’s text; doing so will save your changes and close the header section.


Advertisement
Add New Question
-
Question
How do I make the header show up in the document?

To make a header appear, double-click (left mouse key) the highest part of the «page» and a new box will appear, with a dotted line indicating the «header» boundaries. You can then select the font/sizing/etc. for the header. When you’ve finished writing your header, double-click (left mouse key again) to return to the normal page, and leave the header at the top. Note that the header will fade out slightly and will seem to have a greyish tint. Your header will appear at the top of every page.
-
Question
How can I have page numbers inserted sequentially?
Once you add page numbers in the header options, they will automatically be inserted sequentially.
-
Question
How do I add another header in Microsoft Word if I already have one?
Go to the «Design» tab in the menu across the top. You’ll see an option to «Link to Previous.» That is where you turn headers on and off.
Ask a Question
200 characters left
Include your email address to get a message when this question is answered.
Submit
Advertisement
Video
Thanks for submitting a tip for review!
About This Article
Article SummaryX
1. Open a new or existing document in Microsoft Word.
2. Click Insert.
3. Click Header.
4. Click a header template.
5. Enter your preferred text.
6. Click Close Header and Footer.
Did this summary help you?
Thanks to all authors for creating a page that has been read 300,868 times.
Is this article up to date?
When we insert a header or a footer on any page in a Word document, it automatically appears on all the pages. But sometimes, we need to insert headers and footers to some specific pages except the entire Word document. This tutorial will show you how to insert Headers and Footers on specific pages in Microsoft Word.

How do you put a Header on only certain pages in Word?
To insert a Header on only a certain page, say page 7 in Word, first, you have to insert a Next Page Section Break to the end of its previous page, page 6, and its next page, page 8. After that, insert your Header on the targeted page (page 7) and deselect the Link to Previous option. Now, delete the Header from the previous page (page 6) and the next page (page 8). This will put the Header on only the specific page. We have explained the entire process in detail in this article.
The steps to insert Headers and Footers to some specific pages in Microsoft Word are listed below:
- Launch Microsoft Word.
- Enable the Formatting Marks.
- Go to the page on which you want to insert Header or Footer.
- Insert a Section Break at the end of the page just before the targeted page.
- Insert Header and Footer on the targeted page.
- Unlink Header and Footer on the targeted page from the previous pages.
- Delete Header and Footer from the page just before the targeted page.
- Insert a Section Break at the end of the targeted page.
- Select Header and Footer on the page next to the targeted page and unlink them from the previous pages.
- Delete Header and Footer from the page next to the targeted page.
Let’s see all these steps in detail.
1] Launch Microsoft Word.

2] Select the Home tab and click on the Show/Hide Formatting Marks button to enable formatting marks (as shown in the above screenshot). The formatting marks will show you all the formatting that you do in your Word document. Hence, it will be helpful when you insert a Section Break.
3] Now, go to the page on which you want to insert Header and Footer, and add a Section Break to its previous page. Let’s say, if you want to insert the Header on page 5 in your document, you have to add Section Break on page number 4.

4] To add a Section Break, click at the end of that page (according to our example, it is page 4), and go to “Layout > Breaks > Section Break.” Now, select Next Page.
5] Now, go to the page where you want to insert a Header or a Footer. In the example that we have taken here, it is page 5. To insert Header and Footer, double-click at the top and bottom of that page respectively. Alternatively, you can insert the Header and the Footer from the Insert menu. Simply, go to the Insert menu and then click on the Header or the Footer drop-down menu to select the format of Header and Footer you want to insert into your document.

6] Type your Header and Footer on the targeted page. After that, click on the Design tab and deselect the Link to Previous option. When you are done, click on the Close Header and Footer button.
Read: How to use Header, Footer, and Footnote in Google Docs.
7] After inserting the Header and Footer, you will see that the Header and the Footer have automatically been added to all the pages in the document. To remove the Header and the Footer from all the previous pages, simply select them on the previous page (the page just before the targeted page), and press Delete. This will delete the Header and the Footer from all the pages before the targeted page.
8] To remove Header and Footer from the pages after the targeted page, add Section Break at the end of the targeted page. Let’s understand it with the help of the example that we have taken here. Our targeted page is 5. Therefore, to remove Header and Footer from all the pages after page 5, we have to insert the Section Break at the end of page 5.
To do this, go to “Layout > Breaks > Section Break” and select Next Page. Now, select Header and Footer on the page next to the targeted page (in our case, it is page 6) and deselect the Link to Previous option in the Design menu. After that, delete Header and Footer from the page next to the targeted page (page 6).
Now, your Header and Footer have successfully been inserted into a specific page in a Microsoft Word document. Save your document.
By following the above process, you can also add different Headers and Footers to different pages in a Word document.
How do I start a Header and a Footer on page 3 in Word?
To insert a Header and a Footer on page 3 in Word, first, you have to unlink the Header and Footer on page 3 from the previous pages (page 1 and page 2). For this, click at the end of page 2, go to “Layout > Breaks > Section Break,” and select Next Page. This will insert a Section Break after page 2. Now, insert Header and Footer on page 3. After that, click on the Design tab and then deselect the Link to Previous option.
Go to page 2 and delete Header and Footer from there. This will remove Header and Footer from the first two pages in your Word document.
Hope this helps.
Read next: How to add Header and Footer in Excel spreadsheet.

This tutorial shows how to insert headers and footers in Microsoft Word. We’ll also look at how to edit and delete existing headers and footers.
Quick Links:
- How to Insert Headers and Footers
- How to Edit Headers and Footers
- How to Delete Headers and Footers
If you want to insert page numbers in headers or footers, please see “How to Add Page Numbers in Microsoft Word.”
If you want to insert headers or footers in specific chapters or sections, please see “How to Insert Headers and Footers on Specific Pages in Microsoft Word (PC & Mac).”
This tutorial is available as a YouTube video showing all the steps in real time.
Watch more than 200 other writing-related software tutorials on my YouTube channel.
The images below are from Word for Microsoft 365. These steps will also work in Word 2021, Word 2019, Word 2016, Word 2013, and Word 2010. However, your interface may look slightly different in those earlier versions of the software.
Please note that Word provides many ways to work with headers and footers. Therefore, this tutorial is limited to the steps I believe will be the most useful for the majority of people.
- Select the Insert tab in the ribbon.

- Select the Header or Footer button in the Header & Footer group.

- Select a built-in style from the drop-down menu.

After you select a style, Word will automatically switch from the Insert tab to the Header & Footer tab. This tab only appears when you are working with headers or footers.
- Select the placeholder text, and then type your header or footer information over the placeholder text.
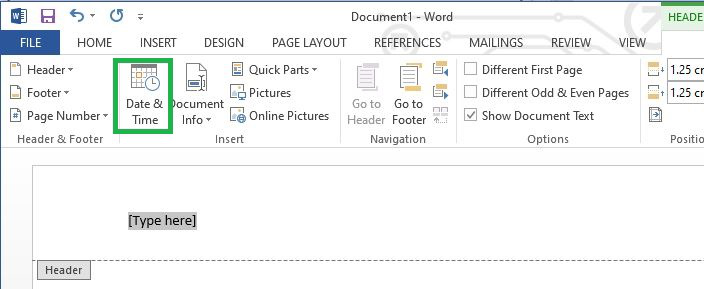
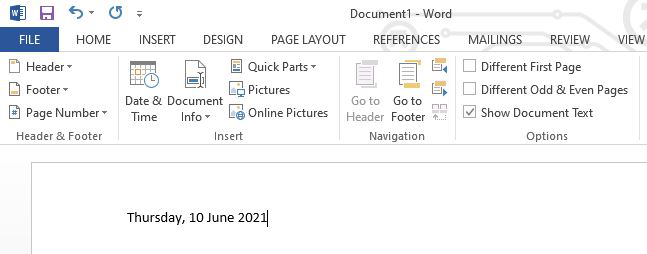
Alternatively, select Date & Time in the Insert group to insert an automatically updating date and time.

- (Optional) Select Different First Page in the Options group to create a different header or footer or no header or footer on the first page.
5.a. Type the information into the First Page Header space. You can also select the Header or Footer button to select a built-in style (see figure 3).
5.b. Leave the space blank if you don’t want a header or footer on the first page.

- (Optional) Select Different Odd & Even Pages in the Options group to create different headers or footers on odd and even pages.

6.a. Select the Next and Previous buttons in the Navigation group to toggle between odd and even pages.
6.b. Type the information into the Odd Page Header and Even Page Header spaces. You can also select the Header or Footer buttons to choose different built-in styles for odd and even pages (see figure 3).

- (Optional) Enter new numbers into the Header from Top and Footer from Bottom text boxes in the Position group to customize the amount of space above the header or below the footer.

Pro Tip: Tabs for Headers and Footers
Tabs placed on the ruler while working on headers or footers won’t appear on the ruler for the body content after you close the Header & Footer tab.

- Select the Close Header & Footer button when you are finished.

The Header & Footer tab will no longer be visible.
- Double-click the header or footer to open the Header & Footer tab. Alternatively, you can right-click the header or footer and select the Edit Header or Edit Footer button.

- The Header & Footer tab will open, and your cursor will automatically move into the header or footer space where you can make adjustments, as necessary.
- Double-click the header or footer you want to delete (i.e., First Page, Odd Pages, or Even Pages). Alternatively, you can right-click the header or footer and select the Edit Header or Edit Footer button (see figure 11).
- Select the Header or Footer button in the Header & Footer tab. (Note that these buttons are in a different location in the Header & Footer tab than in the Insert tab.)

- Select Remove Header or Remove Footer from the drop-down menu.

This method will only delete the type of header or footer that you selected. For example, if your document has different headers on odd and even pages and you selected a header on an odd page, only the odd page headers will be deleted. However, if your document has the same header on every page, all the headers will be removed.
Related Resources
How to Add Headers and Footers to PDFs in Adobe Acrobat
How to Insert Footnotes and Endnotes in Microsoft Word
How to Insert Citations in Microsoft Word
Updated January 21, 2023
Sometimes you’ve got to make longer documents—such as business reports, school papers, and book-length materials. Microsoft Word headers, footers, and page numbers organize the document and make it easier for your readers to navigate.


Here are a few good reasons to use Microsoft Word headers, footers, and page numbers:
- Find a page in the document. Imagine trying to find a specific passage in a 250-page document without page numbers! Microsoft Word page numbers update automatically as you add or delete pages. Plus, they’re easy to work with. You’ve got no excuse for not using this useful feature.
- Identify what you’re reading. Headers and footers also help the reader situate themselves in the document. For example, a glance at the footer can remind them that they’re reading Chapter 16 of The Greatest Novel Ever Written.
- Brand the document. Branding is another reason to use headers and footers. Add your organization’s name and logo. And, if you export your Word Doc into a PDF, you can even make the headers and footers clickable (or hyperlinked) to your website.
Insert Microsoft Word headers, footers, and page numbers in your document or start with a Microsoft Word template that includes pre-formatted headers, footers, and page numbers. Envato Elements and GraphicRiver are great sources of templates for Microsoft Word.
In this article, you’ll learn how to work with headers, footers, and page numbers in Microsoft Word. So, you and your readers can reap all their benefits. Let’s get started!
Note: I’m on Microsoft Word for Mac version 16.33. The steps may differ slightly depending on what version of Microsoft Word you’re using.
Your Quick Start Guide to Add Headers, Footers and Page Numbers (Video)
Are you ready to learn more about using headers, footers, and page numbers in Microsoft Word? Watch this quick screencast to learn all about Word headers and footers.

Or, study the complete written tutorial below.
Work With Headers and Footers in MS Word
Adding a Microsoft Word header or footer is quite intuitive. Follow these steps:
1. How to Insert Headers and Footers
To add a header, go to Insert > Header.


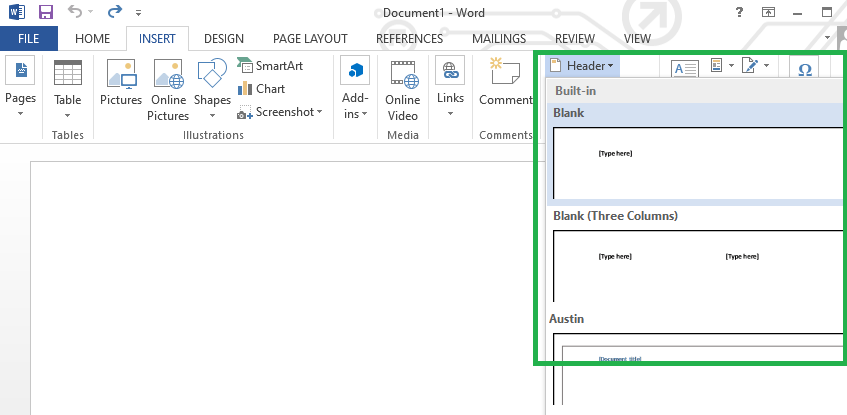
Choose the built-in format you want to use from the menu that appears. You’ve got the option of a blank header, a blank header with three columns, or other built-in styles.


Choose the style you wish to use.


Follow the same steps to add a Microsoft Word footer, but click Insert > Footer instead to get started.
2. How to Insert Text in a Header or Footer
Double-click into the header or footer to open it. Replace the placeholder text, if there’s one, with your own. Otherwise, type your text.


Then, format header or footer text to make it look the way you want. Select the text, then click on the Home tab. From there, change the font, font size, color, and other settings.


To close the header or footer, under the Header & Footer tab, click the Close Header and Footer button. Or, double-click outside the header or footer.


Note: When the header or footer is closed, it’s locked and can’t be edited. Double-click on the header or footer section to open the Header & Footer view.
3. How to Insert the Date or Time in a Header or Footer
To add a date or time in a header or footer, click Insert > Date & Time.


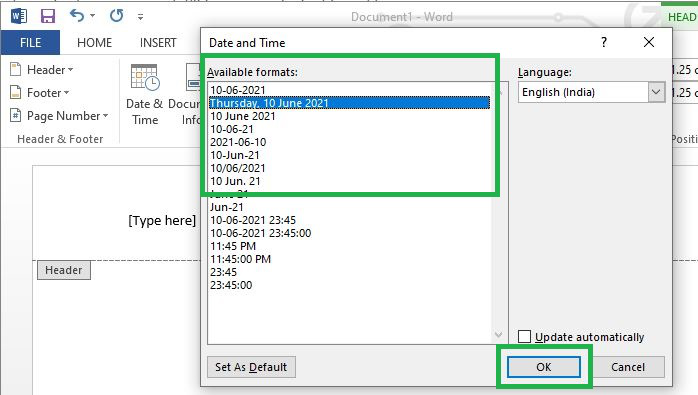
The Date and Time dialog opens.


Choose the format you wish you use. Check Update automatically, if you want the date and time to update each time you modify the document.


4. How to Insert a Logo in a Header or Footer
Aside from text, you can also insert images in a Microsoft Word header or footer. This is a good opportunity for you to brand your document by including your logo.
To insert a logo, open the header or footer. Double-click at the top (for header) or bottom (for footer) of the document. In this example, I’m adding a logo in the footer.
Click Insert > Pictures > Photo Browser.


Locate the logo on your computer, select the file, then click Insert.
![]()
![]()
![]()
The logo is now in the footer.
![]()
![]()
![]()
Double-click outside the footer or click on the Close Header and Footer button in the ribbon to close it.
Work With Microsoft Word Page Numbers
Page numbers are a common element to include in either the header or footer of your document. To learn how to number pages in Microsoft Word, follow these instructions:
1. How to Insert Page Numbers to a Header or Footer in Word
With the header or footer open, click Insert > Page Numbers ….


The Page Numbers dialog opens:


Select the settings you want to use. Decide on the page number’s position and alignment.
There’s also a radio button to Show number on first page. By default, this button is unchecked. This means the first page of your document can be its cover, and the page number won’t be displayed on it. If you want the page number to appear on the first page, check this button.
From here, you can also change the format of the page numbers. With the Header & Footer tab open, click Page Number > Format Page Numbers ….


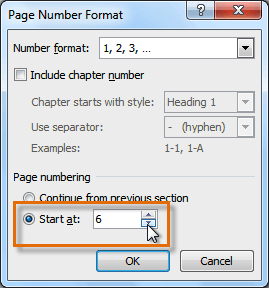
This opens the page numbering format box, where you can make other settings:
- Number format allows you to choose from Roman numerals or Arabic numerals or letters
- Include chapter number, if you’ve set up chapters in your document and want to include them in the page numbering, then check this button.
- Page numbering
- Continue from previous section continues the page count from the previous page.
- Start at ___ lets you restart the page count at any number.
After making your settings, click OK to apply.
2. How to Make Page Numbering Not Appear on the First Page
If you want the first page of your document or section to be the cover page, then you wouldn’t want it to have a page number. To hide the page number from the first page of a document or section, do the following:
Click Insert > Page Numbers ….
The Page Numbers dialog opens. Uncheck the Show number on first page radio button.


Click OK.
3. How to Number Odd and Even Pages Differently
By default, headers and footers appear the same way on odd and even pages, like this:


But sometimes, you may want odd and even pages to appear differently. An example is in the case of books or magazines, where you want the page number to be on the outer edge of the spread when the (printed) document is open.
This is possible in Microsoft Word, where you can format headers, footers, and page numbers differently on odd and even pages.
To do this, double-click inside the header or footer. This opens the Header & Footer ribbon. Check the button for Different Odd & Even Pages.


Edit your odd and even headers/footers separately. When you’re done, double-click outside the header/footer to close.
Now, the positions of the logo and page numbers are different for odd and even pages on my document:


4. How to Add Different Numbers and Formats to Different Sections
You can also use different page numbers and formats for different sections of your document. For example, in my document I want the page numbers in the Introduction section to be Roman numerals.
First, make sure you’ve broken your document into sections.
To define a new section, place the cursor where you want a new section to begin. Then, click Insert > Break > Section Break. Choose whether you want the section to begin on the next page, continue on the same page as the previous section, or begin on either an odd or even page.


In this example, I inserted section breaks before and after the Introduction to make it a separate section from the rest of my document.
To double check if you’ve inserted section breaks where you want them, click on the Show/Hide Paragraph button on the ribbon. This displays how your document into paragraphs as well as sections.


Now, you’re ready to format the page numbers in a specific section.
Double-click in the footer part of the page to open the Header & Footer view. Click inside the footer you want to format.
On the Header & Footer ribbon, click Page Number > Format Page Numbers.


Change the format to the settings you wish to use.


Click OK.
5. How to Control Page Numbers Using Fields
So far, we’ve been using Microsoft Word’s built-in formats for page numbers. For more control over how the page numbers display, use fields.
Double-click on the top or bottom of page to open the Header & Footer view. In the header or footer, place the cursor where you want to insert the page number.
From the Header & Footer ribbon, click on the Field button.


The Field dialog box opens. To add a page number, scroll down Categories, and select Numbering. Then, under Field names, select Page.


Click Options to change the number formatting. Make the selections you want to use, then click OK.
6. How to Fix Broken Page Numbers
Sometimes as the document gets larger and new pages and sections are added, page numbering can break. Below are two common page number errors and how to fix them.
Example 1: Page number starts over at 1 in the middle of the document
This can happen when you’ve defined a section, formatted its page number to restart at 1, then inserted a section break again.
Solution:
Examine the section breaks in your document by clicking on the Show/Hide Paragraph button.
Check how the page numbers are formatted in the section, and make sure to uncheck Start at:___.


Example 2: Word is counting the cover page as page 1
The first page of the document is usually the cover page as well. Naturally, we don’t want it to be included in the page count. But what if your document does? Here’s one way to fix that.
Solution:
Insert a section break after the cover: click Insert > Break > Section break. Select one of the options that appear.
Check the button for Different First Page.


On the page where you want the page count to begin, go to Page Number > Format Page Numbers. Check the radio button for Start at:___. Type the page number that you want the page count to begin at.


Work With Templates With Header and Footer Designs for Microsoft Word
If you’d rather not make any design and formatting decisions, the easiest thing to do is to start with a Microsoft Word template. A good template comes with header, footer, and page numbers all pre-formatted. These will automatically update as you add or remove pages.
Select a Word template like this e-book template for Microsoft Word that I found in Envato Elements.


If you want to edit the header, footer, or page number, click into the header/footer to open it. Make the changes you want to make following the relevant steps above.


When you’re done, double-click outside the header/footer to close it.
Work With Other Header Options and Change Designs
Microsoft Word headers and footers also come with built-in designs for you to choose from.
To select one, click in the header or footer. Click the Header or Footer button on the ribbon. Scroll down to see all the available options. Choose a design from the selections that appear.


Note: This will override any header or footer and page number settings you’ve already made.
Use Microsoft Word Header, Footer, and Page Numbers to Give Readers a Good Experience
By following the steps in this article, even beginning users of Microsoft Word can add headers, footers, and page numbers in their documents. Or, if you’d rather not worry about formatting these page elements, use a Microsoft Word template instead of starting from scratch.
Envato Elements is a wonderful source of professionally designed Microsoft Word templates. Your subscription includes unlimited downloads of everything you need to produce a high-caliber document, from custom fonts to stock photos.
To get templates a la carte, then GraphicRiver is another source of great Microsoft Word templates for you to explore.
Whether creating your own layout or starting with a template, Microsoft Word headers, footers, and page numbers help you provide a better experience for your readers. They’ll be able to more easily navigate the document and find the pages or sections they need.
You can also make the most of headers and footers to brand the document. Add your logo and organization name, as well as the author’s name, to increase brand recognition and establish your thought leadership.
What are your tips for using Word in long documents? Leave a comment and let us know.
Lesson 19: Working with Headers and Footers
/en/word2010/styles-and-themes/content/
Introduction
You can make your document look professional and polished by utilizing the header and footer sections. The header is a section of the document that appears in the top margin, while the footer is a section of the document that appears in the bottom margin. Headers and footers generally contain information such as the page number, date, and document name.
In this lesson, you will learn how to insert and edit headers and footers.
Headers and footers
Headers and footers can help keep longer documents organized and make them easier to read. Text entered in the header or footer will appear on each page of the document.
To insert a header or footer:
- Select the Insert tab.
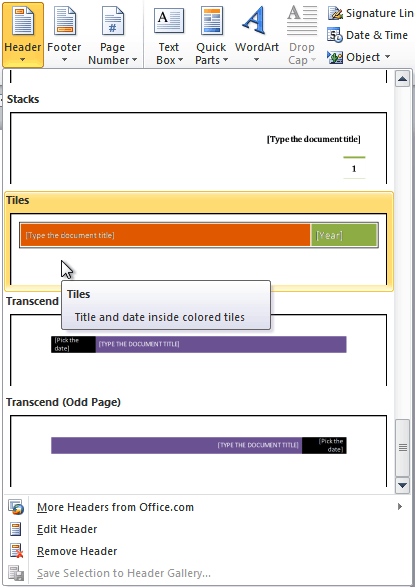
- Click either the Header or Footer command. A drop-down menu will appear.
- From the drop-down menu, select Blank to insert a blank header or footer, or choose one of the built-in options.
Inserting a header
- The Design tab will appear on the Ribbon, and the header or footer will appear in the document.
- Type the desired information into the header or footer.
Typing text into a header
- When you’re finished, click Close Header and Footer in the Design tab, or hit the Esc key.

After you close the header or footer, it will still be visible, but it will be locked. To edit it again, just double-click anywhere on the header or footer, and it will become unlocked.
To insert the date or time into a header or footer:
- Double-click anywhere on the header or footer to unlock it. The Design tab will appear.
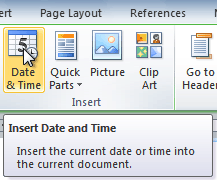
- From the Design tab, click the Date & Time command.
The Date & Time command
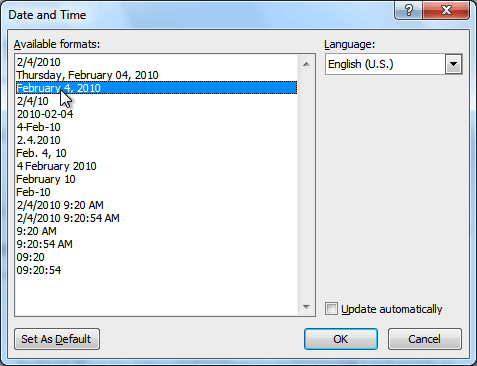
- Select a date format in the dialog box that appears.
Selecting a date format
- Place a check mark in the Update Automatically box if you would like it to always reflect the current date. Otherwise, it will not change when the document is opened at a later date.
- Click OK. The date and time now appears in the document.
To remove content controls:
By default, some of the built-in headers and footers have snippets of text that are called content controls. Content controls can contain information such as the document title or company name, and they allow you to enter this information into a form field.
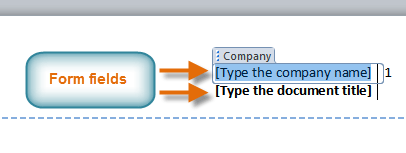 Form fields
However, you’ll often just want to type a normal header without any content controls. To do this, you’ll need to remove any content control fields from the header or footer.
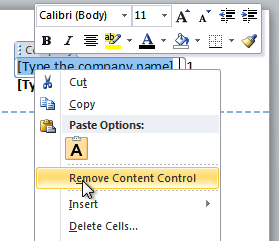
- With the header or footer section active, right-click the content control field you want to remove. A drop-down menu will appear.
- Click Remove Content Control. The content control field will disappear.
Removing Content Control
Other header and footer options
There are many other header and footer options you can use to design these sections of your document. You can review the Header & Footer Tools Design tab to view and explore these options.
 The Design Tab
Adding page numbers
Word can automatically label each page with a page number and place it in a header, footer, or side margin. You can add page numbers to an existing header or footer, or you can insert page numbers into a new header or footer.
To add page numbers to an existing header or footer:
- Select the header or footer. The Design tab will appear.
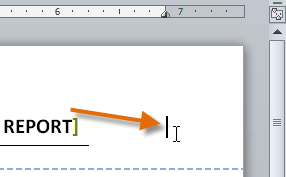
- Place the insertion point where you want the page number to be. You can place it anywhere except inside a content control field.
The insertion point
- From the Design tab, select the Page Number command.
- Click Current Position, then select the desired style. The page number will appear in the document.
Selecting a page number
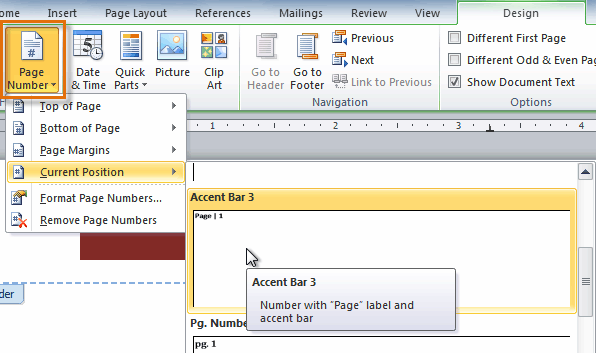
If you’ve already typed information into your header or footer, it’s important to place the page number at the Current Position to avoid losing anything. If you select a page number from Top of Page or Bottom of Page, it will delete anything you’ve already added to the header or footer.
To insert page numbers into a new header or footer:
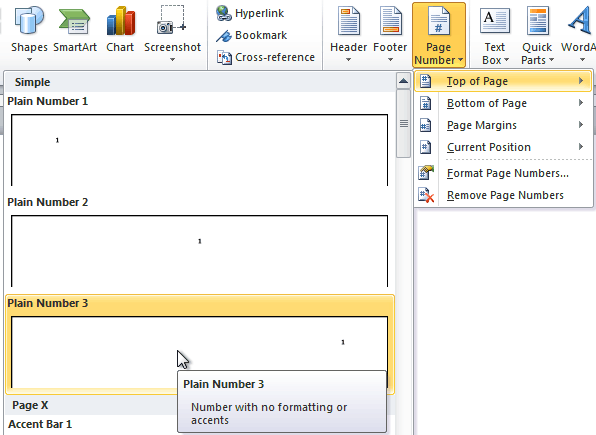
- From the Insert tab, click Page Number. A drop-down menu will appear.
- Select the desired page number style, and it will appear in your document.
Inserting a page number at the top of the page
To hide the page number on the first page:
In some documents, you may not want the first page to show the page number. You can hide the first page number without affecting the rest of the pages.
- Select the header or footer that contains the page number.
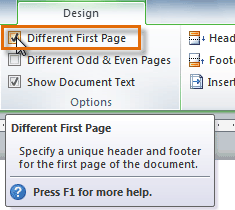
- From the Design tab, place a check mark next to Different First Page. The header and footer will disappear from the first page. If you want, you can type something new in the header or footer, and it will only affect the first page.
Hiding the page number on the first page
If you’re unable to select Different First Page, it may be because an object within the header or footer is selected. Click in an empty area within the header or footer to make sure nothing is selected.
To format page numbers:
- Select the header or footer that contains the page number.
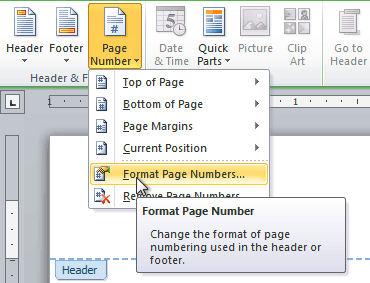
- From the Design tab, select the Page Number command.
- Click Format Page Numbers.
Clicking Format Page Numbers
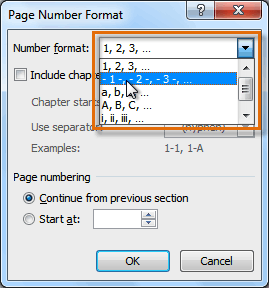
- From the dialog box, select the desired Number format.
Selecting a number format
- Next to Start at, enter the number you want the page numbers to start with.
Selecting a starting page number
If you’ve created a page number in the side margin, it’s still considered part of the header or footer. You won’t be able to select the page number unless the header or footer is selected.
An alternative way to modify your page numbering is by using section breaks. To learn how to do this, read our article on Modifying Page Numbers in Word.
Challenge!
- Create a new Word document.
- Create a blank header.
- Add your name in the header of a document.
- Right-align the text in the header.
- Select a built-in footer.
/en/word2010/reviewing-documents/content/
Want to know about Header and Footer in Microsoft 365 Word and MS Word document? Want to insert a header or footer in Microsoft 365 Word and MS word older version? This article will provide you all details about them.
In this tutorial, you can view all details about the header and footer. And you can know how to add header and footer in Microsoft 365 Word and MS Word document. And remove the header from the first page. And remove the header or footer from the entire document.
Table of Contents
Video Tutorial:
For our reader’s convenience, we provided this article in the form of video tutorial. If you are interested to read, you can skip the video and start reading.
1. How to Insert header and footer in Microsoft 365 Word?

Let us see how to insert a header and footer in Office 365 Word in this section.
Total Time: 3 minutes
Step 1: Create or Open Word document

The first thing you need to do is, create or open the word document in Microsoft 365 in which you want to add header and footer.
Step 2: Click on Insert

Now in the menu bar of Word you can see different options for making your document stylish and professional. Click on the Insert menu from that menu bar list.
Step 3: Click Header & Footer option

When you click on the Insert option, you can see various options like table, pictures, etc to insert into your Word document. From that list of inserting options click on the Header & Footer as shown in the above image.
Step 4: Type the Header content

Once you click on the Header & Footer option, the header and footer will be inserted into your Word document. At the top of the document you can see an empty row for entering the content which you want to present as a header for that document. Type the suitable content as heading for your document as you wish.
Step 5: Type Footer content

Now on the bottom side, you can see an empty row for entering Footer content. Type the content which you want to insert as Footer.
Step 6: Use design formats for header and footer
You can also use designs for header and footer. To make your header and footer more stylish, select the content in the header or footer then a tool menu will appear as shown in the above image. You can use Bold, Italic, Underline and different color, etc from that toolbox.
This is the procedure for inserting Header and Footer in Office 365 Word document.
Estimated Cost: 9.99 USD
Supply:
- Microsoft 365
Tools:
- Microsoft 365
Materials: software
2. How to edit Header and Footer in Microsoft 365 Word?
In the previous section, we have seen the procedure for inserting the header and footer into the Word document. Now in this section let us see how to edit the header and footer in the older version.
Step 1: Open the word document
The first thing you need to do is, open the word document in which you want to change the header and (or) footer.

Step 2: Click on Header or Footer

Once you open the document you can see a Header option at the top right side of your document and footer option at the bottom right side. Click on Header at the top or Footer option at the bottom. Then you can see an unlocked header or footer which supports editing as shown in the below image.

Now in that editing screen you can edit the Header and Footer.
3. How to remove Header and Footer in Microsoft 365?
Up to now, we have seen the procedure to insert and edit the header and footer. There are some cases where you don’t need header and footer to your document. Then you need to know how to remove those from word document. Follow the below steps for removing header and footer.
Step 1: Open the document

Firstly, select and open the document in which you want to remove the header and footer.
Step 2: Click on Header or Footer option at right side of document


Once you open the document, you can see your document which contains header and footer. There you can see header option at the top and the footer option at the bottom of your document. Click on anyone either the Header option or Footer option. Then the editing screen will appear for editing those two where you will find options to remove also.
Step 3: Click Options

In that editing screen itself, you can remove the header and footer. You can see an option namely Options at the right corner of the screen. Click on that Options.
Step 4: Click Remove Headers & Footers

Now in the options window, you can see different options related to header and footer such as Same across entire document, different first page, different last page, etc. Click on Remove Headers & Footers which is placed at the last position.
Step 5: Click Remove all

When you click on Remove Headers & Footers then it asks you a confirmation about your decision on removing the header and footer with ” This will delete all headers and footers including any existing page numbers” along with Remove all and cancel option. Click on Remove all option.
With these steps, the header and footer will be removed from your entire word document.
There are another situations where you need
Header and Footer in Older version MS Word:
Note: It is not recommended to use the older version of word. We recommend buying Microsoft 365 for the best features.
Video Tutorial:
We provided this article in the form of video tutorial for our reader’s convenience. If you are interested to read, you can skip the video and start reading.
4. How to Insert Header and footer in MS Word?
- Go to Insert and Choose Header to add header or Footer to insert footer. The Design tab will appear on the right side of the Ribbon. Select any one of the styles. You will see a header or footer with a dotted box.

- Then type the desired information into the header or footer.

- When finished, click on Close Header and Footer or Press Esc key.
- Related: 4 Simple methods to make a table in Word
- How to change word document back ground color
5. How to Edit Headers and Footers in MS Word
After closing the Header or Footer, it will be visible but locked. If you want to edit the header or footer simply double-click on the header or footer to unlock and it will allow you to edit.
Design Tab Options
When your document’s Header and Footer are unlocked, then the design tab will appear on the right side of the Ribbon, and various editing options are available.
6. How to remove Header and Footer?
Remove Header or footer from the first Page
If some documents you do not want to show Header or Footer only on the first-page select “Different first-page”. For Example, if you are numbering pages, you want to start numbering from the second page and want to hide the first page then use the “Different first-page” option.

Remove the Header or Footer from the Entire document
If you want to delete all information contained in the header or footer, click on the Header command and click remove header from that menu appears. Also, you can remove the footer using the footer command.

- You May Also Like: Quick Guide to create table of contents in Word documents
- How to password protect word document
Conclusion:
We think now you might know complete details about Header and footer in Microsoft 365 and older versions. Once again we recommend to buy Microsoft 365. Because it gives you many features.
I hope you like my article about Header and Footer in MS word. If you like it, do me a favor by sharing it with your friends. Please follow whatvwant on Facebook, Twitter and YouTube.
How to insert, edit, remove header and footer in Microsoft 365 and MS Word- FAQ
Is it possible to add different footer for each page?
Yes, it is possible. You can make footer different for each page by setting different footer for odd & even pages. So they will have different footer for each page alternatively.
Is it possible to add header only for first page?
Yes, it is possible. If you want you can add header for first page only. And you can leave other pages without header.
Will header and footer print on the paper?
Yes, header and footer not only limited to digital copy but they also appear in the hard copy means paper once you inserted them in your word documents.
How to unlock header and footer in Word document?
If you want to unlock header and footer there are two ways. If it is in older version MS Word then give double click on header or footer then they will unlock in order to edit.
If it is in Microsoft 365 then you can see the header option at the top left side of the document and footer option at bottom left side. Click on that header or footer to unlock.
Microsoft Word or MS Word (officially called word) is a graphical word processing program by Microsoft Corporation. The purpose of MS Word is to permit the users to type and save documents. Same to other word processors, it has various helpful tools to make documents.
Sometimes the data you include in your document is best displayed in columns. Not only can columns help improve readability, but some varieties of documents—like newspaper articles, newsletters, and flyers—are often written in column format. Word also allows you to regulate your columns by adding column breaks.
Adding Headers and Footers
Headers and footers will help keep long documents organized and make them easier to read. Text entered within the header or footer will appear on each page of the document. Let us see a demonstration.
Step 1. Click on the Insert menu.
Step 2. Go under the Header & Footer column.
Step 3. Click on the Header and choose any of the following options in the drop-down menu.
The Design tab will appear on the Ribbon, and thus the header or footer will appear within the document. Here you can place Date & Time, Picture Clip, Page number Art and other desired information.
When you have finished editing, click Close Header and Footer within the Design tab, or hit the Esc key.
After you close the header or footer, it’ll still be visible, but it’ll be locked. We can edit it again, you just have to double-click anywhere on the header or footer margin, and it’ll become unlocked for editing
Steps to insert the time or date into a header or footer:
Step 1. Click on the Date and Time option under the Insert category of the Design Tab.
Step 2. Select a date format within the dialog box that appears.
Step 3. Place a checkmark within the Update Automatically box if you’d like it to always reflect the present date. Otherwise, it’ll not change when the document is opened on an old date.
Step 4. Click OK Then date & time will appear in the Word document.

Headers and footers are useful for adding things such as page numbers, dates, file names, and disclaimers to documents. Word allows you to add headers and footers with built-in, ready-made layouts or add your own custom headers and footers.
NOTE: We used Word 2013 to illustrate this feature.
To add a header or footer, click the “Insert” tab.

For this example, we’ll start with adding a header, so, in the “Header & Footer” section of the “Insert” tab, click “Header.”
A list of built-in header layouts display on the drop-down menu. Scroll down for additional layouts and select a ready-made header layout from the list.
The pre-defined layout is inserted into the header, which is marked by a dashed line and a “Header” tag.
Most ready-made headers contain some placeholder text. In the ready-made header we chose, the document title from the advanced properties was inserted into our header. You can keep the placeholder text or replace it with your own text.
Notice that the text in the main body of your document is grayed out. You cannot edit the text in the body of the document while you are editing the header or footer. When we’re done editing the header and footer, we’ll show you how to go back to editing your document.
Notice, also, that an extra tab displays when you are editing your header. A “Design” tab is added at the right end of the ribbon tab bar with a heading of “Header & Footer Tools” above the tab.
NOTE: You may not be able to see the full “Header & Footer Tools” heading above the “Design” tab, depending on the current width of the Word window.
Once you’ve set up your header, you can easily jump to the footer to set it up. To do this, click “Go to Footer” in the “Navigation” section of the “Design” tab under the “Header & Footer Tools.”
You can insert items such as page numbers in your footer using the “Page Number” button in the “Header & Footer” section of the “Design” tab under the “Header & Footer Tools” heading. If you want to insert a ready-made, or built-in, footer, use the “Footer” button above the “Page Number” button to access a list of pre-defined footer layouts, similar to the list available for the header.
When you’re finished setting up your header and footer, you can go back to editing your document by clicking the “Close Header and Footer” button in the “Close” section of the header and footer “Design” tab. You can also double-click on the grayed out text in the main body of the document to return to editing it.
NOTE: If you use the “Close Header and Footer” button, you are returned to where you left off. However, if you double-click on the body text of your document to return to editing it, you are returned to the beginning of your document.
If you want to insert an empty header so you can add your own text or images to it without having to remove placeholder text, click the “Header” button in the “Header & Footer” section of the “Insert” tab and select “Edit Header” from the drop-down menu.
NOTE: You can do the same thing for the footer using the “Footer” button.
Now, you can add your own text and/or images to your header.
Format the text or images however you like, such as centering the line or making the text bold and applying a bigger font.
We made the text in our header bigger than the text in the body of the document, bold, and we added a line below the paragraph. Again, click the “Close Header and Footer” button in the “Close” section of the header and footer “Design” tab to go back to editing your document, or double-click on the grayed-out text in your document.
Headers and footers can be different for odd and even pages. To make different headers and footers for odd and even numbered pages, click the “Different Odd & Even Pages” check box in the “Options” section of the “Design” tab under the “Header & Footer Tools” heading so there is a check mark in the box. The “Header” tag under the dashed line in the header section becomes either “Odd Page Header” or “Even Page Header,” depending on which page you are currently on in your document. Use the “Previous” and “Next” buttons in the “Navigation” section of the “Design” tab to jump between the odd and even headers or footers.
NOTE: The “Different Odd & Even Pages” option is a document-level setting. You can only apply it to the entire document. So, if you turn on the option and your header and/or footer in one or more sections is the same on both odd and even pages, you’ll have to insert the same text twice for each section
When inserting page numbers into the header or footer, you can omit the page number from the first page of your document and start a new section with an odd page number. You can also create multiple headers and footers in a single document.
READ NEXT
- › How to Customize a PowerPoint Handout Layout
- › How to Add Document Properties to a Header or Footer in Microsoft Word
- › How to Edit a Header and Footer in PowerPoint
- › How to Reference Text from Other Documents in Microsoft Word
- › How to Customize or Remove the Headers and Footers of a Notepad Text File
- › How to Create a Book in Microsoft Word
- › How to Have Different Headers and Footers Per Page in Google Docs
- › BLUETTI Slashed Hundreds off Its Best Power Stations for Easter Sale
The header is a part of a document located at the top margin of each page. It’s useful for showcasing additional information like the title, author, page number, or objects and images that add design to your document.
Headers can also help keep documents organized and more readable. Setting up professional-looking headers in MS Word is like a walk in the park for most users.
However, even experienced users may have difficulties when documents require more than one header, such as with corporate or academic documents. The cover page, the main text, and other pages in different orientations can all have dissimilar headers.
Fortunately, MS Word offers several ways to add different headers on each page.

- Using preset header options
- By inserting section breaks
We’ll walk you through each of these methods step by step in the tutorial down below. Don’t feel intimidated, as we’ve made this article with beginners in mind! We’ve also made sure to provide pictures for each step to make sure you can follow us every step of the way.
Without further ado, here’s everything you need to know to have a different header on each page in MS Word.
Method 1: Using the Preset Header Options
In this method, we’ll show you how to access the Design tools of the header to configure two different header options. The first option is helpful if you simply want your first page to have a different header from the rest of the document. The other option allows you to set up two different headers for each odd and even pages.
Here are the steps to access the Design tools of the header.
Step 1: Open up a Word file.
Before we get started, let’s open up a Word file. Feel free to use your own personal document if you already have one prepared. You can also choose to create a new blank document. We won’t really need any content in the main body, but make sure to have a document with at least 2-3 pages to see how each header option works. You can insert random text or press the Enter key multiple times to meet this number of pages.

Step 2: Access the header section.
Once our document is ready, go to the Insert tab and click the Header drop-down menu. Then, select the Edit Header option found at the bottom of the menu.

Alternatively, you can double-click the top margin of your document to access the header section.

Step 3: Access the header design tools.
Now that the header section is enabled, you will be directed to the Header & Footer Design tab. Here, you’ll see two options to choose from: Different First Page and Odd & Even Pages.

If you want the first page to have a different header from the rest of your document, tick the Different First Page checkbox.

On the other hand, tick the checkbox next to Odd & Even Pages if you want the odd-numbered pages to have a different header from the even-numbered pages.

Step 4: Insert content into your header.
Insert your content accordingly to each header. Once done, double-click outside the header section to go back to the main text or press the Close Header and Footer button.
Congratulations! You’ve successfully set up a different header on each page in MS Word.
Method 2: By Inserting Section Breaks
Section breaks identify the point at which a section ends and another one starts. Having section breaks help in organizing the different sections of your document. This way, you’ll find it easier to configure different headers for each page.
Here’s how you can insert section breaks in your document.
Step 1: Open up an MS Word file.
Before anything else, we’ll have to open up an MS Word file. If you have one already open, go ahead and use that. Don’t worry about ruining your document, as we’re only making changes in the header section. After all, any unwanted changes can easily be undone by simply pressing the CTRL + Z keys on your keyboard.

Step 2: Insert section breaks.
Once our document is ready, move your cursor to the start of the page that you want in a different header and click on it. Then, go to the Layout tab and click the Breaks drop-down menu. Finally, select the Next Page option in the selection.
For this example, we’ll insert the section break between the first and second paragraph. So, we’ll place our cursor right at the start of the second paragraph and insert a section break there.

Now, place your cursor at the end of the section and repeat the process. You’ll notice that MS Word inserted paragraph spaces before and after the section and moved it separately to a page.

Step 3: Access the header section.
Go to the Insert tab and click the Header drop-down menu. Then, select Edit Header from the list of options.

Alternatively, you can simply double-click the top margin of the page to access the header section.

Step 4: Unlink section header.
In order to set up a different header for the page we’ve recently created, we’ll need to unlink it to the previous header format. So, with your cursor still inside the header section, click on the Link to Previous button found on the Header & Footer Design tab.

You can now insert your content in the header section. Take note that you’ll have to repeat the same process for each section that you want to have a different header.
To go back to the main text, simply double-click outside the header or press the Close Header and Footer button.
There you have it! You’ve just inserted section breaks to have a different header on each page in MS Word.
Editing and Deleting Different Headers
If you’ve come to the point that you need to edit or delete different headers, don’t worry because doing so is as easy as 1-2-3.
To edit or delete different headers, all you need to do is access the Header and Footer Design tab using the steps discussed above. Remember that your headers are different because they are in different sections. So, each header section is accessible and should not affect the others as you edit or delete them.
Conclusion
That wraps it up for today! Hopefully, we’ve helped you figure out how to have a different header on each page in MS Word. Here’s a brief summary of what we’ve covered in this article.
Learning to add different headers in a single document proves to be an essential skill. Most academic and corporate documents usually call for more than one header per document.
In this guide, we’ve listed down two methods to have a different header on each page in MS Word.
The first method makes use of the preset header tools provided by MS Word.
The second method utilizes section breaks to accomplish the task.
We hope you’ve found this article helpful!