
Insert text or data from another document without using cut-and-paste
Updated on November 21, 2021
What to Know
- Insert a document within Word by going to Insert > Object > Text from File. Select a file and choose Insert.
- Insert a portion of a document by going to Insert > Object > Text from File and selecting a file. Adjust Range to choose a portion.
A common method to insert text into a Microsoft Word document is to cut and paste it. This works well for short pieces of text. When you want to insert an entire document or a lengthy section of a document, there’s a quicker solution than the cut-and-paste method. Instructions in this article apply to Word for Microsoft 365, Word 2019, Word 2016, Word 2013, and Word 2010.
Add Another Document to a Word Document
Word can add an entire document into your work in a few quick steps.
-
Position the cursor where you want to insert the document.
-
Go to the Insert tab.
-
In the Text group, select the Object drop-down arrow.
-
Select Text from File.
-
In the Insert File dialog box, select a document file.
-
Choose Insert.
-
The document is inserted, beginning at the cursor location.
Add a Portion of a Document to a Word Document
If you don’t want to add the entire contents of the file into your Word document, choose which parts of the document or worksheet that you want to insert.
-
Place the cursor where you want to insert the text.
-
Select Insert > Object > Text from File.
-
In the Insert File dialog box, select a document file.
-
Select Range.
-
In the Set Range dialog box, enter the bookmark name from the Word document, or the range of cells from the Excel worksheet.
-
Select OK.
-
In the Insert File dialog box, select Insert.
-
The portion of the document is inserted, beginning at the cursor location.
Insert a Linked Text in a Document
If the text from the document you’re inserting might change, use linked text that can be updated easily. The linked text option offers a third method to insert a document that updates the document automatically if the original changes.
-
Position the cursor where you want to insert the link to the document.
-
Go to the Insert tab.
-
Select the Object drop-down arrow.
-
Choose Object.
-
In the Object dialog box, go to the Create from File tab, then select Browse.
-
In the Browse dialog box, choose the file to insert, then select Insert.
-
In the Object dialog box, select Display as icon to display the inserted file as a clickable icon, rather than display the first page of the file.
-
Select OK to insert the linked file
How to Update Linked Text
Because linked data is stored in the source file, linked objects can be updated if the source is changed.
If the text changes in the original document, select the linked text object (the entire text of the insert will be selected), then press F9. This checks the original and updates the inserted text with the changes made to the original.
Only linked text can be updated. Because embedded objects become part of the Word file, these objects are not connected to the source file and do not update.
Thanks for letting us know!
Get the Latest Tech News Delivered Every Day
Subscribe
Содержание
- Способ 1: Сочетание клавиш
- Способ 2: Контекстное меню
- Способ 3: Меню «Вставить»
- Вопросы и ответы

Способ 1: Сочетание клавиш
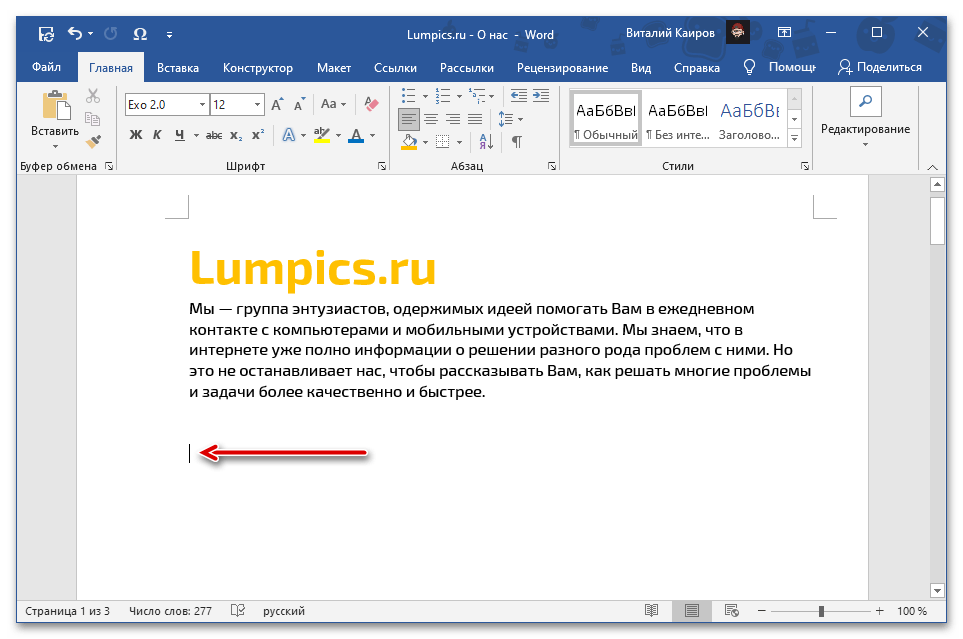
Microsoft Word поддерживает большинство стандартных для настольных операционных систем Windows и macOS сочетаний клавиш, одним из которых и следует воспользоваться для вставки предварительно скопированного текста. Просто установите указатель курсора (каретку) в нужное место документа и воспользуйтесь одной из представленных ниже комбинаций.
- «Ctrl + V» — Windows
- «Command + V» — macOS
Читайте также: Горячие клавиши для работы в Word
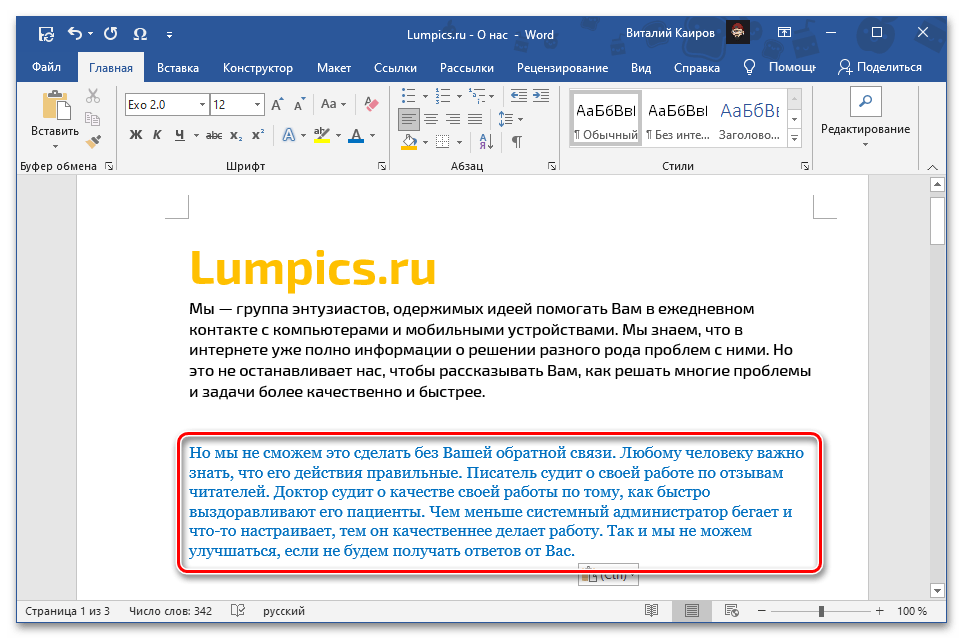
Содержимое буфера обмена будет вставлено в документ Ворд в том же виде, в котором оно было изначально, за исключением разве что неподдерживаемых программой объектов и стилей. Если такой вариант вас не устраивает, ознакомьтесь со следующими способами.
Читайте также: Горячие клавиши для работы в Windows / macOS
Способ 2: Контекстное меню
Другим возможным методом вставки скопированного текста является обращение к контекстному меню, вызываемому нажатием правой кнопки мышки (ПКМ) в нужном месте документа. В отличие от рассмотренного выше решения, такой подход предоставляет до четырех различных вариантов, определяющих конечный вид исходной записи. Рассмотрим каждый из них.
Примечание: Наличие в списке доступных всех или только некоторых из обозначенных ниже пунктов определяется содержимым буфера обмена. То есть для скопированного текста и, например, текста с графическими или какими-либо иными объектами оно может и наверняка будет отличаться.
- «Сохранить исходное форматирование» — скопированный текст будет вставлен в том же виде, который он имел изначально;
- «Объединить форматирование» — изначальное форматирование будет объединено с таковым в текущем документе;
- «Рисунок» — запись будет вставлена в виде графического объекта, непригодного для редактирования обычными средствами, но с ним можно работать как с изображением, например, изменив размер, положение или цвет;

Читайте также: Как изменить рисунок в Microsoft Word
- «Сохранить только текст» — из скопированного содержимого будут исключены все отличные от текста объекты, такие как рисунки, фигуры, таблицы (границы), ссылки и т. д, а его форматирование — полностью очищено.
Читайте также: Как удалить сразу все ссылки из документа Ворд
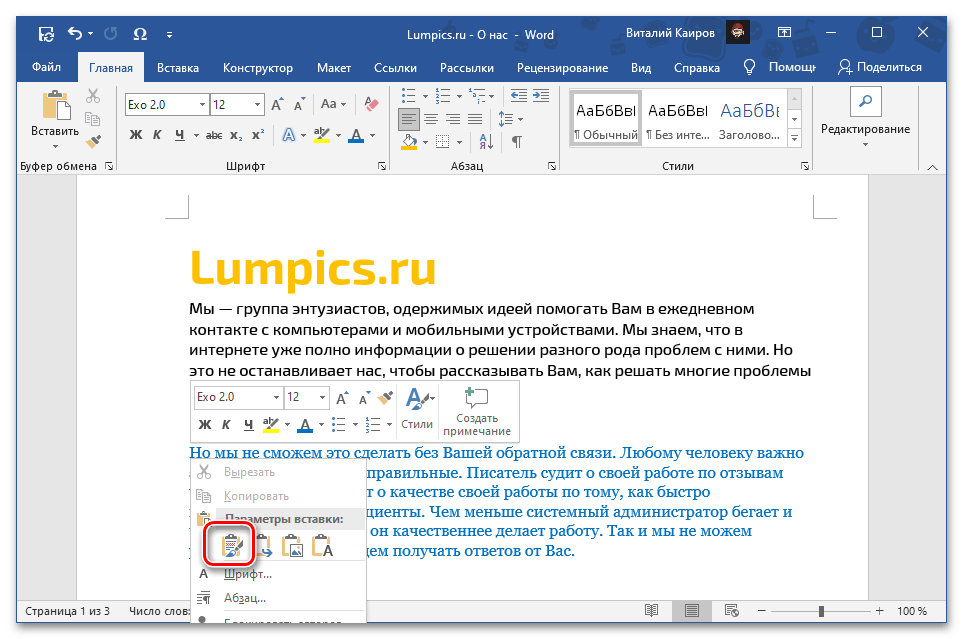
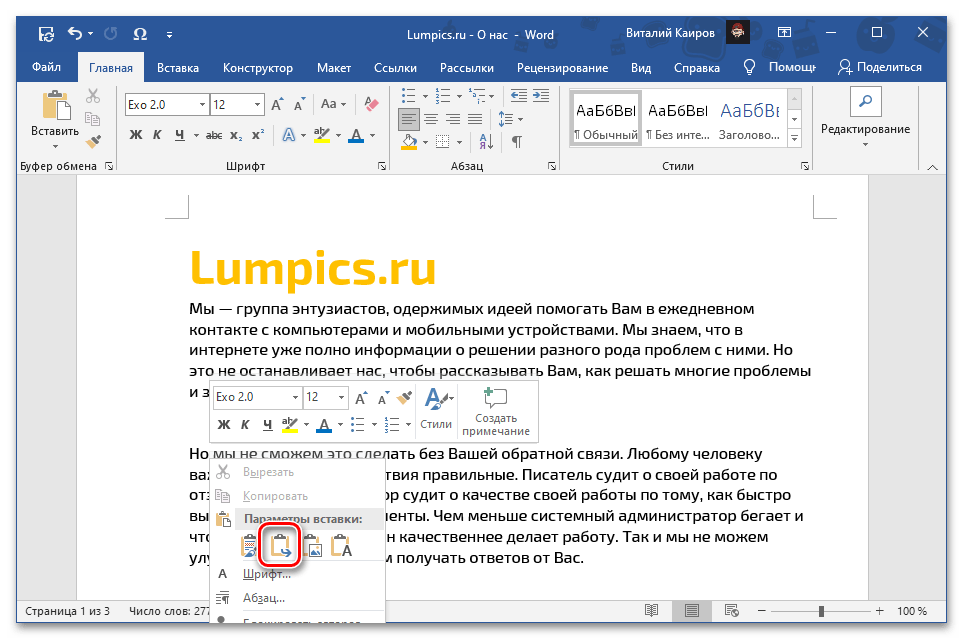


Конечный результат, то есть вид, который приобретет скопированный текст после его вставки посредством каждого из обозначенных параметров, продемонстрирован на соответствующих скриншотах выше.
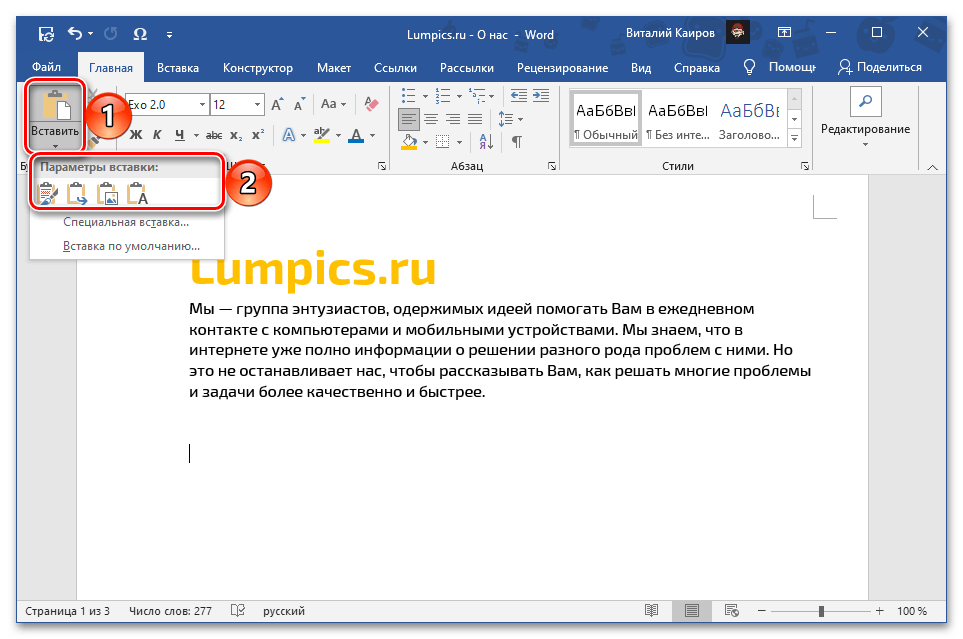
Способ 3: Меню «Вставить»
Наиболее очевидным, но далеко не таким востребованным среди пользователей методом вставки является использование отдельного инструмента текстового редактора – кнопки «Вставить» из группы «Буфер обмена» во вкладке «Главная». Если нажать по ее значку, будет выполнена обычная вставка, аналогичная таковой в части «Способ 1» настоящей статьи, где использовалось сочетание клавиш. Если же нажать по самой надписи «Вставить» или расположенной под ней указывающей вниз стрелкой, на выбор будут доступны следующие пункты, аналогичные таковым в контекстном меню:
- «Сохранить исходное форматирование»;
- «Объединить форматирование»;
- «Рисунок»;
- «Сохранить только текст».

Читайте также: Как форматировать текст в Ворде
Значение каждого из этих параметров было рассмотрено в предыдущей части статьи. Особого внимания заслуживает еще один из них, выделенный отдельным пунктом и предоставляющий ряд дополнительных возможностей. Это «Специальная вставка», которая также вызывается сочетанием клавиш «Alt+Ctrl+V» и предоставляет следующие варианты:

Обратите внимание! Наличие в меню специальной вставки тех или иных пунктов из нижеперечисленных зависит от содержимого буфера обмена, то есть для скопированного текста, текста с объектами (таблицы, фигуры, рисунки, элементы разметки и т. д.) и только объектов их количество может и наверняка будет отличаться.
- «Документ Microsoft Word (объект)» — объект, который визуально напоминает текстовое поле и содержит в себе скопированную запись, а при двойном клике левой кнопки мышки (ЛКМ) открывается в виде отдельного документа с таким же содержимым. Работает по принципу гиперссылки;

Читайте также: Как вставить ссылку на документ в Ворде
- «Текст в формате RTF» — Rich Text Format, проприетарный межплатформенный формат хранения текстовых документов с форматированием;
- «Неформатированный текст» — обычный текст с очищенным исходным форматированием;
Читайте также: Как очистить форматирование в документе Word
- «Метафайл Windows (EMF)» — универсальный формат векторных графических файлов, который поддерживается некоторыми Windows-приложениями, в первую очередь, графическими редакторами по типу GIMP (с предварительной растеризацией) и Inkscape;
Читайте также: Как вставить картинку в Майкрософт Ворд
- «Формат HTML» — если копировался текст данного типа (например, с веб-сайта), он будет вставлен с сохранением формата (заголовки/подзаголовки, тип, размер, начертание и прочие параметры шрифта и т. д.);

Читайте также: Как конвертировать HTML-файл в документ Word
- «Текст в кодировке Юникод» — преобразует кодировку в привычную для текстовых документов Ворд, если ранее она отличалась. В ряде случаев это может негативно сказаться на форматировании и общем отображении содержимого.
Читайте также: Как изменить кодировку текстового документа Word


Примечание: Использование последнего пункта в меню кнопки «Вставить» — «Вставка по умолчанию», — открывает окно «Параметров» текстового редактора, в котором доступна возможность настройки стандартного поведения этой функции. Обратившись к данному разделу, можно сделать так, чтобы при обычной вставке в документ добавлялся, например, только текст с очисткой исходного форматирования («Сохранить только текст»), а не с его сохранением.

То, как будет выглядеть скопированный текст после вставки с помощью каждого из обозначенных выше параметров, продемонстрировано на соответствующих им изображениях выше.
Еще статьи по данной теме:
Помогла ли Вам статья?
In this chapter, we will discuss how to insert text in Word 2010. Many times it is required to go back and insert additional text in an existing line. Microsoft Word provides two ways to insert text in existing text and we will show how to use both the methods of inserting text −
Insert and Add Text
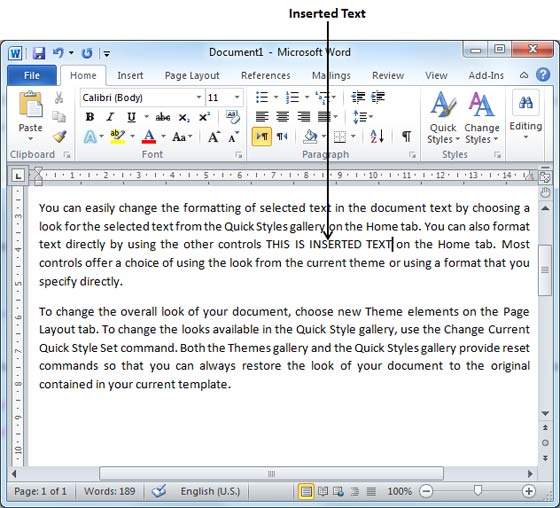
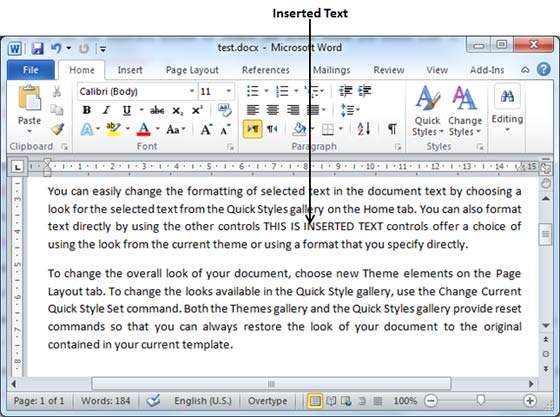
First we will see how inserted text will be added into the existing content without replacing any existing content.
Step 1 − Click the location where you wish to insert text; you can also use the keyboard arrows to locate the place where the text needs to be inserted.
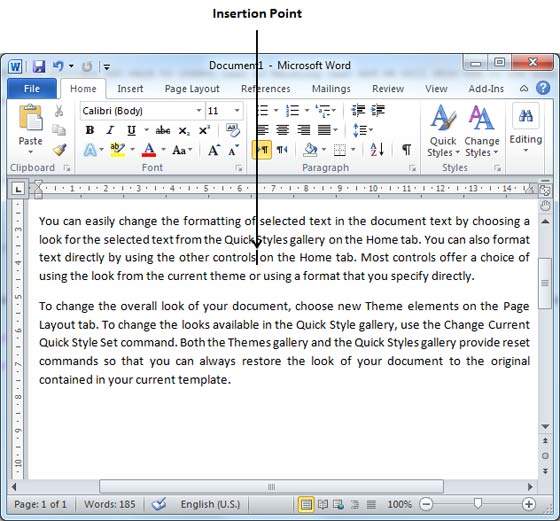
Step 2 − Start typing the text that needs to be inserted. Word inserts the text to the left of the insertion point, moving the existing text to the right
Insert and Replace Text
In the Insertion mode, text will be added into the existing content but same time it will over write all the content which comes in its way.
Step 1 − Right-click the status bar and select the Overtype option from the displayed menu.
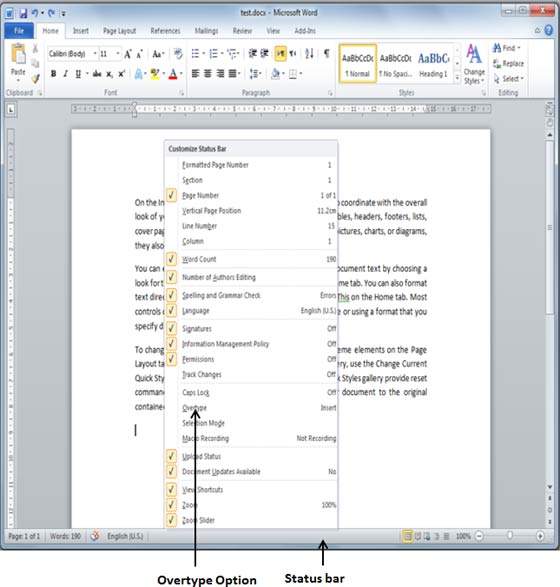
When you select the Overtype option, the status bar will show the insert mode as shown below −
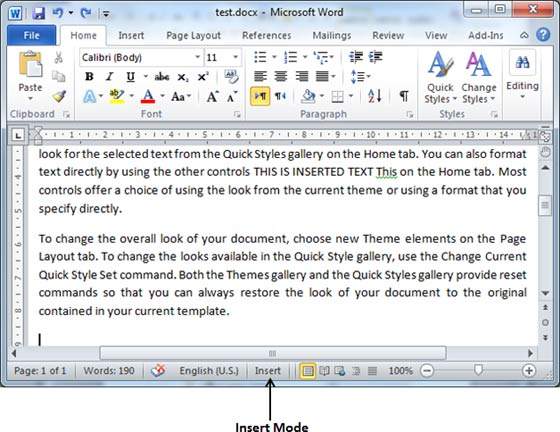
Step 2 − Click on the Insert text available at the status bar and it will switch to the Overtype mode as shown below −
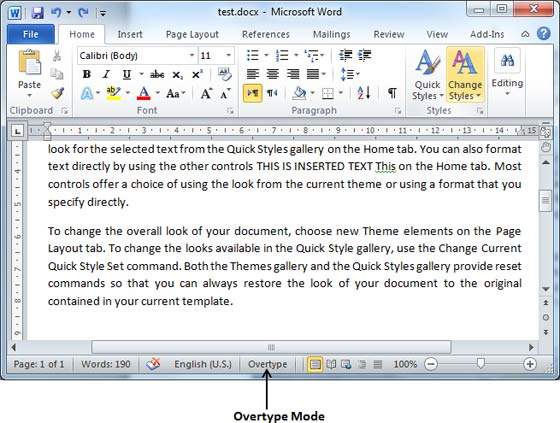
Step 3 − Now click the location where the text needs to be inserted or you can use the keyboard arrows to locate the place where the text needs to be inserted.
Step 4 − Start typing the text that needs to be inserted. Word will replace the existing text with the newly typed text without moving the position of the exiting test.
Note − Microsoft Word 2010 disabled the functionality of the Insert key and it does nothing, so you will have to follow-up with the above mentioned procedure to turn-on or turn-off the Insert mode.
We’ll talk about how to Insert Text in MS Word in this chapter. A lot of the time, you have to go back and add more text to an existing line. There are two ways to insert text to existing text in Microsoft Word, and we’ll show you how to use both of them.
Table of contents
- Insert Text in MS Word
- What is Inserting Text in MS Word?
- What is the Use of Inserting Text?
- How to Insert Text Quickly in Your Word Document
- Insert Text Using Textbox
- Summary
What is Inserting Text in MS Word?
Inserting text is one of the many things that MS-Word can do. For example, if a user is writing something like an article or assignment, he or she might realize that they forgot to write something in the middle, at the beginning, or anywhere else in the document. So, in this case, the feature that comes in very handy is Inserting text, which will do the work for the user.
What is the Use of Inserting Text?
The use of Inserting text in MS Word it has the ability to position the cursor using the mouse or arrow keys at any point in a document and begin typing.
The insert text function permits you to add characters to your document without erasing your previous work.
How to Insert Text Quickly in Your Word Document
Time needed: 2 minutes.
Here are the basic steps for inserting text or making a new document in Word;
- Insert Text in Microsoft Word with Text Replacement
Step 1: First open MS-Word on your PC.
Step 2: Now, Open the document or create a new one in which you want to perform this operation.
Step 3: Now, Put the cursor where you want to insert the text.
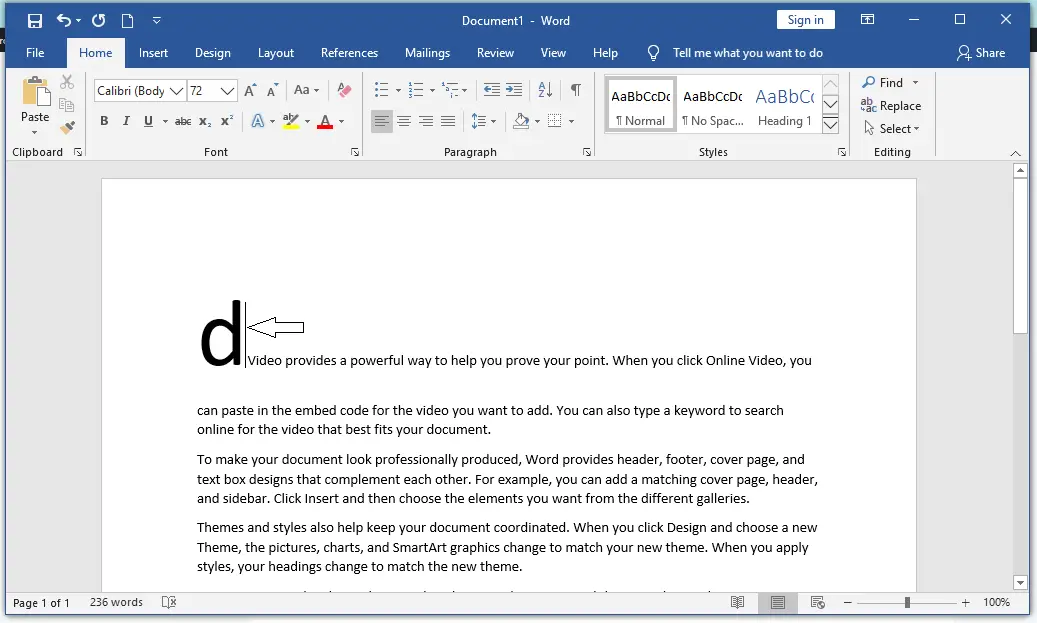
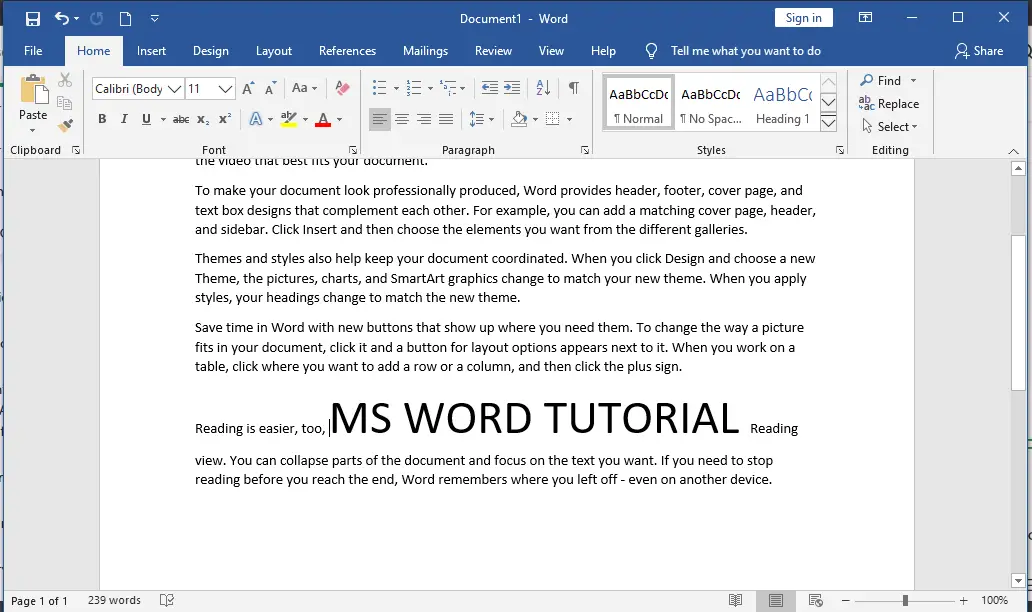
Step 4: Now, Write or type the text which needs to be inserted.
Like here we insert MS Word Tutorial. As shown in the figure below:
Step 5: So, the text is inserted successfully.
- Insert Text in Microsoft Word with Text Replacement
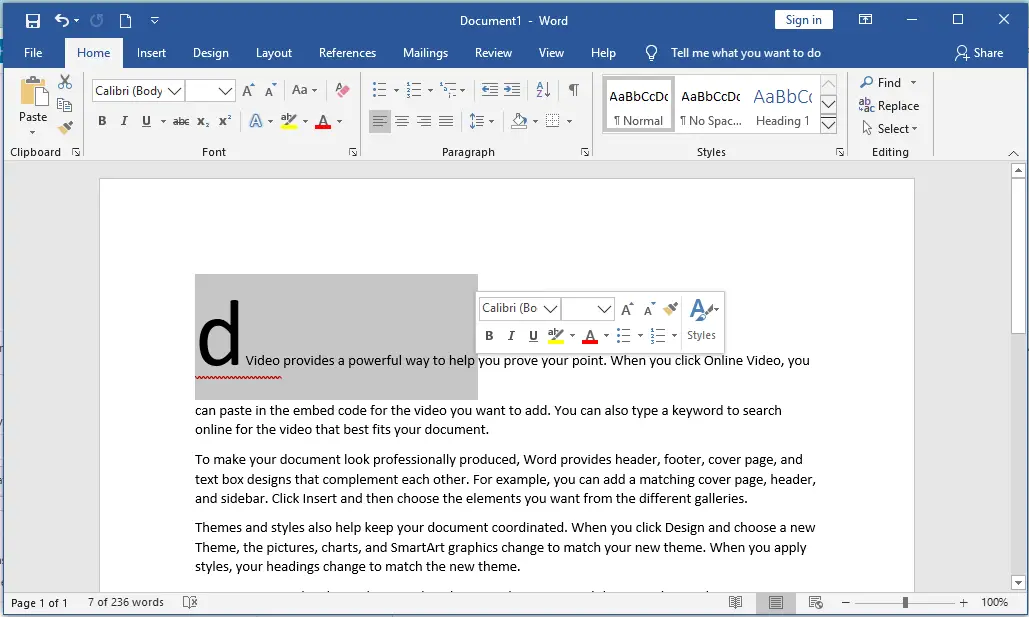
Here are some examples on how to Insert Text in MS Word with replacing some text. Sometimes, a certain part of the whole document or some text needs to be changed to something else.
1. Open the document you wish to perform this action on, or create a new one.
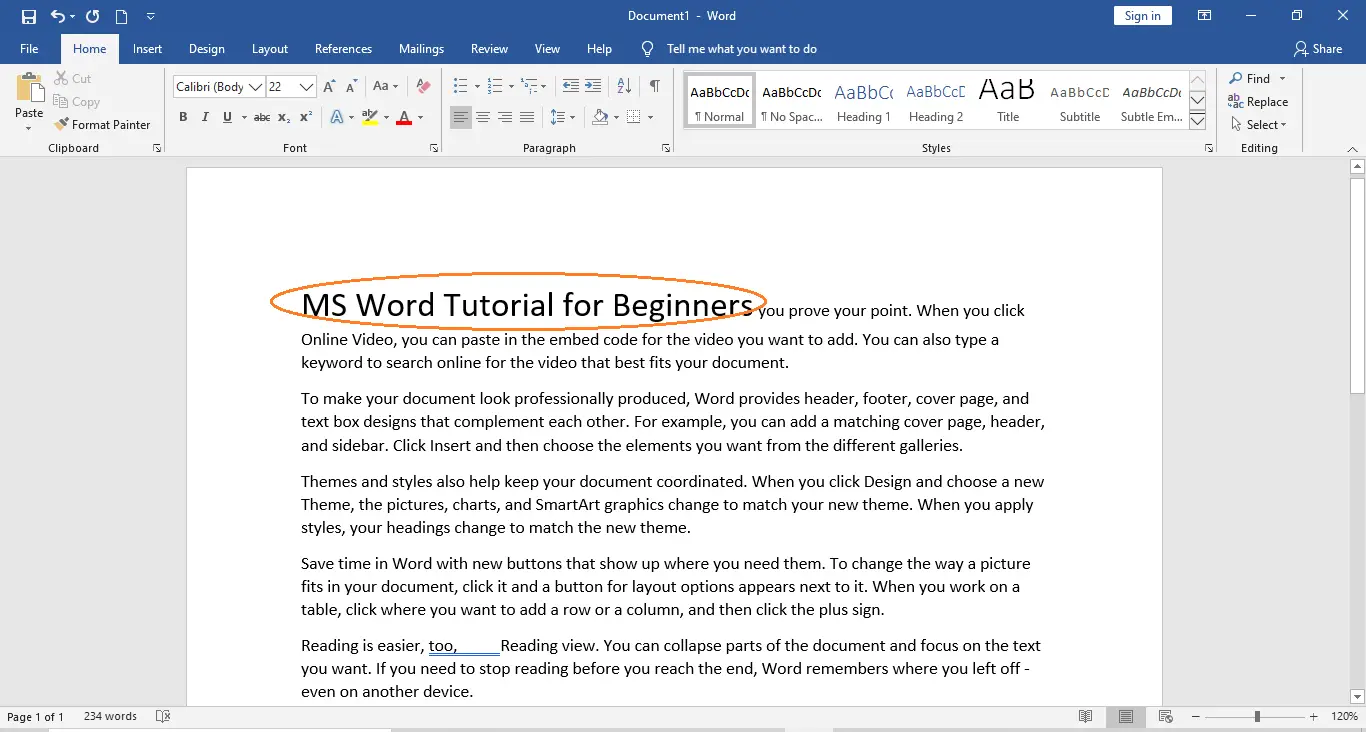
2. Now, choose the text you’d like to change.
3. Now, press the “Backspace” key and start typing the text you want to add. Or, you can just start typing the text you want to insert, and the “selected text by default” feature will go away or be deleted when you do.
Here, we replace the first paragraph with “MS Word Tutorial for Beginners“.
Insert Text Using Textbox
The MS Word allows us to Insert Text boxes anywhere within the document where required. This is another excellent tool provided by Microsoft Word.
A text box is an object you can add to your document that lets you put and type text anywhere in your file. Text boxes can be useful for drawing attention to specific text and can also be helpful when you need to move text around in your document
Now, Open the document or create a new one in which you want to perform this operation.
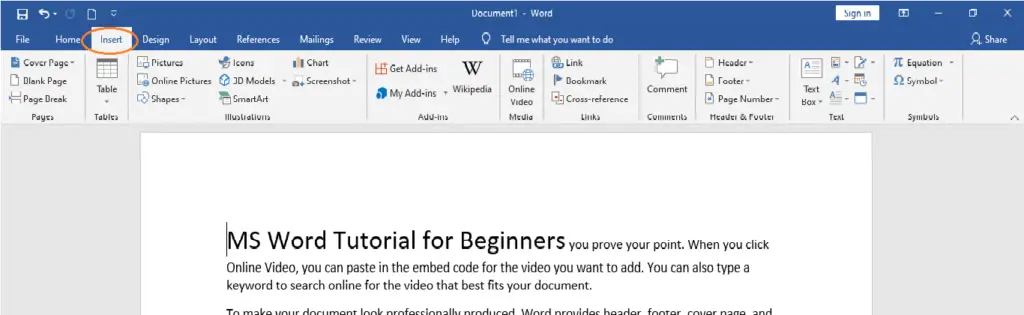
Now, go to “insert tab” above. (As shown in the image below)
Now, In the insert tab, there is a section called “Text“.
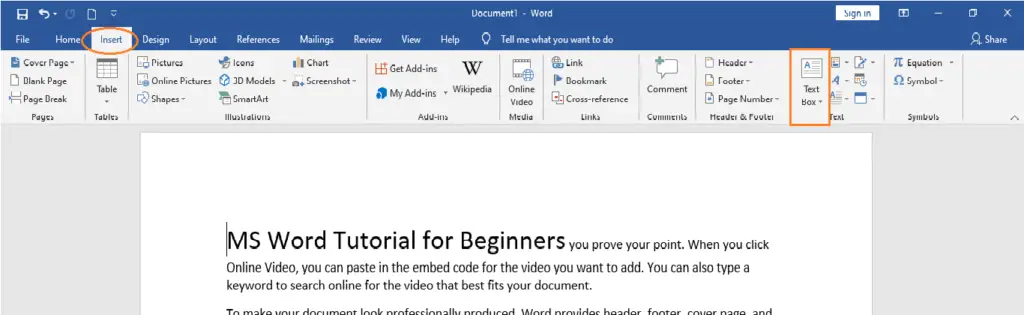
Now, In section Text, there is an option called “Text box“. Click on that option of Text box. Then, Select one of the text boxes available as per you choice. Here, for example, a simple text box has been selected.
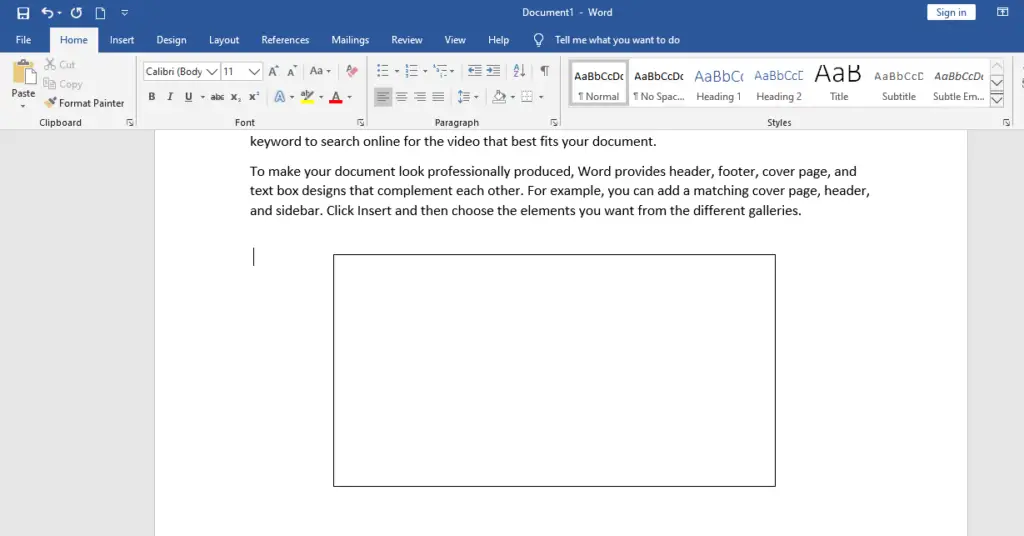
Now, insert text or type anything that you want.
Summary
In summary, we’ve talked about Inserting text in MS Word as well as what those terms mean. Also, we learn different ways to insert text in a document.
We hope this guide helps you as you plan to create a document in MS Word.
PREVIOUS

NEXT

![]()
Download Article
![]()
Download Article
This wikiHow teaches you how to insert the contents of and/or a link to another document into a Microsoft Word document on Windows or Mac.[1]
Steps
-

1
Open a Microsoft Word document. To do so, double-click the blue app that contains or is shaped like a W. Then click File at the top of the screen and Open….
- To create a new document, click New in the file menu.
-
2
Click the place in the document where you want to insert the file.
Advertisement
-
3
Click the Insert tab. It’s at the top of the window.
-
4
Click the
next to Object. It’s in the Text group on the right side of the tool bar at the top of the window.
- On Mac, click Text to expand the group.
-
5
Choose the type of file to insert.
- Click Object… to insert a PDF, image, or another type of non-text file into your Word document. Then click From File… on the left side of the dialog box that opens.
- If you prefer to insert a link to and/or icon of the file, rather than the entire document, click Options on the left side of the dialog box and check Link to File and/or Display as Icon.
- Click Text from File… to insert the text of another Word or text document into the current Word document.
- Click Object… to insert a PDF, image, or another type of non-text file into your Word document. Then click From File… on the left side of the dialog box that opens.
-
6
Select the file to insert.
-
7
Click OK. The file contents, a linked icon, or the text of the file will be inserted into your Word document.


Advertisement
Add New Question
-
Question
I like that I can copy the file and paste to a blank page within another Word file. Is there a way to paste a document that’s more than one page?

Open Microsoft Word. On the top left menu choose Insert. Choose File. Browse through your file system to the file you want. Click on the file name. Choose Insert. For an existing document, place the cursor at the point you want to insert the document, then follow the above instructions. You can also choose a range of pages substituting the final Insert with Range.
-
Question
How do I insert a file into a Word document?
Read and follow the instructions listed in the article above.
-
Question
I need to email a document that is not already in a file. What do I do?
Okay, where is the document? All documents are files. If you don’t like the current format, save it to another format, or copy the material into another file in a standard format. If desperate, take a screenshot by pressing the PrintScreen key and pasting it into a Word document. Save it and you’ll have a file. If you mean the document is a physical piece of paper and not on your computer, you can either scan it or just take a picture of it with your phone.
See more answers
Ask a Question
200 characters left
Include your email address to get a message when this question is answered.
Submit
Advertisement
Video
Thanks for submitting a tip for review!
About This Article
Article SummaryX
1. Open a Word document.
2. Click a place in the document.
3. Click Insert.
4. Click the Object drop-down.
5. Choose the type of file to insert.
6. Select a file to insert.
7. Click OK.
Did this summary help you?
Thanks to all authors for creating a page that has been read 455,641 times.
Is this article up to date?
Download PC Repair Tool to quickly find & fix Windows errors automatically
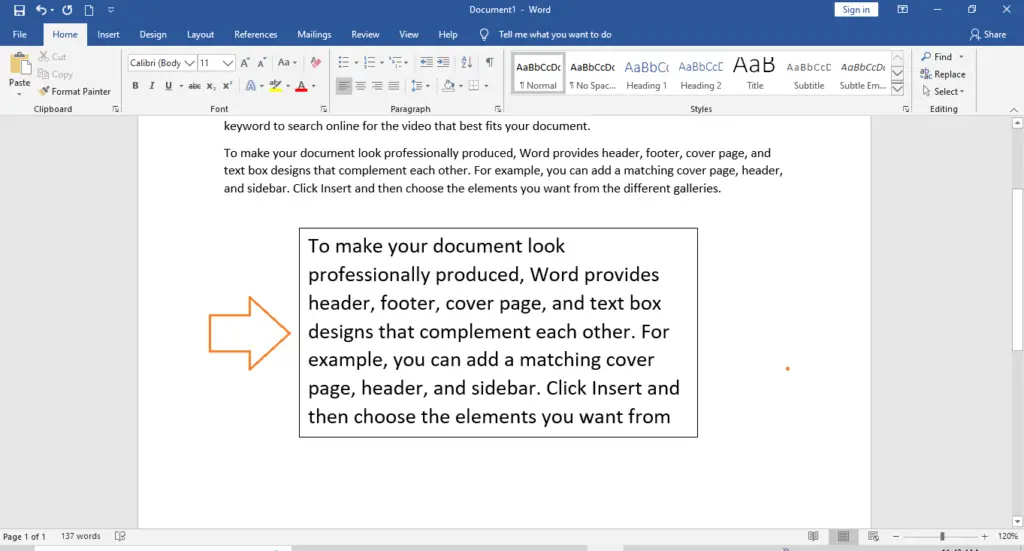
The Shape feature in Microsoft Word allows users to add ready-made shapes to the document, such as Circles, rectangles, and arrows. When the shape is selected, the color and body can be customized to the look you want.
Adding a shape in a Microsoft Word document is easy, but what if you want the text to be inside it. Microsoft Word has a feature that can fit text inside a shape. The text fill shape is like a textbox where you can format the text inside the shape; you can increase and decrease the size of the text, Underline, Bold, italic, and change the font and color of the text. Placing a text into shape is useful when creating flowcharts, network diagrams, and mind maps.
To insert Text into a Shape in Word, follow these steps:
- Open Word document
- Insert Shape
- Right-click and click Add text
- Type or paste the text into the shape
- Click outside the shape
- Save document and exit.
In this tutorial, we will explain how to insert text into a shape; follow the steps below.
Launch Microsoft Word.
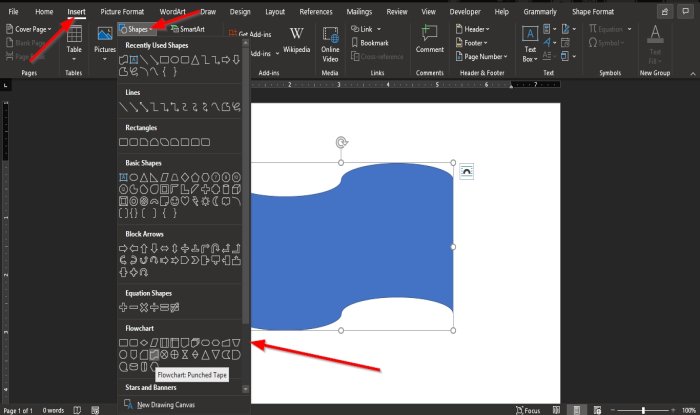
Click the Insert tab and click the Shapes button in the Illustration group.
Choose a shape from the list.
Please draw the shape into the document by dragging the mouse and release it when you reach the size you want.
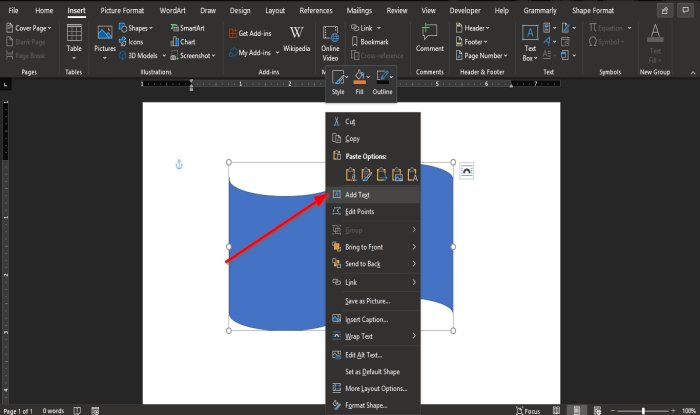
Right-click the shape and click Add text from the context menu.

Enter the text into the shape.
Click outside the shape.
Now, we have a text inside the shape.
You can also format the text inside the shape by changing the font, increasing and decreasing the size, changing the style to underline, italic and bold, and change the color to what you want.
We hope this tutorial helps you understand how to insert text into a shape in Microsoft Word.
Now read: Best Invoice Templates for Word Online to create Business Invoices for free.
Shantel has studied Data Operations, Records Management, and Computer Information Systems. She is quite proficient in using Office software. Her goal is to become a Database Administrator or a System Administrator.
Below is a string which I have
    String def = "R. (12) Blessed the people the Lord has chosen to be his own.rn"
            + "Blessed the nation whose God is the LORD,rn"
            + "the people he has chosen for his own inheritance.rn" + "From heaven the LORD looks down;rn"
            + "he sees all mankind.rn" + "R. Blessed the people the Lord has chosen to be his own.rn"
            + "From his fixed throne he beholdsrn" + "all who dwell on the earth,rn"
            + "He who fashioned the heart of each,rn" + "he who knows all their works.rn"
            + "R. Blessed the people the Lord has chosen to be his own.rn" + "Our soul waits for the LORD,rn"
            + "who is our help and our shield,rn" + "For in him our hearts rejoice;rn"
            + "in his holy name we trust.rn" + "R. Blessed the people the Lord has chosen to be his own.";
I am using the Apache POI library to insert this string into a word document
XWPFParagraph paragraph8 = document.createParagraph();
XWPFRun run8 = paragraph8.createRun();
run8.setText(def);
I want the text in the word in the below format
R. (12) Blessed the people the Lord has chosen to be his own.
Blessed the nation whose God is the LORD,
the people he has chosen for his own inheritance.
From heaven the LORD looks down;
he sees all mankind.
R. Blessed the people the Lord has chosen to be his own.
From his fixed throne he beholds
all who dwell on the earth,
He who fashioned the heart of each,
he who knows all their works.
R. Blessed the people the Lord has chosen to be his own.
Our soul waits for the LORD,
who is our help and our shield,
For in him our hearts rejoice;
in his holy name we trust.
R. Blessed the people the Lord has chosen to be his own.
But I am getting it as a paragraph
R. (12) Blessed the people the Lord has chosen to be his own. Blessed the nation whose God is the LORD, the people he has chosen for his own inheritance. From heaven the LORD looks down; he sees all mankind. R. Blessed the people the Lord has chosen to be his own. From his fixed throne he beholds all who dwell on the earth, He who fashioned the heart of each, he who knows all their works. R. Blessed the people the Lord has chosen to be his own. Our soul waits for the LORD, who is our help and our shield, For in him our hearts rejoice; in his holy name we trust. R. Blessed the people the Lord has chosen to be his own.

To insert an object, click Object on the Insert tab.
Contents
- 1 Where is the Insert Object tool in Word?
- 2 How do you insert an object in Word?
- 3 Where is the insert object in Word o365?
- 4 What is insert in MS Word?
- 5 How do I open an OLE file in Word?
- 6 How do you insert an object?
- 7 How do I insert multiple objects in Word?
- 8 What are objects in MS Word?
- 9 Which tab is used to insert action button?
- 10 What are the 2 options when inserting an object?
- 11 Why can’t I see insert object in Powerpoint?
- 12 How do I insert an object in Word 2016?
- 13 What object Cannot be insert in a Word document from Insert tab?
- 14 How do I insert an attachment into an icon in Word?
- 15 Where is the Insert tab on the ribbon bar?
- 16 Where on the Insert tab could you add a symbol?
- 17 Where can I find OLE objects in Word?
- 18 How do I fix Ole action in Word?
- 19 Which of the following object can be inserted in your document?
- 20 How do I insert multiple boxes in Word?
You can insert an existing file into a Word document and insert text in Word around it.
- Open Document and Click “Insert”
- Open the Word document and click the “Insert” tab on the ribbon menu at the top of the screen.
- Click the “Object” Button.
- Click the “Object” button in the Text group to open the Object dialog box.
How do you insert an object in Word?
Link or Embed a file
- Go to Insert > Object.
- Select Create from File.
- Select Browse and choose the file you want to use.
- Select Insert.
- Choose Display as icon to embed, or Link to file for a link.
- Select OK.
Where is the insert object in Word o365?
Make sure you have the file you want to attach present on your system. Once the document is open, go to the Insert tab on the ribbon and on the Text toolbox, select the Object button. From the menu that opens, select ‘Object’. A new window will open.
What is insert in MS Word?
Insert is a file menu and Ribbon section in software that allows the user to add something (e.g., picture) into a document or file. For example, in Microsoft Word, the user may use the Insert tab in the Ribbon to insert a picture of themselves into their document. Tip.
How do I open an OLE file in Word?
You have an Excel embedded OLE object inserted into a formal module as an icon.
- Then, export the module to Word using File -> Export -> Microsoft Office -> Word.
- Then, open the Excel OLE.
- It opens on the same Microsoft Word document instead of opening into a ‘new’ window.
How do you insert an object?
Embed an object in a worksheet
- Click inside the cell of the spreadsheet where you want to insert the object.
- On the Insert tab, in the Text group, click Object .
- In the Object dialog box, click the Create from File tab.
- Click Browse, and select the file you want to insert.
How do I insert multiple objects in Word?
2 Answers
- Copy all your files to clipboard (Ctrl + C)
- Open the word document you would like to embed your files and click the keyboard combinatin Ctrl + Alt + V [Paste Special] and choose files option and click OK.
What are objects in MS Word?
An object is a combination of data and the application needed to modify that data. You can thus embed objects in or link them to documents created with a different application. For instance, an Excel spreadsheet can be embedded within a Microsoft Word document using OLE.
Which tab is used to insert action button?
Put an action button on your slide
On the Insert tab, click Shapes, and then under Action Buttons at the bottom of the menu, click the button shape that you want to add.
What are the 2 options when inserting an object?
There are two options to insert objects: Create New: Insert object directly. Select the type of the object you want to insert in the Object type roll-down list. WPS Spreadsheets supports a variety of object types, such as WPS Spreadsheets Workbook, WordPad document, and Microsoft Excel among others.
Why can’t I see insert object in Powerpoint?
When you see only the frames of the object but not the icon, it’s probably because you have turned on the “Show picture placeholders” option. Click “File” tab then “Options” to open the “Word Options” dialog box. Then click “Advanced” on the left pane.
How do I insert an object in Word 2016?
Microsoft Word 2016
- Open the first document.
- Place the cursor where you want the second document to be inserted.
- From the Insert tab, Text group, click on the down arrow next to Object and choose Text from file.
- Select the file to be inserted.
- Click on Insert.
What object Cannot be insert in a Word document from Insert tab?
Discussion Forum
| Que. | Which type of file cannot be inserted in a word document via Insert Object option |
|---|---|
| b. | Bitmap Image |
| c. | MP3 file |
| d. | Video Clip |
| Answer:MP3 file |
How do I insert an attachment into an icon in Word?
On the Insert tab, click the Object button near the right end. In the dialog that opens, click the Create From File tab. Click the Browse button and locate the document file to insert. Check the box for Display As Icon, and click OK.
Where is the Insert tab on the ribbon bar?
second tab
Insert tab:
Insert Tab is the second tab in the Ribbon.
Where on the Insert tab could you add a symbol?
From the Insert command tab, in the Symbols group, click SYMBOL » select More Symbols… The Symbol dialog box appears. The special character appears in your document.
Where can I find OLE objects in Word?
The Document Inspector detects OLE Objects or packages that have been inserted from the Object dialog box (click Insert > Object in your Office application), or by using copy and paste commands.
How do I fix Ole action in Word?
Solution. The solution is generally simple — switch to MathType and close the dialog box. Sometimes it’s not that simple though. What if you see MathType’s icon in the Windows Taskbar, but clicking it doesn’t bring the window up so you can close the dialog?
Which of the following object can be inserted in your document?
The Insert tab contains various items that you may want to insert into a document. These items include such things as tables, word art, hyperlinks, symbols, charts, signature line, date & time, shapes, header, footer, text boxes, links, boxes, equations and so on.
How do I insert multiple boxes in Word?
Go to Insert > Text Box, and then select one of the pre-formatted text boxes from the list, select More Text Boxes from Office.com, or select Draw Text Box.