
This article is for people with visual or cognitive impairments who use a screen reader program such as Microsoft’s Narrator, JAWS, or NVDA with Microsoft 365 products. This article is part of the Microsoft 365 screen reader support content set where you can find more accessibility information on our apps. For general help, visit Microsoft Support home.
Use Word with your keyboard and a screen reader to add or change text in a document. We’ve tested it with Narrator, JAWS, and NVDA, but it might work with other screen readers as long as they follow common accessibility standards and techniques. You’ll also learn how to change the font, apply formatting styles, and use built-in heading styles to improve the accessibility and usability of your document.
Notes:
-
New Microsoft 365 features are released gradually to Microsoft 365 subscribers, so your app might not have these features yet. To learn how you can get new features faster, join the Office Insider program.
-
To learn more about screen readers, go to How screen readers work with Microsoft 365.
In this topic
-
Add text to a document
-
Find and replace text
-
Select text
-
Use headings
-
Apply bold, italic, and underline formatting
-
Change the font and font size
-
Use theme fonts
Add text to a document
-
Open the Word document you want to add text to. The focus is on the editing area in the document body.
-
Press the arrow keys until you hear the place where you want to add text and start typing.
-
When you are finished, press Ctrl+S to save your changes. For info on additional saving options, refer to Use a screen reader to save a document in Word.
Find and replace text
-
While editing a Word document, press Ctrl+H. You hear: «Find and replace.» The focus is on the Find what text field.
-
Type the word or phrase you want to find and replace.
-
Press the Tab key. You hear: «Replace with.» Type the word or phrase with which to replace the original one.
-
Do one of the following:
-
To find and replace matching words or phrases one by one, press Alt+R. The first instance is replaced in the document body. Repeat for all instances you want to replace. If you want to skip replacing an instance, press Alt+F to move to the next one.
-
To replace all matching words or phrases in the text, press Alt+A. You hear an alert indicating the number of replacements. To close the alert window, press Enter.
-
Select text
You can quickly select all text in your document, or just a particular piece of the text.
-
To select all text, press Ctrl+A.
-
To select a piece of text, move to the text you want to select, and then press and hold down Shift. Use the arrow keys to move the cursor until the text is selected.
Use headings
Headings are very important for the document accessibility, navigation, and usability. To make sure that your headings work correctly for accessibility, use the built-in heading styles when you create headings. This way your screen reader and Word exchange the right information for smooth navigation.
You can also use the headings as link targets to create hyperlinks within the current document. For instructions, refer to the section «Link to a location within a document» in Use a screen reader to insert a hyperlink in Word.
-
In your document, select the text you want to turn into a heading.
-
Do one of the following:
-
To apply Heading 1 style, press Ctrl+Alt+1.
-
To apply Heading 2 style, press Ctrl+Alt+2.
-
To apply Heading 3 style, press Ctrl+Alt+3.
-
To browse for more heading styles, press Alt+H, L. Press the arrow keys until you hear the style you want, and then press Enter to apply it to your document.
-
Apply bold, italic, and underline formatting
Using character formatting can improve the readability of your document.
-
In your document, select the text you want to format.
-
Do one of the following:
-
To apply bold formatting, press Ctrl+B.
-
To apply italic formatting, press Ctrl+I.
-
To apply underlined formatting, press Ctrl+U.
-
Change the font and font size
To make your document accessible for all users, switch the font to a more readable one, or make the text bigger or smaller.
Change to a different font
-
In your document, select the text you want to format.
-
Press Alt+H, F, F. You hear: «Font,» followed by the current font.
-
Press the Down arrow key until you hear the font you want, and then press Enter.
Tip: To jump directly to a font you have already decided to use, start typing the name of the font. For example, type ti to find Times New Roman.
Change font size
-
In your document, select the text you want to resize.
-
Do one of the following:
-
To make the text 1 point larger, press Ctrl+Right bracket (]).
-
To make the text 1 point smaller, press Ctrl+Left bracket ([).
-
To make the text incrementally larger according to the sizes in the Increase Font Size button, press Ctrl+Shift+Greater than sign (>).
-
To make the text incrementally smaller according to the sizes in the Decrease Font Size button, press Ctrl+Shift+Less than sign (<).
-
To select a particular size, press Alt+H, F, S. You hear the current font size. Type the font size you want, and then press Enter.
-
Change several font properties at once
You can browse font properties and effects and change several at once in the Font dialog box.
-
In your document, select the text you want to format.
-
To open the Font dialog box, press Alt+H, F, N.
-
Do one or more of the following:
-
To go to and change the font properties:
-
Font, press Alt+F, and then press the Down arrow key until you hear the font you want.
-
Font style, press Alt+Y, and then press the Down arrow key until you hear the font style you want.
-
Font size, press Alt+S, and then press the Down arrow key until you hear the font size you want.
-
Font color, press Alt+C, press the arrow keys until you hear the font color you want, and then press Enter.
-
Underline style, press Alt+U, press the Down arrow key until you hear the underline style you want, and then press Enter.
-
Underline color, press Alt+I, press the arrow keys until you hear the underline color you want, and then press Enter.
-
-
To go to and select the font effects:
-
Strikethrough, press Alt+K.
-
Double strikethrough, press Alt+L.
-
Superscript, press Alt+P.
-
Subscript, press Alt+B.
-
Small caps, press Alt+M.
-
All caps, press Alt+A.
-
Hidden, press Alt+H.
-
Set As Default, press Alt+D, and then press Enter.
-
Text Effects, press Alt+E, and then press Enter.
-
Advanced tab, press Alt+V.
-
Font tab, press Alt+N.
-
-
-
To apply the changes, press the Tab key until you hear «OK,» and then press Enter.
Use theme fonts
Theme fonts change the fonts in your entire document. They use a pair of fonts that are designed to work well together. The first font is used for headings and the second for the body text.
Tip: To make sure the theme fonts are applied to headings, apply a Word heading style to the heading text. To learn how, refer to Use headings.
-
In your document, press Alt+G, T, F.
-
Press the Down arrow key until you hear the font you want, and then press Enter.
See also
Use a screen reader to insert a picture or image in Word
Use a screen reader to create bulleted or numbered lists with Word
Keyboard shortcuts in Word
Basic tasks using a screen reader with Word
Set up your device to work with accessibility in Microsoft 365
Use a screen reader to explore and navigate Word
Use Word for Mac with your keyboard and VoiceOver, the built-in macOS screen reader, to add or change text in a document. You’ll also learn how to change the fonts, apply formatting styles, and use built-in heading styles to improve the accessibility and usability of your document.
Notes:
-
New Microsoft 365 features are released gradually to Microsoft 365 subscribers, so your app might not have these features yet. To learn how you can get new features faster, join the Office Insider program.
-
This topic assumes that you are using the built-in macOS screen reader, VoiceOver. To learn more about using VoiceOver, go to VoiceOver Getting Started Guide.
-
We recommend that you read and edit documents in Print Layout View. VoiceOver might not work reliably in other view modes.
In this topic
-
Add text to a document
-
Find and replace text
-
Use headings
-
Apply bold, italic, and underline formatting
-
Change the font and font size
-
Use theme fonts
Add text to a document
-
Open the Word for Mac document which you want to add text to. After the file opens, VoiceOver announces the file name. The focus moves to the text area of the document.
-
Place the cursor where you want to add text and start typing.
-
When you are finished, press Command+S to save your changes. For info on additional saving options, refer to Use a screen reader to save a document in Word.
Find and replace text
-
While editing a Word for Mac document, press Shift+Command+H. You hear: «Search document, combo box.»
-
Type the word or phrase you want to replace. The list of search results is updated as you type.
-
Press the Tab key until you hear «Replace with, Combo box,» and then type the word or phrase with which to replace the original one.
-
Do one of the following:
-
To replace the matching words or phrases one by one, press the Tab key until you hear «Replace button,» and then press Control+Option+Spacebar to replace the first instance. The focus moves to the next instance. Repeat this step for all instances you want to replace.
-
To replace all matching words or phrases, press the Tab key until you hear “Replace all, button,” and then press Control+Option+Spacebar. You hear an alert indicating the number of replacements made. To close the alert window, press Control+Option+Spacebar.
-
Use headings
Headings are very important for the document accessibility, navigation, and usability. To make sure that your headings work correctly for accessibility, use the built-in heading styles when you create headings. This way your screen reader and Word exchange the right information for smooth navigation.
You can also use the headings as link targets to create hyperlinks within the current document. For instructions, refer to the section «Link to another location in the current document» in Use a screen reader to insert a hyperlink in Word.
-
In your document, select the text that you want to turn into a heading.
-
Do one of the following:
-
To apply Heading 1 style, press Command+Option+1.
-
To apply Heading 2 style, press Command+Option+2.
-
To apply Heading 3 style, press Command+Option+3.
-
Apply bold, italic, and underline formatting
The use of character formatting can improve the readability of your document.
-
In your document, select the text you want to format.
-
Do one of the following:
-
To apply bold formatting, press Control+B.
-
To apply italic formatting, press Control+I.
-
To apply underlined formatting, press Control+U.
-
Change the font and font size
To make your document accessible for all users, switch the font to a more readable one, or make the text bigger or smaller.
Change to a different font
-
In your document, select the text you want to change.
-
Press F6 until you hear the currently selected tab, for example «Home, selected, tab.»
-
To open the Font combo box, press the Tab key until you hear the name of the current font, followed by «Font, combo box.» Press Control+Option+Spacebar to open the list.
-
Press the Down arrow key until you hear the name of the font you want, and then press Control+Option+Spacebar. If a font has a submenu with additional options, you hear the name of the font, followed by «Submenu.» Press the Right arrow key to expand the submenu, press the Down arrow key until you hear the option you want, and press Control+Option+Spacebar to select.
Tip: To jump directly to a font you have already decided to use, start typing the name of the font. For example, type ti to find a font called «Times.»
Change font size
-
In your document, select the text you want to resize.
-
Press F6 until you hear the currently selected tab, for example «Home, selected, tab.»
-
To open the Font size combo box, press the Tab key until you hear the font size of the current font, followed by «Font size, combo box.» Press Control+Option+Spacebar to open the list.
-
Press the Down arrow key to browse the available sizes. To apply the currently selected font size, press Control+Option+Spacebar.
Use theme fonts
Theme fonts change the fonts in your entire document. They use a pair of fonts that are designed to work well together. The first font is used for headings and the second for the body text.
Tip: To make sure the theme fonts are applied to headings, you must apply a Word heading style to the heading text. To learn how, refer to Use headings.
-
Press F6 until you hear the currently selected tab, for example «Home, selected, tab.»
-
To open the Font combo box, press the Tab key until you hear the name of the current font, followed by «Font, combo box.» Press Control+Option+Spacebar to open the list.
-
Press T. You hear: «Theme fonts.»
-
Press the Down arrow key to browse the list of available theme fonts. To select and apply the theme font to your document, press Control+Option+Spacebar. The list of the theme fonts ends when you hear either «Recent fonts» or «All fonts.»
See also
Use a screen reader to align text and paragraphs in Word
Use a screen reader to insert a picture or image in Word
Keyboard shortcuts in Word
Basic tasks using a screen reader with Word
Set up your device to work with accessibility in Microsoft 365
Use a screen reader to explore and navigate Word
Use Word for iOS with VoiceOver, the built-in iOS screen reader, to add or change text in a document. You’ll also learn how to change the fonts, apply formatting styles, and use headings to improve your text flow.
Notes:
-
New Microsoft 365 features are released gradually to Microsoft 365 subscribers, so your app might not have these features yet. To learn how you can get new features faster, join the Office Insider program.
-
This topic assumes that you are using the built-in iOS screen reader, VoiceOver. To learn more about using VoiceOver, visit Apple accessibility.
-
We recommend you read and edit documents in Print Layout View. VoiceOver might not work reliably in other view modes.
In this topic
-
Add text to a document
-
Find and replace text
-
Select text
-
Use headings
-
Apply bold, italic, and underline formatting
-
Change the font and font size
-
Use theme fonts
Add text to a document
-
Open the Word for iOS document you want to add text to.
-
To add text to the document, swipe right until you hear the page you want, followed by «Content.» Double-tap the screen. The on-screen keyboard opens.
-
Use the on-screen keyboard to type. When you are done, to close the keyboard, swipe left until you hear «Hide keyboard,» and double-tap the screen. For instructions on how to save your work, refer to Use a screen reader to save a document in Word.
Check the VoiceOver rotor settings to add text
If you can’t access the editing area or open the on-screen keyboard, check the VoiceOver rotor settings.
-
On your phone, navigate to the home screen where you have the Settings icon. Slide one finger down the screen until you hear «Settings,» and then double-tap the screen.
-
Swipe right until you hear «Accessibility, button,» and double-tap the screen.
-
Swipe right until you hear «VoiceOver, On, button,» and double-tap the screen.
-
Swipe right until you hear «Rotor, button,» and then double-tap the screen.
-
Swipe right until you hear the option you want, and then double-tap the screen to select. Repeat this step for all options you want to select. Make sure that at least the Text Selection option is selected.
Find and replace text
-
While editing a Word for iOS document, tap near the top of the screen with four fingers, swipe left or right until you hear «Find button,» and double-tap the screen. You hear: «Search, text field, is editing.» The on-screen keyboard opens.
-
Use the on-screen keyboard to write the word or phrase you want to find and replace. VoiceOver announces the number of matches.
-
Tap near the top of the screen with four fingers. You hear: «Search options, button.» Double-tap the screen. The Options menu opens.
-
Do one of the following:
-
To find and replace matching words or phrases one by one, swipe right until you hear «Find and replace,» and double-tap the screen.
-
To replace all matching words or phrases in the text, swipe right until you hear «Find and replace all,» and then double-tap the screen.
-
-
Swipe left until you hear «Done, button,» and double-tap the screen. The focus returns to the Search pane.
-
Swipe right until you hear «Replace, text field,» and double-tap the screen. Use the on-screen keyboard to type the word or phrase with which to replace the original one.
-
Tap near the top of the screen with four fingers, swipe right until you hear «Replace, button» or «Replace all, button,» depending on your selection in step 4, and then double-tap the screen. If you selected to replace the words or phrases one by one, Word moves to the next instance and the focus stays on the Replace button. Double-tap the screen to replace the instances you want.
-
To close the Search text field, use two fingers to swipe a Z gesture on the screen. You hear: «Leaving Search.»
Select text
You can select text in your document for editing or formatting.
-
To select a piece of text, navigate to the text you want to select.
-
In the VoiceOver rotor, select Edit, swipe up or down until you hear «Select.» The piece of text is selected.
-
To expand your selection, slide two fingers apart on the screen. VoiceOver announces the selection as you move your fingers.
Use headings
Headings are very important for the document accessibility, navigation, and usability. To make sure that your headings work correctly for accessibility, use the built-in heading styles when you create headings. This way your screen reader and Word exchange the right information for smooth navigation.
-
In your document, select the text you want to turn into a heading.
-
Tap near the top of the screen with four fingers, swipe right until you hear «Show ribbon,» and double-tap the screen. You hear the current tab.
-
Double-tap the screen, swipe left until you hear «Home tab,» and double-tap the screen.
-
Swipe right until you hear “Styles button,” and double-tap the screen. The Styles menu opens.
-
Swipe right until you hear the heading style you want, for example, «Heading two,» and then double-tap the screen. The focus returns to the Home tab.
-
To close the ribbon, swipe left until you hear «Hide ribbon,» and double-tap the screen.
Apply bold, italic, and underline formatting
The use of character formatting can improve the readability of your document.
-
In your document, select the text you want to format.
-
Do one or more of the following:
-
To apply bold formatting, swipe right or left until you hear “Bold button,” and double-tap the screen.
-
To apply italic formatting, swipe right or left until you hear “Italic button,» and double-tap the screen.
-
To apply underlined formatting, swipe right or left until you hear «Underline button,» and double-tap the screen.
-
Change the font and font size
To make your document accessible for all users, switch the font to a more readable one, or make the text bigger or smaller.
Change to a different font
-
In your document, select the text you want to format.
-
Tap near the top of the screen with four fingers, swipe right until you hear «Show ribbon,» and double-tap the screen. You hear the current tab.
-
Double-tap the screen, swipe left until you hear «Home tab,» and double-tap the screen.
-
Swipe right until you hear «Fonts,» followed by the current font and font size, and then double-tap the screen. The Fonts menu opens.
-
Swipe right or left until you hear the font you want. VoiceOver announces the fonts as you move. To select a font, double-tap the screen. The Fonts menu closes, and the focus moves to the Home tab.
Change the font size
-
In your document, select the text you want to format.
-
Tap near the top of the screen with four fingers, swipe right until you hear «Show ribbon,» and double-tap the screen. You hear the current tab.
-
Double-tap the screen, swipe left until you hear «Home tab,» and double-tap the screen.
-
Swipe right until you hear «Fonts,» followed by the current font and font size, and then double-tap the screen. The Fonts menu opens.
-
Swipe right or left until you hear «Size,» followed by the current font size.
-
To change the font size, do one of the following:
-
To increase the font size, swipe right or left until you hear «Plus button,» and then double-tap the screen to increase the size by 1 point.
-
To decrease the font size, swipe right or left until you hear «Minus button,» and then double-tap the screen to decrease the size by 1 point.
-
-
To exit the Fonts menu and hide the ribbon, swipe left until you hear «Hide ribbon,» and then double-tap the screen.
Use theme fonts
Theme fonts change the fonts in your entire document. They use a pair of fonts that are designed to work well together. The first font is used for headings and the second for the body text.
Tip: To make sure the theme fonts are applied to headings, you must apply a Word heading style to the heading text. To learn how, refer to Use headings.
-
Tap near the top of the screen with four fingers, swipe right until you hear «Show ribbon,» and double-tap the screen. You hear the current tab.
-
Double-tap the screen, swipe left until you hear «Home tab,» and double-tap the screen.
-
Swipe right until you hear «Fonts,» followed by the current font and font size, and then double-tap the screen. The Fonts menu opens.
-
Swipe right until you hear: «Theme fonts, heading.» Swipe right to listen to the available theme fonts. VoiceOver announces the theme fonts as you move. To select a theme font, double-tap the screen.
The list of the theme fonts ends when you hear: «Recently used fonts, heading.» If you don’t have recent fonts, the list of theme fonts ends when you hear: «Office compatible fonts.»
See also
Use a screen reader to check spelling and grammar in Word
Use a screen reader to share a document in Word
Basic tasks using a screen reader with Word
Set up your device to work with accessibility in Microsoft 365
Use a screen reader to explore and navigate Word
Use Word for Android with TalkBack, the built-in Android screen reader, to add or change text in a document. You’ll also learn how to change the fonts, apply formatting styles, and use headings to improve the text flow and accessibility.
Notes:
-
New Microsoft 365 features are released gradually to Microsoft 365 subscribers, so your app might not have these features yet. To learn how you can get new features faster, join the Office Insider program.
-
This topic assumes that you are using the built-in Android screen reader, TalkBack. To learn more about using TalkBack, go to Android accessibility.
In this topic
-
Add text to a document
-
Find and replace text
-
Select text
-
Use headings
-
Apply bold, italic, and underline formatting
-
Change the font and font size
-
Use theme fonts
Add text to a document
-
Open the Word for Android document you want to add text to. The focus is on the document body.
-
Double-tap the screen, and then use the on-screen keyboard to type your text.
-
When you are finished, to close the keyboard, swipe down-then-left. For instructions on how to save your work, refer to Use a screen reader to save a document in Word.
Find and replace text
-
While editing a Word for Android document, slide one finger around the top of the screen until you hear «Find, button,» and then double-tap the screen. You hear: «Find, three period, edit box.» The on-screen keyboard is displayed at the bottom of the screen.
-
Use the on-screen keyboard to type the word or phrase you want to replace. TalkBack announces the number of matching instances as you type. Swipe down-then-left to close the on-screen keyboard.
-
Swipe right until you hear «Submit, button,» and double-tap the screen. TalkBack announces which matching instance is selected and highlighted in the body text.
-
Swipe left until you hear «Find bar settings button,» and double-tap the screen. The Find settings menu opens at the bottom of the screen. You hear: «Not checked, Replace, check box.»
-
Double-tap the screen. The focus moves to the Replace text field and the on-screen keyboard is displayed at the bottom of the screen.
-
Use the on-screen keyboard to type the word or phrase with which you want to replace the original one. To close the on-screen keyboard, swipe down-then-left.
-
Do one of the following:
-
To replace the matching instances one by one, swipe right until you hear «Replace button,» and then double-tap the screen. Repeat this step to all instances you want to replace one by one.
-
To replace all matching search results at once, swipe right until you hear «Replace all button,» and then double-tap the screen. TalkBack announces the number of replacements.
-
-
To exit the Find bar and return to your document, swipe left until you hear «Close Find bar, button,» and double-tap the screen.
Select text
You can select a particular piece of text or all text in your document.
Select a piece of text
-
To select a piece of text, navigate to the text you want to select.
-
Double-tap and hold the screen to select the item in focus. TalkBack announces the selected item.
-
To expand your selection, slide two fingers apart on the screen.
Select all text
-
To select all text in your document, do one of the following depending on the Android version of your phone:
-
With Android 9.1 or newer, swipe up-then-right. You hear: «TalkBack menu.» Swipe right until you hear «Actions,» and double-tap the screen. The focus is on the Launch Context Menu item. Double-tap the screen. Swipe right until you hear «Select all,» and double tap the screen.
-
With an Android version older than 9.1, double-tap and hold the screen. Swipe left until you hear «Select all,» and double-tap the screen.
-
Use headings
Headings are very important for the document accessibility, navigation, and usability. To make sure that your headings work correctly for accessibility, use the built-in heading styles when you create headings. This way your screen reader and Word exchange the right information for smooth navigation.
-
In your document, select the text you want to turn into a heading.
-
Slide one finger around the top of the screen until you hear «More options button,» and double-tap the screen. You hear the name of the current tab.
-
Double-tap the screen, swipe left until you hear «Home tab,» and double-tap the screen.
-
Swipe right until you hear “Styles menu,” and double-tap the screen. The Styles menu opens.
-
Swipe right until you hear the heading you want, and double-tap the screen. The focus returns to the Home tab.
Apply bold, italic, and underline formatting
The use of character formatting can improve the readability of your document.
-
In your document, select the text you want to format.
-
Do one or more of the following:
-
To apply bold formatting, swipe left or right until you hear “Not checked, Bold, switch,” and double-tap the screen.
-
To apply italic formatting, swipe left or right until you hear “Not checked, Italic, switch,» and double-tap the screen.
-
To apply underlined formatting, swipe left or right until you hear «Not checked, Underline, switch,» and double-tap the screen.
-
Change the font and font size
To make your document accessible for all users, switch the font to a more readable one, or make the text bigger or smaller.
Change to a different font
-
In your document, select the text you want to format.
-
Slide one finger around the top of the screen until you hear «More options button,» and double-tap the screen. You hear the name of the current tab.
-
Double-tap the screen, swipe left until you hear «Home tab,» and double-tap the screen.
-
Swipe right until you hear «Font combo box,» followed by the current font, and then double-tap the screen.
-
Swipe left or right until you hear the font you want, and double-tap the screen.
Change font size
-
In your document, select the text you want to format.
-
Slide one finger around the top of the screen until you hear «More options button,» and double-tap the screen. You hear the name of the current tab.
-
Double-tap the screen, swipe left until you hear «Home tab,» and double-tap the screen.
-
Swipe right until you hear «Font size combo box,» followed by the current font size, and then double-tap the screen.
-
Swipe left or right until you hear the font size you want, and double-tap the screen.
Use theme fonts
Theme fonts change the fonts in your entire document. They use a pair of fonts that are designed to work well together. The first font is used for headings and the second for the body text.
Tip: To make sure the theme fonts are applied to headings, you must apply a Word heading style to the heading text. To learn how, refer to Use headings.
-
Slide one finger around the top of the screen until you hear «More options button,» and double-tap the screen. You hear the name of the current tab.
-
Double-tap the screen, swipe left until you hear «Home tab,» and double-tap the screen.
-
Swipe right until you hear «Font combo box,» followed by the current font, and then double-tap the screen.
-
Swipe left or right until you hear: «Theme fonts.» Swipe right to browse the available theme fonts. To select, double-tap the screen.
The list of the theme fonts ends when you hear either «Recently used fonts» or «All fonts.»
See also
Use a screen reader to check spelling and grammar in Word
Use a screen reader to share a document in Word
Basic tasks using a screen reader with Word
Set up your device to work with accessibility in Microsoft 365
Use a screen reader to explore and navigate Word
Use Word for the web with a screen reader and your keyboard to add or change text in a document. We have tested it with Narrator in Microsoft Edge and JAWS and NVDA in Chrome, but it might work with other screen readers and web browsers as long as they follow common accessibility standards and techniques. You’ll also learn how to change the font, apply formatting styles, and use headings to improve your text flow.
Notes:
-
If you use Narrator with the Windows 10 Fall Creators Update, you have to turn off scan mode in order to edit documents, spreadsheets, or presentations with Microsoft 365 for the web. For more information, refer to Turn off virtual or browse mode in screen readers in Windows 10 Fall Creators Update.
-
New Microsoft 365 features are released gradually to Microsoft 365 subscribers, so your app might not have these features yet. To learn how you can get new features faster, join the Office Insider program.
-
To learn more about screen readers, go to How screen readers work with Microsoft 365.
-
When you use Word for the web with a screen reader, switch to the full screen mode. Press F11 to toggle the full screen mode on and off.
-
When you use Word for the web, we recommend that you use Microsoft Edge as your web browser. Because Word for the web runs in your web browser, the keyboard shortcuts are different from those in the desktop program. For example, you’ll use Ctrl+F6 instead of F6 for jumping in and out of the commands. Also, common shortcuts like F1 (Help) and Ctrl+O (Open) apply to the web browser – not Word for the web.
In this topic
-
Add text to a document
-
Find and replace text
-
Select text
-
Use headings
-
Apply bold, italic, and underline formatting
-
Change the font and font size
-
Use theme fonts
Add text to a document
-
Open the Word for the web document you want to add text to. When the document opens, the focus is on the editing area in the document body.
-
Press the arrow keys until you hear the place where you want to add text and start typing. Changes are saved automatically.
Find and replace text
-
While you’re editing a Word for the web document, press Ctrl+F. The Search pane opens. The focus is on the search text field.
In older JAWS versions, to find and replace text, press Ctrl+H.
-
Press Shift+Tab until you hear «More actions menu,» and press Enter. Press the Up arrow key once. You hear: «Replace.» Press Enter to select. The focus returns to the search text field.
-
Type the word or phrase you want to replace. The search results list is updated as you type.
-
Press the Tab key until you hear «Replace with,» and then type the word or phrase with which you want to replace the original wording.
-
To browse the list of search results, press the Tab key until you hear «Previous result» or «Next result» and press Enter. The screen reader announces the instances as you move in the list.
-
Do one of the following:
-
To replace search results one at a time, press the Tab key or Shift+Tab until you hear «Replace,» and then press Enter. Navigate to the next instance and repeat this step if needed.
-
To replace all instances, press the Tab key until you hear «Replace all,» and press Enter.
-
Select text
You can quickly select all text in your document, or just a particular piece of the text.
-
To select all text, press Ctrl+A.
-
To select a piece of text, move to the text you want to select, and then press and hold down Shift. Use the arrow keys to move the cursor until the text is selected.
Use headings
Headings are very important for the document accessibility, navigation, and usability. To make sure that your headings work correctly for accessibility, use the built-in heading styles when you create headings. This way your screen reader and Word exchange the right information for smooth navigation.
-
In your document, select the text you want to turn into a heading.
-
Do one of the following:
-
To apply Heading 1 style, press Ctrl+Alt+1.
-
To apply Heading 2 style, press Ctrl+Alt+2.
-
To apply Heading 3 style, press Ctrl+Alt+3.
-
To browse for more heading styles, press Alt+Windows logo key, and then H and L. Press the Tab key until you hear the style you want, and then press Enter to select.
-
Apply bold, italic, and underline formatting
The use of character formatting can improve the readability of your document.
-
In your document, select the text you want to format.
-
Do one of the following:
-
To apply bold formatting, press Ctrl+B.
-
To apply italic formatting, press Ctrl+I.
-
To apply underlined formatting, press Ctrl+U.
-
Change the font and font size
To make your document accessible for all users, switch the font to a more readable one, or make the text bigger or smaller.
Change to a different font
-
In your document, select the text you want to format.
-
Press Alt+Windows logo key, and then H, F, and F. You hear: «Font name.»
-
Press the Down arrow key until you hear the font you want, and then press Enter.
Tip: To jump directly to a font you have already decided to use, start typing the name of the font. For example, type ti to find Times New Roman.
Change font size
-
In your document, select the text you want to resize.
-
Do one of the following:
-
To make the text 1 point larger, press Ctrl+Right bracket (]).
-
To make the text 1 point smaller, press Ctrl+Left bracket ([).
-
To make the text incrementally larger according to the sizes in the Increase Font Size button, press Ctrl+Shift+Greater than sign (>).
-
To make the text incrementally smaller according to the sizes in the Decrease Font Size button, press Ctrl+Shift+Less than sign (<).
-
To select a particular font size, press Alt+Windows logo key+H, F, and S. You hear: «Font size.» Type the font size you want, and then press Enter.
-
Change several font properties
You can browse font properties and change them using the options in the Font group on the Home tab.
-
In your document, select the text you want to format.
-
To go to the Home tab, press Alt+Windows logo key+H.
-
Do one or more of the following:
-
To go to and change:
-
Font, press F and then F, and then press the Down arrow key until you hear the font you want, and press Enter.
-
Font style, press F and then Y. Press the Tab key, and then use the Up or Down arrow key until you hear the font style you want, and press Enter.
-
Font size, press F and then S, and then press the Down arrow key until you hear the font size you want, and press Enter.
-
Font Color, press F and then C. Press the Tab key until you hear the font color you want, and then press Enter.
-
Text Highlight Color, press I. Press the Tab key until you hear the highlight color you want, and then press Enter.
-
-
To go to and select:
-
Strikethrough, press 4.
-
Superscript, press 6.
-
Subscript, press 5.
-
-
Use theme fonts
Theme fonts change the fonts in your entire document. They use a pair of fonts that are designed to work well together. The first font is used for headings and the second for the body text.
Tip: To make sure the theme fonts are applied to headings, you must apply a Word heading style to the heading text. To learn how, refer to Use headings.
-
In your document, press Alt+Windows logo key+H, F, and F. You hear: «Font name.»
-
Press Alt+Down arrow key to expand the Font menu.
-
Press the Up arrow key until you hear the name of a font, followed by either «Headings» or «Body,» and then press Enter to select.
Tip: Not all fonts are theme fonts. The theme fonts are usually located at the top of the menu.
See also
Use a screen reader to insert a picture or image in Word
Use a screen reader to check spelling and grammar in Word
Basic tasks using a screen reader with Word
Keyboard shortcuts in Word
Use a screen reader to explore and navigate Word
Technical support for customers with disabilities
Microsoft wants to provide the best possible experience for all our customers. If you have a disability or questions related to accessibility, please contact the Microsoft Disability Answer Desk for technical assistance. The Disability Answer Desk support team is trained in using many popular assistive technologies and can offer assistance in English, Spanish, French, and American Sign Language. Please go to the Microsoft Disability Answer Desk site to find out the contact details for your region.
If you are a government, commercial, or enterprise user, please contact the enterprise Disability Answer Desk.
In this chapter, we will discuss how to insert text in Word 2010. Many times it is required to go back and insert additional text in an existing line. Microsoft Word provides two ways to insert text in existing text and we will show how to use both the methods of inserting text −
Insert and Add Text
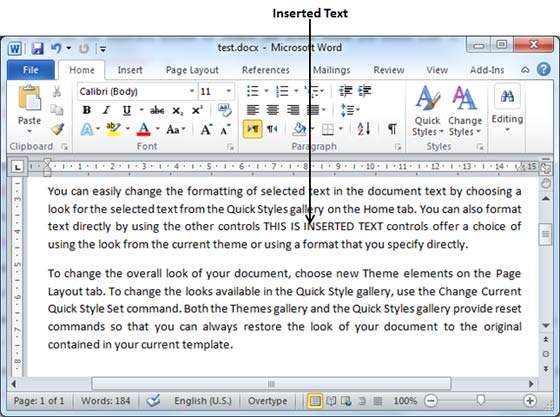
First we will see how inserted text will be added into the existing content without replacing any existing content.
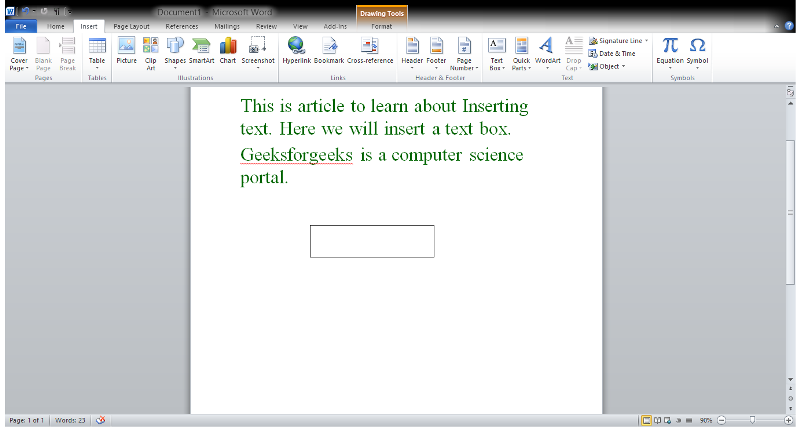
Step 1 − Click the location where you wish to insert text; you can also use the keyboard arrows to locate the place where the text needs to be inserted.
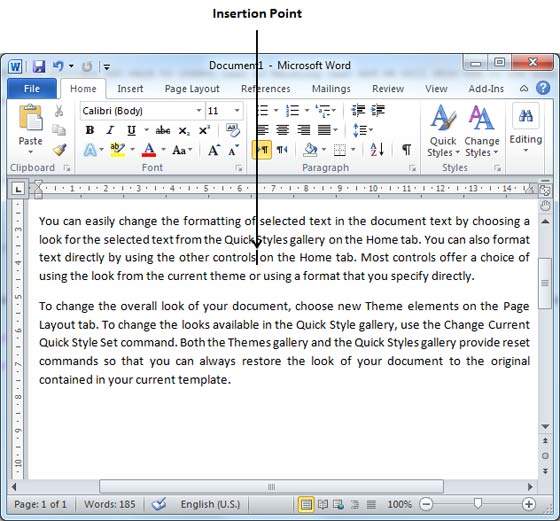
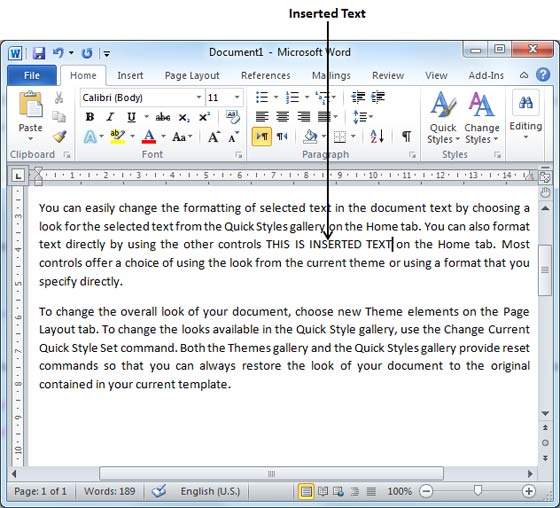
Step 2 − Start typing the text that needs to be inserted. Word inserts the text to the left of the insertion point, moving the existing text to the right
Insert and Replace Text
In the Insertion mode, text will be added into the existing content but same time it will over write all the content which comes in its way.
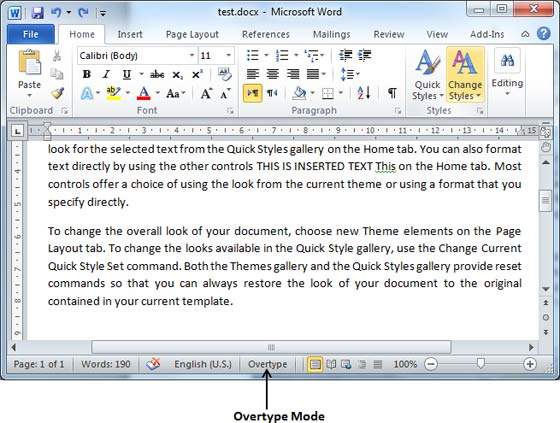
Step 1 − Right-click the status bar and select the Overtype option from the displayed menu.
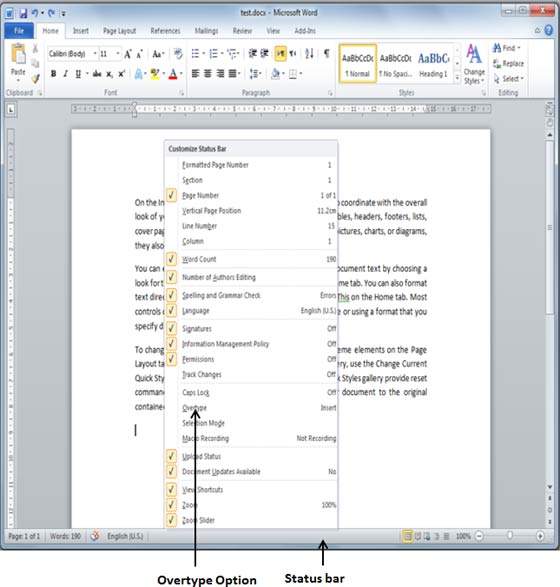
When you select the Overtype option, the status bar will show the insert mode as shown below −
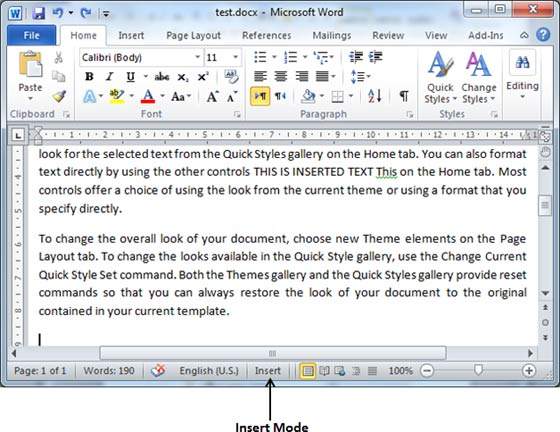
Step 2 − Click on the Insert text available at the status bar and it will switch to the Overtype mode as shown below −
Step 3 − Now click the location where the text needs to be inserted or you can use the keyboard arrows to locate the place where the text needs to be inserted.
Step 4 − Start typing the text that needs to be inserted. Word will replace the existing text with the newly typed text without moving the position of the exiting test.
Note − Microsoft Word 2010 disabled the functionality of the Insert key and it does nothing, so you will have to follow-up with the above mentioned procedure to turn-on or turn-off the Insert mode.
We’ll talk about how to Insert Text in MS Word in this chapter. A lot of the time, you have to go back and add more text to an existing line. There are two ways to insert text to existing text in Microsoft Word, and we’ll show you how to use both of them.
Table of contents
- Insert Text in MS Word
- What is Inserting Text in MS Word?
- What is the Use of Inserting Text?
- How to Insert Text Quickly in Your Word Document
- Insert Text Using Textbox
- Summary
What is Inserting Text in MS Word?
Inserting text is one of the many things that MS-Word can do. For example, if a user is writing something like an article or assignment, he or she might realize that they forgot to write something in the middle, at the beginning, or anywhere else in the document. So, in this case, the feature that comes in very handy is Inserting text, which will do the work for the user.
What is the Use of Inserting Text?
The use of Inserting text in MS Word it has the ability to position the cursor using the mouse or arrow keys at any point in a document and begin typing.
The insert text function permits you to add characters to your document without erasing your previous work.
How to Insert Text Quickly in Your Word Document
Time needed: 2 minutes.
Here are the basic steps for inserting text or making a new document in Word;
- Insert Text in Microsoft Word with Text Replacement
Step 1: First open MS-Word on your PC.
Step 2: Now, Open the document or create a new one in which you want to perform this operation.
Step 3: Now, Put the cursor where you want to insert the text.
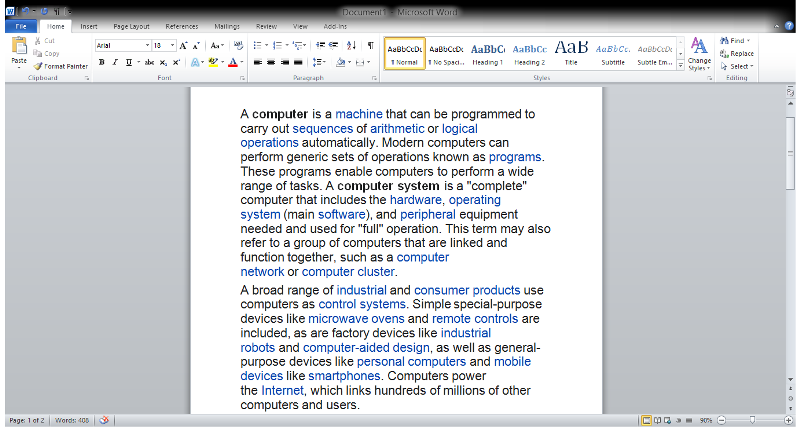
Step 4: Now, Write or type the text which needs to be inserted.
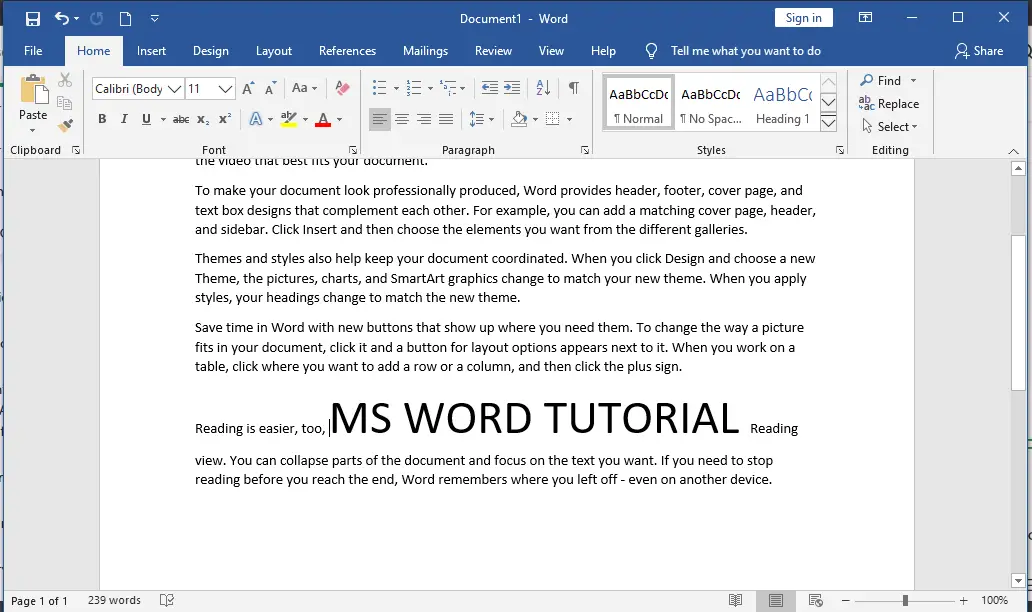
Like here we insert MS Word Tutorial. As shown in the figure below:
Step 5: So, the text is inserted successfully.
- Insert Text in Microsoft Word with Text Replacement
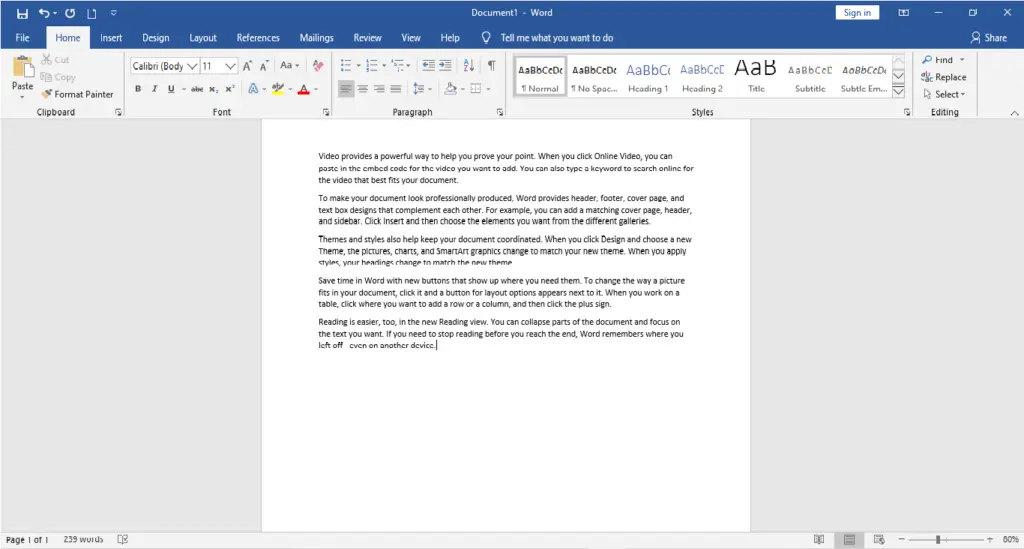
Here are some examples on how to Insert Text in MS Word with replacing some text. Sometimes, a certain part of the whole document or some text needs to be changed to something else.
1. Open the document you wish to perform this action on, or create a new one.
2. Now, choose the text you’d like to change.
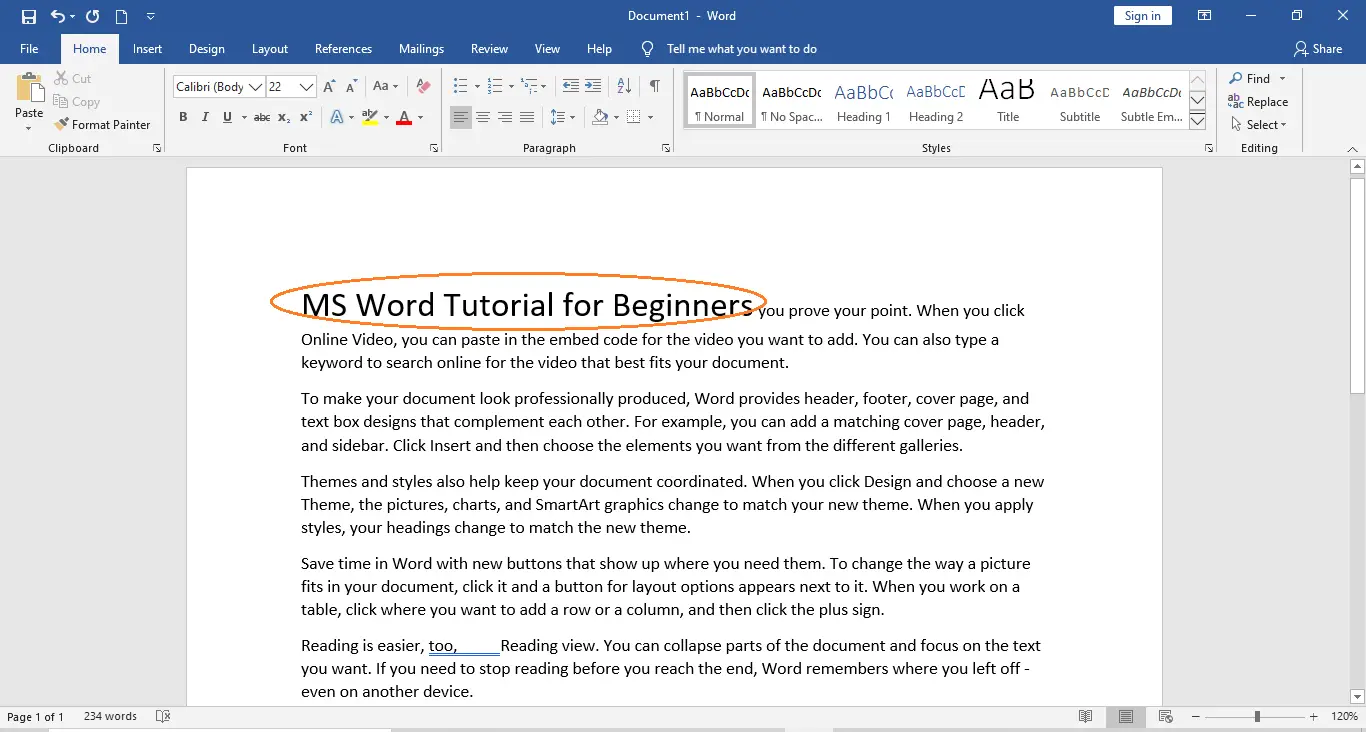
3. Now, press the “Backspace” key and start typing the text you want to add. Or, you can just start typing the text you want to insert, and the “selected text by default” feature will go away or be deleted when you do.
Here, we replace the first paragraph with “MS Word Tutorial for Beginners“.
Insert Text Using Textbox
The MS Word allows us to Insert Text boxes anywhere within the document where required. This is another excellent tool provided by Microsoft Word.
A text box is an object you can add to your document that lets you put and type text anywhere in your file. Text boxes can be useful for drawing attention to specific text and can also be helpful when you need to move text around in your document
Now, Open the document or create a new one in which you want to perform this operation.
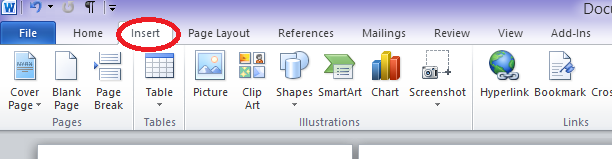
Now, go to “insert tab” above. (As shown in the image below)
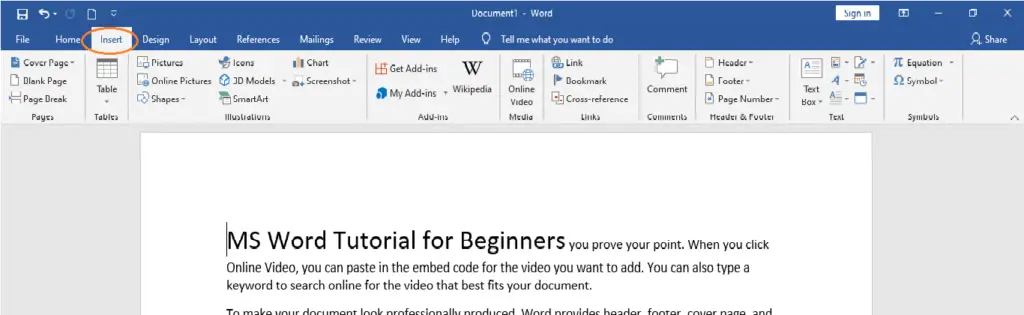
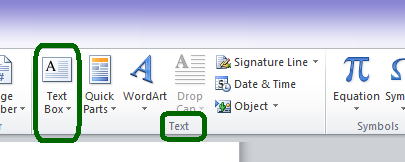
Now, In the insert tab, there is a section called “Text“.
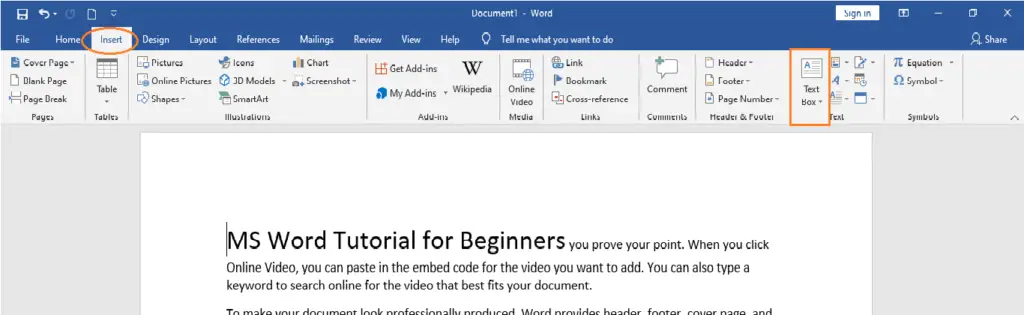
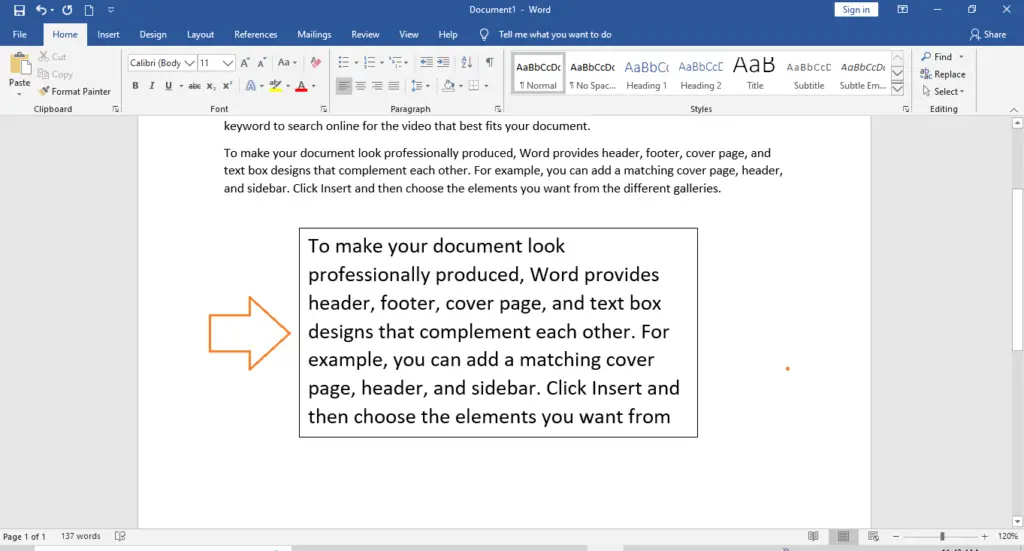
Now, In section Text, there is an option called “Text box“. Click on that option of Text box. Then, Select one of the text boxes available as per you choice. Here, for example, a simple text box has been selected.
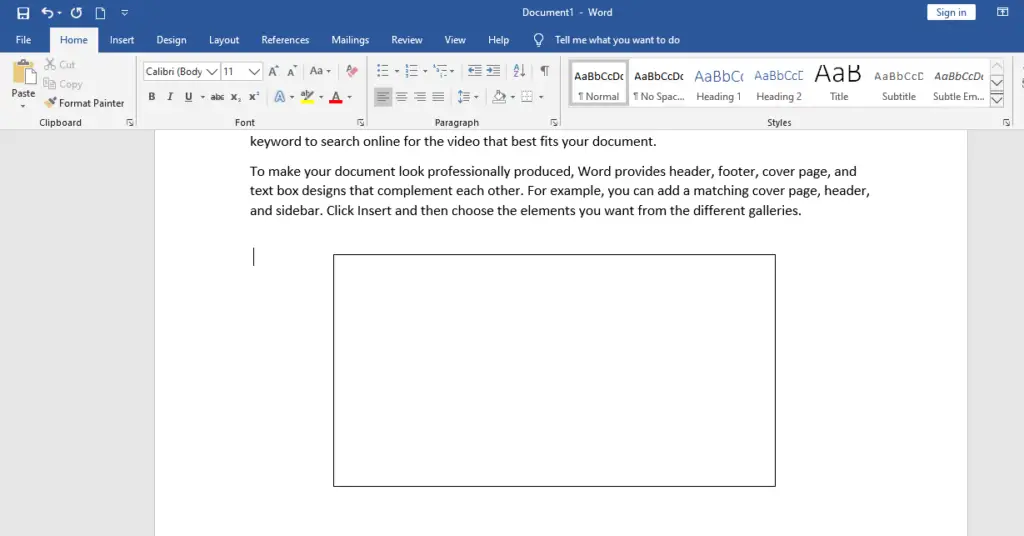
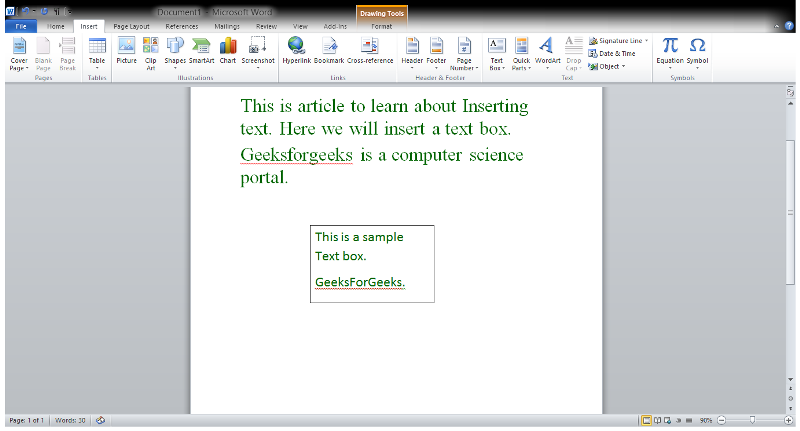
Now, insert text or type anything that you want.
Summary
In summary, we’ve talked about Inserting text in MS Word as well as what those terms mean. Also, we learn different ways to insert text in a document.
We hope this guide helps you as you plan to create a document in MS Word.
PREVIOUS
NEXT

Insert text or data from another document without using cut-and-paste
Updated on November 21, 2021
What to Know
- Insert a document within Word by going to Insert > Object > Text from File. Select a file and choose Insert.
- Insert a portion of a document by going to Insert > Object > Text from File and selecting a file. Adjust Range to choose a portion.
A common method to insert text into a Microsoft Word document is to cut and paste it. This works well for short pieces of text. When you want to insert an entire document or a lengthy section of a document, there’s a quicker solution than the cut-and-paste method. Instructions in this article apply to Word for Microsoft 365, Word 2019, Word 2016, Word 2013, and Word 2010.
Add Another Document to a Word Document
Word can add an entire document into your work in a few quick steps.
-
Position the cursor where you want to insert the document.
-
Go to the Insert tab.
-
In the Text group, select the Object drop-down arrow.
-
Select Text from File.
-
In the Insert File dialog box, select a document file.
-
Choose Insert.
-
The document is inserted, beginning at the cursor location.
Add a Portion of a Document to a Word Document
If you don’t want to add the entire contents of the file into your Word document, choose which parts of the document or worksheet that you want to insert.
-
Place the cursor where you want to insert the text.
-
Select Insert > Object > Text from File.
-
In the Insert File dialog box, select a document file.
-
Select Range.
-
In the Set Range dialog box, enter the bookmark name from the Word document, or the range of cells from the Excel worksheet.
-
Select OK.
-
In the Insert File dialog box, select Insert.
-
The portion of the document is inserted, beginning at the cursor location.
Insert a Linked Text in a Document
If the text from the document you’re inserting might change, use linked text that can be updated easily. The linked text option offers a third method to insert a document that updates the document automatically if the original changes.
-
Position the cursor where you want to insert the link to the document.
-
Go to the Insert tab.
-
Select the Object drop-down arrow.
-
Choose Object.
-
In the Object dialog box, go to the Create from File tab, then select Browse.
-
In the Browse dialog box, choose the file to insert, then select Insert.
-
In the Object dialog box, select Display as icon to display the inserted file as a clickable icon, rather than display the first page of the file.
-
Select OK to insert the linked file
How to Update Linked Text
Because linked data is stored in the source file, linked objects can be updated if the source is changed.
If the text changes in the original document, select the linked text object (the entire text of the insert will be selected), then press F9. This checks the original and updates the inserted text with the changes made to the original.
Only linked text can be updated. Because embedded objects become part of the Word file, these objects are not connected to the source file and do not update.
Thanks for letting us know!
Get the Latest Tech News Delivered Every Day
Subscribe
Formatting text in a document is relevant in all workspace environments. It helps to standardize a document, makes it readable and presentable to an audience. There is, therefore, a need to insert text in a document before formatting text.
Texts take over 90 percent of the content of a Microsoft Word document. Texts are so important that they must appear in every content created, no matter how small. Different documents such as letters, memos, resumes, etc., rely on texts to convey proper communication.
In documents such as flyers, banners, and letterheads, texts are needed for proper brand identification and information delivery. Texts also help to drive home ideas, as well as communicate to an audience.
Because of the importance of text, it is necessary to learn how to format text in a document. In this tutorial, you will learn how to insert and format text in a document by understanding the following:
- Inserting text in a document
- Formatting text in a document
- Using the clipboard commands
- Inserting text box and WordArt
- The drop cap command
- Using the spelling & grammar tool
Before you proceed, remember to explore the first three tutorials in this series. To understand how to work with Microsoft Word better, visit the links below.
- Microsoft Word Tutorial Level 1: What is Microsoft Word
- Microsoft Word Tutorial Level 2: Creating a Document
- Microsoft Word Tutorial Level 3: The Page Layout
To insert or add a text in a document is the process of including text content in a document. You can add text to a document in four ways:
The keyboard input device:
This is the process of typing directly into the document through the keyboard input device. This can also be achieved by using the onscreen keyboard made available in your operating system. Typing is the most popularly used method, and it is popularly used in offices and business centers. Experts in using this method have mastered how to type from the keyboard. And this is usually measured in words per minute. Broderbund’s Mavis Beacon is a popular software used to learn and master typing to become an expert typist.
The clipboard:
This is the process of copying and pasting texts from another document. Texts can be copied from another word document, another application, or a web page. When the copied text is placed in a word document, it becomes part of the present document. This is a faster way of inserting text into a document. It is simply done by highlighting the text or group of texts in one document. Then copying and pasting the selected texts at the insertion point in the present document. The selected text will populate the present document.
OCR (Optical Character Recognition) software:
This is the process of scanning and converting hard copy text documents into a soft or digital copies. This method is gaining popularity and acceptance in the modern office workspace. It enhances productivity, makes it easier to manage paperwork, and eliminates the task of learning typing. Its main disadvantage is that some characters may not be accurately recognized by the software. From experience, some OCR can give up to 95% accuracy depending on the nature of the scanned document. Because of the inaccuracy, you will have to proofread the document thoroughly to identify and correct misinterpreted texts. Some popular OCR software include Readiris, ABBYY cloud OCR, Simple OCR, etc.
Speech to text software:
Though this has not gained much popularity, it is one of the fastest ways of inserting a text. It is the process whereby your voice is being recognized by your computer and spoken words converted to texts. It is made possible by machine learning and artificial intelligence. To achieve high accuracy when using this method, you will train your voice for accurate recognition. Microsoft 365 has the Voice command on the Home tab to ease text dictation.
With these four methods, you can easily insert text into a document. Choose any of the methods, let us start formatting your texts.
Formatting Text in a Document
Formatting text is the process of customizing the text in a document to conform to the desire of the creator. It entails modifying and tweaking text using various text features to make a document presentable.
Text features
Every text in a document has its characteristics. These characteristics include color, size, capitalization, etc. Some of the text features to be modified in a document include:
- Font, which represents a character presentation format. Fonts differ, and each font selected has a unique way of representing a text it applies to. Different font types can be selected from the list of fonts.
- Size, which represents the magnitude of a character or text in a document. There are acceptable character sizes for different types of documents, though this can be left to the user’s choice. For example, in academic research, sizes 12 and 14 are acceptable for thesis and projects respectively.
- Capitalization, which depicts a text in any of two cases: lowercase and uppercase. Other case types are variations of these two cases.
- Boldface, which is used to lay emphasis on a text. It makes selected text bold or dark to show its level of importance in a document. Most times, boldface is used on headings and subheadings in a document.
- Italic, which represents a style of a selected text. Italicize texts are slanted in nature, indicating deviation from normal. This feature is usually used on texts that represent foreign languages, scientific terms, etc.
- Underline, which draws a line under a text. Underline is usually used in the absence of italics and bold. But in recent times, it is rarely used in a document. However, there may be a need for you to use it in a document.
- Subscript, which creates a small letter below a line of text. It is used to create a letter to the base of a standard text, such as 102 (10 base 2).
- Superscript, which creates a small letter above a line of text. It is used to raise a letter above a standard text, such as X3 (X raise to power 3).
- Color, which adds beauty to a text. Color can be applied to a selected text to differentiate it from other texts for different reasons. It may be for beauty, aesthetics, to highlight a point, or for branding, etc.
- Others include text effect and text highlight color. They can be used to distinguish texts in a document.
Applying text formatting
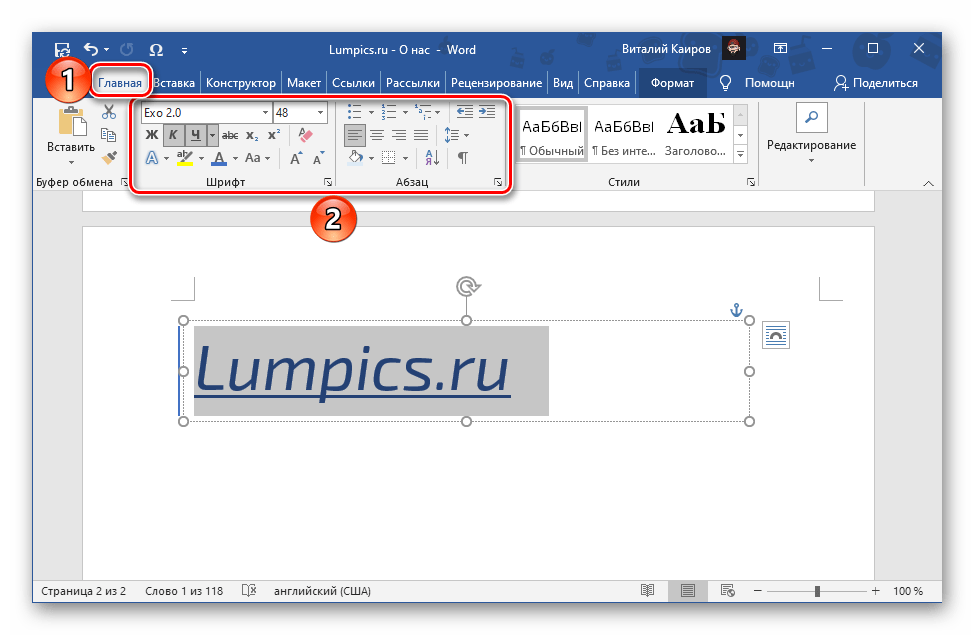
Formatting text is very simple in modern word applications because of the use of ribbon commands. To apply text formatting in a word document, follow these steps.
- Select the text or group of texts you want to apply formatting on.
- On the Home tab, under the Font group, select any of the text features you want to modify.

- Any feature selected will be applied immediately to the document (see features icon in the diagram above).
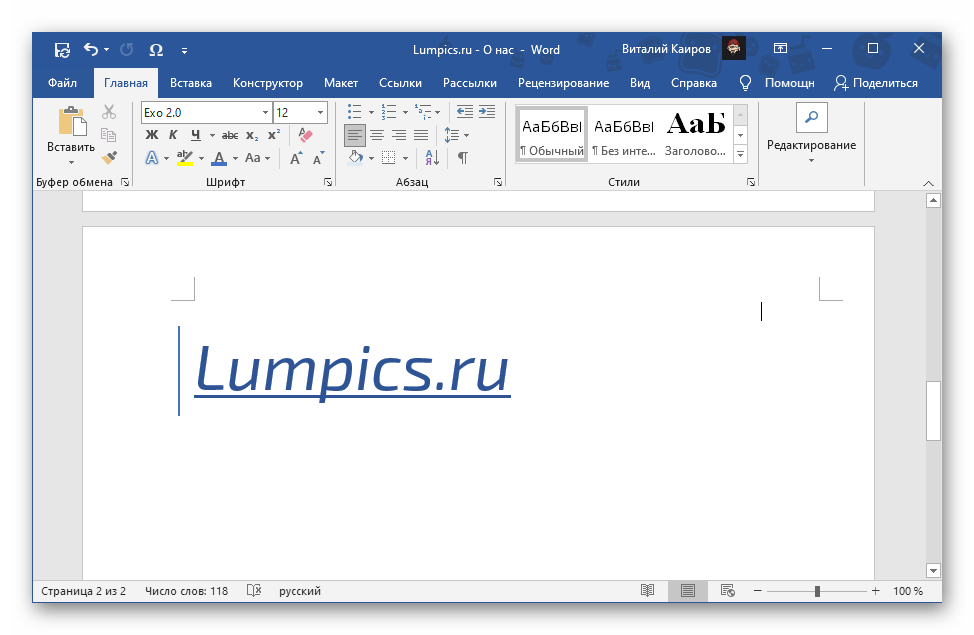
- To change text font, do the following:

- Highlight the text or group of text you want to modify
- On the Home tab, under Font group, select the Fontdropdown arrow
- From the list that appears, select your desired font, e.g. Century Gothic
- The selected font is applied to the highlighted texts.
- To apply capitalization, do the following:

- Highlight the text or group of text you want to modify
- On the Home tab, under Font group, select the Change Casedropdown arrow
- From the list that appears, select your desired font, e.g. UPPERCASE
- The selected font is applied to the highlighted texts.
- You can also apply text formatting by using the font dialog box shown below. To use the font dialog box, do the following.
- Highlight the text or group of text you want to modify
- On the Home tab, under the Font group, select the Font dialog box launcher. The font dialog box appears.

- On the font dialog box, select all the text features you want to modify (font, font style, text size, etc.
- Click the OK button when you are done.
Using the Clipboard Commands
The clipboard is a container where all items copied/ cut are temporarily kept for your use. When you activate the clipboard, items copied from other documents are also kept on the clipboard. This means that items copied from a webpage, Excel app, etc, are placed on the clipboard in a word document.

Storage on the clipboard is limited to 24 items. After 24 items are placed on the clipboard, newer items will displace the older ones in the order of First-in-First-Out. Each item on the clipboard displays the source apps icon, as shown in the diagram above.
To activate the clipboard, click on the clipboard launcher, on the Home tab, under the Clipboard group. An empty clipboard pane will appear if you have not copied any item. When you start copying items, the pane will be populated with the copied/cut items. Select each item on the clipboard to paste it on the insertion point in your document.
The clipboard commands
There are four commands on the clipboard group. Each command has a unique feature and purpose. The commands are named on the clipboard group and include:
- Cut, which is used to remove selected text or group of text and place them on the clipboard.
- Copy, which is used to create a copy of selected text or group of texts and place them on the clipboard.
- Format painter, which is used to apply selected formatting from one text to another. Instead of guessing the formatting features on a text you like, you can copy the formatting to another text. The format painter helps you achieve this result.
- Paste, which is used to add copied/cut content in a document. Items are added at the position of the cursor in a document. The paste command has subcommands, called paste options. These commands help you to paste an item with specific features. Let us examine them.

- Keep source formatting: if you selected this entry, then the item added to the document will retain its formatting features.
- Merge formatting: if this option is selected, then, the item added will change the formatting of the present document.
- Picture: if you chose this option, the item added will be converted to a picture.
- Text only: this option will strip the added item of all formatting features and keep only the text.
Applying the clipboard commands
The cut command:
- Highlight the text or group of text you want to cut (remove) from its present location.
- On the Home tab, under the Clipboard group, select the Cut icon. You can also press CTRL+X on the keyboard.
- The selected texts are placed on the clipboard.
The copy command:
- Highlight the text or group of text you want to copy (duplicate).
- On the Home tab, under the Clipboard group, select the Copy icon. You can also press CTRL+C on the keyboard.
- The selected texts are placed on the clipboard.
The paste command:
- Place the cursor in the position where you want to add the content you copied or cut.
- On the Home tab, under the Clipboard group, select the Paste icon. You can also press CTRL+V on the keyboard. Remember, you can choose any of the paste options.
- The selected texts are added to the document at the selected position.
The format painter command:
- Highlight the text or group of text you want to replicate its formatting.
- On the Home tab, under the Clipboard group, select the Format Painter icon. You can also press CTRL+SHIFT+C on the keyboard. The pointer changes to a brush with a line cursor.
- Use the brush-pointer to select the text or group of text you want to apply the format on.
- If you used the keyboard shortcut, then, select the text you want to apply the format on. On the keyboard, press CTRL+SHIFT+V.
- The formatting will be automatically applied to the selected text.
Inserting Textbox and WordArt
A textbox is a flexible tool that can be used to insert text at any location on the document. The WordArt is an artistic tool that adds flair to a text. Both textbox and WordArt are shapes that can be placed in any location without the limitation of the document margins. They can be very useful when creating documents such as letterheads, business cards, invitation cards, certificates, flyers, banners, etc.
In a document, you can use them to create bold headings or quotes that will attract the attention of readers. In the modern word app, the WordArt is a kind of textbox. In the older word app, Word 97 – 2003 applications, it was different. Therefore, you can work with the WordArt the same way you work with the textbox.
Inserting a textbox
To insert a textbox in your document, do the following:
- On the Insert tab, under Illustrations group, select Shapes.

- From the shapes dropdown list, locate Text Box under Basic Shapes.
- Select the text box icon. The pointer changes to a cross.
- On the document workspace, click and drag to insert a text box.
- Start entering text on the text box as you desire. You can also adjust the size of the text box as you want.
- Drag the text box and position it where you desire on your document.
- Select the text box or its content and apply necessary text formatting as explained in the formatting text section.
- Select the text box. On the Format tab, under Shape Styles, select the Format Shape dialog box launcher.

- On the pane that appears on the right, select Fill, and choose the No Fill radio button.
- On the pane that appears on the right, select Line, and choose the No line radio button.
The above 9 and 10 steps will remove the fill color and line border on the text box. This is necessary when you don’t want to show any of those features. You can decide to leave them if they are required to draw the attention you desire.
The text box has preset designs that you can insert into your document to create attention. To use the preset design, do the following:
- Go to the Insert tab, under Text group, select the Text Box.

- From the dropdown list, you can select one of the preset text boxes.
- The selected text box is inserted into your document.
- If you wish to create your text box, select the Draw Text Box option from the menu list.
- Follow steps 3 – 10 above.
Insert a WordArt
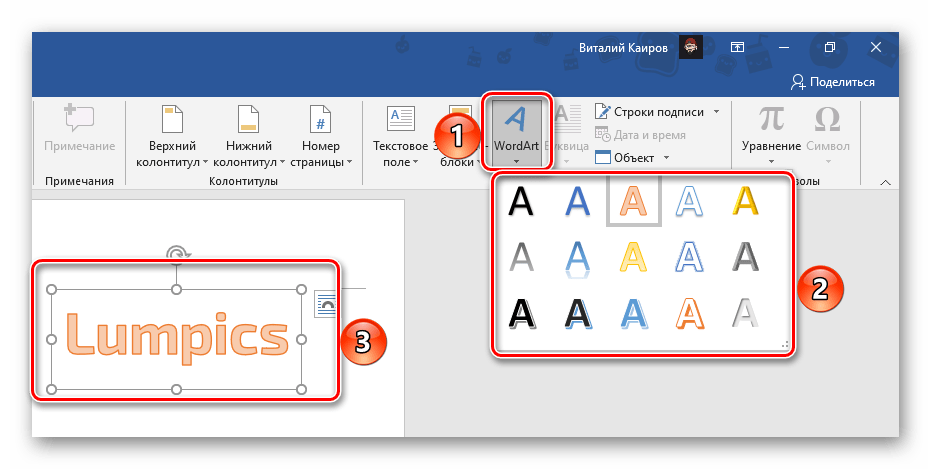
To insert a WordArt in your document, do the following:
- On the Insert tab, under the Text group, select the WordArt icon.

- From the dropdown list, select an artistic design of your choice. A text box with a “Your text here” inscription appears.
- Delete the inscription text and type your desired text to create a WordArt text.
- Drag the WordArt text you created and position it where you desire.
- You can select the WordArt text and apply all the text formatting as explained under formatting text.
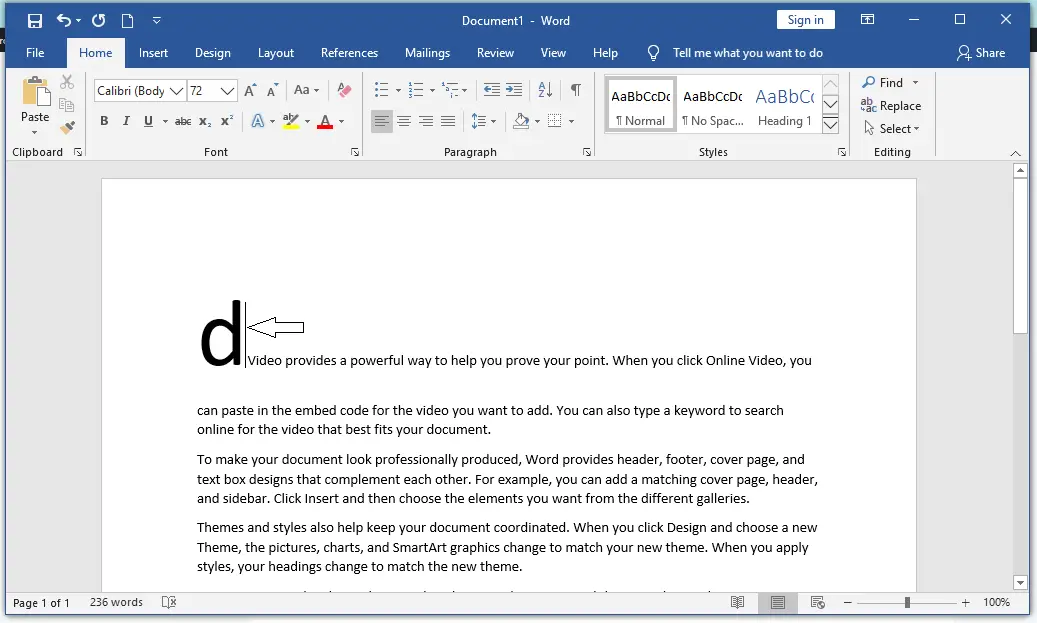
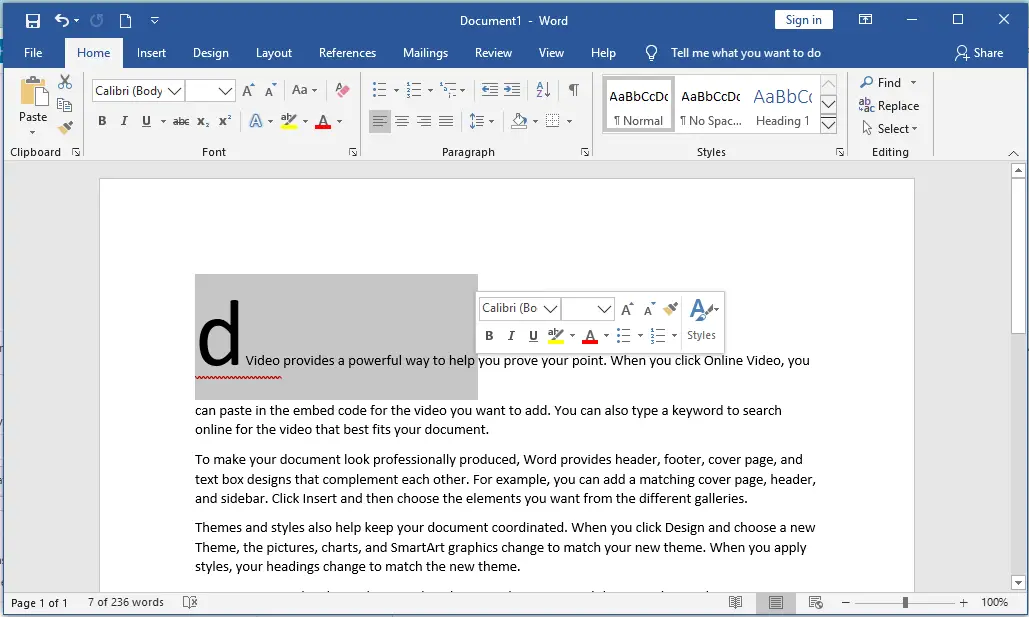
The Drop Cap Command
The drop cap command is used to create a capital letter at the beginning of a paragraph. The created letter usually spans the first 2 to 3 lines of the paragraph to create a beautiful outlook. A drop cap is often seen in newspapers and magazines where it is used to begin a heading or subheading.

In Microsoft word, there are two drop cap options, namely: dropped and in margin. The dropped option creates a drop cap within the document’s workspace. But the in-margin option creates the drop cap inside the document’s margin, allowing text to flow within the workspace.
Applying drop cap in a document
To apply a drop cap in a document, follow the following steps:
- Select the paragraph you want to apply drop cap on.
- On the Insert tab, under the Text group, select the Drop Cap icon.
- From the list that appears (see image above), select any of the two options: dropped or in-margin.
- The selected drop cap option applies automatically to the selected paragraph.
Setting drop cap options
When you apply drop cap in your document, you have the option of customizing how the dropped text will appear. You can change the font, the number of lines dropped, and the distance from the text. To customize drop cap text, do the following:
- Select the drop cap text or the paragraph it applies to.
- On the Insert tab, under the Text group, select the Drop Cap icon.
- From the list that appears (see image above), select Drop Cap Options….

- On the drop cap option dialog box, select your desired font under Font: Also,select the number of lines to drop cap and the distance from the text.
- Click the OK button when you are done. The changes will take effect automatically.
Conclusion
We have come to the end of today’s Microsoft Word tutorial. We were able to look at formatting text in a word document. We began by discussing how you can insert text in a document followed by formatting text in a document.
Our discussion includes how to use the clipboard and the clipboard commands, inserting a text box, and WordArt. And concluded with the drop cap command. Detail on how to format the text box and WordArt was not discussed. We shall discuss them in a later tutorial under working with shapes. As you can see, inserting and formatting text are crucial and simple to apply in a word document. I want to believe that this tutorial is useful, and has helped improve your skill in using MS Word. We shall continue next week with Customizing Paragraphs in a document. If you feel we did not cover your pain point, please kindly let us know. We are open to your suggestions.
MS-Word is a word processing application used worldwide by many users. It is also very popular because of the vast features and tools provided by it to its user. It is a very user-friendly and interactive application developed by Microsoft Corporation Ltd. It is used to create various documents like articles, letters, projects, assignments, etc.
Inserting the Text
Inserting a text is one of the many features provided by MS-Word. For example, a user is writing something(like an article or assignment) and after completing that document or in the middle of writing, he/she realizes that he/she missed something in between or start or anywhere in the document to write. Thus, in this situation Inserting text is the feature that comes to be very much handy and will do the work for the user.
So, in this article, we will see how to insert text, and we will learn it step by step with the help of instruction and images:
Method 1. Inserting the text without replacing any text
Steps to follow for Inserting the text without replacing any text:
Step 1: First open MS-Word on your PC.
Step 2: Now, Open the document or create a new one in which you want to perform this operation.
Step 3: Now, Put the cursor where you want to insert the text.
Step 4: Now, Write or type the text which needs to be inserted(like here we insert “Geeksforgeeks is a computer science portal”). As shown in the figure below:
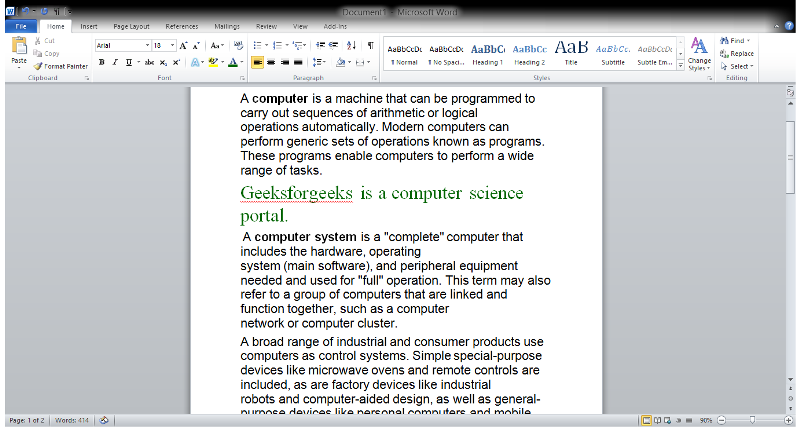
Step 5: So, the text is inserted successfully.
Method 2. Inserting the text with replacing some text
Maybe a situation occurs, where a certain part of the whole document or some text needs to be replaced by some other text.
So, Steps to follow for Inserting the text with replacing some text:
Step 1: First open MS-Word in your PC.
Step 2: Now, Open the document or create a new one in which you want to perform this operation.
Step 3: Now, Select the text that you want to replace.
Step 4: Now, Press “Backspace” key and start typing the text you want to insert. Or Simply, start typing and the selected text by default feature gets vanish or deleted, when you started typing the text you want to insert. (Here in this we replace the First paragraph with “Geeksforgeeks is a computer science portal”)

Step 5: So, the text is inserted successfully.
Method 3. Inserting text with help of a Text box
This is also a fine tool provided by MS-Word. We can use it to insert a Text box anywhere in the document (where required).
Steps to follow for Inserting the text with help of a Text box.
Step 1: First open MS-Word on your PC.
Step 2: Now, Open the document or create a new one in which you want to perform this operation.

Step 3: Now, go to “insert tab” above. (As shown in the image below)
Step 4: Now, In the insert tab, there is a section called “Text“.
Step 5: Now, In section Text, There is an option called “Text box“. Click on that option of Text box.
Step 6: Now, Select any of the available text box(as per you choice). Here, for example we have selected a simple text box.
Step 7: Now, Write or type anything that you want.
So, these are the ways in which we can insert a text.
Содержание
- Способ 1: Текстовые эффекты и оформление
- Способ 2: Текстовое поле
- Способ 3: Объект WordArt
- Способ 4: Стили
- Вопросы и ответы

Способ 1: Текстовые эффекты и оформление
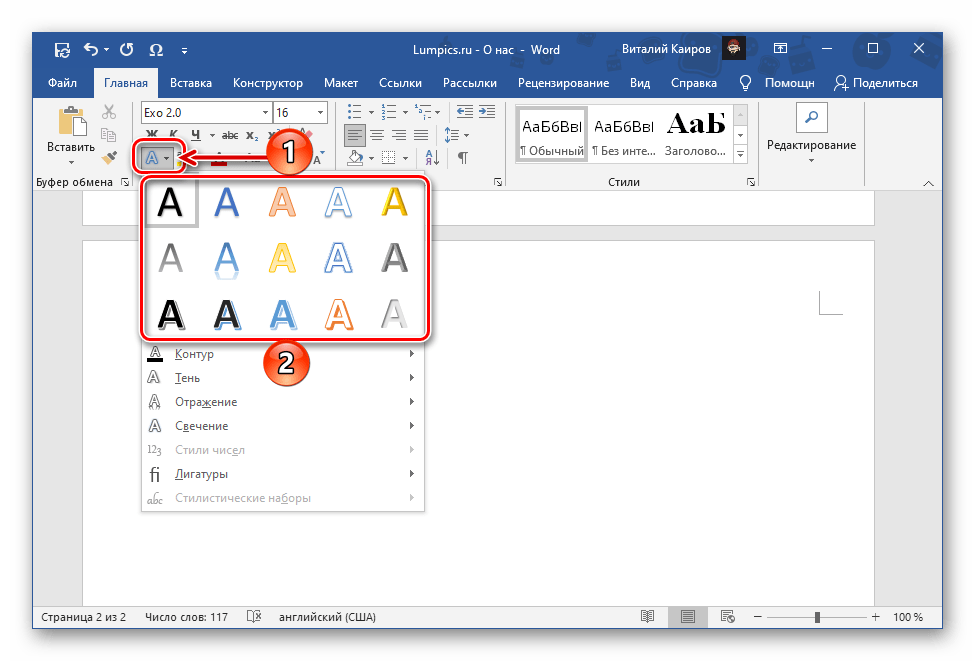
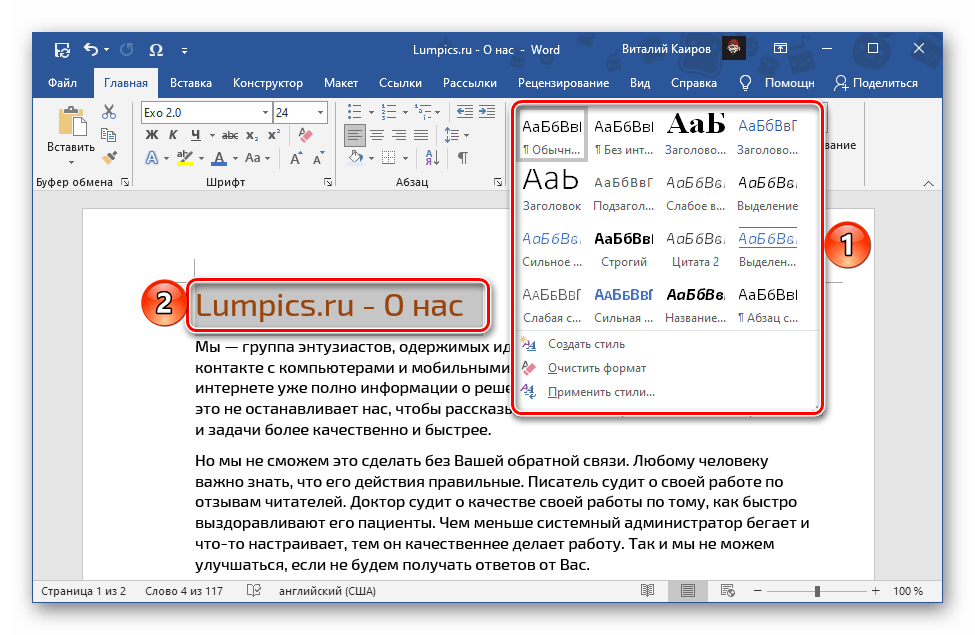
Проще всего создать надпись в Ворде можно с помощью одного из базовых инструментов группы «Шрифт».
- Разверните меню обозначенной на изображении ниже кнопки, нажав на расположенный справа от нее указывающий вниз треугольник, и выберите подходящий вариант оформления (его можно будет изменить в любой момент).
- Введите текст надписи.
- Выделите ее и, по необходимости, измените такие параметры, как шрифт, размер, начертание, цвет и другие.

Читайте также: Как изменить шрифт в Word - В меню выбора стиля, открытом нами на первом шаге текущей инструкции, можно задействовать один из доступных или сразу несколько эффектов.
Надпись, созданная таким образом, представляет собой обычный текст, хотя и отличается внешне. Поэтому для нее доступы те же средства редактирования и форматирования, что и для любых других записей в документе, например, тип выравнивания, отступы, заливка и т. д.
Читайте также:
Как выровнять текст в Ворде
Как форматировать текст в документе Microsoft Word
Способ 2: Текстовое поле
Несколько более широкие возможности оформления и редактирования предоставляет такой вариант создания надписи в Ворде, как использование текстового поля.
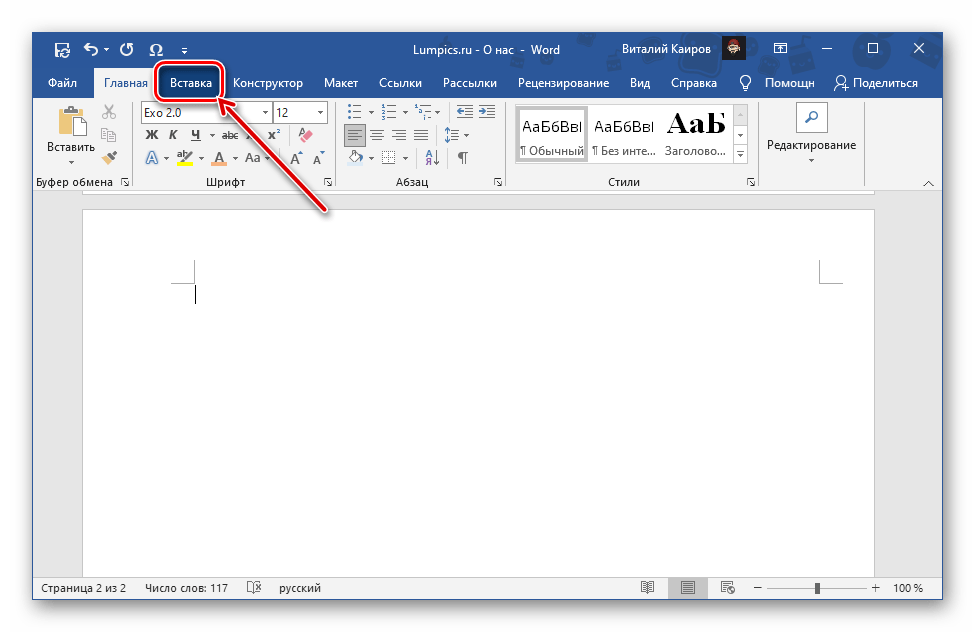
- На ленте с инструментами текстового редактора перейдите во вкладку «Вставка».
- Разверните меню кнопки «Текстовое поле», расположенной в группе «Текст», и выберите подходящий макет.
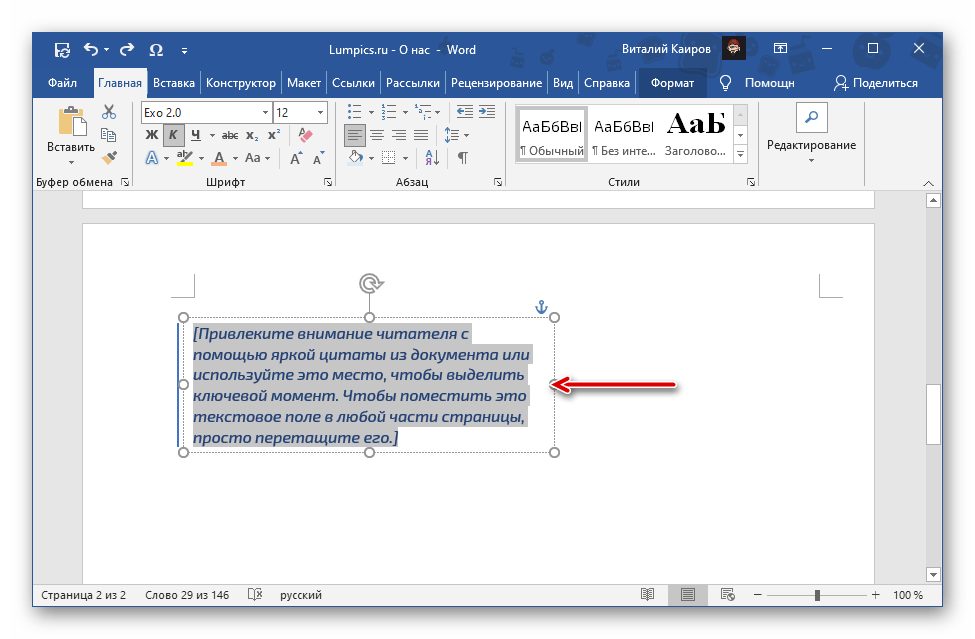
- Руководствуясь собственными пожеланиями и/или выдвигаемыми к документу требованиями,

измените размер и содержимое блока, добавив в него необходимую надпись.


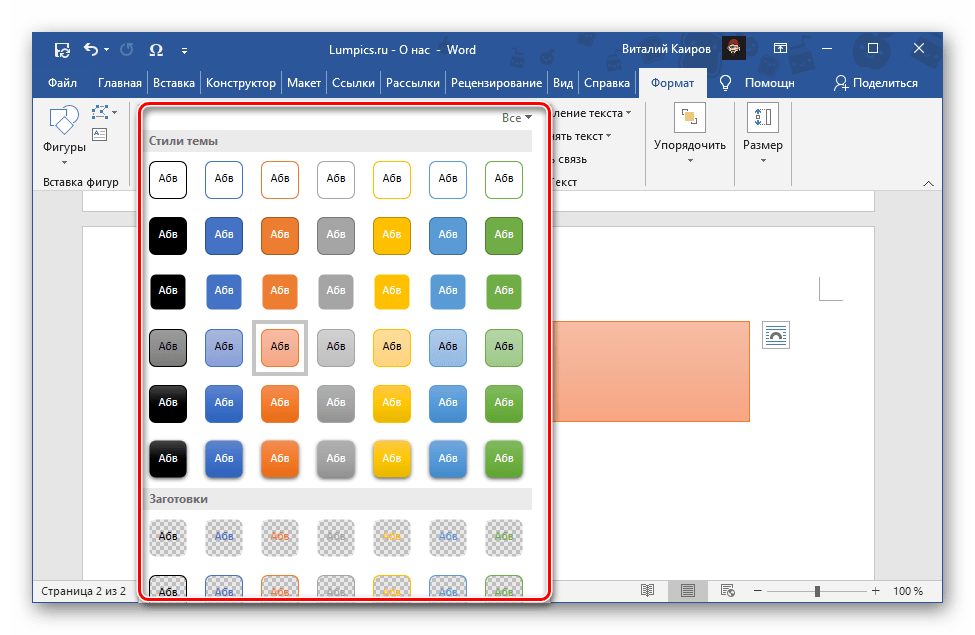
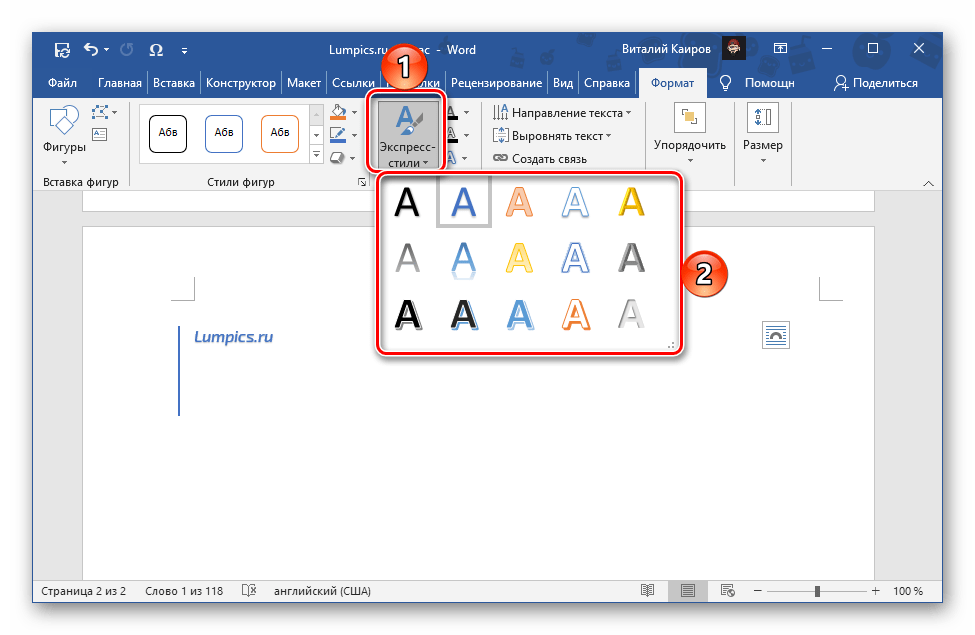
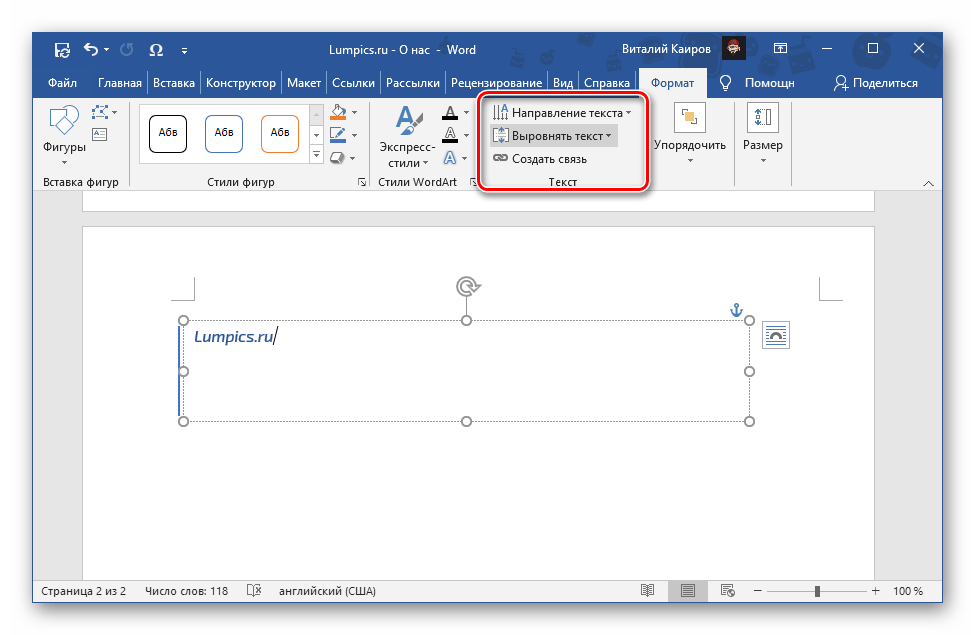
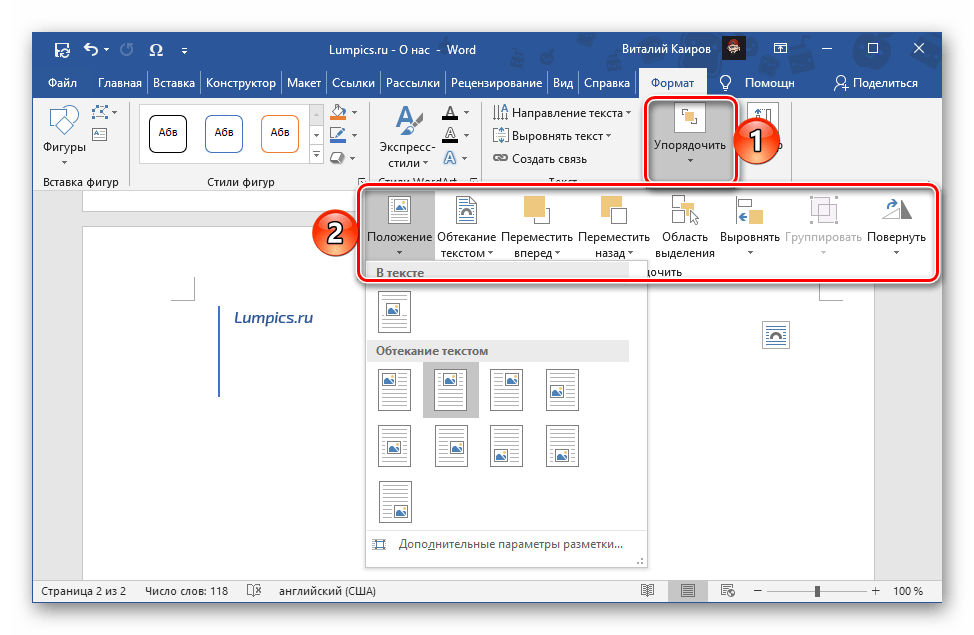
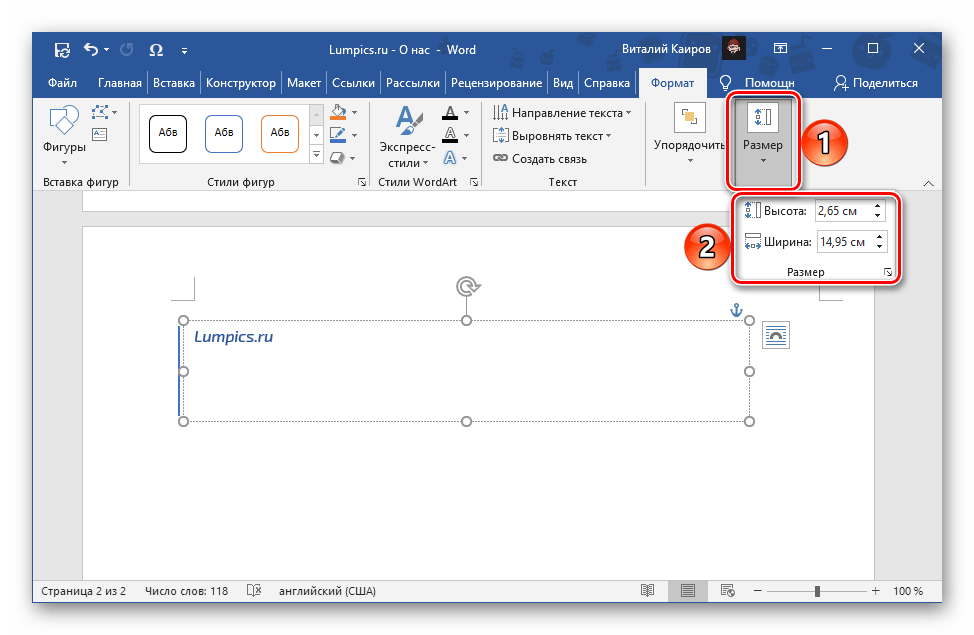
- Оформить содержимое блока с текстом можно во вкладке «Формат», где доступны следующие параметры:

- «Стили фигур» — с помощью представленных в этой группе инструментов можно определить цвет фона за текстом и контура поля, а также добавить эффекты;
- «Стили WordArt» — возможность выбора стиля надписей, их цвета (и заливки, и контура) и художественных эффектов (тени, свечение, отражение и т. д.);
- «Текст» — позволяет изменить направление текста, выровнять его, а также создать связь полей друг с другом;
- «Упорядочить» — здесь можно изменить положение поля с текстом, выбрать вариант обтекания, переместить, повернуть блок и т. д.;

Читайте также: Как повернуть текст в Microsoft Word - «Размер» — возможность задать точные размеры высоты и ширины текстового поля.
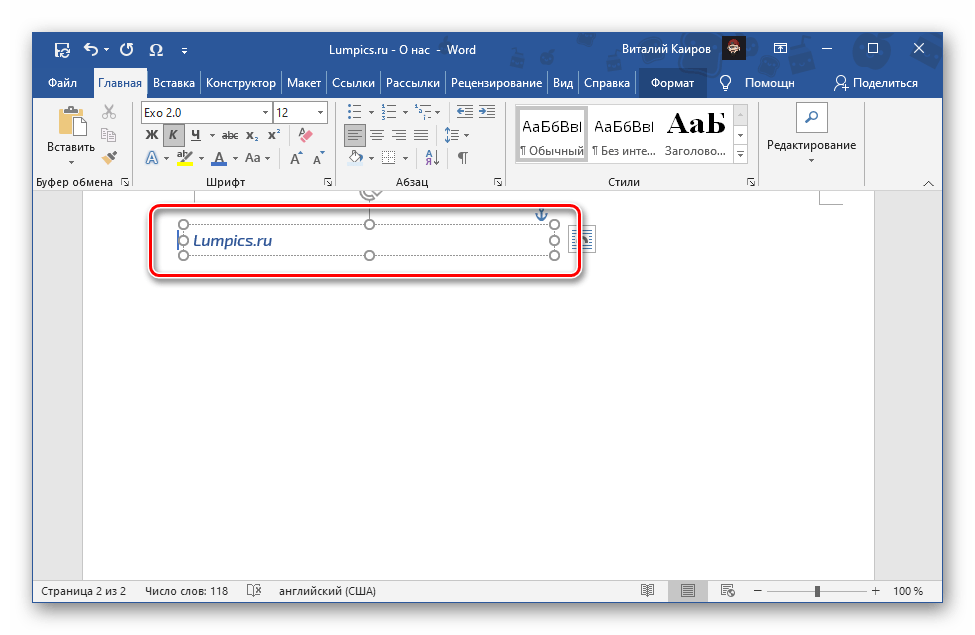
Примечание: Изменить внешний вид текста внутри поля (такие его параметры, как шрифт, размер, начертание и т. д.) также можно с помощью стандартных инструментов, распложенных во вкладке «Главная».
- Закончив с редактированием и оформлением надписи, кликните в произвольном месте документа, за пределами поля. Для того чтобы снова перейти к использованию рассмотренных выше инструментов, выделите блок с текстом двойным кликом левой кнопки мышки (ЛКМ) и перейдите во вкладку «Формат».
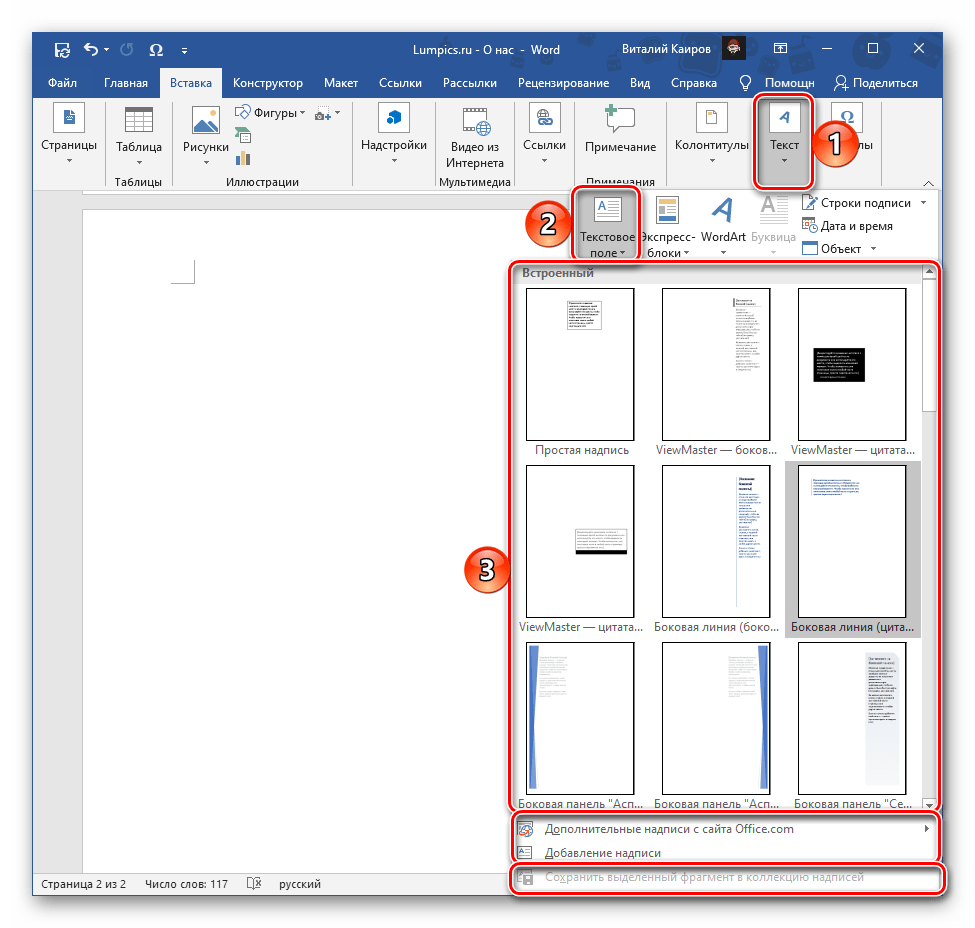
Примечание: Помимо шаблонных полей, можно использовать «Дополнительные надписи с сайта Office.com» (доступно только в лицензионной версии офисного пакета от Microsoft) и «Добавление надписи» (позволяет нарисовать произвольное пустое поле и затем заполнить его). Любую самостоятельно созданную надпись через показанное выше меню можно будет сохранить в коллекцию.


Стоит отметить, что надписи, созданные с помощью текстовых полей, – это отдельные элементы документа, но для работы с ними и редактирования доступны практически все те же возможности и инструменты, что и для обычного текста, а в некоторых случаях даже больше.
Читайте также: Как написать вертикально текст в Ворде
Способ 3: Объект WordArt
Внутри рассмотренного выше «Текстового поля» по умолчанию содержатся надписи обычного вида, который затем можно изменять под свои нужды. Если же вы хотите создать изначально более привлекательный объект, стоит прибегнуть к средствам WordArt, расположенным во все той же вкладке «Вставка». Возможности для редактирования объектов WordArt, по сути, те же, что и для обычных надписей и текстового поля, рассмотренных нами выше, поэтому повторно акцентировать на них внимание не будем.
Читайте также: Как зеркально отразить надпись в Word
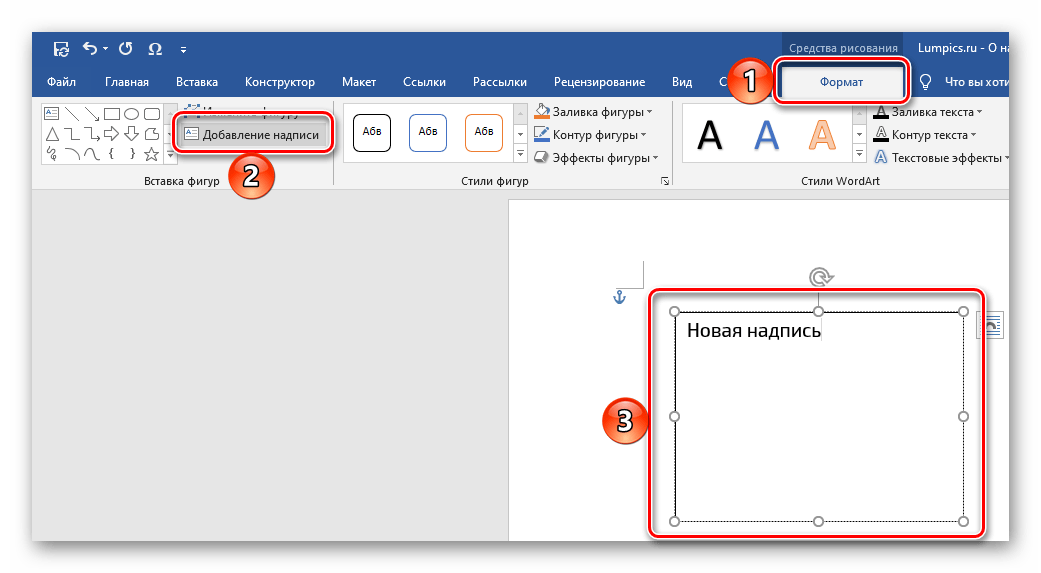
Примечание: После создания текстового поля или WordArt-элемента во вкладке «Формат» появляется возможность «Добавления надписи» (в группе инструментов «Вставка фигур». Используя ее, можно нарисовать пустое поле, заполнить его текстом и отредактировать на свое усмотрение.
Читайте также: Как вставить фигуру в документ Ворд
Способ 4: Стили
Если задача добавления надписи в документ Word обусловлена не необходимостью создания отдельного объекта, а выделением таких важных частей текста, как заголовки и подзаголовки, следует обратиться к доступному в текстовом редакторе набору стилей. В данном случае можно не только выбрать шаблонные варианты, но и создать свои собственные. Более подробно о том, как все это сделать, мы ранее рассказывали в отдельных статьях.
Подробнее:
Как создать свой стиль в Ворде
Как сделать заголовки в Ворде
Еще статьи по данной теме:
Помогла ли Вам статья?
Lesson 5: Text Basics
/en/word2016/saving-and-sharing-documents/content/
Introduction
If you’re new to Microsoft Word, you’ll need to learn the basics of typing, editing, and organizing text. Basic tasks include the ability to add, delete, and move text in your document, as well as how to cut, copy, and paste.
Optional: Download our practice document.
Watch the video below to learn the basics of working with text in Word.
Using the insertion point to add text
The insertion point is the blinking vertical line in your document. It indicates where you can enter text on the page. You can use the insertion point in a variety of ways.
- Blank document: When a new blank document opens, the insertion point will appear in the top-left corner of the page. If you want, you can begin typing from this location.
- Adding spaces: Press the spacebar to add spaces after a word or in between text.
- New paragraph line: Press Enter on your keyboard to move the insertion point to the next paragraph line.
- Manual placement: Once you begin typing, you can use the mouse to move the insertion point to a specific place in your document. Simply click the location in the text where you want to place it.
- Arrow keys: You can also use the arrow keys on your keyboard to move the insertion point. The left and right arrow keys will move between adjacent characters on the same line, while the up and down arrows will move between paragraph lines. You can also press Ctrl+Left or Ctrl+Right to quickly move between entire words.

In a new blank document, you can double-click the mouse to move the insertion point elsewhere on the page.
Selecting text
Before you can move or format text, you’ll need to select it. To do this, click and drag your mouse over the text, then release the mouse. A highlighted box will appear over the selected text.

When you select text or images in Word, a hover toolbar with command shortcuts will appear. If the toolbar does not appear at first, try hovering the mouse over the selection.
To select multiple lines of text:
- Move the mouse pointer to the left of any line so it becomes a right slanted arrow.
- Click the mouse. The line will be selected.
- To select multiple lines, click and drag the mouse up or down.
- To select all of the text in your document, choose the Select command on the Home tab, then click Select All. Alternatively, you can press Ctrl+A on your keyboard.

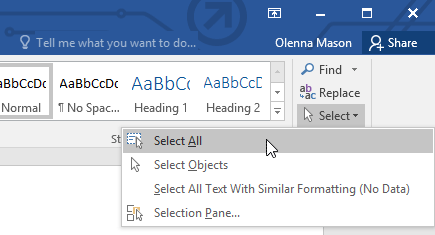
Other shortcuts include double-clicking to select a word and triple-clicking to select an entire sentence or paragraph.
To delete text:
There are several ways to delete—or remove—text:
- To delete text to the left of the insertion point, press the Backspace key on your keyboard.
- To delete text to the right of the insertion point, press the Delete key on your keyboard.
- Select the text you want to remove, then press the Delete key.
If you select text and start typing, the selected text will automatically be deleted and replaced with the new text.
Copying and moving text
Word allows you to copy text that’s already in your document and paste it in other places, which can save you a lot of time and effort. If you want to move text around in your document, you can cut and paste or drag and drop.
To copy and paste text:
- Select the text you want to copy.
- Click the Copy command on the Home tab. Alternatively, you can press Ctrl+C on your keyboard.
- Place the insertion point where you want the text to appear.
- Click the Paste command on the Home tab. Alternatively, you can press Ctrl+V on your keyboard.
- The text will appear.
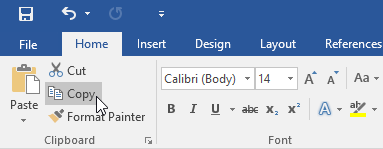
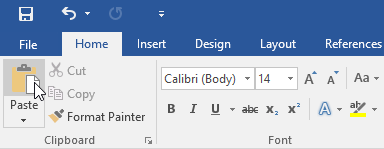
To cut and paste text:
- Select the text you want to cut.
- Click the Cut command on the Home tab. Alternatively, you can press Ctrl+X on your keyboard.
- Place your insertion point where you want the text to appear.
- Click the Paste command on the Home tab. Alternatively, you can press Ctrl+V on your keyboard.
- The text will appear.
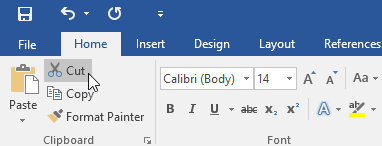
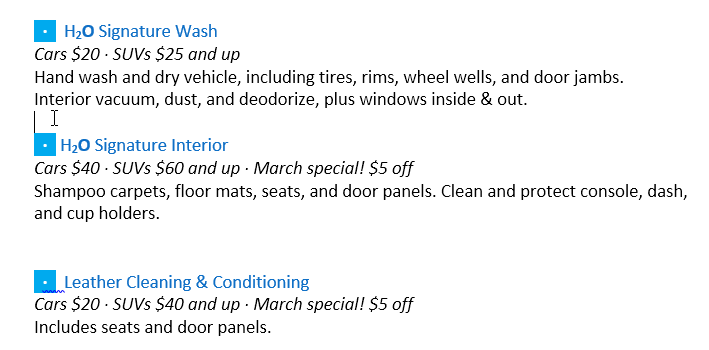
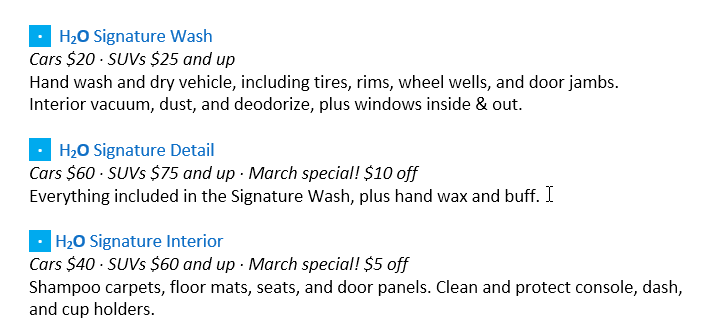
You can also cut, copy, and paste by right-clicking your document and choosing the desired action from the drop-down menu. When you use this method to paste, you can choose from three options that determine how the text will be formatted: Keep Source Formatting, Merge Formatting, and Keep Text Only. You can hover the mouse over each icon to see what it will look like before you select it.
To drag and drop text:
- Select the text you want to move.
- Click and drag the text to the location where you want it to appear. A small rectangle will appear below the arrow to indicate that you are moving text.
- Release the mouse, and the text will appear.
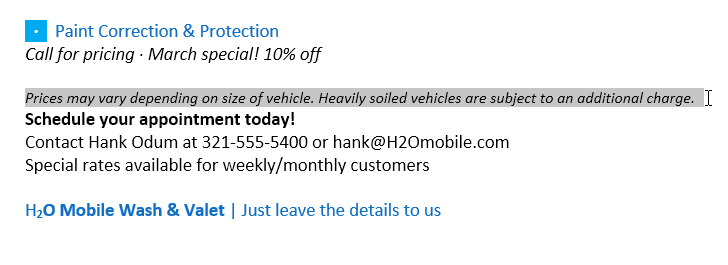

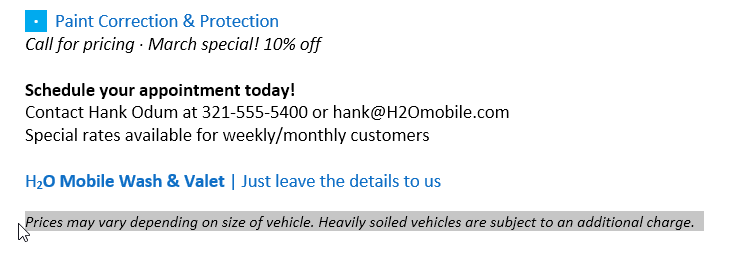
If text does not appear in the exact location you want, you can press the Enter key on your keyboard to move the text to a new line.
Undo and Redo
Let’s say you’re working on a document and accidentally delete some text. Fortunately, you won’t have to retype everything you just deleted! Word allows you to undo your most recent action when you make a mistake like this.
To do this, locate and select the Undo command on the Quick Access Toolbar. Alternatively, you can press Ctrl+Z on your keyboard. You can continue using this command to undo multiple changes in a row.
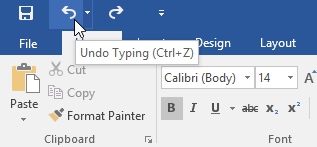
By contrast, the Redo command allows you to reverse the last undo. You can also access this command by pressing Ctrl+Y on your keyboard.
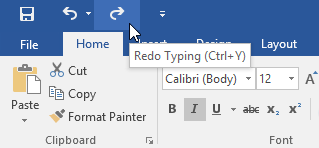
Symbols
If you need to insert an unusual character that’s not on your keyboard, such as a copyright (©) or trademark (™) symbol, you can usually find them with the Symbol command.
To insert a symbol:
- Place the insertion point where you want the symbol to appear.
- Click the Insert tab.
- Locate and select the Symbol command, then choose the desired symbol from the drop-down menu. If you don’t see the one you want, select More Symbols.
- The symbol will appear in the document.
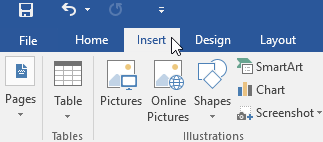
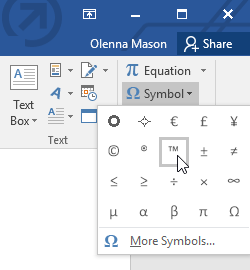
Challenge!
- Open our practice document.
- Scroll to page 2.
- Place the insertion point at the top of the document and type Now Introducing…
- Use your arrow keys to move the insertion point to the Signature Detail Plan’s price and change it to $99.99/mo.
- At the bottom of the document, use drag and drop to move Just leave the details to us to the end of the last line.
- At the end of the line you just moved, insert the trademark symbol. If you cannot find the trademark symbol, insert a different symbol of your choice.
- When you’re finished, your document should look something like this:


/en/word2016/formatting-text/content/