
Home / VBA / How to Insert a Row using VBA in Excel
In this tutorial, we will look at how to insert a row or a column using a VBA code in Excel. We will also explore what are the different ways to write a macro for this.
To insert a row using a VBA code, you need to use the “Entire Row” property with the “Insert” method. With the entire row property, you can refer to the entire row using a cell and then insert a new row there. By default, it will insert a single row before the cell that you have mentioned.

- First, specify a cell using the range object.
- Now, enter a dot (.) to get the list of properties and methods.
- After that, select the “Entire Row” property or type it.
- In the end, again enter a dot (.) and select the “Insert” method or type it.
Range("A1").EntireRow.InsertYour code is ready here to insert a row. Now when you run this code, it will instantly insert a new row before cell A1.
Insert Multiple Rows
There are two ways to insert multiple rows in a worksheet that I have found. The first is the same insert method that we have used in the above example.
With this, you need to specify a range whose count is equivalent to the count of rows you want to insert. Now let’s say you want to insert 5 rows after, in that case, you can use a code like the following.

To be honest, I haven’t found this method quite useful because you need to change the range if you want to change the count of the rows.
So here’s the second method.
Dim iRow As Long
Dim iCount As Long
Dim i As Long

iCount = InputBox(Prompt:="How many rows you want to add?")
iRow = InputBox _
(Prompt:="After which row you want to add new rows? (Enter the row number")

For i = 1 To iCount
    Rows(iRow).EntireRow.Insert
Next i
When you run this code, it asks you to enter the number of rows that you want to add and then the row number where you want to add all those rows. It uses a FOR LOOP (For Next) to loop that number of times and insert rows one by one.
Insert Rows Based on the Cell Values
If you want to insert rows based on a cell value, then you can use the following code.
Dim iRow As Long
Dim iCount As Long
Dim i As Long

iCount = Range("A1").Value
iRow = Range("B1").Value

For i = 1 To iCount
    Rows(iRow).EntireRow.Insert
Next i
When you run this macro, it takes the count of rows from cell A1 and the row where you want to add rows from cell B1.
Insert a Row without Formatting
When you insert a row where the above row has some specific formatting, in that case, the row will also have that formatting automatically. And the simplest way to deal with this thing is to use clear formats. Consider the following code.
Rows(7).EntireRow.Insert
Rows(7).ClearFormats
When you run the above code, it inserts a new row before the 7th row. Now, what happens, when you insert a row before the 7th row that new row becomes the 7th row, and then the second line of code clears the formats from that row.
Insert Copied Row
You can also use the same method to copy a row and then insert it somewhere else. See the following code.
Application.CutCopyMode = False

With Worksheets("Data")

.Rows(5).Copy
.Rows(9).Insert Shift:=xlShiftDown

End With

Application.CutCopyMode = True
More Tutorials
- Count Rows using VBA in Excel
- Excel VBA Font (Color, Size, Type, and Bold)
- Excel VBA Hide and Unhide a Column or a Row
- Excel VBA Range – Working with Range and Cells in VBA
- Apply Borders on a Cell using VBA in Excel
- Find Last Row, Column, and Cell using VBA in Excel
- Merge Cells in Excel using a VBA Code
- Select a Range/Cell using VBA in Excel
- SELECT ALL the Cells in a Worksheet using a VBA Code
- ActiveCell in VBA in Excel
- Special Cells Method in VBA in Excel
- UsedRange Property in VBA in Excel
- VBA AutoFit (Rows, Column, or the Entire Worksheet)
- VBA ClearContents (from a Cell, Range, or Entire Worksheet)
- VBA Copy Range to Another Sheet + Workbook
- VBA Enter Value in a Cell (Set, Get and Change)
- VBA Insert Column (Single and Multiple)
- VBA Named Range | (Static + from Selection + Dynamic)
- VBA Range Offset
- VBA Sort Range | (Descending, Multiple Columns, Sort Orientation
- VBA Wrap Text (Cell, Range, and Entire Worksheet)
- VBA Check IF a Cell is Empty + Multiple Cells
⇠ Back to What is VBA in Excel
Helpful Links – Developer Tab – Visual Basic Editor – Run a Macro – Personal Macro Workbook – Excel Macro Recorder – VBA Interview Questions – VBA Codes
 In certain cases, you may need to automate the process of inserting a row (or several rows) in a worksheet. This is useful, for example, when you’re (i) manipulating or adding data entries, or (ii) formatting a worksheet that uses blank rows for organization purposes.
The information and examples in this VBA Tutorial should allow you to insert rows in a variety of circumstances.
This VBA Tutorial is accompanied by Excel workbooks containing the data and macros I use in the examples below. You can get immediate free access to these example workbooks by clicking the button below.

Use the following Table of Contents to navigate to the section you’re interested in.
Insert Rows in Excel
When working manually with Excel, you can insert rows in the following 2 steps:
- Select the row or rows above which to insert the row or rows.
- Do one of the following:
- Right-click and select Insert.
- Go to Home > Insert > Insert Sheet Rows.
- Use the “Ctrl + Shift + +” keyboard shortcut.

You can use the VBA constructs and structures I describe below to automate this process to achieve a variety of results.
Excel VBA Constructs to Insert Rows
Insert Rows with the Range.Insert Method
Purpose of Range.Insert
Use the Range.Insert method to insert a cell range into a worksheet. The 2 main characteristics of the Range.Insert method are the following:
- Range.Insert can insert a single cell or a cell range. For purposes of this VBA Tutorial, you’re interested in inserting entire rows.
- To make space for the newly-inserted cells, Range.Insert shifts other cells away.
Syntax of Range.Insert
expression.Insert(Shift, CopyOrigin)
“expression” is a Range object. Therefore, I simplify as follows:
Range.Insert(Shift, CopyOrigin)
Parameters of Range.Insert
- Parameter: Shift.
- Description: Specifies the direction in which cells are shifted away to make space for the newly-inserted row.
- Optional/Required: Optional.
- Data type: Variant.
- Values: Use a constant from the xlInsertShiftDirection Enumeration:
- xlShiftDown or -4121: Shifts cells down.
- xlShiftToRight or -4161: Shifts cells to the right.
- Default: Excel decides based on the range’s shape.
- Usage notes: When you insert a row: (i) use xlShiftDown or -4121, or (ii) omit parameter and rely on the default behavior.
- Parameter: CopyOrigin.
- Description: Specifies from where (the origin) is the format for the cells in the newly inserted row copied.
- Optional/Required: Optional.
- Data type: Variant.
- Values: A constant from the xlInsertFormatOrigin Enumeration:
- xlFormatFromLeftOrAbove or 0: Newly-inserted cells take formatting from cells above or to the left.
- xlFormatFromRightOrBelow or 1: Newly-inserted cells take formatting from cells below or to the right.
- Default: xlFormatFromLeftOrAbove or 0. Newly-inserted cells take the formatting from cells above or to the left.
How to Use Range.Insert to Insert Rows
Use the Range.Insert method to insert a row into a worksheet. Use a statement with the following structure:
Range.Insert Shift:=xlShiftDown CopyOrigin:=xlInsertFormatOriginConstant
For these purposes:
- Range: Range object representing an entire row. Use the Worksheet.Rows or Range.EntireRow properties to return a Range object that represents the entire row. Please refer to the sections about the Rows and EntireRow properties below.
- xlInsertFormatOriginConstant: xlFormatFromLeftOrAbove or xlFormatFromRightOrBelow. xlFormatFromLeftOrAbove is the default value. Therefore, when inserting rows with formatting from row above, you can usually omit the CopyOrigin parameter.
You can usually omit the Shift parameter. By default, VBA decides how to shift the cells based on the range’s shape. When inserting a row, this usually results in Excel shifting the cells down.
Specify Rows with the Worksheet.Rows Property
Purpose of Worksheet.Rows
Use the Worksheet.Rows property to return a Range object representing all the rows within the worksheet the property works with.
Worksheet.Rows is read-only.
Syntax of Worksheet.Rows
expression.Rows
“expression” is a Worksheet object. Therefore, I simplify as follows:
Worksheet.Rows
How to Use Worksheet.Rows to Insert Rows
Use the Worksheet.Rows property to specify the row or rows above which new rows are inserted.
To insert a row, use a statement with the following structure:
Worksheets.Rows(row#).Insert
“row#” is the number of the row above which the row is inserted.
To insert multiple rows, use a statement with the following structure:
Worksheet.Rows("firstRow#:lastRow#").Insert
“firstRow#” is the row above which the rows are inserted. The number of rows VBA inserts is calculated as follows:
lastRow# - firstRow# + 1
Specify the Active Cell with the Application.ActiveCell Property
Purpose of Application.ActiveCell
Use the Application.ActiveCell property to return a Range object representing the active cell.
Application.ActiveCell is read-only.
Syntax of Application.ActiveCell
expression.ActiveCell
“expression” is the Application object. Therefore, I simplify as follows:
Application.ActiveCell
How to Use Application.ActiveCell To Insert Rows
When you insert a row, use the Application.ActiveCell property to return the active cell. This allows you to use the active cell as reference for the row insertion operation.
Use the Range.Offset property to return a Range object a specific number of rows above or below the active cell. Use the Range.EntireRow property to return a Range object representing the entire row or rows above which to insert the new row. Please refer to the sections about the Offset and EntireRow properties below.
To insert a row above the active cell, use the following statement:
ActiveCell.EntireRow.Insert Shift:=xlShiftDown
To insert a row a specific number of rows above or below the active cell, use a statement with the following structure:
ActiveCell.Offset(RowOffset).EntireRow.Insert Shift:=xlShiftDown
Specify a Cell Range with the Worksheet.Range Property
Purpose of Worksheet.Range
Use the Worksheet.Range property to return a Range object representing a single cell or a cell range.
Syntax of Worksheet.Range
expression.Range(Cell1, Cell2)
“expression” is a Worksheet object. Therefore, I simplify as follows:
Worksheet.Range(Cell1, Cell2)
Parameters of Worksheet.Range
- Parameter: Cell1.
- Description:
- If you use Cell1 alone (omit Cell2), Cell1 specifies the cell range.
- If you use Cell1 and Cell2, Cell1 specifies the cell in the upper-left corner of the cell range.
- Required/Optional: Required.
- Data type: Variant.
- Values:
- If you use Cell1 alone (omit Cell2): (i) range address as an A1-style reference in language of macro, or (ii) range name.
- If you use Cell1 and Cell2: (i) Range object, (ii) range address, or (iii) range name.
- Description:
- Parameter: Cell2.
- Description: Cell in the lower-right corner of the cell range.
- Required/Optional: Optional.
- Data type: Variant.
- Values: (i) Range object, (ii) range address, or (iii) range name.
How to Use Worksheet.Range to Insert Rows
When you insert a row, use the Worksheet.Range property to return a cell or cell range. This allows you to use a specific cell or cell range as reference for the row insertion operation.
Use the Range.Offset property to return a Range object a specific number of rows above or below the cell or cell range. Use the Range.EntireRow property to return a Range object representing the entire row or rows above which to insert the new row or rows. Please refer to the sections about the Offset and EntireRow properties below.
To insert rows above the cell range specified by Worksheet.Range, use a statement with the following structure:
Worksheet.Range(Cell1, Cell2).EntireRow.Insert Shift:=xlShiftDown
To insert rows a specific number of rows above or below the cell range specified by Worksheet.Range use a statement with the following structure:
Worksheet.Range(Cell1, Cell2).Offset(RowOffset).EntireRow.Insert Shift:=xlShiftDown
If the cell range represented by the Worksheet.Range property spans more than 1 row, the Insert method inserts several rows. The number of rows inserted is calculated as follows:
lastRow# - firstRow# + 1
Please refer to the section about the Worksheet.Rows property above for further information about this calculation.
Specify a Cell with the Worksheet.Cells and Range.Item Properties
Purpose of Worksheet.Cells and Range.Item
Use the Worksheet.Cells property to return a Range object representing all the cells within a worksheet.
Once your macro has all the cells within the worksheet, use the Range.Item property to return a Range object representing one of those cells.
Syntax of Worksheet.Cells and Range.Item
Worksheet.Cells
expression.Cells
“expression” is a Worksheet object. Therefore, I simplify as follows:
Worksheet.Cells
Range.Item
expression.Item(RowIndex, ColumnIndex)
“expression” is a Range object. Therefore, I simplify as follows:
Range.Item(RowIndex, ColumnIndex)
Worksheet.Cells and Range.Item Together
Considering the above:
Worksheet.Cells.Item(RowIndex, ColumnIndex)
However, Item is the default property of the Range object. Therefore, you can generally omit the Item keyword before specifying the RowIndex and ColumnIndex arguments. I simplify as follows:
Worksheet.Cells(RowIndex, ColumnIndex)
Parameters of Worksheet.Cells and Range.Item
- Parameter: RowIndex.
- Description:
- If you use RowIndex alone (omit ColumnIndex), RowIndex specifies the index of the cell you work with. Cells are numbered from left-to-right and top-to-bottom.
- If you use RowIndex and ColumnIndex, RowIndex specifies the row number of the cell you work with.
- Required/Optional: Required.
- Data type: Variant.
- Values: You usually specify RowIndex as a value.
- Description:
- Parameter: ColumnIndex.
- Description: Column number or letter of the cell you work with.
- Required/Optional: Optional.
- Data type: Variant.
- Values: You usually specify ColumnIndex as a value (column number) or letter within quotations (“”).
How to use Worksheet.Cells and Range.Item to Insert Rows
When you insert a row, use the Worksheet.Cells and Range.Item properties to return a cell. This allows you to use a specific cell as reference for the row insertion operation.
Use the Range.Offset property to return a Range object a specific number of rows above or below the cell. Use the Range.EntireRow property to return a Range object representing the entire row above which to insert the row. Please refer to the sections about the Offset and EntireRow properties below.
To insert a row above the cell specified by Worksheet.Cells, use a statement with the following structure:
Worksheet.Cells(RowIndex, ColumnIndex).EntireRow.Insert Shift:=xlShiftDown
To insert a row a specific number of rows above or below the cell specified by Worksheet.Cells, use a statement with the following structure:
Worksheet.Cells(RowIndex, ColumnIndex).Offset(RowOffset).EntireRow.Insert Shift:=xlShiftDown
Specify a Cell Range a Specific Number of Rows Below or Above a Cell or Cell Range with the Range.Offset Property
Purpose of Range.Offset
Use the Range.Offset property to return a Range object representing a cell range located a number of rows or columns away from the range the property works with.
Syntax of Range.Offset
expression.Offset(RowOffset, ColumnOffset)
“expression” is a Range object. Therefore, I simplify as follows:
Range.Offset(RowOffset, ColumnOffset)
Parameters of Range.Offset
- Parameter: RowOffset.
- Description: Number of rows by which cell or cell range is offset.
- Required/Optional: Optional.
- Data type: Variant.
- Values:
- Positive number: Moves down the worksheet.
- Negative number: Moves up the worksheet.
- 0: Stays on the same row.
- Default: 0. Stays on the same row.
- Parameter: ColumnOffset.
- Description: Number of columns by which cell or cell range is offset.
- Required/Optional: Optional.
- Data type: Variant.
- Values:
- Positive number: Moves towards the right of the worksheet.
- Negative number: Moves towards the left of the worksheet.
- 0: Stays on the same column.
- Default: 0. Stays on the same column.
- Usage notes: When you insert a row, you can usually omit the ColumnOffset parameter. You’re generally interested in moving a number of rows (not columns) above or below.
How to Use Range.Offset to Insert Rows
When you insert a row, use the Range.Offset property to specify a cell or cell range located a specific number of rows below above another cell or cell range. This allows you to use this new cell or cell range as reference for the row insertion operation.
Use properties such as Application.ActiveCell, Worksheet.Range and Worksheet.Cells to specify the base range the Offset property works with. Please refer to the sections about the ActiveCell, Range and Cells properties above.
Specify Entire Row with the Range.EntireRow Property
Purpose of Range.EntireRow
Use the Range.EntireRow property to return a Range object representing the entire row or rows containing the cell range the property works with.
Range.EntireRow is read-only.
Syntax of Range.EntireRow
expression.EntireRow
“expression” is a Range object. Therefore, I simplify as follows:
Range.EntireRow
How to Use Range.EntireRow to Insert Rows
When you insert a row, use the Range.EntireRow property to return the entire row or rows above which the new row or rows are inserted.
Use properties such as Application.ActiveCell, Worksheet.Range and Worksheet.Cells to specify the range the EntireRow property works with. Please refer to the sections about the ActiveCell, Range and Cells properties above.
Clear Row Formatting with the Range.ClearFormats Method
Purpose of Range.ClearFormats
Use the Range.ClearFormats method to clear the formatting of a cell range.
Syntax of Range.ClearFormats
expression.ClearFormats
“expression” is a Range object. Therefore, I simplify as follows:
Range.ClearFormats
How to Use Range.ClearFormats to Insert Rows
The format of the newly-inserted row is specified by the CopyOrigin parameter of the Range.Insert method. Please refer to the description of Range.Insert and CopyOrigin above.
When you insert a row, use the Range.ClearFormats method to clear the formatting of the newly-inserted rows. Use a statement with the following structure after the statement that inserts the new row (whose formatting you want to clear):
Range.ClearFormats
“Range” is a Range object representing the newly-inserted row.
Use the Worksheet.Rows or Range.EntireRow properties to return a Range object that represents the newly-inserted row. Please refer to the sections about the Rows and EntireRow properties above.
Copy Rows with the Range.Copy Method
Purpose of Range.Copy
Use the Range.Copy method to copy a cell range to another cell range or the Clipboard.
Syntax of Range.Copy
expression.Copy(Destination)
“expression” is a Range object. Therefore, I simplify as follows:
Range.Copy(Destination)
Parameters of Range.Copy
- Parameter: Destination.
- Description: Specifies the destination cell range to which the copied cell range is copied.
- Required/Optional: Optional parameter.
- Data type: Variant.
- Values: You usually specify Destination as a Range object.
- Default: Cell range is copied to the Clipboard.
- Usage notes: When you insert a copied row, omit the Destination parameter to copy the row to the Clipboard.
How to Use Range.Copy to Insert Rows
Use the Range.Copy method to copy a row which you later insert.
Use a statement with the following structure before the statement that inserts the row:
Range.Copy
“Range” is a Range object representing an entire row.
Use the Worksheet.Rows or Range.EntireRow properties to return a Range object that represents a row. Please refer to the sections about the Rows and EntireRow properties above.
Related VBA and Macro Tutorials
- General VBA constructs and structures:
- Introduction to Excel VBA constructs and structures.
- The Excel VBA Object Model.
- How to declare variables in Excel VBA.
- Excel VBA data types.
- Practical VBA applications and macro examples:
- How to copy and paste with Excel VBA.
You can find additional VBA and Macro Tutorials in the Archives.
Example Workbooks
This VBA Tutorial is accompanied by Excel workbooks containing the data and macros I explain below. If you want to follow and practice, you can get immediate free access to these example workbooks by clicking the button below.
Each worksheet within the workbook contains a single data range. Most of the entries simply state “Data”.

Example #1: Excel VBA Insert Row
VBA Code to Insert Row
The following macro inserts a row below row 5 of the worksheet named “Insert row”.
Sub insertRow()
    'Source: powerspreadsheets.com/
    'For further information: https://powerspreadsheets.com/excel-vba-insert-row/
    Worksheets("Insert row").Rows(6).Insert Shift:=xlShiftDown
End Sub

Process Followed by Macro

VBA Statement Explanation
Worksheets(“Insert row”).Rows(6).Insert Shift:=xlShiftDown
- Item: Worksheets(“Insert row”).
- VBA construct: Workbook.Worksheets property.
- Description: Returns a Worksheet object representing the “Insert row” worksheet.
- Item: Rows(6).
- VBA construct: Worksheets.Rows property.
- Description: Returns a Range object representing row 6 of the worksheet returned by item #1 above.
- Item: Insert.
- VBA construct: Range.Insert method.
- Description: Inserts a new row above the row returned by item #2 above.
- Item: Shift:=xlShiftDown.
- VBA construct: Shift parameter of Range.Insert method.
- Description:
- Shifts rows down (xlShiftDown) to make space for the row inserted by item #3 above.
- You can usually omit this parameter. By default, VBA decides how to shift the cells based on the range’s shape. When inserting a row, this usually results in Excel shifting the cells down.
Effects of Executing the Macro
The following GIF illustrates the results of executing this macro. As expected, VBA inserts a row below row 5 of the worksheet.

Example #2: Excel VBA Insert Multiple Rows
VBA Code to Insert Multiple Rows
The following macro inserts 5 rows below row 10 of the worksheet named “Insert row”.
Sub insertMultipleRows()
    'Source: powerspreadsheets.com/
    'For further information: https://powerspreadsheets.com/excel-vba-insert-row/
    Worksheets("Insert row").Rows("11:15").Insert Shift:=xlShiftDown
End Sub

Process Followed by Macro

VBA Statement Explanation
Worksheets(“Insert row”).Rows(“11:15”).Insert Shift:=xlShiftDown
- Item: Worksheets(“Insert row”).
- VBA construct: Workbook.Worksheets property.
- Description: Returns a Worksheet object representing the “Insert row” worksheet.
- Item: Rows(“11:15”).
- VBA construct: Worksheet.Rows property.
- Description: Returns a Range object representing rows 11 to 15 of the worksheet returned by item #1 above.
- Item: Insert.
- VBA construct: Range.Insert method.
- Description:
- Inserts new rows above the rows returned by item #2 above.
- The number of inserted rows is equal to the number of rows returned by item #2 above. This is calculated as follows:
lastRow# - firstRow# + 1
In this example:
15 - 11 + 1 = 5
- Item: Shift:=xlShiftDown.
- VBA construct: Shift parameter of Range.Insert method.
- Description:
- Shifts rows down (xlShiftDown) to make space for the rows inserted by item #3 above.
- You can usually omit this parameter. By default, VBA decides how to shift the cells based on the range’s shape. When inserting a row, this usually results in Excel shifting the cells down.
Effects of Executing the Macro
The following GIF illustrates the results of executing this macro. As expected, VBA inserts 5 rows below row 10 of the worksheet.

Example #3: Excel VBA Insert Row with Same Format as Row Above
VBA Code to Insert Row with Same Format as Row Above
The following macro (i) inserts a row below row 20, and (ii) applies the formatting of row 20 to the newly-inserted row.
Sub insertRowFormatFromAbove()
    'Source: powerspreadsheets.com/
    'For further information: https://powerspreadsheets.com/excel-vba-insert-row/
    Worksheets("Insert row").Rows(21).Insert Shift:=xlShiftDown, CopyOrigin:=xlFormatFromLeftOrAbove
End Sub

Process Followed by Macro

VBA Statement Explanation
Worksheets(“Insert row”).Rows(21).Insert Shift:=xlShiftDown, CopyOrigin:=xlFormatFromLeftOrAbove
- Item: Worksheets(“Insert row”).
- VBA construct: Workbook.Worksheets property.
- Description: Returns a Worksheet object representing the “Insert row” worksheet.
- Item: Rows(21).
- VBA construct: Worksheet.Rows property.
- Description: Returns a Range object representing row 21 of the worksheet returned by item #1 above.
- Item: Insert.
- VBA construct: Range.Insert method.
- Description: Inserts a new row above the row returned by item #2 above.
- Item: Shift:=xlShiftDown.
- VBA construct: Shift parameter of Range.Insert method.
- Description:
- Shifts rows down (xlShiftDown) to make space for the row inserted by item #3 above.
- You can usually omit this parameter. By default, VBA decides how to shift the cells based on the range’s shape. When inserting a row, this usually results in Excel shifting the cells down.
- Item: CopyOrigin:=xlFormatFromLeftOrAbove.
- VBA construct: CopyOrigin parameter of Range.Insert method.
- Description:
- Sets formatting of row inserted by item #3 above to be equal to that of row above (xlFormatFromLeftOrAbove).
- You can usually omit this parameter. xlFormatFromLeftOrAbove (or 0) is the default value of CopyOrigin.
Effects of Executing the Macro
The following GIF illustrates the results of executing this macro. As expected, VBA (i) inserts a row below row 20, and (ii) applies the formatting of row 20 to the newly-inserted row.

Example #4: Excel VBA Insert Row with Same Format as Row Below
VBA Code to Insert Row with Same Format as Row Below
The following macro (i) inserts a row below row 25, and (ii) applies the formatting of the row below to the newly-inserted row.
Sub insertRowFormatFromBelow()
    'Source: powerspreadsheets.com/
    'For further information: https://powerspreadsheets.com/excel-vba-insert-row/
    Worksheets("Insert row").Rows(26).Insert Shift:=xlShiftDown, CopyOrigin:=xlFormatFromRightOrBelow
End Sub

Process Followed by Macro

VBA Statement Explanation
Worksheets(“Insert row”).Rows(26).Insert Shift:=xlShiftDown, CopyOrigin:=xlFormatFromRightOrBelow
- Item: Worksheets(“Insert row”).
- VBA construct: Workbook.Worksheets property.
- Description: Returns a Worksheet object representing the “Insert row” worksheet.
- Item: Rows(26).
- VBA construct: Worksheet.Rows property.
- Description: Returns a Range object representing row 26 of the worksheet returned by item #1 above.
- Item: Insert.
- VBA construct: Range.Insert method.
- Description: Inserts a new row above the row returned by item #2 above.
- Item: Shift:=xlShiftDown.
- VBA construct: Shift parameter of Range.Insert method.
- Description:
- Shifts rows down (xlShiftDown) to make space for the row inserted by item #3 above.
- You can usually omit this parameter. By default, VBA decides how to shift the cells based on the range’s shape. When inserting a row, this usually results in Excel shifting the cells down.
- Item: CopyOrigin:=xlFormatFromRightOrBelow.
- VBA construct: CopyOrigin parameter of Range.Insert method.
- Description: Sets formatting of row inserted by item #3 above to be equal to that of row below (xlFormatFromRightOrBelow).
Effects of Executing the Macro
The following GIF illustrates the results of executing this macro. As expected, VBA (i) inserts a row below row 25, and (ii) applies the formatting of the row below to the newly-inserted row.

Example #5: Excel VBA Insert Row without Formatting
VBA Code to Insert Row without Formatting
The following macro inserts a row below row 30 without applying the formatting from the rows above or below the newly- inserted row.
Sub insertRowWithoutFormat()
    'Source: powerspreadsheets.com/
    'For further information: https://powerspreadsheets.com/excel-vba-insert-row/
    Dim myNewRowNumber As Long
    myNewRowNumber = 31
    With Worksheets("Insert row")
        .Rows(myNewRowNumber).Insert Shift:=xlShiftDown
        .Rows(myNewRowNumber).ClearFormats
    End With
End Sub

Process Followed by Macro

VBA Statement Explanation
Lines #4 and #5: Dim myNewRowNumber As Long | myNewRowNumber = 31
- Item: Dim myNewRowNumber As Long.
- VBA construct: Dim statement.
- Description:
- Declares a new variable (myNewRowNumber) as of the Long data type.
- myNewRowNumber represents the number of the newly inserted row.
- Item: myNewRowNumber = 31.
- VBA construct: Assignment statement.
- Description: Assigns the value 31 to myNewRowNumber
Lines #6 and #9: With Worksheets(“Insert row”) | End With
- Item: With | End With.
- VBA construct: With… End With statement.
- Description: Statements within the With… End With statement (lines #7 and #8 below) are executed on the worksheet returned by item #2 below.
- Item: Worksheets(“Insert row”).
- VBA construct: Workbook.Worksheets property.
- Description: Returns a Worksheet object representing the “Insert row” worksheet.
Line #7: .Rows(myNewRowNumber).Insert Shift:=xlShiftDown
- Item: Rows(myNewRowNumber).
- VBA construct: Worksheet.Rows property.
- Description:
- Returns a Range object representing a row (whose number is represented by myNewRowNumber) of the worksheet in the opening statement of the With… End With statement (line #6 above).
- In this example, myNewRowNumber equals 31. Therefore, Worksheet.Rows returns row 31 prior to the insertion of the new row. This is a different row from that returned by Worksheet.Rows in line #8 below.
- This line #7 returns a row prior to the row insertion. This line is that above which the new row is inserted.
- Line #8 below returns a row after the row insertion. This line is the newly-inserted row.
- Item: Insert.
- VBA construct: Range.Insert method.
- Description: Inserts a new row above the row returned by item #1 above.
- Item: Shift:=xlShiftDown.
- VBA construct: Shift parameter of Range.Insert method.
- Description:
- Shifts rows down (xlShiftDown) to make space for the row inserted by item #2 above.
- You can usually omit this parameter. By default, VBA decides how to shift the cells based on the range’s shape. When inserting a row, this usually results in Excel shifting the cells down.
Line #8: .Rows(myNewRowNumber).ClearFormats
- Item: Rows(myNewRowNumber).
- VBA construct: Worksheet.Rows property.
- Description:
- Returns a Range object representing a row (whose number is represented by myNewRowNumber) of the worksheet in the opening statement of the With… End With statement (line #6 above).
- In this example, myNewRowNumber equals 31. Therefore, Worksheet.Rows returns row 31 after the insertion of the new row. This is a different row from that returned by Worksheet.Rows in line #7 above.
- This line #8 returns a row after the row insertion. This line is the newly-inserted row.
- Line #7 above returns a row prior to the row insertion. This line is that below the newly-inserted row.
- Item: ClearFormats.
- VBA construct: Range.ClearFormats method.
- Description: Clears the formatting of the row returned by item #1 above.
Effects of Executing the Macro
The following GIF illustrates the results of executing this macro. As expected, VBA inserts a row below row 30 without applying the formatting from the rows above or below the newly- inserted row.

Example #6: Excel VBA Insert Row Below Active Cell
VBA Code to Insert Row Below Active Cell
The following macro inserts a row below the active cell.
Sub insertRowBelowActiveCell()
    'Source: powerspreadsheets.com/
    'For further information: https://powerspreadsheets.com/excel-vba-insert-row/
    ActiveCell.Offset(1).EntireRow.Insert Shift:=xlShiftDown
End Sub

Process Followed by Macro

VBA Statement Explanation
ActiveCell.Offset(1).EntireRow.Insert Shift:=xlShiftDown
- Item: ActiveCell.
- VBA construct: Application.ActiveCell property.
- Description: Returns a Range object representing the active cell.
- Item: Offset(1).
- VBA construct: Range.Offset property.
- Description:
- Returns a Range object representing the cell range 1 row below the cell returned by item #1 above.
- In this example, Range.Offset returns the cell immediately below the active cell.
- Item: EntireRow:
- VBA construct: Range.EntireRow property.
- Description: Returns a Range object representing the entire row containing the cell range returned by item #2 above.
- Item: Insert.
- VBA construct: Range.Insert method.
- Description: Inserts a new row above the row returned by item #3 above.
- Item: Shift:=xlShiftDown.
- VBA construct: Shift parameter of Range.Insert method.
- Description:
- Shifts rows down (xlShiftDown) to make space for the row inserted by item #4 above.
- You can usually omit this parameter. By default, VBA decides how to shift the cells based on the range’s shape. When inserting a row, this usually results in Excel shifting the cells down.
Effects of Executing the Macro
The following GIF illustrates the results of executing this macro. When I execute the macro, the active cell is B35. As expected, inserts a row below the active cell.

Example #7: Excel VBA Insert Copied Row
VBA Code to Insert Copied Row
The following macro (i) copies row 45, and (ii) inserts the copied row below row 40.
Sub insertCopiedRow()
    'Source: powerspreadsheets.com/
    'For further information: https://powerspreadsheets.com/excel-vba-insert-row/
    With Worksheets("Insert row")
        .Rows(45).Copy
        .Rows(41).Insert Shift:=xlShiftDown
    End With
    Application.CutCopyMode = False
End Sub

Process Followed by Macro

VBA Statement Explanation
Lines #4 and #7: With Worksheets(“Insert row”) | End With
- Item: With | End With.
- VBA construct: With… End With statement.
- Description: Statements within the With… End With statement (lines #5 and #6 below) are executed on the worksheet returned by item #2 below.
- Item: Worksheets(“Insert row”).
- VBA construct: Workbook.Worksheets property.
- Description: Returns a Worksheet object representing the “Insert row” worksheet.
Line #5: .Rows(45).Copy
- Item: Rows(45).
- VBA construct: Worksheet.Rows property.
- Description: Returns a Range object representing row 45 of the worksheet in the opening statement of the With… End With statement (line #4 above).
- Item: Copy.
- VBA construct: Range.Copy method.
- Description: Copies the row returned by item #1 above to the Clipboard.
Line #6: .Rows(41).Insert Shift:=xlShiftDown
- Item: Rows(41).
- VBA construct: Worksheet.Rows property.
- Description: Returns a Range object representing row 41 of the worksheet in the opening statement of the With… End With statement (line #4 above).
- Item: Insert.
- VBA construct: Range.Insert method.
- Description:
- Inserts a new row above the row returned by item #1 above.
- The newly-inserted row isn’t blank. VBA inserts the row copied by line #5 above.
- Item: Shift:=xlShiftDown.
- VBA construct: Shift parameter of Range.Insert method.
- Description:
- Shifts rows down (xlShiftDown) to make space for the row inserted by item #2 above.
- You can usually omit this parameter. By default, VBA decides how to shift the cells based on the range’s shape. When inserting a row, this usually results in Excel shifting the cells down.
Line #8: Application.CutCopyMode = False
- Item: Application.CutCopyMode = False.
- VBA construct: Application.CutCopyMode property.
- Description: Cancels (False) the Cut or Copy mode and removes the moving border that accompanies this mode.
Effects of Executing the Macro
The following GIF illustrates the results of executing this macro. As expected, VBA (i) copies row 45, and (ii) inserts the copied row below row 40.

Example #8: Excel VBA Insert Blank Rows Between Rows in a Data Range
VBA Code to Insert Blank Rows Between Rows in a Data Range
The following macro inserts blank rows within the specified data range. This results in all rows within the data range being separated by a blank row.
Sub insertBlankRowsBetweenRows()
    'Source: powerspreadsheets.com/
    'For further information: https://powerspreadsheets.com/excel-vba-insert-row/
    Dim myFirstRow As Long
    Dim myLastRow As Long
    Dim myWorksheet As Worksheet
    Dim iCounter As Long
    myFirstRow = 5
    Set myWorksheet = Worksheets("Insert blank rows")
    myLastRow = myWorksheet.Cells.Find( _
                                        What:="*", _
                                        LookIn:=xlFormulas, _
                                        LookAt:=xlPart, _
                                        SearchOrder:=xlByRows, _
                                        SearchDirection:=xlPrevious).Row
    For iCounter = myLastRow To (myFirstRow + 1) Step -1
        myWorksheet.Rows(iCounter).Insert Shift:=xlShiftDown
    Next iCounter
End Sub

Process Followed by Macro

VBA Statement Explanation
Lines #4 through #9: Dim myFirstRow As Long | Dim myLastRow As Long | Dim myWorksheet As Worksheet | Dim iCounter As Long | myFirstRow = 5 | Set myWorksheet = Worksheets(“Insert blank rows”)
- Item: Dim myFirstRow As Long.
- VBA construct: Dim statement.
- Description:
- Declares a new variable (myFirstRow) as of the Long data type.
- myFirstRow represents the number of the first row with data in the data range you work with.
- Item: Dim myLastRow As Long.
- VBA construct: Dim statement.
- Description:
- Declares a new variable (myLastRow) as of the Long data type.
- myLastRow represents the number of the last row with data in the data range you work with.
- Item: Dim myWorksheet As Worksheet.
- VBA construct: Dim statement.
- Description:
- Declares a new object variable (myWorksheet) to reference a Worksheet object.
- myWorksheet represents the worksheet you work with.
- Item: Dim iCounter As Long.
- VBA construct: Dim statement.
- Description:
- Declares a new variable (iCounter) as of the Long data type.
- iCounter represents a loop counter.
- Item: myFirstRow = 5.
- VBA construct: Assignment statement.
- Description: Assigns the value 5 to myFirstRow.
- Item: Set myWorksheet = Worksheets(“Insert blank rows”).
- VBA constructs:
- Set statement.
- Workbooks.Worksheets property.
- Description: Assigns the Worksheet object representing the “Insert blank rows” worksheet to myWorksheet.
- VBA constructs:
Lines #10 through #15: myLastRow = myWorksheet.Cells.Find( What:=”*”, LookIn:=xlFormulas, LookAt:=xlPart, SearchOrder:=xlByRows, SearchDirection:=xlPrevious).Row
- Item: myLastRow =.
- VBA construct: Assignment statement.
- Description: Assigns the value returned by items #2 through #9 below to myLastRow.
- Item: myWorksheet.Cells.
- VBA construct: Worksheet.Cells property.
- Description: Returns a Range object representing all cells on myWorksheet.
- Item: Find.
- VBA construct: Range.Find method.
- Description:
- Finds information in the cell range returned by item #2 above and returns a Range object representing the first cell where the information is found.
- In this example, the Range object Range.Find returns represents the last cell with data in last row with data in myWorksheet.
- Item: What:=”*”.
- VBA construct: What parameter of Range.Find method.
- Description: Specifies the data Range.Find searches for. The asterisk (*) is a wildcard and, therefore, Range.Find searches for any character sequence.
- Item: LookIn:=xlFormulas.
- VBA construct: LookIn parameter of Range.Find method.
- Description: Specifies that Range.Find looks in formulas (xlFormulas).
- Item: LookAt:=xlPart.
- VBA construct: LookAt parameter of Range.Find method.
- Description: Specifies that Range.Find looks at (and matches) a part (xlPart) of the search data.
- Item: SearchOrder:=xlByRows.
- VBA construct: SearchOrder parameter of Range.Find method.
- Description: Specifies that Range.Find searches by rows (xlByRows).
- Item: SearchDirection:=xlPrevious.
- VBA construct: SearchDirection parameter of Range.Find method.
- Description: Specifies that Range.Find searches for the previous match (xlPrevious).
- Item: Row.
- VBA construct: Range.Row property.
- Description:
- Returns the row number of the Range object returned by item #3 above.
- In this example, the number returned by Range.Row corresponds to the last row with data in myWorksheet.
Lines #16 and #18: For iCounter = myLastRow To (myFirstRow + 1) Step -1 | Next iCounter
- Item: For | Next iCounter.
- VBA construct: For… Next statement.
- Description:
- Repeats the statement inside the For… Next loop (line #17 below) a specific number of times.
- In this example:
- The macro starts on the last row of the data range as specified by item #2 below.
- Every iteration, the loop counter decreases by 1, as specified by item #4 below. Therefore, the macro moves to the previous row.
- The macro exits the loop after working with the second row in the data range (myFirstRow + 1), as specified by item #3 below.
- Item: iCounter = myLastRow.
- VBA construct: Counter and Start of For… Next statement.
- Description: Specifies myLastRow as the initial value of the loop counter (iCounter).
- Item: To (myFirstRow + 1).
- VBA construct: End of For… Next statement.
- Description: Specifies the value represented by myFirstRow plus 1 (myFirstRow + 1) as the final value of the loop counter.
- Item: Step -1.
- VBA construct: Step of For… Next statement.
- Description: Specifies that the loop counter (iCounter) decreases by 1 (-1) every loop iteration.
Line #17: myWorksheet.Rows(iCounter).Insert Shift:=xlShiftDown
- Item: myWorksheet.Rows(iCounter).
- VBA construct: Worksheet.Rows property.
- Description:
- Returns a Range object representing the row (whose number is represented by iCounter) of myWorksheet.
- Worksheet.Rows returns the row through which the macro is currently looping.
- Item: Insert.
- VBA construct: Range.Insert method.
- Description:
- Inserts a new row above the row returned by item #1 above.
- The macro loops through each line in the data range (excluding the first) as specified by lines #16 and #18 above. Therefore, Range.Insert inserts a row between all rows with data.
- Item: Shift:=xlShiftDown.
- VBA construct: Shift parameter of Range.Insert method.
- Description:
- Shifts rows down (xlShiftDown) to make space for the row inserted by item #2 above.
- You can usually omit this parameter. By default, VBA decides how to shift the cells based on the range’s shape. When inserting a row, this usually results in Excel shifting the cells down.
Effects of Executing the Macro
The following GIF illustrates the results of executing this macro. As expected, VBA inserts blank rows within the specified data range. This results in all rows within the data range being separated by a blank row.

Example #9: Excel VBA Insert a Number of Rows Every Number of Rows in a Data Range
VBA Code to Insert a Number of Rows Every Number of Rows in a Data Range
The following macro inserts 2 rows every 3 rows within the specified data range.
Sub insertMRowsEveryNRows()
    'Source: powerspreadsheets.com/
    'For further information: https://powerspreadsheets.com/excel-vba-insert-row/
    Dim myFirstRow As Long
    Dim myLastRow As Long
    Dim myNRows As Long
    Dim myRowsToInsert As Long
    Dim myWorksheet As Worksheet
    Dim iCounter As Long
    myFirstRow = 5
    myNRows = 3
    myRowsToInsert = 2
    Set myWorksheet = Worksheets("Insert M rows every N rows")
    myLastRow = myWorksheet.Cells.Find( _
                                        What:="*", _
                                        LookIn:=xlFormulas, _
                                        LookAt:=xlPart, _
                                        SearchOrder:=xlByRows, _
                                        SearchDirection:=xlPrevious).Row
    For iCounter = myLastRow To (myFirstRow + myNRows) Step -1
        If (iCounter - myFirstRow) Mod myNRows = 0 Then myWorksheet.Rows(iCounter & ":" & iCounter + myRowsToInsert - 1).Insert Shift:=xlShiftDown
    Next iCounter
End Sub

Process Followed by Macro

VBA Statement Explanation
Lines #4 through 13: Dim myFirstRow As Long | Dim myLastRow As Long | Dim myNRows As Long | Dim myRowsToInsert As Long | Dim myWorksheet As Worksheet | Dim iCounter As Long | myFirstRow = 5 | myNRows = 3 | myRowsToInsert = 2 | Set myWorksheet = Worksheets(“Insert M rows every N rows”)
- Item: Dim myFirstRow As Long.
- VBA construct: Dim statement.
- Description:
- Declares a new variable (myFirstRow) as of the Long data type.
- myFirstRow represents the number of the first row with data in the data range you work with.
- Item: Dim myLastRow As Long.
- VBA construct: Dim statement.
- Description:
- Declares a new variable (myLastRow) as of the Long data type.
- myLastRow represents the number of the last row with data in the data range you work with.
- Item: Dim myNRows As Long.
- VBA construct: Dim statement.
- Description:
- Declares a new variable (myNRows) as of the Long data type.
- myNRows represents the number of rows per block. The macro doesn’t insert rows between these rows.
- Item: Dim myRowsToInsert As Long.
- VBA construct: Dim statement.
- Description:
- Declares a new variable (myRowsToInsert) as of the Long data type.
- myRowsToInsert represents the number of rows to insert.
- Item: Dim myWorksheet As Worksheet.
- VBA construct: Dim statement.
- Description:
- Declares a new object variable (myWorksheet) to reference a Worksheet object.
- myWorksheet represents the worksheet you work with.
- Item: Dim iCounter As Long.
- VBA construct: Dim statement.
- Description:
- Declares a new variable (iCounter) as of the Long data type.
- iCounter represents a loop counter.
- Item: myFirstRow = 5.
- VBA construct: Assignment statement.
- Description: Assigns the value 5 to myFirstRow.
- Item: myNRows = 3.
- VBA construct: Assignment statement.
- Description: Assigns the value 3 to myNRows.
- Item: myRowsToInsert = 2.
- VBA construct: Assignment statement.
- Description: Assigns the value 2 to myRowsToInsert.
- Item: Set myWorksheet = Worksheets(“Insert M rows every N rows”).
- VBA constructs:
- Set statement.
- Workbooks.Worksheets property.
- Description: Assigns the Worksheet object representing the “Insert M rows every N rows” worksheet to myWorksheet.
- VBA constructs:
Lines #14 through #19: myLastRow = myWorksheet.Cells.Find( What:=”*”, LookIn:=xlFormulas, LookAt:=xlPart, SearchOrder:=xlByRows, SearchDirection:=xlPrevious).Row
- Item: myLastRow =.
- VBA construct: Assignment statement.
- Description: Assigns the value returned by items #2 through #9 below to myLastRow.
- Item: myWorksheet.Cells.
- VBA construct: Worksheet.Cells property.
- Description: Returns a Range object representing all cells on myWorksheet.
- Item: Find.
- VBA construct: Range.Find method.
- Description:
- Finds information in the cell range returned by item #2 above and returns a Range object representing the first cell where the information is found.
- In this example, the Range object Range.Find returns represents the last cell with data in last row with data in myWorksheet.
- Item: What:=”*”.
- VBA construct: What parameter of Range.Find method.
- Description: Specifies the data Range.Find searches for. The asterisk (*) is a wildcard and, therefore, Range.Find searches for any character sequence.
- Item: LookIn:=xlFormulas.
- VBA construct: LookIn parameter of Range.Find method.
- Description: Specifies that Range.Find looks in formulas (xlFormulas).
- Item: LookAt:=xlPart.
- VBA construct: LookAt parameter of Range.Find method.
- Description: Specifies that Range.Find looks at (and matches) a part (xlPart) of the search data.
- Item: SearchOrder:=xlByRows.
- VBA construct: SearchOrder parameter of Range.Find method.
- Description: Specifies that Range.Find searches by rows (xlByRows).
- Item: SearchDirection:=xlPrevious.
- VBA construct: SearchDirection parameter of Range.Find method.
- Description: Specifies that Range.Find searches for the previous match (xlPrevious).
- Item: Row.
- VBA construct: Range.Row property.
- Description:
- Returns the row number of the Range object returned by item #3 above.
- In this example, the number returned by Range.Row corresponds to the last row with data in myWorksheet.
Lines #20 and #22: For iCounter = myLastRow To (myFirstRow + myNRows) Step -1 | Next iCounter
- Item: For | Next iCounter.
- VBA construct: For… Next statement.
- Description:
- Repeats the statement inside the For… Next loop (line #21 below) a specific number of times.
- In this example:
- The macro starts on the last row of the data range as specified by item #2 below.
- Every iteration, the loop counter decreases by 1, as specified by item #4 below. Therefore, the macro moves to the previous row.
- The macro exits the loop after working with the row below the first block of rows you want to keep, as specified by item #3 below. Each block of rows has a number of rows equal to myNRows.
- In this example, myNRows equals 3. Therefore, the macro exits the loop after working with the fourth row in the data range.
- Item: iCounter = myLastRow.
- VBA constructs: Counter and Start of For… Next statement.
- Description: Specifies myLastRow as the initial value of the loop counter (iCounter).
- Item: To (myFirstRow + myNRows).
- VBA construct: End of For… Next statement.
- Description: Specifies the value represented by myFirstRow plus myNRows (myFirstRow + myNRows) as the final value of the loop counter.
- Item: Step -1.
- VBA construct: Step of For… Next statement.
- Description: Specifies that the loop counter (iCounter) decreases by 1 (-1) every loop iteration.
Line #21: If (iCounter – myFirstRow) Mod myNRows = 0 Then myWorksheet.Rows(iCounter & “:” & iCounter + myRowsToInsert – 1).Insert Shift:=xlShiftDown
- Item: If | Then.
- VBA construct: If… Then… Else statement.
- Description: Conditionally executes the statement specified by items #3 and #4 below, subject to condition specified by item #2 below being met.
- Item: (iCounter – myFirstRow) Mod myNRows = 0.
- VBA constructs:
- Condition of If… Then… Else statement.
- Numeric expression with Mod operator.
- Description:
- The Mod operator (Mod) (i) divides one number (iCounter – myFirstRow) by a second number (myNRows), and (ii) returns the remainder of the division.
- The condition ((iCounter – myFirstRow) Mod myNRows = 0) is met (returns True) if the remainder returned by Mod is 0.
- The condition is met (returns True) every time the macro loops through a row above which blank rows should be added.
- iCounter represents the number of the row through which the macro is currently looping.
- (iCounter – myFirstRow) is the number of rows (in the data range) above the row through which the macro is currently looping.
- ((iCounter – myFirstRow) Mod myNRows) equals 0 when the number of rows returned by (iCounter – myFirstRow) is a multiple of myNRows. This ensures that the number of rows left above the row through which the macro is currently looping can be appropriately separated into blocks of myNRows. In this example, myNRows equals 3. Therefore, the condition is met every 3 rows.
- VBA constructs:
- Item: myWorksheet.Rows(iCounter & “:” & iCounter + myRowsToInsert – 1).
- VBA constructs:
- Statements executed if the condition specified by item #2 above is met.
- Worksheet.Rows property.
- Description:
- Returns an object representing several rows of myWorksheet. The first row is represented by iCounter. The last row is represented by (iCounter + myRowsToInsert – 1).
- The number of rows Worksheet.Rows returns equals the number of rows to insert (myRowsToInsert).
- iCounter represents the number of the row through which the macro is currently looping.
- (iCounter + myRowsToInsert – 1) returns a row located a number of rows (myRowsToInsert – 1) below the row through which the macro is currently looping. In this example, myRowsToInsert equals 2. Therefore, (iCounter + myRowsToInsert – 1) returns a row located 1 (2 – 1) rows below the row through which the macro is currently looping.
- VBA constructs:
- Item: Insert.
- VBA construct: Range.Insert method.
- Description:
- Inserts new rows above the rows returned by item #3 above.
- The number of inserted rows is equal to the value of myRowsToInsert. This is calculated as follows:
lastRow# - firstRow# + 1
(iCounter + myRowsToInsert - 1) - iCounter + 1 = myRowsToInsert
In this example, if the current value of iCounter is 8:
(8 + 2 - 1) - 8 + 1
9 - 8 + 1 = 2
- Item: Shift:=xlShiftDown.
- VBA construct: Shift parameter of Range.Insert method.
- Description:
- Shifts rows down (xlShiftDown) to make space for the rows inserted by item #4 above.
- You can usually omit this parameter. By default, VBA decides how to shift the cells based on the range’s shape. When inserting a row, this usually results in Excel shifting the cells down.
Effects of Executing the Macro
The following GIF illustrates the results of executing this macro. As expected, VBA inserts 2 rows every 3 rows within the specified data range.

In this Article
- Insert a Single Row or Column
- Insert New Row
- Insert New Column
- Insert Multiple Rows or Columns
- Insert Multiple Rows
- Insert Multiple Columns
- Insert – Shift & CopyOrigin
- Other Insert Examples
- Insert Copied Rows or Columns
- Insert Rows Based on Cell Value
- Delete Rows or Columns
This tutorial will demonstrate how to use VBA to insert rows and columns in Excel.
To insert rows or columns we will use the Insert Method.
Insert a Single Row or Column
Insert New Row
To insert a single row, you can use the Rows Object:
Rows(4).InsertOr you can use the Range Object along with EntireRow:
Range("b4").EntireRow.InsertInsert New Column
Similar to inserting rows, we can use the Columns Object to insert a column:
Columns(4).InsertOr the Range Object, along with EntireColumn:
Range("b4").EntireColumn.InsertInsert Multiple Rows or Columns
Insert Multiple Rows
When inserting multiple rows with the Rows Object, you must enter the rows in quotations:
Rows("4:6").InsertInserting multiple rows with the Range Object works the same as with a single row:
Range("b4:b6").EntireRow.InsertInsert Multiple Columns
When inserting multiple columns with the Columns Object, enter the column letters in quotations:
Columns("B:D").InsertInserting multiple columns with the Range Object works the same as with a single column:
Range("b4:d4").EntireColumn.InsertVBA Coding Made Easy
Stop searching for VBA code online. Learn more about AutoMacro — A VBA Code Builder that allows beginners to code procedures from scratch with minimal coding knowledge and with many time-saving features for all users!

Learn More
Insert – Shift & CopyOrigin
The Insert Method has two optional arguments:
- Shift – Which direction to shift the cells
- CopyOrigin – Which cell formatting to copy (above, below, left, or right)
The Shift argument is irrelevant when inserting entire rows or columns. It only allows you to indicate to shift down or shift to the right:
- xlShiftDown – Shift cells down
- xlShiftToRight – Shift cells to the right
As you can see, you can’t shift up or to the left.
The CopyOrigin argument has two potential inputs:
- xlFormatFromLeftorAbove – (0) Newly-inserted cells take formatting from cells above or to the left
- xlFormatFromRightorBelow (1) Newly-inserted cells take formatting from cells below or to the right.
Let’s look at some examples of the CopyOrigin argument. Here’s our initial data:
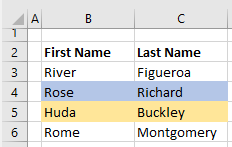
This example will insert a row, taking the formatting from the above row.
Rows(5).Insert , xlFormatFromLeftOrAbove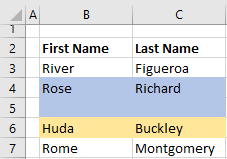
This example will insert a row, taking the formatting from the below row.
Rows(5).Insert , xlFormatFromRightOrBelow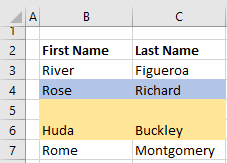
Other Insert Examples
Insert Copied Rows or Columns
If you’d like to insert a copied row, you would use code like this:
Range("1:1").Copy
Range("5:5").Insert
Here we copy Row 1 and Insert it at Row 5.
VBA Programming | Code Generator does work for you!
Insert Rows Based on Cell Value
This will loop through a range, inserting rows based on cell values:
Sub InsertRowswithSpecificValue()

Dim cell As Range

For Each cell In Range("b2:b20")
    If cell.Value = "insert" Then
        cell.Offset(1).EntireRow.Insert
    End If
Next cell

End Sub
Delete Rows or Columns
To delete rows or columns, simply use the Delete method.
Rows(1).Delete

Range("a1").EntireRow.Delete

Columns(1).Delete

Range("a1").EntireColumn.DeleteInserting a row in VBA somewhat differs from inserting a column in VBA. In columns, we used the entire column method to insert rows and the worksheet method with the insert command to insert a row. We also provide a row reference where we want to insert another row similar to the columns.
Insert Row with VBA Excel
We can perform almost all our actions in Excel with VBA coding. For example, we can copy, paste, delete, and do many more things through the VBA language. “Inserting Row” is one such method we often do in Excel. This article will show you how to perform the insert row method in VBA.
Table of contents
- Insert Row with VBA Excel
- How to Insert Row in Excel VBA?
- Method #1 – Using the Insert Method
- Method #2 – Using Entire Row Property
- Method #3 – Using Row Numbers
- Method #4 – Using Active Cell Property
- Method #5 – Using Active Cell Property with Offset Function
- Insert Alternative Rows
- Recommended Articles
- How to Insert Row in Excel VBA?
You are free to use this image on your website, templates, etc, Please provide us with an attribution linkArticle Link to be Hyperlinked
For eg:
Source: VBA Insert Row (wallstreetmojo.com)
How to Insert Row in Excel VBA?
Below are the various methods of using VBA to insert a row in Excel.
Method #1 – Using the Insert Method
In VBA, we need to use a similar technique in the Excel worksheet to insert a row. In VBA, we need to use the range objectRange is a property in VBA that helps specify a particular cell, a range of cells, a row, a column, or a three-dimensional range. In the context of the Excel worksheet, the VBA range object includes a single cell or multiple cells spread across various rows and columns.read more to insert the row.
For example, look at the below code.
Code:
Sub InsertRow_Example1()

  Range("A1").Insert

End Sub
This code will move down cell A1 to the B1 and insert the only cell.

It will cause so many problems in terms of handling the data. It will just move the mentioned cell down, and all associated columns remain the same.
Method #2 – Using Entire Row Property
In the top insert row, we can use several methods. The below method will insert the entire row above the selected cell.
Step 1: Mention the cell address first.
Code:
Sub InsertRow_Example2()

  Range("A1").

End Sub

Step 2: Instead of just selecting the “Entire Row” property.
Code:
Sub InsertRow_Example2()

  Range("A1").EntireRow.

End Sub

Step 3: After accessing the entire row property,use the insert method.
Code:
Sub InsertRow_Example2()

  Range("A1").EntireRow.Insert

End Sub

It will insert the row above cell A1. Since A1 is the first row, it will move down the A1 cell to B1.

As you can see in the above image, it has to insert the entire row, not the single cell.
Method #3 – Using Row Numbers
In the above example, we have just used the single-cell address and inserted the row. However, we can also insert it by using row numbers.
Assume you want to insert a row below the 5th row. First, we need to mention the row numbers using the RANGE object.
Code:
Sub InsertRow_Example3()

  Range("6:6").

End Sub
Since we have mentioned the entire row as 6:6, we need to use the Entire Row property here. Then, we can use the “INSERT” method.
Code:
Sub InsertRow_Example3()

  Range("6:6").Insert

End Sub
It will also insert the entire row, not the single cell.

If you want to insert two rows below the 5th row, we need to select 2 rows first and then use the INSERT method.
Sub InsertRow_Example3()

  Range("6:7").Insert

End Sub
It will insert two rows below the 5th row.

Like this, we can insert as many rows as possible in the worksheet.
Method #4 – Using Active Cell Property
We can use the Active Cell VBA property to insert rows. The active cell is nothing but a presently selected cell.
Assume you are in cell B5 and want to insert a row above. Then, you can use the ActiveCell property.
Sub InsertRow_Example4()

  ActiveCell.EntireRow.Insert

End Sub
It will insert the row above the active cell.
Method #5 – Using Active Cell Property with Offset Function
Assume you want to insert a row after two rows of the active cell. We need to use the Offset functionThe OFFSET function in excel returns the value of a cell or a range (of adjacent cells) which is a particular number of rows and columns from the reference point. read more to offset the number of rows.
Assume you are in the B5 cell.

We can use the code below if you want to insert the row after the 2nd row from the active cell.
Code:
Sub InsertRow_Example5()

  ActiveCell.Offset(2, 0).EntireRow.Insert

End Sub
It will insert a row after the 6th row.

Insert Alternative Rows
Inserting alternative rows is what we have come across many times. For example, look at the below data image.

Now, we need to insert alternative rows. Finally, we need to use loops to insert every alternate row.
Code:
Sub InsertRow_Example6()
  Dim K As Integer
  Dim X As Integer

  X = 1

  For K = 1 To 4
    Cells(X, 1).EntireRow.Insert
    X = X + 2
  Next K
End Sub
This will insert rows like this.
You can download this VBA Insert Row Excel here. VBA Insert Row Excel Template
Recommended Articles
This article has been a guide to VBA Insert Row. Here, we learned the top 5 methods to Insert Row in Excel VBA, some practical examples, and a downloadable Excel template. Below are some useful Excel articles related to VBA: –
- VBA IntegerIn VBA, an integer is a data type that may be assigned to any variable and used to hold integer values. In VBA, the bracket for the maximum number of integer variables that can be kept is similar to that in other languages. Using the DIM statement, any variable can be defined as an integer variable.read more
- Top 3 Methods to Insert Row in ExcelThe insertion of an excel row is simply the addition of a new (blank) row to the worksheet. The insertion of a row is eased with the help of shortcuts.read more
- Insert Columns in Excel using VBATo add any columns in VBA, we must use the insert command and the entire column statement. When inserting a single column, use a single column reference, and when adding multiple columns, use multiple column references.read more
- What are ListObjects in VBA ListObject is a way of referring to the excel tables while writing the VBA code. It facilitates the user to create, delete, or format the excel tables with the help of VBA code.read more VBA?VBA ListObject is a way of referring to the excel tables while writing the VBA code. It facilitates the user to create, delete, or format the excel tables with the help of VBA code.read more
Excel VBA Insert Row
As there are two things in this word one is VBA and other is Insert Row. In this, I’ll be explaining how to Insert Row in Excel using VBA (Visual Basic for Applications).
VBA – It’s a programming language for those who work in Excel and other Office programs, so one can automate tasks in Excel by writing so-called Macros. Using VBA coding we can perform all most all the tasks that we perform in Excel as we can copy, paste, delete, etc.
Insert Row – It is used to insert a row in Excel between another row with the help of automation i.e. on one click.
Suppose we are entering the Employee details in Excel and we have skipped some of the Employees and want to insert the details of the missing ones in between so we have to create a space and insert a row to enter their details. Instead of inserting row one by one we can automate the task of inserting rows using VBA and creating Macros.
There are many ways using which we can insert the rows using VBA coding. The function used for inserting a row in VBA is:
Range().Row().EntireRow.Insert
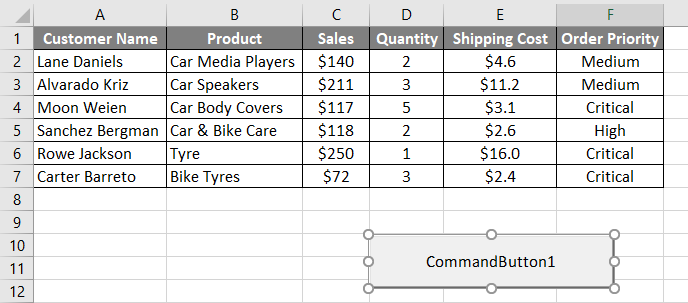
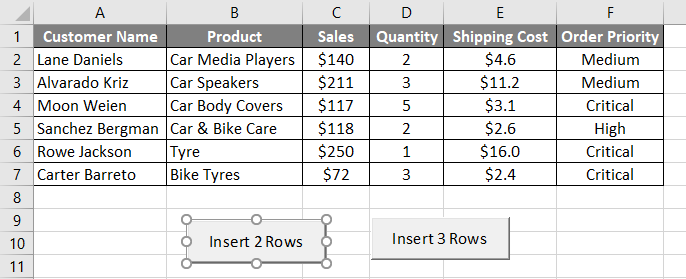
Let’s consider we have a dataset which consists of columns like Customer Name, Product, Sales, Quantity, Shipping Cost, Order Priority.
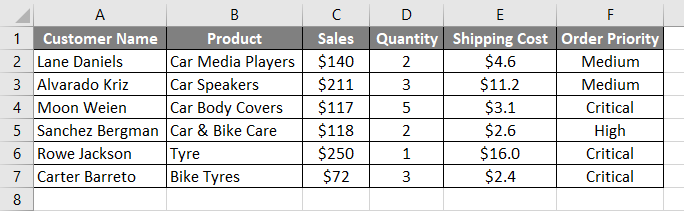
Suppose on the chance that we need to shift the columns down to insert a 3 new row between 3 and 4 to insert a new missing record. Instead of inserting row one by one we will automate this to insert all the 3 rows on a single click.
How to Insert Rows in Excel VBA?
Below are the different examples to insert rows in Excel using VBA code.
You can download this VBA Insert Row Excel Template here – VBA Insert Row Excel Template
Example #1 – Using Entire Row
Follow the below steps to insert Rows in excel using VBA code.
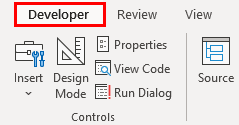
Step 1: To create a Macro we need to select the Developer Tab.
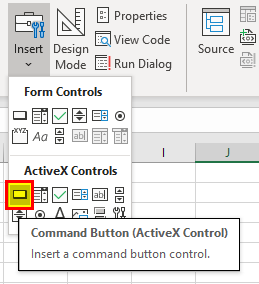
Step 2: After the Developer tab opens, insert a button from the Controls group. Click on Insert and select the first option from ActiveX Controls. As you can see that Command Button.
Step 3: Drag the arrow at any cell to create a Command Button.
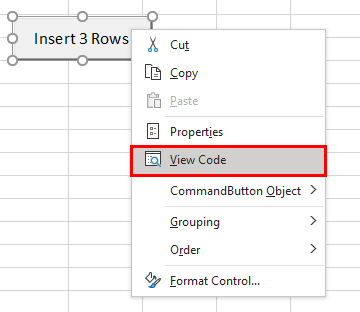
Step 4: To enter the Insert function Right-click on the Comand Button i.e. Insert 3 Rows and click on View Code.
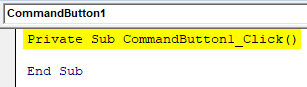
Step 5: When you click on the View code, the following code appears.
Code:
Private Sub CommandButton1_Click()

End Sub
Step 6: We have to write our code of INSERT ROW. As mentioned previously we have to use Rows.EntireRow function with RANGE in VBA. In this code, we have to insert 3 between 3rd and 4th.
Code:
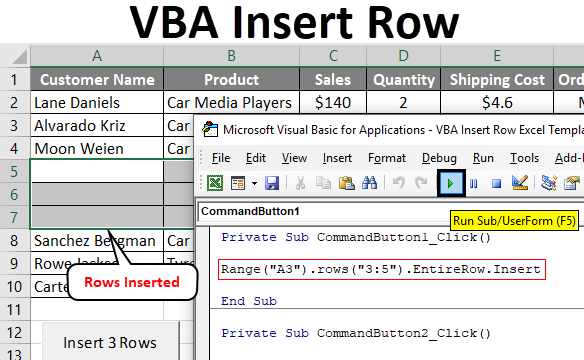
Private Sub CommandButton1_Click()

Range("A3").rows("3:5").EntireRow.Insert

End Sub
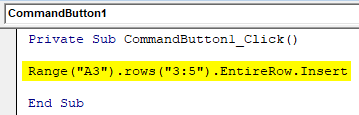
In the above line of code, A3 is a column where we have to insert row and Rows(3:5) is we have to insert 3 new rows.
Step 7: Run the code by clicking on the Insert 3 Rows Command Button.
Example #2 – Using Row Numbers
Similarly, we will write a code to insert 2 rows on a click of a button.
In this, we need to mention row from start row to end row number using RANGE followed by INSERT which will insert the rows.
Code:
Private Sub CommandButton2_Click()

Range("3:4").Insert

End Sub
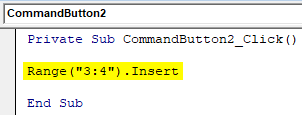
When we click on the button “Insert 2 Rows” we see that 2 rows have been inserted in between 3rd and 4th row.

Similarly, we can customize our function to insert as many rows as we can.
Example #3 – Using Active Cell
Active cell means the cell that is presently selected. We will use Active cell to insert rows. Assume we are on cell B3 and want to insert the cell above it we will use active cell property. We will use the following code for the active cell.
Code:
Private Sub CommandButton3_Click()

ActiveCell.EntireRow.Insert

End Sub
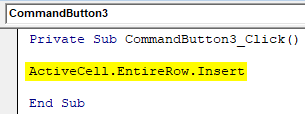
When we click on the button “Active Cell Property” we see that one cell is inserted above the selected cell. In the above, we have selected B5 and below we can see that one row is inserted above it.
Example #4 – Using Active Cell with Offset
Suppose we want to insert a row after 3 rows of the active cell, for this we will use OFFSET function. Suppose we are in cell B4 and have to insert row after 2 rows, we will use this code.
Code:
Private Sub CommandButton4_Click()

ActiveCell.Offset(2, 0).EntireRow.Insert

End Sub
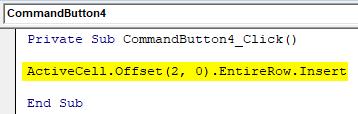
When we click on the button “Active Cell using Offset” one row is inserted in B6.
Things to Remember
- It is used to insert rows in Excel by Automating it.
- VBA Insert Row is used with RANGE object in VBA.
- Before working do enable the “Enable all Macros” in Macro settings.
Recommended Articles
This is a guide to VBA Insert Row. Here we discuss how to insert Row in Excel Using VBA code along with practical examples and downloadable excel template. You may also look at the following articles to learn more –
- VBA GetObject
- VBA StrConv
- VBA AND
- VBA Get Cell Value
Inserting Rows in Excel Worksheet using VBA
VBA insert rows excel macro helps while automating and dealing with the records. For example, we may automate certain task based on the number of items in certain category. And the number of items may not be equal in all the situations it may vary time to time. We will see a practical example in this topic.
- Inserting Rows in Worksheet using Excel VBA – An Example
- Inserting Rows in Worksheet using Excel VBA – Case study
- Inserting Rows in Worksheet using Excel VBA – Download Example Files
How to Insert Rows in Excel Worksheet using VBA – Solution(s):
We can insert use EntireRow.Insert method to insert rows. The following is the example code to inserting rows in excel worksheet.
VBA insert rows excel – An Example
The following example will show you how to insert a row in Excel Worksheet. You can insert multiple rows at a time.
Code:
Sub sbInsertingRows()
'Inserting a Row at at Row 2
Range("A2").EntireRow.Insert
'
'Inserting 3 Rows from 3
Rows("3:5").EntireRow.Insert
End Sub
Instructions:
- Open an excel workbook
- Press Alt+F11 to open VBA Editor
- Insert a Module for Insert Menu
- Copy the above code and Paste in the code window
- Save the file as macro enabled workbook
- Press F5 to run it
Input:
Shcreen-shot of example, before executing of the above code. You can see the 10 rows of data available in the worksheet.

Output:
Shcreen-shot of example, after executing of the above code. You can see the 4 new rows are inserted in the worksheet.

Inserting Rows in Worksheet using Excel VBA – Case study
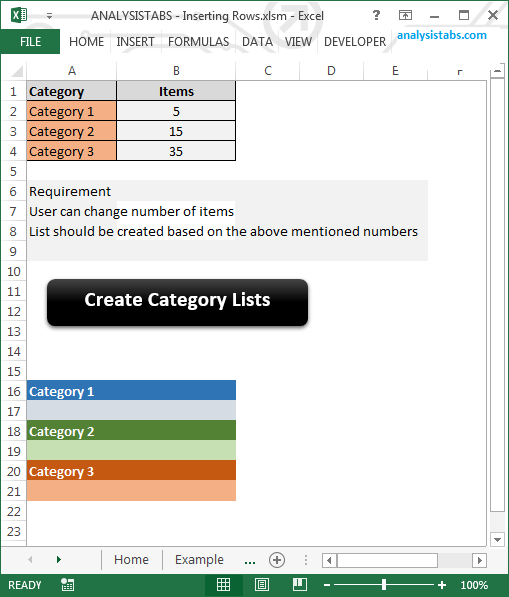
The following example create the list if items by inserting the rows based on the numbers mentioned for each category.
Code:
Sub sbInsertingRowsCaseStudy()

Dim iCntr, jCntr

For iCntr = 2 To 4 ' for each category

    'Find the start row of category
    startRow = Application.WorksheetFunction.Match(Cells(iCntr, 1), Range("A16:A3300"), 0) + 15 'assuming maximum items are around3000
    For jCntr = 1 To Cells(iCntr, 2) 'print items
         Rows(startRow + 2).EntireRow.Insert
        Cells(startRow + 2, 2) = "Item " & Cells(iCntr, 2) - jCntr + 1
    Next
Next

End Sub
Instructions:
Download the example file and click on the ‘Create Category List’, it will create the categories based on the number mentioned for each category.
Inserting Rows in Worksheet using Excel VBA – Download: Example File
You can download the example file and see example codes on Inserting Rows in Excel Worksheet.
ANALYSISTABS – Inserting Rows
A Powerful & Multi-purpose Templates for project management. Now seamlessly manage your projects, tasks, meetings, presentations, teams, customers, stakeholders and time. This page describes all the amazing new features and options that come with our premium templates.
Save Up to 85% LIMITED TIME OFFER

All-in-One Pack
120+ Project Management Templates
Essential Pack
50+ Project Management Templates
Excel Pack
50+ Excel PM Templates
PowerPoint Pack
50+ Excel PM Templates
MS Word Pack
25+ Word PM Templates
Ultimate Project Management Template
Ultimate Resource Management Template
Project Portfolio Management Templates
Related Posts
-
- How to Insert Rows in Excel Worksheet using VBA – Solution(s):
VBA Reference
Effortlessly
Manage Your Projects
120+ Project Management Templates
Seamlessly manage your projects with our powerful & multi-purpose templates for project management.
120+ PM Templates Includes:
43 Comments
-
venkat
January 15, 2015 at 4:06 PM — ReplyI need small information .In excel every 27 rows after insert 5 rows.how to do this .Please suggest to me
-
PNRao
January 16, 2015 at 2:47 PM — ReplyHi Venkat,
Here the VBA macro to insert n umber of rows after every nth row:
Sub Insert_Rows_After_Every_Nth_Row()
lRow = 41 ' last row in your sheet
'If yoyr data is not fixed:
'please refere the 100+ useful macro to find last row macro


everyNthRows = 27 'After every nth row
NumRowsTobeInserted = 5 'Number of rows to be inserted


Do While lRow >= everyNthRows
If lRow Mod everyNthRows = 0 Then Rows(lRow + 1 & ":" & lRow + NumRowsTobeInserted).Insert
lRow = lRow - 1
Loop

End Sub
Hope this helps!
Thanks-PNRao! -
Spandan
February 16, 2015 at 12:03 PM — ReplyI want to create a column before some specific text inside the cell .can you please help me in this ?
-
PNRao
March 2, 2015 at 6:58 PM — Reply -
JH
March 11, 2015 at 7:12 AM — ReplyHi, I would like to create a number of rows based on a cell input.
For example, based on input = 3 in a certain cell, I want to create 3-minus-1 rows.
How do I do this? Many thanks! -
PNRao
March 21, 2015 at 2:35 PM — ReplyYou can write something like this, lets say you are entering the number at Range A1 and you want to insert the new rows starting from Row2:
Sub sbInsertRowsBasedOnACellValue() numberRows = Range("A1") InsertRowsAtRow = 2 Rows(InsertRowsAtRow & ":" & InsertRowsAtRow - 1 + numberRows - 1).EntireRow.Insert 'Here numberRows - 1 indicates, number mentioned at A1 Minus 1 End Sub -
David
March 25, 2015 at 5:23 PM — ReplyHi,
Wondering if this can be modified to suit something I’ve been struggling with:The code listed below is tasked to :
> Create a new sheet based on each page break (which have been inserted through the subtotals function)
> Save the sheet to a designated location and,
> Auto-name each sheet according to the value in cell A2.
Code below:“Sub Sample()
Dim rowCurrent As Long, rowPrevious As Long, i As Long
Dim oWB As Workbook, newWbk As Workbook
Dim oWS As WorksheetSet oWB = ActiveWorkbook
Set oWS = oWB.Sheets(“Specials”)
rowPrevious = oWS.UsedRange.Row + oWS.UsedRange.Rows.Count – 1
For i = oWS.HPageBreaks.Count To 0 Step -1
If i = 0 Then
oWS.Rows(“1:” & rowPrevious).Copy
Else
rowCurrent = oWS.HPageBreaks(i).Location.Row
oWS.Rows(rowCurrent & “:” & rowPrevious).Copy
End IfWorkbooks.Add
ActiveSheet.Paste
ActiveWorkbook.SaveAs “file_path ” & ActiveSheet.Range(“A2″).Value & -i
ActiveWorkbook.CloserowPrevious = rowCurrent – 1
Next
End Sub”What I want to do, is take the column headings from the main file and insert them as row 1 on each sheet.
Would greatlly appreciate the assist.
David
-
Rob Garven
April 7, 2015 at 4:37 AM — ReplyGood morning
I am trying to insert 9 blank rows after every line of text and am a loss as to how to write the script. I have had a look at the example above and am wondering what the script should look like?
Thank you in advance
Rob -
Erin Stack
April 14, 2015 at 6:10 PM — ReplyI am trying to add an add row button to several sections in Excel. I can execute the commands and get the rows to add but when it runs if you add a row to section 1 at the end of the existing rows it works fine, but in section two the new row is added within the section and not at the end of the section. How do I write the script to always add a row at the end of the section regardless of the new rows added above the section?
-
Mike
May 27, 2015 at 2:59 AM — ReplyI have been looking for a way to add rows to a worksheet based on the number in a cell. This is the only place (of many) I found something that works. Thanks!
Mike
-
jay
July 18, 2015 at 1:06 PM — Replymust have to set object variable
-
Simon
July 30, 2015 at 7:43 PM — ReplyHi Erin
I’m struggling with this one too. It does work if you click on one of the rows within the range of data before you run the macro though.
-
PNRao
July 30, 2015 at 9:09 PM — ReplyHi Simon,
Could you please explain your requirement and share the code which you have tried.
Thanks-PNRao
-
Ash
October 12, 2015 at 3:07 PM — ReplyCan you share the code please. I am unable to use the above one.
-
PNRao
October 22, 2015 at 11:28 PM — ReplyHi Ash,
Please click on Download Now to download the example file and see the example codes on Inserting Rows in Excel Worksheet at the end of the page.
Regards-PNRAO
-
Nikos
November 4, 2015 at 2:54 PM — ReplyHi!
I find very useful all your informations!
I have a question: I have a workbook and I want to add an intire row that contains data or functions, directly beneath. The “problem” is that there are other rows that I want them to move down. For example, if I want to copy row A1, there are data in row A2,AE etc and I want them to move one row down so I can stell use them..
Thanks in advance for your reply -
Prakash
February 11, 2016 at 9:32 PM — ReplyHi I wants to add row if data/value found, else not.
so, there are many line items but not very specific sequence.
please provide macro.
Thank you
-
FT
February 24, 2016 at 2:40 AM — ReplyHi, How can I copy the formulas in a row to the next row.
-
usha
March 1, 2016 at 2:02 PM — ReplyHi,
I want a macro for rows that are having phone numbers more than 1 e.g.,
from
xxxxxx 234555, 455555, 5677777, 567778
xxxxxxxx 455656
fdgggfdf 7878787, 455550
xxxxxxxx 455656to
xxxxxx 234555
xxxxxx 455555e.g., 234555, 455555, 5677777, 567778 these numbers should come one after the other by using macro code.
These can occur randomly on my data sheet, it can be 2, 3, 4, or 5 numbers. But they will have the same name in separate colm.
I want them to be inserted as new cells, so that they do not overlap the numbers below
-
Krishna
March 29, 2016 at 9:04 PM — ReplyHi, What if I have a row of heading and want to skip it, the above macro helps when there is no heading but if I have a heading it will go for a toss.
-
Krishna
March 30, 2016 at 3:54 PM — ReplyHi , What I mean is how to tell the macro to skip first n rows so header wont be affected and then run the macro like above!
-
Nayan
May 10, 2016 at 12:01 AM — ReplyHi I need a macro which will insert multiple rows below consecutive rows and insert particular data in the newly insrted rows.
Example :-
33498 000001 ABC
33498 000001 PQR
33498 000001 MNB
33498 000001
33498 000001 ASD
33498 000001 AZXC
33498 000001
33498 000001 AWE
33498 000001
33498 000001 QWE
33498 000001 CDD
33689
33456Here it whould add 11 rows for 33689 and copy the data from ABC to CDD from column 3(including blank cells). Below is the output expected
33498 000001 ABC
33498 000001 PQR
33498 000001 MNB
33498 000001
33498 000001 ASD
33498 000001 AZXC
33498 000001
33498 000001 AWE
33498 000001
33498 000001 QWE
33498 000001 CDD
33689 000001 ABC
33689 000001 PQR
33689 000001 MNB
33689 000001
33689 000001 ASD
33689 000001 AZXC
33689 000001
33689 000001 AWE
33689 000001
33689 000001 QWE
33689 000001 CDD
33456 000001 ABC
33456 000001 PQR
33456 000001 MNB
33456 000001
33456 000001 ASD
33456 000001 AZXC
33456 000001
33456 000001 AWE
33456 000001
33456 000001 QWE
33456 000001 CDD -
JR
July 2, 2016 at 6:52 AM — ReplyHi,
Good day!
I would like to ask help on how to create a macro on my data sheet.
I have a list of company names in column A and then I need to insert 50 rows after each name because I going to insert 51 state jurisdiction in column E to be able to search each name in each state.
Column A (ENTITY NAMES) B C D Column E (State search)
Microsemi Storage Solutions, Inc. AK
Microsemi Storage Solutions, Inc. AL
…..
Microsemi Storage Solutions, Inc. WY
PMC-Sierra US, Inc. AK
PMC-Sierra US, Inc. AL
PMC-Sierra US, Inc. AR
….
Wintegra, Inc.Thank you so much..
-
Kiran
August 1, 2016 at 3:44 AM — ReplyI have following table
header1
row1
row2
row3need to convert as below
header1
row1
header1
row2
header1
row3Can anyone share code for this….note the row count is changing every time you insert
Thanks.
-
Rahul
August 9, 2016 at 3:48 PM — ReplyHi PNRao,
I want to add Row on specified sheet. number of row to inserted is mention in Cell ( for example: E10) of instruction sheet. when i run macro than this macro should enter number of row mention in cell E10 in sheet name XYZ.
I have two worksheet. i will make separate macro for each sheet to do same thing. as both sheet have different figure and 1st i need to insert on one sheet after getting other data than i need to add raw sheet to other sheet. -
PNRao
August 14, 2016 at 11:46 PM — ReplyThe below VBA code will, insert the number of rows specified:
Sub sbInsertRowsSpeccifiedNumberInARange()
targetSht = "SheetName" 'Your target sheet name to insert Rows
targetStartRow = 10 'Rows will be inserted from here in your taget sheet
numberOfRows = Sheets("XYZ").Range("E10")

For i = 1 To targetStartRow
    Rows(targetStartRow).Insert Shift:=xlDown
Next

End Sub
Thanks-PNRao!
-
Emilee
August 20, 2016 at 2:45 AM — ReplyI have a spreadsheet where I add a row every day and add new information into that row manually. There are also some formulas that autofill when the new line is inserted. I have a total at the very bottom of the spreadsheet. How do you change this VBA code to insert a line just above the total as opposed to the number it is at now “301”? The way the code is now, it always inserts a line at 301, but I want it to insert right above the total line regardless of which line it is on. I have also created other VBA formulas in the totals row which sum, count, and then a combined formula to get the average using the sum and count (all based on colors of cells). Thanks in advance for your help!
Sub Inserting_Line()
‘
‘ Inserting_Line Macro
‘‘
Rows(“301:301”).Select
ActiveSheet.Unprotect
Selection.Insert Shift:=xlDown, CopyOrigin:=xlFormatFromLeftOrAbove
Range(“A299:Y299”).Select
Selection.AutoFill Destination:=Range(“A299:Y300”), Type:=xlFillDefault
Range(“A299:Y300”).Select
End Sub -
Gelareh Nobakht
July 11, 2017 at 1:40 AM — ReplyI want to insert 8 rows after each 20 row. It’s my first time using VBA in excel.
-
PNRao
July 17, 2017 at 2:10 PM — ReplySub sbAT_InserRowsAfterEvery20Rows() intStartRow = 1 'Starting row intAfterEveryNRows = 20 'Number of Rows to Skip intNumRows = 8 'Number of rows to be inserted intRepeatNTime = 10 'Number of times to be repeated For iCntr = 1 To intRepeatNTime startRow = intStartRow + intAfterEveryNRows * iCntr + (intNumRows * (iCntr - 1)) endRow = intStartRow + intAfterEveryNRows * iCntr + (intNumRows * iCntr) - 1 Rows(startRow & ":" & endRow).Insert _ Shift:=xlDown, CopyOrigin:=xlFormatFromLeftOrAbove Next End Sub
-
REVA
July 17, 2017 at 4:07 PM — Replyhello PNRao,
what VBA code can i put if i want to copy down data validation rule to next cell based on the condtion that previous cell is empty or not? -
REVA
July 18, 2017 at 10:05 AM — ReplyHi,
I am new to VBA coding and writing macros. i am trying to insert a new row based on my cursor position. This is the code which i am tried using but it gives error like Run-time error “1004”: method ‘Range’ of object ‘_Global’ failed. please suggest how to corect it.Sub insertrow()
‘Inserting a new row at my cursor postion
Range(“xlapp.ActiveCell.Row”).EntireRow.Insert
End Sub
-
REVA
July 18, 2017 at 12:10 PM — Replyhi, i have got solution to my previous problem and now i am bale to insert row and column at my desireed location(here cursor location). now i have one more problem which is i am not able to undo the cells created. i want to create a code so that it undo’s or brings excel to original sheet once i open it again.
-
Anwesh
July 25, 2017 at 10:31 PM — ReplyHi,
I have a column that has numbers like 30, 60 ,90,120 and so on.I want a macro for inserting a row when there is difference of 120 or above. can you please help. -
PNRao
July 27, 2017 at 7:16 PM — ReplyHere is the code to insert a row if there difference is more than a certain value:
Sub sbInsertRowIfDifferenceMoreThanCetrainValue()

colToCheck = 1 'This is the Column number to Check
lastRow = 100 'This is Your Last Row with Data
diffToCeck = 120' Difference value


For iCntr = lastRow - 1 To 1 Step -1

If Abs(Cells(iCntr, colToCheck) - Cells(iCntr + 1, colToCheck)) >= diffToCeck Then
Rows(iCntr + 1).Insert
End If

Next

End Sub
Thanks!
-
Junn
July 30, 2017 at 12:38 PM — ReplyHi Reva,
What’s the new code? I am looking for the solution too.
Thanks,
JUnn -
algae
September 22, 2017 at 3:37 PM — ReplyHi,
I’m struggling with trying to copy a row from one file and insert the row in another file. Please helpRange” file name ABC”(“B1:F1″).Copy
Range” File name XYZ”(“A1″).EntireRow.Insert
Range” File name XYZ”(“B1:F1”).Select
ActiveSheet.Paste ‘
Application.CutCopyMode = FalseEnd
-
algae
September 22, 2017 at 3:42 PM — ReplyFile ABC has only one worksheet, whereas file XYZ has 56 worksheets, that is to say that range B1:F1 go to worksheet 1, range B2:F2 go to worksheet 2 and so on. Thanks
-
PNRao
October 1, 2017 at 1:36 PM — ReplyHello,
Here is the VBA code to copy to insert new row and paste the copied data in workbook.
Sub sbCopyRangeAndPasteInToAnpotherFile() Set Wb1 = Workbooks("ABC") Set Wb2 = Workbooks("XYZ") Wb2.Sheets("Sheet1").Range("A1").EntireRow.Insert Wb1.Sheets("Sheet1").Range("B1:F1").Copy Destination:=Wb2.Sheets("Sheet1").Range("B1:F1") End Sub -
PNRao
October 1, 2017 at 1:44 PM — ReplyYou can use a for loop and change the macro accordingly. Here is the VBA code to insert rows in each sheet of the workbook and copy the data and paste it in newly created row.
Sub sbCopyRangeAndPasteInToAnpotherFile() Set Wb1 = Workbooks("Book1") Set Wb2 = Workbooks("Book2") 'Loop 56 times For iCntr = 1 To 4 'First Insert Row Wb2.Sheets(iCntr).Range("A1").EntireRow.Insert 'Now copy the data Wb1.Sheets(1).Range("B" & iCntr & ":F" & iCntr).Copy Destination:=Wb2.Sheets(iCntr).Range("B1:F1") Next End Sub -
Hallgrimur
June 1, 2018 at 9:00 PM — ReplyI’m making a model for startup costs, construction time and profit. I’m trying to create a macro that takes a varying value input (construction time) and generates rows based on the input. The cells in the generated rows need to contain a constant divided between them equally (the startup cost). So the construction time may vary and I can’t seem to get this right.
-
Jarett
July 27, 2018 at 12:53 AM — ReplyI am wondering if it is possible to use the information from row 1 A1 and row 2 A1 to create a different number of rows between the 2.
what i am thinking is taking row 1 A1 information minus row 2 A1 information dived by 60 and that is the number of lines that need to be created between row A and B. And them repeat this all the way thru the document. between 2-3 thousand lines. to create a document with around 120 thousand lines. -
phil
November 21, 2018 at 12:04 AM — ReplyHI, I have a macro that inserts a new row into my table, I also have a macro that inserts a complete new table for recording absence. The trouble I have is that when inserting the new table the tables already existing get moved downwards as requested but my insert row macro for the second table no longer works as it is still referencing from the above location.
Hope this makes sence
-
Prasanth
December 8, 2020 at 1:04 AM — ReplyI need to Insert with the data in it ,at the end . I need to insert in the middle
Effectively Manage Your
Projects and Resources
ANALYSISTABS.COM provides free and premium project management tools, templates and dashboards for effectively managing the projects and analyzing the data.
We’re a crew of professionals expertise in Excel VBA, Business Analysis, Project Management. We’re Sharing our map to Project success with innovative tools, templates, tutorials and tips.
Project Management
Excel VBA
Download Free Excel 2007, 2010, 2013 Add-in for Creating Innovative Dashboards, Tools for Data Mining, Analysis, Visualization. Learn VBA for MS Excel, Word, PowerPoint, Access, Outlook to develop applications for retail, insurance, banking, finance, telecom, healthcare domains.
Page load link
Go to Top
Вставка диапазона со сдвигом ячеек вправо или вниз методом Insert объекта Range. Вставка и перемещение строк и столбцов из кода VBA Excel. Примеры.
Range.Insert – это метод, который вставляет диапазон пустых ячеек (в том числе одну ячейку) на рабочий лист Excel в указанное место, сдвигая существующие в этом месте ячейки вправо или вниз. Если в буфере обмена содержится объект Range, то вставлен будет он со своими значениями и форматами.
Синтаксис
|
Expression.Insert(Shift, CopyOrigin) |
Expression – выражение (переменная), возвращающее объект Range.
Параметры
| Параметр | Описание | Значения |
|---|---|---|
| Shift | Необязательный параметр. Определяет направление сдвига ячеек. Если параметр Shift опущен, направление выбирается в зависимости от формы* диапазона. | xlShiftDown (-4121) – ячейки сдвигаются вниз; xlShiftToRight (-4161) – ячейки сдвигаются вправо. |
| CopyOrigin | Необязательный параметр. Определяет: из каких ячеек копировать формат. По умолчанию формат копируется из ячеек сверху или слева. | xlFormatFromLeftOrAbove (0) – формат копируется из ячеек сверху или слева; xlFormatFromRightOrBelow (1) – формат копируется из ячеек снизу или справа. |
* Если диапазон горизонтальный или квадратный (количество строк меньше или равно количеству столбцов), ячейки сдвигаются вниз. Если диапазон вертикальный (количество строк больше количества столбцов), ячейки сдвигаются вправо.
Примеры
Простая вставка диапазона
Вставка диапазона ячеек в диапазон «F5:K9» со сдвигом исходных ячеек вправо:
|
Range(«F5:K9»).Insert Shift:=xlShiftToRight |
Если бы параметр Shift не был указан, сдвиг ячеек, по умолчанию, произошел бы вниз, так как диапазон горизонтальный.
Вставка вырезанного диапазона
Вставка диапазона, вырезанного в буфер обмена методом Range.Cut, из буфера обмена со сдвигом ячеек по умолчанию:
|
Range(«A1:B6»).Cut Range(«D2»).Insert |
Обратите внимание, что при использовании метода Range.Cut, точка вставки (в примере: Range("D2")) не может находится внутри вырезанного диапазона, а также в строке или столбце левой верхней ячейки вырезанного диапазона вне вырезанного диапазона (в примере: строка 1 и столбец «A»).
Вставка скопированного диапазона
Вставка диапазона, скопированного в буфер обмена методом Range.Copy, из буфера обмена со сдвигом ячеек по умолчанию:
|
Range(«B2:D10»).Copy Range(«F2»).Insert |
Обратите внимание, что при использовании метода Range.Copy, точка вставки (в примере: Range("F2")) не может находится внутри скопированного диапазона, но в строке или столбце левой верхней ячейки скопированного диапазона вне скопированного диапазона находится может.
Вставка и перемещение строк
Вставка одной строки на место пятой строки со сдвигом исходной строки вниз:
Вставка четырех строк на место пятой-восьмой строк со сдвигом исходных строк вниз:
Вставка строк с использованием переменных, указывающих над какой строкой осуществить вставку и количество вставляемых строк:
|
1 2 3 4 5 6 7 8 9 10 11 12 13 14 15 16 17 18 19 20 21 22 |
Sub Primer1() Dim n As Long, k As Long, s As String ‘Номер строки, над которой необходимо вставить строки n = 8 ‘Количесто вставляемых строк k = 4 ‘Указываем адрес диапазона строк s = n & «:» & (n + k — 1) ‘Вставляем строки Rows(s).Insert End Sub ‘или то же самое с помощью цикла Sub Primer2() Dim n As Long, k As Long, i As Long n = 8 k = 4 For i = 1 To k Rows(n).Insert Next End Sub |
Перемещение второй строки на место шестой строки:
|
Rows(2).Cut Rows(6).Insert |
Вторая строка окажется на месте пятой строки, так как третья строка заместит вырезанную вторую строку, четвертая встанет на место третьей и т.д.
Перемещение шестой строки на место второй строки:
|
Rows(6).Cut Rows(2).Insert |
В этом случае шестая строка окажется на месте второй строки.
Вставка и перемещение столбцов
Вставка одного столбца на место четвертого столбца со сдвигом исходного столбца вправо:
Вставка трех столбцов на место четвертого-шестого столбцов со сдвигом исходных столбцов вправо:
Перемещение третьего столбца на место седьмого столбца:
|
Columns(3).Cut Columns(7).Insert |
Третий столбец окажется на месте шестого столбца, так как четвертый столбец заместит вырезанный третий столбец, пятый встанет на место четвертого и т.д.
Перемещение седьмого столбца на место третьего столбца:
|
Columns(7).Cut Columns(3).Insert |
В этом случае седьмой столбец окажется на месте третьего столбца.
Skip to content
![]()
How to insert a single row in a worksheet using Excel, VBA and Shortcut methods
METHOD 1. Insert a row by selecting an entire row
EXCEL
Select an entire row > Right-click anywhere on the selected row > Click Insert
| 1. Select an entire row where you want to insert a new row. Note: in this example we are inserting a new row as a second row. To select an entire row, click either on the row heading number or select the first cell of the row, press and hold the Ctrl and Shift keys and press the Right key. |
 |
| 2. Right-click anywhere on the selected row and click Insert. |  |
METHOD 2. Insert a row using the ribbon option
EXCEL
Select a cell in the row where you want to insert a new row > Home tab > Cells group > Insert > Insert Sheet Rows
| 1. Select any cell in the same row where you want to insert a new row. Note: in this example a new row will be inserted as row 2, given we have selected a cell in the second row. |
 |
| 2. Select the Home tab. |  |
| 3. Click Insert in the Cells group. 4. Click Insert Sheet Rows. |
 |
METHOD 3. Insert a row using the cell option
EXCEL
Right-click on a cell in the row where you want to insert a new row > Insert > Entire row > OK
| 1. Right-click on any cell in the row where you want to insert a new row. 2. Click Insert Note: in this example a new row will be inserted as row 2, given we have right-clicked on a cell in the second row. |
 |
| 3. Select the Entire row option and click OK group. |  |
METHOD 1. Insert a row using VBA by selecting a single cell
VBA
Sub Insert_a_Row()
‘insert a new row as row 2
Worksheets(«Sheet1»).Range(«A2»).EntireRow.Insert
End Sub
OBJECTS
Worksheets: The Worksheets object represents all of the worksheets in a workbook, excluding chart sheets.
ADJUSTABLE PARAMETERS
Row Selection: Select where you want to insert a new row by changing the row number in the cell reference («A2»). You can also change the column reference to any column as this will have no impact on where the row will be inserted.
Worksheet Selection: Select the worksheet where you want to insert a new row by changing the Sheet1 worksheet name.
METHOD 2. Insert a row using VBA by selecting a range of cells
VBA
Sub Insert_a_Row()
‘insert a new row as row 2
Worksheets(«Sheet1»).Range(«A2:D2»).EntireRow.Insert
End Sub
OBJECTS
Worksheets: The Worksheets object represents all of the worksheets in a workbook, excluding chart sheets.
ADJUSTABLE PARAMETERS
Row Selection: Select where you want to insert a new row by changing the row number reference («A2:D2»). You can also change the column reference to any column as this will have no impact on where the row will be inserted.
Worksheet Selection: Select the worksheet where you want to insert a new row by changing the Sheet1 worksheet name.
METHOD 3. Insert a row using VBA by selecting an entire row
VBA
Sub Insert_a_Row()
‘insert a new row as Row 2
Worksheets(«Sheet1»).Range(«2:2»).EntireRow.Insert
End Sub
OBJECTS
Worksheets: The Worksheets object represents all of the worksheets in a workbook, excluding chart sheets.
ADJUSTABLE PARAMETERS
Row Selection: Select where you want to insert a new row by changing the row number reference («2:2»).
Worksheet Selection: Select the worksheet where you want to insert a new row by changing the Sheet1 worksheet name.
Insert a row using a Shortcut
SHORTCUT
WINDOWS SHORTCUT
Method 1
Method 2
NOTES
To insert a row using these shortcut methods you will need to select an entire row. If you select a single cell or a range of cells and action this shortcut an Insert dialog box will appear and you will need to select Entire row and click OK.
The Plus Sign key in the first method refers to the key on the top of the keyboard. The Plus Sign key in the second method refers to the key to the right of the keyboard, which some devices will not have. The reason why the first method requires the use of the Shift key is because the Plus Sign key is used for both Plus and Equal Signs, therefore, to activate the Plus Sign you are required to use the Shift key.
Explanation about how to insert a row
EXPLANATION
EXPLANATION
This tutorial explains and provides step by step instructions on how to insert a single row in a worksheet using Excel, VBA and Shortcut methods.
Excel Methods: Using Excel you can insert a new row by selecting an entire row or a single cell and using a ribbon or cell option.
VBA Methods: Using VBA you can insert a new row by referencing to a single cell, a range of cells or an entire row. If you want to insert a single row by referencing to a range of cells you need to ensure that the range of cells only references to a single row. As per the example in this tutorial the VBA code references to only row 2 across multiple columns («A2:D2»).
Shortcut Methods: Using a Shortcut you can instantly insert a new row by selecting the entire row where you want to insert a new row and actioning the shortcut.
ADDITIONAL NOTES
Note 1: Inserting a new row will move the existing rows that are below the new row downward. In this this tutorial every row below row 2 will be moved down.
Note 2: If the last row in a worksheet has a cell that is not empty, you will not be able to insert a new row. To insert a row you will need to ensure that every cell in the last row is clear of any content.
| Related Topic | Description | Related Topic and Description |
|---|---|---|
| Insert a column | How to insert a single column in a worksheet using Excel, VBA and Shortcut methods | |
| Delete a column | How to delete a single column in a worksheet using Excel, VBA and Shortcut methods | |
| Delete multiple columns | How to delete multiple columns in a worksheet using Excel, VBA and Shortcut methods | |
| Insert multiple columns | How to insert multiple columns in a worksheet using Excel, VBA and Shortcut methods | |
| Insert multiple rows | How to insert multiple rows in a worksheet using Excel, VBA and Shortcut methods |