
Insert pictures

-
Do one of the following:
-
Select Insert > Pictures > This Device for a picture on your PC.
-
Select Insert > Pictures > Stock Images for high quality images or backgrounds.
-
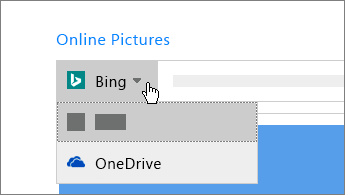
Select Insert > Pictures > Online Pictures for a picture on the web.
Tip: For a picture from your OneDrive, go to the drop-down list at the top left, and switch from Bing to OneDrive.

-
-
Select the picture you want, and then select Insert.
Resize or move pictures
-
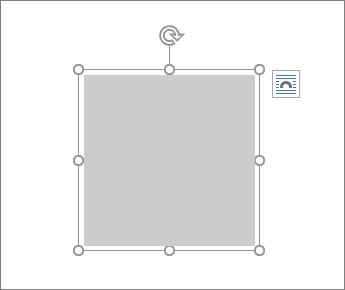
To resize a picture, select the picture and drag a corner handle.
-
To wrap text around a picture, select the picture, and then select a wrapping option.
Tip: Pick something other than In Line with Text, and you can move the picture around the page: select the picture and drag it.
What about EPS?
EPS files can no longer be inserted into Office documents. For details, see Support for EPS images has been turned off in Microsoft 365.
What do you want to do?
-
Click the location in your document where you want to insert a picture.
-
On the Insert tab, click Pictures.
-
Select the option you want to use for inserting pictures.
The Photo Browser option helps you browse through existing photo sets on your computer, such as photos in iPhoto or Photo Booth. Picture from File lets you browse through your computer’s file structure to look for photos.
-
When you find the picture you want, drag it from the Photo Browser into your document, or click Insert in the file browser.
Tip: The picture is embedded in your document. If your picture has a large file size and makes your document too large, you can reduce the size of your document by linking to the picture instead of embedding it. In the Choose a Picture dialog box, select the Link to File box.
You can insert a picture or photo into the body of an email message, instead of attaching the file. Inserting a picture requires that your message uses HTML formatting. To set HTML formatting, select Options > HTML.
-
In the body of your message, click where you want to add a picture.
-
On the Message tab, click Pictures.
-
Select the option you want to use for inserting pictures.
The Photo Browser option helps you browse through existing photo sets on your computer, such as photos in iPhoto or Photo Booth. Picture from File lets you browse through your computer’s file structure to look for photos.
-
When you find the picture you want, drag it from the Photo Browser into your document, or click Open in the file browser.
Resize the picture, if necessary, by clicking one of the handles that surround the picture and dragging it. Click the handle at the top of the picture to rotate it.
-
Hold down CONTROL and click the picture, and then click Change Picture.
-
Locate a new picture on your computer, and then click Insert.
See also
Crop a picture
Move, rotate, or group a picture, text box, or other object in Office for Mac
Change the size of a picture, shape, WordArt, or other object in Word 2016 for Mac
Control text wrapping around objects in Word 2016 for Mac
Pictures make documents more engaging and easier to understand.
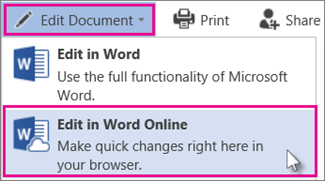
Tip: To add pictures in Word for the web, first switch to Editing View by clicking Edit Document > Edit in Word for the web.
Insert a picture
Do one of the following:
-
Insert a picture from my computer: On the Insert tab, click Picture, browse to, and select the picture you want, and click Open.
-
Insert a picture from the web: On the Insert tab, click Online Pictures, and in the Search Bing box, type a word that describes the picture you’re looking for, such as ‘cat’.

Tip: You can also insert a picture by copying it (Ctrl + C) and pasting it (Ctrl + V) where you want.
Add style and formatting to a picture
When you insert a picture, Word for the web places the picture in your document and displays the Picture Tools ribbon with the Format tab.
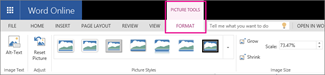
Tip: To open the Picture Tools ribbon anytime you’re in Editing View, select the picture.
-
To change the picture’s size, style, or to add alt text, on the Format tab choose the style options that you want to apply to the picture.
Note: If you have Word 2013 or 2016 for Windows, you can do much more to fine-tune a picture: compress it, crop it, remove the background, apply artistic effects, control its position on the page, put it in front of or behind the text, trim it to a specific size, and control how text wraps around it. Click Open in Word to get started.
Need more help?
Want more options?
Explore subscription benefits, browse training courses, learn how to secure your device, and more.
Communities help you ask and answer questions, give feedback, and hear from experts with rich knowledge.
![]()
Download Article
Step-by-step guide to inserting pictures in Word
![]()
Download Article
- Windows
- Mac
- Web App
- Video
- Q&A
- Tips
|
|
|
|
|
Whether you’re working on a hefty research project or a friendly holiday greeting card, adding images to your Word document can really add value to your project. Whether you want to insert a picture from your computer or find one online, it’s easy to add photos in Word. This wikiHow teaches you how to insert an image into a Microsoft Word document using Windows, a Mac, and the free web version of Word.
Things You Should Know
- Use the Insert tab on Windows, Mac, and the web app to add a picture.
- Select Pictures > This Device to use an image on your computer.
- Click the image to resize and reformat it.
-
1
Click the place in your document where you want to insert the picture. Word’s insertion cursor, a vertical blinking bar, will appear at this point. When you insert the image, its bottom-left corner will be at this point.
- This method works for all modern versions of Word beginning with Word 2016. You can also use it as a guide for earlier versions of Windows, although there will be fewer tools and features.
- Changing the background is done through a different method, using the Design tab.
-
2
Click the Insert tab. It’s near the top of Word between «Home» and «Draw» (or «Home» and «Design» in some versions).
Advertisement
-
3
Click the Pictures tool. It’s in the «Illustrations» section of the toolbar running along the top of Word. Some location options will appear. If you’re using Word 2019 or later, a menu will expand. If you’re using Word 2016 or earlier, your file browser will appear.
-
4
Select the type of image you want to insert. You can choose an image on your computer, a stock image from Microsoft, or an image from the internet.
- Word 2019 or later:
- Click This Device if the picture is on your computer.
- Click Stock Images to select a free stock image from Microsoft’s collection.
- Click Online Pictures to use Bing’s image search to find photos on the web.
- If the photo is on your OneDrive, select Online Pictures and click OneDrive at the bottom-left corner.
- Word 2016:
- If the picture is on your computer, simply navigate to it in the file browser.
- If you want to search for a photo online or insert one from Facebook, Flickr, or your OneDrive, close the file browser and click the Online Pictures icon next to the «Pictures» in the toolbar. You can then select an image from Bing image search, Flickr, or Facebook.
- If the picture is on your OneDrive, click Online Pictures instead of Pictures and click Browse next to «OneDrive.»
- Word 2019 or later:
-
5
Select the image you want to insert. When you find the picture, click it once to select it.
- If you’re selecting from stock images or online images, you can click multiple pictures to add more than one.
- If you’re choosing files from your computer and want to add more than one picture, hold the Ctrl button down as you click each image.
-
6
Click Insert. It’ll be near the bottom-right corner of the window no matter where you’ve selected your image(s). You’re done! Continue to the next steps for formatting information, or print the document when you’re ready.
-
7
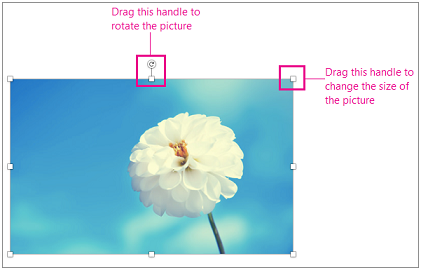
Resize the picture. If you want to change the picture’s size, click it once to select it, and then drag any of the corner circles in or out.[1]
- You can also specify the size if you want. Double-click the picture to open the Picture Format tab at the top, and then set your desired measurements next to «Height» and «Width.»
-
8
Use the curved arrow at the top of the picture to rotate it. It’s above the dot at the top-center part of the picture. To rotate, place the mouse cursor over the curved arrow, and then click and drag the cursor left or right until you’re satisfied.
-
9
Double-click the picture to access more editing tools. This opens the «Picture Format» (2019 and later) or «Format» (2016) tab at the top of Word. On this tab, you can:
- In the «Arrange» panel in the top-right area, click Wrap Text to choose how to situate the picture in blocks of text. You can also set alignment preferences here. Wrapping the text is a good way to get your document formatted exactly the way you want.
- To crop the picture, click the Crop tool in the «Size» panel at the top-right corner.
- The «Adjust» panel near the top-left corner has additional tools for background removal, color effects, and corrections.
- To add a border or effect around the picture, select one of the «Picture Styles» at the center of the Format bar, or choose any of the other options in the section to have more control over the style.


Advertisement
-
1
Click the place in your document where you’d like to insert a picture. This places the cursor at that location.
-
2
Click the Insert tab. It’s at the top of Word between the «Home» and «Design» or «Home» and «Draw» tabs.
-
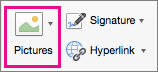
3
Click the Pictures icon. It’s on the toolbar that runs along the top of Word. Look for an icon of a green mountain with a yellow sun between «Tables» and «Shapes.»
-
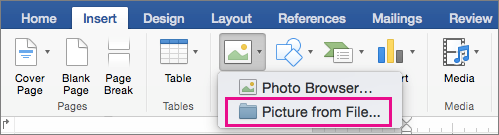
4
Click Photo Browser or Picture from File. If you want to browse images in your Mac’s Photos app, use Photo Browser. To select an image file using Finder, choose Picture from File.
-
5
Insert the picture into the document. If you’re using the Photo Browser option, simply drag the photo into your document. If you’re using Picture from File, select the image and click Insert.
-
6
Resize the picture. If you want to increase or reduce the picture’s size, click the image to select it, and then do one of the following:
- To maintain the picture’s proportions so it doesn’t stretch or warp, hold down the Shift key as you drag any of the sizing handles (the circles) inward or outward.[2]
- To keep the image’s center in place as you resize, hold down the Option key as you drag the handles.
- You can also specify a size. Double-click the Picture to open the Picture Format tab, then enter your desired measurements next to «Height» and «Width.»
- To maintain the picture’s proportions so it doesn’t stretch or warp, hold down the Shift key as you drag any of the sizing handles (the circles) inward or outward.[2]
-
7
Drag the curved arrow at the top of the picture to rotate it. It’s above the dot at the top-center edge of the picture. Just place the mouse cursor over the curved arrow, and then click and drag it left or right until it’s correct.
-
8
Double-click the picture to access more editing tools. This opens the «Picture Format» tab at the top of Word, which has a bunch of editing features, including the ability to remove the background and add styles.
- Click Corrections near the top-left corner to correct lighting and color problems.
- Click Artistic Effects to play around with filters, and Transparency to make the picture more see-through.
- To crop the picture, click the Crop tool next to the height and width controls.
- Click Wrap Text to choose how to situate the picture in blocks of text, and use Align and Position to ensure correct placement.
- Click Quick Styles to choose pre-styled borders, shadows, and other options.


Advertisement
-
1
Click the place in your document where you’d like to insert a picture. This places the cursor at that location.
- If it’s your first time using Office Online on the web, go to https://www.office.com, sign in with your Microsoft account, and select Word to get started.
-
2
Click Insert. This opens the Insert tab.
-
3
Click Pictures. This opens a drop down options menu.
-
4
Select a picture type. There are four options to choose from:
- This Device — choose a picture on your computer
- OneDrive — choose an image from your OneDrive
- Stock Images — insert a stock image or sticker
- Bing Pictures — search Bing for an image
-
5
Select an image. If you choose the This Device option, you’ll be prompted to select an image from your computer. Click it to select it.
-
6
Click Open. This is in the bottom right corner of the image selection window. This will confirm your selected image and insert it into the document.
-
7
Resize the picture. If you want to change the picture’s size, click it once to select it, and then drag any of the corner circles in or out.
- You can also specify the size if you want. Double-click the picture to open the Picture tab at the top, and then set your desired measurements next to «Height» and «Width.»
-
8
Use the curved arrow at the top of the picture to rotate it. It’s above the dot at the top-center part of the picture. To rotate, place the mouse cursor over the curved arrow, and then click and drag the cursor left or right until you’re satisfied.
-
9
Double-click the picture to access more editing tools. This opens the «Picture» tab at the top of the Word web app. On this tab, you can:
- In the «Arrange» panel in the top-right area, click Wrap Text to choose how to situate the picture in blocks of text. You can also set alignment preferences here.
- To crop the picture, click the Crop tool in the «Image Size» panel at the top-right corner.
- To add a border or effect around the picture, select one of the «Picture Styles» at the center of the bar, or choose any of the other options in the section to have more control over the style.


Advertisement
Add New Question
-
Question
How do I take screenshots?

On a Mac, shift command 3 to screenshot the whole screen. If you want to take a screenshot of a certain area on the screen, press shift command 4. On a Windows PC, press control and print screen at the same time, then you can paste the image into Paint or Microsoft Word.
-
Question
When I insert several photos on an age in a Word document, the photos often won’t stay in place. How do I stop the photos from bumping each other around?
You can right-click the image, hold the cursor over the «Wrap Text» menu option, and select an option from the list that is NOT «In Line with Text» (usually selected by default), such as «Tight» or «Behind/In Front of Text.» Then you should be able to move the image freely around the page.
-
Question
How do I format images in a Word document?
Try double-tapping the photo. A photo format menu should come up on the right side.
See more answers
Ask a Question
200 characters left
Include your email address to get a message when this question is answered.
Submit
Advertisement
Video
-
Adding photos to your Word document increases its size.
-
Other photo modification features available in newer versions of Microsoft Word include the ability to add borders, cutout styles, shadows, beveled edges, glows, and drop shadows.
-
When you crop a picture, the actual cropped part of the picture is hidden, not removed; unless you check the «Delete Cropped Areas of Pictures» box in the «Compression Settings» dialog box. Any compressed pictures with their cropped areas deleted cannot be restored to their original appearance.
Show More Tips
Thanks for submitting a tip for review!
Advertisement
About This Article
Article SummaryX
1. Click the place you want to insert the image.
2. Click the Insert tab.
3. Click Pictures.
4. Choose a location.
5. Select the image and click Insert.
6. Double-click the picture to open editing and format tools.
Did this summary help you?
Thanks to all authors for creating a page that has been read 650,203 times.
Is this article up to date?
This tutorial shows how to insert images in Microsoft Word. We will also look at how to resize images, align images with the text, and add a border.
Quick Links:
- How to Insert an Image
- How to Resize an Image
- How to Align an Image with the Text
- How to Add a Border to an Image
Do you want to insert shapes instead of images? Please see “How to Insert and Modify Shapes in Microsoft Word (PC & Mac).”
This tutorial is also available as a YouTube video showing all the steps in real time.
Watch more than 200 other writing-related software tutorials on my YouTube channel.
The images below are from Word for Microsoft 365. These steps also apply to Word 2021, Word 2019, Word 2016, and Word 2013. However, the stock image options will be limited in those older versions of the software.
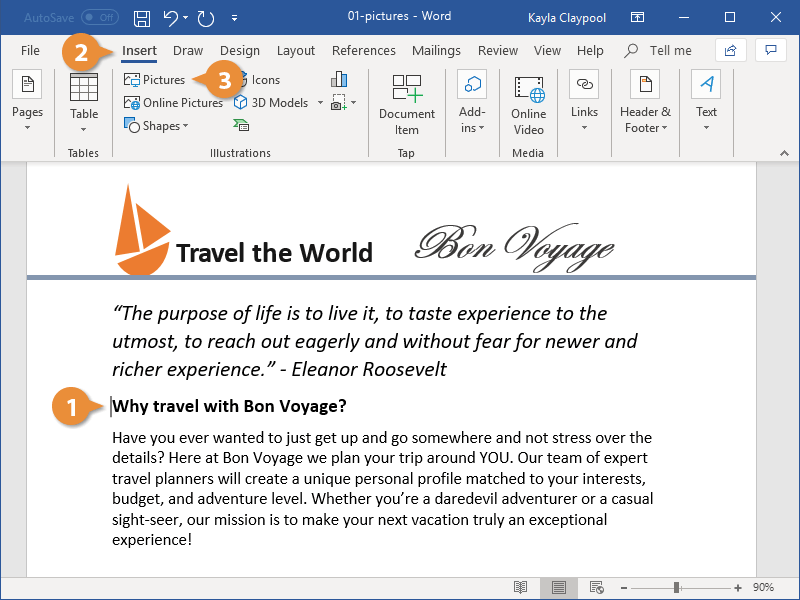
- Place your cursor where you want to insert the image. (This is an approximate placement. You can change the alignment with the text after inserting the images, as shown in the section below.)
- Select the Insert tab in the ribbon.

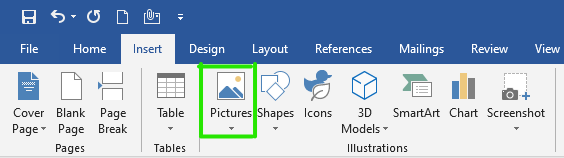
- Select the Pictures button in the Illustrations group.

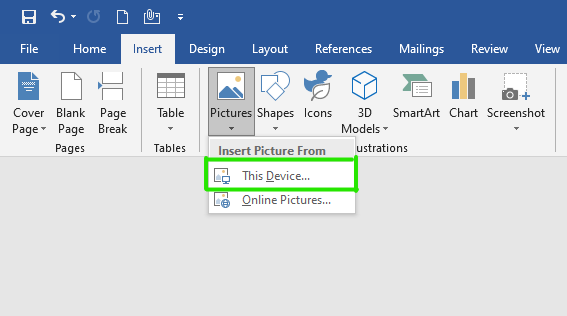
- Select the location of the image from the Insert Picture From menu:
-
- This Device lets you choose an image stored on your computer or network server.
- Stock Images lets you choose stock images, icons, cutout people, stickers, and illustrations. The full stock image library is only available to users signed into Word for Microsoft 365.
- Online Pictures lets you search for images through Bing, Microsoft’s search engine. This option also provides a link to OneDrive.

For this tutorial, we will insert an image stored on the device.
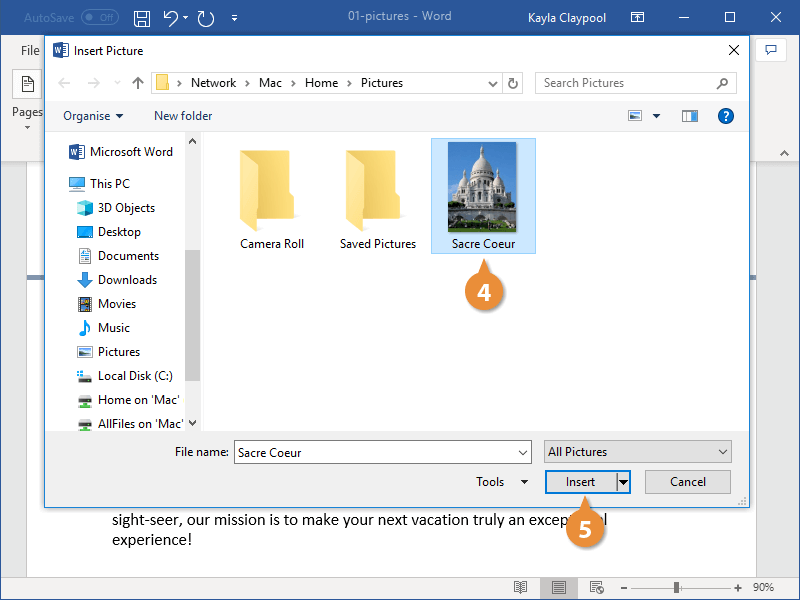
- (For “This Device” option only) Locate the image in the Insert Picture dialog box.

- Select the Insert button.

Your image should now appear in your Word document.
How to Resize an Image in Microsoft Word
- Select the image. A border with resizing handles will appear when the image is selected.
- Select one of the resizing handles and then drag the image to a new size.
Pro Tip: Choose a corner handle to maintain the image’s current shape.

Optional Steps: How to Rotate an Image in Microsoft Word
- Select the image.
- Select the rotation handle at the top of the border.
- Rotate the image to the left or right.

How to Align an Image with the Text in Microsoft Word
- Select the image.
- Select the Layout Options button.

- Select an option from the layout menu:
-
- In Line with Text
- Square
- Tight
- Through
- Top and Bottom
- Behind Text
- In Front of Text
The visual effectiveness of each option will depend on the size of your image and the density of your text. So, you may need to experiment with several options to find the one most suited to your content.

Pro Tip: If you select an option other than In Line with Text, you can select and “grab” the image, and then move it almost anywhere in the document.
How to Add a Border to an Image in Microsoft Word
- Select the image.
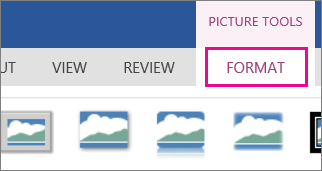
- Select the Picture Format tab in the ribbon. (This tab only appears when an image is selected.)

From here, you can add a built-in border or edge effect or manually create a border.
How to Add a Built-In Border or Edge Effect to an Image
- Select the bottom menu arrow in the Picture Styles group.
![]()
- Select a frame or other edge effect from the Picture Styles menu.

Your new border or edge effect should appear immediately.

How to Add a Manual Border to an Image
- Select Picture Border in the Picture Styles group.

- Select a color from the drop-down menu.

- Reselect Picture Border, select Weight, and then choose a line thickness.

- Reselect Picture Border, select Dashes, and then choose a line style.

Your new manual border should appear immediately.

Documents with a lot of images can negatively affect Word’s performance. If you notice Word reacting slowing, please see “How to Make Microsoft Word Faster by Hiding Images.”
Related Resources
How to Write Figure Captions for Graphs, Charts, Photos, Drawings, and Maps
How to Insert Figure Captions and Table Titles in Microsoft Word
How to Change the Style of Table Titles and Figure Captions in Microsoft Word
How to Update Table and Figure Numbers in Microsoft Word
How to Save Tables and Figures as Images in Microsoft Word (PC & Mac)
Updated February 20, 2023
You can insert graphics and pictures that you have on hand into your document. For example, you can insert an image made in another program, or a photo off a digital camera.
Insert a Picture
- Click in your document where you want to insert your picture.
- Click the Insert tab.
- Click Pictures button.

- Navigate to the picture you want to insert and select it.
- Click Insert button.
A file browser window opens.
To insert more than one file at a time, press and hold down Ctrl as you select them.
The selected picture is inserted.
Insert an Online Picture
You can also use the internet to search for a picture if you don’t have one handy in your files.
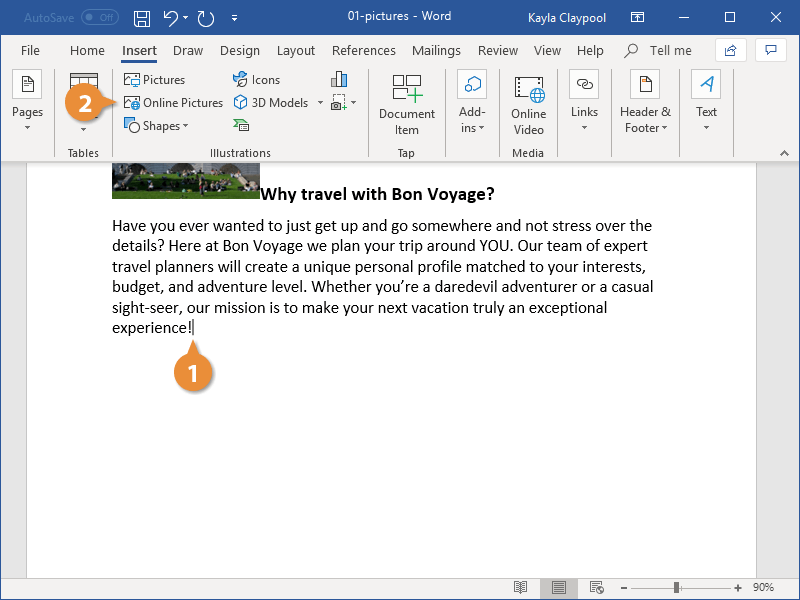
- Click where you want to insert your online picture.
- Click the Online PIctures button on the Insert tab.
- Enter keyword text into the search field and press Enter.
- Size: Choose how big you want the image to be, from a small thumbnail to an extra-large image.
- Type: You can search for a photograph, clipart, line drawings, animations, or images with transparent backgrounds.
- Color: Select a color to show images that primarily feature that color.
- Layout: Search for square, wide, or tall images.
- Select the picture you wish to use.
- Click the Insert button.
From here, you can search for pictures using Bing Image Search, or browse your OneDrive account for something to use.
You can click the Filter button below the search field to refine your search.
The image is inserted.
Crop a Picture
When you crop a picture, you trim its horizontal and vertical sides. Cropping is useful when you only want to include a portion of a picture, or when you need to adjust its proportions.
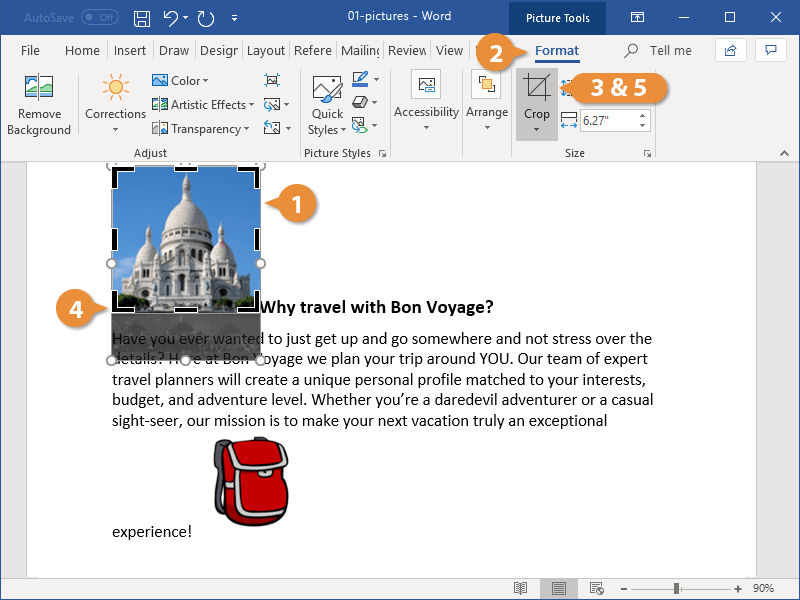
- Select the picture.
- Click the Format tab in the Picture Tools ribbon group.
- Click the Crop button.
- Click and drag the crop handles where you want to crop.
- Click the Crop button again when you’re finished setting the crop area.
Crop handles appear on the sides and corners of the image.
To crop all four sides of a picture or graphic at once while maintaining the graphic’s proportions, press and hold down Ctrl as you drag the handles.
The image is cropped to the borders you set.
Use Picture Styles
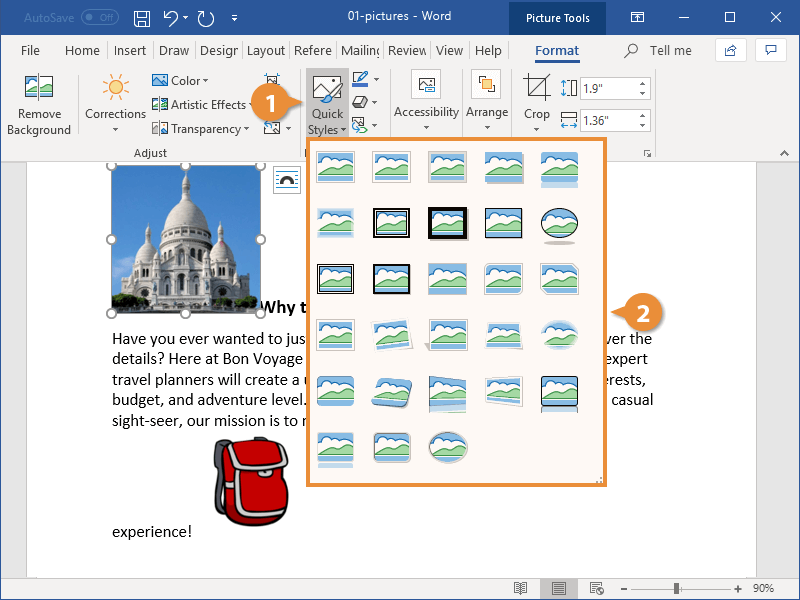
Picture styles let you add borders and effects, such as shadows, reflections, and 3D rotation, to images. You can select a Quick Style or customize your own style.
- Click the Quick Styles button on the Format tab.
- Select a style.
The Quick Styles gallery expands. Each thumbnail gives a rough preview of how the style will affect the image.
The style is applied, updating the picture’s border and effects.
Use Artistic Effects
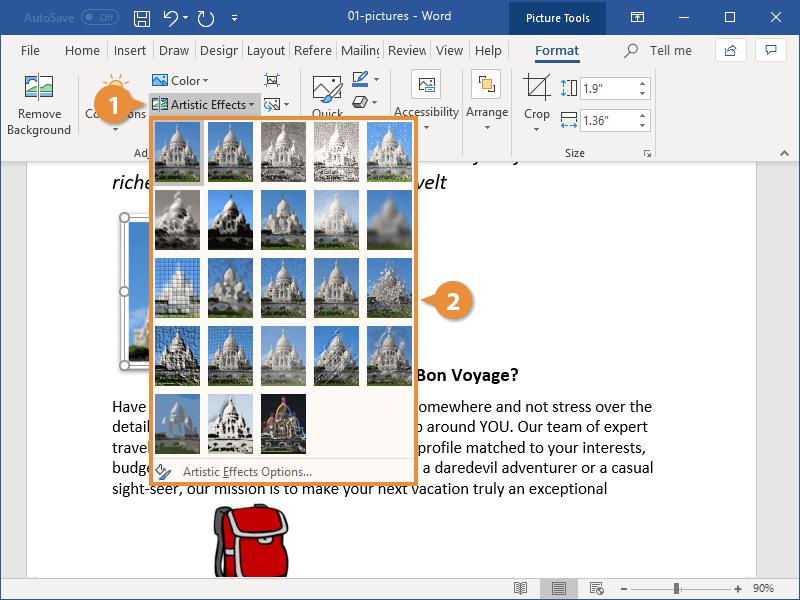
You can apply a variety of artistic effects to the images in your Word document. Using these effects is an easy way to make your document stand out.
- With the picture selected, click the Artistic Effects list arrow on the Format tab in the Picture Tools ribbon group.
- Select an effect from the list.
Thumbnails for the available artistic effects appear, with emulated pencil sketch styles, paint styles, and texture effects.
The artistic effect is applied.
You can use the Corrections menu the same way to adjust and enhance your picture brightness, contrast, sharpness, or softness. You can also use the Color menu to adjust saturation and tone, or to add a color filter.

FREE Quick Reference
Click to Download
Free to distribute with our compliments; we hope you will consider our paid training.
Microsoft Word is a software tool that allows us to create document files like articles, office letters, projects files, and many more in a very simple and easy manner. MS Word makes our document more attractive as compare to paper or file work by providing different features like it has different size of pages, fonts, colors, design, bullets, tables, chart, page borders/numbers, and many more.
It also provides various features like editing, texting, formatting, graphics designs, fonts color, and styles, inserting images, videos, printing documents, etc.
This MS Word software saves our article/letters in a form of document and saves it in the computer forever. Whenever it is required it can be shared or can access the document.
Features of MS Word
- Images: MS Word provides inserting of various images in our document.
- Videos: We can insert videos in our document
- Fonts Styles: It has a wide range of font styles for our text.
- Colors: It also has different types of colors to make our document more attractive.
- Page number and size: You can set the size of the page of your document
- WordArt: It provides various writing styles for our documents.
- Tables: Tables in MS Word are used to represent data in Tabular form
- Graph and Charts: These are used to represent statistical data
- Animations and Designs: MS Word allows the creation of Animations and designs as per user needs
- Page border/color: MS Word allows adding borders and colors to pages.
Adding Pictures in MS Word
Adding pictures in our document is a very good way to have an interaction with our audience. Images increase the understanding level to extremely high. By the help of pictures, we can convey our messages, thoughts, ideas in a very simple and a beautiful way. Pictures attract the audience to understand our topic very easily.
MS Word has a feature that allows us to insert an image or picture file directly from our computer into our projects. You’ll be able to edit the pictures inside and also customize their look. So we should use different types of pictures in our document.
How to insert pictures from Files in MS Word?
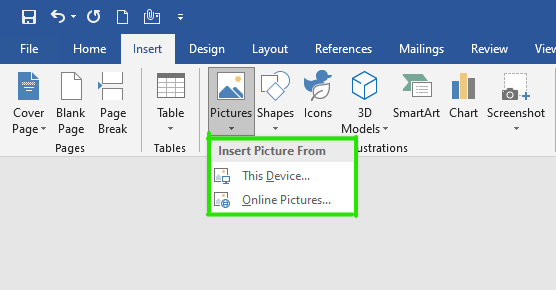
Step 1: Select the insert option from the navigation menu.
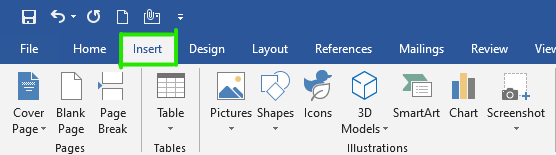
Step 2: Now select the picture option as shown:
Step 3: A insert picture from dialog box will open.

There are two ways to insert a picture:
- This Device – You can insert a picture file from your computer.
- Online Pictures – You can also insert pictures from online sites.
Step 4: Select this device option as shown:
Step 5: A insert picture dialog box will open.
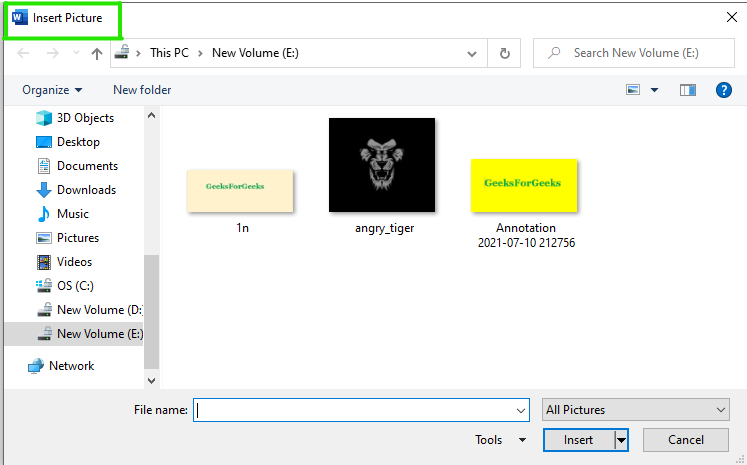
Step 6: Select the drive or folder from the left panel menu where your pictures are saved as shown:
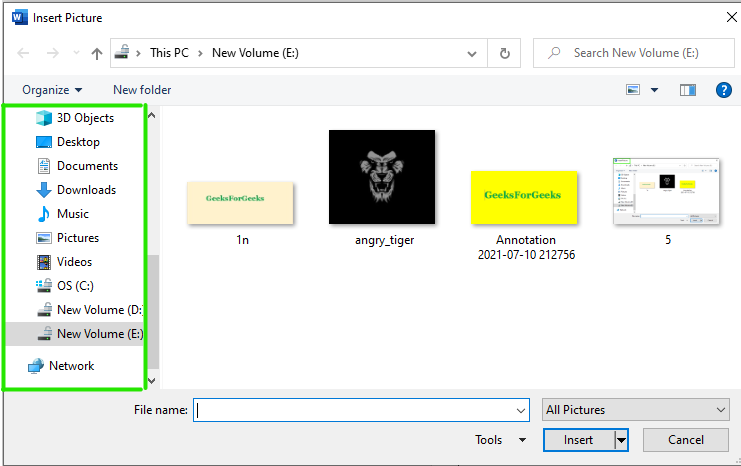
Step 7: Next select the picture/image you want to insert in your document.
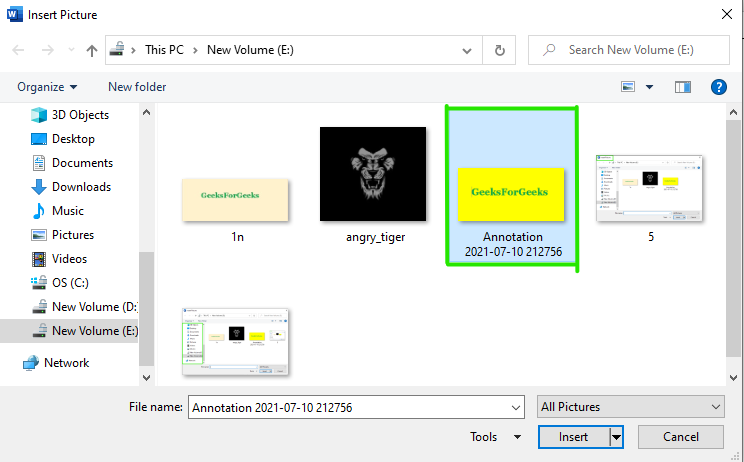
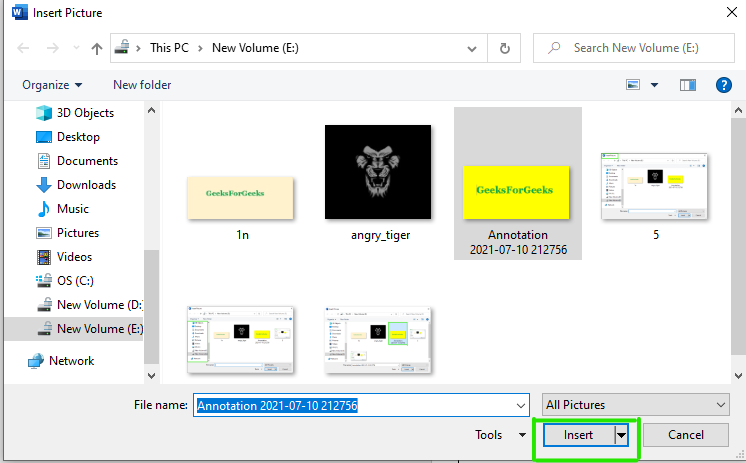
Step 8: Click on the insert option as shown:
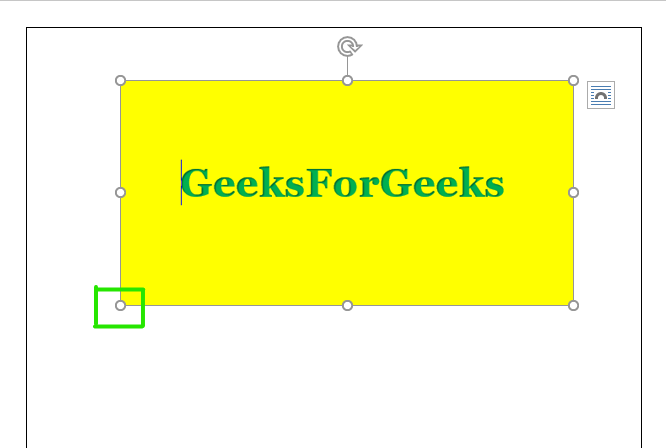
Step 9: Now you can set or resize the size of your picture according to your requirement using the dot button.
Step 10: To give styles to the picture click on the format option from the navigation menu.

Step 11: Click on drop-down arrow as shown:
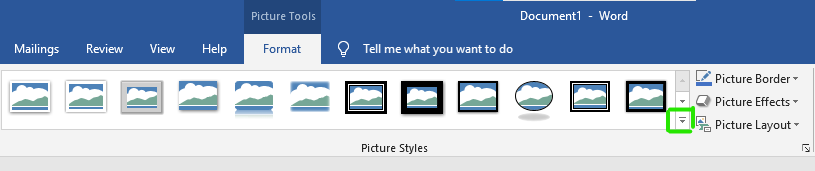
Step 12: Select picture style as per your choice.


Finally, pictures/images are added to your document.
How to insert Online Images in MS Word?
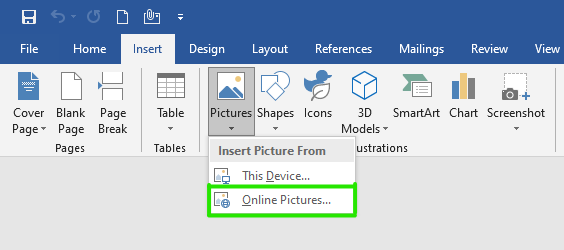
Step 1: Select the insert option from the navigation menu.

Step 2: Now select the picture option as shown:

Step 3: A insert picture dialog box will open.
Step 4: Select the online pictures option as shown:
Step 5: A online pictures dialog box will open where you can search a variety of online pictures.

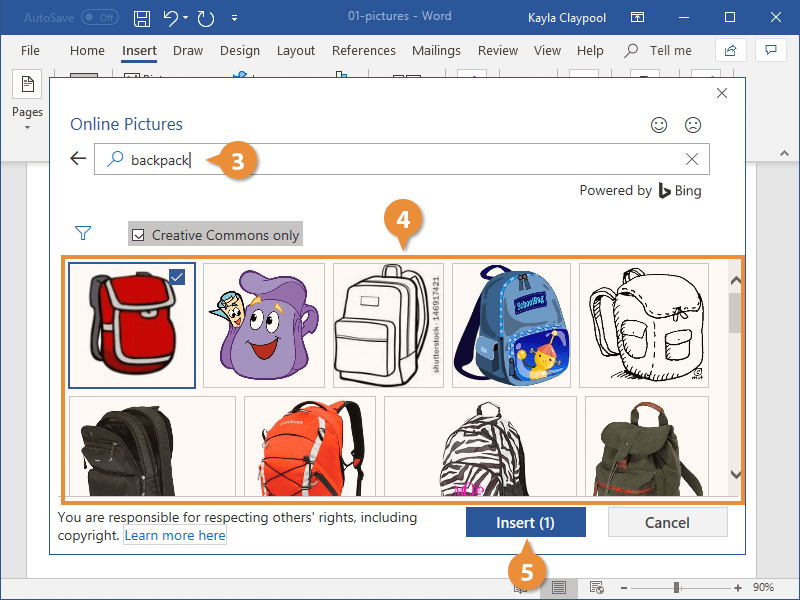
Step 6: Search the picture/image name in the search bar.
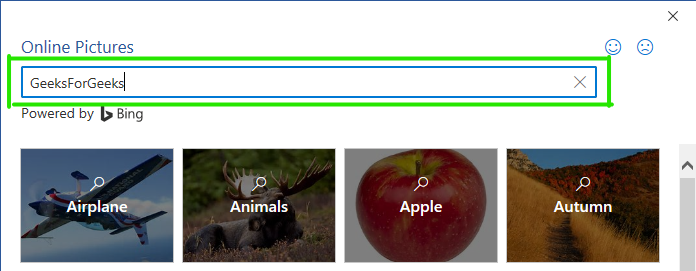
Step 7: Select the picture and then click on the insert button as shown:
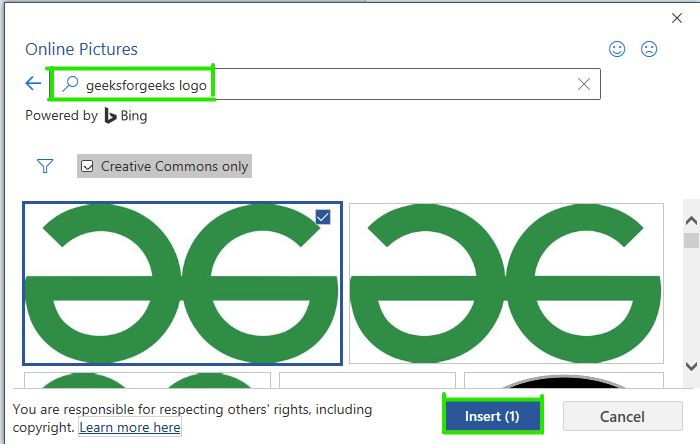

Finally, online images will be added to your document.