
I’m adding «.jpg» files to my Excel sheet with the code below :
'Add picture to excel
xlApp.Cells(i, 20).Select
xlApp.ActiveSheet.Pictures.Insert(picPath).Select
'Calgulate new picture size
With xlApp.Selection.ShapeRange
    .LockAspectRatio = msoTrue
    .Width = 75
    .Height = 100
End With
'Resize and make printable
With xlApp.Selection
    .Placement = 1 'xlMoveAndSize
    '.Placement = 2 'xlMove
    '.Placement = 3 'xlFreeFloating
    .PrintObject = True
End With
I don’t know what I am doing wrong but it doesn’t get inserted into the right cell, so what should I do to put this picture into a specified cell in Excel?
![]()
SWa
4,32323 silver badges40 bronze badges
asked Oct 17, 2012 at 14:29
![]()
Berker YüceerBerker Yüceer
6,98618 gold badges67 silver badges102 bronze badges
2
Try this:
With xlApp.ActiveSheet.Pictures.Insert(PicPath)
    With .ShapeRange
        .LockAspectRatio = msoTrue
        .Width = 75
        .Height = 100
    End With
    .Left = xlApp.ActiveSheet.Cells(i, 20).Left
    .Top = xlApp.ActiveSheet.Cells(i, 20).Top
    .Placement = 1
    .PrintObject = True
End With
It’s better not to .select anything in Excel, it is usually never necessary and slows down your code.
answered Oct 17, 2012 at 14:42
![]()
1
Looking at posted answers I think this code would be also an alternative for someone. Nobody above used .Shapes.AddPicture in their code, only .Pictures.Insert()
Dim myPic As Object
Dim picpath As String

picpath = "C:Usersphoto.jpg" 'example photo path

Set myPic = ws.Shapes.AddPicture(picpath, False, True, 20, 20, -1, -1)

With myPic
    .Width = 25
    .Height = 25
    .Top = xlApp.Cells(i, 20).Top 'according to variables from correct answer
    .Left = xlApp.Cells(i, 20).Left
    .LockAspectRatio = msoFalse
End With
I’m working in Excel 2013. Also realized that You need to fill all the parameters in .AddPicture, because of error «Argument not optional». Looking at this You may ask why I set Height and Width as -1, but that doesn’t matter cause of those parameters are set underneath between With brackets.
Hope it may be also useful for someone 
answered Oct 22, 2019 at 9:17
![]()
TeamothyTeamothy
1,9903 gold badges15 silver badges24 bronze badges
If it’s simply about inserting and resizing a picture, try the code below.
For the specific question you asked, the property TopLeftCell returns the range object related to the cell where the top left corner is parked. To place a new image at a specific place, I recommend creating an image at the «right» place and registering its top and left properties values of the dummy onto double variables.
Insert your Pic assigned to a variable to easily change its name. The Shape Object will have that same name as the Picture Object.
Sub Insert_Pic_From_File(PicPath as string, wsDestination as worksheet)
    Dim Pic As Picture, Shp as Shape
    Set Pic = wsDestination.Pictures.Insert(FilePath)
    Pic.Name = "myPicture"
    'Strongly recommend using a FileSystemObject.FileExists method to check if the path is good before executing the previous command
    Set Shp = wsDestination.Shapes("myPicture")
    With Shp
        .Height = 100
        .Width = 75
        .LockAspectRatio = msoTrue  'Put this later so that changing height doesn't change width and vice-versa)
        .Placement = 1
        .Top = 100
        .Left = 100
    End with
End Sub
Good luck!
answered Mar 14, 2017 at 3:40
![]()
FCastroFCastro
5916 silver badges7 bronze badges
1
I have been working on a system that ran on a PC and Mac and was battling to find code that worked for inserting pictures on both PC and Mac. This worked for me so hopefully someone else can make use of it!
Note: the strPictureFilePath and strPictureFileName variables need to be set to valid PC and Mac paths Eg
For PC: strPictureFilePath = «E:Dropbox» and strPictureFileName = «TestImage.jpg» and with Mac: strPictureFilePath = «Macintosh HD:Dropbox:» and strPictureFileName = «TestImage.jpg»
Code as Follows:
    On Error GoTo ErrorOccured

    shtRecipeBrowser.Cells(intDestinationRecipeRowCount, 1).Select

    ActiveSheet.Pictures.Insert(Trim(strPictureFilePath & strPictureFileName)).Select

    Selection.ShapeRange.Left = shtRecipeBrowser.Cells(intDestinationRecipeRowCount, 1).Left
    Selection.ShapeRange.Top = shtRecipeBrowser.Cells(intDestinationRecipeRowCount, 1).Top + 10
    Selection.ShapeRange.LockAspectRatio = msoTrue
    Selection.ShapeRange.Height = 130
answered Jul 17, 2016 at 9:31
![]()
TristanTristan
1632 silver badges10 bronze badges
Firstly, of all I recommend that the pictures are in the same folder as the workbook.
You need to enter some codes in the Worksheet_Change procedure of the worksheet. For example, we can enter the following codes to add the image that with the same name as the value of cell in column A to the cell in column D:
Private Sub Worksheet_Change(ByVal Target As Range)
Dim pic As Picture
If Intersect(Target, [A:A]) Is Nothing Then Exit Sub
On Error GoTo son

For Each pic In ActiveSheet.Pictures
    If Not Application.Intersect(pic.TopLeftCell, Range(Target.Offset(0, 3).Address)) Is Nothing Then
        pic.Delete
    End If
Next pic

ActiveSheet.Pictures.Insert(ThisWorkbook.Path & "" & Target.Value & ".jpg").Select
Selection.Top = Target.Offset(0, 2).Top
Selection.Left = Target.Offset(0, 3).Left
Selection.ShapeRange.LockAspectRatio = msoFalse
Selection.ShapeRange.Height = Target.Offset(0, 2).Height
Selection.ShapeRange.Width = Target.Offset(0, 3).Width
son:

End Sub
With the codes above, the picture is sized according to the cell it is added to.
Details and sample file here : Vba Insert image to cell
answered Jan 24, 2021 at 18:06
![]()
kadrleynkadrleyn
3341 silver badge5 bronze badges
1
I tested both @SWa and @Teamothy solution. I did not find the Pictures.Insert Method in the Microsoft Documentations and feared some compatibility issues. So I guess, the older Shapes.AddPicture Method should work on all versions. But it is slow!
On Error Resume Next
'
' first and faster method (in Office 2016)
'
    With ws.Pictures.Insert(Filename:=imageFileName, LinkToFile:=msoTrue, SaveWithDocument:=msoTrue)
        With .ShapeRange
            .LockAspectRatio = msoTrue
            .Width = destRange.Width
            .height = destRange.height '222
        End With
        .Left = destRange.Left
        .Top = destRange.Top
        .Placement = 1
        .PrintObject = True
        .Name = imageName
    End With
'
' second but slower method (in Office 2016)
'

If Err.Number <> 0 Then
    Err.Clear
    Dim myPic As Shape
    Set myPic = ws.Shapes.AddPicture(Filename:=imageFileName, _
            LinkToFile:=msoFalse, SaveWithDocument:=msoTrue, _
            Left:=destRange.Left, Top:=destRange.Top, Width:=-1, height:=destRange.height)

    With myPic.OLEFormat.Object.ShapeRange
        .LockAspectRatio = msoTrue
        .Width = destRange.Width
        .height = destRange.height '222
    End With
End If
answered Jan 31, 2020 at 15:06
![]()
DrMarbuseDrMarbuse
77410 silver badges30 bronze badges
1
Dear Friends,
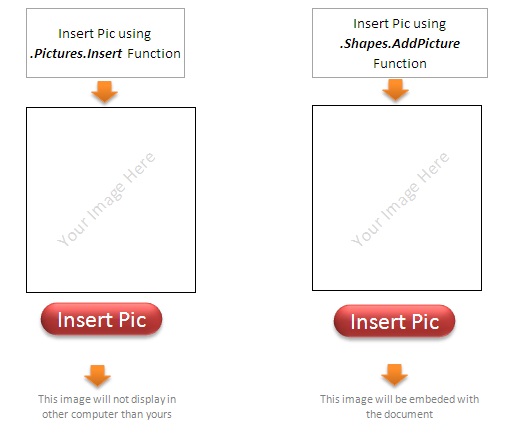
In this article, I am going to teach you a simple VBA code, which help you in inserting a picture in Excel Sheet. I will also discuss about difference between Inserting a picture in Excel and Embedding a picture in Excel Sheet using Excel VBA.
It is based on request from one of LEM reader who wants to know, How to insert a picture in excel sheet using VBA code It is a very simple one liner code to insert a picture in Excel using vba code.

Insert Picture Using VBA Code
Basically, there are two methods to insert a picture in Excel Sheet
Method 1. ActiveSheet.Pictures.Insert
Method 2. ActiveSheet.Shapes.AddPicture
VBA Code for Inserting Picture in Excel Sheet [Method 1]
Using .Pictures.Insert() method, you can insert a picture in Active sheet. Let see the Syntax of this method:
Syntax of .Pictures.Insert Method
[highlight color=”yellow”]ActiveSheet.Pictures.Insert(‘Picture URL’)[/highlight]
This function requires only one parameter – Full path of the picture to be inserted in Excel Sheet. This is a mandatory parameter here.
For Example:
ActiveSheet.Pictures.Insert(“C:….myPic.jpg”)
Above statement will simply insert myPic.jpg picture in Active sheet in its original Size.
If you want to resize and locate the picture according to you, then use the following statement to resize the image and place it where ever you want in the excel sheet.
1. VBA Code to re-size (height and width) the inserted picture
Below code will set the height and width of the selected picture in worksheet which is inserted using VBA code:
    With ActiveSheet.Pictures.Insert("Picture full path")
        .Left = 110
        .Top = 220
        .Width = 123
        .Height = 134
    End With
Explanation and issues with above Code
Left and Top will be set without any issue.
Later, Width of the image will be set to 123 as specified – Height of the image will be automatically set to a respective height to the width – because AspectRatio of the image is by default set to True
Similarly when control goes to the next statement then it will reset the height to 134 and since, aspect ratio is false, width will be adjusted to new respective value.
Challenge here is that you can NOT set AspectRatio flag of the picture while inserting it. (by above statement)
Therefore, be careful while resizing the picture while inserting it by using the above code
So what is the solution?
Here is the solution…
1. first add the picture in its own size.
2. Store the name of this image (uniquely generated one) in a variable. So that you can refer this picture uniquely later on
3. Using this variable, select that Shape and set the aspect ratio to false
4. Then set the height and width of the picture.
Here is the code now…
    Dim nameOfPicture as String
    With ActiveSheet.Pictures.Insert("Picture file full path")
        .Left = ActiveSheet.Range("photograph").Left + 2
        .Top = ActiveSheet.Range("photograph").Top + 2
        nameOfPicture= .Name
    End With
    ActiveSheet.Pictures(profile).Select
    With Selection.ShapeRange
        .LockAspectRatio = msoFalse
        .Width = 123
        .Height = 134
    End With
2. VBA Code to set the location of the inserted Picture
Here you can either set fixed Left and Top value where you want to place your picture. In this case no matter what is the height and width of the cell in the worksheet, your picture will be always placed at a specific location. But suppose if you want – your picture should always be placed at a specific row and column then you can set the left and top values as follows:
    With ActiveSheet.Pictures.Insert(<path of your picture in local drive>)
        .Left = ActiveSheet.Range("A1").Left
        .Top = ActiveSheet.Range("A1").Top
        .Placement = 1
    End With
Now your selected picture will always be placed where Column A1 starts from left and Row 1 starts from top. It means even if you change height or width of the Range A1, your picture is always going to be in Range A1 only.
Warning!
This method, simply links the image in to your Excel Sheet. It means, after inserting a picture, using this method, if you send it to another computer, picture will not be displayed and an Error message be displayed.
Therefore, this method is good only when you are going to use this excel sheet always in your own computer.
VBA Code for Embedding Picture in Excel Sheet [Method 2]
Using .Shapes.AddPicture() method, you can insert a picture in Active sheet. This method overcome the challenges of above method. This allows user to Embed the picture with the Excel Workbook itself. It means, even if you share the workbook to other computer… this picture will go with the document and you will be able to see it in other computer as well.
Syntax of .Shapes.AddPicture Method
[highlight color=”yellow”].Shapes.AddPicture( Filename , LinkToFile , SaveWithDocument , Left , Top , Width , Height )[/highlight]
Where:
Filename : (Mandatory) As the names suggests, this is the complete file path of the picture you want to embed to your Excel Sheet
LinkToFile : (Mandatory) MsoTriState- True or False – To set whether you want to create a link to the file?
SaveWithDocument : (Mandatory) MsoTriState – True or False – This is the flag which needs to be set to TRUE to embed the picture with Excel Sheet.
Left : (Mandatory)The position of the upper-left corner of the picture with respect to the upper-left corner of the document.
Top : (Mandatory) The position (in points) of the upper-left corner of the picture with respect to the top of the document.
Width : (Mandatory) The width of the picture you want to set. To keep the picture in its original width provide -1
Height : (Mandatory) The Height of the picture you want to set. To keep the picture in its original Height provide -1
Example:
Following VBA code will Embed this picture with the Excel file and it will display in any computer you sent it.
ActiveSheet.Shapes.AddPicture _
Filename:="full path of your file with extension", _
linktofile:=msoFalse, savewithdocument:=msoCTrue, _
Left:=50, Top:=50, Width:=250, Height:=250
Info !
Therefore .Shapes.AddPicture Method can insert a picture with and without links just simply by passing some flags.
For your practice I have created an Excel workbook which you can download and play around.
VBA Code Insert Picture – Sample Workbook
Hi There! Trying to rock the dashboard with meaningful pictures. Or just trying to insert picture into cell Excel VBA. Well, you can’t insert pictures into excel cells but you can resize it to fit into excel cell. Doing it manually will take a lot of time and it’s annoying. So what is the solution? You guessed it right, a VBA Macro. We will code now.
Below is the excel vba code to insert picture from a folder into a cell or a given range. Press Alt+F11, insert a module and copy this code.
Don’t worry, I have explained it below so that you can modify it according to your needs.
Insert Picture In Excel Cell With VBA into a Cell or a Given Range
End Sub
Sub InsertPictureInRange(PictureFileName As String, TargetCells As Range)
‘ inserts a picture and resizes it to fit the TargetCells range
Dim p As Object, t As Double, l As Double, w As Double, h As Double
If TypeName(ActiveSheet) <> «Worksheet» Then Exit Sub
If Dir(PictureFileName) = «» Then Exit Sub
‘ import picture
Set p = ActiveSheet.Pictures.Insert(PictureFileName)
‘ determine positions
With TargetCells
t = .Top
l = .Left
w = .Offset(0, .Columns.Count).Left — .Left
h = .Offset(.Rows.Count, 0).Top — .Top
End With
‘ position picture
With p
.Top = t
.Left = l
.Width = w
.Height = h
End With
Set p = Nothing
End Sub
Explanation:
Part 1:
End Sub
The above subroutine just calls our main subroutine InsertPictureInRange that takes only two arguments. First the address of image file with its name and second Range where you want to insert the picture in Excel.
Part 2:
If TypeName(ActiveSheet) <> «Worksheet» Then Exit Sub
If Dir(PictureFileName) = «» Then Exit Sub
‘ import picture
Set p = ActiveSheet.Pictures.Insert(PictureFileName)
‘ determine positions
With TargetCells
t = .Top
l = .Left
w = .Offset(0, .Columns.Count).Left — .Left
h = .Offset(.Rows.Count, 0).Top — .Top
End With
‘ position picture
With p
.Top = t
.Left = l
.Width = w
.Height = h
End With
Set p = Nothing
End Sub
This is the main subroutine that inserts and resizes the picture to fit the given range. Let’s dig into it.
Dim p As Object, t As Double, l As Double, w As Double, h As Double
This line is just a variable declaration that we will need. Note p As the object variable. This variable will hold our picture.
If TypeName(ActiveSheet) <> "Worksheet" Then Exit Sub
It checks whether the Activesheet is a worksheet or not. If it does not, it will exit the code immediately and nothing will happen.
If Dir(PictureFileName) = "" Then Exit Sub
Check that you have provided an address for the image to insert a photo into the excel cell. If you have not provided it, it will exit immediately and nothing will happen.
Set p = ActiveSheet.Pictures.Insert(PictureFileName)
Now, this is the most important line. In this line, we are using the Insert function of Activesheet. Pictures object and put it into the object p that we declared earlier. Now using p we can easily adjust the image’s width and length.
With TargetCells
t = .Top
l = .Left
w = .Offset(0, .Columns.Count).Left - .Left
h = .Offset(.Rows.Count, 0).Top - .Top
End With
This segment just gets Length, Width, Top and Left from the given range.
With p
.Top = t
.Left = l
.Width = w
Height = h
End With
This part adjusts the image to the given range. And it’s done. Lastly, we set it free by setting it to nothing.
Set p = Nothing
This line free’s memory.
This code will work in Excel 2016, Excel 2013, Excel 2010 and Excel 2007.
Here I wanted to insert the image in range A1:C10. To do this, I modified my code below
End Sub
And this is what I got. Exactly what I wanted.

So, yeah. Use this code to insert a picture into the excel cell or range. Play around the code. Try to insert different formats, strange ranges and see what happens. If you have any questions or are facing any challenge, use the below comments section to ask me.
Download file
Требуется макросом поместить изображение (картинку) на лист Excel?
Используйте функцию ВставитьКартинку, которая позволит вам вставить картинку в выбранную ячейку (или диапазон ячеек).
При вызове функции можно задать дополнительные дополнительные параметры, указав, следует ли подгонять картинку (или ячейку) по высоте и ширине.
В этом примере демонстрируются возможные варианты применения функции вставки картинок:
Sub ПримерВставкиИзображенийНаЛист()

    ПутьКФайлуСКартинками = "D:BMPAboutForm.jpg"    ' полный путь к файлу изображения

    ' вставка картинки в ячейку A5 (размеры картинки и ячейки не меняются)
    ВставитьКартинку Cells(5, 1), ПутьКФайлуСКартинками

    ' вставка картинки в ячейку F5 (ячейка подгоняется по ШИРИНЕ под картинку)
    ВставитьКартинку Cells(5, 6), ПутьКФайлуСКартинками, True

    ' вставка картинки в ячейку E1 (ячейка подгоняется по ВЫСОТЕ под картинку)
    ВставитьКартинку [e1], ПутьКФайлуСКартинками, , True

    ' вставка картинки в ячейку F2 (ячейка принимает размеры картинки)
    ВставитьКартинку Range("F2"), ПутьКФайлуСКартинками, True, True

    ' =========================================
    ' вставка картинки в ячейку F5 (картинка подгоняется по ШИРИНЕ под ячейку)
    ВставитьКартинку Cells(5, 6), ПутьКФайлуСКартинками, True, , True

    ' вставка картинки в ячейку E1 (картинка подгоняется по ВЫСОТЕ под ячейку)
    ВставитьКартинку [e1], ПутьКФайлуСКартинками, , True, True

    ' вставка картинки в диапазон a2:e3 (картинка вписывается в диапазон)
    ВставитьКартинку [a2:e3], ПутьКФайлуСКартинками, True, True, True

End Sub
А вот и сама функция (скопируйте этот код в стандартный модуль, чтобы иметь возможность вставки картинок одной строкой кода из любого макроса):
Sub ВставитьКартинку(ByRef PicRange As Range, ByVal PicPath As String, _
                     Optional ByVal AdjustWidth As Boolean, _
                     Optional ByVal AdjustHeight As Boolean, _
                     Optional ByVal AdjustPicture As Boolean = False)
    ' ==========  функция получает в качестве параметров:  ====================
    ' PicRange - прямоугольный диапазон ячеек, поверх которого будет расположено изображение
    ' PicPath - полный путь к файлу картинки (файл в формате JPG, BMP, PNG, и т.д.)
    ' AdjustWidth - если TRUE, то включен режим подбора ширины (подгонка по высоте)
    ' AdjustHeight - если TRUE, то включен режим подбора высоты (подгонка по ширине)
    ' AdjustPicture - если TRUE, то подгоняются размеры картинки под ячейку,
    '                 если FALSE (по умолчанию), то изменяются размеры ячейки

    On Error Resume Next: Application.ScreenUpdating = False
    ' вставка изображения на лист
    Dim ph As Picture: Set ph = PicRange.Parent.Pictures.Insert(PicPath)
    ' совмещаем левый верхний угол ячейки и картинки
    ph.Top = PicRange.Top: ph.Left = PicRange.Left

    K_picture = ph.Width / ph.Height    ' вычисляем соотношение размеров сторон картинки
    K_PicRange = PicRange.Width / PicRange.Height    ' вычисляем соотношение размеров сторон диапазона ячеек

    If AdjustPicture Then    ' ПОДГОНЯЕМ РАЗМЕРЫ ИЗОБРАЖЕНИЯ под ячейку (оптимальный вариант)

        ' если AdjustWidth=TRUE, то высоту не трогаем - изменяем ширину
        If AdjustWidth Then ph.Width = PicRange.Width: ph.Height = ph.Width / K_picture

        ' если AdjustHeight=TRUE, то ширину не трогаем - изменяем высоту
        If AdjustHeight Then ph.Height = PicRange.Height: ph.Width = ph.Height * K_picture

        ' AdjustWidth=TRUE и AdjustHeight=TRUE: вписываем картинку в ячейку (без соблюдения пропорций)
        If AdjustWidth And AdjustHeight Then ph.Width = PicRange.Width: ph.Height = PicRange.Height


    Else    ' ИЗМЕНЯЕМ РАЗМЕРЫ ЯЧЕЙКИ под размеры изображения (нежелательно при вставке НЕСКОЛЬКИХ картинок...)

        If AdjustWidth Then    ' если AdjustWidth=TRUE, то высоту не трогаем - изменяем ширину
            PicRange.Cells(1).ColumnWidth = PicRange.Cells(1).ColumnWidth * ph.Width / PicRange.Cells(1).Width
            While Abs(PicRange.Cells(1).Width - ph.Width) > 0.1    ' точный подбор ширины ячейки
                PicRange.Cells(1).ColumnWidth = PicRange.Cells(1).ColumnWidth - 0.2 * (PicRange.Cells(1).Width - ph.Width)
            Wend
        End If

        If AdjustHeight Then    ' если AdjustHeight=TRUE, то ширину не трогаем - изменяем высоту
            PicRange.Cells(1).RowHeight = PicRange.Cells(1).RowHeight * ph.Height / PicRange.Cells(1).Height
            While Abs(PicRange.Cells(1).Height - ph.Height) > 0.1    ' точный подбор высоты ячейки
                PicRange.Cells(1).RowHeight = PicRange.Cells(1).RowHeight - 0.2 * (PicRange.Cells(1).Height - ph.Height)
            Wend
        End If

    End If
End Sub
Содержание
- Метод Shapes.AddPicture (Excel)
- Синтаксис
- Параметры
- Возвращаемое значение
- Пример
- Поддержка и обратная связь
- Вставить картинку в лист — по списку или выбору из ячейки
- How to Insert, Move & Delete Pictures with VBA
- Adapting the code to your needs
- Insert an image into a worksheet
- Image names
- Get image properties
- Delete an image
- Make images invisible
- Loop through all images on a worksheet
- Delete an image
- Confirm if the selected object is a picture
- Linked pictures
- Image placement and locking options
- Rotate images
- Set image position to the center of a cell
- Flipping an image horizontally or vertically
- Resize an image
- Cropping
- Changing Z-Order
- Set the background image
- Save picture from Excel
- Conclusion
Метод Shapes.AddPicture (Excel)
Создает рисунок из существующего файла. Возвращает объект Shape , представляющий новый рисунок.
Синтаксис
expression. AddPicture (FileName, LinkToFile, SaveWithDocument, Left, Top, Width, Height)
выражение: переменная, представляющая объект Shapes.
Параметры
| Имя | Обязательный или необязательный | Тип данных | Описание |
|---|---|---|---|
| FileName | Обязательный | String | Файл, из которого создается рисунок. |
| LinkToFile | Обязательный | MsoTriState | Файл, на который необходимо связать ссылку. Используйте msoFalse , чтобы сделать рисунок независимой копией файла. Используйте msoTrue , чтобы связать рисунок с файлом, из которого он был создан. |
| SaveWithDocument | Обязательный | MsoTriState | Сохранение рисунка вместе с документом. Используйте msoFalse для хранения только сведений о ссылках в документе. Используйте msoTrue , чтобы сохранить связанный рисунок с документом, в который он вставлен. Этот аргумент должен иметь значение msoTrue, если LinkToFile имеет значение msoFalse. |
| Left | Обязательный | Single | Положение (в точках) левого верхнего угла рисунка относительно левого верхнего угла документа. |
| Top | Обязательный | Single | Положение (в точках) левого верхнего угла рисунка относительно верхней части документа. |
| Width | Обязательный | Single | Ширина рисунка в точках (введите -1, чтобы сохранить ширину существующего файла). |
| Height | Обязательный | Single | Высота рисунка в точках (введите -1, чтобы сохранить высоту существующего файла). |
Возвращаемое значение
Shape
Пример
В этом примере изображение, созданное из файла Music.bmp, добавляется в myDocument. Вставленный рисунок связан с файлом, из которого он был создан, и сохраняется с помощью myDocument.
Поддержка и обратная связь
Есть вопросы или отзывы, касающиеся Office VBA или этой статьи? Руководство по другим способам получения поддержки и отправки отзывов см. в статье Поддержка Office VBA и обратная связь.
Источник
Вставить картинку в лист — по списку или выбору из ячейки
Сама по себе задача вставки картинки на листе не сложная и ответ лежит на поверхности: это доступно прямо из меню: Вставка (Insert) -группа Иллюстрации (Illustrations) —Рисунок (Picture) : 
Кодом VBA вставить тоже не сложно, даже макрорекордер записывает это действие:
Sub InsertPicture() ActiveSheet.Pictures.Insert(«G:ДокументыИзображенияExcel_vba_ru.png»). _ Select End Sub
Но что делать, если вставить надо картинку из заранее известной папки, но с изменяющимся именем? А если при этом еще надо не просто вставить — а подогнать размер картинки под размер ячейки? Например, в ячейке А2 название товара(соответствует названию картинки), а в В2 должно быть изображение. Здесь уже посложнее. Но тоже вполне реализуемо при помощи VBA
‘————————————————————————————— ‘ Author : The_Prist(Щербаков Дмитрий) ‘ Профессиональная разработка приложений для MS Office любой сложности ‘ Проведение тренингов по MS Excel ‘ https://www.excel-vba.ru ‘ info@excel-vba.ru ‘ WebMoney — R298726502453; Яндекс.Деньги — 41001332272872 ‘ Purpose: вставка в ячейку картинки с подгонкой под размеры ячейки ‘————————————————————————————— Sub InsertPicToCell() ‘путь к папке с картинками Const sPicsPath As String = «G:ДокументыИзображения» Dim sPicName As String, sPFName As String, sSpName As String Dim oShp As Shape Dim zoom As Double ‘в этой ячейке выпадающий список с именами картинок sPicName = Range(«A2»).Value ‘если имя картинки не задано If sPicName = «» Then Exit Sub End If ‘проверяем наличие картинки в папке sPFName = sPicsPath & sPicName If Dir(sPFName, 16) = «» Then Exit Sub End If ‘в эту ячейку вставляем картинку With Range(«B2») On Error Resume Next ‘задаем картинке уникальный адрес, ‘привязанный к адресу ячейки sSpName = «_» & .Address(0, 0) & «_autopaste» ‘если картинка уже есть — удаляем её Set oShp = ActiveSheet.Shapes(sSpName) If Not oShp Is Nothing Then oShp.Delete End If ‘вставляем выбранную картинку Set oShp = ActiveSheet.Shapes.AddPicture(sPFName, False, True, .Left + 1, .Top + 1, -1, -1) ‘определяем размеры картинки в зависимости от размера ячейки zoom = Application.Min(.Width / oShp.Width, .Height / oShp.Height) oShp.Height = oShp.Height * zoom — 2 ‘переименовываем вставленную картинку(чтобы потом можно было заменить) oShp.Name = sSpName End With End Sub
Чтобы использовать код необходимо создать в книге стандартный модуль(переходим в редактор VBA( Alt + F11 ) —Insert —Module) и вставить в него приведенный выше код. Чтобы картинка вставилась в ячейку, надо записать имя картинки в ячейку A2 , нажать сочетание клавиш Alt + F8 и выбрать макрос InsertPicToCell. Не очень удобно, правда?
Значит теперь попробуем сделать так, чтобы при каждом изменении в А2 картинка менялась сама, без необходимости запускать каждый раз код вручную. Для этого придется использовать возможность Excel отслеживать такие события, как изменения ячейки(чтобы лучше понять где это лучше сразу прочитать статью Что такое модуль? Какие бывают модули? и особое внимание уделить описанию про модули листов). Теперь чуть переделываем код:
Private Sub Worksheet_Change(ByVal Target As Range) ‘————————————————————————————— ‘ Author : The_Prist(Щербаков Дмитрий) ‘ Профессиональная разработка приложений для MS Office любой сложности ‘ Проведение тренингов по MS Excel ‘ https://www.excel-vba.ru ‘ info@excel-vba.ru ‘ WebMoney — R298726502453; Яндекс.Деньги — 41001332272872 ‘ Purpose: вставка в ячейку картинки с подгонкой под размеры ячейки ‘————————————————————————————— ‘путь к папке с картинками Const sPicsPath As String = «G:ДокументыИзображения» Dim sPicName As String, sPFName As String, sSpName As String Dim oShp As Shape Dim zoom As Double ‘т.к. список с именами картинок у нас в ячейке А2, ‘то определяем, что значение изменилось именно в ней ‘ если в ячейке А2 имена картинок, а список товара в другой ячейке ‘ то надо заменить А2 на ту, которая изменяется списком или руками If Intersect(Target, Range(«A2»)) Is Nothing Then ‘изменения не в А2 — ничего не делаем, завершаем код Exit Sub End If ‘в этой ячейке выпадающий список с именами картинок sPicName = Range(«A2»).Value ‘если имя картинки не задано If sPicName = «» Then Exit Sub End If ‘проверяем наличие картинки в папке sPFName = sPicsPath & sPicName If Dir(sPFName, 16) = «» Then Exit Sub End If ‘в эту ячейку вставляем картинку With Range(«B2») On Error Resume Next ‘задаем картинке уникальный адрес, ‘привязанный к адресу ячейки sSpName = «_» & .Address(0, 0) & «_autopaste» ‘если картинка уже есть — удаляем её Set oShp = ActiveSheet.Shapes(sSpName) If Not oShp Is Nothing Then oShp.Delete End If ‘вставляем выбранную картинку Set oShp = ActiveSheet.Shapes.AddPicture(sPFName, False, True, .Left + 1, .Top + 1, -1, -1) ‘определяем размеры картинки в зависимости от размера ячейки zoom = Application.Min(.Width / oShp.Width, .Height / oShp.Height) oShp.Height = oShp.Height * zoom — 2 ‘переименовываем вставленную картинку(чтобы потом можно было заменить) oShp.Name = sSpName End With End Sub
Теперь переходим на лист, где в А2 будет изменяться название картинки -правая кнопка мыши на этом листе —Посмотреть код (View Code) . Вставляем код выше. Все, теперь при любом изменении в А2 картинка будет изменяться(если указанный файл будет найден в нужной папке).
Если картинки расположены не в «G:ДокументыИзображения» , а в той же папке, что и сама книга с кодом, достаточно эту строку
Const sPicsPath As String = «G:ДокументыИзображения»
заменить такими
Dim sPicsPath As String
sPicsPath = ThisWorkbook.Path & «»
тогда папка с книгой будет определяться автоматически.
Но я понимаю, что куда правильнее в ячейке А2 при помощи выпадающего списка выбирать наименование товара, а в В2 при помощи функции ВПР(VLOOKUP) подтягивать из справочника название картинки и уже по этому названию вставлять картинку. Но подстроить код под это уже не сложно. Приводить его здесь не буду, т.к. можно будет запутаться с описанием списка, функций, где и что. Тем более что сам код практически не отличается. К тому же именно в этой реализации код есть в приложенном к статье файле.
Скачать файл:
 Вставить картинку в ячейку (366,9 KiB, 2 328 скачиваний)
И еще часто встречающаяся задача по вставке картинок — это вставка картинок массово. Т.е. вставить картинки на основании значений, записанных в столбце. В данном случае это столбец В. А вставлять картинки будем в столбец С, подгоняя размеры картинок под размер каждой ячейки и проверяя, не вставляли ли мы эту картинку туда ранее 
Впрочем, основная часть кода была приведена выше — здесь мы лишь добавим цикл по ячейкам. Так же в этом коде мы используем диалог выбора папки, в котором просматривать картинки:
‘————————————————————————————— ‘ Author : The_Prist(Щербаков Дмитрий) ‘ Профессиональная разработка приложений для MS Office любой сложности ‘ Проведение тренингов по MS Excel ‘ https://www.excel-vba.ru ‘ info@excel-vba.ru ‘ WebMoney — R298726502453; Яндекс.Деньги — 41001332272872 ‘ Purpose: вставка в ячейку картинки с подгонкой под размеры ячейки ‘————————————————————————————— Option Explicit Sub InsertPictureByVal() Dim sPicsPath As String Dim sPicName As String, sPFName As String, sSpName As String Dim llastr As Long, lr As Long Dim oShp As Shape Dim zoom As Double ‘выбираем путь к папке с картинками With Application.FileDialog(msoFileDialogFolderPicker) .Title = «Выбрать папку с картинками» ‘заголовок окна диалога .ButtonName = «Выбрать папку» .Filters.Clear ‘очищаем установленные ранее типы файлов .InitialFileName = ThisWorkbook.Path ‘назначаем первую папку отображения .InitialView = msoFileDialogViewLargeIcons ‘вид диалогового окна If .Show = 0 Then Exit Sub ‘показываем диалог sPicsPath = .SelectedItems(1) ‘считываем путь к папке End With ‘ если путь надо указать статичный — вместо диалога прописываем одну строку ‘ sPicsPath = «C:images» ‘проверяем, есть ли слеш после пути к папке ‘если нет — добавляем, иначе путь к картинке будет неверный If Right(sPicsPath, 1) <> Application.PathSeparator Then sPicsPath = sPicsPath & Application.PathSeparator End If ‘определяем последнюю ячейку по столбцу с именами картинок llastr = Cells(Rows.Count, 2).End(xlUp).Row ‘если кроме шапки в столбце с именами картинок ничего нет If llastr «» And sPicName <> «» Then ‘в эту ячейку вставляем картинку With Cells(lr, 3) ‘задаем картинке уникальный адрес, ‘привязанный к адресу ячейки sSpName = «_» & .Address(0, 0) & «_autopaste» ‘если картинка уже есть — удаляем её Set oShp = Nothing On Error Resume Next Set oShp = ActiveSheet.Shapes(sSpName) If Not oShp Is Nothing Then oShp.Delete End If On Error GoTo 0 ‘вставляем выбранную картинку Set oShp = ActiveSheet.Shapes.AddPicture(sPFName, False, True, .Left + 1, .Top + 1, -1, -1) ‘определяем размеры картинки в зависимости от размера ячейки zoom = Application.Min(.Width / oShp.Width, .Height / oShp.Height) oShp.Height = oShp.Height * zoom — 2 ‘переименовываем вставленную картинку(чтобы потом можно было заменить) oShp.Name = sSpName End With End If Next End Sub
Прикладываю пример в формате ZIP-архива, т.к. вместе с самим файлом с кодом я приложил папку images, которая содержит картинки, используемые для вставки в файле. Папка images и сам файл с кодом должны быть распакованы в одну папку.
Скачать файл:
Вставить картинку в ячейку (366,9 KiB, 2 328 скачиваний)
Обратная задача — сохранение картинок из листа — уже разбиралась мной в этой статье: Как сохранить картинки из листа Excel в картинки JPG
Статья помогла? Поделись ссылкой с друзьями!
Источник
How to Insert, Move & Delete Pictures with VBA

While it is not often that we have to control pictures or images within Excel, based on the number of Google searches for this topic, it’s clearly something people want to know more about. This post serves as a reference to cover most of the scenarios we’re likely to encounter to copy, insert, move, delete and control pictures.
This code can be used in conjunction with my post about using a user defined function to insert and change pictures based on a cell value, which can be found here: https://exceloffthegrid.com/automatically-change-picture/
Download the example file
I recommend you download the example file for this post. Then you’ll be able to work along with examples and see the solution in action, plus the file will be useful for future reference.
Download the file: 0042 VBA copy insert, move, delete pictures.zip
Adapting the code to your needs
It is unlikely that any of the codes will meet your exact requirements. Every code snippet uses variables to hold either the image, the worksheet, a range or an object. By changing those variables, the code can easily be changed and combined with other code snippets to meet your specific requirements.
Insert an image into a worksheet
The following code will insert an image into the active cell of the active worksheet, keeping the original image’s size.
Depending on our needs, it may be better to create an image straight into an object variable. Then we can refer to the image by using the variable and do not need to know the name of the image. The following code is an example of this technique.
Image names
The code below will display the name of the last inserted image.
The message box is to illustrate that the code works. Once we have captured the shape as an object in the real world, we would perform other actions on the shape.
The code below renames an existing image.
Get image properties
The following code demonstrates how to retrieve common image properties
Delete an image
The following code will delete an image called Picture 1 from the active worksheet.
Make images invisible
Images can be made invisible. They still exist and are part of the workbook, but they are not visible to the user.
Loop through all images on a worksheet
The following code will loop through all the images on the active sheet.
Delete an image
The code below will delete a specific named picture.
Confirm if the selected object is a picture
The code below will check if a specific object is a Picture.
Linked pictures
Images can be linked to cells or named ranges. This makes the image dynamic; when the contents of the cells change, so does the picture.
Image placement and locking options
Image behavior can be controlled using the placement option.
Rotate images
The following code rotates the image by a specific amount
The following code rotates the image to a specific amount.
Set image position to the center of a cell
An image is positioned based on the top and left of that image. The following code will set the position so that it appears centered within a specific cell.
Flipping an image horizontally or vertically
Flip the image horizontally:
Flip the image vertically:
Resize an image
The code below locks the aspect ratio; therefore, resizing the width or height will maintain the image’s proportions.
When setting the aspect ratio to msoFalse, the height and width operate independently.
The following code positions an image and stretches it to perfectly cover a specified range.
Cropping
The code below crops an image based on the distance from the top, left, bottom or right.
Changing Z-Order
The image can be moved forward or backward within the stack of objects (known as the Z-Order).
The Z-Order position cannot be set directly. First, send the image to the back, then move the image forward with a loop. Continue looping until the image reaches the correct Z-Order Position.
Set the background image
The background image appears behind the cells in the spreadsheet.
Save picture from Excel
If we have a picture in an Excel workbook, there is no straightforward way to save it to disk as a picture. A common workaround is to set the picture as the background of a chart area, then export the chart as an image.
Conclusion
In this post we have provided over 25 examples to demonstrate how to insert, delete, move and control pictures with VBA. Checkout the other posts on this site which use these techniques:

About the author
Hey, I’m Mark, and I run Excel Off The Grid.
My parents tell me that at the age of 7 I declared I was going to become a qualified accountant. I was either psychic or had no imagination, as that is exactly what happened. However, it wasn’t until I was 35 that my journey really began.
In 2015, I started a new job, for which I was regularly working after 10pm. As a result, I rarely saw my children during the week. So, I started searching for the secrets to automating Excel. I discovered that by building a small number of simple tools, I could combine them together in different ways to automate nearly all my regular tasks. This meant I could work less hours (and I got pay raises!). Today, I teach these techniques to other professionals in our training program so they too can spend less time at work (and more time with their children and doing the things they love).
Do you need help adapting this post to your needs?
I’m guessing the examples in this post don’t exactly match your situation. We all use Excel differently, so it’s impossible to write a post that will meet everybody’s needs. By taking the time to understand the techniques and principles in this post (and elsewhere on this site), you should be able to adapt it to your needs.
But, if you’re still struggling you should:
- Read other blogs, or watch YouTube videos on the same topic. You will benefit much more by discovering your own solutions.
- Ask the ‘Excel Ninja’ in your office. It’s amazing what things other people know.
- Ask a question in a forum like Mr Excel, or the Microsoft Answers Community. Remember, the people on these forums are generally giving their time for free. So take care to craft your question, make sure it’s clear and concise. List all the things you’ve tried, and provide screenshots, code segments and example workbooks.
- Use Excel Rescue, who are my consultancy partner. They help by providing solutions to smaller Excel problems.
What next?
Don’t go yet, there is plenty more to learn on Excel Off The Grid. Check out the latest posts:
Источник