
This article is for people with visual or cognitive impairments who use a screen reader program such as Microsoft’s Narrator, JAWS, or NVDA with the Microsoft 365 products. This article is part of the Microsoft 365 screen reader support content set where you can find more accessibility information on our apps. For general help, visit Microsoft Support home or Fixes or workarounds for recent office issues.
Use Word with your keyboard and a screen reader to insert a picture or image from your computer or an online source. We’ve tested it with Narrator, JAWS, and NVDA, but it might work with other screen readers as long as they follow common accessibility standards and techniques. You’ll also learn how to add alt texts to the pictures to make them more accessible.
 Need instructions on how to insert pictures to a Word document, but not using a screen reader? See Insert pictures.
Notes:
-
New Microsoft 365 features are released gradually to Microsoft 365 subscribers, so your app might not have these features yet. To learn how you can get new features faster, join the Office Insider program.
-
To learn more about screen readers, go to How screen readers work with Microsoft 365.
In this topic
-
Insert an image or picture from your computer
-
Insert an image from an online source
-
Place a picture in line with text
-
Add alt text to an image
Insert an image or picture from your computer
-
In your Word document, place the insertion point where you want to insert an image.
-
Press Alt+N, P, D. The Insert Picture dialog box opens. The focus is on the File name text field.
-
Use the Tab key and the arrow keys to navigate to the location of the picture on your computer. When you hear the name of the picture, followed by «Selected,» press Enter. The original picture is embedded into your document.
Tip: If your picture has a large file size, it can make your document too large. To reduce the size of your document, you can link to the picture instead of embedding it. In the Insert Picture dialog box, press the Tab key until you hear with Narrator and NVDA: «Insert, split button.» With JAWS, you hear: «Leaving menus, Insert button.» Press the Down arrow key until you hear «Link to file,» and then press Enter.
Insert an image from an online source
If you don’t have the perfect picture on your computer, you can search for and insert a picture from a web location straight from Word.
-
In your Word document, place the insertion point where you want to insert an image.
-
Press Alt+N, P, O. The Bing image search dialog box opens. The focus is on the search text field.
-
Type your search words to describe the picture you’re looking for, and then press Enter. The search results are listed, and the focus is on the first matching image.
Tip: To browse for more images from your OneDrive, press the Tab key until you hear «OneDrive,» and press Enter.
-
Use the arrow keys to browse the search results. Your screen reader describes each image as you move through the search results.
-
To select an image, press Spacebar.
-
To insert the selected image, press the Tab key until you hear «Insert,» and press Enter. Word downloads and inserts the image into your document.
Place a picture in line with text
To be read correctly by a screen reader, the picture has to be in line with the text. By default, Word inserts a picture in line with text, but you can check it to make sure that the screen readers can read the pictures.
-
In your Word document, move the focus to the picture you want. When the focus is on the picture, you hear the file name or number of the picture, followed by «Image.»
-
Press Shift+Right arrow key once to select the picture. Then press Shift+F10. The context menu opens.
-
Press the Up arrow key until you hear «Wrap text,» and then press the Right arrow key once. You hear: «In line with text.» Press Enter. If you don’t hear «In line with text,» press the Up arrow key until you reach the In line with text button, and press Enter.
Add alt text to an image
Add alt text to the images to make your document accessible to all audiences. For more information on alt text, refer to Everything you need to know to write effective alt text.
-
In your Word document, move the focus to the picture that you want to add alt text to. When the focus is on the image, you hear the page you’re on, the file name or the number of the image, followed by «Image.» Press Shift+Right arrow key once to select the image.
-
Press Shift+F10 to open the context menu.
-
Press the Up arrow key until you hear «Edit alt text,» and press Enter.
-
The Alt Text pane opens, and the focus is on the alt text field. Type alt text for the image.
-
When you’re ready, press Esc to return to the body of the document.
See also
Use a screen reader to insert a hyperlink in Word
Use a screen reader to align text and paragraphs in Word
Keyboard shortcuts in Word
Basic tasks using a screen reader with Word
Set up your device to work with accessibility in Microsoft 365
Use a screen reader to explore and navigate Word
What’s new in Microsoft 365: Release notes for Current Channel
Use Word for Mac with your keyboard and VoiceOver, the built-in MacOS screen reader, to insert a picture or image into a document. You’ll also learn how to add alt texts to the pictures to make them more accessible.
Need instructions on how to insert pictures to a Word document, but not using a screen reader? See Insert pictures.
Notes:
-
New Microsoft 365 features are released gradually to Microsoft 365 subscribers, so your app might not have these features yet. To learn how you can get new features faster, join the Office Insider program.
-
This topic assumes that you are using the built-in macOS screen reader, VoiceOver. To learn more about using VoiceOver, go to VoiceOver Getting Started Guide.
In this topic
-
Insert an image or picture from your computer
-
Insert an image from an online source
-
Place a picture in line with text
-
Add alt text to an image
Insert an image or picture from your computer
-
In your Word document, place the insertion point where you want to insert an image.
-
Press F6 until you hear the currently selected tab on the ribbon, for example, «Home, selected, tab.» Press Control+Option+Right or Left arrow key until you hear «Insert tab,» and press Control+Option+Spacebar.
-
Press the Tab key until you hear «Pictures, menu button,» and press Control+Option+Spacebar.
-
Press Control+Option+Right arrow key until you hear «Picture from file,» and then press Control+Option+Spacebar.
-
A dialog box opens with the focus on a recent images folder. To access the images in this folder, press Control+Option+Right arrow key. To browse to another location, use the Tab key, Shift+Tab, and the arrow keys.
-
When on the correct location, use the Up or Down arrow key to browse the files or subfolders. To open a subfolder, press the Right arrow key.
-
When you’ve located the correct image file, press Return. The picture is inserted into the document.
Insert an image from an online source
If you don’t have the perfect picture on your computer, you can search for and insert a picture from a web location straight from Word for Mac.
-
In your Word document, place the insertion point where you want to insert an image.
-
Press F6 until you hear the currently selected tab on the ribbon, for example, «Home, selected, tab.» Press Control+Option+Right or Left arrow key until you hear «Insert tab,» and press Control+Option+Spacebar.
-
Press the Tab key until you hear «Pictures, menu button,» and press Control+Option+Spacebar.
-
Press Control+Option+Right arrow key until you hear «Online pictures,» and then press Control+Option+Spacebar.
-
The Bing image search pane opens. The focus is on the search text field. Type your search words to describe the picture you’re looking for, and then press Return. The search results are listed, and the focus is on the first matching image.
-
Press Control+Option+Right or Left arrow key to browse the search results. VoiceOver describes each image as you move through the search results.
-
To select an image, press Control+Option+Spacebar.
-
To insert the selected image, press the Tab key until you hear «Insert,» and press Control+Option+Spacebar. Word downloads and inserts the image into your document.
Place a picture in line with text
To be read correctly by a screen reader, the picture has to be in line with the text.
-
In your Word document, move the cursor before the picture you want, press and hold Shift, and then press the Right arrow key once to select the picture. You hear: «Grouped object, you’re currently on a grouped object.»
-
Press F6 until you hear: «Picture format.»
-
Press the Tab key until you hear «Position button,» and then press Control+Option+Spacebar.
-
Press Control+Option+Left arrow key until you hear «In line with text,» and press Control+Option+Spacebar.
Add alt text to an image
Add alt text to the images to make your document accessible to all audiences. For more information on alt text, refer to Everything you need to know to write effective alt text.
-
In your Word document, select the picture that you want to add alt text to. To select a picture in Word, place the cursor before the image, hold down Shift, and then press the Right arrow key. You hear: «Grouped object, you’re currently on a grouped object.»
-
Press Control+Option+Shift+M. The context menu opens. Press Control+Option+Right arrow key until you hear «Edit alt text,» and press Control+Option+Spacebar.
-
The Alt Text pane opens, and the focus in on the alt text field. Type alt text for the image.
-
When you’re ready, press Shift+Tab until you hear «Close alt text button,» and press Control+Option+Spacebar. The Alt Text pane closes, and the focus moves back to your document.
See also
Use a screen reader to insert a hyperlink in Word
Use a screen reader to align text and paragraphs in Word
Keyboard shortcuts in Word
Basic tasks using a screen reader with Word
Set up your device to work with accessibility in Microsoft 365
Use a screen reader to explore and navigate Word
What’s new in Microsoft 365: Release notes for Current Channel
Use Word for iOS with VoiceOver, the built-in iOS screen reader, to insert a picture or image into a document. You’ll also learn how to add alt texts to the pictures to make them more accessible.
Notes:
-
New Microsoft 365 features are released gradually to Microsoft 365 subscribers, so your app might not have these features yet. To learn how you can get new features faster, join the Office Insider program.
-
This topic assumes that you are using the built-in iOS screen reader, VoiceOver. To learn more about using VoiceOver, visit Apple accessibility.
-
We recommend you read and edit documents in Print Layout View. VoiceOver might not work reliably in other view modes.
In this topic
-
Insert an image or picture from your phone
-
Insert a picture from the camera
-
Place a picture in line with text
-
Add alt text to an image
Insert an image or picture from your phone
-
While editing your Word document, place the insertion point where you want to insert an image.
-
Tap near the top of the screen with four fingers, swipe right until you hear «Show ribbon,» and double-tap the screen. You hear the currently selected tab, for example, «Home tab.»
-
Double-tap the screen, swipe right or left until you hear “Insert tab,” and double-tap the screen. You hear: “Insert tab.”
-
Swipe right until you hear “Insert pictures button,” and double-tap the screen. The Photos app opens.
-
Swipe right until you hear the image location you want, and then double-tap the screen to select.
-
To browse the images, swipe right or left. As you move, VoiceOver announces the images by the image types and dates.
-
When on the picture you want to insert into the document, double-tap the screen. The picture is inserted and the focus returns to your document with the image selected.
Insert a picture from the camera
You can open the device camera straight from Word for iOS, take a photo, and then insert the photo into the document.
-
While editing your Word document, place the insertion point where you want to insert a picture.
-
Tap near the top of the screen with four fingers, swipe right until you hear «Show ribbon,» and double-tap the screen. You hear the currently selected tab, for example, «Home tab.»
-
Double-tap the screen, swipe right or left until you hear “Insert tab,” and double-tap the screen. You hear: “Insert tab.”
-
Swipe right until you hear “Insert pictures button,” and double-tap the screen. The Photos app opens.
-
Swipe right until you hear “Insert picture from camera, button,” and then double-tap the screen. The Camera app opens.
Note: If you hear «Word would like to access the camera,» swipe right until you hear «OK, button,» and double-tap the screen.
-
Swipe right until you hear «Take picture, button,» point the camera in the right direction, and double-tap the screen.
-
Swipe right or left until you hear «Use photo, button,» and then double-tap the screen to insert the photo. The focus returns to your document.
Place a picture in line with text
To be read correctly by a screen reader, the picture has to be in line with the text.
-
While editing your Word document, slide one finger around the document body until you hear the image you want. When the image is in focus, VoiceOver announces the image file name, followed by «Image,» and the image layout. Double-tap the screen. You hear: «Selected.»
-
Tap near the bottom of the screen with four fingers, swipe left until you hear «Show ribbon,» and double-tap the screen. You hear: «Picture tab.»
-
Swipe right until you hear «Wrap text button,» and double-tap the screen. Swipe left until you hear «In line with text,» and double-tap the screen.
Add alt text to an image
Add alt text to the images to make your document accessible to all audiences. For more information on alt text, refer to Everything you need to know to write effective alt text.
-
While editing your Word document, to select a picture, slide one finger around the document body until you hear the image you want to add alt text to. When the image is in focus, VoiceOver announces the image file name, followed by «Image,» and the image layout. Double-tap the screen. You hear: «Selected.»
-
Tap near the bottom of the screen with four fingers, swipe left until you hear «Show ribbon,» and double-tap the screen. You hear: «Picture tab.»
-
Swipe right until you hear «Alt text button,» and double-tap the screen.
-
To add alt text, swipe right until you hear «Description, text field,» double-tap the screen, and then use the on-screen keyboard to type alt text for the image.
-
When you’re ready, tap near the top of the screen with four fingers, swipe right until you hear «Done button,» and double-tap the screen. The focus moves back to the document body.
See also
Use a screen reader to insert and change text in Word
Use a screen reader to set line spacing and indenting in Word
Basic tasks using a screen reader with Word
Set up your device to work with accessibility in Microsoft 365
Use a screen reader to explore and navigate Word
What’s new in Microsoft 365: Release notes for Current Channel
Use Word for Android with TalkBack, the built-in Android screen reader, to insert a picture or image into a document. You’ll also learn how to add alt texts to the pictures to make them more accessible.
Notes:
-
New Microsoft 365 features are released gradually to Microsoft 365 subscribers, so your app might not have these features yet. To learn how you can get new features faster, join the Office Insider program.
-
This topic assumes that you are using the built-in Android screen reader, TalkBack. To learn more about using TalkBack, go to Android accessibility.
In this topic
-
Insert an image or picture from your phone
-
Insert a picture from the camera
-
Place a picture in line with text
-
Add alt text to an image
Insert an image or picture from your phone
-
While editing your Word document, place the insertion point where you want to insert an image.
-
Swipe left until you hear «More options button,» and double-tap the screen. You hear the currently selected tab, for example, «Home tab.» Double-tap the screen, swipe right or left until you hear “Insert tab,” and double-tap the screen.
-
Swipe right until you hear “Pictures menu,” and double-tap the screen. The Pictures menu opens.
-
Swipe right until you hear “Photos button,” and double-tap the screen. The default gallery app opens.
Note: If you’re signed in and using your organization’s phone and account, you might have to switch to your personal account or select a gallery app before you can insert an image into a document.
-
Do one of the following:
-
To navigate through the pictures in the currently selected image storage location, swipe right until you hear the image you want.
-
To navigate to another storage location, for example, Downloads or Images, swipe left until you hear «Show roots button,» and then double-tap the screen. Swipe right until you hear the location you want, and then double-tap the screen. Swipe left or right until you hear the image you want.
TalkBack announces the images by their filenames, sizes, and dates.
-
-
When on the image you want to insert, double-tap the screen. The image preview opens.
-
Swipe right until you hear «Done,» and then double-tap the screen. The image is inserted and the focus returns to your document with the image selected.
Insert a picture from the camera
You can open the device camera straight from Word for Android, take a photo, and then insert the photo into the document.
-
While editing your Word document, place the insertion point where you want to insert a picture.
-
Swipe left until you hear «More options button,» and double-tap the screen. You hear the currently selected tab, for example, «Home tab.» Double-tap the screen, swipe right or left until you hear “Insert tab,” and double-tap the screen.
-
Swipe right until you hear “Pictures menu,” and then double-tap the screen. The Pictures menu opens.
-
Swipe right until you hear “Camera button,” and then double-tap the screen. The Camera app opens.
Note: If you hear «Allow Word to take pictures and record video, Allow button,» double-tap the screen.
-
To take a picture, swipe right until you hear «Capture,» point the camera to the right direction, and then double-tap the screen.
-
The image is captured, and the editing view opens. Swipe right until you hear «Confirm,» and double-tap the screen.
-
The image preview opens. Swipe right until you hear «Done,» and then double-tap the screen. The image is inserted and the focus returns to your document with the image selected.
Place a picture in line with text
To be read correctly by a screen reader, the picture has to be in line with the text.
-
While editing your Word document, slide one finger around the document body until you hear the image you want. When the focus is on the image, you hear the file name or number of the image, followed by «Image.» Double-tap and hold the screen with one finger. You hear: «Cut button.»
-
Swipe down-then-left. Then slide one finger near the lower-right corner of the screen until you hear «Not checked, More options switch,» and double-tap the screen. The focus moves to the Picture tab on the ribbon.
-
Swipe right until you hear «Wrap text menu,» and double-tap the screen.
-
Swipe right until you hear «In line with text,» and double-tap the screen.
Add alt text to an image
Add alt text to the images to make your document accessible to all audiences. For more information on alt text, refer to Everything you need to know to write effective alt text.
-
While editing your Word document, slide one finger around the document body until you hear the image you want to add alt text to. When the focus is on the image, you hear: «Selected, Image.» Double-tap the screen.
-
Slide one finger near the lower-right corner of the screen until you hear «Not checked, More options switch,» and double-tap the screen.
-
The focus moves to the Picture tab on the ribbon. Swipe right until you hear «Alt text menu,» and double-tap the screen.
-
Swipe right until you hear «Edit box, for, describe this object for someone who is blind,» and double-tap the screen. Use the on-screen keyboard to type alt text for the image. To close the on-screen keyboard, swipe down-then-left.
-
To move the focus back to the document body, swipe down-then-left.
See also
Use a screen reader to insert and change text in Word
Use a screen reader to set line spacing and indenting in Word
Basic tasks using a screen reader with Word
Set up your device to work with accessibility in Microsoft 365
Use a screen reader to explore and navigate Word
What’s new in Microsoft 365: Release notes for Current Channel
Use Word for the web with your keyboard and a screen reader to insert a picture or image into a document. We have tested it with Narrator in Microsoft Edge and JAWS and NVDA in Chrome, but it might work with other screen readers and web browsers as long as they follow common accessibility standards and techniques. You’ll also learn how to add alt texts to the pictures to make them more accessible.
Need instructions on how to insert pictures to a Word document, but not using a screen reader? See Insert pictures.
Notes:
-
If you use Narrator with the Windows 10 Fall Creators Update, you have to turn off scan mode in order to edit documents, spreadsheets, or presentations with Microsoft 365 for the web. For more information, refer to Turn off virtual or browse mode in screen readers in Windows 10 Fall Creators Update.
-
New Microsoft 365 features are released gradually to Microsoft 365 subscribers, so your app might not have these features yet. To learn how you can get new features faster, join the Office Insider program.
-
To learn more about screen readers, go to How screen readers work with Microsoft 365.
-
When you use Word for the web with a screen reader, switch to the full screen mode. Press F11 to toggle the full screen mode on and off.
-
When you use Word for the web, we recommend that you use Microsoft Edge as your web browser. Because Word for the web runs in your web browser, the keyboard shortcuts are different from those in the desktop program. For example, you’ll use Ctrl+F6 instead of F6 for jumping in and out of the commands. Also, common shortcuts like F1 (Help) and Ctrl+O (Open) apply to the web browser – not Word for the web.
In this topic
-
Insert a picture from your computer
-
Insert a picture from the web
-
Place a picture in line with text
-
Add alt text to an image
Insert a picture from your computer
-
In your Word document, place the insertion point where you want to insert the picture.
-
Press Alt+Windows logo key+N, P, P. The Windows Open dialog box opens. The focus is on the File name text field.
-
Use the Tab key and the arrow keys to navigate to the location of the picture on your computer. When you hear the name of the picture, followed by «Selected,» press Enter. The original picture is embedded into your document.
Insert a picture from the web
If you don’t have the perfect picture on your computer, you can search for and insert a picture from a web location straight from Word for the web.
Note: When using photos, images, or clip art, you’re responsible for respecting copyright. For images, the license filter in Bing can help.
-
In your Word document, place the insertion point where you want to insert the image.
-
Press Alt+Windows logo key+N, P, F.
-
The Bing image search dialog box opens. The focus is on the search text field. Type your search words to describe the picture you’re looking for, and then press Enter. The search results are listed, and the focus is on the first matching image.
-
Use the arrow keys to browse the search results. Your screen reader describes each image as you move through the search results.
-
To select an image, press Spacebar.
-
To insert the selected image, press the Tab key until you hear «Insert,» and press Enter. Word downloads and inserts the image into your document.
Place a picture in line with text
To be read correctly by a screen reader, the picture has to be in line with the text.
-
In your Word document, move the focus to the picture you want. When the picture is in focus and selected, you hear: «Image.»
-
Press Shift+F10. The context menu opens.
-
Press the Up arrow key until you hear «Wrap text,» and then press the Right arrow key once. You hear: «In line with text.» Press Enter. If you don’t hear «In line with text,» press the Up arrow key until you reach the In line with text button, and press Enter.
Add alt text to an image
Add alt text to the images to make your document accessible to all audiences. For more information on alt text, refer to Everything you need to know to write effective alt text.
-
In your Word document, move the focus to the image that you want to add alt text to. When the image is in focus and selected, you hear: «Image.»
-
Press Alt+Windows logo key+J, P, E. The Format Picture pane opens, and the focus moves to the Alternative Text section.
-
Press the Tab key until you hear «Description,» and then type alt text for the image.
-
To return the focus to document body, press Esc.
See also
Use a screen reader to insert and change text in Word
Use a screen reader to check spelling and grammar in Word
Keyboard shortcuts in Word
Basic tasks using a screen reader with Word
Use a screen reader to explore and navigate Word
What’s new in Microsoft 365: Release notes for Current Channel
Technical support for customers with disabilities
Microsoft wants to provide the best possible experience for all our customers. If you have a disability or questions related to accessibility, please contact the Microsoft Disability Answer Desk for technical assistance. The Disability Answer Desk support team is trained in using many popular assistive technologies and can offer assistance in English, Spanish, French, and American Sign Language. Please go to the Microsoft Disability Answer Desk site to find out the contact details for your region.
If you are a government, commercial, or enterprise user, please contact the enterprise Disability Answer Desk.
![]()
Download Article
Step-by-step guide to inserting pictures in Word
![]()
Download Article
- Windows
- Mac
- Web App
- Video
- Q&A
- Tips
|
|
|
|
|
Whether you’re working on a hefty research project or a friendly holiday greeting card, adding images to your Word document can really add value to your project. Whether you want to insert a picture from your computer or find one online, it’s easy to add photos in Word. This wikiHow teaches you how to insert an image into a Microsoft Word document using Windows, a Mac, and the free web version of Word.
Things You Should Know
- Use the Insert tab on Windows, Mac, and the web app to add a picture.
- Select Pictures > This Device to use an image on your computer.
- Click the image to resize and reformat it.
-

1
Click the place in your document where you want to insert the picture. Word’s insertion cursor, a vertical blinking bar, will appear at this point. When you insert the image, its bottom-left corner will be at this point.
- This method works for all modern versions of Word beginning with Word 2016. You can also use it as a guide for earlier versions of Windows, although there will be fewer tools and features.
- Changing the background is done through a different method, using the Design tab.
-
2
Click the Insert tab. It’s near the top of Word between «Home» and «Draw» (or «Home» and «Design» in some versions).
Advertisement
-
3
Click the Pictures tool. It’s in the «Illustrations» section of the toolbar running along the top of Word. Some location options will appear. If you’re using Word 2019 or later, a menu will expand. If you’re using Word 2016 or earlier, your file browser will appear.
-
4
Select the type of image you want to insert. You can choose an image on your computer, a stock image from Microsoft, or an image from the internet.
- Word 2019 or later:
- Click This Device if the picture is on your computer.
- Click Stock Images to select a free stock image from Microsoft’s collection.
- Click Online Pictures to use Bing’s image search to find photos on the web.
- If the photo is on your OneDrive, select Online Pictures and click OneDrive at the bottom-left corner.
- Word 2016:
- If the picture is on your computer, simply navigate to it in the file browser.
- If you want to search for a photo online or insert one from Facebook, Flickr, or your OneDrive, close the file browser and click the Online Pictures icon next to the «Pictures» in the toolbar. You can then select an image from Bing image search, Flickr, or Facebook.
- If the picture is on your OneDrive, click Online Pictures instead of Pictures and click Browse next to «OneDrive.»
- Word 2019 or later:
-
5
Select the image you want to insert. When you find the picture, click it once to select it.
- If you’re selecting from stock images or online images, you can click multiple pictures to add more than one.
- If you’re choosing files from your computer and want to add more than one picture, hold the Ctrl button down as you click each image.
-
6
Click Insert. It’ll be near the bottom-right corner of the window no matter where you’ve selected your image(s). You’re done! Continue to the next steps for formatting information, or print the document when you’re ready.
-
7
Resize the picture. If you want to change the picture’s size, click it once to select it, and then drag any of the corner circles in or out.[1]
- You can also specify the size if you want. Double-click the picture to open the Picture Format tab at the top, and then set your desired measurements next to «Height» and «Width.»
-
8
Use the curved arrow at the top of the picture to rotate it. It’s above the dot at the top-center part of the picture. To rotate, place the mouse cursor over the curved arrow, and then click and drag the cursor left or right until you’re satisfied.
-
9
Double-click the picture to access more editing tools. This opens the «Picture Format» (2019 and later) or «Format» (2016) tab at the top of Word. On this tab, you can:
- In the «Arrange» panel in the top-right area, click Wrap Text to choose how to situate the picture in blocks of text. You can also set alignment preferences here. Wrapping the text is a good way to get your document formatted exactly the way you want.
- To crop the picture, click the Crop tool in the «Size» panel at the top-right corner.
- The «Adjust» panel near the top-left corner has additional tools for background removal, color effects, and corrections.
- To add a border or effect around the picture, select one of the «Picture Styles» at the center of the Format bar, or choose any of the other options in the section to have more control over the style.


Advertisement
-
1
Click the place in your document where you’d like to insert a picture. This places the cursor at that location.
-
2
Click the Insert tab. It’s at the top of Word between the «Home» and «Design» or «Home» and «Draw» tabs.
-
3
Click the Pictures icon. It’s on the toolbar that runs along the top of Word. Look for an icon of a green mountain with a yellow sun between «Tables» and «Shapes.»
-
4
Click Photo Browser or Picture from File. If you want to browse images in your Mac’s Photos app, use Photo Browser. To select an image file using Finder, choose Picture from File.
-
5
Insert the picture into the document. If you’re using the Photo Browser option, simply drag the photo into your document. If you’re using Picture from File, select the image and click Insert.
-
6
Resize the picture. If you want to increase or reduce the picture’s size, click the image to select it, and then do one of the following:
- To maintain the picture’s proportions so it doesn’t stretch or warp, hold down the Shift key as you drag any of the sizing handles (the circles) inward or outward.[2]
- To keep the image’s center in place as you resize, hold down the Option key as you drag the handles.
- You can also specify a size. Double-click the Picture to open the Picture Format tab, then enter your desired measurements next to «Height» and «Width.»
- To maintain the picture’s proportions so it doesn’t stretch or warp, hold down the Shift key as you drag any of the sizing handles (the circles) inward or outward.[2]
-
7
Drag the curved arrow at the top of the picture to rotate it. It’s above the dot at the top-center edge of the picture. Just place the mouse cursor over the curved arrow, and then click and drag it left or right until it’s correct.
-
8
Double-click the picture to access more editing tools. This opens the «Picture Format» tab at the top of Word, which has a bunch of editing features, including the ability to remove the background and add styles.
- Click Corrections near the top-left corner to correct lighting and color problems.
- Click Artistic Effects to play around with filters, and Transparency to make the picture more see-through.
- To crop the picture, click the Crop tool next to the height and width controls.
- Click Wrap Text to choose how to situate the picture in blocks of text, and use Align and Position to ensure correct placement.
- Click Quick Styles to choose pre-styled borders, shadows, and other options.


Advertisement
-
1
Click the place in your document where you’d like to insert a picture. This places the cursor at that location.
- If it’s your first time using Office Online on the web, go to https://www.office.com, sign in with your Microsoft account, and select Word to get started.
-
2
Click Insert. This opens the Insert tab.
-
3
Click Pictures. This opens a drop down options menu.
-
4
Select a picture type. There are four options to choose from:
- This Device — choose a picture on your computer
- OneDrive — choose an image from your OneDrive
- Stock Images — insert a stock image or sticker
- Bing Pictures — search Bing for an image
-
5
Select an image. If you choose the This Device option, you’ll be prompted to select an image from your computer. Click it to select it.
-
6
Click Open. This is in the bottom right corner of the image selection window. This will confirm your selected image and insert it into the document.
-
7
Resize the picture. If you want to change the picture’s size, click it once to select it, and then drag any of the corner circles in or out.
- You can also specify the size if you want. Double-click the picture to open the Picture tab at the top, and then set your desired measurements next to «Height» and «Width.»
-
8
Use the curved arrow at the top of the picture to rotate it. It’s above the dot at the top-center part of the picture. To rotate, place the mouse cursor over the curved arrow, and then click and drag the cursor left or right until you’re satisfied.
-
9
Double-click the picture to access more editing tools. This opens the «Picture» tab at the top of the Word web app. On this tab, you can:
- In the «Arrange» panel in the top-right area, click Wrap Text to choose how to situate the picture in blocks of text. You can also set alignment preferences here.
- To crop the picture, click the Crop tool in the «Image Size» panel at the top-right corner.
- To add a border or effect around the picture, select one of the «Picture Styles» at the center of the bar, or choose any of the other options in the section to have more control over the style.


Advertisement
Add New Question
-
Question
How do I take screenshots?

On a Mac, shift command 3 to screenshot the whole screen. If you want to take a screenshot of a certain area on the screen, press shift command 4. On a Windows PC, press control and print screen at the same time, then you can paste the image into Paint or Microsoft Word.
-
Question
When I insert several photos on an age in a Word document, the photos often won’t stay in place. How do I stop the photos from bumping each other around?
You can right-click the image, hold the cursor over the «Wrap Text» menu option, and select an option from the list that is NOT «In Line with Text» (usually selected by default), such as «Tight» or «Behind/In Front of Text.» Then you should be able to move the image freely around the page.
-
Question
How do I format images in a Word document?
Try double-tapping the photo. A photo format menu should come up on the right side.
See more answers
Ask a Question
200 characters left
Include your email address to get a message when this question is answered.
Submit
Advertisement
Video
-
Adding photos to your Word document increases its size.
-
Other photo modification features available in newer versions of Microsoft Word include the ability to add borders, cutout styles, shadows, beveled edges, glows, and drop shadows.
-
When you crop a picture, the actual cropped part of the picture is hidden, not removed; unless you check the «Delete Cropped Areas of Pictures» box in the «Compression Settings» dialog box. Any compressed pictures with their cropped areas deleted cannot be restored to their original appearance.
Show More Tips
Thanks for submitting a tip for review!
Advertisement
About This Article
Article SummaryX
1. Click the place you want to insert the image.
2. Click the Insert tab.
3. Click Pictures.
4. Choose a location.
5. Select the image and click Insert.
6. Double-click the picture to open editing and format tools.
Did this summary help you?
Thanks to all authors for creating a page that has been read 650,203 times.
Is this article up to date?
This tutorial shows how to insert images in Microsoft Word. We will also look at how to resize images, align images with the text, and add a border.
Quick Links:
- How to Insert an Image
- How to Resize an Image
- How to Align an Image with the Text
- How to Add a Border to an Image
Do you want to insert shapes instead of images? Please see “How to Insert and Modify Shapes in Microsoft Word (PC & Mac).”
This tutorial is also available as a YouTube video showing all the steps in real time.
Watch more than 200 other writing-related software tutorials on my YouTube channel.
The images below are from Word for Microsoft 365. These steps also apply to Word 2021, Word 2019, Word 2016, and Word 2013. However, the stock image options will be limited in those older versions of the software.
- Place your cursor where you want to insert the image. (This is an approximate placement. You can change the alignment with the text after inserting the images, as shown in the section below.)
- Select the Insert tab in the ribbon.

- Select the Pictures button in the Illustrations group.

- Select the location of the image from the Insert Picture From menu:
-
- This Device lets you choose an image stored on your computer or network server.
- Stock Images lets you choose stock images, icons, cutout people, stickers, and illustrations. The full stock image library is only available to users signed into Word for Microsoft 365.
- Online Pictures lets you search for images through Bing, Microsoft’s search engine. This option also provides a link to OneDrive.

For this tutorial, we will insert an image stored on the device.
- (For “This Device” option only) Locate the image in the Insert Picture dialog box.

- Select the Insert button.

Your image should now appear in your Word document.
How to Resize an Image in Microsoft Word
- Select the image. A border with resizing handles will appear when the image is selected.
- Select one of the resizing handles and then drag the image to a new size.
Pro Tip: Choose a corner handle to maintain the image’s current shape.

Optional Steps: How to Rotate an Image in Microsoft Word
- Select the image.
- Select the rotation handle at the top of the border.
- Rotate the image to the left or right.

How to Align an Image with the Text in Microsoft Word
- Select the image.
- Select the Layout Options button.

- Select an option from the layout menu:
-
- In Line with Text
- Square
- Tight
- Through
- Top and Bottom
- Behind Text
- In Front of Text
The visual effectiveness of each option will depend on the size of your image and the density of your text. So, you may need to experiment with several options to find the one most suited to your content.

Pro Tip: If you select an option other than In Line with Text, you can select and “grab” the image, and then move it almost anywhere in the document.
How to Add a Border to an Image in Microsoft Word
- Select the image.
- Select the Picture Format tab in the ribbon. (This tab only appears when an image is selected.)

From here, you can add a built-in border or edge effect or manually create a border.
How to Add a Built-In Border or Edge Effect to an Image
- Select the bottom menu arrow in the Picture Styles group.
![]()
- Select a frame or other edge effect from the Picture Styles menu.

Your new border or edge effect should appear immediately.

How to Add a Manual Border to an Image
- Select Picture Border in the Picture Styles group.

- Select a color from the drop-down menu.

- Reselect Picture Border, select Weight, and then choose a line thickness.

- Reselect Picture Border, select Dashes, and then choose a line style.

Your new manual border should appear immediately.

Documents with a lot of images can negatively affect Word’s performance. If you notice Word reacting slowing, please see “How to Make Microsoft Word Faster by Hiding Images.”
Related Resources
How to Write Figure Captions for Graphs, Charts, Photos, Drawings, and Maps
How to Insert Figure Captions and Table Titles in Microsoft Word
How to Change the Style of Table Titles and Figure Captions in Microsoft Word
How to Update Table and Figure Numbers in Microsoft Word
How to Save Tables and Figures as Images in Microsoft Word (PC & Mac)
Updated February 20, 2023
Довольно часто работа с документами в MS Word не ограничивается одним только текстом. Так, если вы печатаете реферат, методичку, брошюру, какой-нибудь отчет, курсовую, научную или дипломную работу, вам вполне может понадобиться вставить в то или иное место изображение.
Урок: Как сделать буклет в Ворде
Вставить рисунок или фото в документ Word можно двумя способами — простым (не самым правильным) и чуточку посложнее, зато правильным и более удобным для работы. Первый метод заключается в банальном копирование/вставке или перетаскивание графического файла в документ, второй — в использование встроенных инструментов программы от Microsoft. В этой статье мы расскажем о том, как правильно в Ворде вставить картинку или фотографию в текст.
Урок: Как сделать диаграмму в Word
1. Откройте текстовый документ, в который требуется добавить изображение и кликните в том месте страницы, где оно должно находиться.
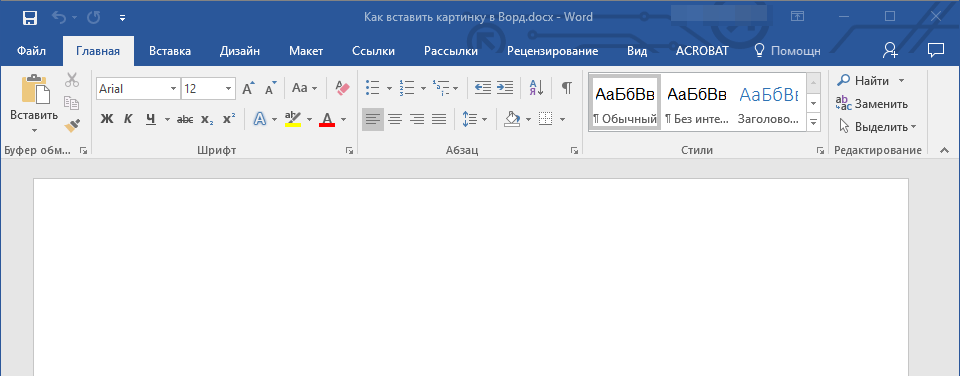
2. Перейдите ко вкладке “Вставка” и нажмите на кнопку “Рисунки”, которая расположена в группе “Иллюстрации”.

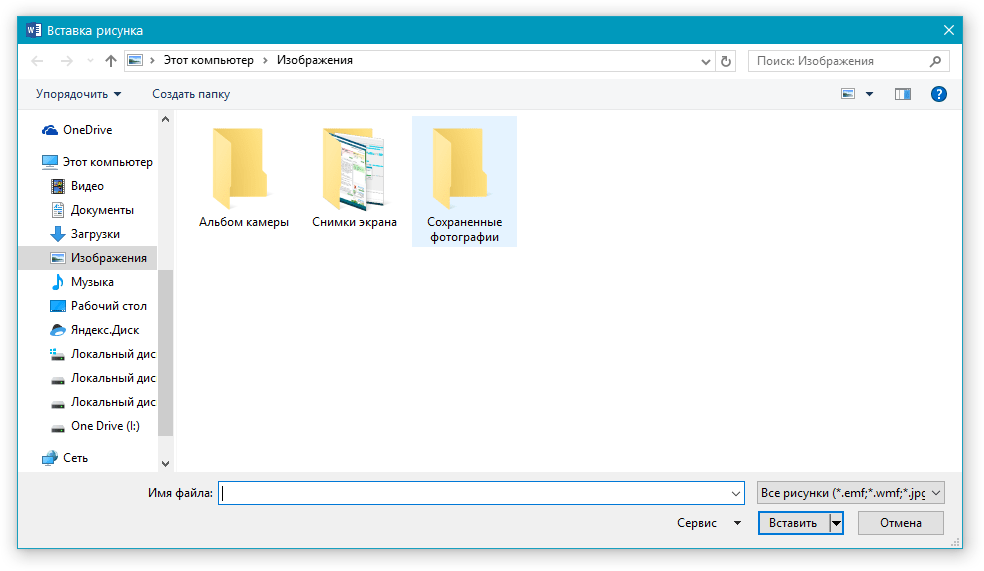
3. Откроется окно проводника Windows и стандартная папка “Изображения”. откройте с помощью этого окна папку, в которой содержится необходимый графический файл, и кликните по нему.
4. Выбрав файл (картинку или фото), нажмите кнопку “Вставить”.
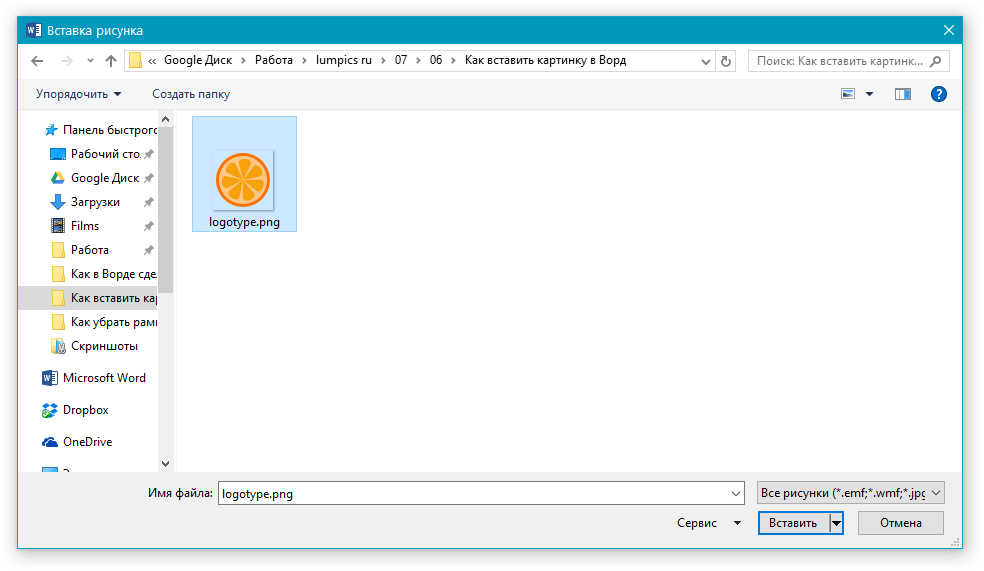
5. Файл будет добавлен в документ, после чего сразу откроется вкладка “Формат”, содержащая в себе инструменты для работы с изображениями.

Основные инструменты для работы с графическими файлами
Удаление фона: если это необходимо, вы можете удалить фон картинки, точнее, убрать нежелательные элементы.

Коррекция, изменение цвета, художественные эффекты: с помощью этих инструментов вы можете изменить цветовую гамму изображения. В число параметров, которые можно изменить, входят яркость, контраст, насыщенность, оттенок, другие варианты цвета и многое другое.
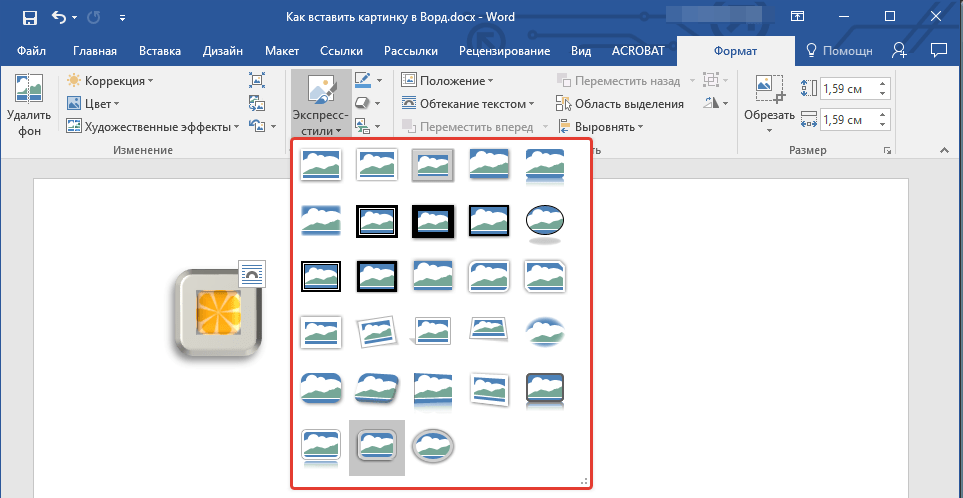
Стили рисунков: используя инструменты “Экспресс-стили”, вы можете изменить внешний вид добавленного в документ изображения, в том числе и форму отображения графического объекта.
Положение: данный инструмент позволяет изменить положение изображения на странице, “вклинив” его в текстовое содержимое.
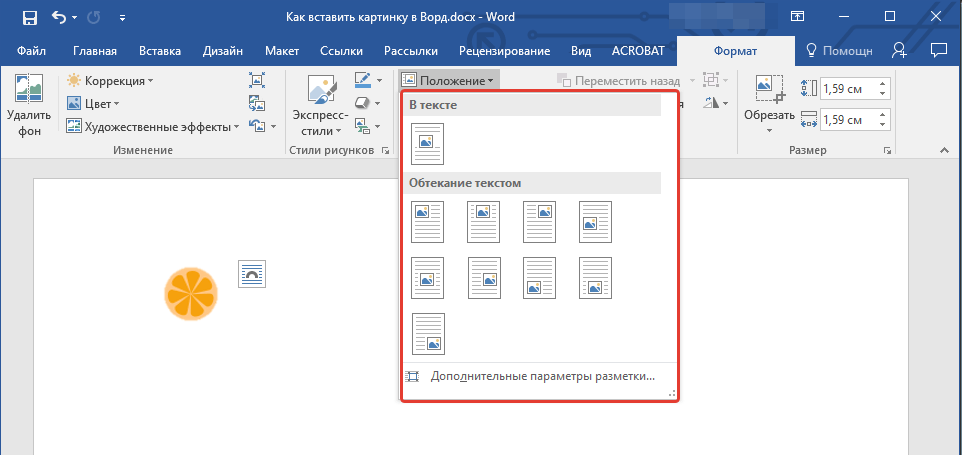
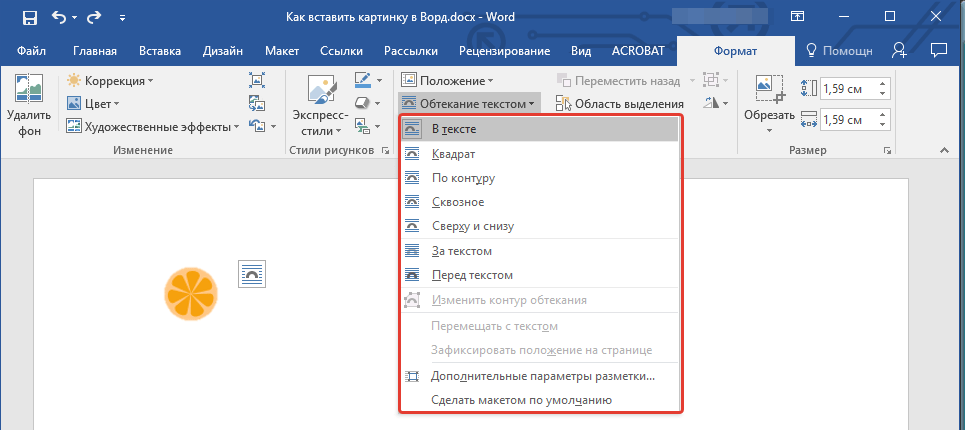
Обтекание текстом: этот инструмент позволяет не только грамотно расположить картинку на листе, но и вписать ее непосредственно в текст.
Размер: это группа инструментов, в которой вы можете обрезать изображение, а также задать точные параметры для поля, внутри которого находится картинка или фото.
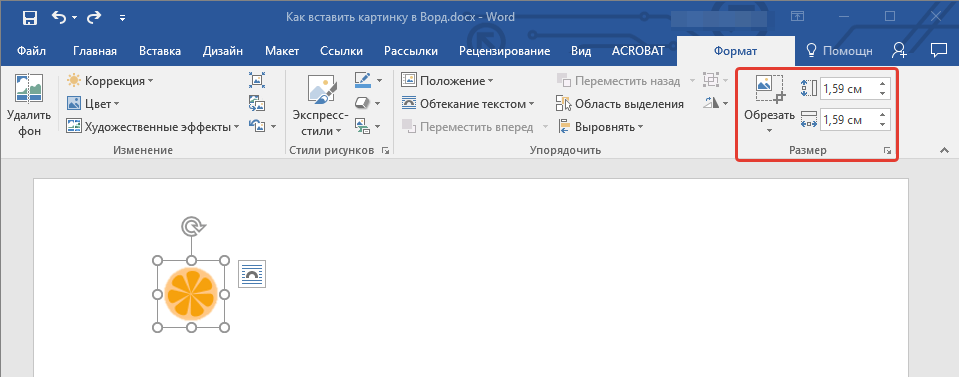
Примечание: Область, внутри которой находится изображение, всегда имеет прямоугольную форму, даже если сам объект имеет другую форму.
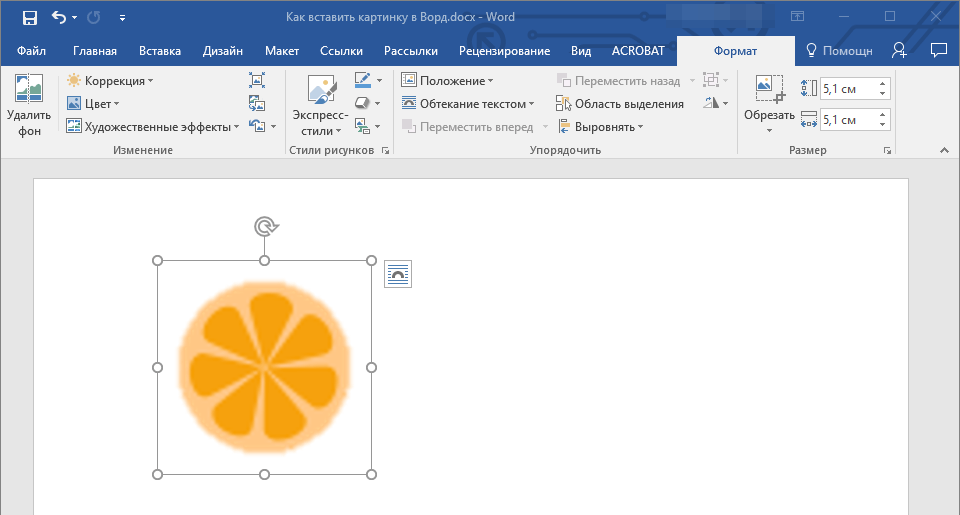
Изменение размера: если вы хотите задать точный размер для картинки или фото, используйте инструмент “Размер”. Если же ваша задача — растянуть картинку произвольно, просто возьмите за один из кружков, обрамляющих изображение, и потяните за него.
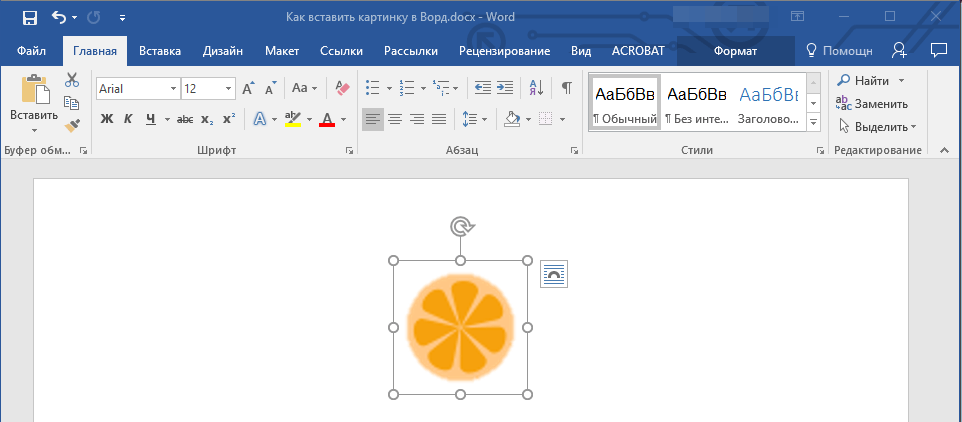
Перемещение: для того, чтобы переместить добавленное изображение, кликните по нему левой кнопкой мышки и перетяните в необходимое место документа. Для копирования/вырезки/вставки используйте горячие комбинации клавиш — Ctrl+C/Ctrl+X/Ctrl+V, соответственно.
Поворот: чтобы повернуть изображение, кликните по стрелке, расположенной в верхней части области, в которой находится графический файл, и поверните его в необходимом направлении.
- Совет: Чтобы выйти из режима работы с изображением, просто кликните левой кнопкой мышки за пределами обрамляющей его области.
Урок: Как нарисовать линию в MS Word
Собственно, на этом все, теперь вы знаете, как в Ворде вставить фото или картинку, а также знаете о том, как ее можно изменить. И все же, стоит понимать, что данная программа является не графическим, а текстовым редактором. Желаем вам успехов в ее дальнейшем освоении.
Some documents have digital photographs and images created and saved in other programs that make documents entertaining or convey information better than words. These types of images are referred to as pictures.
Insert an image
To insert a picture in a Word document, on the Insert tab, in the Illustrations group, click the Pictures button, then choose the option you prefer:

- Select This Device to choose an image stored on the local computer, laptop, shared locations, or network server:

Select an image in the Insert Picture dialog box and click the Insert button.
- Select Stock Images to choose Stock Images, Icons, Cutout People, Stickers, and Illustrations from the stock image library:

Select one or several objects (see the number near the Insert label) and click the Insert button.
- Select Online Pictures to find and insert images from Bing, Microsoft’s search engine, or OneDrive:
Select one or a few objects (see the number near the Insert label) and click the Insert button.


Note: Another option is to insert the image as a linked object that creates a link between the document and the external image but does not embed the image in the Word document. Using linked objects can help minimize the file size of the final document while preserving images, photographs, and other objects that can take up storage space. However, if image files are not available when you open a Word document, the images are not displayed. This option is not recommended to create documents distributed to other users, as they may not access the images.
When you click on a picture, Word shows the Picture Format tab:

Using features from that tab, you can:
- Adjust picture characteristics:
- Remove the background by designating either the areas you want to keep or those you want to remove
- Sharpen, soften, and adjust the brightness of images for better printing or on-screen presentation
- Apply different color masks to achieve antiquing, sepia tone, grayscale, and a variety of other color effects
- Choose one of 23 special effects, such as pencil sketch, blurring, charcoal sketch, paint strokes, and others
- Apply effects such as shadows, reflections, and borders; or apply combinations of these effects
- Choose a picture transparency
- Compress the pictures in the document
- Format picture by using predefined picture styles or choosing some of the proposed features such as shape and orientation, borders, and other effects
- Arrange the picture to specify its relationship to the page and other elements on the page
- Crop the parts of the picture or crop the picture to a shape
- Resize, scale, and rotate the picture by using its sizing handles or appropriate fields in the Layout dialog box (see below)
- Position the object in any of several predefined locations on the page
- Specify how other text should wrap around the object.
Resize an image
To resize a picture, select it and do one of the following:
- On the Picture Format tab, in the Size group, change the Height and Width for the picture in the appropriate fields:

- Click and drag the side sizing handles to stretch it horizontally or vertically:


Scale an image
To scale a picture, select it and do one of the following:
- On the Picture Format tab, in the Size group, click the dialog box launcher:
- Click and drag one of the corner sizing handles to maintain the image’s current shape. The image will change size while keeping the same proportions:
- Open the Layout dialog box by one of the methods:
- On the Picture Format tab, in the Size group, click the dialog box launcher.
- Right-click the selected picture and choose Size and Position… in the popup menu:


In the Layout dialog box, on the Size tab, in the Scale section:

- Rescale the picture by changing the height and width percentages.
- Select the Lock aspect ratio check box (selected by default) to scale the picture by height and width using the same percentage.
Deselect the Lock aspect ratio check box to scale height and width separately.
- Select the Relative to original picture size check box (selected by default) to scale the picture height and width as percentages of the original size.
Note: See the picture’s original size in the Original size section.
Rotate an image
To rotate a picture, do one of the following:
- Click and drag the rotation handle at the top of the border:

- Open the Layout dialog box by one of the methods:
- On the Picture Format tab, in the Size group, click the dialog box launcher.
- Right-click the selected picture and choose Size and Position… in the popup menu.
In the Layout dialog box, on the Size tab, select or type a rotation in the Rotation field.

Hide and display images on the page
The picture can be hidden using the Selection pane (see how to open it). For example, Picture 6:

To hide the picture, click the Showing icon ![]() to the right of the object name. After clicking that icon, it will change to a simple icon indicating that the object is Hidden
to the right of the object name. After clicking that icon, it will change to a simple icon indicating that the object is Hidden ![]() from view. To show the object once again, click the Hidden icon
from view. To show the object once again, click the Hidden icon ![]() , and it will reappear.
, and it will reappear.
Note: You can hide all images in the document by changing global Word options:

See Hiding pictures for more details.
Copy the formatting
To copy the formatting of one picture to another picture, do the following:
1. Select the formatted picture, which formatting you need to copy.
2. On the Home tab, in the Clipboard group, click the Format Painter button:

3. Click another picture to apply the color adjustments, color corrections, or picture style from the first picture.
Add an Alternative text for images
The Alternative text (Alt text) for pictures is a common requirement. By default, Word generates Alt text for all inserted pictures (see how to turn off that feature).
Alt text is:
- Read aloud when a screen reader will encounter such an image.
- Shown if there are some problems with displaying an image.
You can see the generated Alt text at the bottom of the object immediately after inserting it in a document:

or

To change or add Alt text to a picture, do the following:
1. Select the picture.
2. Open the Alt text pane by doing one of the following:
- On the Picture Format tab, in the Accessibility group, click the Alt Text button:

- Right-click and choose Edit Alt Text… in the popup menu:
- On the Review tab, in the Accessibility group, click the Check Accessibility button, then choose Alt Text:


3. On the Alt Text pane:

- Modify or enter an Alt text you need.
Alt text should briefly describe the purpose or content of the image, photo, icon, table, or equation. It is recommended to use no more than 15 words.
- Select the Mark as decorative check box if the picture is purely decorative and does not provide helpful information for the document content.
Note: If the option for automatic generation of Alt text for pictures is turned on (see how to turn on and turn off that feature), after modifying a generated Alt text, you can regenerate it by clicking the Generate a description for me:

See also how to create picture captions.