
In Excel VBA stands for (Visual Basic for Application Code) where we can automate our task with help of codes and codes that will manipulate(like inserting, creating, or deleting a row, column, or graph) the data in a worksheet or workbook. With the help of VBA, we can also automate the task in excel to perform all these tasks we need to insert and run the VBA code properly which we will discuss in this article.
Steps to Insert and Run VBA Code in Excel
To use the VBA code properly in Excel we need to change the default macro security settings of excel for that we need to follow further steps
Step 1: Click on the “File” menu at the left top of the excel tab.

Step 2: Select “Options” to get the “Excel Options” window.

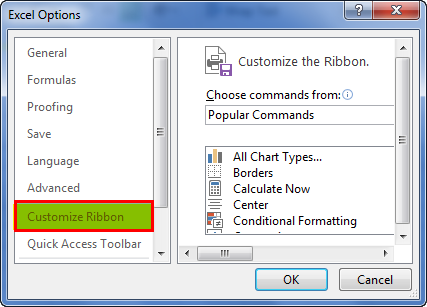
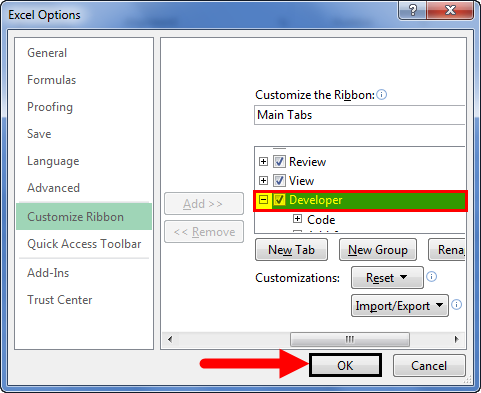
Step 3: Select “Customized Ribbon” in the “Excel Options” Window and then select the “Developer” check box in the “Main Tabs”.

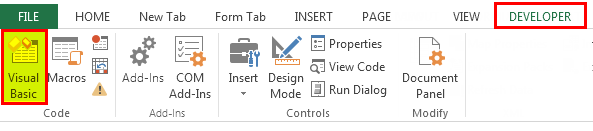
Step 4: Then return to the main Excel window to select the “Developer” ribbon and then click on “Macro Security” in the “Code” group.

Step 5: Click on “Macro Settings” to select “Disable all macros except digitally signed macros”.

Now, to insert and run the VBA in Excel so that we can write codes we need to follow further steps:
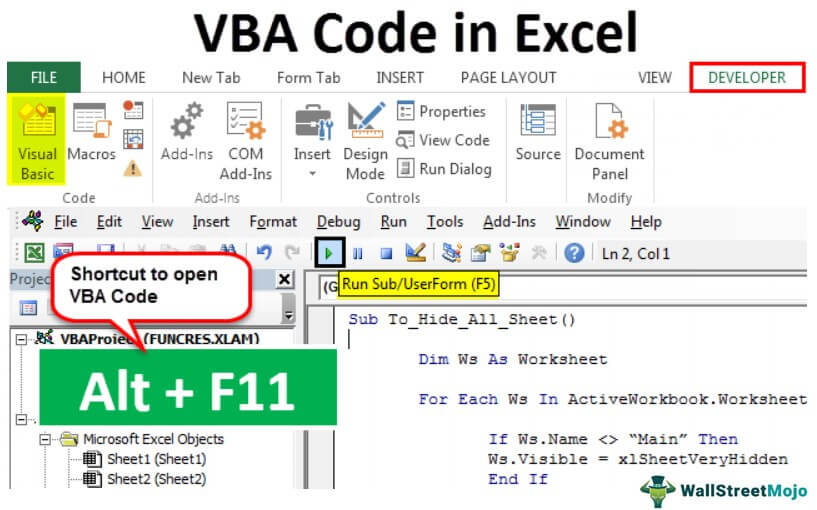
Step 1: In the main Excel window press “Alt + F11” to open Visual Basic Editor

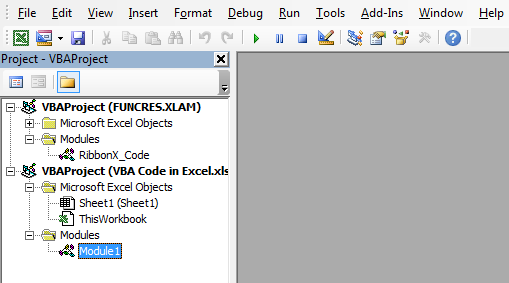
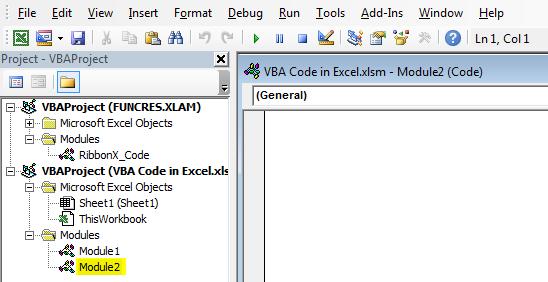
Step 2: Select “Sheet1(Sheet1)” in the “Project – VBAProject” tab.

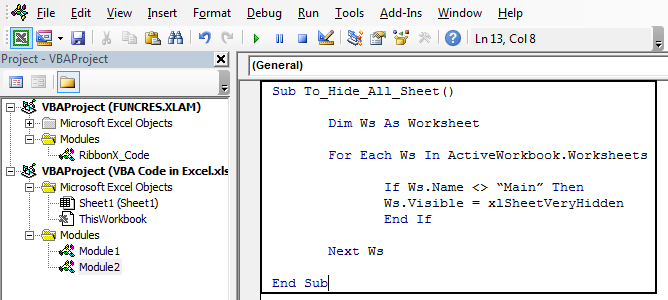
Then we will get a terminal where we can write the following code,

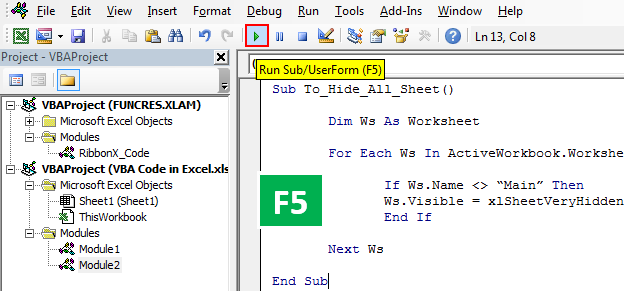
Step 4: After writing a piece of code according to the user’s need we need to press “F5” to run the code and then click on “Run” in the “Macro” Tab

Then, the output of the code will be seen in the Excel sheet.
Содержание
- VBA Code
- Excel VBA Code
- Enable Developer Tab
- Examples to Use Excel VBA Code
- #1 – Paste Code in Module
- #2 – Save the Workbook with VBA Code
- #3 – Assign Macro Code to Shapes
- Recommended Articles
- Excel VBA Tutorial – How to Write Code in a Spreadsheet Using Visual Basic
- Introduction
- Prerequisites
- Learning Objectives
- Important Concepts
- What is VBA?
- Why use VBA in Excel?
- Getting Set Up to Write VBA in Excel
- Developer Tab
- VBA Editor
- Excel VBA Examples
- Example #1: Display a Message when Users Open the Excel Workbook
- How is it doing that?
- When could I use this?
- Real World Examples
- Example #2: Allow User to Execute another Procedure
- How is it doing that?
- When could I use this?
- Real World Examples
- Example #3: Add Numbers to a Range with a For-Next Loop
- How is it doing that?
- When could I use this?
- Real World Examples
- Conclusion
VBA Code


Excel VBA Code
VBA, also known as Visual Basic Applications, is a programming language for Excel. Not only Excel but for most Microsoft Office programs. We can write a set of instructions in a Visual Basic Editor that performs certain tasks for us, known as code in VBA.
In Excel, we can find VBA under the “Developer” tab for developers. To access the “Developer” tab, we need to enable it first, and then we can access it from the tab or by the keyboard shortcut ALT + F11. A combination of codes makes a procedure, which is also known as macros in VBA. So, in other words, macros are a set of codes, a programming language written together.
If you are new to VBA and have no idea about it, this article is for you.
Table of contents
You are free to use this image on your website, templates, etc., Please provide us with an attribution link How to Provide Attribution? Article Link to be Hyperlinked
For eg:
Source: VBA Code (wallstreetmojo.com)
Enable Developer Tab

If your Excel is not showing the “Developer” tab, follow the steps below to enable the “Developer” tab in your Excel.
Check the “Developer” tab on the right side. Once you select the options, click on “OK.”
Examples to Use Excel VBA Code
#1 – Paste Code in Module
To write VBA code, you first need to go to the “Developer” tab and click on “Visual Basic.”

As you open the visual basic, you will see a window like the one below.
Next, go to “Insert” and click on “Module.”
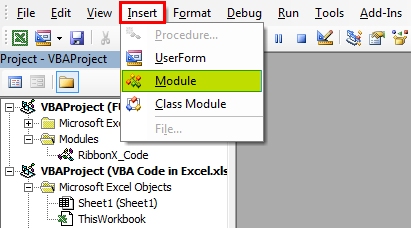
As soon as you click on the “Module,” it will insert it, and you can see the “Module” name. And also, you will see a white plain board on the right.
On the white plain board, you need to paste your copied code.
After pasting the code, you need to execute it.
We can conduct the execution process by pressing the shortcut key F5 or clicking the green run button on the top.
It will execute the copied VBA code in your window.
#2 – Save the Workbook with VBA Code
We know you do not need any special introduction to save the Excel file. But when it comes to the VBA code in the Excel workbook, you need one special introduction.
If you have already saved the workbook and just copied the VBA code, you need to change the file extension because when you click on the “Save” option, you will see the alert message below.
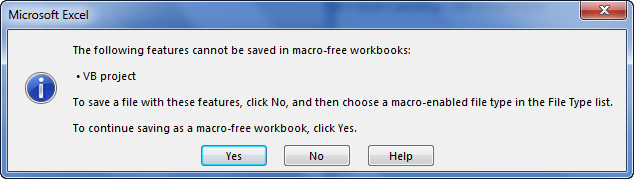
It says the workbook you are trying to save contains a VB project, and it cannot save as a normal Excel workbook. So instead, save this workbook as a “Macro-Enabled” workbook.
Click on “Save As” or press the F12 key. You will see below a window.
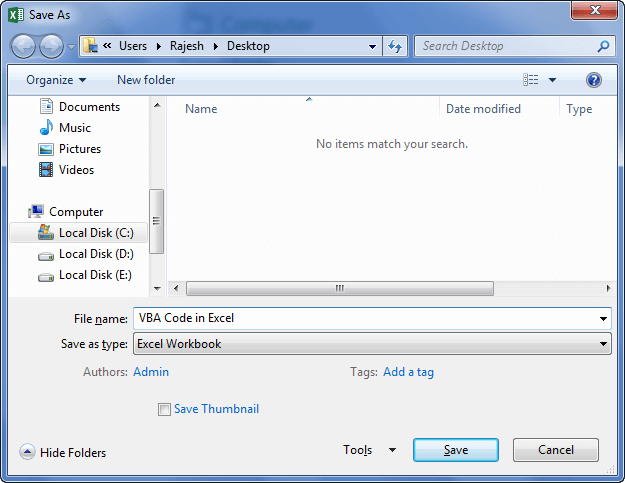
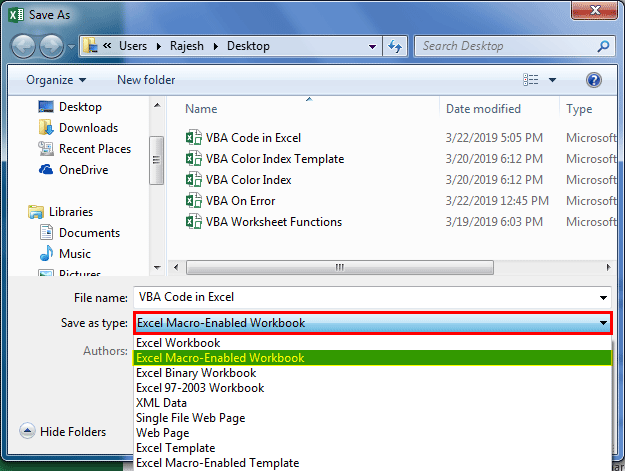
Enter the file name as per your wish but select the “Save as type” as “Excel Macro-Enabled Workbook (*.xlsm).
Click “OK” to save the workbook as “Macro-Enabled Workbook.”

#3 – Assign Macro Code to Shapes
Whenever we need to run VBA, we need to return to the visual basic editor and run. It is a time-consuming process.
Step 1: Go to “Insert” and select the shape per your wish.
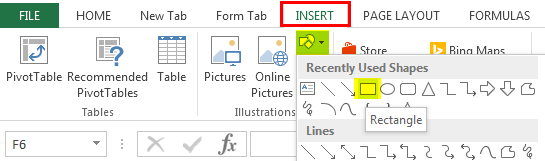
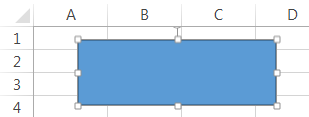
Step 2: After selecting the shape, draw this on your worksheet, ideally, away from the data.
Step 3: Right-click and select “Edit Text.”
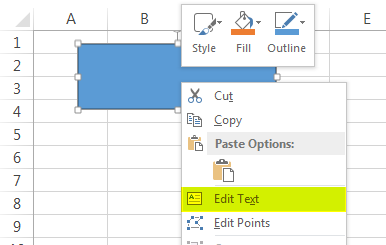
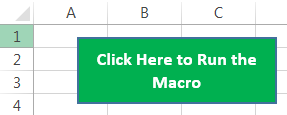
Step 4: Add the word as per your wish. We have added the word “Click Here to Run the Macro.”
Step 5: Again, right-click and select the option to assign a macro.
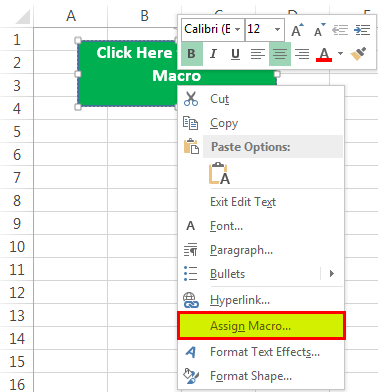
Step 6: Now, we will see all the macro lists. Select the macro name you wish to assign.

Step 7: Click on “OK.” Now, this button holds the macro code. Whenever you click on this button, it will execute this code.
Recommended Articles
This article is a guide to VBA Code. Here, we learn how to copy, insert and run the VBA code in Excel, along with simple and practical examples. Below are some useful Excel articles related to VBA: –
Источник
Excel VBA Tutorial – How to Write Code in a Spreadsheet Using Visual Basic

Introduction
This is a tutorial about writing code in Excel spreadsheets using Visual Basic for Applications (VBA).
Excel is one of Microsoft’s most popular products. In 2016, the CEO of Microsoft said «Think about a world without Excel. That’s just impossible for me.” Well, maybe the world can’t think without Excel.
- In 1996, there were over 30 million users of Microsoft Excel (source).
- Today, there are an estimated 750 million users of Microsoft Excel. That’s a little more than the population of Europe and 25x more users than there were in 1996.
We’re one big happy family!
In this tutorial, you’ll learn about VBA and how to write code in an Excel spreadsheet using Visual Basic.
Prerequisites
You don’t need any prior programming experience to understand this tutorial. However, you will need:
- Basic to intermediate familiarity with Microsoft Excel
- If you want to follow along with the VBA examples in this article, you will need access to Microsoft Excel, preferably the latest version (2019) but Excel 2016 and Excel 2013 will work just fine.
- A willingness to try new things
Learning Objectives
Over the course of this article, you will learn:
- What VBA is
- Why you would use VBA
- How to get set up in Excel to write VBA
- How to solve some real-world problems with VBA
Important Concepts
Here are some important concepts that you should be familiar with to fully understand this tutorial.
Objects: Excel is object-oriented, which means everything is an object — the Excel window, the workbook, a sheet, a chart, a cell. VBA allows users to manipulate and perform actions with objects in Excel.
If you don’t have any experience with object-oriented programming and this is a brand new concept, take a second to let that sink in!
Procedures: a procedure is a chunk of VBA code, written in the Visual Basic Editor, that accomplishes a task. Sometimes, this is also referred to as a macro (more on macros below). There are two types of procedures:
- Subroutines: a group of VBA statements that performs one or more actions
- Functions: a group of VBA statements that performs one or more actions and returns one or more values
Note: you can have functions operating inside of subroutines. You’ll see later.
Macros: If you’ve spent any time learning more advanced Excel functionality, you’ve probably encountered the concept of a “macro.” Excel users can record macros, consisting of user commands/keystrokes/clicks, and play them back at lightning speed to accomplish repetitive tasks. Recorded macros generate VBA code, which you can then examine. It’s actually quite fun to record a simple macro and then look at the VBA code.
Please keep in mind that sometimes it may be easier and faster to record a macro rather than hand-code a VBA procedure.
For example, maybe you work in project management. Once a week, you have to turn a raw exported report from your project management system into a beautifully formatted, clean report for leadership. You need to format the names of the over-budget projects in bold red text. You could record the formatting changes as a macro and run that whenever you need to make the change.
What is VBA?
Visual Basic for Applications is a programming language developed by Microsoft. Each software program in the Microsoft Office suite is bundled with the VBA language at no extra cost. VBA allows Microsoft Office users to create small programs that operate within Microsoft Office software programs.
Think of VBA like a pizza oven within a restaurant. Excel is the restaurant. The kitchen comes with standard commercial appliances, like large refrigerators, stoves, and regular ole’ ovens — those are all of Excel’s standard features.
But what if you want to make wood-fired pizza? Can’t do that in a standard commercial baking oven. VBA is the pizza oven.

Why use VBA in Excel?
Because wood-fired pizza is the best!
A lot of people spend a lot of time in Excel as a part of their jobs. Time in Excel moves differently, too. Depending on the circumstances, 10 minutes in Excel can feel like eternity if you’re not able to do what you need, or 10 hours can go by very quickly if everything is going great. Which is when you should ask yourself, why on earth am I spending 10 hours in Excel?
Sometimes, those days are inevitable. But if you’re spending 8-10 hours everyday in Excel doing repetitive tasks, repeating a lot of the same processes, trying to clean up after other users of the file, or even updating other files after changes are made to the Excel file, a VBA procedure just might be the solution for you.
You should consider using VBA if you need to:
- Automate repetitive tasks
- Create easy ways for users to interact with your spreadsheets
- Manipulate large amounts of data
Getting Set Up to Write VBA in Excel
Developer Tab
To write VBA, you’ll need to add the Developer tab to the ribbon, so you’ll see the ribbon like this.

To add the Developer tab to the ribbon:
- On the File tab, go to Options > Customize Ribbon.
- Under Customize the Ribbon and under Main Tabs, select the Developer check box.
After you show the tab, the Developer tab stays visible, unless you clear the check box or have to reinstall Excel. For more information, see Microsoft help documentation.
VBA Editor
Navigate to the Developer Tab, and click the Visual Basic button. A new window will pop up — this is the Visual Basic Editor. For the purposes of this tutorial, you just need to be familiar with the Project Explorer pane and the Property Properties pane.

Excel VBA Examples
First, let’s create a file for us to play around in.
- Open a new Excel file
- Save it as a macro-enabled workbook (. xlsm)
- Select the Developer tab
- Open the VBA Editor
Let’s rock and roll with some easy examples to get you writing code in a spreadsheet using Visual Basic.
Example #1: Display a Message when Users Open the Excel Workbook
In the VBA Editor, select Insert -> New Module
Write this code in the Module window (don’t paste!):
Sub Auto_Open()
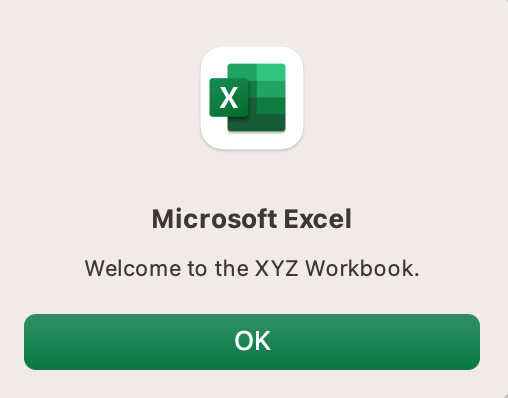
MsgBox («Welcome to the XYZ Workbook.»)
End Sub
Save, close the workbook, and reopen the workbook. This dialog should display.
How is it doing that?
Depending on your familiarity with programming, you may have some guesses. It’s not particularly complex, but there’s quite a lot going on:
- Sub (short for “Subroutine): remember from the beginning, “a group of VBA statements that performs one or more actions.”
- Auto_Open: this is the specific subroutine. It automatically runs your code when the Excel file opens — this is the event that triggers the procedure. Auto_Open will only run when the workbook is opened manually; it will not run if the workbook is opened via code from another workbook (Workbook_Open will do that, learn more about the difference between the two).
- By default, a subroutine’s access is public. This means any other module can use this subroutine. All examples in this tutorial will be public subroutines. If needed, you can declare subroutines as private. This may be needed in some situations. Learn more about subroutine access modifiers.
- msgBox: this is a function — a group of VBA statements that performs one or more actions and returns a value. The returned value is the message “Welcome to the XYZ Workbook.”
In short, this is a simple subroutine that contains a function.
When could I use this?
Maybe you have a very important file that is accessed infrequently (say, once a quarter), but automatically updated daily by another VBA procedure. When it is accessed, it’s by many people in multiple departments, all across the company.
- Problem: Most of the time when users access the file, they are confused about the purpose of this file (why it exists), how it is updated so often, who maintains it, and how they should interact with it. New hires always have tons of questions, and you have to field these questions over and over and over again.
- Solution: create a user message that contains a concise answer to each of these frequently answered questions.
Real World Examples
- Use the MsgBox function to display a message when there is any event: user closes an Excel workbook, user prints, a new sheet is added to the workbook, etc.
- Use the MsgBox function to display a message when a user needs to fulfill a condition before closing an Excel workbook
- Use the InputBox function to get information from the user
Example #2: Allow User to Execute another Procedure
In the VBA Editor, select Insert -> New Module
Write this code in the Module window (don’t paste!):
Sub UserReportQuery()
Dim UserInput As Long
Dim Answer As Integer
UserInput = vbYesNo
Answer = MsgBox(«Process the XYZ Report?», UserInput)
If Answer = vbYes Then ProcessReport
End Sub
Sub ProcessReport()
MsgBox («Thanks for processing the XYZ Report.»)
End Sub
Save and navigate back to the Developer tab of Excel and select the “Button” option. Click on a cell and assign the UserReportQuery macro to the button.
Now click the button. This message should display:
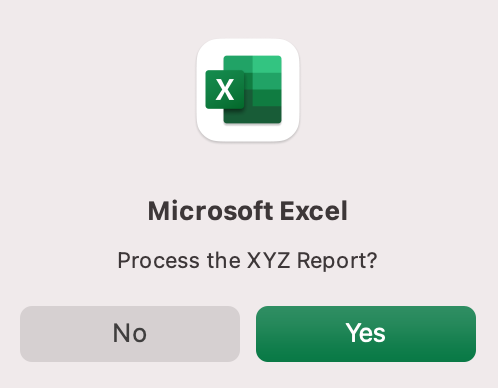
Click “yes” or hit Enter.
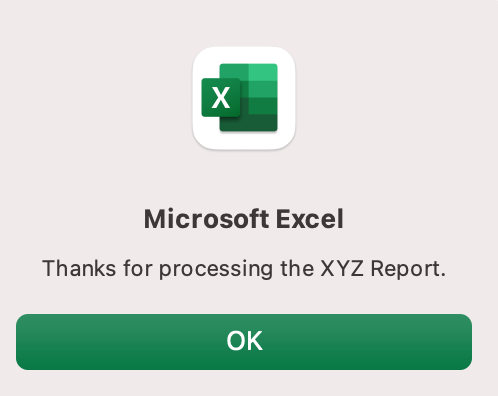
Once again, tada!
Please note that the secondary subroutine, ProcessReport, could be anything. I’ll demonstrate more possibilities in example #3. But first.
How is it doing that?
This example builds on the previous example and has quite a few new elements. Let’s go over the new stuff:
- Dim UserInput As Long: Dim is short for “dimension” and allows you to declare variable names. In this case, UserInput is the variable name and Long is the data type. In plain English, this line means “Here’s a variable called “UserInput”, and it’s a Long variable type.”
- Dim Answer As Integer: declares another variable called “Answer,” with a data type of Integer. Learn more about data types here.
- UserInput = vbYesNo: assigns a value to the variable. In this case, vbYesNo, which displays Yes and No buttons. There are many button types, learn more here.
- Answer = MsgBox(“Process the XYZ Report?”, UserInput): assigns the value of the variable Answer to be a MsgBox function and the UserInput variable. Yes, a variable within a variable.
- If Answer = vbYes Then ProcessReport: this is an “If statement,” a conditional statement, which allows us to say if x is true, then do y. In this case, if the user has selected “Yes,” then execute the ProcessReport subroutine.
When could I use this?
This could be used in many, many ways. The value and versatility of this functionality is more so defined by what the secondary subroutine does.
For example, maybe you have a file that is used to generate 3 different weekly reports. These reports are formatted in dramatically different ways.
- Problem: Each time one of these reports needs to be generated, a user opens the file and changes formatting and charts; so on and so forth. This file is being edited extensively at least 3 times per week, and it takes at least 30 minutes each time it’s edited.
- Solution: create 1 button per report type, which automatically reformats the necessary components of the reports and generates the necessary charts.
Real World Examples
- Create a dialog box for user to automatically populate certain information across multiple sheets
- Use the InputBox function to get information from the user, which is then populated across multiple sheets
Example #3: Add Numbers to a Range with a For-Next Loop
For loops are very useful if you need to perform repetitive tasks on a specific range of values — arrays or cell ranges. In plain English, a loop says “for each x, do y.”
In the VBA Editor, select Insert -> New Module
Write this code in the Module window (don’t paste!):
Sub LoopExample()
Dim X As Integer
For X = 1 To 100
Range(«A» & X).Value = X
Next X
End Sub
Save and navigate back to the Developer tab of Excel and select the Macros button. Run the LoopExample macro.
This should happen:
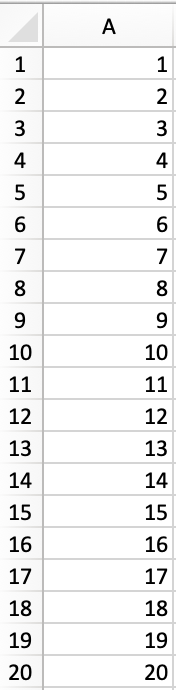
Etc, until the 100th row.
How is it doing that?
- Dim X As Integer: declares the variable X as a data type of Integer.
- For X = 1 To 100: this is the start of the For loop. Simply put, it tells the loop to keep repeating until X = 100. X is the counter. The loop will keep executing until X = 100, execute one last time, and then stop.
- Range(«A» & X).Value = X: this declares the range of the loop and what to put in that range. Since X = 1 initially, the first cell will be A1, at which point the loop will put X into that cell.
- Next X: this tells the loop to run again
When could I use this?
The For-Next loop is one of the most powerful functionalities of VBA; there are numerous potential use cases. This is a more complex example that would require multiple layers of logic, but it communicates the world of possibilities in For-Next loops.
Maybe you have a list of all products sold at your bakery in Column A, the type of product in Column B (cakes, donuts, or muffins), the cost of ingredients in Column C, and the market average cost of each product type in another sheet.
You need to figure out what should be the retail price of each product. You’re thinking it should be the cost of ingredients plus 20%, but also 1.2% under market average if possible. A For-Next loop would allow you to do this type of calculation.
Real World Examples
- Use a loop with a nested if statement to add specific values to a separate array only if they meet certain conditions
- Perform mathematical calculations on each value in a range, e.g. calculate additional charges and add them to the value
- Loop through each character in a string and extract all numbers
- Randomly select a number of values from an array
Conclusion
Now that we’ve talked about pizza and muffins and oh-yeah, how to write VBA code in Excel spreadsheets, let’s do a learning check. See if you can answer these questions.
- What is VBA?
- How do I get set up to start using VBA in Excel?
- Why and when would you use VBA?
- What are some problems I could solve with VBA?
If you have a fair idea of how to you could answer these questions, then this was successful.
Whether you’re an occasional user or a power user, I hope this tutorial provided useful information about what can be accomplished with just a bit of code in your Excel spreadsheets.
Источник
Перейти к содержанию
На чтение 3 мин Опубликовано 27.10.2015
Это краткое пошаговое руководство предназначено для начинающих пользователей и рассказывает о том, как вставлять код VBA (Visual Basic for Applications) в книгу Excel, и как запускать вставленный макрос для выполнения различных задач на этом листе.
Большинство пользователей не являются гуру Microsoft Office. Они могут не знать всех тонкостей работы той или иной функции, и не смогут ответить на вопрос, как отличается скорость выполнения макроса VBA в Excel 2010 и 2013. Многие просто используют Excel, как инструмент для обработки данных.
Предположим, нужно изменить данные на листе Excel определённым образом. Мы немало погуглили и нашли макрос VBA, который решает эту задачу. Однако, наше знание VBA оставляет желать лучшего. Вот тут-то и придёт на помощь пошаговая инструкция, с помощью которой мы сможем использовать найденный код.
- Вставляем код VBA в книгу Excel
- Запускаем макрос VBA в Excel
Вставляем код VBA в книгу Excel
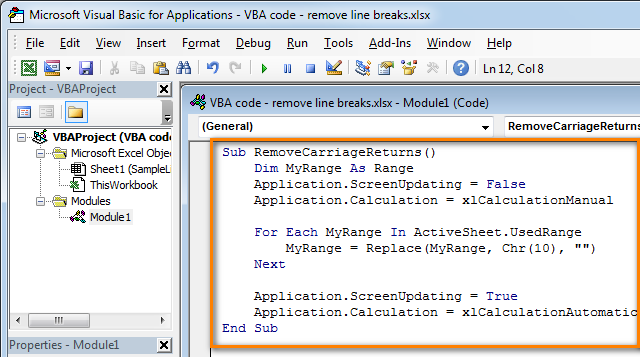
В этом примере мы будем использовать VBA макрос, который удаляет переносы строк из ячеек текущего листа Excel.
-
- Открываем рабочую книгу в Excel.
- Нажатием Alt+F11 вызываем окно редактора Visual Basic

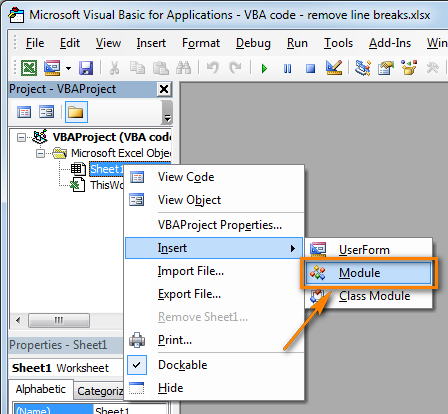
- На панели Project-VBAProject кликаем правой кнопкой мыши по имени рабочей книги (в левой верхней части окна редактора) и в контекстном меню выбираем Insert > Module.
- Копируем код VBA (с веб-страницы или из другого источника) и вставляем его в правую область редактора VBA (окно Module1).Подсказка: Как увеличить скорость выполнения макроса?
В самом начале кода Вашего макроса VBA должны содержаться строки:
Application.ScreenUpdating = False
Application.Calculation = xlCalculationManualЕсли таких строк нет, то обязательно добавьте следующие строки в свой макрос, чтобы он работал быстрее (см. рисунок выше):
- В самое начало кода после всех строк, начинающихся с Dim (если строк, начинающихся с Dim нет, то вставляем сразу после строки Sub):
Application.ScreenUpdating = False
Application.Calculation = xlCalculationManual - В самый конец кода, перед End Sub:
Application.ScreenUpdating = True
Application.Calculation = xlCalculationAutomatic
Эти строки, как можно понять из их содержания, отключают обновление экрана и пересчёт формул рабочей книги перед выполнением макроса. После выполнения кода эти параметры снова включаются. Данный приём приводит к ускорению выполнения макроса от 10% до 500% (да, макрос может работать в 5 раз быстрее, если манипуляции над ячейками происходят без лишних остановок).
- В самое начало кода после всех строк, начинающихся с Dim (если строк, начинающихся с Dim нет, то вставляем сразу после строки Sub):
- Сохраняем рабочую книгу, как книгу Excel с поддержкой макросов. Для этого нажмите Ctrl+S и в окне с предупреждением Следующие компоненты невозможно сохранить в книге без поддержки макросов (The following features cannot be saved in macro-free workbook) нажмите Нет (No).Откроется диалоговое окно Сохранение документа (Save as). В выпадающем списке Тип файла (Save as type) выбираем Книга Excel с поддержкой макросов (Excel macro-enabled workbook) и нажимаем кнопку Сохранить (Save).

 Подсказка: Как увеличить скорость выполнения макроса?
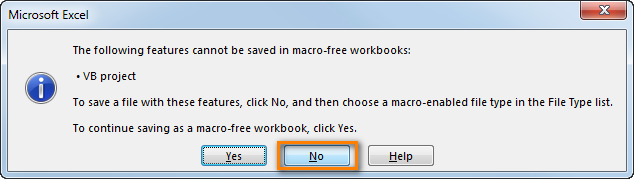 Откроется диалоговое окно Сохранение документа (Save as). В выпадающем списке Тип файла (Save as type) выбираем Книга Excel с поддержкой макросов (Excel macro-enabled workbook) и нажимаем кнопку Сохранить (Save).
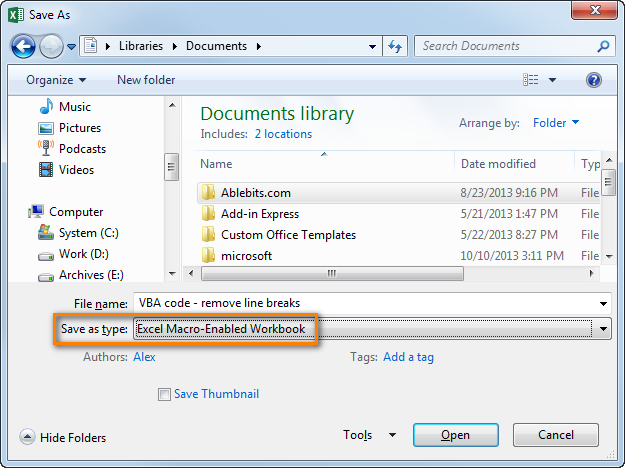
- Нажимаем Alt+Q, чтобы закрыть окно редактора VBA и вернуться к книге Excel.
Запускаем макрос VBA в Excel
Чтобы запустить только что добавленный макрос, нажмите Alt+F8. Откроется диалоговое окно Макрос (Macro). В списке Имя макроса (Macro name) выберите нужный макрос и нажмите кнопку Выполнить (Run).

Оцените качество статьи. Нам важно ваше мнение:
Вставка диапазона со сдвигом ячеек вправо или вниз методом Insert объекта Range. Вставка и перемещение строк и столбцов из кода VBA Excel. Примеры.
Range.Insert – это метод, который вставляет диапазон пустых ячеек (в том числе одну ячейку) на рабочий лист Excel в указанное место, сдвигая существующие в этом месте ячейки вправо или вниз. Если в буфере обмена содержится объект Range, то вставлен будет он со своими значениями и форматами.
Синтаксис
|
Expression.Insert(Shift, CopyOrigin) |
Expression – выражение (переменная), возвращающее объект Range.
Параметры
| Параметр | Описание | Значения |
|---|---|---|
| Shift | Необязательный параметр. Определяет направление сдвига ячеек. Если параметр Shift опущен, направление выбирается в зависимости от формы* диапазона. | xlShiftDown (-4121) – ячейки сдвигаются вниз; xlShiftToRight (-4161) – ячейки сдвигаются вправо. |
| CopyOrigin | Необязательный параметр. Определяет: из каких ячеек копировать формат. По умолчанию формат копируется из ячеек сверху или слева. | xlFormatFromLeftOrAbove (0) – формат копируется из ячеек сверху или слева; xlFormatFromRightOrBelow (1) – формат копируется из ячеек снизу или справа. |
* Если диапазон горизонтальный или квадратный (количество строк меньше или равно количеству столбцов), ячейки сдвигаются вниз. Если диапазон вертикальный (количество строк больше количества столбцов), ячейки сдвигаются вправо.
Примеры
Простая вставка диапазона
Вставка диапазона ячеек в диапазон «F5:K9» со сдвигом исходных ячеек вправо:
|
Range(«F5:K9»).Insert Shift:=xlShiftToRight |
Если бы параметр Shift не был указан, сдвиг ячеек, по умолчанию, произошел бы вниз, так как диапазон горизонтальный.
Вставка вырезанного диапазона
Вставка диапазона, вырезанного в буфер обмена методом Range.Cut, из буфера обмена со сдвигом ячеек по умолчанию:
|
Range(«A1:B6»).Cut Range(«D2»).Insert |
Обратите внимание, что при использовании метода Range.Cut, точка вставки (в примере: Range("D2")) не может находится внутри вырезанного диапазона, а также в строке или столбце левой верхней ячейки вырезанного диапазона вне вырезанного диапазона (в примере: строка 1 и столбец «A»).
Вставка скопированного диапазона
Вставка диапазона, скопированного в буфер обмена методом Range.Copy, из буфера обмена со сдвигом ячеек по умолчанию:
|
Range(«B2:D10»).Copy Range(«F2»).Insert |
Обратите внимание, что при использовании метода Range.Copy, точка вставки (в примере: Range("F2")) не может находится внутри скопированного диапазона, но в строке или столбце левой верхней ячейки скопированного диапазона вне скопированного диапазона находится может.
Вставка и перемещение строк
Вставка одной строки на место пятой строки со сдвигом исходной строки вниз:
Вставка четырех строк на место пятой-восьмой строк со сдвигом исходных строк вниз:
Вставка строк с использованием переменных, указывающих над какой строкой осуществить вставку и количество вставляемых строк:
|
1 2 3 4 5 6 7 8 9 10 11 12 13 14 15 16 17 18 19 20 21 22 |
Sub Primer1() Dim n As Long, k As Long, s As String ‘Номер строки, над которой необходимо вставить строки n = 8 ‘Количесто вставляемых строк k = 4 ‘Указываем адрес диапазона строк s = n & «:» & (n + k — 1) ‘Вставляем строки Rows(s).Insert End Sub ‘или то же самое с помощью цикла Sub Primer2() Dim n As Long, k As Long, i As Long n = 8 k = 4 For i = 1 To k Rows(n).Insert Next End Sub |
Перемещение второй строки на место шестой строки:
|
Rows(2).Cut Rows(6).Insert |
Вторая строка окажется на месте пятой строки, так как третья строка заместит вырезанную вторую строку, четвертая встанет на место третьей и т.д.
Перемещение шестой строки на место второй строки:
|
Rows(6).Cut Rows(2).Insert |
В этом случае шестая строка окажется на месте второй строки.
Вставка и перемещение столбцов
Вставка одного столбца на место четвертого столбца со сдвигом исходного столбца вправо:
Вставка трех столбцов на место четвертого-шестого столбцов со сдвигом исходных столбцов вправо:
Перемещение третьего столбца на место седьмого столбца:
|
Columns(3).Cut Columns(7).Insert |
Третий столбец окажется на месте шестого столбца, так как четвертый столбец заместит вырезанный третий столбец, пятый встанет на место четвертого и т.д.
Перемещение седьмого столбца на место третьего столбца:
|
Columns(7).Cut Columns(3).Insert |
В этом случае седьмой столбец окажется на месте третьего столбца.
Skip to content
![]()
If you often work with Microsoft Excel you might come to the point when standard functions won’t solve your problems any longer. In such case, you might have to start working with VBA macros. Of course, you can record steps in VBA, but usually you start from the opposite direction: You google a solution for your problem and find some VBA code snippets. Also, many of my articles contain short VBA codes. But how to use them? This article summarizes how to insert a new VBA module and paste some code in Excel.
At first, you have to insert a new VBA module.
Start, as usual, in Excel.
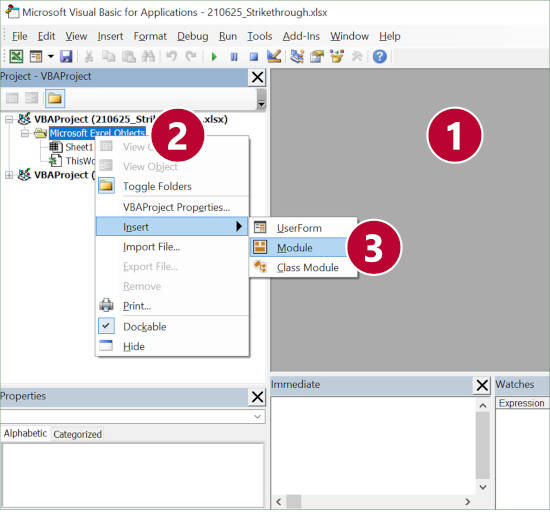
- Open the VBA editor. The fastest way to do this would be to press Alt + F11 on the keyboard.
Alternatively, go to the Developer ribbon (if you don’t see the developer ribbon, you must activate it first) and click on Editor. - Right-click on the Excel file VBA name (or any other item below, for example the “Microsoft Excel Objects” folder icon as in the screenshot).
- Go to “Insert” and click on “Module”.
Next: Paste your code and run it
After you have inserted a new VBA module, you can paste and run your macro:
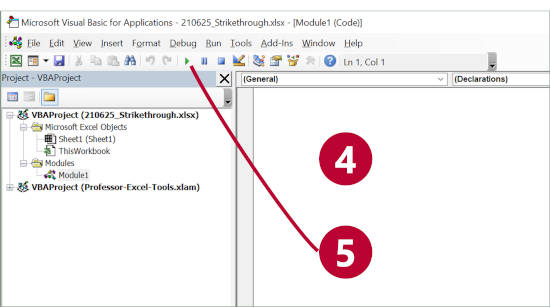
- Now it should look similar to number 4 and you see the white code area in which you can paste the VBA source codes from below.
- Make sure that your cursor is located within your pasted code. Then, click on the green Start button to run the macro. Alternatively, press F5 on the keyboard.
More help on VBA macros
You need more help with VBA macros? Please refer to this article. It provides an overview of the first steps.
Image by Meine Reise geht hier leider zu Ende. Märchen beginnen mit from Pixabay

Henrik Schiffner is a freelance business consultant and software developer. He lives and works in Hamburg, Germany. Besides being an Excel enthusiast he loves photography and sports.
We use cookies on our website to give you the most relevant experience by remembering your preferences and repeat visits. By clicking “Accept”, you consent to the use of ALL the cookies.
.