
Create and Insert Calendar in Excel
Inserting a calendar is a useful feature provided by Excel. It will become more useful when working on a shared worksheet where you will often have to enter dates. It will help you reduce your time doing manual entries, remember the format, etc.
Inserting a calendar in Excel will help you to resolve these problems. First, you need to insert a dropdown calendar and select the date from them.
Table of contents
- Create and Insert Calendar in Excel
- Steps to Insert & Create Calendar in Excel
- #1 – Inserting Calendar based on Templates available in Excel
- #2 – Inserting Seasonal Photo Calendar in Excel
- #3 – Using Date Picker Control
- Below are the steps to enter Date Picker control:
- Example of Date and Time Picker
- How to Install Third-Party Add-ins for Excel Calendar?
- Ablebits Date Picker Tools Additional Options
- Things to Remember
- Recommended Articles
- Steps to Insert & Create Calendar in Excel

You are free to use this image on your website, templates, etc, Please provide us with an attribution linkArticle Link to be Hyperlinked
For eg:
Source: Insert Calendar in Excel (wallstreetmojo.com)
Steps to Insert & Create Calendar in Excel
Following are the ways to insert and create a calendar in Excel:
#1 – Inserting Calendar based on Templates available in Excel
There are several Excel Calendar templatesCalendar Template in Excel offers a pre-designed structure of a calendar that can be customized according to one’s needs. Excel calendar can be used for school curriculums, desk calendars etc.read more available in Excel. You can choose any of them according to the requirement by following the below steps.
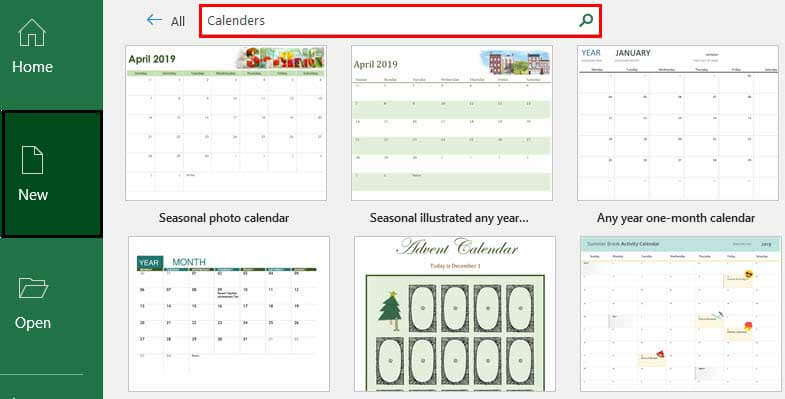
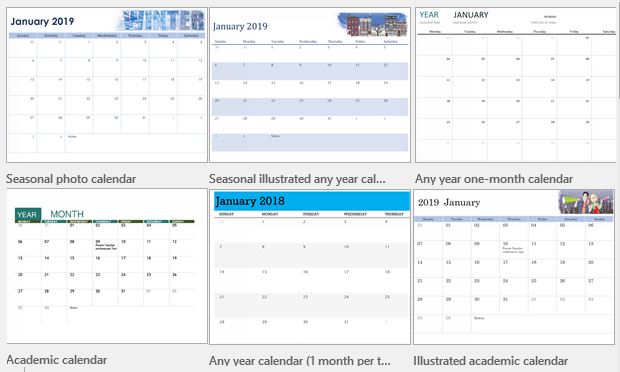
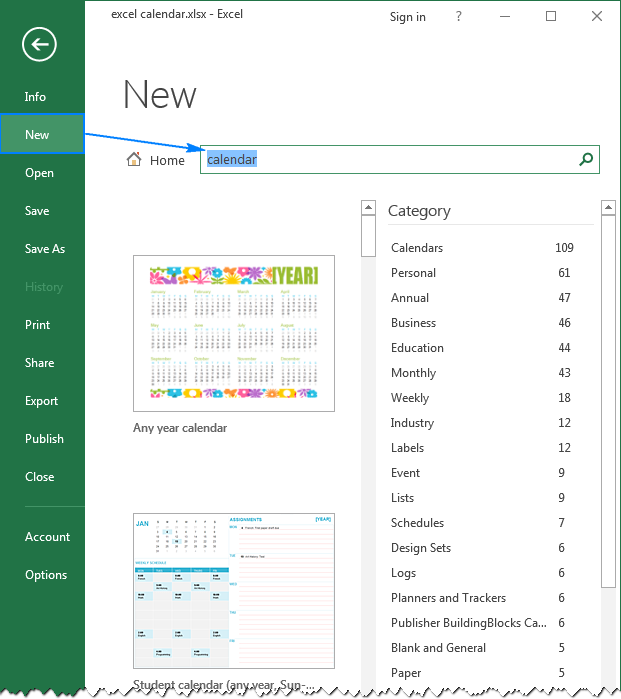
Click on “Files” and select “New Search” for the calendar in the search box. It will show you several Excel calendar templates by categories, “Seasonal photo calendar,” “Academic Calendar,” “Any Year Calendar,” etc. In addition, you may see the screenshot below to learn how to insert free Excel calendar templates.
#2 – Inserting Seasonal Photo Calendar in Excel
Click on the “File” and select “New Search” and “Seasonal photo calendar” from the search box.
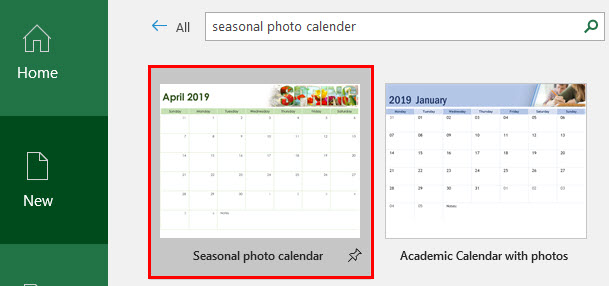
Select the calendar and click on “Create.”

It will look like this.
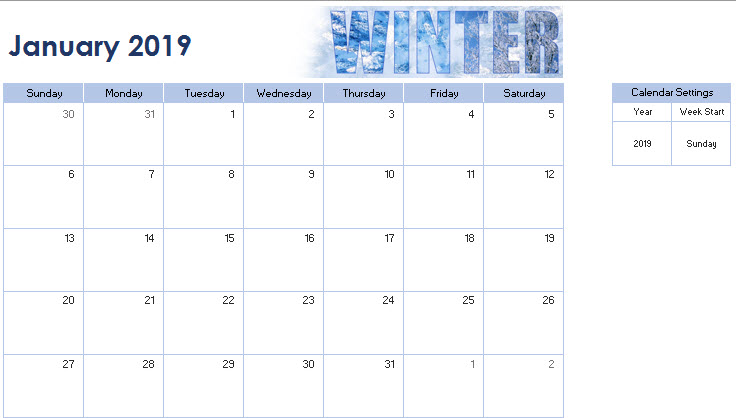
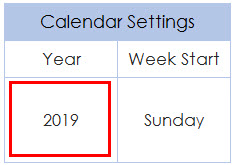
Now, we must insert a year below the “Year” cell. Then, it will automatically update the calendar for that year.
All the 12 sheets with the month names will be updated according to the year entered in the January sheet. In addition, the “Week Start” date can be selected as “Sunday” or “Monday” (This will update the first cell of the calendar as “Sunday” or “Monday”).
Note: Enter formula =YEAR(TODAY()) in a cell below the “Year” cell. It will show you the current year’s calendar whenever you open it.
We can follow the above steps, search the calendar from the Excel online template, and start working on it according to the requirements.
Want to know more about these functions –
- Year Function in ExcelThe year function in excel is a date function to calculate the year from a given date. This function takes a serial number as an argument and returns a four-digit numeric value representing the year of the given date, formula = year (serial number)read more
- Today Function in excelToday function is a date and time function that is used to find out the current system date and time in excel. This function does not take any arguments and auto-updates anytime the worksheet is reopened. This function just reflects the current system date, not the time.read more
#3 – Using Date Picker Control
The “Date Picker” control is “ActiveX Controls,” found under the Excel Developer TabEnabling the developer tab in excel can help the user perform various functions for VBA, Macros and Add-ins like importing and exporting XML, designing forms, etc. This tab is disabled by default on excel; thus, the user needs to enable it first from the options menu.read more. However, it is normally hidden and cannot be seen directly under “ActiveX Controls.” Therefore, you need to explore the “ActiveX Controls.”
Below are the steps to enter Date Picker control:
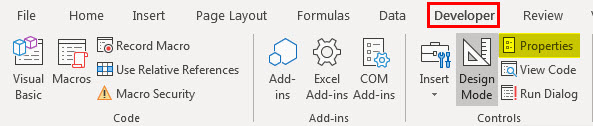
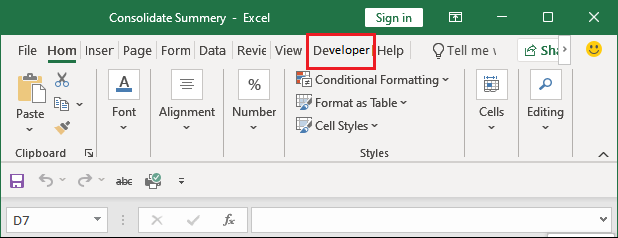
First, check if the “Developer” tab is in the “Menu” bar. If you cannot see the “Developer” tab, then follow the below-given steps.
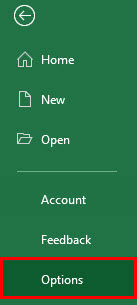
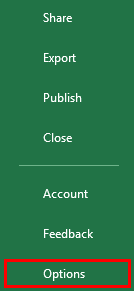
- First, we must go to the “File” menu and click “Options.”

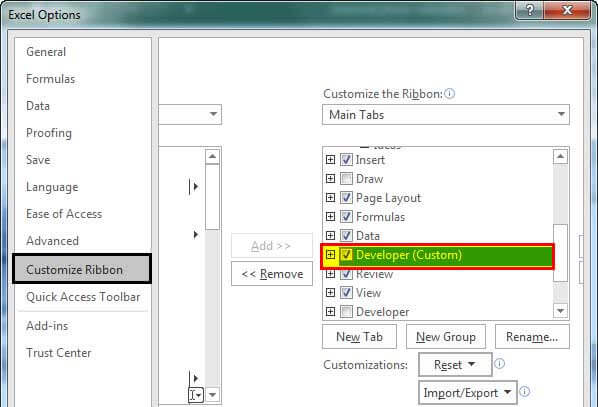
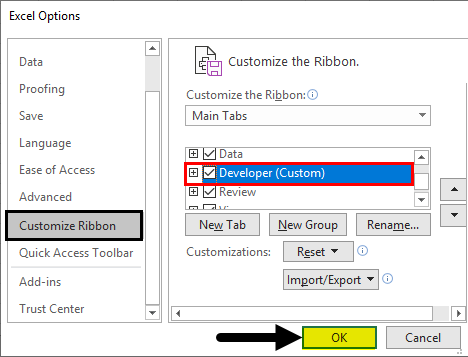
- Then, select “Customize Ribbon” in Excel and check the “Developer (Custom)” option.

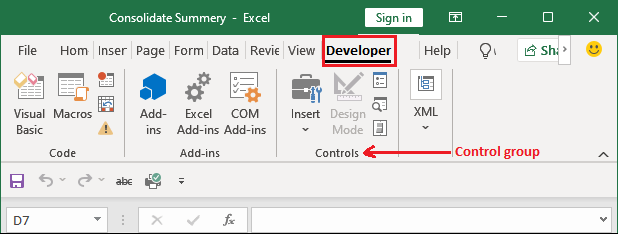
We may see the “Developer” tab in the “Menu” bar.
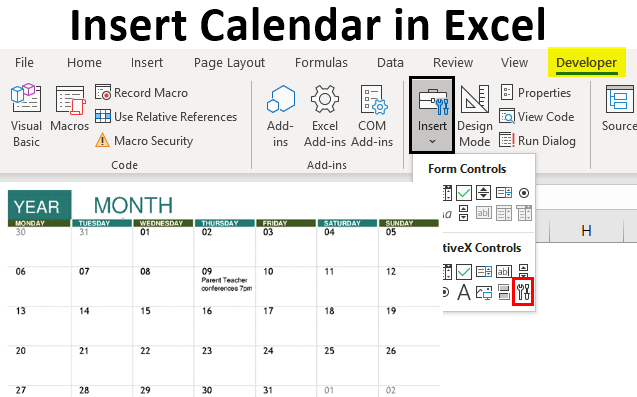
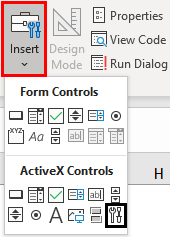
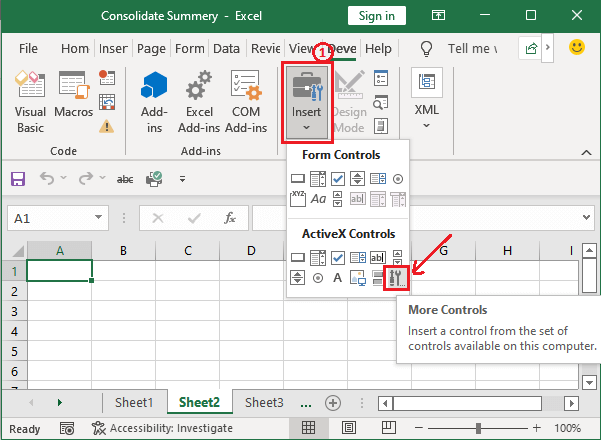
- Now, click on “Insert” under the “Developer” tab (It will look like the setting button).

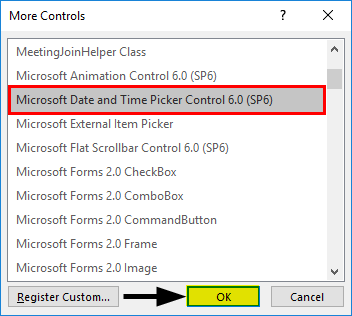
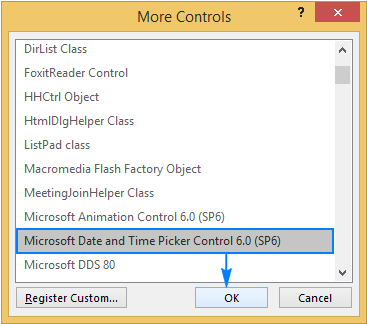
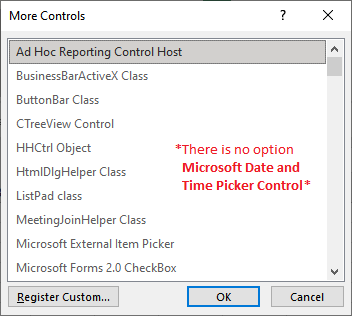
- A dialog box (More Controls) will open as below. Search for “Microsoft Date and Time Picker Control 6.0 (SP6)” and select it. Click “OK.”

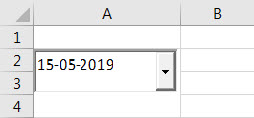
- Select “Microsoft Date and Time Picker Control 6.0 (SP6).” It will enter a “Drop-down” calendar.

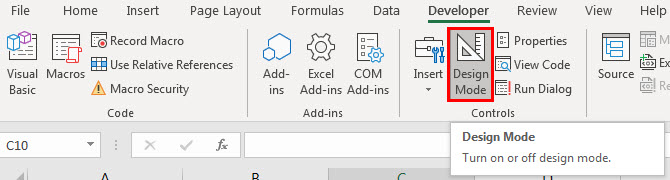
- We can select the desired date, whatever we would like to choose. But, first, we must turn off the “Design Mode.”


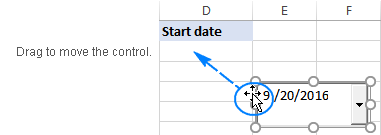
We can move the calendar to the desired cell. But, first, we must right-click on the date picker and move it to the selected cell.
Example of Date and Time Picker
Below is an example of using a date and time picker.
Suppose we need to get the difference between two dates. We must insert one date picker in cell A2 and another in cell C2.

Excel cannot recognize the value of a date picker control. Link the date picker controls to certain cells in the following way to fix this:
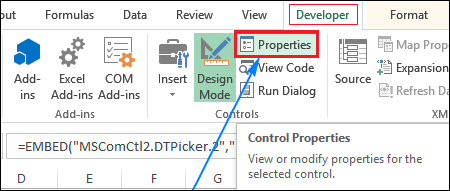
We must first select the date picker. Then, under the “Developer” tab, click on “Properties.”
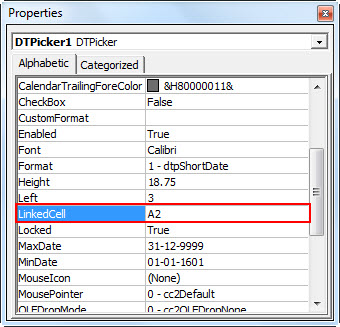
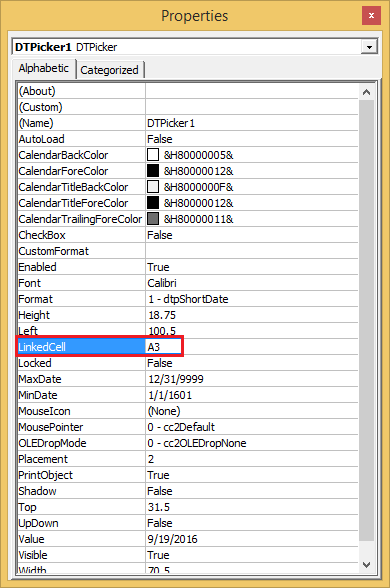
In “Properties,” at “LinkedCell,” type A2. It will link the date picker control to the A2 cell.
Similarly, link the second date picker to cell C2.
Now, we must insert the formula =C2-A2 in Cell E2. Then, finally, select the date from both date pickers.

We have selected 01/01/2019 in “Date picker 1” and 23/02/2019 in “Date picker 2.” Now, we must put the formula =C2-A2 in cell E2.
It will calculate the difference between the selected dates.

Calculate the days between both dates. The result is 53.
We do not need to worry about the format and do not care about manual date writing. We need to click on the dropdown list in excelA drop-down list in excel is a pre-defined list of inputs that allows users to select an option.read more. It will show the calendar. We need to select a date from them.
How to Install Third-Party Add-ins for Excel Calendar?
We must go to Google, search for the given third-party Add-ins, then download and install them.
After installation, we can see the third-party Add-ins in the Excel “Menu” bar.
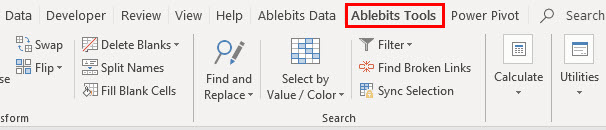
The above image is a screenshot of “Ablebits Tools.”
Under “Ablebits Tools,” click on “Date Picker.” It will activate “Date Picker.”

Now, enter any date in desired cells. A date picker pop-up may show at the top right corner of that cell.
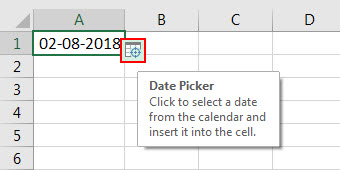
Click on the pop-up, select the desired date, and start working.

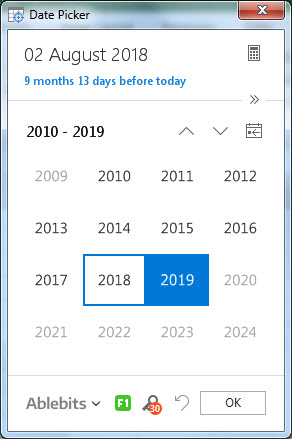
Ablebits Date Picker Tools Additional Options
Use ^ to go to the previous month and another button to go to next month. For example, click “August 2018” to select another month or year instead of moving months.

Things to Remember
- Microsoft “DatePicker” and “TimePicker” are only available on 32-bit Windows.
- Suppose we are using a 64-bit version. We cannot use the “DatePicker” and “TimePicker.”
- For a 64-bit version, we must use third-party external Add-ins Tools for your ExcelAn add-in is an extension that adds more features and options to the existing Microsoft Excel.read more.
- Some third-party Add-ins available are Excel Date PickerExcel Date Picker is the drop-down calendar that facilitates the user to put the dates in the excel worksheet promptly. It is inserted with the help of ActiveX Control and is not available for the 64-bit version of MS Excel.read more, “Ablebits Date Picker,” “Popup Calendar Add-ins,” etc.
- Installing third-party Add-ins is very easy and user-friendly. Just download and install it, and we are all set to use the tool.
Recommended Articles
This article is a guide to Excel Insert Calendar. We discuss inserting and creating a calendar in Excel using various date picker controllers and third-party Add-ins. You can learn more about Excel functions from the following articles: –
- VBA Today Function
- Excel Checkbox
- Radio Button in Excel
- Excel Checklist
Excel Insert Calendar (Table of Contents)
- Create and Insert Calendar in Excel
- How to Insert Calendar in Excel?
Create and Insert Calendar in Excel
Calendar is an inbuilt function in Excel, it has a variety of calendars, and we can choose any format as per our requirement. Calendar in excel is an advanced version or format of the calendar, which is already there with a window also; it can also be created by VBA coding.
How to Insert Calendar in Excel?
Insert Calendar in Excel is very simple and easy. Let’s understand how to Insert a Calendar in Excel with some examples.
Example #1 – Excel Insert Calendar
This is the best and easy way to access a calendar in excel. With this, we can insert a calendar with many different designs that are already inbuilt in excel or else we can search for a new design. For this:
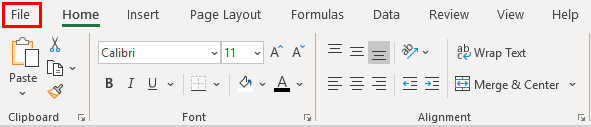
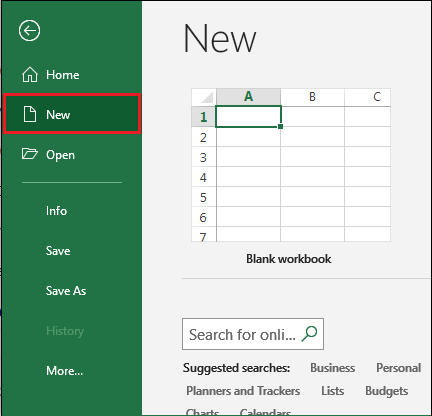
- Go to the File menu as shown below.
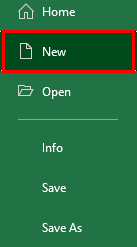
- After that, it will get us to the File menu screen; as shown below from there, select the “New” option from the list.
- As we can see in the above screenshot, under the option “New”, we can directly search the calendar in the search bar and then click on the “Search” icon as shown below or else directly click on the Calendar option, which is located just below the search bar. Let’s just click on the Calendar option from the below screenshot.

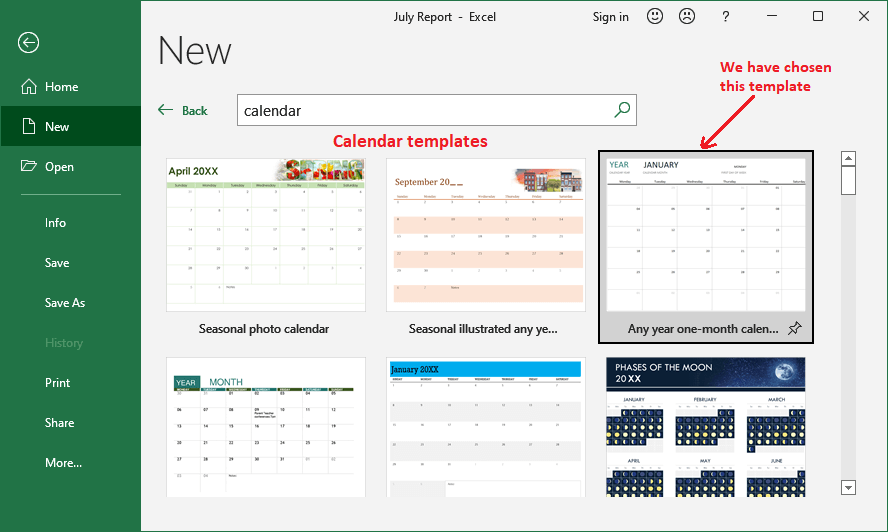
- Once you click on it, we will get all the inbuilt Calendar templates, as shown below. We can select any of the templates as per our needs.
- All the inbuilt templates of Calendar in excel can be used for many different purposes. For example, let’s select “Academic calendar” as shown below.
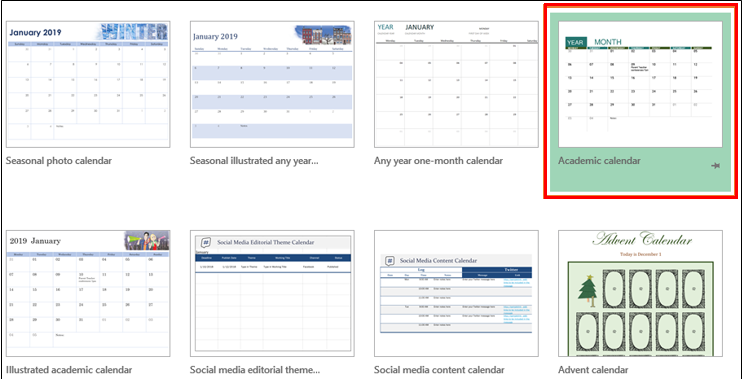
- After selecting the required template, we will get a preview of the selected template, as shown above. From there, we can navigate to the next or previous template, or we can select the same selected template by clicking on the “Create” icon as shown below.
![]()
Note: For using inbuilt Calendar templates, we must connect our system with the Internet.
- After clicking on Create icon, the selected template of Calendar will get downloaded, and it will automatically get opened in a new workbook with the name of the selected calendar template name as shown below.
- We can filter the calendar month name from the drop-down menu available at the right side of the name of the month as highlighted in the above screenshot.
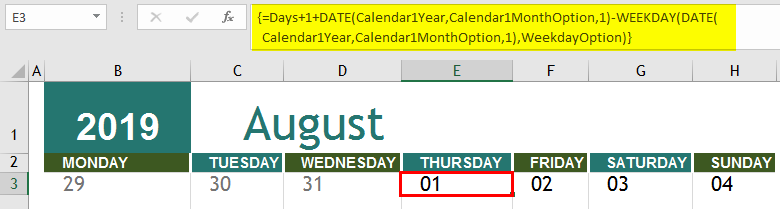
- If we put the cursor on any of the date cells, we can see the complete formula which is applied to it. Although we can change or modify the formula, but it is not recommended to do so.
Example #2 – Excel Insert Calendar
There is one more option from where we can insert calendar in excel, for that:
- Go to the File menu to select “Options”, as shown in the below screenshot.
- In Customize Ribbon, checkmark the “Developer (Custom)” option to enable the tab in the menu bar and click on Ok, as shown below.
- Now go to the Developer menu, and under the Controls section, select Insert as shown below.

Note: This technique can be used in both 32Bit and 64Bit windows to insert a calendar.
- Once you click on it, we will get a drop-down menu of it, from that select “More Control” option as shown below.
- We will then get the More Controls window; from there, with the help of scroll, select Microsoft Date and Time Picker Control 6.0 (SP6) as shown below and click on OK.
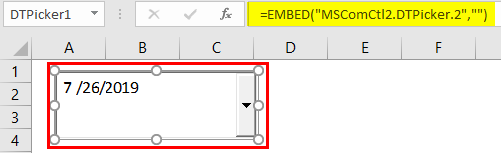
- After clicking on it, it will enable the pointer to draw a box as per our need, as shown below. And it will frame the current date in that box with a drop-down at a corner.
- Now right click on the box and select “Properties” from “DTPicker Object”, as shown below.
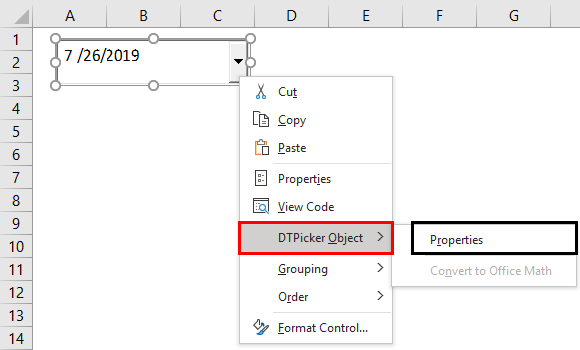
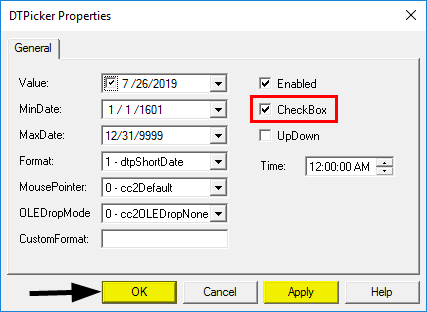
- This will take us to DTPicker Properties. From there, tick the CheckBox option and click on Apply and OK, as shown below.
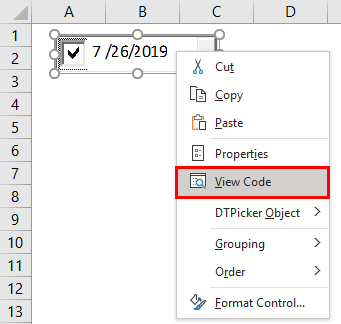
- Now right click on the date box and select View Code to go to VBA Mode.
- This will take us to a new VBA Code window, as shown below. In the blank sheet shown above, we will write a code that will frame a calendar in the button we have created. Below, we have written code and compiled it.
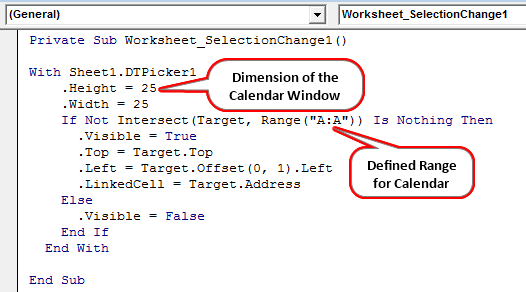
- This complete code will enable the calendar in the selected button which we have created above. Now save the VBA code and close the window to see where it is implemented or not. For that, go to excel, where we have created the box for date and click on the drop-down as shown below.
Pros
- We can change the position of the created calendar box anywhere in the current excel sheet.
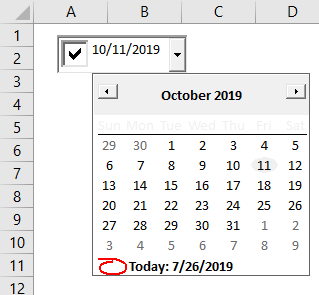
- The created calendar looks exactly like a calendar in the Window tab.
- We can add any text, memo or notes in a calendar as we do in our mobile phone/outlook calendar.
- No need to change the calendar format manually. Just change the month or year, and the whole setting will get updated.
Cons
- Calendar inserted by VBA can only be done if you are using windows 32bit.
Things to Remember About Insert Calendar in Excel
- Always exit from Design mode if you are using a calendar by VBA coding.
- Use window 32bit when you want to add a calendar by VBA coding.
- Save the file in Excel Marco-Enabled Workbook to allow macro function in work.
- If you want to insert a calendar by using the inbuilt templates available in excel, you must have an internet connection to download and import the setting and template from the Microsoft server.
Recommended Articles
This is a guide to Insert Calendar in Excel. Here we discuss How to Insert Calendar in Excel along with practical examples and downloadable excel template. You can also go through our other suggested articles –
- Excel Insert Button
- Insert Comment in Excel
- Excel Calendar Template
- Excel Insert Page Break
A calendar in Microsoft Excel comes in handy if you’ve a busy schedule. Although an Excel calendar is an outstanding tool that can assist you to stay prepared when it comes to vital events, appointments, activities, meetings, etc. Therefore, today we are here to discuss how to create calendar in Excel or how to insert calendar in Excel effortlessly.
So, without any further ado, let’s get started…
To repair corrupt Excel file, we recommend this tool:
This software will prevent Excel workbook data such as BI data, financial reports & other analytical information from corruption and data loss. With this software you can rebuild corrupt Excel files and restore every single visual representation & dataset to its original, intact state in 3 easy steps:
- Download Excel File Repair Tool rated Excellent by Softpedia, Softonic & CNET.
- Select the corrupt Excel file (XLS, XLSX) & click Repair to initiate the repair process.
- Preview the repaired files and click Save File to save the files at desired location.
If you want to keep your data in a more organized way then a proper calendar system is very important for the right time management. Luckily Excel offers different ways to create calendars. Let’s know about each of them one by one in detail.
Method 1: Insert Calendar In Excel Using Date Picker Control
Well putting the drop-down calendar in Excel is quite easy to do but just because the time and date picker control are hidden so many users don’t know where it actually exists.
Here is the complete method to create a calendar in Excel perform this task step by step:
Note: Date Picker control of Microsoft works Microsoft’s very smoothly in the Excel 32-bit versions but not in Excel 64-bit version.
- Enable The Developer Tab on Excel ribbon.
Excel date picker control actually belongs to the ActiveX controls family, which comes under the Developer tab. Though this Excel Developer tab is kept hidden you can enable its visibility.
- On the Excel ribbon, you have to make a right-click, and after that choose the option Customize the Ribbon…. This will open the Excel options.
- From the opened window go to the right-hand side section. Now from customizing the ribbon section, you have to select the Main Tabs. In the appearing main tab list check the Developer box option and then click the OK button.

Also Read: How to Create a Flowchart in Excel? (Step-By-Step Guide)
- Insert The Calendar Control
Well, the Excel drop-down calendar is technically known as Microsoft Date and Time Picker Control.
To apply this in the Excel sheet, perform the following steps:
- Hit the Developer tab and then from the Controls group, you have to make a tap over arrow sign present within the Insert tab.
Now from the ActiveX Controls choose the “More Controls” button.

- From the opened dialog box of More Controlsselect the Microsoft Date and Time Picker Control 6.0 (SP6). After that click to the OK

- Hit the cell, in which you have to enter the calendar control.
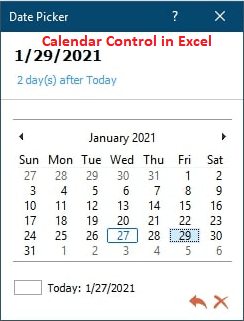
You will see that a drop-down calendar control starts appearing on your Excel sheet:

Once this date picker control is been inserted, you will see that the EMBED formula starts appearing within the formula bar.
This gives detail to your Excel application about what kind of control is embedded within the sheet. You can’t change edit or delete this control because this will show the error “Reference is not valid“.
Adding the ActiveX control such date picker automatically enables the design mode which will allow you to change the properties and appearance of any freshly added control. The most obvious modification that you need to make at this time is resizing the calendar control and then linking it back to any specific cell.
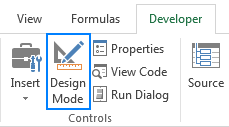
For activating the Excel drop-down calendar option, hit the Design tab, and then from the Controls group, disable the Design Mode:
- Now, make a tap over the drop-down arrow for showing up the calendar and then select the date as per your need.
- Click the dropdown arrow to show the calendar in Excel and choose your desired date.

Note:
If MS date picker control is now not available within the list of More Controls. This situation mainly arises due to the following reasons.
- While you are running the MS Office 64 bit version. As there is no official date picker control available in the Office 64-bit.
- Calendar control i.e mscomct2.ocx is now not present or it is not registered on your PC.
- Customize Calendar Control
After the addition of the calendar control on your Excel sheet, now you have to shift this calendar control on the desired location and then resize it to get an easy fit within a cell.
- For resizing this date picker control, you have to enable the Design Mode after that drag this control from the corner section:

Or else you after enabling the Design Mode on, from the calendar control group choose the Properties tab:

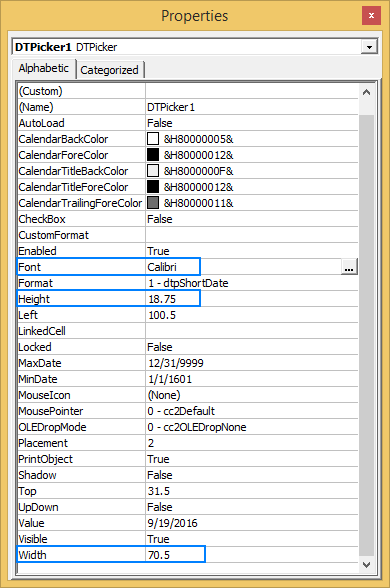
- From the opened Properties window, you have to set the desired width, height, font size and style:
- To shift the Excel date picker control, place your mouse pointer over that and when the cursor changes into a four-pointed arrow sign, just drag the object wherever you want to place it.
- Link Excel Calendar Control With The Cell
After successfully adding the calendar drop-down in excel, you need to link it with some specific cell. This step very compulsory to perform if you want to make use of any selected dates with the formulas.
Suppose you are writing the formula for counting up the order’s number between any specific dates. For stopping any other from entering wrong dates such as 2/30/2016 you have inserted a drop-down calendar within 2 cells.
The COUNTIF formula that you have applied for calculating a number of orders will return the value “0” even if the orders are present.

Well, the main reason can be that your Excel is unable to recognize the value present in the date picker control. This problem will persist until you link the control with some specific cell. Here is the step that you need to perform:
- Selecting the calendar control you have to enable the Design Mode.
- Go to the Developer tab and then from the control group tap to the
- In the opened “Properties” windows, assign cell reference in the LinkedCell property (here I have written A3):

If Excel shows the following error “Can’t set cell value to NULL…” then click the OK button to ignore this.
After selecting the date from the drop-down calendar, the date will immediately start appearing in the linked cell. Now excel won’t face any issue in understanding the dates and the formula referencing done in the linked cells will work smoothly.

If you don’t need to have extra dates then link the date picker control with the cells where they are present.
Also Read: 4 Ways To Create Drop-Down List In Excel
Method 2: Using Excel Calendar Template
In Excel, there are handy graphic options with the clipart, tables, drawing tools, charts, etc. Using these options one can easily create a monthly calender or weekly calendar with special occasion dates or photos.
So go with the Excel calendar template which is the fastest and easiest way to create calendar in Excel using worksheet data.
Here are the steps to create calendar from Excel spreadsheet data using the template.
- Click the File> New after that in the search box you have to type “calendar”.
- Excel will make search thousands of online templates and then shows you the selected calendar templates which are grouped into the following categories.
- Choose the calendar template as per your requirement, and then tap to the Create.

That’s all you need to do…!
Excel calendar template will be opened from the new Excel workbook and then print or customize as per your need. Usually, Excel weekly calendar templates are set with a year, whereas in some templates you can set a day for starting a week.
Note: for displaying always the current year in your excel calendar just assign a simple formula like this in the cell of the year: =YEAR(TODAY())

In this way, you can easily insert the drop-down calendar. Also, you can make a printable Excel calendar.
Method 3: Create Calendar In Excel Using VBA Code
In this method, you will get know-how using the Visual Basic for Applications(VBA) macro code you can create calendar in Excel.
- Open your Excel workbook.
- For excel 2003 users: Go to the Tools menu, and then hit the Macro tab. After that choose the Visual Basic Editor.
For Excel 2007 or later users: go to the Developer tab from the Excel ribbon and choose Visual Basic.
- From the Insert menu, choose the Module option.
- Now paste the VBA code which is given below into the opened sheet of the module.
- Go to the File menu and choose the Close and Return to Microsoft Excel.
- Now make a selection of the Sheet1
- From the Tools menu, go to the Macro tab. After that choose the Macros icon.
- Now you have to choose the CalendarMaker Now press the Run button to create Excel calendar.
Visual Basic Procedure To Create a Calendar In Excel:
You have to paste this code in the module sheet.
Sub CalendarMaker()
‘ Unprotect sheet if had previous calendar to prevent error.
ActiveSheet.Protect DrawingObjects:=False, Contents:=False, _
Scenarios:=False
‘ Prevent screen flashing while drawing calendar.
Application.ScreenUpdating = False
‘ Set up error trapping.
On Error GoTo MyErrorTrap
‘ Clear area a1:g14 including any previous calendar.
Range(“a1:g14”).Clear
‘ Use InputBox to get desired month and year and set variable
‘ MyInput.
MyInput = InputBox(“Type in Month and year for Calendar “)
‘ Allow user to end macro with Cancel in InputBox.
If MyInput = “” Then Exit Sub
‘ Get the date value of the beginning of inputted month.
StartDay = DateValue(MyInput)
‘ Check if valid date but not the first of the month
‘ — if so, reset StartDay to first day of month.
If Day(StartDay) <> 1 Then
StartDay = DateValue(Month(StartDay) & “/1/” & _
Year(StartDay))
End If
‘ Prepare cell for Month and Year as fully spelled out.
Range(“a1”).NumberFormat = “mmmm yyyy”
‘ Center the Month and Year label across a1:g1 with appropriate
‘ size, height and bolding.
With Range(“a1:g1”)
.HorizontalAlignment = xlCenterAcrossSelection
.VerticalAlignment = xlCenter
.Font.Size = 18
.Font.Bold = True
.RowHeight = 35
End With
‘ Prepare a2:g2 for day of week labels with centering, size,
‘ height and bolding.
With Range(“a2:g2”)
.ColumnWidth = 11
.VerticalAlignment = xlCenter
.HorizontalAlignment = xlCenter
.VerticalAlignment = xlCenter
.Orientation = xlHorizontal
.Font.Size = 12
.Font.Bold = True
.RowHeight = 20
End With
‘ Put days of week in a2:g2.
Range(“a2”) = “Sunday”
Range(“b2”) = “Monday”
Range(“c2”) = “Tuesday”
Range(“d2”) = “Wednesday”
Range(“e2”) = “Thursday”
Range(“f2”) = “Friday”
Range(“g2”) = “Saturday”
‘ Prepare a3:g7 for dates with left/top alignment, size, height
‘ and bolding.
With Range(“a3:g8”)
.HorizontalAlignment = xlRight
.VerticalAlignment = xlTop
.Font.Size = 18
.Font.Bold = True
.RowHeight = 21
End With
‘ Put inputted month and year fully spelling out into “a1”.
Range(“a1”).Value = Application.Text(MyInput, “mmmm yyyy”)
‘ Set variable and get which day of the week the month starts.
DayofWeek = WeekDay(StartDay)
‘ Set variables to identify the year and month as separate
‘ variables.
CurYear = Year(StartDay)
CurMonth = Month(StartDay)
‘ Set variable and calculate the first day of the next month.
FinalDay = DateSerial(CurYear, CurMonth + 1, 1)
‘ Place a “1” in cell position of the first day of the chosen
‘ month based on DayofWeek.
Select Case DayofWeek
Case 1
Range(“a3”).Value = 1
Case 2
Range(“b3”).Value = 1
Case 3
Range(“c3”).Value = 1
Case 4
Range(“d3”).Value = 1
Case 5
Range(“e3”).Value = 1
Case 6
Range(“f3”).Value = 1
Case 7
Range(“g3”).Value = 1
End Select
‘ Loop through range a3:g8 incrementing each cell after the “1”
‘ cell.
For Each cell In Range(“a3:g8”)
RowCell = cell.Row
ColCell = cell.Column
‘ Do if “1” is in first column.
If cell.Column = 1 And cell.Row = 3 Then
‘ Do if current cell is not in 1st column.
ElseIf cell.Column <> 1 Then
If cell.Offset(0, -1).Value >= 1 Then
cell.Value = cell.Offset(0, -1).Value + 1
‘ Stop when the last day of the month has been
‘ entered.
If cell.Value > (FinalDay – StartDay) Then
cell.Value = “”
‘ Exit loop when calendar has correct number of
‘ days shown.
Exit For
End If
End If
‘ Do only if current cell is not in Row 3 and is in Column 1.
ElseIf cell.Row > 3 And cell.Column = 1 Then
cell.Value = cell.Offset(-1, 6).Value + 1
‘ Stop when the last day of the month has been entered.
If cell.Value > (FinalDay – StartDay) Then
cell.Value = “”
‘ Exit loop when calendar has correct number of days
‘ shown.
Exit For
End If
End If
Next
‘ Create Entry cells, format them centered, wrap text, and border
‘ around days.
For x = 0 To 5
Range(“A4”).Offset(x * 2, 0).EntireRow.Insert
With Range(“A4:G4”).Offset(x * 2, 0)
.RowHeight = 65
.HorizontalAlignment = xlCenter
.VerticalAlignment = xlTop
.WrapText = True
.Font.Size = 10
.Font.Bold = False
‘ Unlock these cells to be able to enter text later after
‘ sheet is protected.
.Locked = False
End With
‘ Put border around the block of dates.
With Range(“A3”).Offset(x * 2, 0).Resize(2, _
7).Borders(xlLeft)
.Weight = xlThick
.ColorIndex = xlAutomatic
End With
With Range(“A3”).Offset(x * 2, 0).Resize(2, _
7).Borders(xlRight)
.Weight = xlThick
.ColorIndex = xlAutomatic
End With
Range(“A3”).Offset(x * 2, 0).Resize(2, 7).BorderAround _
Weight:=xlThick, ColorIndex:=xlAutomatic
Next
If Range(“A13”).Value = “” Then Range(“A13”).Offset(0, 0) _
.Resize(2, 8).EntireRow.Delete
‘ Turn off gridlines.
ActiveWindow.DisplayGridlines = False
‘ Protect sheet to prevent overwriting the dates.
ActiveSheet.Protect DrawingObjects:=True, Contents:=True, _
Scenarios:=True
‘ Resize window to show all of calendar (may have to be adjusted
‘ for video configuration).
ActiveWindow.WindowState = xlMaximized
ActiveWindow.ScrollRow = 1
‘ Allow screen to redraw with calendar showing.
Application.ScreenUpdating = True
‘ Prevent going to error trap unless error found by exiting Sub
‘ here.
Exit Sub
‘ Error causes msgbox to indicate the problem, provides new input box,
‘ and resumes at the line that caused the error.
MyErrorTrap:
MsgBox “You may not have entered your Month and Year correctly.” _
& Chr(13) & “Spell the Month correctly” _
& ” (or use 3 letter abbreviation)” _
& Chr(13) & “and 4 digits for the Year”
MyInput = InputBox(“Type in Month and year for Calendar”)
If MyInput = “” Then Exit Sub
Resume
End Sub
Note: You can customize the above code as per your requirement.
How Do I Make Excel Calendar Update Automatically?
Automatization is the chief strength of Microsoft Excel. However, if you need to create your calendar update automatically then use the formula mentioned below:
“= EOMONTH (TODAY() , – 1) +1”.
Well, the above formula employs “TODAY” feature to locate the present date & calculates the 1st day of the month with the “EOMONTH” feature.
Related FAQs:
Does Excel Have a Calendar Template?
Yes, of course, Microsoft Excel have a wide variety of calendar templates that can be used easily.
What Is the Formula to Create a Calendar in Excel?
=DATE(A2,A1,1) is the formula that can be used to create a calendar in MS Excel. All you need to do is to select the blank cell for showing the starting month’s date, then simply enter =DATE(A2,A1,1) in a formula bar >> press Enter key.
Can You Insert a Calendar into An Excel Cell?
YES, you can insert a calendar into an Excel cell. For this, you have to go to File menu >> select Close & Return to MS Excel. After this, select a tab ‘Sheet1’. On Tools menu, simply point to the Macro, & select Macros. choose CalendarMaker >> select the Run to create a calendar.
Also Read: How To Create Backup Of Active Workbooks In Excel?
Wrap Up:
MS Excel offers its user a broad range of tools which will increase their productivity by using the projects, dates, and tracking events. In order to view the data of your Excel worksheet in calendar format, Microsoft will change your data and then import it into the Outlook. This will automatically change it into a calendar format.
Hopefully, you must have found an ample amount of information in this post. Thanks for reading this post….!


Priyanka is an entrepreneur & content marketing expert. She writes tech blogs and has expertise in MS Office, Excel, and other tech subjects. Her distinctive art of presenting tech information in the easy-to-understand language is very impressive. When not writing, she loves unplanned travels.
A calendar is a visual element to pick a date from it. In Microsoft Excel, users can add to their sheet to represent the specific month. It provides an internal function to add a basic calendar layout and customize it.
Excel offers a variety of calendar templates. You can use any of them from it. It is a special feature of Excel that allows the users to add the calendar in an Excel sheet. Additionally, Excel enables various other methods to insert a calendar in an Excel file.
We will define all the possible ways to insert the calendar in an Excel sheet. Follow this chapter till the end to learn all the methods so that you can choose any one of them.
Why add a calendar to spreadsheet?
The calendar is a basic need in Excel. If the users want, they can include it in their sheets. It is beneficial for the users themselves when they are trying to plan the upcoming activities.
Sometimes, a user often needs to enter the date. If you manually enter the date one by one in the Excel cells, it takes too much time. Manual entries for dates require to be entered in a proper format. By adding the calendar to the Excel sheet will resolve this issue, and the user does not need to worry about the format.
After inserting the calendar, you just need to click the dropdown calendar and select a date from it. By using the calendar inside the spreadsheet, the user does not need to about the date format.
Benefits of inserting calendar in Excel
Users get some benefits when you insert the calendar to an Excel spreadsheet, such as —
- The Excel users have to take care of the format when inserting date in an Excel sheet manually. Inserting the calendar into the sheet helps; the users need not to worry about the date format.
- The Excel users have to just select a date from the calendar to insert it into the Excel sheet.
- It also saves users time to insert several dates manually, one by one.
How to insert calendar to spreadsheet?
There are several methods to insert the calendar into an Excel sheet.
- Insert a calendar using online template
- Insert a calendar using Date Picker control
- Download the third-party tool
- Register Calendar control in Excel
Insert a calendar using online template
Excel offers various calendar templates that you can use in an Excel sheet. These calendar templates need to be downloaded, which you want to insert in Excel. You can search and choose any one of them. Remember that you require an internet connection to search these templates.
You do not need to go outside the Excel to search for the calendar templates.
You can insert the calendar into the Excel spreadsheet by following the simple process of inserting the calendar into Excel.
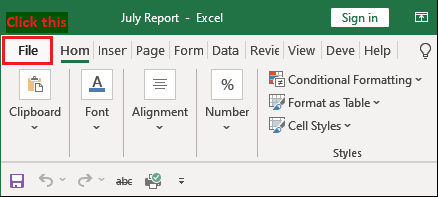
Step 1: Open an Excel sheet or create a new one. At the top left corner, click the File option.
Step 2: Next is to click the New button present on the left side panel of the Excel backscreen.
Step 3: On the Excel backscreen, you see a search box in which you type calendar and hit the Enter key to search the templates.
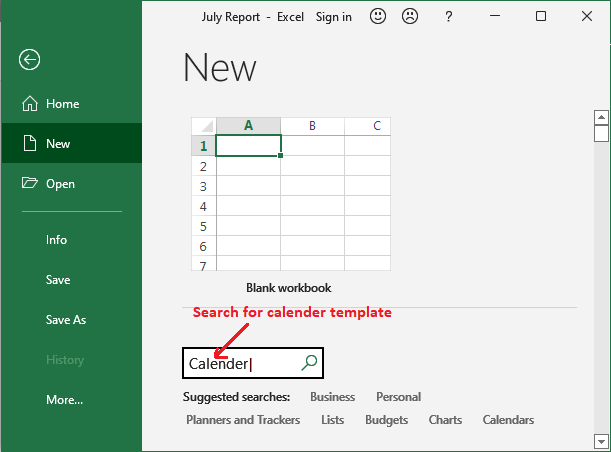
Step 4: Several calendar templates will appear there, such as Academic calendar, Seasonal calendar, etc. You can choose one from here to insert it into the current worksheet.
For example, We select the second template from here.
Step 5: Here, click the Create button to complete the insertion of the calendar to Excel sheet.
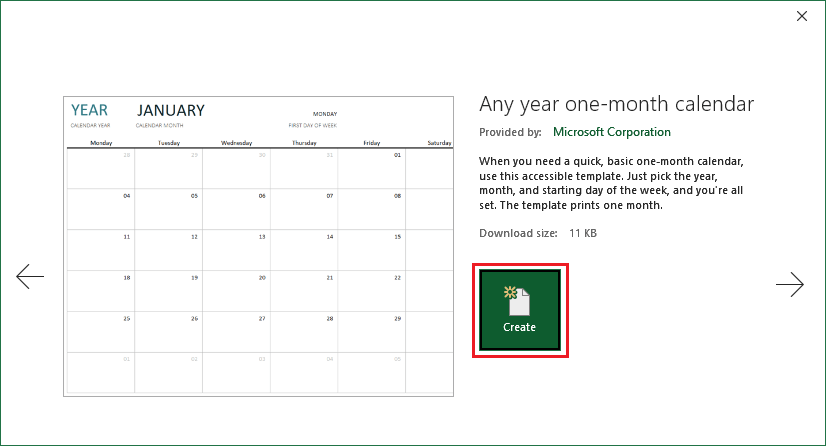
You see a left and a right arrow on the above screenshot. Using these arrows, you can change the template before creating it.
Step 6: A new workbook is created with your selected template as it is successfully inserted into the Excel sheet. This calendar has been inserted for January 2021.
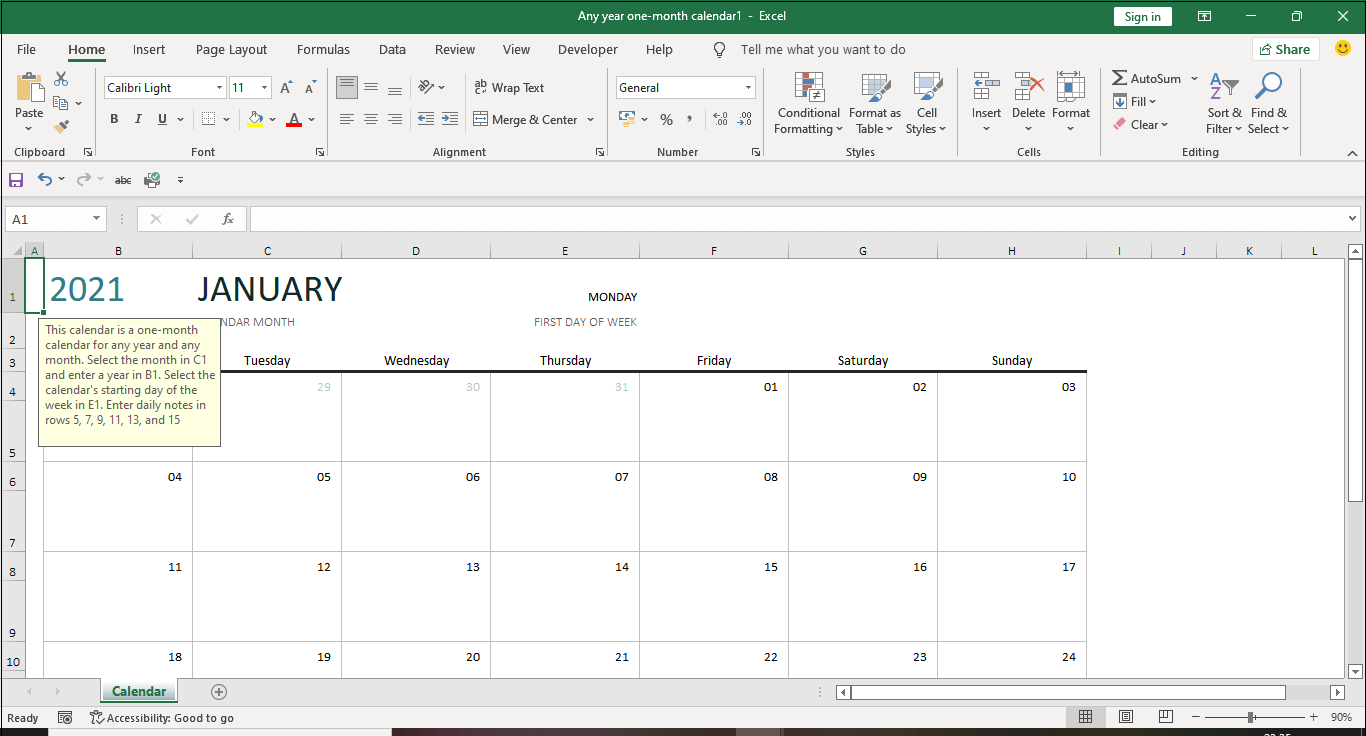
This takes full screen of the Excel worksheet and till H15 cells. It was the only one-month calendar for the year 2021.
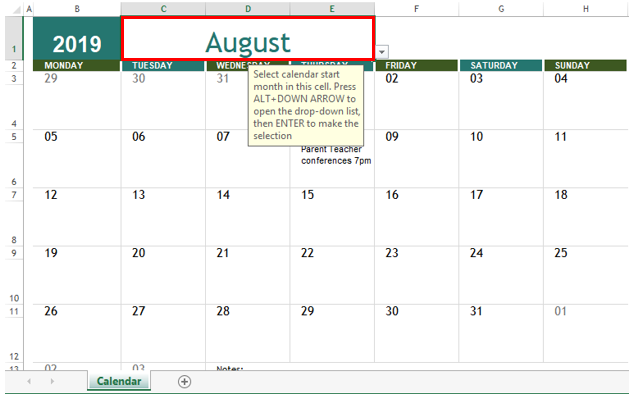
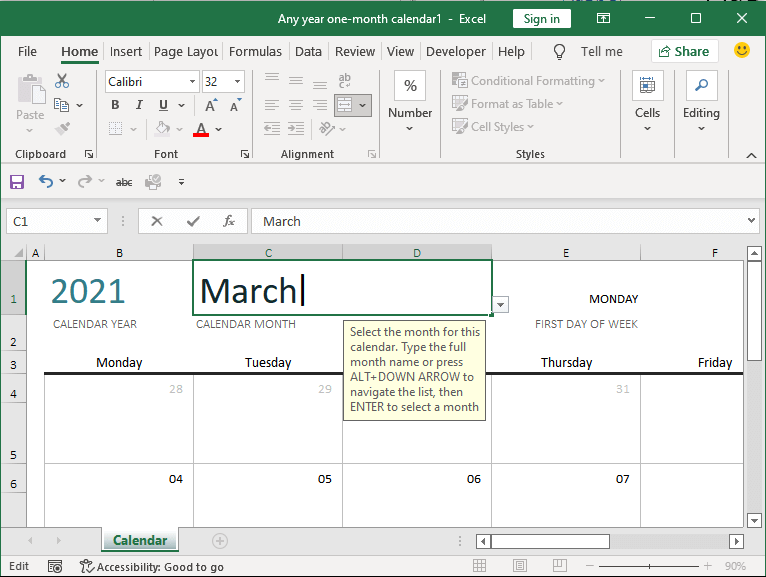
Step 7: If you want to change the month of the calendar, select the C1 cell to make it editable and enter the month name. Then, hit Enter to update the calendar for the modified month automatically.
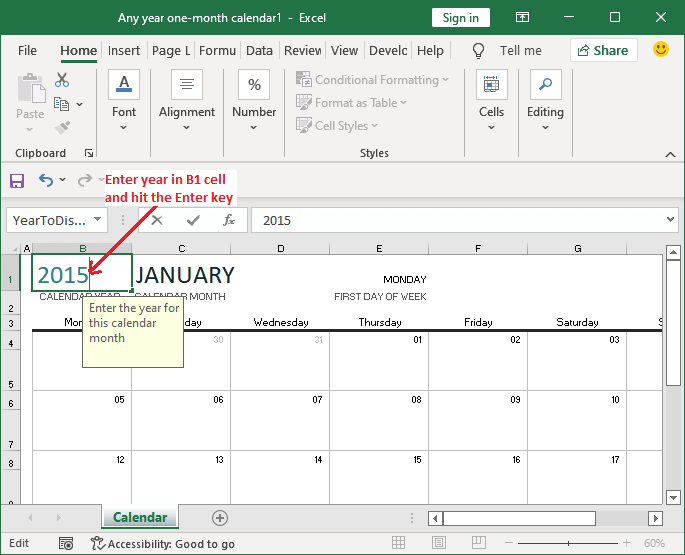
Similarly, one can change the year by changing the targeted year in B1 cell.
Step 8: To change the year of the calendar, select the B1 cell to make it editable. Then, hit Enter to update the calendar for the inserted year automatically.
Insert a calendar using Date Picker control
Another way to insert the calendar in an Excel sheet is Date and time picker control. Inserting a calendar in MS Excel is easy, but several users are not aware with the feature of Date and time picker control as it is hidden.
This feature is not easily available to the users as it is hidden initially in Excel. You can find this feature inside the Developer tab. Using this, one can insert the dropdown calendar to select a date to insert in a cell.
We will show you a complete example for this. Perform the following steps to insert a calendar using Date Picker control.
- Enable the developer tab
- Insert calendar control
- Customize the inserted calendar control
- Link the calendar control to a cell
That’s it.
Now, go through with each step as we explain.
1. Enable the developer console
Usually, the developer console is hidden with the installation of MS Excel. The users have to manually add it to the Excel menu bar if they need it to perform its related operations. Hence, the first step is to enable the developer console.
Perform the steps to enable the developer tab in MS Excel:
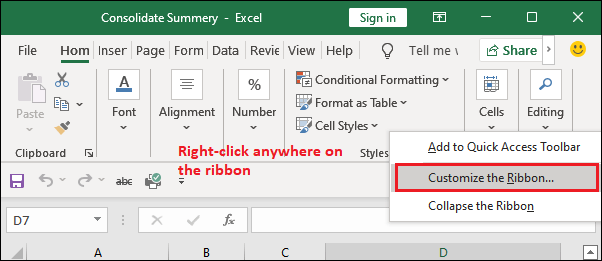
Step 1: Right-click anywhere on the Excel ribbon and choose to Customize the ribbon from it.
Step 2: A window of Excel Options will open where mark the Developer option checkbox available in the right pane and then click OK.

Step 3: You can now see that the Developer tab is added to the Excel ribbon between the View and Help tab.
2. Insert a calendar control
A calendar in dropdown form is called as Date and Time Picker Control in Excel. It can be inserted into the Excel sheet easily. You need to follow a simple process. Go through with the following steps:
Step 1: In the Excel ribbon, navigate to the Developer tab where you see the control group.
Step 2: In the control group, click the Insert dropdown button and choose the More Control icon.
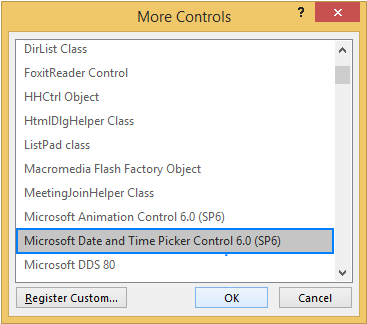
Step 3: A dialogue window will open for More Control, select Microsoft Date and Time Picker Control 6.0 (SP6) inside the ActiveX control, and then click OK.
At last, click on a cell wherever you want to insert it in the sheet.
Once the datepicker control is inserted, the EMBED formula will appear inside the formula bar. It indicates which type of control is embedded with the sheet.
«Tip: When you insert any of the ActiveX control, Excel automatically turns into the design mode that allows the users to modify the design and appearance of the recently added control.»
The most common change that a user normally wants is: to resize the inserted calendar control and link with the particular cells so that it can be fully visible and easy to select date.
If the Microsoft Date and Time Picker Control 6.0 (SP6) is not available
In case this option is not found in the More Control list like in the below screenshot —
You need to follow the instruction below at the end of this chapter.
3. Customize the calendar control
Once the calendar control is added to your sheet, you can now customize it. So, firstly move it to the desired location where you want to place it and get it fit in a cell.
- You can resize it by turning it to the design mode and then dragging the corners of the control to resize it.
- You can also modify and set the other properties for the calendar from the Properties option that resides with the Design Mode tab.
4. Link the calendar control to a cell
Till now, you have successfully added a dropdown calendar control to your Excel sheet. Sometimes, you may also want it to link to a particular cell. It becomes mandatory for the users if they want to use the dates in formula for some other operations.
Scenario
Suppose that you want to count the difference between two dates. So, you have inserted the start date and end date using date picker control. When you try to calculate the number of days between the inserted date using COUNTIF(), it returns 0.
The reason for returning 0 is that Excel does not recognize the dates inserted by using the date picker control that is not associated with the cell till now. You have to link the date picker control to cells to fix this issue.
You will find a Properties option for the inserted calendar control near the Design Mode in the Developer tab. Click on this Properties option.
A window will open in which you see Linked Cell property. Enter the cell reference next to the Linked Cell whom you want to link and click OK.
Now, calculate the difference between the two inserted dates. It will now return the correct result.
Download the third-party tool
Additionally, Excel users can also download the third-party tool or add-ins to insert the calendar in an Excel spreadsheet. It is the easiest way to insert a date and picker into Microsoft Excel.
You may find some tools paid and some are free. One can easily download them to MS Excel. If you also want to download the third-party tool, follow the steps below:
- Go to a search engine like Google and search for the third-party add-in/tool for date and picker control. Or Click here.
- Download a tool from the internet and install it on your system.
- Once the tool is installed, you can see that it has been added to MS Excel.
-
You will find it in the Excel menu bar at the end; see in the below screenshot.
We have downloaded the third-party tool named Ablebit. - Navigate to the Ablebit Tool tab and click the Date Picker that will activate the Date picker for the sheet.
- You can now enter any date in the desired cell by selecting it from the calendar. Select a date from the calendar.
- When you click a cell to select date, a popup of the calendar will show you from which you can select the date.
These were the different methods to insert the calendar in an Excel sheet. You can choose one which you prefer.
Register calendar control in Excel
In earlier versions of Excel, Date and Picker control had come with the installation of Excel by default. But in Excel version 2016 and above, the users will have to download the Date and Picker control manually and register it in Excel. See how can do it:
Check if mscomct.ocx exists on your system
You can firstly check whether the Microsoft calendar control is available on your system or not. For this, you need to check mscomct.ocx file (date and time picker) in your system. To do this —
- Click the Start button of your system, and
- Type mscomct.ocx inside the search box. Then,
- Hit the enter key find it inside the system.
If you found this mscomct.ocx available in your system, you can skip the next step (download the date and time picker).
Download the date and time picker
If the date and time picker is not found on your system, you have to download it manually. You can download it by using the following link.
Tip: «This control work only on 32-bit version of Excel 2010 and above.»
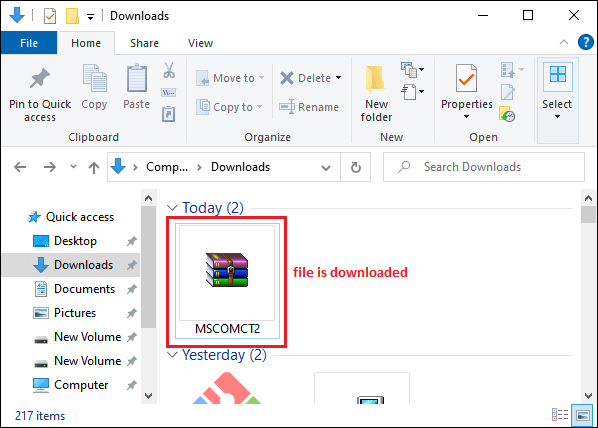
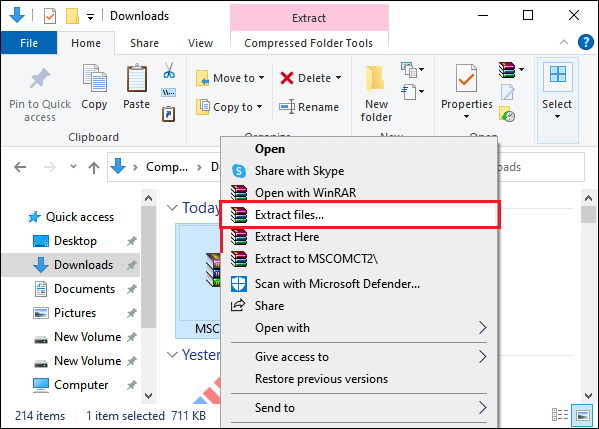
A zip file will download. Now, extract the downloaded file. You can extract the zip file by right-clicking and selecting the Extract files option like in the below screenshot.
Copy the extracted file folder to the C:WindowsSystem64 folder.
- On Windows 32 bit — C:WindowsSystem32
- On Windows 64 bit — C:WindowsSystem64
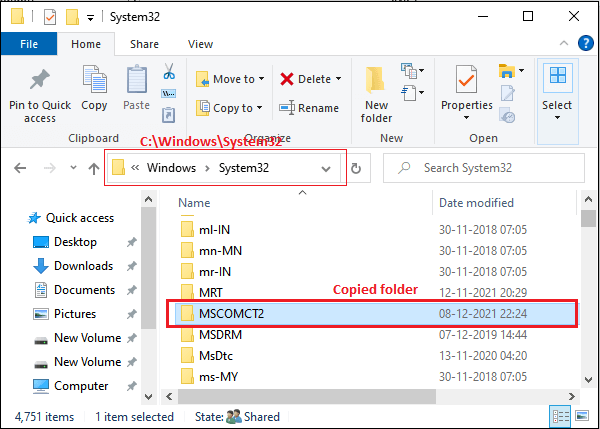
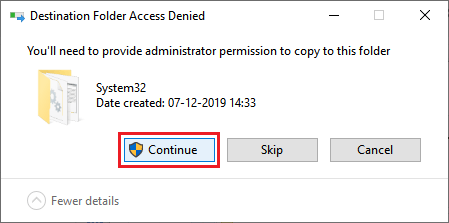
The user must have administrative permission to copy the file to the system folder. But in case you still get the Destination Access Denied dialogue box, just click Continue on this.
Register calendar control on your system
The next step is to register the calendar control on your system after downloading and extracting the zip file. The calendar control must be downloaded as well as registered on the system.
Follow the steps to register the calendar control:
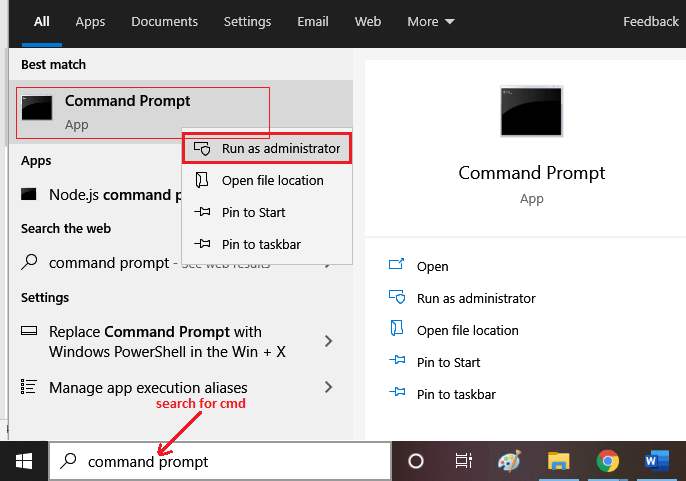
Search for the command prompt (CMD) in the start menu and run it as administrator.
In the command prompt, type one of the following commands according to your system configuration —
Our system is a 32-bit system. So, we will run the below command.
C:WindowsSystem64regsvr32.exe mscomct2.ocx
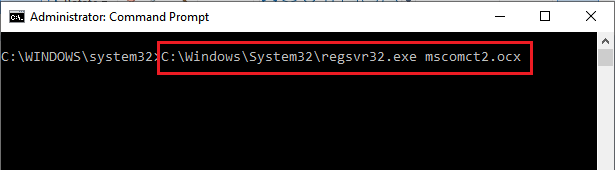
You will get the following message like below on successfully registering the mscomct2.ocx.
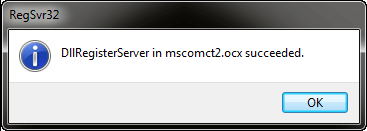
Now, restart the MS Excel once the mscomct2.ocx registered.
Then, navigate to the Developer tab that will now contain the Date and Time picker control and click the Insert and then More Controls.

You will see that — this time, Date and Time picker control there in the list.
How to insert a calendar in Excel using templates
- Open Microsoft Excel.
- Choose a calendar.
- Preview your selected calendar.
- Press “Create”
- Edit your calendar.
- Go to the “File” menu.
- Select “Customize Ribbon”
- Click “Insert”
Contents
- 1 Is there a calendar template in Excel?
- 2 How do I create a drop down calendar in Excel?
- 3 What is the formula for calendar in Excel?
- 4 How do I insert a date picker in Google Sheets?
- 5 How do I use Google Calendar on my laptop?
- 6 How do I create a calendar in Google Sheets?
- 7 How do I make an editable calendar?
- 8 How do I create a digital calendar?
- 9 How do I add a calendar to my slides?
- 10 How do I add Google Calendar to Microsoft calendar?
- 11 How do I add Google Calendar to Windows 10?
Is there a calendar template in Excel?
Many calendar templates are available for use in Microsoft Excel. A template provides a basic calendar layout that you can easily adapt for your needs. An Excel calendar template may have one or more of these features: Twelve months in one or separate worksheets.
How do I create a drop down calendar in Excel?
Create the Data Validation Drop Down List
- On the data entry sheet, select B3, where the drop down list of dates will be added.
- On the Excel Ribbon, click the Data tab.
- Click Data Validation (click the upper section of the command)
- On the Settings tab of the data validation dialog box, from the Allow drop down, click List.
What is the formula for calendar in Excel?
Select a blank cell for displaying the start date of month (here I select cell B6), then enter formula =DATE(A2,A1,1) into the formula bar, and press the Enter key. Note: In the formula, A2 is the cell contains the certain year, and A1 is the Combo Box contains all months of a year.
How do I insert a date picker in Google Sheets?
by
- Highlight the range of cells that you want to add a date picker too.
- Select the Data menu > Data validation.
- In the Criteria section, choose ‘Date’ from the drop-down list.
- In the box that appears alongside ‘Date’, choose if you want to allow any date (leave it as ‘is valid date’) or a specific date range.
How do I use Google Calendar on my laptop?
Get Google Calendar
- On your computer, visit Google Calendar.
- If you already have a Google Account, sign in. If you don’t have one yet, click Create an account.
- Once you sign in, you’ll be taken to Google Calendar.
- To change any of your settings, go to the top right corner and click Settings .
How do I create a calendar in Google Sheets?
How to Make a Calendar in Google Sheets
- Open a new spreadsheet and choose your month.
- Begin to format your calendar.
- Use a formula to fill in the days of the week.
- Fill in the numbers.
- Fill in the rest of the numbers.
- Reformat your calendar if necessary.
- Add design elements to professionalize the look.
How do I make an editable calendar?
To choose one, open Microsoft Word and click the “New” tab in the left-hand pane. Next, type “Calendar” in the online templates search box. Scroll through the library and select a calendar template you like by clicking it. A pop-up window will appear showing a preview and a description of the calendar.
How do I create a digital calendar?
Create a Digital Calendar
- Go to my Google Calendar Template and make a copy. Add an image to the header.
- Take a screenshot of the calendar so it is a jpg or png.
- Upload this image to ThingLink.
- Add links, prompts, challenges, missions, or apps to explore.
How do I add a calendar to my slides?
Open your PowerPoint presentation, select the slide where you want the calendar, and then click “File.” In the left-hand pane, select “New.” In the search bar, type “calendar” and hit Enter to search. Browse through the available templates and select the one you like.
How do I add Google Calendar to Microsoft calendar?
Import a calendar from Google Calendar
- Log in to your Google Calendar account.
- In the left column, click My calendars to expand it, click the arrow button next to the calendar that you want to import into Outlook, and then click Calendar Settings.
- Under Private Address, click ICAL.
How do I add Google Calendar to Windows 10?
How do sync my Google calendar with Windows 10 and Cortana?
- Go to Mail app.
- Click on Settings option.
- Click on Add an account.
- Then type your Google mail id and add it.
- Then go to Accounts and click on sync.
- This method will sync all your mail, calendar and contacts of Google with Windows.