
Word for Microsoft 365 Word for Microsoft 365 for Mac Word 2021 Word 2021 for Mac Word 2019 Word 2019 for Mac Word 2016 Word 2016 for Mac Word 2013 Word 2010 Word for Mac 2011 More…Less
A text box is an object you can add to your document that lets you put and type text anywhere in your file. Text boxes can be useful for drawing attention to specific text and can also be helpful when you need to move text around in your document.
Add a text box
-
Place cursor where you want the text box to appear.
-
Go to Insert and in Illustrations select Drawing.
-
Select Text Box and use your cursor to create the text box.
-
Insert text in box and apply any styling needed.
-
Select Save andClose.
If you aren’t using a mouse
-
Press Alt + Period (.) and then press N.
-
Then press D to select drawings.
-
Press Alt + Period (.) and then press N.
-
Type the text that you want.
-
Press the Esc key 3 times.
-
Press Enter to save textbox.
Notes:
-
To format the text in the text box, select the text, and then use the formatting options in the Font group on the Home tab.
-
To format the text box itself, use the commands on the Shape Format contextual tab that appears when you select a text box.
-
To position the text box, select it, and then when the pointer becomes a
 four-headed arrow, drag the text box to a new location.
 -
You can also change or remove a border from a text box or shape.
-
If you have multiple text boxes, you can link them together so that text will flow from one box to another. Select one of the text boxes and on the Shape Format tab, select Create Link.
-
 four-headed arrow, drag the text box to a new location.
Editing in a text box
-
Double click the textbox.
-
In Drawing (Preview), select the textbox to place your cursor and edit text.
-
When finished select Save and Close to view updated text box.
Copy a text box
-
Select the border of the text box that you want to copy.
-
Press Ctrl+C.
Note: Make sure the pointer is on the border of the text box, not inside it. If the pointer is inside, pressing Ctrl+C will copy the text, not the text box.
-
Select a location and press Ctrl+V to paste the text box.
Delete a text box
-
Select the border of the text box that you want to delete, and then press Delete.
Note: Make sure the pointer is on the border of the text box and not inside it. If the pointer is inside the box, pressing Delete will delete the text inside the text box, not the box.
Add a text box
-
Go to Insert > Text Box, and then select Draw Text Box.
-
Click or tap in the document, and drag to draw the text box the size that you want.
-
To add text to a text box, select inside the text box, and then type or paste text.
Notes:
-
To format the text in the text box, select the text, and then use the formatting options in the Font group on the Home tab.
-
To format the text box itself, use the commands on the Format contextual tab, which appears under Drawing Tools when you select a text box.
-
To position the text box, select it, and then when the pointer becomes a
, drag the text box to a new location. -
You can also change or remove a border from a text box or shape.
-
If you have multiple text boxes, you can link them together so that text will flow from one box to another. Select one of the text boxes and on the Format tab, under Drawing Tools, and then select Create Link.
-
Copy a text box
-
Select the border of the text box that you want to copy.
-
Go to Home > Copy
.Make sure that the pointer is not inside the text box, but rather on the border of the text box. If the pointer is not on the border, pressing Copy will copy the text inside the text box and not the text box.
-
Go to Home and select Paste.
 .
.
Delete a text box
-
Select the border of the text box and then press DELETE.
Make sure that the pointer is not inside the text box, but rather on the border of the text box. If the pointer is not on the border, pressing DELETE will delete the text inside the text box instead.
Add a text box
-
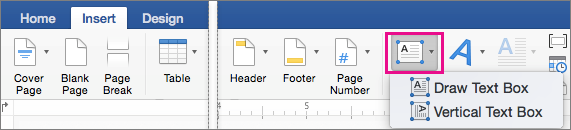
Go to Insert > Text Box and then select either Draw Text Box (where the text aligns horizontally on the page) or Vertical Text Box (where the text aligns vertically on the page).
-
Select in the document, and then drag to draw the text box the size that you want.
-
To add text to a text box, click or tap inside the text box, and then type or paste text.
-
To format the text in the text box, select it, and then Control + Click the text and select Font.
-
To add different effects to the text box, select the text box, and use the options on the Shape Format tab (such as changing the text direction or aligning the text at the top, middle or bottom of the text box).
-
To position the text box, select and hold it, and then when the pointer becomes a
, drag the text box to a new location.
-
Note: If you have drawn multiple text boxes, you can link them together so that text will flow from one box to another. You can only link an empty text box to the one that you’ve selected. To do this, select the text box that you want to link to another text box, and then go to Shape Format > Create Link.
Copy a text box
-
Select the text box you want to copy.
Make sure that the pointer is on the border of the text box and not inside the text box. If the pointer is not on the border, the text inside the text box is copied.
-
Press Control + Click, and then select Copy. Or, press
+ C. -
Select the location in your document where you want to paste the text box, press Control + Click, and then select Paste. Or, press
+ V.
 + C.
+ C.Remove a text box
-
Select the border of the text box that you want to delete, and then press DELETE.
Make sure that the pointer is on the border of the text box and not inside the text box. If the pointer is not on the border, pressing DELETE will delete the text inside the text box.
Add a text box
-
Go to Insert > Text Box.
-
Click in your file where you’d like to insert the text box, hold your mouse button down, then drag to draw the text box the size that you want.
-
After you’ve drawn the text box click inside it to add text.
Copy a text box
-
Select the text box you want to copy.
Make sure that the pointer is on the border of the text box and not inside the text box. If the pointer is not on the border, the text inside the text box is copied.
-
Press Control + Click, and then select Copy. Or, press
+ C. -
Select the location in your document where you want to paste the text box, press Control + Click, and then select Paste. Or, press
+ V.
Remove a text box
-
Select the border of the text box that you want to delete, and then press DELETE.
Make sure that the pointer is on the border of the text box and not inside the text box. If the pointer is not on the border, pressing DELETE will delete the text inside the text box.
Need more help?
Even though Microsoft Word gives you plenty of ways to format, align, and manipulate text, there may be a time when it’s not enough. By using text boxes in Word, you have the flexibility to place text where you want, put it inside a shape, or customize it to make it pop.
Content
- How to Insert a Text Box in Word
- How to Resize, Rotate, or Move a Text Box
- How to Customize the Text Box Appearance
- How to Connect Text Boxes in Word
- Frequently Asked Questions
You can insert a premade text box that includes formatting and a style or start from scratch by drawing your own.
Insert a Built-In Text Box
Using a premade text box, you can get a jump start on the formatting or apply a bit of flare without any extra work. Currently, this feature is only available in Word on Windows, not Mac.
- Head to the “Insert” tab and open the “Text Box” drop-down box. You’ll see options below “Built-in” at the top. If you hover your cursor over one, you can see a brief description.

- Choose the premade text box you want to use, and you’ll see it pop onto the page.

- Click inside the box, which selects the sample text, then type your own.

You can customize the built-in text box, just like one you draw yourself, which is described below.
Draw a Text Box
If you want a complete blank canvas for your text box, you can draw one the size you need and insert your text. Additionally, this is the only option for inserting a text box in Word on Mac at this time.
- Go to the “Insert” tab and open the “Text Box” drop-down box. On Windows, select “Draw Text Box.”

- On Mac, select either “Draw Text Box” or “Draw Vertical Text Box.” The latter places the text sideways in the box as shown below.

- When your cursor changes to a crosshair symbol, drag to draw the text box the size you want. You can still resize the text box later if needed.

- Once you have your box, just type your text inside of it.

Note: you can also add text boxes in Google Docs.
How to Resize, Rotate, or Move a Text Box
You aren’t stuck with the size, angle, or location of your new text box. You can easily resize, rotate, or move a text box in Word a few different ways.
Resize a Text Box
- To quickly resize a text box, drag a corner or edge.

- You can also go to the “Shape Format” tab to change the size. Use the Size section of the ribbon to enter the dimensions in the “Height” and “Width” boxes.

- If you want to size your box according to the text within it, right-click the text box and pick “Format Shape.” When the sidebar opens, go to the “Layout & Properties” tab and check the box for “Resize shape to fit text.”

Rotate a Text Box
- To freely rotate the box, drag the circular arrow at the top to the right or left.

- To rotate it right or left 90 degrees, go to the “Shape Format” tab. Pick an option from the “Rotate” drop-down menu in the “Arrange” section of the ribbon.

- For an exact angle, right-click and choose “More Layout Options.” Open the Size tab, enter the angle in the “Rotation” box, and click “OK.”

Move a Text Box
To move a text box, drag it to your desired location.
Because a text box works like an object, any other text in your document won’t move out of the way for a text box. However, you can use the Wrap Text and Position features to adjust this if needed.

- Go to the “Shape Format” tab, then use the “Wrap Text” drop-down box in the “Arrange” section of the ribbon to choose a wrapping option. For instance, you can place the box in line with the text.

- You can also use the “Position” drop-down box to the left of “Wrap Text” to place the box in a specific spot within the text. For example, you can place it on the top left with text wrapping around it.

Tip: learn how you can create and customize tables in Word.
How to Customize the Text Box Appearance
Along with resizing, rotating, or moving a text box, you may want to change its appearance. You can customize the shape of the text box, apply a background color, or give it a border.
- Select the text box and head to the “Shape Format” tab, then use the following sections of the ribbon to customize the box and text:
- Insert Shapes: open the “Edit Shape” drop-down menu, move to “Change Shape,” and select a new shape in the pop-out menu.

- Shape Styles: pick a preformatted design in the Shapes Styles box or choose a fill, apply a border, or add a shadow.

- WordArt Styles and Text: use these two sections to adjust the appearance of the text. Apply a design, fill, outline, or effect. You can also change the direction or align the text. For the font style and size, use the options in the “Font” section of the “Home” tab.

- For additional options, right-click the text box and select “Format Shape,” then you can adjust both the box and text settings in the sidebar. Some options match those in the ribbon while others are different. For instance, you can adjust the transparency of the box or text.

Try this: create an organized document with a table of contents and add page numbers in Word.
How to Connect Text Boxes in Word
One super-handy feature of text boxes in Word is that you can link them together. This allows you to start typing in one box and have the text carry over to the next box. It’s ideal for a list of tips, brief instructions, or short stories you want to include with your content.
To link text boxes, the box you want to connect to the previous one must be empty. If you already have your boxes filled with text, you can either remove the text from the subsequent boxes or add new boxes and remove the existing ones.
- Insert a text box as described earlier, then add a second text box, but be sure to leave it empty.

- Select the first text box, go to the “Shape Format” tab, and pick “Create Link” in the Text section of the ribbon.

- When your cursor changes to a paint can icon, click inside the second text box. This creates a link between the two. If you want a third or fourth text box linked, follow the same process by linking the second box to the third, third to the fourth, and so on.
- As you add text to the first box, the text that won’t fit then fills the second text box. If you have more text boxes, they will continue to fall into them.

- If you resize the text boxes, the amount of text in each one adjusts to accommodate it. When you resize one text box, you’ll see the linked box automatically resize as well.

- Should you decide later you don’t want the boxes linked, you can break the link. Select the first text box, go to the “Shape Format” tab, and click “Break Link.” Follow the same process to remove any additional text box connections.

Frequently Asked Questions
Can I add a hyperlink to a text box in Word?
You can add a link to a text box or specific text within it, just like any other object or text in a Word document.
To link the box, select it. To link specific text within the box, select it instead. Right-click, pick “Link” or “Hyperlink,” then choose an existing file or web page, place in the document, new document, or email address. On the right, select the item or add the URL and click “OK.”
How do I stop text from wrapping inside of a text box?
By default, the text inside of a text box wraps to the next line when it reaches the edge of the shape. But you can change this if you would like.
Right-click the text box and pick “Format Shape.” When the sidebar opens, select the “Layout & Properties” tab and uncheck the box for “Wrap text in shape.”
Can I temporarily hide text boxes in Word?
As you work on the other content in your document, you may want to hide a text box or two to focus on other things.
Select a text box, go to the “Shape Format” tab, and click “Selection Pane” in the “Arrange” section. When the sidebar opens, click the eye icon to the right of a text box to hide it. For all text boxes, click “Hide All” at the top. To unhide the text boxes, select the eye with a line through it to the right or pick “Show All” at the top.
Image credit: Pixabay. All screenshots by Sandy Writtenhouse.

Sandy Writtenhouse
With her BS in Information Technology, Sandy worked for many years in the IT industry as a Project Manager, Department Manager, and PMO Lead. She wanted to help others learn how technology can enrich business and personal lives and has shared her suggestions and how-tos across thousands of articles.
Subscribe to our newsletter!
Our latest tutorials delivered straight to your inbox
![]()
Download Article
![]()
Download Article
Want to add a check box or tick box to a list or form in Microsoft Word? It’s easy to do, and you can even make it checkable so you can click the box with your mouse. We’ll show you an easy way to add a clickable checkbox using Developer Mode in Microsoft Word.
Steps
-
1
Open a new file in Microsoft Word. Do so by opening the app shaped like a blue W. Then click on File in the menu bar at the top of the screen, and click on New Blank Document.
-
2
Click on File in the menu bar and then Options in the menu.
- On Mac, click on Word in the menu bar and then Preferences… in the menu.
Advertisement
-
3
Click on Customize Ribbon and then Main Tabs in the «Customize the Ribbon:» drop-down menu.»[1]
- On Mac, click on Ribbon & Toolbar in the «Authoring and Proofing Tools» section of the dialog box, then click on the Ribbon tab at the top of the dialog box.
-
4
Check «Developer» in the «Main Tabs» pane.
-
5
Click on Ok.
-
6
Click on Developer. It’s a tab in the upper-right part of the window.
-
7
Position the cursor where you’d like to insert the check box.
-
8
Click on Check Box. It’s in the menu bar at the top of the window.
-
9
Add additional check boxes and text as needed.
-
10
Lock the form. To do so, select the entire list, to be found in the Controls section on the Developer tab, then click on Group and Group.
- On Mac, click Protect Form in the Developer tab toolbar.


Advertisement
Add New Question
-
Question
What should I do if the check box is grayed out in my ribbon?

It is grayed out for me too. However, if you click on the one icon that isn’t — Legacy Tools — then you will find the exact same checkbox, which you should be able to select.
-
Question
How can I enlarge the size of a text box without enlarging the text?
In Word, just dragging the corner of the text box should be sufficient. If the text changes size accidentally, you can always highlight it and change it back to the desired size.
-
Question
How do you make a drop box in word?
Download LibreOffice. Follow the manual on how to add a list or list/add or list/multiselect box (or just look under «insert» in the menu). You can add a data source for the dropdown menu items from a database, a spreadsheet or within the file structure itself.
See more answers
Ask a Question
200 characters left
Include your email address to get a message when this question is answered.
Submit
Advertisement
Thanks for submitting a tip for review!
About This Article
Article SummaryX
1. Open a document.
2. Click File.
3. Select Customize Ribbon and then click Main Tabs.
4. Check the «Developer» box.
5. Click Save.
6. Click Developer.
7. Click where you want to insert the check box.
8. Click Check Box.
9. Add additional boxes and text.
10. Lock the form.
Did this summary help you?
Thanks to all authors for creating a page that has been read 1,240,190 times.
Is this article up to date?

First, you need to customize Word’s ribbon and enable the “Developer” tab to show the option to add check boxes. Then, select “Developer” and click the “Check Box Content Control” button to insert a check box into your document. You can also transform Word’s bullets into checkboxes.
When you create surveys or forms with Microsoft Word, check boxes make the options easier to read and answer. We’re covering two good options for doing just that. The first is ideal for documents that you want people to fill out digitally within the Word document itself. The second option is easier if you’re planning to print documents like to-do lists.
Option 1: Use Word’s Developer Tools to Add the Check Box Option for Forms
In order to create fillable forms that include checkboxes, you first need to enable the “Developer” tab on the Ribbon. With a Word document open, click the “File” drop-down menu and then choose the “Options” command. In the “Word Options” window, switch to the “Customize Ribbon” tab. On the right-hand “Customize the Ribbon” list, select “Main Tabs” on the dropdown menu.

On the list of available main tabs, select the “Developer” check box, and then click the “OK” button
Notice that the “Developer” tab is added to your Ribbon. Just position your cursor in the document where you want a check box, switch to the “Developer” tab, and then click the “Check Box Content Control” button.
You should see a check box appear wherever you placed your cursor. Here, we’ve gone ahead and placed a check box next to each answer and, as you can see, those check boxes are interactive. Click a box to mark it with an “X” (as we’ve done for answers 2, 3, and 4) or select the whole form box (as we’ve done for answer 4) to move the check box around, format it, and so on.
RELATED: How to Create a Fillable Form With Microsoft Word
Option 2: Change Bullets to Check Boxes for Printed Documents
If you’re creating a document to print out—like a to-do list or printed survey—and just want check boxes on it, you don’t have to mess around with adding Ribbon tabs and using forms. Instead, you can create a simple bullet list and then change the bullets from the default symbol to check boxes.
In your Word document, on the “Home” tab, click the small arrow to the right of the “Bullet List” button. On the dropdown menu, select the “Define new bullet” command.
In the “Define New Bullet” window, click the “Symbol” button.
In the “Symbol” window, click the “Font” dropdown and choose the “Wingdings 2” option.
You can scroll through the symbols to find the empty square symbol that looks like a check box, or you just type the number “163” into the “Character Code” box to automatically select it. Of course, if you see a symbol you like better—like the open circle (symbol 153)—feel free to choose that instead.
When you’ve selected your symbol, click the “OK” button to close the “Symbol” window, and then click the “OK” button to close the “Define New Bullet” window, too.
Back in your Word document, you can now type your bullet list. The check boxes appear instead of the regular bullet symbol.
And the next time you need the check box symbol, you don’t have to navigate through that whole set of windows. Just click that small arrow to the right of the “Bullet List” button again, and you’ll see the checkbox listed under the “Recently Used Bullets” section.
Again, this method is really only useful for documents you want to print out. The check box symbols are not interactive, so you can’t check them off inside a Word document.
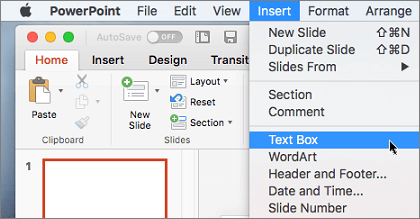
If you’re also creating spreadsheets and presentations, you may want to learn how to insert checkboxes in Excel and add checkboxes to PowerPoint too.
RELATED: How to Add a Check Mark or Tick Mark in Word
READ NEXT
- › How to Add a Check Mark or Tick Mark in Word
- › How to Add a Drop-Down List to a Word Document
- › How to Create a Basic Survey in Microsoft Word
- › How to Count Checkboxes in Microsoft Excel
- › How to Create a Fillable Form With Microsoft Word
- › The New NVIDIA GeForce RTX 4070 Is Like an RTX 3080 for $599
- › HoloLens Now Has Windows 11 and Incredible 3D Ink Features
- › Google Chrome Is Getting Faster
A text box is an element you can insert and position anywhere in a document. Text boxes are great for calling special attention to a quote or a whole block of text.
Insert a Text Box
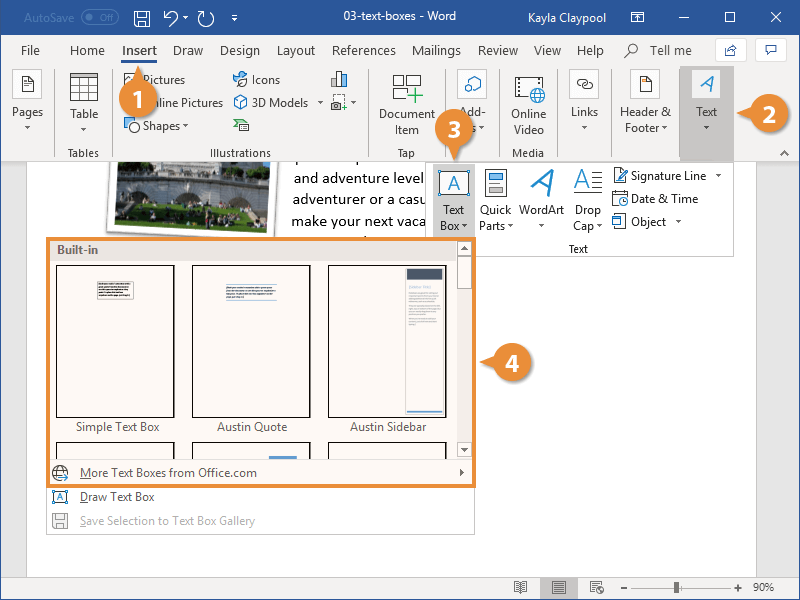
- Click the Insert tab.
- Expand the Text group, if necessary.
- Click the Text Box button.
- Select the text box you’d like to use.

- Click the text box and type to replace the placeholder text.
A gallery of text box styles appears. The styles range from simple text boxes to stylized sidebars.
The text box is automatically inserted.
The placeholder text disappears as soon as you start typing.
Text boxes can be sized, moved, arranged, and styled just like shapes and pictures.
Draw Text Boxes
You don’t have to use one of Word’s built-in text boxes; you can create one from scratch.
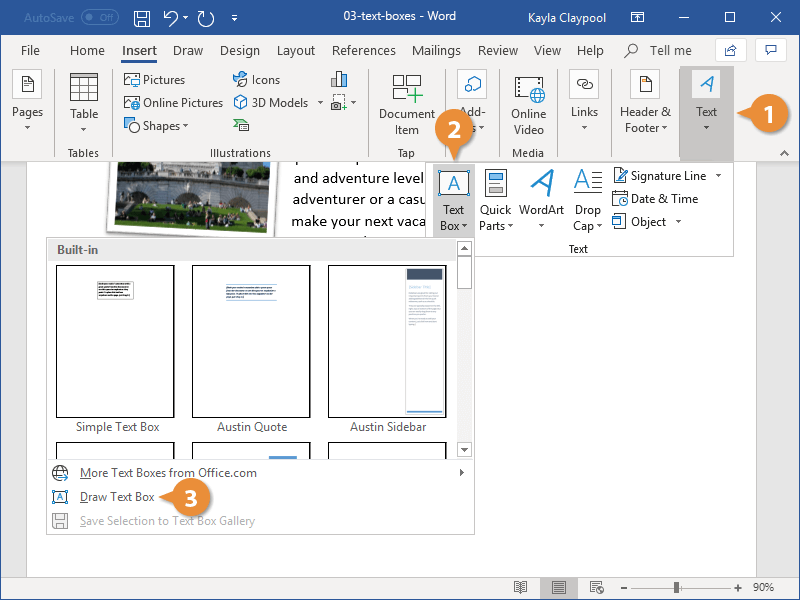
- From the Insert tab, expand the Text group, if necessary.
- Click the Text Box button.
- Select Draw Text Box.
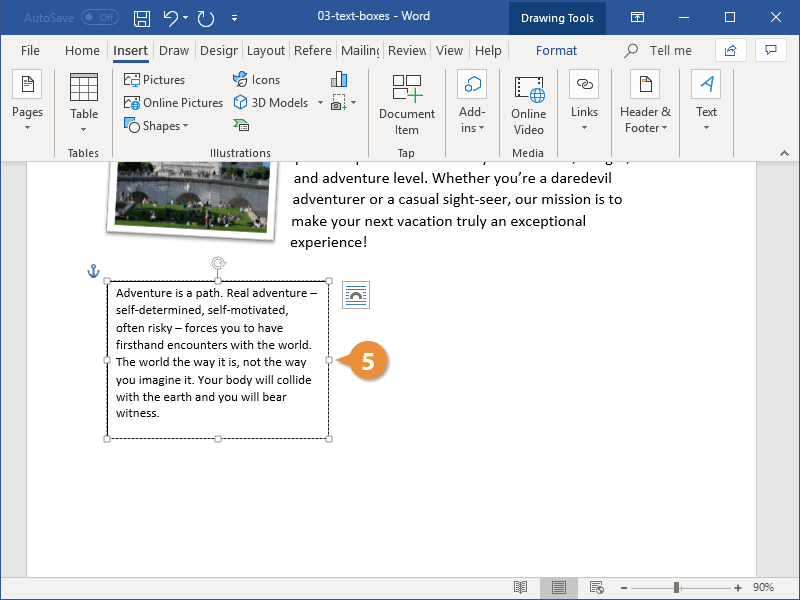
- Click and drag in your document to create the text box.
The pointer changes to a crosshair, indicating that you can draw the text box.
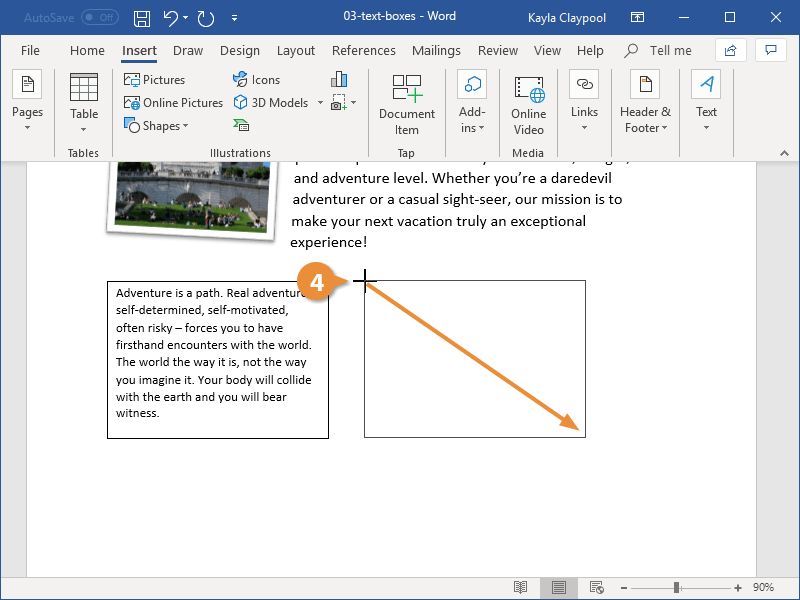
The text box is inserted.
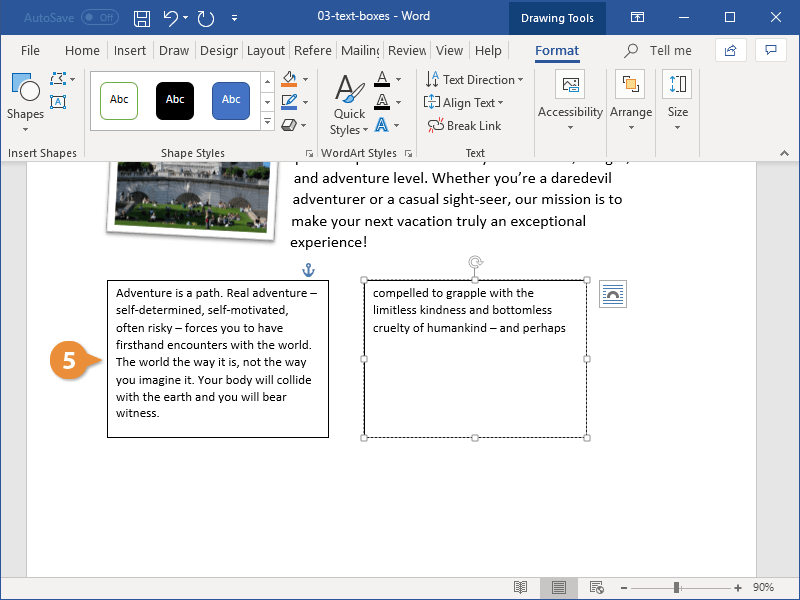
Link Text Boxes
Linking text boxes allows text to flow between them. For example, you could make the text of a long article flow through several smaller text boxes in a more advanced layout.
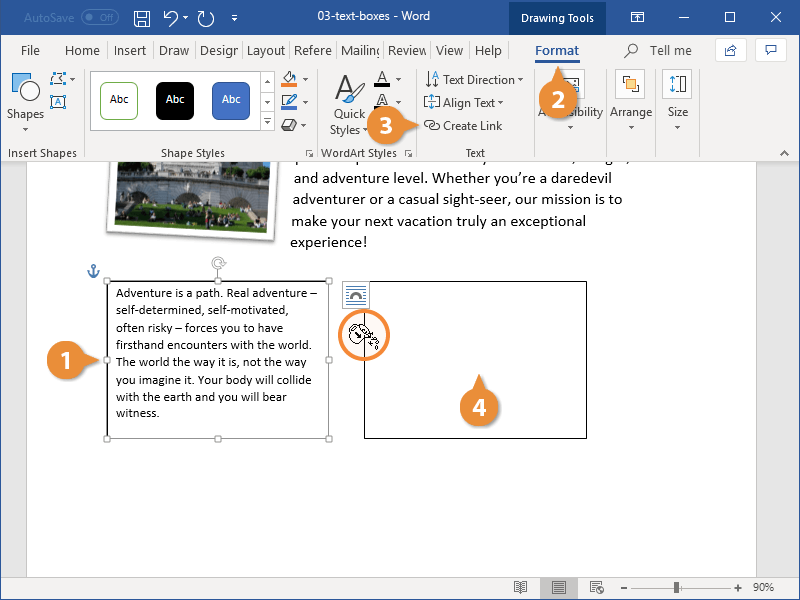
- After you have created two or more text boxes, select the first one.
- Click the Format tab in the Drawing Tools ribbon group.
- Click Create Link from the Text group.
- Click the second text box with the new cursor.
- Switch back to the first text box and type into it.
The second text box must be empty, so make sure to remove any text in it before proceeding.
The cursor changes into a tiny pitcher full of letters. Moving the cursor over the second text box reveals that you can “pour” additional text into it.
The two text boxes are linked. Now, once enough text is entered into the first text box, it will automatically overflow into the second.
You can format the text in a text box just as you would any other text by using the Font and Paragraph groups on the Home tab.

FREE Quick Reference
Click to Download
Free to distribute with our compliments; we hope you will consider our paid training.