
This entry shows how to create an input form in
MS Word containing several input fields.
The input fields are highlighted in green and
become active as soon as you click on a field.
The input fields are simple text fields,
drop-down selection fields or multi-line comment fields
The inputs can be further processed as
variables in macros and automated.
Inquiries for the entry form under codedocu.de,
Raimund.popp@codedocu.de
The file with the following input field as a template
or example is available for download in the appendix.
|
Name: |
|
|
Vorname: |
Raimund |
|
Email: |
Email eingeben |
|
Land: |
Wählen Sie ein Land aus. |
|
Kommentar: |
Input
form in Word

Create input fields
Step 1: Menu-> Developer Tools ->
[Controls] -> Text Only Content Control

Step 2: Turn on draft mode

Step
3) Input field-> Properties

Step
4) Enter title, text, field lock
Here first name and first name
Lock: the content control can not be deleted
-> enable

Step
5) Mark text
Then mark text in the field

Step
6) Enter preview text
As default or preview text you can either enter
spaces or enter as logical input text like «please enter first name».

Step 7) Highlight the color
In order to recognize the input fields as an
input form, the fields should be marked in color.
To do this, completely mark the text inside the
input field and highlight it with the color tool as the background color.
Tip: As a field as the tax office with light green.

Step
 Turn off draft mode
Under Menu-> Developer Tools> Turn Off
Design Mode

Step
9) Check input fields
The input fields now appear as green
placeholders. As soon as you click in a field, the field appears darker and a
frame becomes visible.

Step
10) Check input
If you then enter text with the keyboard, the
green placeholder is replaced and the text box expands as far as the input text
itself is
As you enter text, the field expands

Alternative input fields
1)
As a mail merge field
Advantage: can be connected to a serial letter
|
Email: |
«Email» |
|
«Mergefield» «Name_Seriendruckfeld» |
2) Fill-in field
Simple text input to complete. Disadvantage:
can not be automated in macros.
|
Alter: |
55 |
|
{ FILLIN Alter d 55 |
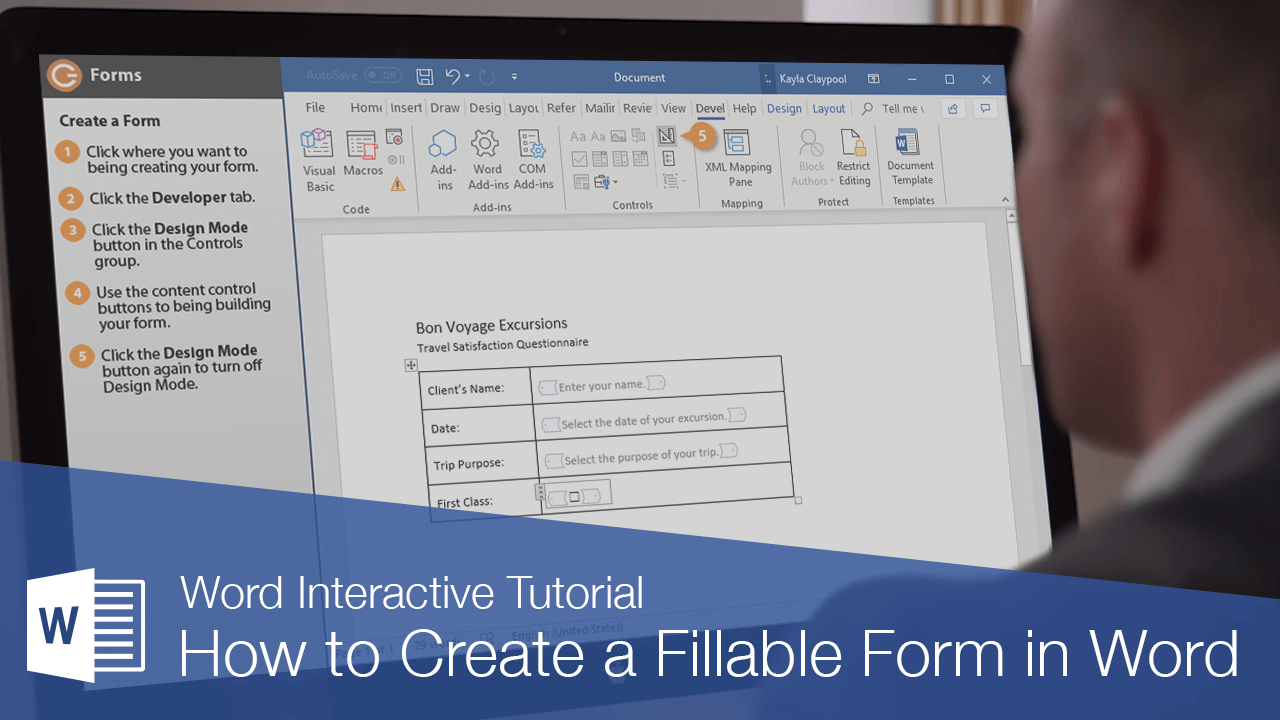
You can use Word to create interactive digital forms that other people can fill out on their computers before printing or sending them back to you. It takes a little preparation but keeps you from having to decipher messy handwriting! Some of the tools you will use when creating a form include:
- Templates: Forms are normally saved as templates so that they can be used again and again.
- Content controls: The areas where users input information in a form.
- Tables: Tables are often used in forms to align text and form fields, and to create borders and boxes.
- Protection: Users can complete the form fields without being able to change the form’s text and/or design.
Show the Developer Tab
Before you can create a form, you’ll need to turn on the Developer tab to get access to the advanced tools.
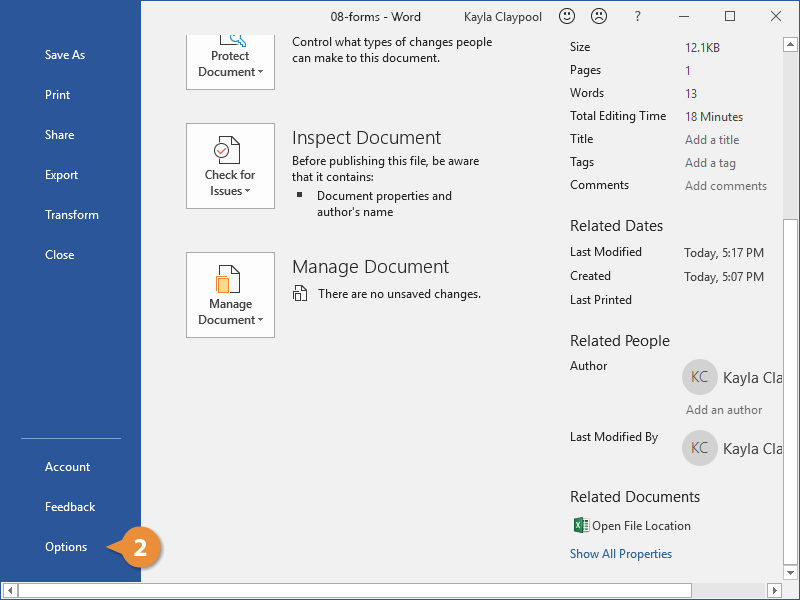
- Click the File tab.

- Select Options.

The Word Options window opens.
- Click the Customize Ribbon tab on the left.
The column on the right controls which ribbon tabs are enabled.
- Check the Developer check box.
- Click OK.
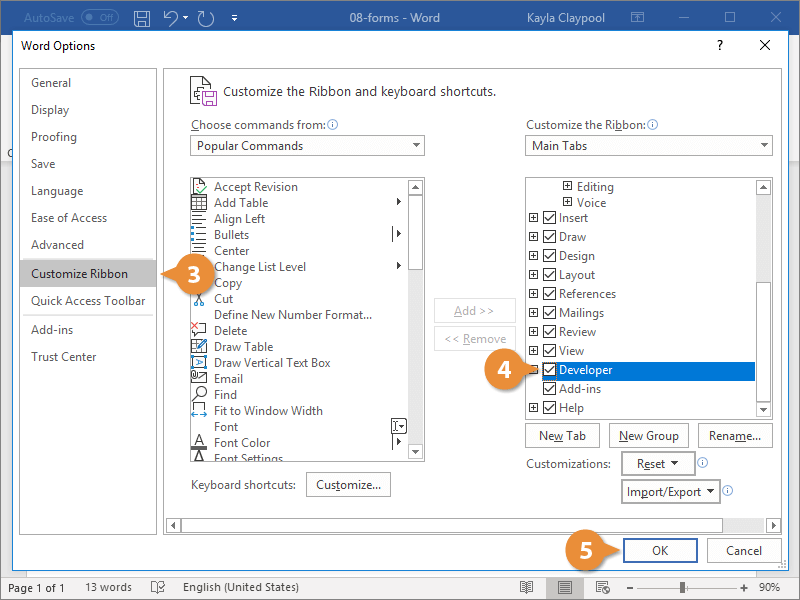
The Developer tab now appears on the ribbon. In addition to advanced tools for macro recording, add-ins, and document protection, we now have access to form controls.
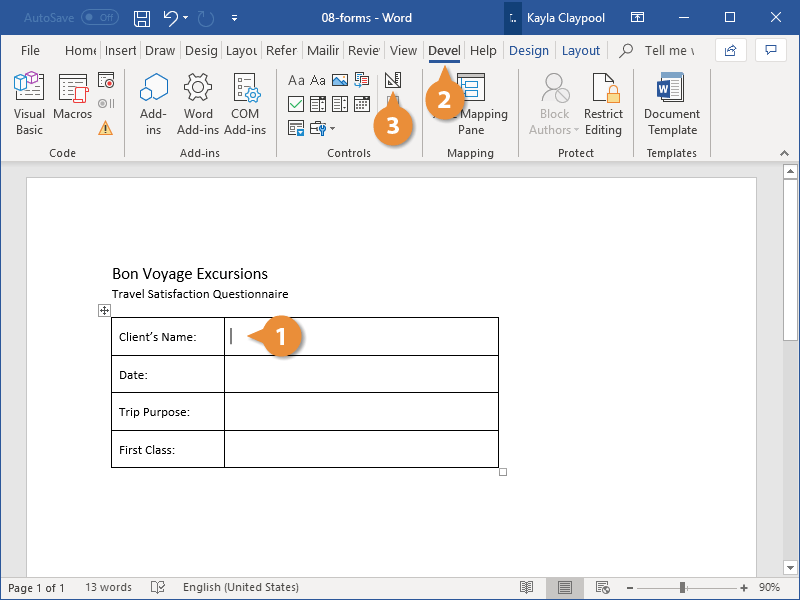
Create a Form
Once you’ve enabled the Developer tab, and created the layout and structure of the form, you can start adding form fields to your document with Content Controls.
- Place the text cursor where you want to insert the form field.
- Click the Developer tab on the ribbon.
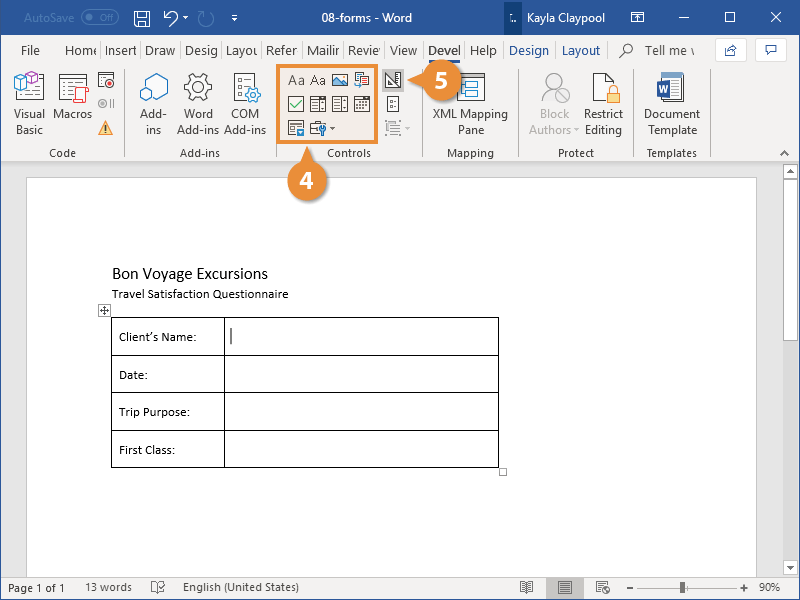
The Controls group contains the different kinds of content controls you can add to a form, as well as the toggle button for Design Mode.
- Click the Design Mode button in the controls group.
While Design Mode is active, controls you insert won’t be active, so clicking a check box to move it around won’t also check it. You can also customize placeholder text for some controls.
- Click a Content Control buttons to insert the selected type of control.
The content control is inserted.
Select a form field and click the Properties button on the ribbon to edit a control’s options. Depending on the type of control you’ve inserted, you can change its appearance, set up the options in a list, or lock the control once edited.
- When you’re done, click the Design Mode button again to exit Design Mode.
You leave Design Mode, and the content controls that you’ve inserted can now be used.
Types of Form Controls
There are many different types of form controls you can add to a form that will allow people to add different types of responses.
Finalize a Form
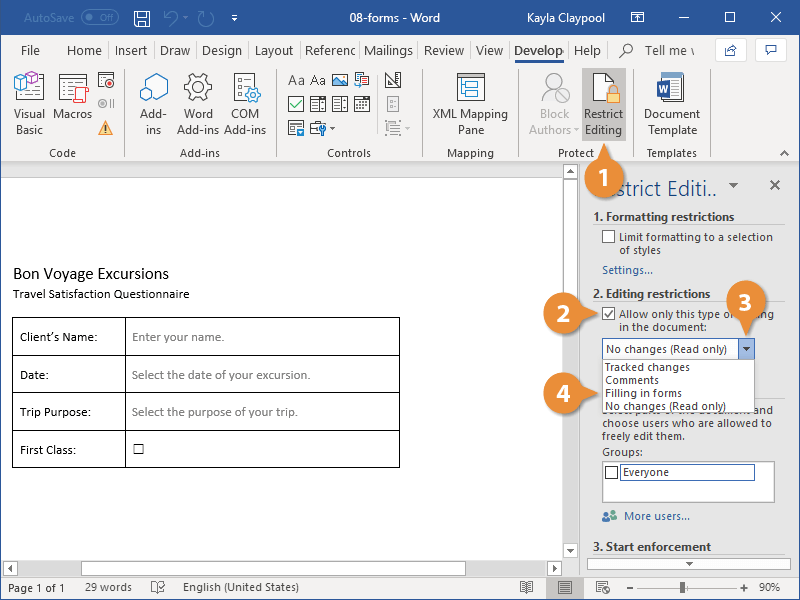
When you’re ready to distribute a form so others can fill it out, you can restrict the form so that content controls cannot be removed or changed by those filling it out.
- Click the Restrict Editing button on the Developer tab.
The Restrict Editing pane appears on the right.
- Check the Editing restrictions check box.
- Click the Editing restriction list arrow.
- Select Filling in forms.
When this option is enabled, the only change that anyone else can make to this document is the filling in of form fields. They won’t be able to move, delete, or edit the fields themselves until protection is turned off.
- Click the Yes, Start Enforcing Protection button.
A password is not required to start enforcing protection, but you can add one if you’d like to prevent just anyone from turning this protection off.
- Enter a password (optional), then click OK.
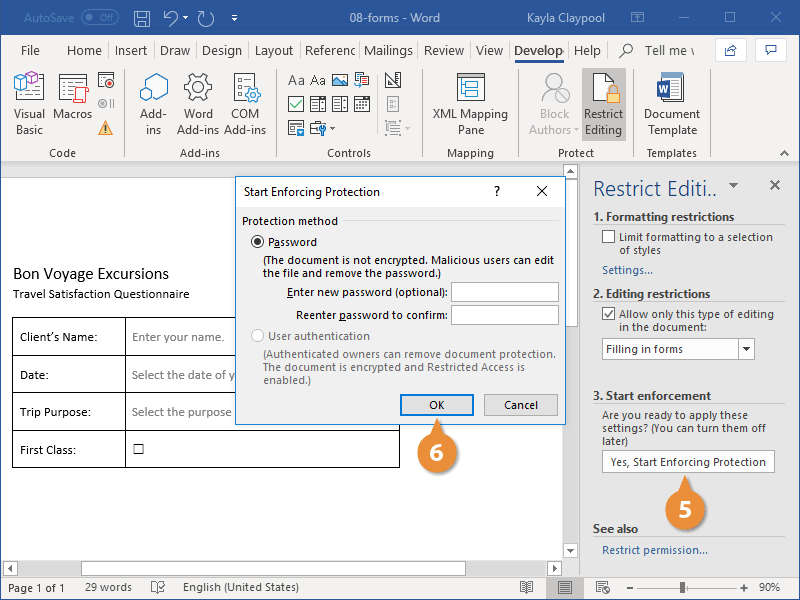
The document is now restricted, and anyone you send it to will only be able to fill in the forms.

FREE Quick Reference
Click to Download
Free to distribute with our compliments; we hope you will consider our paid training.
No, the variables do not have to come from a third party site.
Your question has some ambiguities, but if you have a Word bookmark named «NAME», then
{ IF "{ NAME }" = "Alex" "Hello Alex" "What is your name?" }
would display the text Alex if the bookmark’s value was Alex, and would display What is your name? If it was not Alex. But it would not generate an input box or any other structure that would let you enter a name.
In this case, you could also use
{ IF NAME = "Alex" "Hello Alex" "What is your name?" }
You could also do this
{ IF NAME = Alex "Hello Alex" "What is your name?" }
but be aware that that may not work as you expect if you happen to have something like
{ SET NAME Alex }{ SET Alex Alx }{ IF NAME = Alex "Hello Alex" "What is your name?" }
All the {} pairs have to be the special field code brace pairs that you can insert on Windows Desktop Word using ctrl-F9, on Mac Desktop Word using cmd-F9, or a varietion on those sequences depending on your keyboard and setup.
At the moment you appear to have doubled up whatever type of brace you are using
{ IF "{{name}}" etc.
That won’t work!
The value of the bookmark NAME could come from a number of place. e.g. you might select a piece of text and insert the bookmark «NAME» there, e.g. if I selected piece of text and inserted a bookmark called NAME, the value of NAME would be piece of text. Or you could set the value of NAME using
{ SET NAME "piece of text" }
Or you could use an ASK field like this
{ ASK NAME "What is your name?" }
or a combination of a SET and a FILLIN field (Let’s not go there). You (or the user) has to select all the relevant fields and «update» them (e.g. F9 on Windows Word).
In addition, if your document is a mailmerge main document connected to a data source that has a column called NAME, you may find that the data in that column is used to populate a bookmark in Word called NAME. This dates back to early versions of Word where you referenced a column in the data source using { NAME } rather than { MERGEFIELD NAME }. I think that in recent versions it only applies to data sources that Word opens through its file converters, e.g. if the data source is a Word document or HTML file, not (say) an Excel workbook opened using OLE DB.
And you can of course try to set the name using something like
{ IF "{ NAME }" = "Alex" "Hello Alex" "{ ASK NAME "What is your name?" }" }
but the user would have to execute that IF field twice to see Hello Alex if the value of bookmark NAME was not Alex beforehand. It doesn’t seem like a very good approach. Nor is there a looping construct in Word that would help you there.
When choosing bookmark names,
- avoid names that are the names of Word field types (such as
IF,ASK,FILLIN,SETetc. - avoid names that «look like» table cell names (
A1,AB1etc.)
The other possible way to do this would be to use «legacy Form Field codes, and use a Textbox field to enter the name. That type of textbox field also has an associated bookmark name that you can specify in the field’s properties. But to use those legacy form fields, you have to put the whole document into «protected for forms» mode, which means that everything else becomes uneditable.
Word for Microsoft 365 Word for Microsoft 365 for Mac Word 2021 Word 2021 for Mac Word 2019 Word 2019 for Mac Word 2016 Word 2016 for Mac Word 2013 Word 2010 Word for Mac 2011 More…Less
To create a form in Word that others can fill out, start with a template or document and add content controls. Content controls include things like check boxes, text boxes, date pickers, and drop-down lists. If you’re familiar with databases, these content controls can even be linked to data.
Show the Developer tab
If the developer tab isn’t displayed in the ribbon, see Show the Developer tab.
Open a template or a blank document on which to base the form
To save time, start with a form template or start from scratch with a blank template.
-
Go to File > New.
-
In Search online templates, type Forms or the type of form you want and press ENTER.
-
Choose a form template, and then select Create or Download.
-
Go to File > New.
-
Select Blank document.
Add content to the form
Go to Developer, and then choose the controls that you want to add to the document or form. To remove a content control, select the control and press Delete. You can set properties on controls once inserted.
Note: You can print a form that was created using content controls, but the boxes around the content controls will not print.
In a rich text content control, users can format text as bold or italic, and they can type multiple paragraphs. If you want to limit what users add, insert the plain text content control.
-
Click or tap where you want to insert the control.
-
Select Developer > Rich Text Content Control
 or Plain Text Content Control .
 or Plain Text Content Control
  .
.To set specific properties on the control, see Set or change properties for content controls.
A picture control is often used for templates, but you can also add a picture control to a form.
-
Click or tap where you want to insert the control.
-
Select Developer > Picture Content Control
.
 .
.To set specific properties on the control, see Set or change properties for content controls.
Use building block controls when you want people to choose a specific block of text. For example, building block controls are helpful when you need to add different boilerplate text depending on the contract’s specific requirements. You can create rich text content controls for each version of the boilerplate text, and then you can use a building block control as the container for the rich text content controls.
-
Click or tap where you want to insert the control.
-
Go to DeveloperBuilding Block Gallery Content Control
(or Building Block Content Control). -
Select Developer and content controls for the building block.
 (or Building Block Content Control).
-
Click or tap where you want to insert the control.
To set specific properties on the control, see Set or change properties for content controls.
In a combo box, users can select from a list of choices that you provide or they can type in their own information. In a drop-down list, users can only select from the list of choices.
-
Go to Developer > Combo Box Content Control
or Drop-Down List Content Control . -
Select the content control, and then select Properties.
-
To create a list of choices, select Add under Drop-Down List Properties.
-
Type a choice in Display Name, such as Yes, No, or Maybe.
Repeat this step until all of the choices are in the drop-down list.
-
Fill in any other properties that you want.
Note: If you select the Contents cannot be edited check box, users won’t be able to click a choice.
 or Drop-Down List Content Control
  .
.-
Click or tap where you want to insert the date picker control.
-
Select Developer > Date Picker Content Control
.
 .
.To set specific properties on the control, see Set or change properties for content controls.
-
Click or tap where you want to insert the check box control.
-
Select Developer > Check Box Content Control
.
 .
.To set specific properties on the control, see Set or change properties for content controls.
Legacy form controls are for compatibility with older versions of Word and consist of legacy form and Active X controls.
-
Click or tap where you want to insert a legacy control.
-
Go to Developer > Legacy Forms
drop-down. -
Select the Legacy Form control or Active X Control that you want to include.
 drop-down.
Set or change properties for content controls
Each content control has properties that you can set or change. For example, the Date Picker control offers options for the format you want to use to display the date.
-
Select the content control that you want to change.
-
Go to Developer > Properties.
-
Change the properties that you want.

Add protection to a form
If you want to limit how much others can edit or format a form, use the Restrict Editing command:
-
Open the form that you want to lock or protect.
-
Select Developer > Restrict Editing.
-
After selecting restrictions, select Yes, Start Enforcing Protection.


Advanced Tip:
If you want to protect only parts of the document, separate the document into sections and only protect the sections you want.
To do this, choose Select Sections in the Restrict Editing panel. For more info on sections, see Insert a section break.

Show the Developer tab
If the developer tab isn’t displayed in the ribbon, see Show the Developer tab.
Open a template or use a blank document
To create a form in Word that others can fill out, start with a template or document and add content controls. Content controls include things like check boxes, text boxes, and drop-down lists. If you’re familiar with databases, these content controls can even be linked to data.
-
Go to File > New from Template.
-
In Search, type form.
-
Double-click the template you want to use.
-
Select File > Save As, and pick a location to save the form.
-
In Save As, type a file name and then select Save.

-
Go to File > New Document.
-
Go to File > Save As.
-
In Save As, type a file name and then select Save.

Add content to the form
Go to Developer, and then choose the controls that you want to add to the document or form. To remove a content control, select the control and press Delete. You can set Options on controls once inserted. From Options, you can add entry and exit macros to run when users interact with the controls, as well as list items for combo boxes, .
-
In the document, click or tap where you want to add a content control.
-
On Developer, select Text Box, Check Box, or Combo Box.
-
To set specific properties for the control, select Options, and set .
-
Repeat steps 1 through 3 for each control that you want to add.

Options let you set common settings, as well as control specific settings. Select a control and then select Options to set up or make changes.
-
Set common properties.
-
Select Macro to Run on lets you choose a recorded or custom macro to run on Entry or Exit from the field.
-
Bookmark Set a unique name or bookmark for each control.
-
Calculate on exit This forces Word to run or refresh any calculations, such as total price when the user exits the field.
-
Add Help Text Give hints or instructions for each field.
-
OK Saves settings and exits the panel.
-
Cancel Forgets changes and exits the panel.
-
-
Set specific properties for a Text box
-
Type Select form Regular text, Number, Date, Current Date, Current Time, or Calculation.
-
Default text sets optional instructional text that’s displayed in the text box before the user types in the field. Set Text box enabled to allow the user to enter text into the field.
-
Maximum length sets the length of text that a user can enter. The default is Unlimited.
-
Text format can set whether text automatically formats to Uppercase, Lowercase, First capital, or Title case.
-
Text box enabled Lets the user enter text into a field. If there is default text, user text replaces it.
-
-
Set specific properties for a Check box.
-
Default Value Choose between Not checked or checked as default.
-
Checkbox size Set a size Exactly or Auto to change size as needed.
-
Check box enabled Lets the user check or clear the text box.
-
-
Set specific properties for a Combo box
-
Drop-down item Type in strings for the list box items. Press + or Enter to add an item to the list.
-
Items in drop-down list Shows your current list. Select an item and use the up or down arrows to change the order, Press — to remove a selected item.
-
Drop-down enabled Lets the user open the combo box and make selections.
-
-
Go to Developer > Protect Form.
Note: To unprotect the form and continue editing, select Protect Form again.
-
Save and close the form.

If you want, you can test the form before you distribute it.
-
Protect the form.
-
Reopen the form, fill it out as the user would, and then save a copy.
Show the Developer tab
-
On the right side of the ribbon, select
, and then select Ribbon Preferences. -
Under Customize, select Developer .
 , and then select Ribbon Preferences.
Open a template or a document on which to base the form
You can start with a blank document and create your own form. Or, to save time, you can start with a form template.
-
Go to File > New from Template.
-
In the left pane, expand Online Templates, and then select Forms.
-
Double-click the form template that you want to use.
Add content controls to the form
-
In the document, click where you want to add the control.
-
On the Developer tab, under Form Controls, select Text Box, Check Box, or Combo Box.
-
To set specific properties for the control, select Options, and then configure the properties that you want.
Note: To create a list of drop-down items in a combo box, select the combo box placeholder, click Options, and then add the items that you want to appear in the drop-down list.
-
Repeat steps 1 through 3 for each control that you want to add.
Add instructional text (optional)
Instructional text (for example, «Type First Name») in a text box can make your form easier to use. By default, no text appears in a text box, but you can add it.
-
Select the text box control that you want to add instructional text to.
-
On the Developer tab, under Form Controls, select Options.
-
In Default Text, type the instructional text.
-
Make sure that Fill-in enabled is selected, and then select OK.
Protect the form
-
On the Developer tab, under Form Controls, select Protect Form.
Note: To unprotect the form and continue editing, click Protect Form again.
-
Save and close the form.
Test the form (optional)
If you want, you can test the form before you distribute it.
-
Protect the form.
-
Reopen the form, fill it out as the user would, and then save a copy.
Creating fillable forms isn’t available in Word for the web.
You can create the form with the desktop version of Word with the instructions in Create a fillable form.
When you save the document and reopen it in Word for the web, you’ll see the changes you made.
Need more help?
Download PC Repair Tool to quickly find & fix Windows errors automatically
In Microsoft Word, you can insert built-in or custom fields into your Word document that may change within your document. In Word, the field feature inserts fields into your document; some fields will be inserted automatically, such as NumPages, NumWords, and Date.
What are Fields in Microsoft Word?
In Microsoft Word, a field is a placeholder for document information that can be changed. Microsoft Word displays the field result instead of the field codes.
How to add Fields to my Document?
There are various types of fields that you can add to your document; some field text will be inserted automatically, and some you have to modify in the dialog box before you add it to the document. In this tutorial, we will discuss how to add fields to your word documents.
To add text fields to your Word document, follow the steps below.
- Launch Microsoft Word
- Click anywhere on the document
- Click the Insert tab
- Click the Quick Parts button
- Click Field from the drop-down menu
- Choose a field name from the field name list.
- then, choose an option from the list on the right.
- Click OK
Launch Microsoft Word
Click anywhere on the Word document.
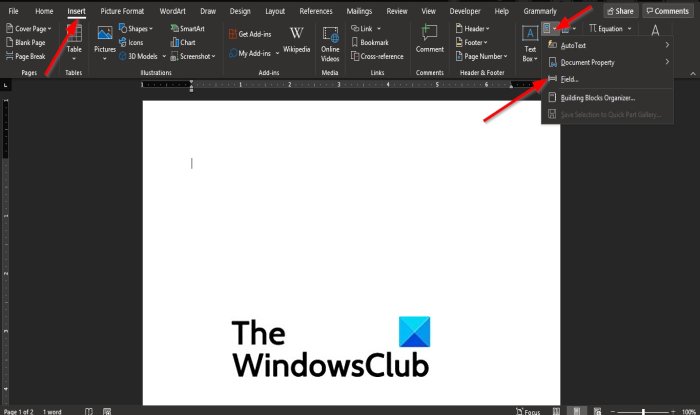
On the menu bar, click the Insert tab.
In the Text group, click the Quick Parts button.
Then select Field from the drop-down menu.
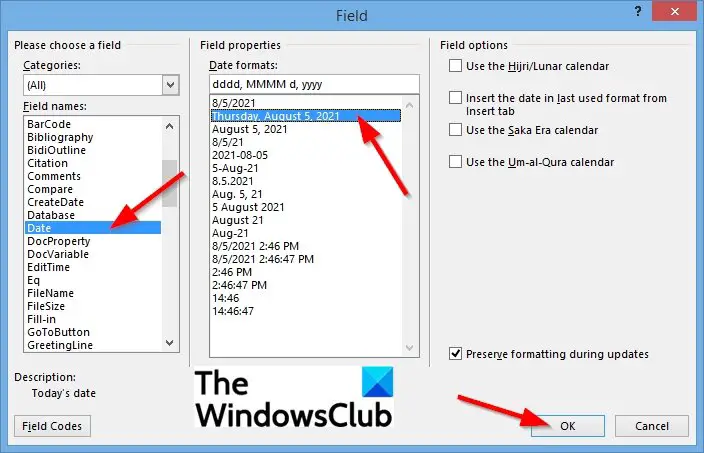
A Field dialog box will appear.
Inside the dialog box, there are various fields to choose from in the Field Name list.
Select a field from the Field Name list on the left.
In this tutorial, we chose to select the Date field.
Then, choose a field option from the list on the right.
Depending on the field name selected, the options on the right will change.
Then click OK.
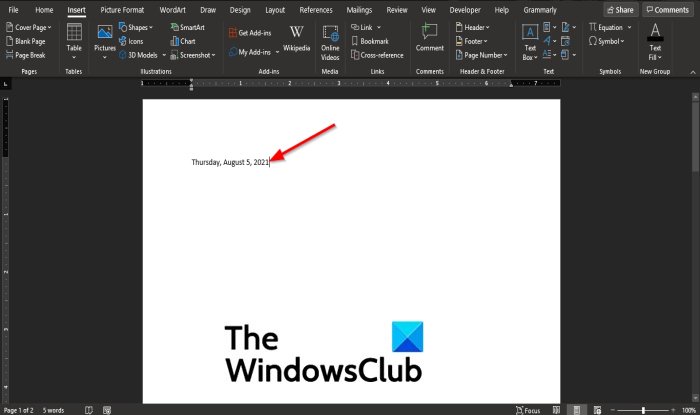
The field is added to the Word document.
If you want to change the format of the field, you cannot change it directly on the Word document; you have to change it within the Field dialog box.

To change the format of the field, right-click the field and select Edit Field.
It will return to the Field dialog box, where you can change the format of the field and then click OK to see the field change.
We hope this tutorial helps you understand; how to insert a text field in Microsoft Word; if you have questions about the tutorial, let us know.

Shantel has studied Data Operations, Records Management, and Computer Information Systems. She is quite proficient in using Office software. Her goal is to become a Database Administrator or a System Administrator.