
Все, кому приходилось работать с формулами и математическими переменными в Ворде, когда-нибудь интересовались, как поставить верхний или нижний индекс в Word. К сожалению, многих пользователей ставит в тупик задача — поставить степень числа или переменной. На самом деле всё делается достаточно просто. Именно на этот вопрос и постараемся ответить в статье. Подробнее о том, как поставить надстрочный и подстрочный знаки в Ворде далее в статье. Давайте разбираться. Поехали!

В математических функциях часто используют специальные символы
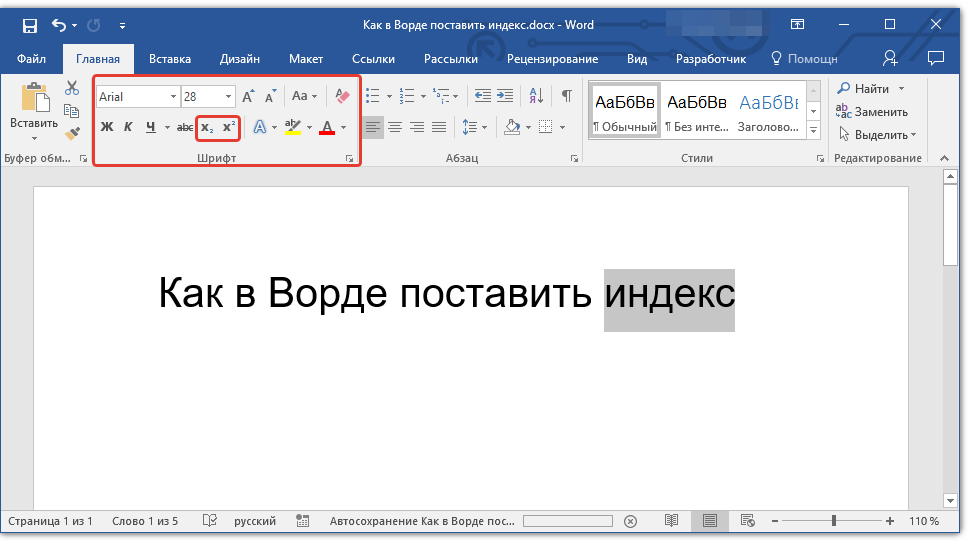
Очень удобно, что разработчики Microsoft вынесли необходимые иконки прямо на панель вкладки «Главная». Найти нужные кнопки можно в разделе «Шрифт», прямо под полем «Размер шрифта». Пользоваться ими очень просто. Сначала введите букву или цифру, к которой хотите добавить индекс. Затем нажмите на соответствующую кнопку добавления подстрочного или надстрочного знака. После этого вы заметите, что палочка курсора стала вполовину меньше. Далее, можно ввести значение. Чтобы вернуться к нормальному формату набора текста, нажмите кнопку добавления подстрочного или надстрочного знака ещё раз. Обратите внимание на то, что, когда функция активирована, соответствующая иконка инструмента будет выделена серым.

Второй способ — воспользоваться горячими клавишами. Такой подход поможет немного ускорить работу с инструментом. Чтобы поставить подстрочный знак, используйте комбинацию Ctrl и =. Если необходимо добавить надстрочное значение, примените комбинацию клавиш Ctrl, Shift, +.
Ещё один вариант — кликнуть по специальной иконке в правом нижнем углу блока «Шрифт» в ленте инструментов, чтобы открыть полное меню. В разделе «Видоизменение» отметьте галочками пункты «надстрочный» либо «подстрочный». В зависимости от отмеченного варианта курсор примет соответствующий вид и положение.

Если в документе большое количество уравнений, где много значений и переменных в квадрате или других степенях, будет удобнее работать непосредственно в конструкторе формул. После того как вы добавили уравнение, откроется вкладка «Конструктор». На панели инструментов находится специальная кнопка «Индекс». Нажав на неё, откроется меню, в котором необходимо будет выбрать нужный вариант расположения индекса. После того как вы выберите подходящий, на листе появятся два пустых поля в виде квадратов. Внутри большого введите букву или цифру, внутри маленького введите значение степени либо подпись. Достоинство такого подхода в том, что он позволяет одновременно добавлять несколько индексов для более сложных математических расчётов.

Каждый из описанных способов удобнее использовать в том или ином случае. Выбирайте тот вариант, который является более подходящим для решения ваших задач. Теперь работа с индексами в Microsoft Word больше не будет для вас проблемой. Оставляйте в комментариях своё мнение о статье, особенно если она оказалась полезной и задавайте возникшие вопросы по теме.
Содержание
- Написание индекса в Ворде
- Способ 1: Инструменты группы «Шрифт»
- Способ 2: Горячие клавиши
- Удаление индекса
- Заключение
- Вопросы и ответы

Верхний и нижний или надстрочный и подстрочный индекс в Microsoft Word — это тип символов, которые отображаются выше или ниже стандартной строки (на ее границе) с обычным текстом в документе. Размер этих символов меньше, чем у обычного текста, а используется такой тип написания, в большинстве случаев, в сносках и ссылках, а также при записи математических нотаций и выражений.
Читайте также: Как изменить регистр в Word
Написание индекса в Ворде
Возможности программы Microsoft Word позволяют легко переключаться между надстрочным и подстрочным индексами, используя для этого инструменты группы «Шрифт» или горячие клавиши. В этой статье мы рассмотрим оба варианта, а также то, как отменить подобное написание.
Способ 1: Инструменты группы «Шрифт»
Изменение индекса, в котором написан или только будет писаться текст, осуществляется в той же группе инструментов, где изменяется шрифт в целом, его размер, начертание, цвет и некоторые другие параметры. Для этого в данном блоке вкладки «Главная» предусмотрены отдельные кнопки.
Читайте также: Как в Ворде изменить шрифт
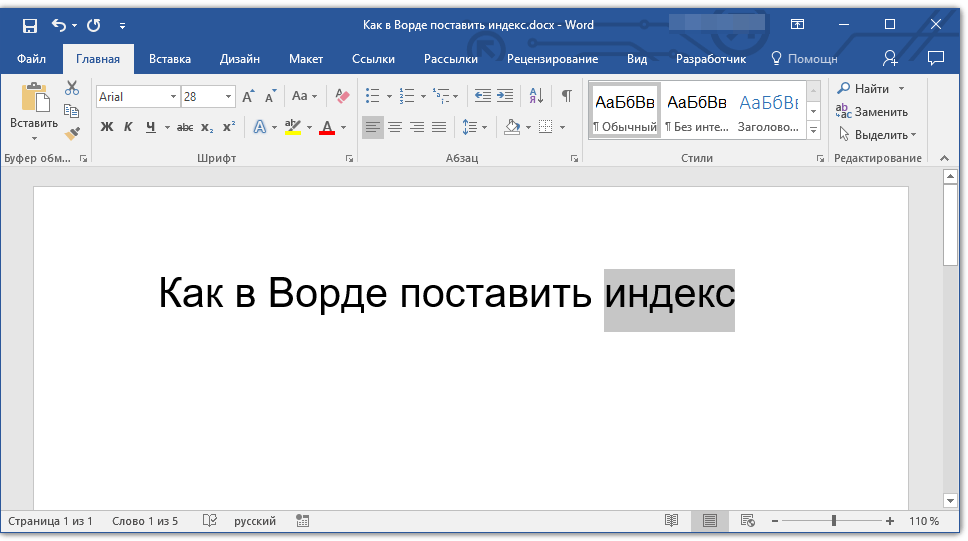
- Выделите фрагмент текста, который необходимо преобразовать в индекс, либо установите указатель курсора в том месте, где только планируете набирать текст в надстрочном или подстрочном индексе.
- Во вкладке «Главная» в группе «Шрифт» нажмите кнопку «Подстрочный знак» или «Надстрочный знак», в зависимости от того, какой вариант написания вам нужен — нижний или верхний.
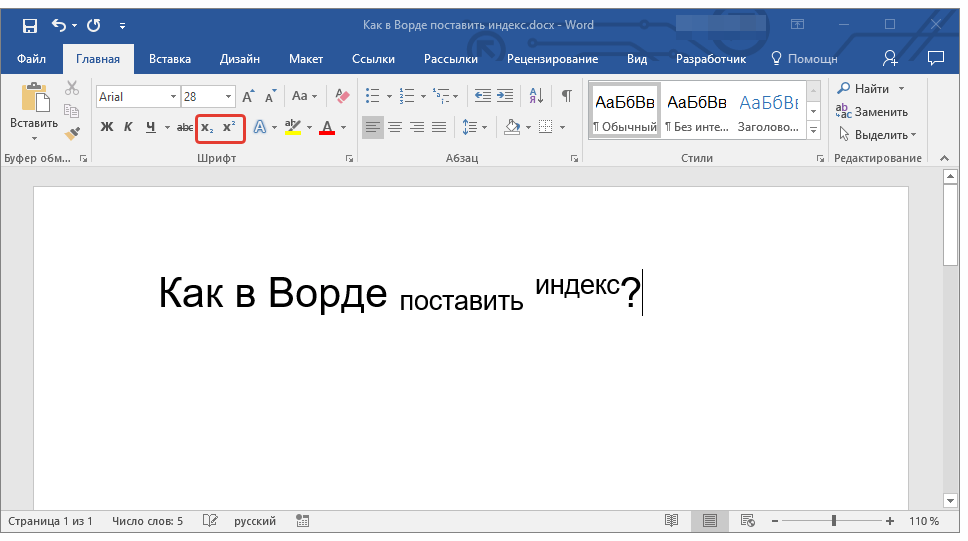
- Выделенный текст будет преобразован в индекс. Если же вы не выделяли его, а только собирались писать, введите то, что должно быть возведено индекс.

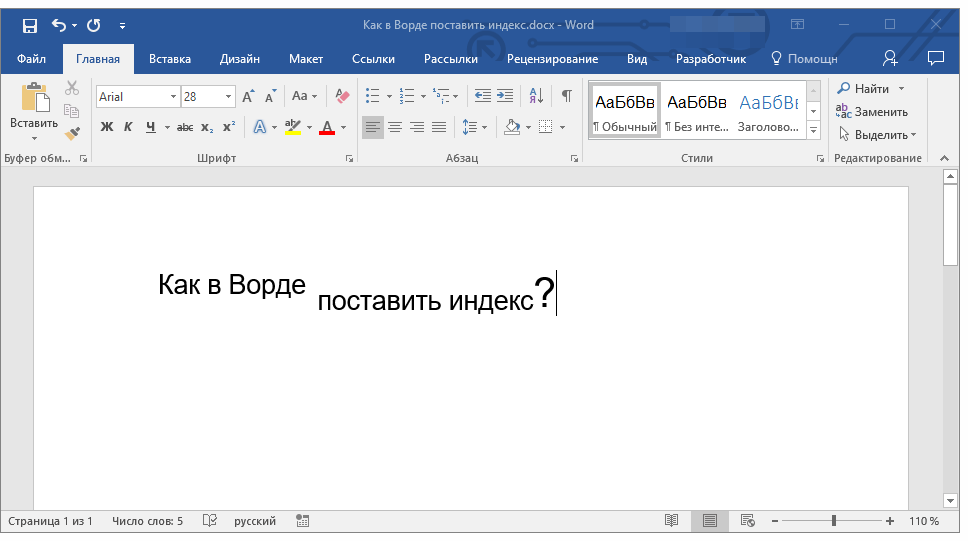
Для возвращения к нормальному написанию кликните левой кнопкой мышки в месте за текстом, преобразованным в верхний или нижний индекс. Отключите кнопку «Подстрочный знак» или «Надстрочный знак», чтобы вернуться к «классическому» набору.

Вот так просто с помощью инструментов на ленте текстового редактора от Майкрософт можно записать текст в надстрочном или подстрочном индексе либо преобразовать в него уже имеющуюся запись. Но есть и еще более простое и удобное в своей реализации решение.
Читайте также: Как в Ворде поставить градусы Цельсия
Способ 2: Горячие клавиши
Вполне возможно, что при выполнении предыдущего способа вы заметили, что при наведении указателя курсора на кнопки, отвечающие за изменение индекса, отображается не только их назначение, но и комбинация клавиш, отвечающих за быстрый вызов этих функций. Если выполнять те или иные действия и использовать инструментарий Microsoft Word вам проще посредством горячих клавиш, просто запомните следующие комбинации:
| «CTRL» + «=» | Переключение в подстрочный индекс |
| «CTRL» + «SHIFT» + «+» | Переключение в надстрочный индекс |
Как и в случае с кнопками на панели управления, выделите текст, который необходимо преобразовать в верхний или нижний индекс, и нажмите соответствующую комбинацию клавиш либо же просто воспользуйтесь ею, если только собираетесь записать текст в таком виде.
Читайте также: Как в Word поставить обозначение квадратного и кубического метров
Удаление индекса
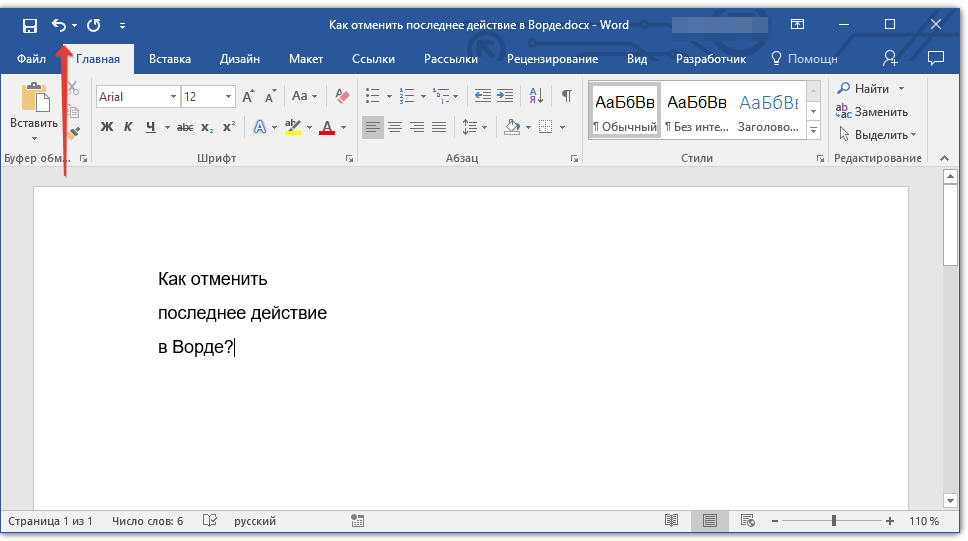
Бывает и так, что требуется выполнить действие, обратное тому, что озвучено в заголовке данной статьи, либо же просто продолжить писать текст в обычном режиме. О последнем мы рассказали в конце первого способа, но кроме этого вы всегда можете отменить преобразование в надстрочный или подстрочный текст. Нюанс заключается в том, что использовать для этого нужно не стандартную функцию отмены последнего действия (круговая стрелка в верхнем левом углу ленты Майкрософт Ворд или клавиши «CTRL+Z»), а другую комбинацию.

Читайте также: Как в Ворде отменить последнее действие
Так, для отмены преобразования в индекс необходимо воспользоваться клавишами «CTRL» + «SPACE» (Пробел) — после их нажатия текст примет привычный вид.
Читайте также: Горячие клавиши в MS Word
Заключение
Мы рассмотрели то, как в Microsoft Word можно записать что-либо в верхнем и нижний индексе. Это работает как с текстом, так и с числовыми значениями, на которых применяется значительно чаще, например, для возведения в степень.
Читайте также: Как в Ворде поставить степень
Еще статьи по данной теме:
Помогла ли Вам статья?
Word for Microsoft 365 Word 2021 Word 2019 Word 2016 Word 2013 Word 2010 Word 2007 More…Less
An index lists the terms and topics that are discussed in a document, along with the pages that they appear on. To create an index, you mark the index entries by providing the name of the main entry and the cross-reference in your document, and then you build the index.
You can create an index entry for an individual word, phrase, or symbol, for a topic that spans a range of pages, or that refers to another entry, such as «Transportation. See Bicycles.» When you select text and mark it as an index entry, Word adds a special XE (Index Entry) field that includes the marked main entry and any cross-reference information that you choose to include.
After you mark all the index entries, you choose an index design and build the finished index. Word collects the index entries, sorts them alphabetically, references their page numbers, finds and removes duplicate entries from the same page, and displays the index in the document.
Mark the entries
These steps show you how to mark words or phrases for your index, but you can also Mark index entries for text that spans a range of pages.
-
Select the text you’d like to use as an index entry, or just click where you want to insert the entry.
-
On the References tab, in the Index group, click Mark Entry.

-
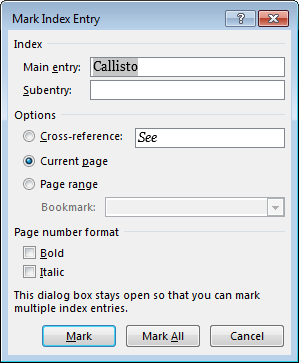
You can edit the text in the Mark Index Entry dialog box.
-
You can add a second-level in the Subentry box. If you need a third level, follow the subentry text with a colon.
-
To create a cross-reference to another entry, click Cross-reference under Options, and then type the text for the other entry in the box.
-
To format the page numbers that will appear in the index, select the Bold check box or Italic check box below Page number format.
-
-
Click Mark to mark the index entry. To mark this text everywhere it shows up in the document, click Mark All.
-
To mark additional index entries, select the text, click in the Mark Index Entry dialog box, and then repeat steps 3 and 4.

Create the index
After you mark the entries, you’re ready to insert the index into your document.
-
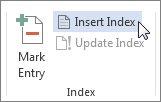
Click where you want to add the index.
-
On the References tab, in the Index group, click Insert Index.
-
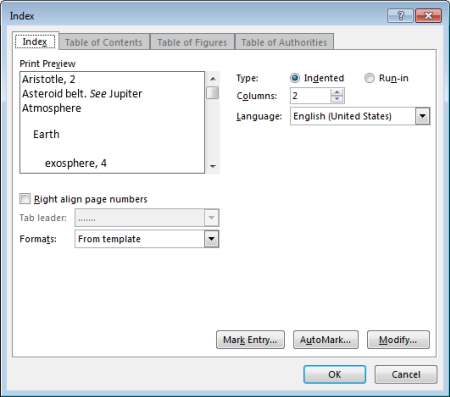
In the Index dialog box, you can choose the format for text entries, page numbers, tabs, and leader characters.
-
You can change the overall look of the index by choosing from the Formats dropdown menu. A preview is displayed in the window to the top left.
-
Click OK.
Edit or format an index entry and update the index
If you mark more entries after creating your index, you’ll need to update the index to see them.
-
If you don’t see the XE fields, click Show/Hide
in the Paragraph group on the Home tab. -
Find the XE field for the entry that you want to change, for example, { XE «Callisto» t «See Moons» }.
-
To edit or format an index entry, change the text inside the quotation marks.
-
To update the index, click the index, and then press F9. Or click Update Index in the Index group on the References tab.
 in the Paragraph group on the Home tab.
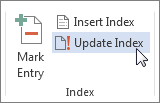
If you find an error in the index, locate the index entry that you want to change, make the change, and then update the index.
Delete an index entry and update the index
-
Select the entire index entry field, including the braces ({}), and then press DELETE.
If you don’t see the XE fields, click Show/Hide
in the Paragraph group on the Home tab. -
To update the index, click the index, and then press F9. Or click Update Index in the Index group on the References tab.
Need more help?
Currently, for any user, whether university student, professional or housewife, it is important to manage certain tools that Microsoft Word brings , which make your life easier when writing a document. One of these are the indexes, which are ideal for displaying the content of the work in an orderly and logical fashion, offering elegance and professionalism that is very pleasing to the eye.
Word is a powerful word processor of the suite Microsoft Office , it is a program that allows you to do a lot of things and among them a table of contents, commonly called an index, which is very useful for getting the document organized, or for the user to have a reference when reading it. ‘access to the information because you can view the structure of the text by chapters, title and subtitles and this definitely helps the reader.
In this sense, in this tutorial we will learn how to create an index in Microsoft 2007 and 2010 at through very explicit, simple and practical illustrations, so that from the moment you can create the table of contents of any document, either as a diploma thesis, university work or organizational manuals. The novelty of this guide is that you will learn how to do it both ways: manual and automatic.
Text tables can be generated in two ways and you will learn how to do it both ways in this tutorial. It is an extremely simple process that you can even do without much knowledge thanks to the software’s intuitive interface. But to make it even easier for you, we’ll show you step by step how to do each of them.
Automatically generate index
The advantage of doing this with Microsoft Word is that once the index is created, if we add more content to the document, the index will be updated directly .
- Create an index or a table of contents in Word, for this you must establish the title, subtitles and any division in the text , for this tutorial we are developing an example text with one title and three sub-titles.
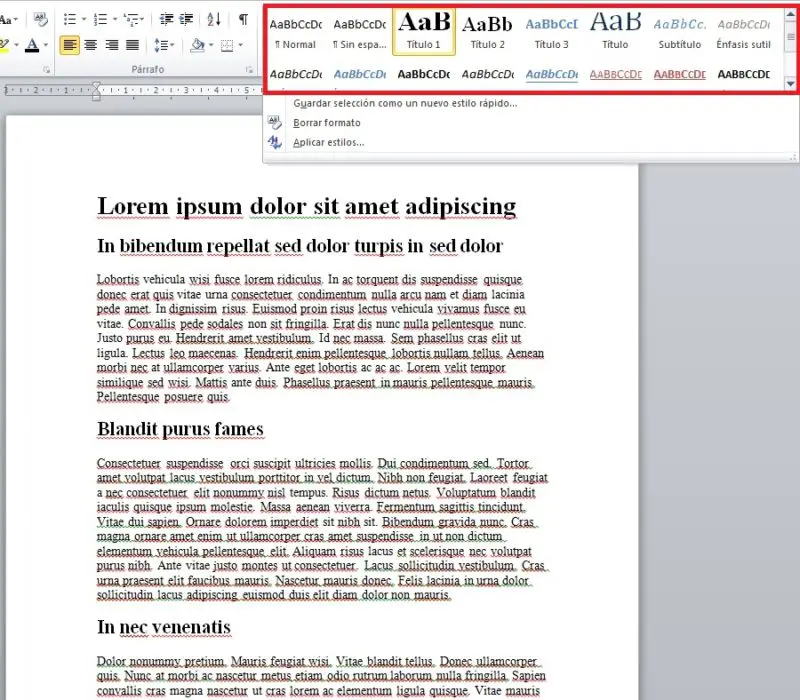
- Here you have to select the titles in order of importance, for example you have to click on the one that will make the title I, the title II and so on. You do this in the title section .
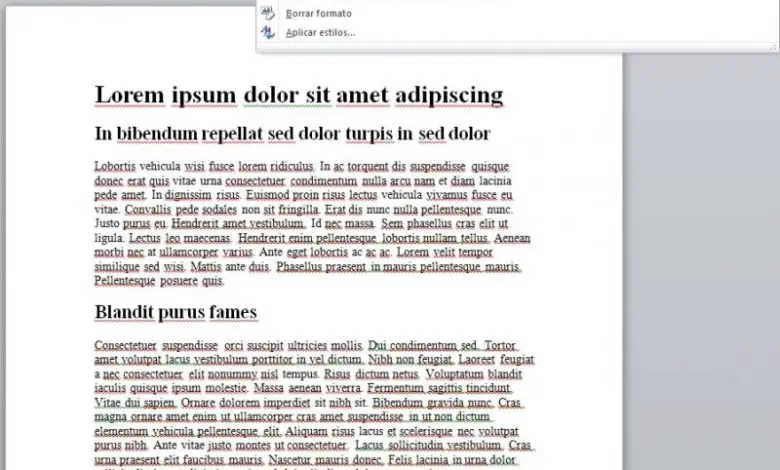
- If you don’t like the font options your titles have been changed to after formatting them as title , you can change them by shading the text and right-clicking and selecting «Edit».
- Then a new window will appear, and this is where you choose the style you like the most.
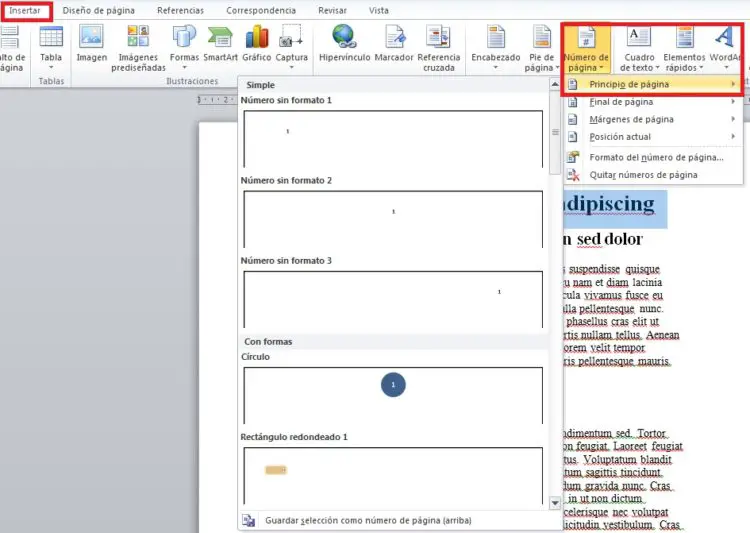
- Insert page numbering. You go to the «insert» menu , then search for the «Page number» option and choose the one that best suits your needs.
«UPDATE ✅ Do you need to CREATE a table of contents in Word 2010 and 2007 software and don’t know how to do it?» ⭐ ENTER HERE ⭐ and find out how to do it step by step with this UT EASY and QUICK TUTORIAL ✅ »
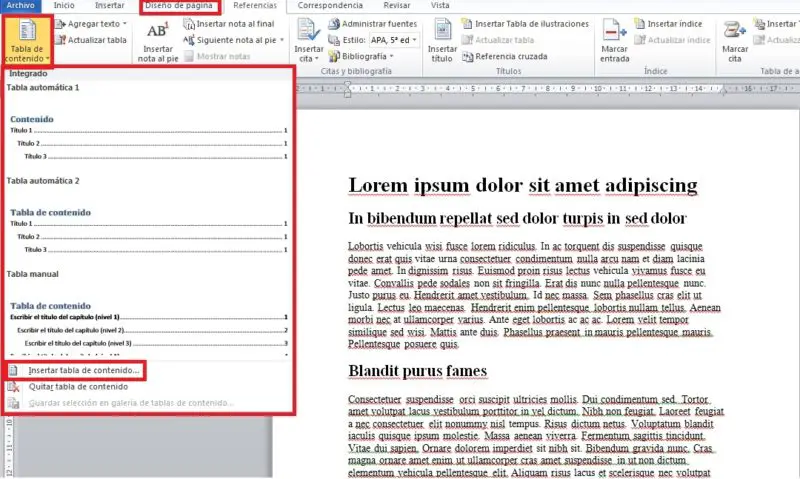
- Then it directs you to the menu » page design » , he places the «Table of Contents» on the left side and choose the design you like the most and finally click on insert table of contents.
- Then a new window appears with the table preview then click accept. The result will be the index with its respective numbering perfectly generated.
Create a table of contents manually
This is another way to index. For this you must configure tab stops in the rule when the document is opened.
- If by chance the horizontal ruler does not appear, go to the tab «Display» and tick the box » Rule «.

- Once you see the horizontal ruler, create a tab stop by clicking on the position that the page numbers of the sections of your table of contents will occupy. (it is usually 14cm) . Then double-click on this tab to display the window tabs .
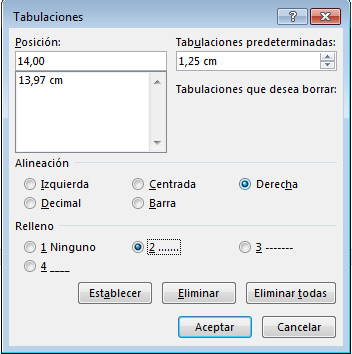
- Make sure the alignment is right, and then select the fill characters that the word processor will display between each entry and the page number. Click on OK to return to your document.
- Then type the name of your first entry (e.g. I used Introduction here) and press the TAB key . type then the page number and press the key Starter . You’ll repeat this step for each new entry you want to create (for tutorial, location, background, goals, and structure).
- Ready, you have the option manual to index the content , hope the information has been helpful to you.
If you have any questions, please leave them in the comments, we will get back to you as soon as possible, and it will be a great help for more community members as well. Thank you!


Currently, for any user, whether a university student, professional or housewife, it is important to use certain tools that Microsoft Word brings, which make your life easier when you make a document. One of these are the indexes, which are ideal for displaying in an orderly and logical way the content of the work, providing elegance and professionalism very pleasant to the eye.
Word is a powerful word processor of the Microsoft Office Suite , it is a program that allows you to do many things and among them a table of contents, commonly called index, which is very useful to obtain the organization of the document, or for the user to have a reference when accessing the information, since you can visualize the structure of the text by chapters, title and subtitles and that definitely helps the reader.
In this sense, in this tutorial, we will teach you how to create an index in Microsoft 2007 and 2010 through very explicit, simple and practical illustrations, so that from the moment you prepare the Table of contents of any document, whether as a thesis, university papers or organization manuals. The novelty of this guide is that you will learn to do it both ways: the manual and the automatic.
Steps to index Microsoft Word 2007 and 2010
Text tables can be generated in two ways and you’ll learn how to do it both ways in this tutorial. It is an extremely simple process that you can even do without much knowledge thanks to the intuitive software interface. But to make things even easier for you, we tell you step by step how to do each of them.
Generate index automatically
The advantage of doing so with Microsoft Word is that once the index is created, if we add more content to the document, the index will be updated directly .
- Create an index or table of contents in Word, for that you must set the title, subtitles and any division in the text , for this tutorial we elaborate an example text with a title and three subtitles.
- Here you have to select the titles in order of importance, for example you must click on which one will do the Title I, Title II and so on. You do that in the titles section .

- If you don’t like the font options with which your titles have been changed after assigning them a Heading (header) format, you can change them by shading the text and clicking with the right-click on the mouse and select representedModify important.
- Then a new window will appear, and this is where you choose the style you like best.
- Insert page numbering. You are located in the “insert” menu , then look for the option “Page number” and choose the one that best suits your needs.

- Then it directs you to the menu « page layout» , there it locates on the left side the «table of contents» and chooses the design that more please and finally click on insert table of contents.

- Then a new window appears with the preliminary view of the table and then click on Accept. The result will be the index with its respective perfectly generated numbering.
Create table of contents manually
This is another way of doing the index. For this you must configure the tab points in the rule when the document is opened.
- If by chance you don’t see the horizontal ruler, scroll to the “View” tab and check the “ Ruler ” box.

- Once you see the horizontal ruler, create a tab point by clicking on the position that the page numbers of the sections of your content index will occupy (it is 14 cm long) Then, double-click on that tabulation point so that the Tables.
window is displayed
- Check that the alignment is to the right and then select the fill characters that the word processor will expose between each entry and the page number. Click Accept to return to your document.
- Then, type the name of your first entry (for example, here I used Introduction) and press the TAB key Then, type the page number and touch the Enter key. You will repeat this step for each new entry you want to make (for the tutorial place, Background, Objectives and structure).
- Done, you have the option manual to do the content index , I hope you found the information useful.
Если вы создаете документ, содержащий множество химических формул и других символов, которые вы хотите преобразовать в верхние или нижние индексы, то начиная с Word 2007 вы найдете кнопки для того, чтобы поставить индекс в ворде прямо на ленте. Более подробно, как поставить индекс в ворде, будет рассмотрено в этой статье.
Как поставить нижний индекс в ворде
Следующие шаги описывают, как поставить нижний индекс в ворде:
- Выделите текст, который вы хотите сделать в виде нижнего индекса. В нашем примере мы хотим поставить нижний индекс в формуле воды:

Как поставить индекс в Word – Поставить нижний индекс в химической формуле воды
- Перейдите на вкладку «Главная».

Как поставить индекс в Word – Вкладка Главная
- Чтобы поставить нижний индекс, нажмите кнопку «Подстрочный знак» в разделе «Шрифт» на ленте.

Как поставить индекс в Word – Подстрочный знак, нижний индекс
- Выделенный текст будет преобразован в нижний индекс. В данном примере, мы поставили нижний индекс в химической формуле воды:

Как поставить индекс в Word – Пример как поставить нижний индекс
Также вы можете поставить индекс внизу для выделенного текста нажав сочетание клавиш CTRL+=.
Как поставить верхний индекс в ворде
Для того чтобы поставить верхний индекс в ворде, проделайте описанные шаги:
- Выделите текст, который вы хотите сделать в виде верхнего индекса.

Как поставить индекс в Word – Поставить верхний индекс в ворде для выделенного текста
- Перейдите на вкладку «Главная».
Как поставить индекс в Word – Вкладка Главная
- Нажмите кнопку «Надстрочный знак» в разделе «Шрифт» на ленте, чтобы поставить верхний индекс в ворде.

Как поставить индекс в Word – Надстрочный знак, верхний индекс
- Выделенный текст будет преобразован в верхний индекс. В нашем примере мы поставили верхний индекс «2» в формуле квадратного уравнения:

Как поставить индекс в Word – Пример как поставить верхний индекс в формуле
Также вы можете поставить индекс сверху для выделенного текста используя сочетание клавиш CTRL+SHIFT+=.
Теперь вы знаете, как поставить верхний или нижний индекс в ворде.