
As your document grows it becomes harder to manage and it makes sense to break it into smaller chunks.
Think about how a regular book is divided into chapters or sections. In Word, you can create a master document which acts as a container for all its sub-documents.
The computer can process the document faster, different contributors can work on different documents at the same time, maintenance is faster, and styling can be controlled centrally from the master document.
This post walks through how to set up a master document using the INCLUDETEXT field.
1. What does a master document look like with INCLUDETEXT fields
Here is one of my training manuals which weighs in at 148 pages.
The whole manual can be condensed into this.

Each INCLUDETEXT entry points to a different chapter. Each chapter is a document stored in the same folder as the master document.
The single line between the first two INCLUDETEXT entries represents a page break so the content on the second subdocument continues on the page directly after the first subdocument.
The double line between the second and third INCLUDETEXT entries represent a section break. For consistency, I always start a new chapter on the next odd page (the right-hand page on a 2-page spread), regardless of whether the current chapter finishes on an odd or even page.
Clicking the pilcrow icon (the one that looks like a backward P) on the Home ribbon, reveals the hidden formatting and clearly shows what kinds of break exist between each INCLUDETEXT field.

And to remove the white space to get the condensed view:
1. Click on the gap between two pages to set the focus.
2. Double-click again to remove or add the white space.

2. How to insert an INCLUDETEXT field
Fields are always enclosed with braces { }. You cannot simply type these. Rather you must press Ctrl F9 or insert a field from the Quick Parts feature.
1. Click the Insert tab.
2. Click the Quick Parts icon on the far-right side of the Insert ribbon.

3. Select Field towards the bottom of the menu. The Field dialog is displayed.

4. From the Field Names list, choose INCLUDETEXT.
5. In 99% of cases the default field options can be left.
6. However, the Preserve Formatting During Updates checkbox could be important.
- If your subdocuments have a variety of styles and formatting that bear no resemblance to those of other subdocuments, then tick (check) this box to retain the styling This will add a * MERGEFORMAT switch like this.
![]()
- If you wish to style all subdocuments consistently using a central set of styles within the master document, then leave the checkbox unticked. This means the *MERGEFORMAT switch will not be added. If the subdocument and master document have styles with the same names, the master document now takes precedence. I would recommend this approach. It’s what I use.
![]()
3. How to toggle the INCLUDETEXT field with its content
To toggle one INCLUDETEXT field to show the subdocument content (or vice versa):
1. Place the cursor inside the braces. Grey shading will appear behind the text. This tells you that Word controls the content, not you!
2. Press Alt F9.
To toggle all INCLUDETEXT fields to show the subdocument content (or vice versa):
1. Press Ctrl A to select the entire document content.
2. Press Alt F9.
4. Update subsequent changes to a sub-doc in the master doc
To toggle all INCLUDETEXT fields to show the subdocument content:
1. Press Ctrl A to select the entire document content.
2. Press F9.
So there you have it. An easy way to create a master document and subdocument setup.
There are 74 fields to explore in the Field dialog too. That will keep you busy for a while!
I hope you found plenty of value in this post. I’d love to hear your biggest takeaway in the comments below together with any questions you may have.
Have a fantastic day.


About the author
Jason Morrell
Jason loves to simplify the hard stuff, cut the fluff and share what actually works. Things that make a difference. Things that slash hours from your daily work tasks. He runs a software training business in Queensland, Australia, lives on the Gold Coast with his wife and 4 kids and often talks about himself in the third person!
SHARE
Suppose you would like to link fields in two different documents. As an example, let’s say you have a document wherein your client enters their name, address, e-mail address, telephone number, and date. Also suppose that you would to be able to lift that information to populate fields in a whole different document!
The easiest method to make this happen is to use the INCLUDETEXT field. This field will allow you to include text from your first document to your second one.
The first step would be to make certain that the text you want to include in your second document has bookmarks that define it, such as a bookmark that denotes your client’s name and another for the client’s address, etc. Say your first document is named Client Information.doc. If that is the case, then you would use the field below in your second document:
[ INCLUDETEXT “c:\my folder\Client Information.doc” ClientName }
The above field is the path to your Client Information document, with the name of the bookmark that defines the text you would like to include in your second document.
Of course, you would replace “my folder” with the name of the folder in which your Client Information document is stored.
You can include as many bookmarked fields from your Client Information in other documents that you would like. Simply use a separate INCLUDETEXT field for each piece of information you would like to reference.
Add and edit text

Try it!
Follow these steps to add, replace, and format text in Word.
Add text
-
Place the cursor where you want to add the text.
-
Start typing.
Replace text
-
Select the text you want to replace.
-
To select a single word, double-click it.
-
To select a line, click to the left of it.
-
-
Start typing.
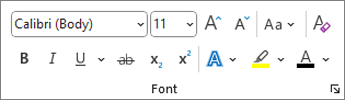
Format text
-
Select the text you want to format.
-
From the pop up toolbar or the Home tab, select an option to change the Font, Font Size, Font Color, or make the text bold, italics, or underline.

Copy formatting
-
Select the text with the formatting you want to copy.
-
Click
Format painter, and then select the text you want to copy the formatting to.Tip: Double-click
Format painter if you want to copy the formatting in more than one place.
 Format painter, and then select the text you want to copy the formatting to.
Want more?
Video: Change the look of text
Select text
Word Quick Start
Need more help?
In this chapter, we will discuss how to insert text in Word 2010. Many times it is required to go back and insert additional text in an existing line. Microsoft Word provides two ways to insert text in existing text and we will show how to use both the methods of inserting text −
Insert and Add Text
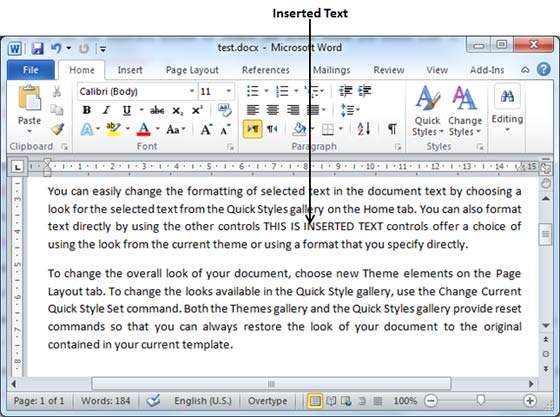
First we will see how inserted text will be added into the existing content without replacing any existing content.
Step 1 − Click the location where you wish to insert text; you can also use the keyboard arrows to locate the place where the text needs to be inserted.
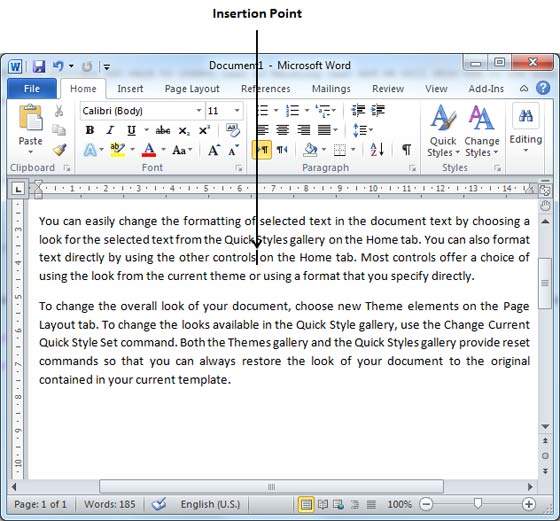
Step 2 − Start typing the text that needs to be inserted. Word inserts the text to the left of the insertion point, moving the existing text to the right
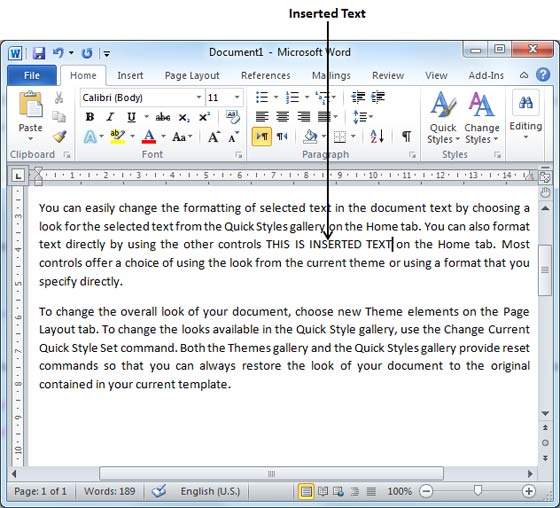
Insert and Replace Text
In the Insertion mode, text will be added into the existing content but same time it will over write all the content which comes in its way.
Step 1 − Right-click the status bar and select the Overtype option from the displayed menu.
When you select the Overtype option, the status bar will show the insert mode as shown below −
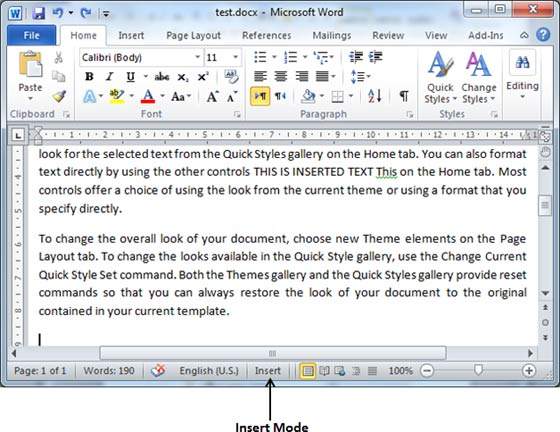
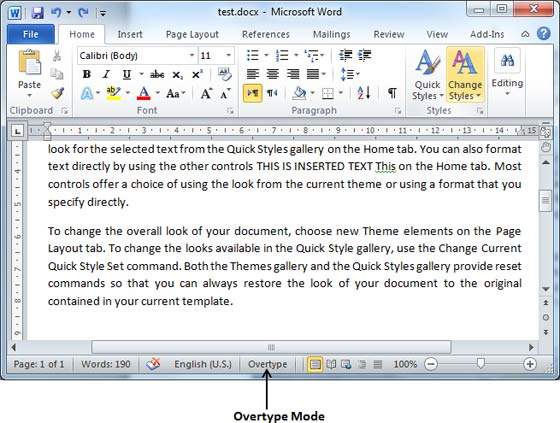
Step 2 − Click on the Insert text available at the status bar and it will switch to the Overtype mode as shown below −
Step 3 − Now click the location where the text needs to be inserted or you can use the keyboard arrows to locate the place where the text needs to be inserted.
Step 4 − Start typing the text that needs to be inserted. Word will replace the existing text with the newly typed text without moving the position of the exiting test.
Note − Microsoft Word 2010 disabled the functionality of the Insert key and it does nothing, so you will have to follow-up with the above mentioned procedure to turn-on or turn-off the Insert mode.
Insert text or data from another document without using cut-and-paste
Updated on November 21, 2021
What to Know
- Insert a document within Word by going to Insert > Object > Text from File. Select a file and choose Insert.
- Insert a portion of a document by going to Insert > Object > Text from File and selecting a file. Adjust Range to choose a portion.
A common method to insert text into a Microsoft Word document is to cut and paste it. This works well for short pieces of text. When you want to insert an entire document or a lengthy section of a document, there’s a quicker solution than the cut-and-paste method. Instructions in this article apply to Word for Microsoft 365, Word 2019, Word 2016, Word 2013, and Word 2010.
Add Another Document to a Word Document
Word can add an entire document into your work in a few quick steps.
-
Position the cursor where you want to insert the document.
-
Go to the Insert tab.
-
In the Text group, select the Object drop-down arrow.
-
Select Text from File.
-
In the Insert File dialog box, select a document file.
-
Choose Insert.
-
The document is inserted, beginning at the cursor location.
Add a Portion of a Document to a Word Document
If you don’t want to add the entire contents of the file into your Word document, choose which parts of the document or worksheet that you want to insert.
-
Place the cursor where you want to insert the text.
-
Select Insert > Object > Text from File.
-
In the Insert File dialog box, select a document file.
-
Select Range.
-
In the Set Range dialog box, enter the bookmark name from the Word document, or the range of cells from the Excel worksheet.
-
Select OK.
-
In the Insert File dialog box, select Insert.
-
The portion of the document is inserted, beginning at the cursor location.
Insert a Linked Text in a Document
If the text from the document you’re inserting might change, use linked text that can be updated easily. The linked text option offers a third method to insert a document that updates the document automatically if the original changes.
-
Position the cursor where you want to insert the link to the document.
-
Go to the Insert tab.
-
Select the Object drop-down arrow.
-
Choose Object.
-
In the Object dialog box, go to the Create from File tab, then select Browse.
-
In the Browse dialog box, choose the file to insert, then select Insert.
-
In the Object dialog box, select Display as icon to display the inserted file as a clickable icon, rather than display the first page of the file.
-
Select OK to insert the linked file
How to Update Linked Text
Because linked data is stored in the source file, linked objects can be updated if the source is changed.
If the text changes in the original document, select the linked text object (the entire text of the insert will be selected), then press F9. This checks the original and updates the inserted text with the changes made to the original.
Only linked text can be updated. Because embedded objects become part of the Word file, these objects are not connected to the source file and do not update.
Thanks for letting us know!
Get the Latest Tech News Delivered Every Day
Subscribe
I’m trying to use realtive paths in an MS Word file to streamline all links. Since relative paths are not possible as such in MS Word, I created a main path in the file’s properties and I’m trying to embed this in all links. I have confirmed that this «property path» works, when I type this code link:
{ DOCPROPERTY "Path" /* MERGEFORMAT }
and update, it returns the path desired:
C:\Users\PATH
The problem is that when embedding this in a link, it does not seem to take the property path:
{ INCLUDETEXT "{ DOCPROPERTY Path }\sum.xml" n xmlns:ns1='schema.xsd' x /ns1:aaaa/ns1:bbbb * MERGEFORMAT }
which returns an error.
I also verified that the absolute path works well:
{ INCLUDETEXT "C:\Users\PATH\sum.xml" n xmlns:ns1='schema.xsd' x /ns1:aaaa/ns1:bbbb * MERGEFORMAT }
Does anybody know whether this is impossible or whether I am making a mistake?
Thanks in advance!
Возможно, у вас есть текст, который вы часто вводите в документы Word, например, адреса. Вместо того, чтобы перепечатывать этот текст каждый раз, когда вам это нужно, вы можете поместить этот общий текст в один документ Word и ссылаться на него в других документах — он даже автоматически обновится во всех ваших документах, если вы его измените.
Скажем, вы хотите поместить свой адрес в нижний колонтитул ваших документов, но адрес меняется время от времени. Вы можете сохранить адрес в отдельном общем документе Word и использовать поле в своем отчете для извлечения текста из общего документа и обновления при каждом его изменении. Мы покажем вам, как это сделать.
Для начала создайте новый документ Word, который будет служить вашим хранилищем для адреса, который вы хотите вставить в другие документы Word. Сохраните его в месте, доступном для других документов. Например, не сохраняйте его на сетевом диске, к которому у вас не всегда есть доступ.
Мы будем использовать закладки для ссылки на адрес в нашем общем документе. Введите строку текста, которую вы хотите вставить в другие документы (в нашем случае, адрес). Создайте закладку, выделив имя и перейдя в меню «Вставка»> «Закладка» и присвоив ей имя, например «Адрес». См. Наше руководство по закладкам в Word для получения информации о их создании.
Обратите внимание, что в именах закладок не должно быть пробелов. Мы рекомендуем поместить название закладки над каждым элементом в вашем общем информационном файле, чтобы вы могли легко узнать, какое имя использовать для какого элемента. Это особенно полезно, если вы планируете иметь много элементов многократного использования в этом общем документе. В нашем примере мы добавили наш адрес в общий информационный документ и поместили название закладки «Адрес» над элементом.

После добавления элемента в общий документ вы можете сохранить его и закрыть. Откройте документ, в который вы хотите вставить адрес, и поместите курсор туда, куда вы хотите поместить этот текст. В нашем примере мы добавим нижний колонтитул и вставим туда адрес.

Мы будем использовать код поля INCLUDETEXT для ссылки на закладку, которую мы создали в общем документе. Для этого нажмите «Ctrl + F9», чтобы вставить скобки для кода поля.
ПРИМЕЧАНИЕ. Нельзя просто вводить нормальные скобки вокруг кодов полей. Вы должны использовать «Ctrl + F9», чтобы вставить правильный тип скобок.

Курсор автоматически помещается между скобками. Введите следующий текст в скобках, заменив «<путь к файлу>» абсолютным полным путем к общему слову, содержащему имя, которое вы хотите вставить. Замените «<имя закладки>» на имя закладки, назначенное элементу в общем документе.
INCLUDETEXT "<путь к файлу>" <имя закладки>
ПРИМЕЧАНИЕ. Не вводите скобки в коде поля.
Например, мы набрали следующее между скобками кода поля:
INCLUDETEXT Адрес "C: \ Users \ Lori \ Documents \ Общая информация \ CommonInformation.docx"
ПРИМЕЧАНИЕ: вы должны использовать двойную обратную косую черту в пути, как мы это делали. Кроме того, убедитесь, что вы используете прямые кавычки , а не умные, при вводе кода выше в поле.

Чтобы извлечь адрес из общего документа и вставить его в только что введенный код поля, щелкните правой кнопкой мыши код поля и выберите «Обновить поле» во всплывающем меню.

Адрес отображается в документе. Скобки по-прежнему отображаются вокруг адреса, если у вас включена опция «Показать закладки». Снова, посмотрите нашу статью о закладках, чтобы узнать, как отключить эту опцию. Кроме того, код поля может быть затенен. Тем не менее, вы также можете отключить это .

Если вы хотите изменить код поля, вы можете снова отобразить код, а не результат. Для этого щелкните правой кнопкой мыши на полученном элементе и выберите «Переключить коды полей» во всплывающем меню. Текст, который вы ввели в код поля, отобразится снова, и вы сможете его редактировать. Просто обновите поле, чтобы отобразить новый результат.

Создав общий документ, вы можете использовать его для хранения других элементов, которые вы часто вводите в свои документы Word. Просто используйте отдельное поле INCLUDETEXT в ваших документах Word для каждой части информации, которую вы хотите автоматически вставить из вашего общего документа.