
| Title | Converting other format files into Stata dataset files | |
| Author | Nicholas J. Cox, Durham University, UK |
-
1. A rule to remember
2. How to get information from Excel into Stata
3. Other methods for transferring information-
3.1 Copy and paste
3.2 import delimited command
3.3 ODBC and odbc load
4. Copying a Stata graph into Excel or any other package
5. Common problems-
5.1 Nonnumeric characters
5.2 Spaces
5.3 Cell formats
5.4 Variable names
5.5 Missing rows and columns
5.6 Leading zeros
5.7 Filename and folder
-
3.1 Copy and paste
1. A rule to remember
Stata expects one matrix or table of data from one sheet,
with at most one line of text at the start defining the contents of
the columns.
2. How to get information from Excel into Stata
Stata can directly import data from Excel (both .xls and .xlsx) files.
Select File > Import > Excel Spreadsheet from Stata’s menus.
Also, see import excel for more
information on importing Excel spreadsheets directly into Stata.
3. Other methods for transferring information
3.1 Copy and paste
Using your Windows or Mac computer,
- Start Excel.
- Enter data in rows and columns or read in a previously saved file.
-
Highlight the data of interest, and then select Edit and click
Copy. -
Start Stata and open the Data Editor (type edit at the Stata dot
prompt). - Paste data into editor by selecting Edit and clicking Paste.
3.2 import delimited command
The following section is based on material originally written by James Hardin,
University of South Carolina, and Ted Anagnoson, California State Los Angeles.
- Launch Excel and read in your Excel file.
-
Save as a text file (tab delimited or comma delimited) by
selecting File and clicking Save As.
If the original filename is
filename.xls, then save the file under the name
filename.txt or filename.csv.
(Use the Save as type list—specifying an extension such as
.txt is not sufficient to produce a text file.) - Quit Excel if you wish.
-
Launch Stata if it is not already running. (If Stata is already running,
then either
save or
clear
your current data.) -
In Stata, type import delimited using filename.ext,
where filename.ext is the name of the file that you
just saved in Excel. Give the complete filename, including the
extension. -
In Stata, type
compress. -
Save the data as a Stata dataset using the
save
command.
3.3 ODBC and odbc load
The following section is provided by Kevin Turner, StataCorp.
- You will have to download and install an Excel ODBC driver from
Microsoft’s website to work with Excel files. - Launch Stata.
- List the ODBC data sources that have been defined by
Windows using the odbc list command. - Click DSN (data source name) listing provided by odbc
list to query that DSN.
odbc list will then list a default entry called
“Excel Files” that you can
use to choose any Excel (*.xls) file to load via ODBC. You
must select an Excel file every time you issue an
odbc command using this DSN. You can also
define your own DSN that always points to a specific Excel
file. On Windows, you would define this special DSN via the
Control Panel called “Administrative Tools”, and
then select “Data Sources (ODBC)”. More
documentation is available from Microsoft concerning how to
define your own Data Sources. - Click the sheet/table corresponding to your data within the
Excel file to describe the contents. You may need to
issue the odbc query command with the
dialog(complete) option if you selected an arbitrary
Excel file in the previous list. - If you are satisfied with the previous description of the
sheet/table, you can click to load the described table. - If all goes well, your data will load into Stata. There are,
however, a few general reasons why loading Excel via ODBC
may be problematic, and those are covered in
section 5.
4. Copying a Stata graph into Excel or any other package
Once you have a suitable graph in Stata’s Graph window,
- Select Edit and click Copy Graph.
- Open or switch to Excel and move to where you want to paste the graph.
- Select Edit and click Paste.
These steps should also work in other packages that accept input in this
manner.
5. Common problems
The following section is from material by Ted Anagnoson, California State
Los Angeles; Dan Chandler, Trinidad, CA; Ronan Conroy, Royal College of
Surgeons, Dublin; David Moore, Hartman Group; Paul Wicks, South Manchester
University Hospitals Trust; Eric Wruck, Positive Economics; and Colin
Fischbacher, University of Edinburgh.
The problems mentioned in it are primarily with respect to text-based methods of importing data from Excel to Stata, such as copying and pasting and import delimited. import excel handles most of these issues.
5.1 Nonnumeric characters
One cell containing a nonnumeric character, such as a letter, within a
column of data is enough for Stata to make that variable a string variable.
It is often easiest to fix this in Excel. Within Stata,
suppose the problematic string variable is named foo.
Here are three alternative ways to identify the rogue observations:
        . tab foo if real(foo) == .
        . edit foo if real(foo) == .
        . list foo if real(foo) == .
If appropriate, they can be replaced by missing, and then the variable as a
whole can be converted to numeric by typing:
        . replace foo = "" if real(foo) == .
        . gen newfoo = real(foo)
        . drop foo
        . rename newfoo foo
You could also use
destring:
. destring foo, replace
destring includes an option for stripping
commas, dollar signs, percent signs, and other nonnumeric characters. It
also allows automatic conversion of percentage data.
5.2 Spaces
What appear to be purely numeric data in Excel are often treated by
Stata as string variables because they include spaces. People may
inadvertently enter space characters in cells that are otherwise
empty. Although Excel strips leading and trailing spaces from numeric
entries, it does not trim spaces from character entries. One or more
space characters by themselves constitute a valid character entry and
are stored as such. Stata dutifully reads the entire column as a
string variable.
Excel has a search and replace capability that enables you to delete these
stray spaces, or you can use a text-processing program or a text editor on
the text file. You can also use the solution in
nonnumeric characters.
5.3 Cell formats
Much of the formatting in Excel interferes with Stata’s ability to interpret
the data reasonably. Just before saving the data as a text file, make sure
that all formatting is turned off, at least temporarily. You can do this by
highlighting the entire spreadsheet, selecting Format, then
selecting Cells, and clicking General.
However, no solution solves all problems. Here is a cautionary tale. A text
file included address data. One column included house numbers, and a few
were in the form 4/2. Excel decided these few were dates and converted them
to 4th February. Setting all cells to a General format does not help
because it converts these unwanted dates to 5 digit Excel date codes. One
solution is to apply a Text format to the offending column when
offered the option during Excel’s text import process. But even this works
only if you have manageably few columns to look through and are aware of the
possibility of the problem.
5.4 Variable names
Stata limits variable names to 32 characters and does not allow
any characters that it uses as operators or delimiters. Also,
variable names should start with a letter. People who are Excel
users first and Stata users second are often creative with the names
they apply to columns. Stata converts illegal column (field) names to labels
and makes a best guess at a sensible variable name. Stata’s best guess,
however, may not be as good as the name a user would choose knowing Stata’s
naming restrictions.
For example, Stata will make variable names using the first 32 characters
of the variable name and use the rest for a label. If the first 32
characters are not unique, subsequent occurrences will be called
var1, var2, etc., or v1, v2, etc. (If you paste
the data, the variable stub is var; if you use insheet, the
stub is v, so be careful writing do-files.)
5.5 Missing rows and columns
Stata completely ignores empty rows in a spreadsheet but not
completely empty columns. A completely empty column gets read
in as a variable with missing values for every observation. Of
course, no harm is done in either case, but spreadsheet users who wish
to add blank columns and/or rows to enhance legibility may wish to
note this difference.
It is best if the first row of data is complete with no missing data.
If necessary, add a dummy row with every value present, and then once in
Stata type
. drop in 1
The missings command by Nicholas J. Cox, which allows
variables or observations that are all missing to be easily dropped, was published in Stata
Journal 15(4). Type search dm0085 for information on this command.
5.6 Leading zeros
With integer-like codes, such as ICD-9 codes or U.S. Social Security
numbers, that do not contain a dash, leading zeros will get dropped when
pasted into Stata from Excel. One solution is to flag
the variable as a string in the first line: add a nonnumeric character in Excel on that
line, and then remove it in Stata.
The missing leading zeros can also be replaced in a conversion to string
with one Stata command line; for example,
. gen svar = string(nvar, "%012.0f")
The second argument on the right-hand side of this command is a format
specifying leading zeros on conversion of nvar to its string
equivalent. For more details on formats, see
format.
5.7 Filename and folder
Confirm the filename and location of the file you are trying to read.
Use Explorer or its equivalent to check.
For example, you may have inadvertently produced a file named
filename.txt.txt, or more generally, a name that ends with two
extensions, which may or may not be the same extension. This naming is
possible if you have an option checked in Windows Explorer under
View, Folder Options to hide file extensions for known or
registered file types. Manually rename the file, or use the correct
filename in your Stata command. You may also wish to uncheck this option to
avoid similar mistakes in the future.
Data is shared in many different formats, with one of the most common file formats being Microsoft Excel (.xls or .xlsx) spreadsheets. If you have received your raw data in this format you will need to import it into Stata in order to analyse it. Here we will go through how to import an MS Excel file using both Stata menus and commands.
Import Excel using Stata Menus:
File > Import > Excel spreadsheet (*.xls;*.xlsx)

Click Browse…

Navigate to the location of the file you want to import and select it. We are going to import a dataset called econostata.xlsx.
Click Open

Once you select your dataset you will be shown a snapshot of that dataset and how it is going to import.
By default Stata will assume the excel column names (A, B, C, etc.) are the variable names. If the first row of your spreadsheet contains the true variables names, select the tick box «Import first row as variable names» as I have done in the image above.
By default Stata will preserve the text case of the variable names. It is generally recommended that you change this from «Preserve» to «Lower» via the drop-down menu below «Variable case:» on the right side of the window, as I have done in the image above.
Note: Stata variable names are case-sensitive. If you preserve the case of your variable names you will need to remember where upper and lower case letters are in each variable name in order to use those variables in commands in Stata.
If you have multiple worksheets in your spreadsheet, they will need to be imported one at a time as separate datasets. Once imported and saved these individual sheet datasets can be merged or appended as needed. Stata will automatically assume you want to import the first sheet.
If there is another sheet you want to import, you will need to select it from the drop-down menu under «Worksheet:» on the left side of the window. In the above image the selected sheet is shown in the selection box as «Sheet1 A1:H1157».
Stata will try to detect the cell range for you, and it will select all columns and rows with data. If your spreadsheet is set up with empty columns/rows between filled columns/rows you may need to alter the cell range as Stata will stop its selection when it reaches the first empty column and row. Additionally, if you only want to import part of the spreadsheet you may want to alter the cell range to include only the information you want.
To specify your cell range, click the «…» button or simply type in your new cell range in the box below «Cell range:» on the right side of the window.
There is also an option to «Import all data as strings», which is a tick box below the tick box for «Import first row as variable names». There are some instances where you want to format or convert numeric variables in a special way in Stata. It is sometimes easier to do this by importing a numeric variable as a string and then formatting it appropriately once it is in Stata. If this is something you need to do, make sure to select this tick box. We do not want to do this for this example.
Once you have made the selections appropriate for your dataset, click OK
Your dataset should now be loaded, and you should be able to examine it using the browse command.
Import Excel using Stata Commands:
To import an excel spreadsheet through the Command pane you use the command import excel. There are several options that can be added to this command as needed. To import the same spreadsheet in the same way as was done above with the menus, you use the following command:
In the command above, you start with the command import excel followed by the full file path of the excel file you are importing. You then add a comma, and anything after the comma are options you need to specify if you want to alter the default import settings.
The sheet() option used in this command gives the name of the sheet you are importing. If there is only one sheet in the file you do not need to specify this option.
The firstrow option used in this command tells Stata that the first row of your spreadsheet contains the variable names.
The case() option used in this command tells Stata which case the variable names should be imported as. You can specify either lower, upper, or preserve inside the brackets. It is generally recommended to specify the case as lower when importing, as was done in our command above.
There are additional options you can add which we did not use here. Any option just needs to be added after the comma, as was done in the command above. Make sure to separate multiple options with a space between each option. The additional options not used here are outlined below as follows:
The cellrange() option is used when you want to specify a range that is different to what Stata has selected by default. You can specify a cell range in one of two ways. First, you can just give the starting (top left) cell for your dataset. For example — cellrange(B27) tells Stata that the data in the spreadsheet starts at cell B27 and continues across in columns and down in rows until a blank column and row is reached. The second way of specifying a cell range is to give both the starting and ending cells. If you also need to specify the end (bottom right) cell, you just add a colon between the two cells. For example — cellrange(B27:H1235) tells Stata the top left cell is B27 and the bottom right cell is H1235.
the allstring option is used when you want all your variables to be imported into Stata as string or text variables. You just add this after the comma to use.
The clear option is used when you want to replace the current dataset loaded in memory with this newly imported excel dataset. Note: This will permanently erase any data that was already loaded. Make sure to save your current dataset before you use this option. You just add this after the comma to use.
When you enter your command through the Stata Command pane your dataset should then be loaded into Stata.
Output:
The only output Stata will give you when you are importing a file is print the selected command to the Results pane, followed by the number of variables and observations imported. It will print the command even if you use Stata menus to import your file. This is because all interactions with Stata are ultimately done through commands, even those initially done through menus. All the Stata menus are doing is taking the selections you make and converting them to a command that is then given to Stata to run. The output for this example is below:

To examine my imported dataset I use the browse command to open it in spreadsheet view, which you can see below:

| cd | Change directory |
| dir or ls | Show files in current directory |
| insheet | Read ASCII (text) data created by a spreadsheet |
| infile | Read unformatted ASCII (text) data |
| infix | Read ASCII (text) data in fixed format |
| input | Enter data from keyboard |
| import excel | Import Excel .xls or .xlsx file |
| describe | Describe contents of data in memory or on disk |
| compress | Compress data in memory |
| save | Store the dataset currently in memory on disk in Stata data format |
| use | Load a Stata-format dataset |
| count | Show the number of observations |
| list | List values of variables |
| clear | Clear the entire dataset and everything else |
2.0 Demonstration and explanation
A) Preparing the workspace
A1. Changing the working directory
We start by changing the working directory, which is the default directory (folder) from which Stata will read files and to which Stata will write files. We can read/write to a directory different from the working directory by specifying a full path name when reading/writing files. We use the cd command to change directories and then dir or ls to list the contents of the directory.
cd w:     /* note: directory and path may differ on your computer */
dir
A2. No dataset can be loaded while another dataset is in memory
In Stata, we can only have one dataset loaded in memory at a time. Before another dataset can be loaded, we must erase all data from memory using the clear command. We can also clear memory as we load in another dataset using the clear option on one of the data-loading commands (see below)
clear
B) Use import delimited to read in delimited data from other sources
B1. Comma-separated file with variable names
Our first data will come as a spreadsheet, often managed or created by programs such as Excel. For example, in
Excel, we can save data as a comma-separated-values format (.csv) file, which is a text file with fields separated by commas. Here is a how a .csv file might appear:
gender,id,race,ses,schtyp,prgtype,read,write,math,science,socst
0,70,4,1,1,general,57,52,41,47,57
1,121,4,2,1,vocati,68,59,53,63,61
0,86,4,3,1,general,44,33,54,58,31
0,141,4,3,1,vocati,63,44,47,53,56
0,172,4,2,1,academic,47,52,57,53,61
0,113,4,2,1,academic,44,52,51,63,61
0,50,3,2,1,general,50,59,42,53,61
0,11,1,2,1,academic,34,46,45,39,36
0,84,4,2,1,general,63,57,54,,51
0,48,3,2,1,academic,57,55,52,50,51
The command import delimited can read text files in which the fields are separated by any character, such as spaces, commas or tabs. The command reads the first line of the data file to automatically indentify the character used as the separator (the separator can be explicitly specified with the delimiter option). Imagine we have a data file, hs0.csv, located in our current working directory. Here are the Stata commands to read these data. We use the describe command to check if the input was successful.
import delimited using hs0.csv,  clear
describe
B2. Comma-separated file without variable names
If the first line of the data does not contain the variable names, we must supply the names to the import delimited command.
Let’s try to read such a file called hs0_noname.csv.
import delimited gender id race ses schtyp prgtype read write math science socst using hs0_noname.csv, clear
describe
B3. Delimited files in general
We can use the import delimited command to read text files where the fields are separated by any character, such as spaces or tabs. Here is a snapshot of the datafile, hs0.raw.
0	70	4	1	1	general		57	52	41	47	57
1	121	4	2	1	vocati		68	59	53	63	61
0	86	4	3	1	general		44	33	54	58	31
0	141	4	3	1	vocati		63	44	47	53	56
0	172	4	2	1	academic	47	52	57	53	61
0	113	4	2	1	academic	44	52	51	63	61
The columns are left-justified, suggesting that the file is tab-delimited. However, some columns (namely columns 6 and 7) may have 1 or 2 tabs between them — it can be hard to tell by visual inspection. We explicitly tell Stata that the delimiter is a tab in the datafile using the delimiter option, and use the suboption collapse to treat multiple tabs as one delimiter. This file has no variable names, so we must supply them again:
import delimited gender id race ses schtyp prgtype read write math science socst using hs0.raw, delimiter(tab, collapse) clear
C) Use infix to read in fixed format files
Another data format in which data can be stored is fixed format. It always
requires a codebook to specify which column(s) corresponds to which variable. Here is small
example of this type of data with a codebook. Notice how we make use of the
codebook in the infix command below. We will use the
schdat.fix data file.
        195  094951
        26386161941
        38780081841
        479700  870
        56878163690
        66487182960
        786  069  0
        88194193921
        98979090781
       107868180801
| variable name | column number |
| id | 1-2 |
| a1 | 3-4 |
| t1 | 5-6 |
| gender | 7 |
| a2 | 8-9 |
| t2 | 10-11 |
| tgender | 12 |
Below we use the infile command, where we specify variable names and the column numbers that their corresponding values inhabit.
clear
infix id 1-2 a1 3-4 t1 5-6 gender 7 a2 8-9 t2 10-11 tgender 12 using schdat.fix
D) Use import excel to read in Excel files
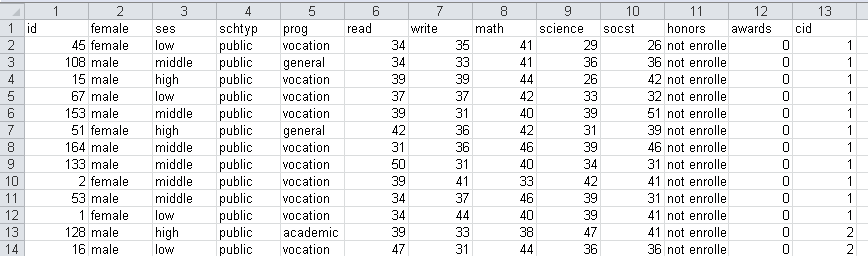
The import excel command was introduce in Stata 12. Here is what the file hsbdemo.xlsx looks like.
On the import excel command below, we specify the sheet where the data are located with the sheet() option and that the variable names are contained in the first row using the firstrow option.
import excel using hsbdemo.xlsx, sheet("hsbdemo") firstrow clear
E) Use input to enter data from the keyboard or a do-file
We can also use the do-file editor to input data. The do-file editor is used for
writing a sequence of commands and running them all at once. You can copy and paste
the following Stata syntax to the do-file editor and run it. You can also paste this directly into the Command window
clear
input id female race ses str3 schtype prog read write math science socst
147 1 1 3 pub 1 47 62 53 53 61
108 0 1 2 pub 2 34 33 41 36 36
 18 0 3 2 pub 3 50 33 49 44 36
153 0 1 2 pub 3 39 31 40 39 51
 50 0 2 2 pub 2 50 59 42 53 61
 51 1 2 1 pub 2 42 36 42 31 39
102 0 1 1 pub 1 52 41 51 53 56
 57 1 1 2 pub 1 71 65 72 66 56
160 1 1 2 pub 1 55 65 55 50 61
136 0 1 2 pub 1 65 59 70 63 51
end
After running the above program, we can issue the describe command to get a
general idea about the data set.
describe
F) The save command reads stores data as Stata data (.dta) files, and the use command loads Stata data files
We can save the data set we just created to disk by issuing the save command. This creates a .dta file when no extension is specified.
save hsb10
We can then load the data we just saved using the use command.
clear
use hsb10
use "W:hsb10", clear
G) The use command can load files over the internet
The use command can also be used to read a data file over the
internet, which we will do throughout this seminar.
use https://stats.idre.ucla.edu/stat/data/hs0, clear
3.0 For more information
- Data
Management Using Stata: A Practical Handbook- Chapter 2
- Statistics
with Stata 12- Chapter 2
- Gentle Introduction to Stata, Revised Third Edition
- Chapter 2
- Data Analysis Using Stata, Third Edition
- Chapter 11
An Introduction to Stata for Health Researchers, Third Edition- Chapter 6
- Stata Learning Modules
- A sample Stata
session - Inputting raw data files into Stata
- A sample Stata
- Frequently Asked Questions
- How can I convert files among SAS,
SPSS and Stata? - How can I input a dataset quickly?
- How
can I read Excel files in Stata? (Stata 12) - How
can I read Stata 12 data files in Stata 11? - How do I read a data file that uses
commas/tabs as delimiters? - How can I handle the No Room to Add
Observations Error?
- How can I convert files among SAS,
оглавление
- 1. Метод 1: Ctrl + C / Ctrl + V (применимо, когда объем данных небольшой)
- 2. Способ 2. Импортируйте файл Excel напрямую (применимо, если файл большой).
- 3. Способ 3. Дважды щелкните файл dta, чтобы открыть его с помощью Stata.
- 4. Метод 4: импортировать сохраненный файл в Stata.
- 5. Метод 5. Введите команду использования.
Эта статья основана на «Эконометрике и приложении статистики», написанном Чен Цян.
Адрес загрузки набора данных:Домашняя страница профессора Цян Чена по эконометрике и статистике
1. Метод 1: Ctrl + C / Ctrl + V (применимо, когда объем данных небольшой)
2. Метод 2. Импортируйте файл Excel напрямую (применимо, если файл большой).
3. Способ 3. Дважды щелкните файл dta, чтобы открыть его с помощью Stata.
немного
4. Метод 4: импортировать сохраненный файл в Stata.
- Используйте SPSS, чтобы открыть сохраненный файл, SPSS может вывести файл в формат Stata

- Выберите сохранить, чтобы получить файл dta, дважды щелкните, чтобы открыть данные с помощью Stata

5. Метод 5. Введите команду использования.
Войдите в область команд Stata
используйте D: Data Stata Files Data-Finished-Undergraduate Measurement grilic_small.dta
Вы можете использовать файл dta.Как правило, удобнее открыть папку напрямую и дважды щелкнуть ее, чтобы открыть.
нота:
- Stata не обеспечивает операций отмены, а несохраненные данные хранятся в области памяти. Используйте команду clear, чтобы удалить данные в области памяти. Обратите внимание на своевременное сохранение и резервное копирование при выполнении операций редактирования данных.
- Stata чувствительна к регистру.
When it comes to leveraging data quickly and efficiently, importing data from an Excel spreadsheet into Stata is a key skill to master. Learning how to import Excel data with variable names in the first row using Stata provides you with the ability to quickly manage and analyse data to help make better business decisions.
Before You Begin
Before you begin importing data from an Excel spreadsheet into Stata, it’s important to note the following:
- The data needs to be arranged in a standard dataset form in the Excel spreadsheet before importing it into Stata. This means that data needs to be arranged in either a Stacked form or a Rectangular form, both of which are explained below.
- Ensure the variable names are in the first row.
- Select what type of variable is contained in each cell.
- Ensure the variable name names are in a standard format, meaning they should contain no spaces, punctuation marks or non-alphabetical characters.
What is Stacked Form?
Stacked form is a dataset form where the cases are lined up in a single column and the variables that describe each case are placed in secondary columns. To understand how a stacked form looks, consider the example below:
| ID | Name | Age | Gender |
|---|---|---|---|
| 1 | Jeff | 27 | Male |
| 2 | Annie | 28 | Female |
What is Rectangular Form?
Rectangular form is a dataset form where the cases are lined up in rows and the variables that describe each case are placed in columns. To understand how a rectangular form looks, consider the example below:
| ID | Name | Age | Gender |
|---|---|---|---|
| 1 | Jeff | 27 | Male |
| 2 | Annie | 28 | Female |
Step-by-Step Guide and Links
Follow these steps to learn how to import Excel data with variable names in the first row using Stata:
Open up Stata.
Open up the Excel file that contains the data you need to export.
Arrange the spreadsheet in either the staked or the rectangular form.
Ensure the variable names are in the first row.
Select what type of variable is contained in each cell.
Go to File > Import data > Excel files.
Select the Excel file that contains the data you need to export and click “Open”.
Select “Yes” within the dialogue box that appears.
Select “Stata Dataset” in the “Files of type” drop-down menu and click “Open”.
Select “Import range of cells” in the “Output” drop-down menu and click “OK”.
Select “Stacked” or “Rectangular” form in the “Format of the source data” drop-down menu.
Select “Yes, the first row contains variable names” in the “Does the first row in the spreadsheet contain names of the variables?” drop-down menu.
Ensure the “Save as type” drop-down menu is set to “Stata Dataset” and click “OK”.
Once the data has been exported, review it and make any necessary adjustments.
FAQ
What do I need to do before I start importing Excel data with variable names in the first row using Stata?
Before you begin importing data from an Excel spreadsheet into Stata, it’s important to note that the data needs to be arranged in a standard dataset form in the Excel spreadsheet before importing it into Stata. This means that data needs to be arranged in either a Stacked form or a Rectangular form. Additionally, ensure the variable names are in the first row, select what type of variable is contained in each cell and ensure the variable names are in a standard format, meaning they should contain no spaces, punctuation marks or non-alphabetical characters.
What is Stacked form?
Stacked form is a dataset form where the cases are lined up in a single column and the variables that describe each case are placed in secondary columns. To understand how a stacked form looks, consider the example below:
| ID | Name | Age | Gender |
|---|---|---|---|
| 1 | Jeff | 27 | Male |
| 2 | Annie | 28 | Female |
What is Rectangular form?
Rectangular form is a dataset form where the cases are lined up in rows and the variables that describe each case are placed in columns. To understand how a rectangular form looks, consider the example below:
| ID | Name | Age | Gender |
|---|---|---|---|
| 1 | Jeff | 27 | Male |
| 2 | Annie | 28 | Female |
What type of files can be imported into Stata?
Stata supports the import of various different types of files, including plain text (.txt, .csv, .por, .dta, and .dbf), Microsoft Excel (.xls, .xlsx and .xlsm), SPSS (.sav), SAS (.sas7bdat) and more.
Is it possible to import data from multiple files into Stata at once?
Yes, it is possible to import data from multiple files into Stata at once. To do this, you’ll need to use the use command with the batch prefix, followed by the complete path to the files you need to import.
For example, if the files you wish to import are located at c:/data/, then the command you would use would be:
use c:/data/*
How can I view the data I’ve imported into Stata once the import is complete?
To view the data you’ve imported into Stata, you can use the browse command or you can use the Explore window which can be opened by clicking View > Explore or using the command explore.
https://www.stata.com/help.cgi?import_excel
https://www.stata.com/help.cgi?dataset_formats