
Make the whole picture transparent
If you’re using Word 2021 or a Microsoft 365 subscription, you can apply transparency directly to a picture. For more info, see Make a picture transparent.
-
Draw a shape first
-
Fill it with a picture
-
Adjust the picture’s transparency

For other versions of Word, use this workaround.
-
Select Insert > Shapes and choose a shape.
-
Draw the shape in your document, making it the same proportions as the picture you’re about to add to it.
-
Right-click the shape and select Outline > No Outline.
-
Right-click the shape again, and then select Format Shape.
-
In the Format Shape pane, select the Fill icon
 , and then select Picture or texture fill.
-
Select File, choose a picture, and then select the Insert button.
-
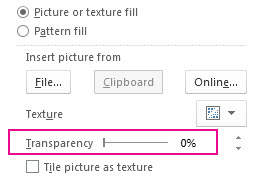
Move the Transparency slider in the Format Shape pane to adjust the picture.
Or you may enter a number in the box next to the slider: 0 is fully opaque, the default setting; and 100% is fully transparent.
 , and then select Picture or texture fill.
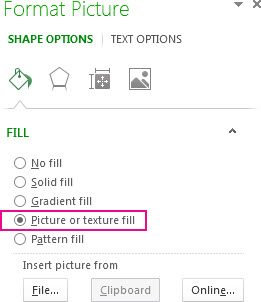
If your picture is distorted, you can make adjustments to the appearance by resizing your shape or by using the Offset settings below the transparency slider.
You can make one color in a picture transparent by using the built-in transparency feature. Unlike making an entire picture transparent, making one color transparent is possible only in an object that’s inserted as a picture, not inside a shape.
Important: Areas that seem to be a single color (for example, green leaves) might actually be made up of a range of subtle color variations, and you might not get the effect you want. Setting a transparent color works best with simple, solid-color pictures, such as clip art.
-
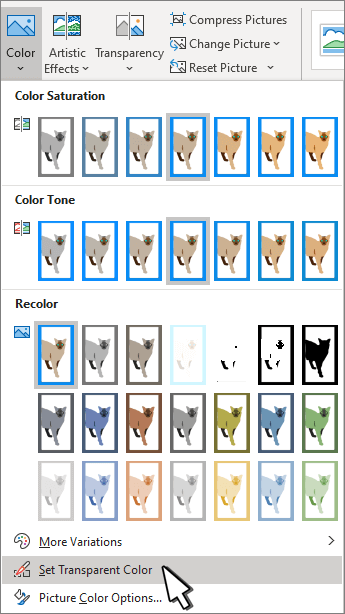
Select the picture, and go to Picture Format > Color or Picture Tools > Format > Color.
-
Select Set Transparent Color.
-
When the pointer changes, select the color you want to make transparent.
To undo color changes, select Reset Picture in the Adjust group.
Note: When you print pictures with transparent areas, the transparent areas are the same color as the paper. On your screen or a website, the transparent areas are the same color as the background.
Change the transparency of a picture or fill color
If you’re using Word 2021 or a Microsoft 365 subscription, you can apply transparency directly to a picture. For more info, see Make a picture transparent.
For other versions of Word, use this workaround.
-
Go to Insert > Shapes and choose a shape to use.
-
Select Shape Format > Shape Fill.
-
Select Picture and choose the picture that you want.
-
Select Insert.
-
Select the shape, and go to Shape Format to open the Format Pane.
-
Select Fill > Picture or gradient fill and then drag the Transparency slider to set the exact percentage of transparency you want.

Make one color of a picture transparent
You can make one color in a picture transparent to hide part of the picture or create a layered effect. Transparent areas in pictures show through the color of the paper or background.
-
Go to Insert > Picture and add a picture to your document
-
Select the picture for which you want to change the transparency of a color.
-
On the Picture Format tab, select Color or Recolor, and then select Set Transparent Color.
-
Click or tap the color in the picture or image that you want to make transparent.
Note: You can’t make more than one color in a picture transparent. Areas that appear to be a single color might actually be made up of a range of subtle color variations. The color that you select might appear in only a small area, and it might be difficult to see the transparent effect in certain pictures.
You can’t make a picture transparent in Word for the web. You have to use a desktop version of Word (on either Windows or macOS) instead.

Как вы наверняка уже знаете, в MS Word можно работать не только с текстом, но и с рисунками. Последние после добавления в программу можно даже редактировать с помощью большого набора встроенных инструментов. Однако, учитывая тот факт, что Ворд — это все-таки текстовый редактор, с некоторыми задачами по работе с изображениями бывает не так просто справиться.
Урок: Как в Word изменить изображение
Одна из задач, с которой могут столкнуться пользователи данной программы — необходимость изменить прозрачность добавленного рисунка. Это может потребоваться для того, чтобы уменьшить акцент на изображении, либо же визуально “отдалить” его от текста, а также по ряду других причин. Именно о том, как в Ворде изменить прозрачность рисунка мы и расскажем ниже.
Урок: Как в Word сделать обтекание картинки текстом
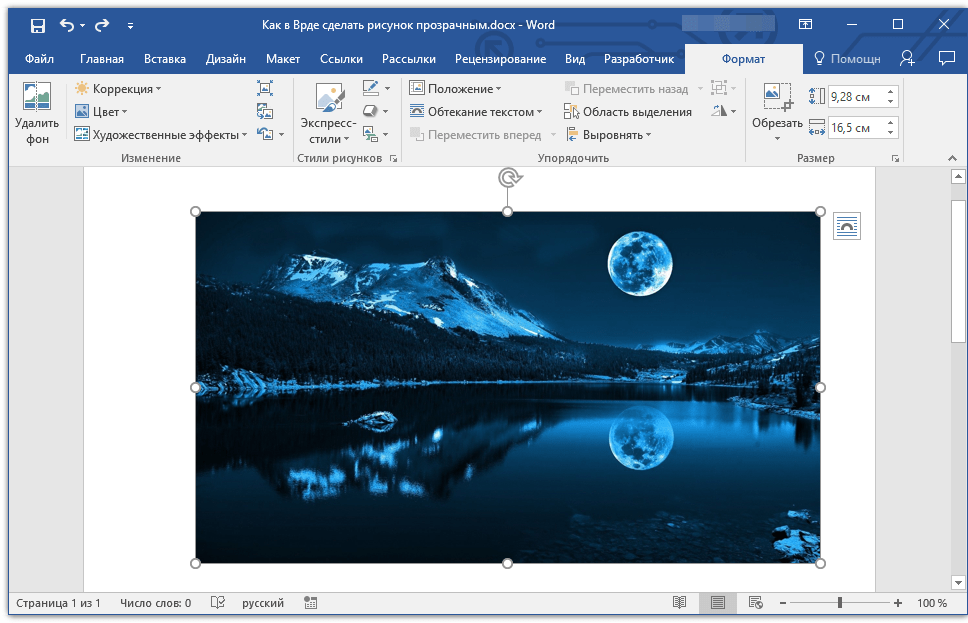
1. Откройте документ, но пока не торопитесь добавлять в него рисунок, прозрачность которого требуется изменить.
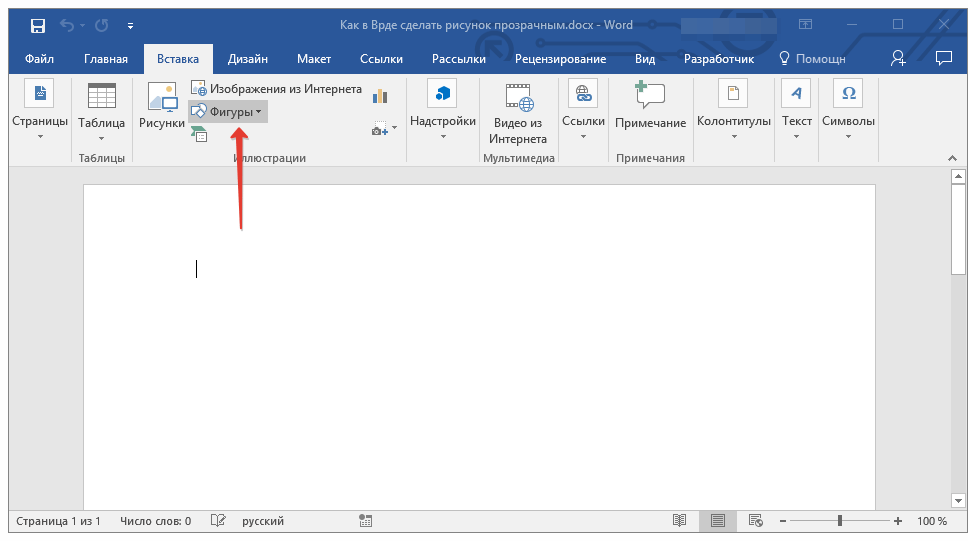
2. Перейдите во вкладку “Вставка” и нажмите кнопку “Фигуры”.
Урок: Как в Ворде сгруппировать фигуры
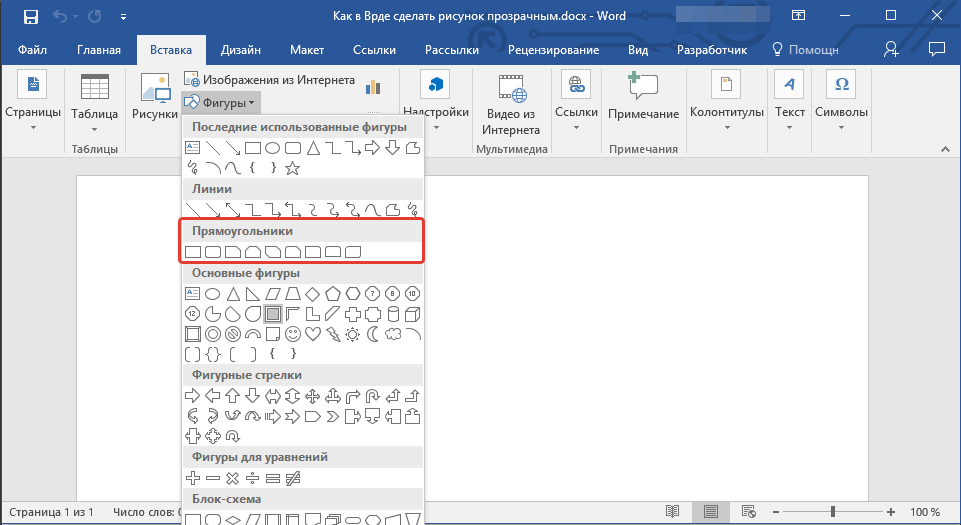
3. В выпадающем меню выберите простую фигуру, прямоугольник подойдет лучше всего.
4. Правой кнопкой мышки кликните внутри добавленной фигуры.

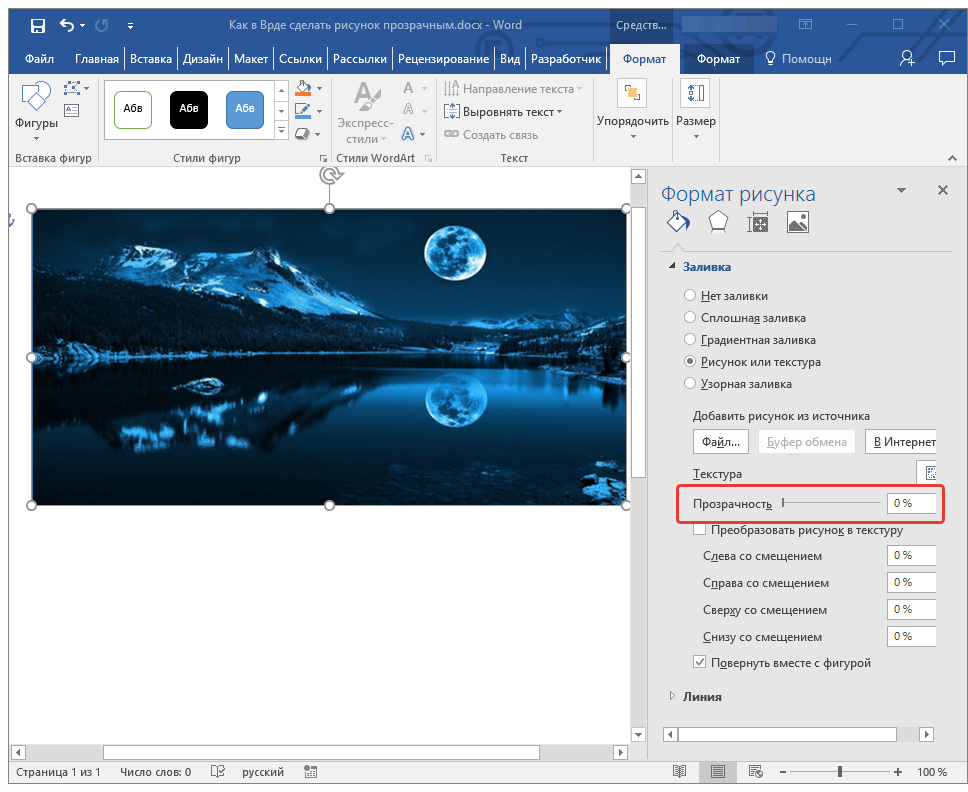
5. В открывшемся справа окне в разделе “Заливка” выберите пункт “Рисунок”.


6. Выберите в открывшемся окне “Вставка картинок” пункт “Из файла”.
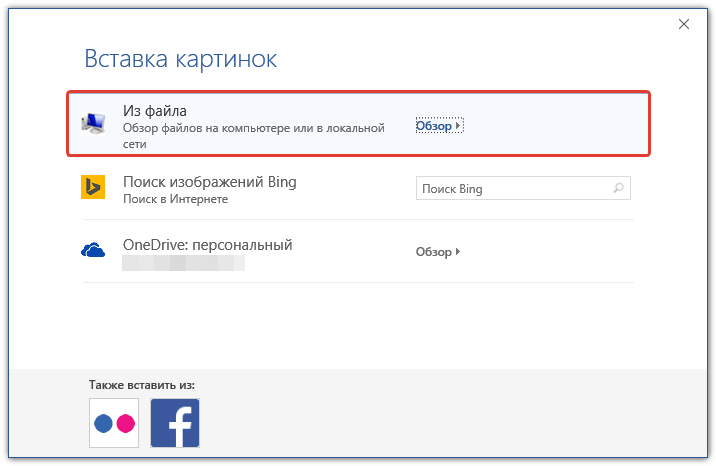
7. В окне проводника укажите путь к рисунку, прозрачность которого необходимо изменить.

8. Нажмите “Вставить” для добавления рисунка в область фигуры.
9. Кликните правой кнопкой мышки по добавленному рисунку, нажмите на кнопку “Заливка” и выберите пункт “Текстура”, а затем “Другие текстуры”.
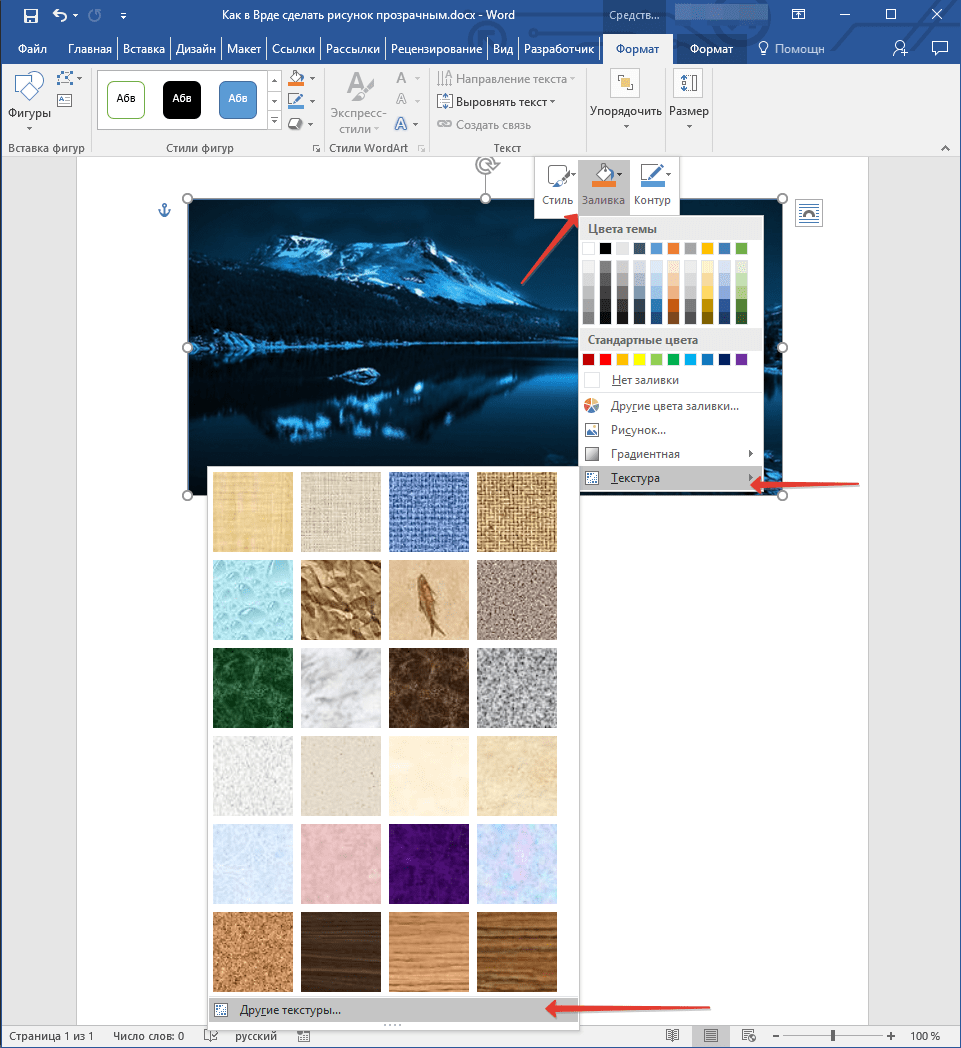
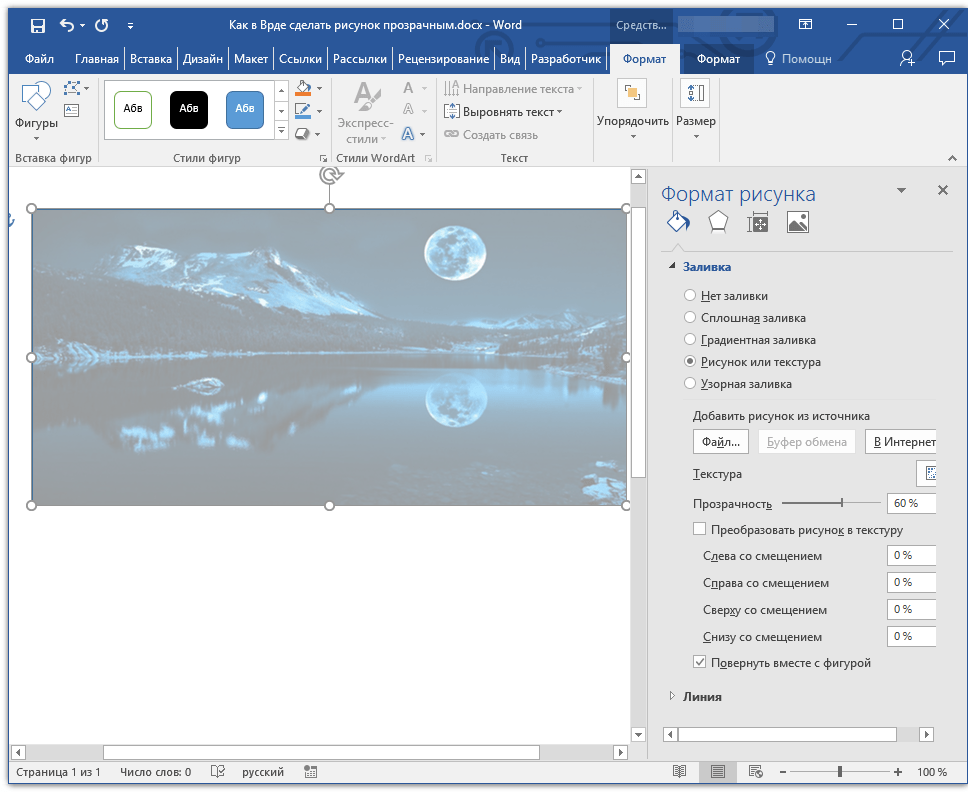
10. В окне “Формат рисунка”, которое появится справа, перемещайте ползунок параметра “Прозрачность”, пока не добьетесь желаемого результата.
11. Закройте окно “Формат рисунка”.
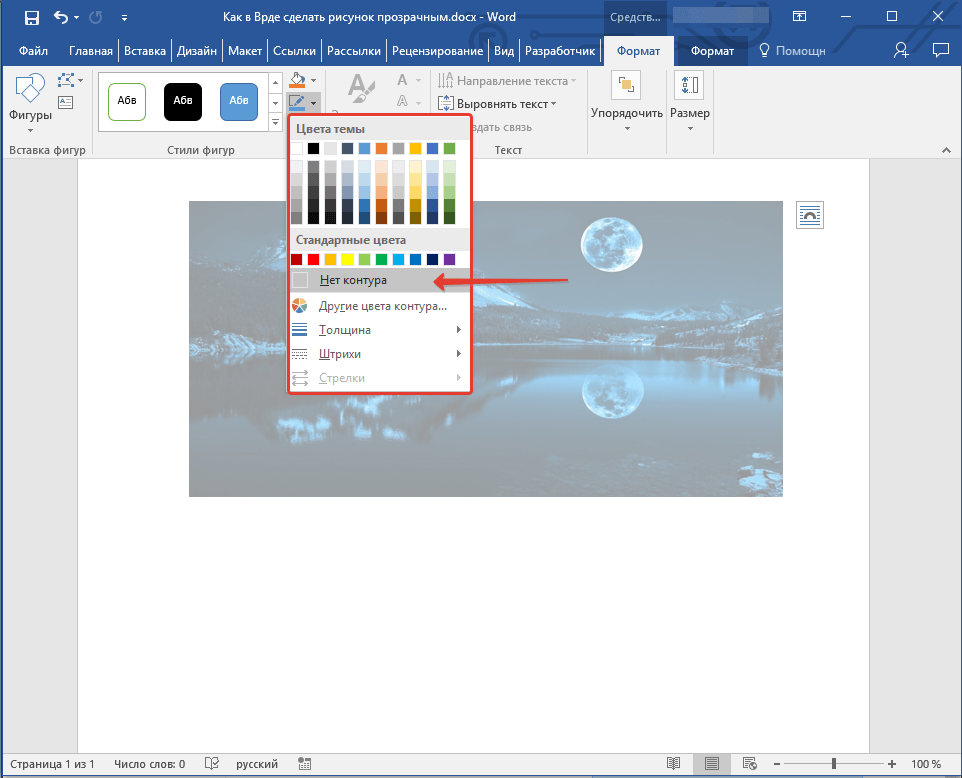
11. Удалите контур фигуры, внутри которой находится картинка. Для этого выполните следующие действия:
- Во вкладке “Формат”, которая появляется при нажатии на фигуру, разверните меню кнопки “Контур фигуры”;
- Выберите пункт “Нет контура”.
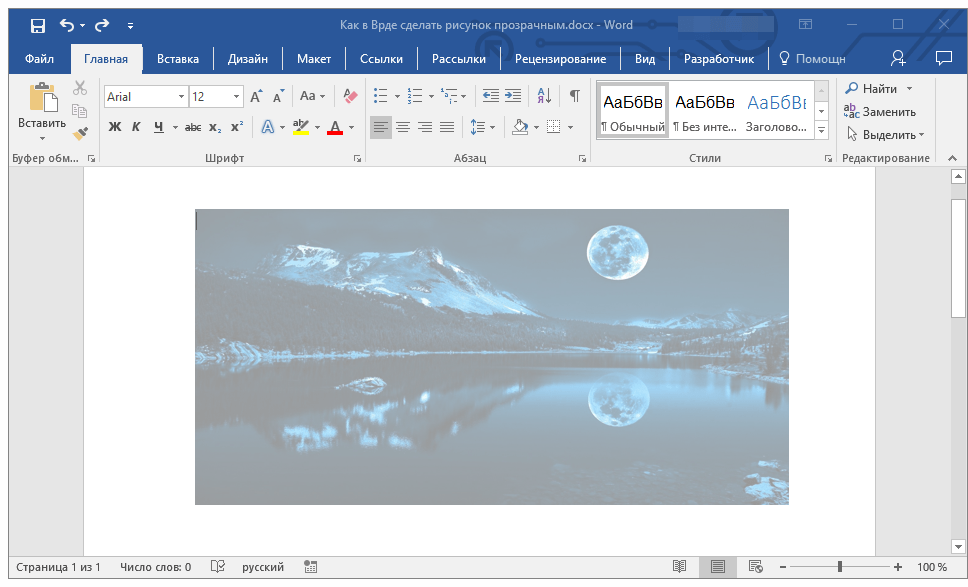
- Кликните в пустом месте документа, чтобы выйти из режима редактирования.
Важное примечание: Изменяя исходные размеры фигуры путем перетаскивания маркеров, расположенных на ее контуре, можно исказить находящееся внутри нее изображение.
- Совет: Для настройки внешнего вида рисунка можно использовать параметр “Смещение”, который находится под параметром “Прозрачность”, расположенным в окне “Формат рисунка”.
12. После внесения всех необходимых изменений, закройте окно “Формат рисунка”.
Изменение прозрачности части рисунка
Среди инструментов, представленных во вкладке “Формат” (появляется после добавления рисунка в документ) есть и те, с помощью которых можно сделать прозрачным не все изображение, а его отдельную область.
Важно понимать, что идеального результата можно добиться лишь в том случае, если область рисунка, прозрачность которой вы хотите изменить, является одноцветной.
Примечание: Некоторые области изображений могут казаться одноцветными, не являясь таковыми на самом деле. Например, обычный листья деревьев на фотографии или картинке могут содержать в себе широчайший диапазон близких по цвету оттенков. В таком случае желаемого эффекта прозрачности добиться не получится.
1. Добавьте изображение в документ, воспользовавшись нашей инструкцией.

Урок: Как в Word вставить рисунок
2. Дважды кликните по изображению, чтобы открылась вкладка “Формат”.
3. Нажмите на кнопку “Цвет” и выберите в выпадающем меню параметр “Установить прозрачный цвет”.

4. Вид указателя курсора изменится. Кликните ним по тому цвету, который необходимо сделать прозрачным.
5. Выбранная вами область рисунка (цвет) станет прозрачной.

Примечание: На печати прозрачные области изображений будут иметь тот же цвет, что и бумага, на которой они распечатываются. При вставке такого изображения на веб-сайт, его прозрачная область примет цвет фона сайта.
Урок: Как в Ворд распечатать документ
На этом все, теперь вы знаете, как в Word изменить прозрачность рисунка, а также знаете о том, как сделать прозрачными отдельные его фрагменты. Не забывайте о том, что данная программа — это текстовый, а не графический редактор, поэтому не следует выдвигать к нему слишком высоких требований.

Blurring pictures in Word will be very useful when you write text on pictures in Word, helping to see the text content more clearly in case the image has many outstanding colors, avoiding the case of not seeing the text clearly. To blur pictures in Word we have many different ways, such as relying on the image editing tool in Word, or the watermark insertion feature in Word. The following article will guide you how to blur pictures in Word.
1. Blur a picture in Word with the editing feature
Step 1:
Friend Click on Insert then choose Picture to select the image to insert and to blur in Word.

Step 2:
As soon as you insert an image into Word, an interface with image editing tools will be displayed, at the top Format tab. We will click on Section Corrections to adjust the level of brightness for the image, making the image blurry.
In Sharpen/Soften part you choose the level of opacity for the image, press Soften 50% or 25% depending on how much you want to blur your photo.

Step 3:
If we want the image to be darker, we will adjust the brightness level for the image at Brightness/Contrast.
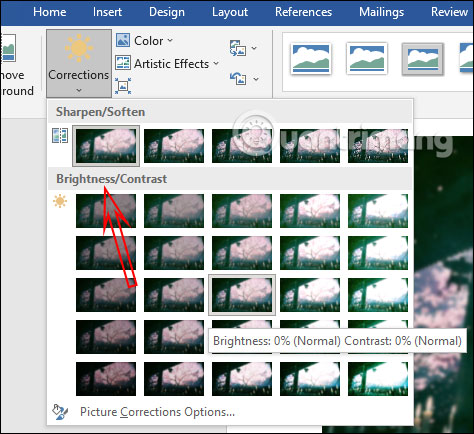
As a result, we have a blurred image as shown below.

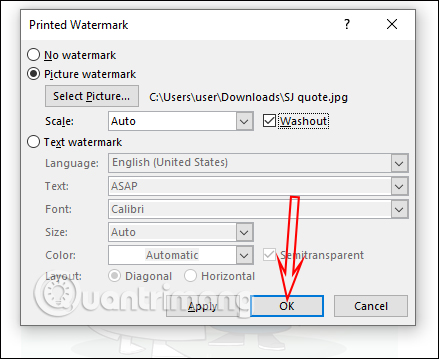
2. How to insert a watermark in Word
Step 1:
At the interface in Word we click Design tab. Then look down below and click Watermark and choose Custom Watermarks…
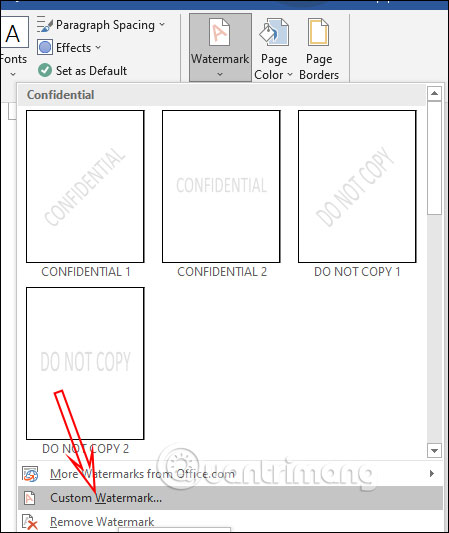
Step 2:
Next, display the interface Printed Watermark, we press choose Picture watermark and choose Select Picture. Next, you also select the image you want to blur in Word.
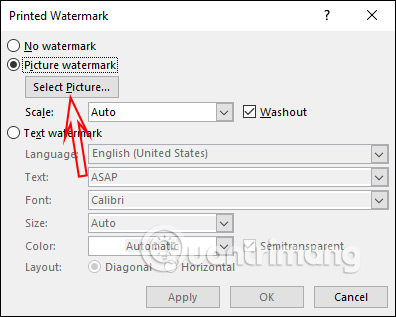
Step 3:
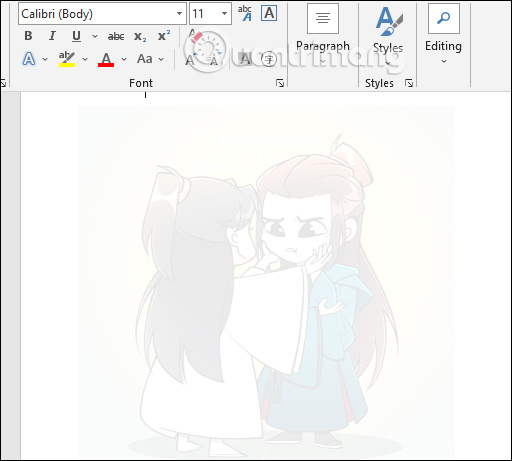
Once we have selected the image, we mark check washout to blur the image. If you want to adjust the size of the image, adjust it in the Scale section. Final press OK to save.
The resulting image will be completely blurred as shown below.
So depending on how you want to blur the image and what kind of blur image type is, you choose method 1 or method 2 to do it.
Source link: How to blur pictures in Word
– https://techtipsnreview.com/
blur, pictures, Word
Some time we copy data from different websites and it contains different graphic elements pictures or images that we don’t want to include in our Word document. Its really difficult to remove all images or graphic elements one by one from that copied data. By using simple find and replace method in Word we can solve this problem easily. Lets see how to Remove all images from Word document or remove images from specific portion or the document without losing any text formatting.
See also: Remove all hyperlinks from Word document
Microsoft Word gives an option to find for graphic elements in the word document. Here we will use this find and replace trick to find for images in the document and replace with nothing, this way we can remove all images from the document.
Advertisement
First open the Word document from which you want to remove images
Tip: This method will remove all images form your document, If you want to remove image from a portion of your document then first select that portion and then follow these steps.
Press Crtl+h from keyboard or click the Home tab at the left side of the Ribbon then click on Replace to open the Find and Replace window.
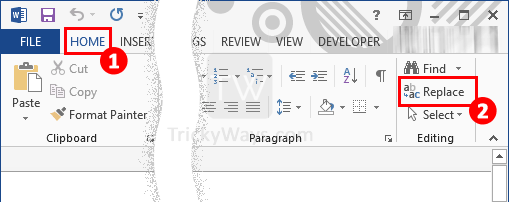
Then click on More button to get some more search options.
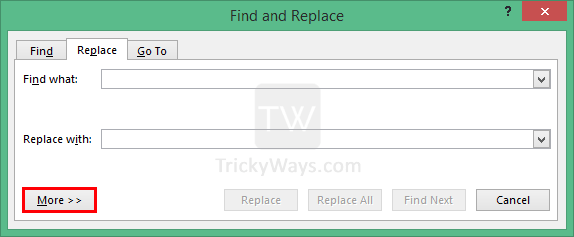
Click in the Find what text field, then select Graphic from Special Drop-down list as shown below. Click Replace All.
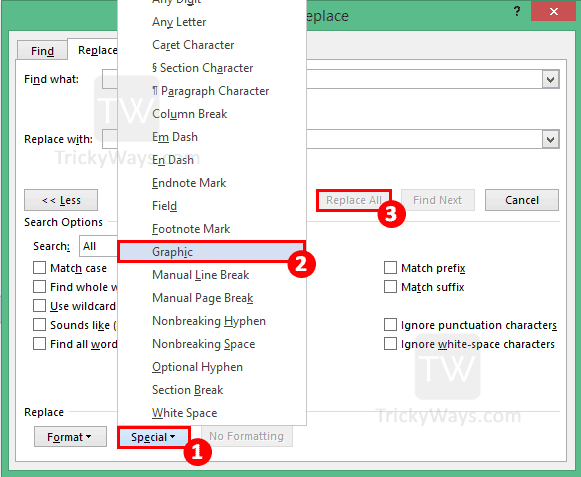
You will notice all the images from word document removed.
Using find and replace option in Microsoft Word we can achieve lot of difficult tasks in few seconds, go ahead and explore some other options in it.
Looks like no one’s replied in a while. To start the conversation again, simply
ask a new question.
Hi,
I don’t understant why my images (all format including PDF) are blurry when I insert them in Word and are totally clear and professionnal in Pages.
I tried evrything (Ctr+C and V. Slide the image from Finder to the doc, Insert the image from the word menu…) And all ways are blurry.
I looks on the Internet, lot of user have this problem without any solution.
My iMac is running OS X El Capitan
Thank you for your help
iMac with Retina 5K display,
iOS 10
Posted on Sep 17, 2016 8:15 AM
Images blurry in Word and Clear in Pages