
Элемент управления пользовательской формы Image, используемый в VBA Excel для добавления на форму изображения. Свойства элемента управления Image.
Image – это элемент управления пользовательской формы, предназначенный для отображения на форме изображения в формате *. bmp, *. gif, *. jpg, *. wmf, *. emf, *. ico, *. dib, *. cur.
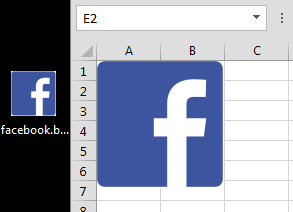
Добавить изображение на пользовательскую форму можно и с помощью элемента управления Label, но качество, в некоторых случаях, может быть неудовлетворительным. На скриншоте ниже одинаковые изображения в формате «*. jpg» добавлены с помощью элемента управления Image – слева и Label – справа:

Основное отличие элемента управления Image от элемента управления Label заключается в поведении изображения при уменьшении размеров Image и Label до размеров меньше размеров изображения:
- изображение в элементе управления Image обрезается;
- изображение в элементе управления Label уменьшается с нарушением пропорций, подстраиваясь под новый размер элемента управления.
Изображение в элементе управления Image будет вести себя также, как в Label, если установить свойство Image.PictureSizeMode равным fmPictureSizeModeStretch.
Свойства элемента Image
| Свойство | Описание |
|---|---|
| AutoSize | Автоподбор размера элемента управления Image под размер изображения. True – размер автоматически подстраивается под изображение. False – размер элемента управления определяется свойствами Width и Height (по умолчанию), а поведение изображения зависит от свойства PictureSizeMode. |
| BackColor | Цвет заливки (фона) элемента управления Image, отображается при отсутствии изображения и на полях вокруг изображения. |
| BackStyle | Задает стиль заливки (фона) элемента управления Image: fmBackStyleTransparent (0) – фон прозрачный, fmBackStyleOpaque (1) – фон непрозрачный (по умолчанию). |
| BorderColor | Цвет рамки элемента управления. |
| BorderStyle | Стиль рамки элемента управления. |
| ControlTipText | Текст всплывающей подсказки при наведении курсора на изображение. |
| Enabled | Возможность взаимодействия пользователя с элементом управления Image. True – взаимодействие включено, False – отключено. |
| Height | Высота элемента управления. |
| Left | Расстояние от левого края внутренней границы пользовательской формы до левого края элемента управления. |
| Picture | Адрес добавляемого изображения. |
| PictureAlignment | Выравнивание изображения на элементе управления Image. |
| PictureSizeMode | Способ изменения размеров изображения в зависимости от размеров элемента управления Image. fmPictureSizeModeClip (0) – рисунок обрезается или добавляются поля (по умолчанию), fmPictureSizeModeStretch (1) – рисунок растягивается или сжимается с нарушением пропорций, заполняя собой всю площадь элемента управления Image, fmPictureSizeModeZoom (3) – рисунок растягивается или сжимается с сохранением пропорций и добавлением компенсирующих полей. |
| PictureTiling | Задает размещение изображения мозаичным способом по всему элементу управления. True – изображение размещается мозаичным способом, False – изображение размещается обычным способом (по умолчанию). |
| SpecialEffect | Определяет внешний вид элемента управления. |
| Top | Расстояние от верхнего края внутренней границы пользовательской формы до верхнего края элемента управления. |
| Visible | Видимость элемента управления Image. True – элемент управления отображается на пользовательской форме, False – скрыт. |
| Width | Ширина элемента управления. |
Примеры добавления изображений
Пример 1
Добавление изображения на элемент управления Image при загрузке пользовательской формы:
|
Private Sub UserForm_Initialize() Me.Image1.Picture = LoadPicture(«C:ФотографииПриродаБерезовая роща.jpg») End Sub |
Пример 2
Добавление изображения на элемент управления Image по адресу, записанному в ячейку таблицы Excel:
|
Private Sub CommandButton1_Click() UserForm1.Image1.Picture = LoadPicture(Worksheets(«Лист1»).Cells(1, 6)) End Sub |

Images are what enriches our content, visualizing data enables us to compare results, notice patterns and provide insights. Most Excel files are bereft of any images, presenting raw data supported by boring charts. Dashboard often could use a couple of images here and there to visual a metric or trend. Today shortly on how to dynamically create, embed and delete images from your Excel Workbooks by using only VBA.
We will start by introducing the Shapes AddPicture function:
Shapes.AddPicture function
Syntax
Shapes.AddPicture( _
           Filename, LinkToFile, SaveWithDocument, _
           Left, Top, Width, Height)
Parameters
Filename
File or URL of the picture to add.
LinkToFile
Use MsoTrue or MsoCTrue by default. Full list here.
SaveWithDocument
Use MsoTrue or MsoCTrue by default. Full list here.
Left
Position (in points) of the upper-left corner of the picture relative to the left corner of the document.
Top
Position (in points) of the upper-left corner of the picture relative to the top corner of the document.
Width
Width of the picture in points.
Height
Height of the picture in points.
Add an Image from VBA using a file
Let’s start with a simple example. Say we want to embed an image into our Excel Worksheet as such:
To simply embed an image from a file we need to add a new Shape using the AddPicture function:
Call ActiveSheet.Shapes.AddPicture("C:UsersUserDesktopfacebook.bmp", _
     msoCTrue, msoCTrue, 0, 0, 100, 100)
This will add the image “facebook.bmp” to the upper-top corner of our spreadsheet. The size of the image will be 100×100 points.
Similarly we can add the image using an URL of the current weather conditions in the US:
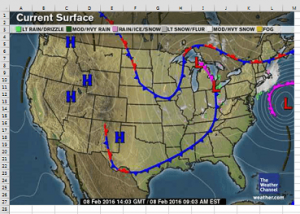
Call ActiveSheet.Shapes.AddPicture( _
     "https://i.imwx.com/images/maps/current/curwx_600x405.jpg", _
     msoCTrue, _
     msoCTrue, _
     0, 0, 600, 405)
This will load the image from the URL. Can take a couple of seconds to complete. Awesome right?
Now with this you can do cool things. Why not upload your project status/dashboard on a webpage and simply refresh it using VBA?
Deleting / Replacing images using VBA
Often you will want to replace an existing image or remove one. Not as obvious as it seems, you can’t replace an existing image – instead need to delete and recreate using a new picture.
Delete an image from VBA
Just deleting an image can be done like this – based on it’s index:
ActiveSheet.Shapes(1).Delete
Or like this if you need to obtain the Shape by name:
ActiveSheet.Shapes("Picture 1").Delete
Replacing images using VBA
Now let’s see what’s the correct way to replace an image (of similar sizes and location):
fileName = "C:NewImage.bmp"

'Collect the location and size of the image
Dim shHeight As Long, shWidth As Long, shTop As Long, shLeft As Long
Dim s as Shape, ws as Worksheet
Set ws = ActiveSheet
Set s = ws.Shapes("Picture 1")
shHeight = ws.Height: shWidth = ws.Width: shTop = ws.Top: shLeft = ws.Left
'Delete the image
s.Delete

'Recreate the image using same location and size
ws.Shapes.AddPicture(fileName, msoCTrue, msoCTrue, shLeft, shTop, shWidth, shHeight)
Not As Easy As You’d Think…
One would think that saving something as a picture file (png, jpg, etc…) inside Excel with VBA would be a pretty straightforward exercise. Unfortunately, the “Save as Picture” functionality only exists for saving images of Charts (called exporting). This leaves saving pictures of shapes, icons, and cell ranges void of any VBA automation.
However, with a little bit of creativity, we can utilize the chart object to store our desired image and use the chart object’s Export function to create the image file that we can manually generate by right-clicking and selecting Save as Picture…
In this article I’ll walk you through the basic concept of what the VBA code is doing and also go through two VBA macro examples pertaining to saving shapes/icons and cell ranges in various file formats.
Methodology
Not many people know this but Charts can actually store shapes/objects inside of them. For example, if you have ever copied a textbox and pasted it while a chart is selected, you’ll notice the textbox object appears to be grouped with the chart. Meaning, if you move the chart to a different location, the textbox would move right along with it. What is actually occurring is the textbox is getting embedded within the chart and is essentially now a component of the chart object (think legend, chart title, chart series, axis, etc…).
Notice that the chart object is selected while selecting the textbox? This indicates the textbox has been embedded into the chart object.
The fact that charts in Excel can absorb other objects is what we will be utilizing to workaround the fact that shapes and other objects cannot be saved as a picture in VBA.
Before we dive into the VBA code, the concept the macro will be utilizing will be to isolate the object you want to save as a picture file and also generating a blank/empty chart object.
With those two objects in place, the VBA code will simply paste the desired object into the Chart Object (kind of like converting it into a chart!).
With this concept in mind, let’s take a look at the VBA code I’ve proposed to get this job done!
Save Shape As A PNG File [VBA Code]
Hopefully the following VBA macro is easily to follow along, but I’ll outline essentially the steps it is doing so you can customize it accordingly if needed.
-
Determine if a shape is selected, if not, don’t proceed. Store the selected shape to a variable (ActiveShape)
-
Generate a Chart Object that is the exact same size as the selected shape
-
Remove the chart’s Fill and Border to make the background transparent
-
Copy the selected shape and Paste it into the Chart Object
-
Export the Chart Object as a PNG file and save to the user’s desktop
-
Delete the chart so it appears like nothing has occurred to the user
Sub SaveShapeAsPicture()
‘PURPOSE: Save a selected shape/icon as a PNG file to computer’s desktop
‘SOURCE: www.thespreadsheetguru.com
Dim cht As ChartObject
Dim ActiveShape As Shape
Dim UserSelection As Variant
‘Ensure a Shape is selected
On Error GoTo NoShapeSelected
Set UserSelection = ActiveWindow.Selection
Set ActiveShape = ActiveSheet.Shapes(UserSelection.Name)
On Error GoTo 0
‘Create a temporary chart object (same size as shape)
Set cht = ActiveSheet.ChartObjects.Add( _
Left:=ActiveCell.Left, _
Width:=ActiveShape.Width, _
Top:=ActiveCell.Top, _
Height:=ActiveShape.Height)
‘Format temporary chart to have a transparent background
cht.ShapeRange.Fill.Visible = msoFalse
cht.ShapeRange.Line.Visible = msoFalse
‘Copy/Paste Shape inside temporary chart
ActiveShape.Copy
cht.Activate
ActiveChart.Paste
‘Save chart to User’s Desktop as PNG File
cht.Chart.Export Environ(«USERPROFILE») & «Desktop» & ActiveShape.Name & «.png»
‘Delete temporary Chart
cht.Delete
‘Re-Select Shape (appears like nothing happened!)
ActiveShape.Select
Exit Sub
‘ERROR HANDLERS
NoShapeSelected:
MsgBox «You do not have a single shape selected!»
Exit Sub
End Sub
Save Range As A JPG File [VBA Code]
Hopefully the following VBA macro is easily to follow along, but I’ll outline essentially the steps it is doing so you can customize it accordingly if needed.
-
Determine if a cell range is selected, if not, don’t proceed.
-
Copy/Paste the range as a picture and store the picture to a variable (ActiveShape)
-
Generate a Chart Object that is the exact same size as the selected shape
-
Remove the chart’s Fill and Border to make the background transparent
-
Copy the selected shape and Paste it into the Chart Object
-
Export the Chart Object as a PNG file and save to the user’s desktop
-
Delete the generated chart & picture so it appears like nothing has occurred to the user
Sub SaveRangeAsPicture()
‘PURPOSE: Save a selected cell range as a JPG file to computer’s desktop
‘SOURCE: www.thespreadsheetguru.com
Dim cht As ChartObject
Dim ActiveShape As Shape
‘Confirm if a Cell Range is currently selected
If TypeName(Selection) <> «Range» Then
MsgBox «You do not have a single shape selected!»
Exit Sub
End If
‘Copy/Paste Cell Range as a Picture
Selection.Copy
ActiveSheet.Pictures.Paste(link:=False).Select
Set ActiveShape = ActiveSheet.Shapes(ActiveWindow.Selection.Name)
‘Create a temporary chart object (same size as shape)
Set cht = ActiveSheet.ChartObjects.Add( _
Left:=ActiveCell.Left, _
Width:=ActiveShape.Width, _
Top:=ActiveCell.Top, _
Height:=ActiveShape.Height)
‘Format temporary chart to have a transparent background
cht.ShapeRange.Fill.Visible = msoFalse
cht.ShapeRange.Line.Visible = msoFalse
‘Copy/Paste Shape inside temporary chart
ActiveShape.Copy
cht.Activate
ActiveChart.Paste
‘Save chart to User’s Desktop as PNG File
cht.Chart.Export Environ(«USERPROFILE») & «Desktop» & ActiveShape.Name & «.jpg»
‘Delete temporary Chart
cht.Delete
ActiveShape.Delete
‘Re-Select Shape (appears like nothing happened!)
ActiveShape.Select
End Sub
I Hope This Helped!
Hopefully, I was able to explain how you can use VBA to create image files in Excel. If you have any questions about this technique or suggestions on how to improve it, please let me know in the comments section below.
About The Author
Hey there! I’m Chris and I run TheSpreadsheetGuru website in my spare time. By day, I’m actually a finance professional who relies on Microsoft Excel quite heavily in the corporate world. I love taking the things I learn in the “real world” and sharing them with everyone here on this site so that you too can become a spreadsheet guru at your company.
Through my years in the corporate world, I’ve been able to pick up on opportunities to make working with Excel better and have built a variety of Excel add-ins, from inserting tickmark symbols to automating copy/pasting from Excel to PowerPoint. If you’d like to keep up to date with the latest Excel news and directly get emailed the most meaningful Excel tips I’ve learned over the years, you can sign up for my free newsletters. I hope I was able to provide you some value today and hope to see you back here soon! — Chris
Содержание
- VBA Excel. Свойство Picture элементов управления
- Свойство Picture элементов управления
- Синтаксис
- Добавление изображений в редакторе VBA
- Добавление изображений из кода VBA Excel
- VBA Excel. Элемент управления Image
- Элемент управления Image
- Свойства элемента Image
- Примеры добавления изображений
- Excel VBA UserForm Image
- VBA Reference
- 120+ Project Management Templates
- VBA Image_Control on the UserForm
- Add dynamic Image_Control on the UserForm using VBA
- Procedure to call in the CommandButton:
- Delete Image_Control on the UserForm using VBA
- An Excel Blog For The Real World
- VBA Code To Save As Picture in Excel
- Not As Easy As You’d Think…
- Methodology
- Save Shape As A PNG File [VBA Code]
- Save Range As A JPG File [VBA Code]
- I Hope This Helped!
VBA Excel. Свойство Picture элементов управления
Добавление изображений на элементы управления пользовательской формы. Свойство Picture. Привязка картинки в редакторе и из кода VBA Excel. Удаление изображения.
Свойство Picture элементов управления
Свойство Picture есть у пользовательской формы и некоторых элементов управления: CheckBox, CommandButton, Frame, Image, Label, OptionButton, ToggleButton. Оно позволяет отобразить на этих объектах изображение с расширением jpg, bmp, gif.
Синтаксис
- object – пользовательская форма или подходящий элемент управления;
- pathname – полный путь к изображению.
Добавление изображений в редакторе VBA
Чтобы добавить картинку на форму или элемент управления в редакторе VBA Excel, необходимо в окне Properties выбранного объекта нажать кнопку с тремя точками в поле значений свойства Picture:

Откроется окно проводника, с помощью которого следует выбрать нужное изображение.
Картинка на элементе управления может использоваться вместо надписи или вместе с ней. За выравнивание изображения и положение надписи на объекте отвечает свойство PicturePosition. Подходящее значение свойства PicturePosition проще подобрать в окне Properties выбранного элемента управления.
Добавление изображений из кода VBA Excel
Пример кода VBA Excel, добавляющего надпись и изображение на элемент управления ToggleButton:
Источник
VBA Excel. Элемент управления Image
Элемент управления пользовательской формы Image, используемый в VBA Excel для добавления на форму изображения. Свойства элемента управления Image.
Элемент управления Image
Добавить изображение на пользовательскую форму можно и с помощью элемента управления Label, но качество, в некоторых случаях, может быть неудовлетворительным. На скриншоте ниже одинаковые изображения в формате «*. jpg» добавлены с помощью элемента управления Image – слева и Label – справа:
Основное отличие элемента управления Image от элемента управления Label заключается в поведении изображения при уменьшении размеров Image и Label до размеров меньше размеров изображения:
- изображение в элементе управления Image обрезается;
- изображение в элементе управления Label уменьшается с нарушением пропорций, подстраиваясь под новый размер элемента управления.
Изображение в элементе управления Image будет вести себя также, как в Label, если установить свойство Image.PictureSizeMode равным fmPictureSizeModeStretch .
Свойства элемента Image
| Свойство | Описание |
|---|---|
| AutoSize | Автоподбор размера элемента управления Image под размер изображения. True – размер автоматически подстраивается под изображение. False – размер элемента управления определяется свойствами Width и Height (по умолчанию), а поведение изображения зависит от свойства PictureSizeMode. |
| BackColor | Цвет заливки (фона) элемента управления Image, отображается при отсутствии изображения и на полях вокруг изображения. |
| BackStyle | Задает стиль заливки (фона) элемента управления Image: fmBackStyleTransparent (0) – фон прозрачный, fmBackStyleOpaque (1) – фон непрозрачный (по умолчанию). |
| BorderColor | Цвет рамки элемента управления. |
| BorderStyle | Стиль рамки элемента управления. |
| ControlTipText | Текст всплывающей подсказки при наведении курсора на изображение. |
| Enabled | Возможность взаимодействия пользователя с элементом управления Image. True – взаимодействие включено, False – отключено. |
| Height | Высота элемента управления. |
| Left | Расстояние от левого края внутренней границы пользовательской формы до левого края элемента управления. |
| Picture | Адрес добавляемого изображения. |
| PictureAlignment | Выравнивание изображения на элементе управления Image. |
| PictureSizeMode | Способ изменения размеров изображения в зависимости от размеров элемента управления Image. fmPictureSizeModeClip (0) – рисунок обрезается или добавляются поля (по умолчанию), fmPictureSizeModeStretch (1) – рисунок растягивается или сжимается с нарушением пропорций, заполняя собой всю площадь элемента управления Image, fmPictureSizeModeZoom (3) – рисунок растягивается или сжимается с сохранением пропорций и добавлением компенсирующих полей. |
| PictureTiling | Задает размещение изображения мозаичным способом по всему элементу управления. True – изображение размещается мозаичным способом, False – изображение размещается обычным способом (по умолчанию). |
| SpecialEffect | Определяет внешний вид элемента управления. |
| Top | Расстояние от верхнего края внутренней границы пользовательской формы до верхнего края элемента управления. |
| Visible | Видимость элемента управления Image. True – элемент управления отображается на пользовательской форме, False – скрыт. |
| Width | Ширина элемента управления. |
Примеры добавления изображений
Пример 1
Добавление изображения на элемент управления Image при загрузке пользовательской формы:
Источник
Excel VBA UserForm Image
VBA Reference
Effortlessly
Manage Your Projects
120+ Project Management Templates
Seamlessly manage your projects with our powerful & multi-purpose templates for project management.
120+ PM Templates Includes:
50+ Excel Templates
50+ PowerPoint Templates
25+ Word Templates
A Powerful & Multi-purpose Templates for project management. Now seamlessly manage your projects, tasks, meetings, presentations, teams, customers, stakeholders and time. This page describes all the amazing new features and options that come with our premium templates.
Save Up to 85% LIMITED TIME OFFER
All-in-One Pack
120+ Project Management Templates
Essential Pack
50+ Project Management Templates
Excel Pack
50+ Excel PM Templates
PowerPoint Pack
50+ Excel PM Templates
MS Word Pack
25+ Word PM Templates
Ultimate Project Management Template
Ultimate Resource Management Template
Project Portfolio Management Templates
Image is one of the UserForm control. You can select and drag Image on the UserForm. You can select and drag Image on the UserForm. Image control embeds a picture such as a jpg, jpeg, gif, png, bitmap, etc. It can be used on the UserForm. You can see how it works and more details about Image Control.
VBA Image_Control on the UserForm
Please find more details about VBA ActiveX Image_Control on the UserForm.
-
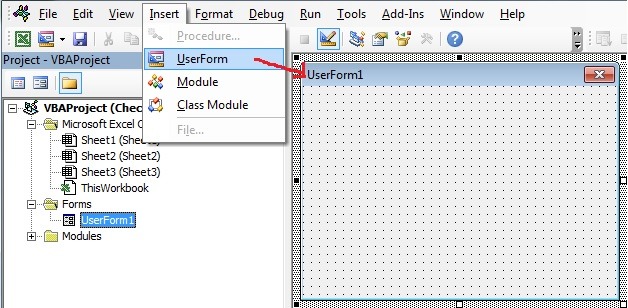
- Go To Developer Tab and then click Visual Basic from the Code or Press Alt+F11.
- Go To Insert Menu, Click UserForm. Please find the screenshot for the same.
-
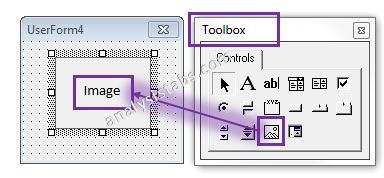
- Drag the Image_control on the Userform from the Toolbox. Please find the screenshot for the same.
-
- Click on the image_control properties.
- On the left side find ‘Picture’ from the available properties of the control.
- On the right side click on that, and select image from the source.
- On the left side find ‘PictureSizeMode’ from the available properties of the control.
- On the right side, select ‘1 – frmPictureSiseModeStretch’ from the available list.
- Now, Click ‘F5’ to see the output.
- Now, you can see the following output as shown below in the screen shot.
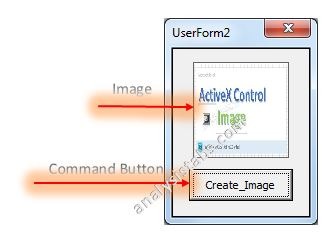
Add dynamic Image_Control on the UserForm using VBA
Please find the following steps and example code, it will show you how to add dynamic Image_control on the userform.
-
- Add Image and CommandButton on the userform from the toolbox.
- Right click on the CommandButton, click properties
- Change the CommandButton caption to ‘Create_Image ’
- Double click on the CommandButton
- Now, it shows the following code.
-
- Call the below procedure named ‘Add_Dynamic_Image ’ and find the below procedure to run.
Procedure to call in the CommandButton:
-
- Now, click F5 to run the macro, click ‘Create_Image ’ button to see the result.
- You can see the created dynamic Image_control which is shown in the following screen shot.
output:
Delete Image_Control on the UserForm using VBA
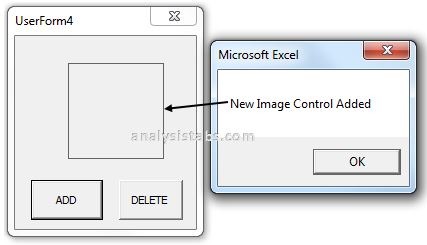
Please find the below code, it will show you how to delete or remove the control on the UserForm. In the below example, its deleting the Image named ‘New Image’ which is on the UserForm named ‘UserForm4’. We can use Remove method to delete the controls which are created during run time. Controls which are created during design time cannot be deleted using this method. Please find the below example and screen shots for better understand.
Code 1: Adding control During Run Time
Please find the below screen shot for your reference for the above macro and its output.
When we click on Add Command Button:
Code 1: Deleting or Removing Image_control which is created during run time.
Please find the below screen shot for your reference for the above macro and its output.
When we click on Delete Command Button:
Источник
An Excel Blog For The Real World
A blog focused primarily on Microsoft Excel, PowerPoint, & Word with articles aimed to take your data analysis and spreadsheet skills to the next level. Learn anything from creating dashboards to automating tasks with VBA code!
VBA Code To Save As Picture in Excel

Not As Easy As You’d Think…
One would think that saving something as a picture file (png, jpg, etc…) inside Excel with VBA would be a pretty straightforward exercise. Unfortunately, the “Save as Picture” functionality only exists for saving images of Charts (called exporting). This leaves saving pictures of shapes, icons, and cell ranges void of any VBA automation.
However, with a little bit of creativity, we can utilize the chart object to store our desired image and use the chart object’s Export function to create the image file that we can manually generate by right-clicking and selecting Save as Picture…
In this article I’ll walk you through the basic concept of what the VBA code is doing and also go through two VBA macro examples pertaining to saving shapes/icons and cell ranges in various file formats.
Methodology
Not many people know this but Charts can actually store shapes/objects inside of them. For example, if you have ever copied a textbox and pasted it while a chart is selected, you’ll notice the textbox object appears to be grouped with the chart. Meaning, if you move the chart to a different location, the textbox would move right along with it. What is actually occurring is the textbox is getting embedded within the chart and is essentially now a component of the chart object (think legend, chart title, chart series, axis, etc…).
Notice that the chart object is selected while selecting the textbox? This indicates the textbox has been embedded into the chart object.
The fact that charts in Excel can absorb other objects is what we will be utilizing to workaround the fact that shapes and other objects cannot be saved as a picture in VBA.
Before we dive into the VBA code, the concept the macro will be utilizing will be to isolate the object you want to save as a picture file and also generating a blank/empty chart object.
With those two objects in place, the VBA code will simply paste the desired object into the Chart Object (kind of like converting it into a chart!).
With this concept in mind, let’s take a look at the VBA code I’ve proposed to get this job done!
Save Shape As A PNG File [VBA Code]
Hopefully the following VBA macro is easily to follow along, but I’ll outline essentially the steps it is doing so you can customize it accordingly if needed.
Determine if a shape is selected, if not, don’t proceed. Store the selected shape to a variable (ActiveShape)
Generate a Chart Object that is the exact same size as the selected shape
Remove the chart’s Fill and Border to make the background transparent
Copy the selected shape and Paste it into the Chart Object
Export the Chart Object as a PNG file and save to the user’s desktop
Delete the chart so it appears like nothing has occurred to the user
Sub SaveShapeAsPicture()
‘PURPOSE: Save a selected shape/icon as a PNG file to computer’s desktop
‘SOURCE: www.thespreadsheetguru.com
Dim cht As ChartObject
Dim ActiveShape As Shape
Dim UserSelection As Variant
‘Ensure a Shape is selected
On Error GoTo NoShapeSelected
Set UserSelection = ActiveWindow.Selection
Set ActiveShape = ActiveSheet.Shapes(UserSelection.Name)
On Error GoTo 0
‘Create a temporary chart object (same size as shape)
Set cht = ActiveSheet.ChartObjects.Add( _
Left:=ActiveCell.Left, _
Width:=ActiveShape.Width, _
Top:=ActiveCell.Top, _
Height:=ActiveShape.Height)
‘Format temporary chart to have a transparent background
cht.ShapeRange.Fill.Visible = msoFalse
cht.ShapeRange.Line.Visible = msoFalse
‘Copy/Paste Shape inside temporary chart
ActiveShape.Copy
cht.Activate
ActiveChart.Paste
‘Save chart to User’s Desktop as PNG File
cht.Chart.Export Environ(«USERPROFILE») & «Desktop» & ActiveShape.Name & «.png»
‘Delete temporary Chart
cht.Delete
‘Re-Select Shape (appears like nothing happened!)
ActiveShape.Select
‘ERROR HANDLERS
NoShapeSelected:
MsgBox «You do not have a single shape selected!»
Exit Sub
Save Range As A JPG File [VBA Code]
Hopefully the following VBA macro is easily to follow along, but I’ll outline essentially the steps it is doing so you can customize it accordingly if needed.
Determine if a cell range is selected, if not, don’t proceed.
Copy/Paste the range as a picture and store the picture to a variable (ActiveShape)
Generate a Chart Object that is the exact same size as the selected shape
Remove the chart’s Fill and Border to make the background transparent
Copy the selected shape and Paste it into the Chart Object
Export the Chart Object as a PNG file and save to the user’s desktop
Delete the generated chart & picture so it appears like nothing has occurred to the user
Sub SaveRangeAsPicture()
‘PURPOSE: Save a selected cell range as a JPG file to computer’s desktop
‘SOURCE: www.thespreadsheetguru.com
Dim cht As ChartObject
Dim ActiveShape As Shape
‘Confirm if a Cell Range is currently selected
If TypeName(Selection) <> «Range» Then
MsgBox «You do not have a single shape selected!»
Exit Sub
End If
‘Copy/Paste Cell Range as a Picture
Selection.Copy
ActiveSheet.Pictures.Paste(link:=False).Select
Set ActiveShape = ActiveSheet.Shapes(ActiveWindow.Selection.Name)
‘Create a temporary chart object (same size as shape)
Set cht = ActiveSheet.ChartObjects.Add( _
Left:=ActiveCell.Left, _
Width:=ActiveShape.Width, _
Top:=ActiveCell.Top, _
Height:=ActiveShape.Height)
‘Format temporary chart to have a transparent background
cht.ShapeRange.Fill.Visible = msoFalse
cht.ShapeRange.Line.Visible = msoFalse
‘Copy/Paste Shape inside temporary chart
ActiveShape.Copy
cht.Activate
ActiveChart.Paste
‘Save chart to User’s Desktop as PNG File
cht.Chart.Export Environ(«USERPROFILE») & «Desktop» & ActiveShape.Name & «.jpg»
‘Delete temporary Chart
cht.Delete
ActiveShape.Delete
‘Re-Select Shape (appears like nothing happened!)
ActiveShape.Select
I Hope This Helped!
Hopefully, I was able to explain how you can use VBA to create image files in Excel. If you have any questions about this technique or suggestions on how to improve it, please let me know in the comments section below.
Источник
I am looking to view an image from the worksheet in an Image control on a userform.
This image will change based on the value on a combobox. I have inserted (Using: Insert -> Pictures) a couple of images into «Sheet1» of my workbook and named them «Picture1» & «Picture2».
I have created the below UserForm:
Form http://im56.gulfup.com/msKyqi.png
And this is the code that I am trying to use in order to load the images from the sheet, but unfortunately, this is not working at the moment.
Private Sub ComboBox1_Change()

UserForm1.Image1.Picture = LoadPicture(Worksheets("Sheet1").Shapes(ComboBox1.Value))

End Sub

Private Sub UserForm_Initialize()

UserForm1.ComboBox1.Clear
UserForm1.ComboBox1.AddItem "Picture1"
UserForm1.ComboBox1.AddItem "Picture2"

UserForm1.ComboBox1.Value = "Picture1"

UserForm1.Image1.Picture = LoadPicture(Worksheets("Sheet1").Shapes(ComboBox1.Value))

End Sub
Every time I run this code I get the below error:
Error http://im43.gulfup.com/YoWvTp.png
Please advise.
asked May 23, 2014 at 20:55
![]()
I figured it out!
As I am using a UserForm there is a workaround to the issue.
Instead of having the images in the worksheet to then try and load them in the form I tried having them in the UserForm in the first place, here is how.
Create a frame on your userform:
Frame http://im88.gulfup.com/Moy8I6.png
Set the visible property of the frame to «False«:
Visible http://im88.gulfup.com/sAIQqh.png
Insert your images by adding a picture control and loading the images, you can add as many images as you need:
Images http://im88.gulfup.com/oas0EQ.png
Name the images:
Name http://im88.gulfup.com/cIO317.png
Drag all the images one over the other into the frame, (you can then move the frame into a corner so it doesn’t bother you:
Drag http://im88.gulfup.com/1fOSut.png
Move Away http://im88.gulfup.com/Q1fzKd.png
Next create a picture control, this is what you will use to display the picture based on a selection:
Form View http://im88.gulfup.com/X1UVRB.png
In this example, I am going to use a combobox for the selection. Now insert the below code in to the form which is pretty straight forward:
    Private Sub ComboBox1_Change()

    ' Image1 is the name of the created picture control
    UserForm3.Controls.Item("Image1").Picture = UserForm3.Controls.Item(UserForm3.ComboBox1.Value).Picture

    End Sub

    Private Sub UserForm_Initialize()

    UserForm3.ComboBox1.AddItem "Argentina"
    UserForm3.ComboBox1.AddItem "Brazil"
    UserForm3.ComboBox1.AddItem "Chile"

    End Sub
As you will see, the frame with the pictures is Hidden, and the image is changing inside the picture control based on a selection:
Result http://im88.gulfup.com/MSqyHF.png
I think it’s the better way to go as opposed to exporting the images from the worksheet to a Temp folder and then loading them back into the picture controls.
answered May 30, 2015 at 18:32
![]()
CaptainABCCaptainABC
1,2196 gold badges24 silver badges40 bronze badges
5
The LoadImage() function expects a filename (which can be fully qualified with a drive letter and path). You are getting a type mismatch because it wants a string, and you are giving it an image object.
There is, as far as I know, no simple way to put an image that resides in the current application into an image control. The (hackish) workaround that I know about is to export the image to a file, and then import that same file using LoadImage().
This is the same path you have to go down if you want to embed a chart that updates dynamically into a userform. You export the chart as an image (e.g., a JPEG), and then use LoadImage() to pull the image back into the image control.
answered May 24, 2014 at 1:10
![]()
1
I know this post is ancient, but I found my way here. I came up with a slightly different solution to this problem. I have about 30 pictures I need to load based on a combo-box selection. First, all combo-box options (for discussion «XX») are saved to a separate worksheet which is «Very hidden» from the user and loaded into the combobox on userform activation. On the userform a frame was added, and within the frame 30 image-boxes all overlapping perfectly were placed. Each image-box was carefully named «Img_XX» where XX is the simple two-letter identifier.
With this setup it is now possible to iterate through each «Control» (the image boxes) in the Frame and hide them all, except the one with a name that matches the combo-box value. The code in the userform module, within the Combobox_Change() function, looks something like this:
 Private Sub ComboBox_Change()
    Dim SearchValue as String
    SearchValue = me.Combobox.value

    Dim Ctrl as Control
    For each Ctrl in Me.TestFrame.Controls
        If Ctrl.Name Like "img_" & SearchValue Then
            Ctrl.visible = True
        else
            Ctrl.Visible = False
        End If
    next Ctrl
 End Sub
I hope this helps, let me know what you think. 
answered Jan 31, 2020 at 16:37
![]()