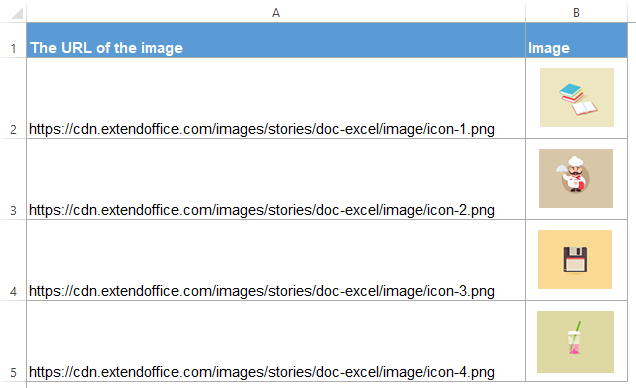
You can update the code like the following by adding this line to it:
Pshp.Placement = xlMoveAndSize
Sub URLPictureInsert()
'Updateby Extendoffice 20161116
'Update #1 by Haytham Amairah in 20180104
'Update #2 by Haytham Amairah in 20180108Dim Pshp As Shape
Dim xRg As Range
Dim xCol As Long
On Error Resume Next
Application.ScreenUpdating = False
Set Rng = ActiveSheet.Range("A2:A140")
For Each cell In Rng
filenam = cell
ActiveSheet.Pictures.Insert(filenam).Select
Set Pshp = Selection.ShapeRange.Item(1)
Pshp.Placement = xlMoveAndSize
If Pshp Is Nothing Then GoTo lab
xCol = cell.Column + 1
Set xRg = Cells(cell.Row, xCol)
With Pshp
.LockAspectRatio = msoFalse
.Width = 60
.Height = 30
.Top = xRg.Top + (xRg.Height - .Height) / 2
.Left = xRg.Left + (xRg.Width - .Width) / 2
End With
lab:
Set Pshp = Nothing
Range("A2").Select
Next
Application.ScreenUpdating = True
End Sub
This will change the property for each image after inserting it to make it move and size with the cell.
This is my modified version of the answer shared by tomelin5. It works in Excel 2016 and likely in (much) earlier versions too.
In my case I created a Microsoft PowerApps app to collect and store signatures using the pen input control.
Aside: In case you’re reading this because you’re trying to create a PowerApp: the magic sauce to save the contents of your controls to the spread sheet is the Patch function.
The way it works is that the pen input control saves images as PNG files in a directory and stores relative addresses to the PNG files as URLs in cells in a spread sheet: URL e.g. .MyAppName_imagesx829ca33re2d6114588e59ca45829d21.png
I wanted to display those signatures in that Excel spreadsheet so they could be sorted using the other data entered through through the app. tomelin5’s solution worked so nicely as a basis for my solution I figured I ought to share my remix.
My solution stores the URLs in column «A» (1) and places the images themselves in column «I» (9). It also adjusts the height of the rows to the column width of column 9, though, you will likely want to modify/eliminate that behaviour.
All URLs are processed beginning with A2 and extending to the last filled cell in column A. Note that my solution does not do any exception handling and you’d need that in case images were unavailable.
Sub Button1_Click()
    ' https://msdn.microsoft.com/en-us/library/office/aa221353(v=office.11).aspx
    ' http://www.excelhowto.com/macros/loop-range-cells/
    ' https://www.excelcampus.com/vba/find-last-row-column-cell/
    ' https://superuser.com/questions/52760/embed-pictures-from-web-by-url-in-excel-spreadsheet-or-oo-calc#

    Dim Pic As Picture
    Dim SrcRange As Range
    Dim LastRowA As Long

    LastRowA = Cells.Find(What:="*", _
                    After:=Range("A1"), _
                    LookAt:=xlPart, _
                    LookIn:=xlFormulas, _
                    SearchOrder:=xlByRows, _
                    SearchDirection:=xlPrevious, _
                    MatchCase:=False).Row

    Set SrcRange = ActiveSheet.Range(Cells(2, 1), Cells(LastRowA, 1))

    SrcRange.Rows().RowHeight = ActiveSheet.Columns(9).Width

    For Each Cell In SrcRange.Cells
        With Cell
            Set Pic = .Parent.Pictures.Insert(.Value)
            With .Offset(, 8)
                Pic.Top = .Top
                Pic.Left = .Left
                Pic.Height = .Height
                Pic.Width = .Width
                Pic.Border.Color = vbRed
            End With
        End With
    Next
End Sub
I’m creating a csv file with one of the columns containing an url of an image (e.g., www.myDomain.com/myImage.jpg).
How I can get Excel to render this image?
GSerg
75.3k17 gold badges160 silver badges340 bronze badges
asked Jun 10, 2011 at 22:32
RayLovelessRayLoveless
19.3k21 gold badges75 silver badges93 bronze badges
Dim url_column As Range
Dim image_column As Range

Set url_column = Worksheets(1).UsedRange.Columns("A")
Set image_column = Worksheets(1).UsedRange.Columns("B")

Dim i As Long
For i = 1 To url_column.Cells.Count

  With image_column.Worksheet.Pictures.Insert(url_column.Cells(i).Value)
    .Left = image_column.Cells(i).Left
    .Top = image_column.Cells(i).Top
    image_column.Cells(i).EntireRow.RowHeight = .Height
  End With

Next
As Excel behaviour has apparently changed over years, you might want to specify more parameters to the Insert call explicitly:
For people landing here. Different versions of Excel handle this request differently, Excel 2007 will insert the picture as an object, ie embed it in the workbook. Excel 2010 will insert it as a link, which is bad times if you plan on sending it to anyone. You need to change the insert to specify that it is embedded:
Insert(Filename:= <path>, LinkToFile:= False, SaveWithDocument:= True)
answered Jun 10, 2011 at 22:53
8
On Google Sheets you can add the IMAGE(url) method to your CSV file and it will be rendered (Tested on Google Sheets).
Here is an example:
=IMAGE("http://efdreams.com/data_images/dreams/lion/lion-03.jpg")
answered Apr 30, 2017 at 9:04
Sahar MenasheSahar Menashe
1,9352 gold badges17 silver badges16 bronze badges
1
I had same issue. My solution was:
- import csv to Excel,
- from excel copy table to Google Sheets
- in Google Sheets use =IMAGE(«http://example.com/01.jpg») on column you want to have images. Google Sheets load the images,
- just copy all back to Excel.
In excel images will be in original sizes but always started on apropriate row, so just select all and change width or height of all images. If you change only height by height of the row, you will have everything ordered and positioned right.
answered Sep 3, 2021 at 17:07
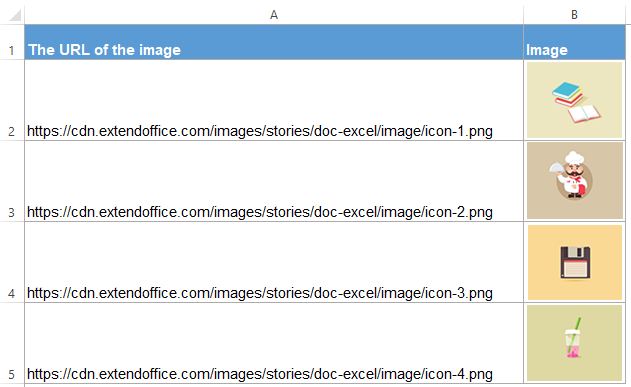
If you have a list of image URL addresses in column A, and now, you want to download the corresponding pictures from the URLs and display them into the adjacent column B as left screenshot shown. In Excel, how could you extract the actual pictures from the image URLs quickly and easily?
Convert the image URLs to actual images with VBA code
Convert the image URLs to actual images with Kutools for Excel
Convert the image URLs to actual images with VBA code
The following VBA code can help you quickly extract the actual images from the image URL addresses, please do as this:
1. Hold down the ALT + F11 keys to open the Microsoft Visual Basic for Applications window.
2. Click Insert > Module, and paste the following code in the Module Window.
VBA code: Convert the image URLs to actual images:
Sub URLPictureInsert()
Dim Pshp As Shape
Dim xRg As Range
Dim xCol As Long
On Error Resume Next
Application.ScreenUpdating = False
Set Rng = ActiveSheet.Range("A2:A5")
For Each cell In Rng
filenam = cell
ActiveSheet.Pictures.Insert(filenam).Select
Set Pshp = Selection.ShapeRange.Item(1)
If Pshp Is Nothing Then GoTo lab
xCol = cell.Column + 1
Set xRg = Cells(cell.Row, xCol)
With Pshp
.LockAspectRatio = msoFalse
If .Width > xRg.Width Then .Width = xRg.Width * 2 / 3
If .Height > xRg.Height Then .Height = xRg.Height * 2 / 3
.Top = xRg.Top + (xRg.Height - .Height) / 2
.Left = xRg.Left + (xRg.Width - .Width) / 2
End With
lab:
Set Pshp = Nothing
Range("A2").Select
Next
Application.ScreenUpdating = True
End Sub
Notes:
- 1. In the above code, A2:A5 is the range of cells which contains the URL addresses you want to extract the images, you should change the cell references to your need.
- 2. With this code, you can not specify the size of the extracted images to your need.
- 3. The above code only can extract the actural images into the cells besides your URL column, you can not specify cell to output the images.
- 4. You should have some basic knowledge of the code, if any character missed or incorrect, the code will not be executed successfully.
3. Then press F5 key to run this code, and all corresponding pictures have been extracted from the image URLs to the adjacent column at once, and the images will be placed at the center of your specific cells, see screenshot:
Convert the image URLs to actual images with Kutools for Excel
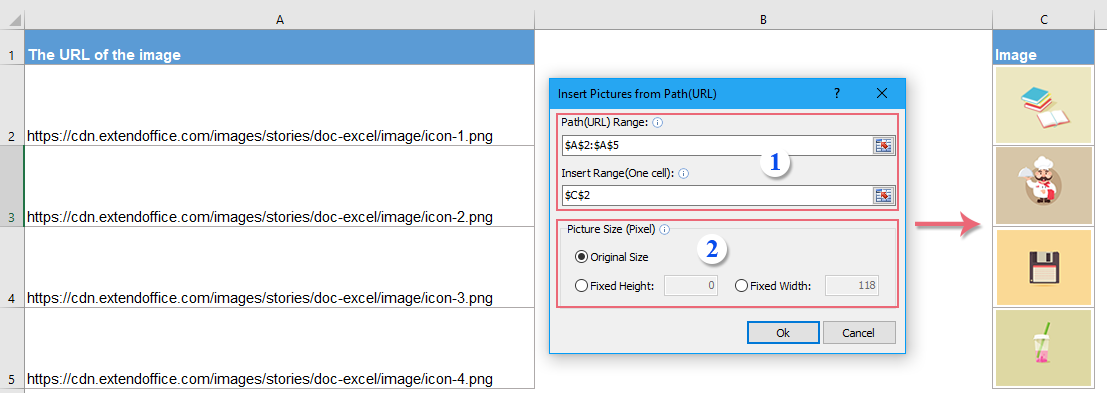
If you are not familiar with the VBA code or want to remedy the limitation of the above code, Kutools for Excel‘s Insert Pictures form Path(URL) feature can help you to quickly insert the cprresponding images based on the URL addresses or specific path in your computer as below screenshot shown. Click to download Kutools for Excel!
Note:To apply this Insert Pictures form Path(URL), firstly, you should download the Kutools for Excel, and then apply the feature quickly and easily.
After installing Kutools for Excel, please do as this:
1. Click Kutools > Insert > Insert Pictures form Path(URL), in the popped out dialog box, please set the following operations, see screenshots:
2. Then, click Ok button, and the pictures will be extracted from the URLs, see screenshot:
Click to Download and free trial Kutools for Excel Now!
The Best Office Productivity Tools
Kutools for Excel Solves Most of Your Problems, and Increases Your Productivity by 80%
- Reuse: Quickly insert complex formulas, charts and anything that you have used before; Encrypt Cells with password; Create Mailing List and send emails…
- Super Formula Bar (easily edit multiple lines of text and formula); Reading Layout (easily read and edit large numbers of cells); Paste to Filtered Range…
- Merge Cells/Rows/Columns without losing Data; Split Cells Content; Combine Duplicate Rows/Columns… Prevent Duplicate Cells; Compare Ranges…
- Select Duplicate or Unique Rows; Select Blank Rows (all cells are empty); Super Find and Fuzzy Find in Many Workbooks; Random Select…
- Exact Copy Multiple Cells without changing formula reference; Auto Create References to Multiple Sheets; Insert Bullets, Check Boxes and more…
- Extract Text, Add Text, Remove by Position, Remove Space; Create and Print Paging Subtotals; Convert Between Cells Content and Comments…
- Super Filter (save and apply filter schemes to other sheets); Advanced Sort by month/week/day, frequency and more; Special Filter by bold, italic…
- Combine Workbooks and WorkSheets; Merge Tables based on key columns; Split Data into Multiple Sheets; Batch Convert xls, xlsx and PDF…
- More than 300 powerful features. Supports Office / Excel 2007-2021 and 365. Supports all languages. Easy deploying in your enterprise or organization. Full features 30-day free trial. 60-day money back guarantee.
Office Tab Brings Tabbed interface to Office, and Make Your Work Much Easier
- Enable tabbed editing and reading in Word, Excel, PowerPoint, Publisher, Access, Visio and Project.
- Open and create multiple documents in new tabs of the same window, rather than in new windows.
- Increases your productivity by 50%, and reduces hundreds of mouse clicks for you every day!
Comments (61)
No ratings yet. Be the first to rate!
Это моя модифицированная версия ответа, которую поделился с tomelin5. Он работает в Excel 2016 и, вероятно, (намного) в более ранних версиях.
В моем случае я создал приложение Microsoft PowerApps для сбора и хранения подписей с помощью ручки ввода.
В стороне: Если вы читаете это, потому что пытаетесь создать PowerApp: волшебным соусом для сохранения содержимого ваших элементов управления в электронную таблицу является функция Patch .
Это работает так, что перьевой элемент управления сохраняет изображения в виде файлов PNG в каталоге и сохраняет относительные адреса к файлам PNG в виде URL-адресов в ячейках электронной таблицы: URL, например .MyAppName_imagesx829ca33re2d6114588e59ca45829d21.png
Я хотел отобразить эти подписи в этой электронной таблице Excel, чтобы их можно было отсортировать, используя другие данные, введенные через приложение. Решение tomelin5 работало так хорошо, как основа для моего решения, и я решил, что должен поделиться своим ремиксом.
Мое решение сохраняет URL-адреса в столбце «A» (1) и помещает сами изображения в столбец «I» (9). Он также регулирует высоту строк в соответствии с шириной столбца 9-го столбца, хотя вы, вероятно, захотите изменить / устранить это поведение.
Все URL-адреса обрабатываются, начиная с A2, и простираются до последней заполненной ячейки в столбце A. Обратите внимание, что мое решение не обрабатывает никаких исключений, и вам понадобится это в случае, если изображения были недоступны.
Sub Button1_Click()
    ' https://msdn.microsoft.com/en-us/library/office/aa221353(v=office.11).aspx
    ' http://www.excelhowto.com/macros/loop-range-cells/
    ' https://www.excelcampus.com/vba/find-last-row-column-cell/
    ' https://superuser.com/questions/52760/embed-pictures-from-web-by-url-in-excel-spreadsheet-or-oo-calc#

    Dim Pic As Picture
    Dim SrcRange As Range
    Dim LastRowA As Long

    LastRowA = Cells.Find(What:="*", _
                    After:=Range("A1"), _
                    LookAt:=xlPart, _
                    LookIn:=xlFormulas, _
                    SearchOrder:=xlByRows, _
                    SearchDirection:=xlPrevious, _
                    MatchCase:=False).Row

    Set SrcRange = ActiveSheet.Range(Cells(2, 1), Cells(LastRowA, 1))

    SrcRange.Rows().RowHeight = ActiveSheet.Columns(9).Width

    For Each Cell In SrcRange.Cells
        With Cell
            Set Pic = .Parent.Pictures.Insert(.Value)
            With .Offset(, 8)
                Pic.Top = .Top
                Pic.Left = .Left
                Pic.Height = .Height
                Pic.Width = .Width
                Pic.Border.Color = vbRed
            End With
        End With
    Next
End Sub


