
See all How-To Articles
This tutorial demonstrates how to import an HTML table into Excel or Google Sheets.
Import Table Data From Website
Using the Power Query feature, you can pull live data directly from a website into Excel.
- Open the Excel file that you wish to import the data into.
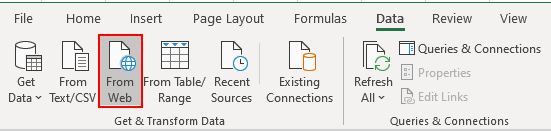
- In the Ribbon, select Data > Get & Transform Data > From Web.
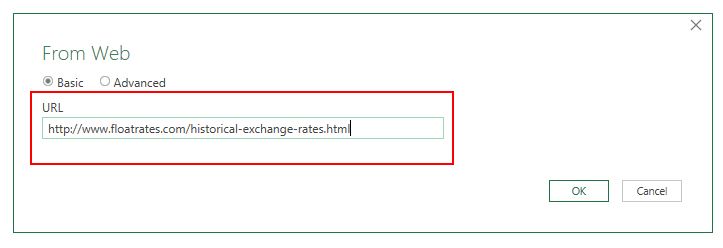
- Type in the URL from which you wish to fetch the data and click OK.
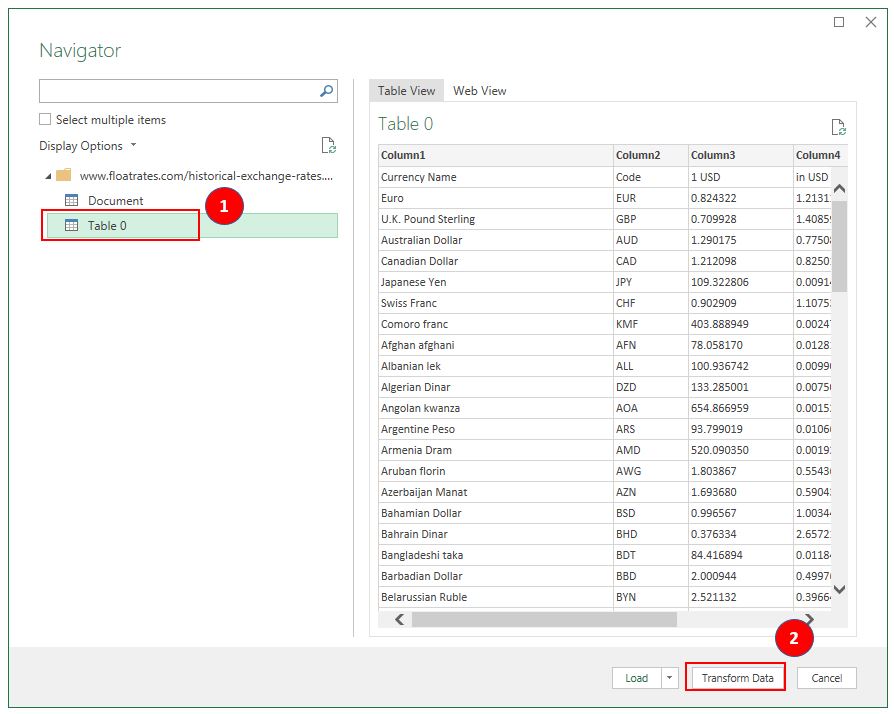
- In the Navigator, on the left, select the table to be imported, then click Transform Data.
- The Power Query Editor will open. Manipulate the table as required – in this case, select Use First Row as Headers. Then to load the data, click Close and Load.
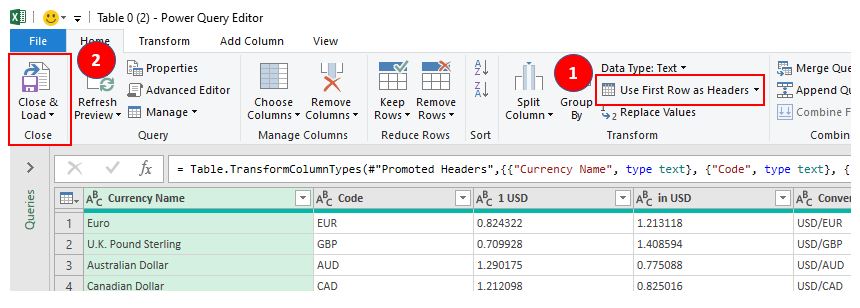
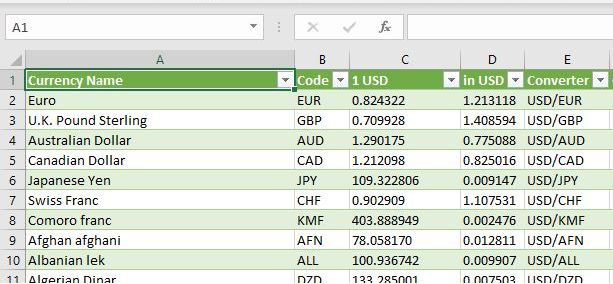
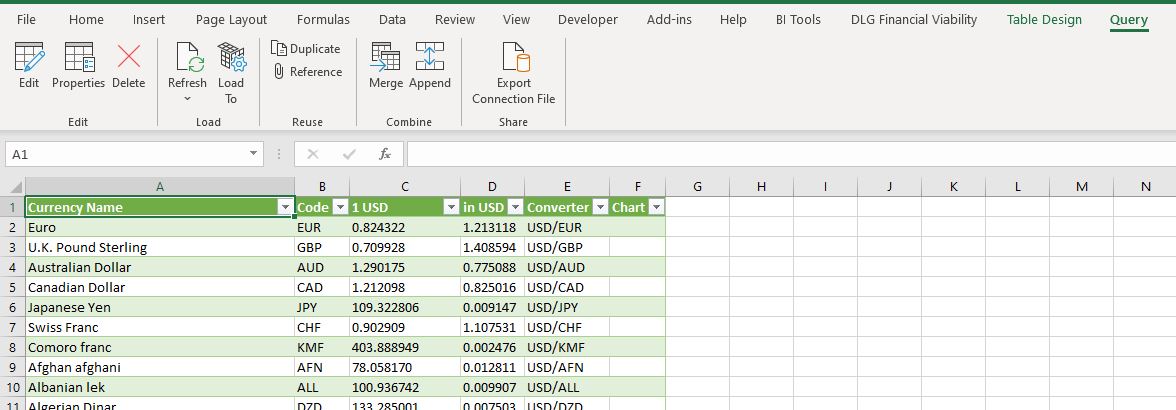
- The table will then be loaded into Excel with two new Ribbon tabs available: Table Design and Query.
How to Import an HTML Table into Google Sheets
- Open the Google sheet where the data needs to be imported to and select the cell where the data will be positioned.
- Then, type in an HTML import formula such as the one shown below:
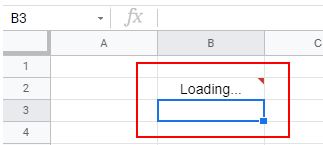
=IMPORTHTML("http://www.floatrates.com/historical-exchange-rates.html", "table",0)- As soon as you press ENTER, Google Sheets will try to load the data into the sheet.
Once done, the data will be displayed.
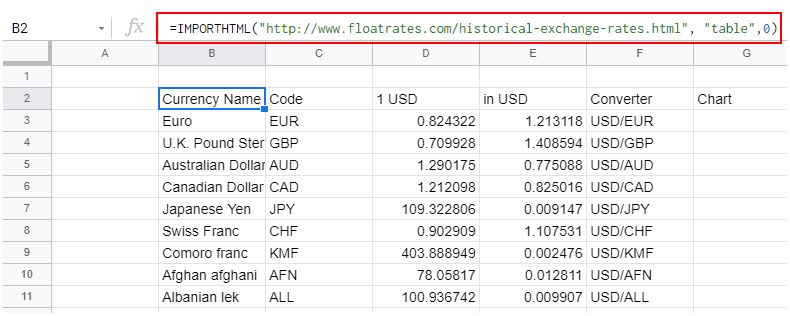
table of contents
html-to-xlsx recipe generates Excel xslx files from HTML tables. This isn’t a full HTML -> Excel conversion but a rather pragmatic and fast way to create Excel files from jsreport. The recipe reads input table and extract a couple of CSS style properties using a specific HTML engine (which defaults to chrome), and finally uses the styles to create the Excel cells.
Examples
- Basic table
- Cells with data types
- Cell with line break
- Cell with format
- Cell with formula
- Merged cells
- Multiple sheets
- Conversion JS trigger
- Insert output into xlsx template
- Postprocess using xlsx
The following CSS properties are supported:
background-color— cell background colorcolor— cell foreground colorborder— all theborder-[left|right|top|bottom]-width,border-[left|right|top|bottom]-style,border-[left|right|top|bottom]-colorwill be transformed into Excel cells borders.text-align— text horizontal align in the Excel cellvertical-align— vertical align in the Excel cellwidth— the Excel column will get the highest width; it can be little bit inaccurate because of pixel to Excel points conversionheight— the Excel row will get the highest heightfont-family— font family, defaults toCalibrifont-size— font size, defaults to16pxfont-style—normal, anditalicstyles are supportedfont-weight— control whether the cell’s text should be bold or nottext-decoration—underlineandline-throughare supportedoverflow— the Excel cell will have text wrap enabled if this is set to scroll.
The following HTML attributes are supported:
colspan— numeric value that merges current column with columns to the rightrowspan— numeric value that merges current row with rows below.
Options
htmlEngine—String(supported values here depends on the HTML engines that you have available in your jsreport installation, by default justchromeis available but you can additionally install better performing cheerio as HTML engine too)waitForJS—Booleanwhether to wait for the JavaScript trigger to be enabled before trying to read the HTML tables on the page or not. defaults tofalse.insertToXlsxTemplate—Booleancontrols if the result of the HTML to Excel tables conversion should be added as new sheets of existing xlsx template, it needs you to set an xlsx template to work. Default isfalse.
Sheets
Each table detected on the HTML source is converted to a new sheet in the final xlsx file. The sheets names are by default Sheet1, Sheet2 etc. However, you can specify a custom sheet name using the name or data-sheet-name attribute on the table element where the data-sheet-name has precedence.
<table name="Data1">
    <tr>
        <td>1</td>
    </tr>
</table>
<table data-sheet-name="Data2">
    <tr>
        <td>2</td>
    </tr>
</table>
Cells with data types
To produce a cell with specific data type you need to use the data-cell-type on the td element. The supported data types are number, boolean, date, datetime and formula:
<table>
    <tr>
        <td data-cell-type="number">10</td>
        <td data-cell-type="boolean" style="width: 85px">1</td>
        <td data-cell-type="date">2019-01-22</td>
        <td data-cell-type="datetime">2019-01-22T17:31:36.000-05:00</td>
    </tr>
</table>
Format
Excel supports setting cell string format. Add the following attributes to the td element:
data-cell-format-str-> Specify the raw string formatdata-cell-format-enum-> Select an existing format
Possible values of the data-cell-format-enum are:
0-> format equal togeneral1-> format equal to02-> format equal to0.003-> format equal to#,##04-> format equal to#,##0.009-> format equal to0%10-> format equal to0.00%11-> format equal to0.00e+0012-> format equal to# ?/?13-> format equal to# ??/??14-> format equal tomm-dd-yy15-> format equal tod-mmm-yy16-> format equal tod-mmm17-> format equal tommm-yy18-> format equal toh:mm am/pm19-> format equal toh:mm:ss am/pm20-> format equal toh:mm21-> format equal toh:mm:ss22-> format equal tom/d/yy h:mm37-> format equal to#,##0 ;(#,##0)38-> format equal to#,##0 ;[red](#,##0)39-> format equal to#,##0.00;(#,##0.00)40-> format equal to#,##0.00;[red](#,##0.00)41-> format equal to_(* #,##0_);_(* (#,##0);_(* "-"_);_(@_)42-> format equal to_("$"* #,##0_);_("$* (#,##0);_("$"* "-"_);_(@_)43-> format equal to_(* #,##0.00_);_(* (#,##0.00);_(* "-"??_);_(@_)44-> format equal to_("$"* #,##0.00_);_("$"* (#,##0.00);_("$"* "-"??_);_(@_)45-> format equal tomm:ss46-> format equal to[h]:mm:ss47-> format equal tommss.048-> format equal to##0.0e+049-> format equal to@
<style>
    td {
        width: 60px;
        padding: 5px;
    }
</style>
<table>
    <tr>
        <td data-cell-type="number" data-cell-format-str="0.00">10</td>
        <td data-cell-type="number" data-cell-format-enum="3">100000</td>
        <td data-cell-type="date" data-cell-format-str="m/d/yyy">2019-01-22</td>
    </tr>
</table>
Setting the format is also required when the cell needs to have a specific format category which depends on the computer locale. The cell is otherwise categorized by Excel as General.
For example, using data-cell-type="date" makes the cell a date and you can use it in the date-based calculations. However, the cell format category in Excel is displayed as General and not Date. To rectify this, you need to use data-cell-format-str to match your locale.
Formula
A formula cell can be specified using data-cell-type="formula" on the td element.
<table>
    <tr>
        <td data-cell-type="number">10</td>
        <td data-cell-type="number">10</td>
        <td data-cell-type="formula">=SUM(A1, B1)</td>
    </tr>
</table>
Font family
You can use the following CSS styles to change the default font-family for all cells in table.
td  {
  font-family: 'Verdana';
  font-size: 18px;
}
Insert output into xlsx template
The table to xlsx conversion can be enough for some cases. However, for more complex cases (like producing pivot tables or complex charts using Excel) there is an option to insert the produced tables into an existing xlsx template (as new sheets) instead of producing a new xlsx file.
The flow is the following:
- Open your desktop Excel application and prepare file with pivot tables and charts on the one sheet and with static data on the second.
- Upload the xlsx to jsreport studio and link it with your
html-to-xlsxtemplate generating dynamic table. - Make sure the table name matches with the data sheet name in your Excel.
Running the template now produces dynamic Excel with charts or pivots based on the data assembled by jsreport.
See this example to get an idea of what can be possible with this feature.
Conversion triggers
You may need to postpone conversion of tables until some JavaScript async tasks are processed. If this is the case; set htmlToXlsx.waitForJS = true in the API options or Wait for conversion trigger in the studio menu. When set, the conversion won’t start until you set window.JSREPORT_READY_TO_START = true inside your template’s JavaScript.
...
<script>
    // do some calculations or something async
    setTimeout(function() {
        window.JSREPORT_READY_TO_START = true; //this will start the conversion and read the existing tables on the page
    }, 500);
    ...
</script>
Issues with row height being larger than actual the content
When using phantomjs as the engine there are cases when a row height ends with a larger height than the actual content. This is caused by a phantomjs bug that retrieves a larger height when the content of cells contains white space characters.
There are two possible workarounds:
- use
letter-spacingCSS property with some negative value (demo)
<!-- without "letter-spacing" the row would be more larger -->
<table style="letter-spacing: -4px">
    <tr>
        <td> From Date: N/A</td>
        <td> To Date: N/A </td>
        <td> Search Text: N/A </td>
        <td> Sort Order: N/A </td>
        <td> Sort Key: N/A </td>
        <td> Filter: N/A </td>
    </tr>
</table>
- use
line-height: 0with a specificheight(demo)
<!-- without "line-height" and "height" the row would be more larger -->
<table style="line-height: 0">
    <tr style="height: 20px">
        <td> From Date: N/A</td>
        <td> To Date: N/A </td>
        <td> Search Text: N/A </td>
        <td> Sort Order: N/A </td>
        <td> Sort Key: N/A </td>
        <td> Filter: N/A </td>
    </tr>
</table>
Performance
The chrome engine can have performance problems when evaluating huge tables with many cells. For these cases the recipe provides an additional helper which splits large tables into chunks and runs evaluation in batches. Usage is like each or jsrender for handlebar helpers.
<table>
    {{#htmlToXlsxEachRows people}}
      <tr>
        <td>{{name}}</td>
        <td>{{address}}</td>
      </tr>
    {{/htmlToXlsxEachRows}}
</table>
Cheerio HTML engine
Although the htmlToXlsxEachRows helper prevents Chrome from hanging, the rendering can still be slow. This is because Chrome needs to create DOM elements for the whole table and evaluate every single cell. Fortunately, there is a better option for large tables – using the custom HTML engine cheerio-page-eval.
This custom engine is experimental and requires manual installation through NPM.
npm i cheerio-page-eval
restart jsreport
Afterward, you can select it in the studio HTML to xlsx menu and start using it. This engine doesn’t create DOM representation like Chrome, so it has much better performance. However, the lack of DOM also introduces some limitations.
- The cheerio engine doesn’t support global CSS styles in the
<style>tag. You need to use in-line styles on cells. - It also doesn’t evaluate JavaScript in the
<script>tags. The helpers and templating engines aren’t limited.
htmlToXlsxEachRows helper also works with the cheerio engine and can significantly improve rendering memory footprint on long tables.
Preview in studio
See general documentation for office preview in studio here.
Postprocess using xlsx recipe
The html-to-xlsx will be always limited and you may miss some features that aren’t yet implemented in it. In this case you can use xlsx recipe and postprocess the html-to-xlsx and modify what you need using low level xlsx helpers.
Demo in playground
API
You can specify the template the standard way by using name or shortid, or alternatively you can also send it in the API request. If you have the Excel template stored as an asset you can also reference it in the request.
{
  "template":  {
    "recipe":  "html-to-xlsx",
    "engine":  "handlebars",
    "content": "<table></table>",
    "htmlToXlsx":  {
      "templateAssetShortid":  "xxxx"
    }
  },
  "data":  {}
}
If you don’t have the xlsx template stored as an asset you can send it directly in the API request.
{
  "template":  {
    "recipe":  "html-to-xlsx",
    "engine":  "handlebars",
    "content": "<table></table>",
    "htmlToXlsx":  {
      "templateAsset":  {
        "content": "base64 encoded word file",
        "encoding":"base64"
       }
    }
  },
  "data":  {}
}
In this tutorial you can find the solution of How to Export or Download the HTML Table Data in Excel Sheet by using JavaScript. Exporting Data to Excel is required feature in our web application. Because by export data functionality will helps to download data from web application to different file format for offline use of data and for this excel format is an ideal for exporting data in file for offline use. There many tutorial we have published for export data to excel at server side scripting using PHP. But if we can perform at client-side for export data into Excel sheet, so it will reduce load on server. So for this for export data to excel , here we will use JavaScript for perform client-side export data to excel sheet.
The client-side export feature will makes our web application more user-friendly. So with the help of JavaScript, we can export HTML table data to Excel format without refresh of web page. Under this tutorial, you can learn How to export HTML table data to excel using JavaScript. In this tutorial, we will use SheetJS JavaScript Library for export HTML table data to Excel.

- HTML Table Data:
- JavaScript Code:
1. HTML Table Data
For Export HTML data to Excel, here first we have to load some data in HTML table. So here we have make fetch employee table data and load in HTML table with table column like name, address, gender, designation and age. Here we have create HTML table with id employee_data. So this id we will use for fetch this HTML table data in JavaScript code. Under this HTML code we have make one button tag with id export_button, so when use has click on this button, then HTML table data will be download in Excel file format without refresh of web page using JavaScript.
<?php

$connect = new PDO("mysql:host=localhost;dbname=testing", "root", "");

$query = "SELECT * FROM tbl_employee ORDER BY name ASC";

$result = $connect->query($query);

?>

<!DOCTYPE HTML>
<html>
<head>
	<meta charset="utf-8" />
	<title>Export HTML table data to excel using JavaScript</title>
	<meta name="viewport" content="width=device-width, initial-scale=1" />
    <link rel="stylesheet" href="https://maxcdn.bootstrapcdn.com/bootstrap/4.0.0/css/bootstrap.min.css" integrity="sha384-Gn5384xqQ1aoWXA+058RXPxPg6fy4IWvTNh0E263XmFcJlSAwiGgFAW/dAiS6JXm" crossorigin="anonymous">

    <script type="text/javascript" src="https://unpkg.com/xlsx@0.15.1/dist/xlsx.full.min.js"></script>
</head>
<body>
    <div class="container">
    	<h2 class="text-center mt-4 mb-4">Export HTML table data to excel using JavaScript</h2>
    	<div class="card">
    		<div class="card-header">
    			<div class="row">
    				<div class="col col-md-6">Sample Data</div>
    				<div class="col col-md-6 text-right">
    					<button type="button" id="export_button" class="btn btn-success btn-sm">Export</button>
    				</div>
    			</div>
    		</div>
    		<div class="card-body">
    			<table id="employee_data" class="table table-striped table-bordered">
                    <tr>
                        <th>Name</th>
                        <th>Address</th>
                        <th>Gender</th>
                        <th>Designation</th>
                        <th>Age</th>
                    </tr>
                    <?php
                    foreach($result as $row)
                    {
                        echo '
                        <tr>
                            <td>'.$row["name"].'</td>
                            <td>'.$row["address"].'</td>
                            <td>'.$row["gender"].'</td>
                            <td>'.$row["designation"].'</td>
                            <td>'.$row["age"].'</td>
                        </tr>
                        ';
                    }
                    ?>
                </table>
    		</div>
    	</div>
    </div>
</body>
</html>
2. JavaScript Code
In this tutorial, we have use SheetJS JavaScript Library for export HTML table data to Excel using JavaScript. So first we have to include following SheetJS library link at header of this HTML web page.
<script type="text/javascript" src="https://unpkg.com/xlsx@0.15.1/dist/xlsx.full.min.js"></script>
In JavaScript code part, first we have make html_table_to_excel(type) function. This function has use SheetJS Library function and convert or Write HTML table data to Excel format and download in browser without refresh of web page.
Once function is ready then we have to called html_table_to_excel(type) function on button click event, so for trigger button click event, we have use addEventListener method. So when user has click on button then html_table_to_excel(type) function has been called with xlsx file type. So it will download HTML table data in .xlsx format Excel file in browser without refresh of web page at client-side.
function html_table_to_excel(type)
    {
        var data = document.getElementById('employee_data');

        var file = XLSX.utils.table_to_book(data, {sheet: "sheet1"});

        XLSX.write(file, { bookType: type, bookSST: true, type: 'base64' });

        XLSX.writeFile(file, 'file.' + type);
    }

    const export_button = document.getElementById('export_button');

    export_button.addEventListener('click', () =>  {
        html_table_to_excel('xlsx');
    });
Conclusion
This tutorial will helps you to add export feature of download HTML table data in Excel sheet without using third-party jQuery plugin or any server-side script. By follow this tutorial you can easily export HTML table data to Excel using minimal JavaScript code.
If you want to get complete source with .sql file, so please write your email address in comment box. We will send you complete source code file at your define email address.
The reason the solution you found on the internet is no working is because of the line that starts var colCount. The variable mytable only has two elements being <thead> and <tbody>. The var colCount line is looking for all the elements within mytable that are <tr>. The best thing you can do is give an id to your <thead> and <tbody> and then grab all the values based on that. Say you had <thead id='headers'> :
function write_headers_to_excel()
{
  str="";

  var myTableHead = document.getElementById('headers');
  var rowCount = myTableHead.rows.length;
  var colCount = myTableHead.getElementsByTagName("tr")[0].getElementsByTagName("th").length;

var ExcelApp = new ActiveXObject("Excel.Application");
var ExcelSheet = new ActiveXObject("Excel.Sheet");
ExcelSheet.Application.Visible = true;

for(var i=0; i<rowCount; i++)
{
    for(var j=0; j<colCount; j++)
    {
        str= myTableHead.getElementsByTagName("tr")[i].getElementsByTagName("th")[j].innerHTML;
        ExcelSheet.ActiveSheet.Cells(i+1,j+1).Value = str;
    }
}

}
and then do the same thing for the <tbody> tag.
EDIT: I would also highly recommend using jQuery. It would shorten this up to:
function write_to_excel()
{
 var ExcelApp = new ActiveXObject("Excel.Application");
 var ExcelSheet = new ActiveXObject("Excel.Sheet");
 ExcelSheet.Application.Visible = true;

  $('th, td').each(function(i){
    ExcelSheet.ActiveSheet.Cells(i+1,i+1).Value = this.innerHTML;
  });
}
Now, of course, this is going to give you some formatting issues but you can work out how you want it formatted in Excel.
EDIT: To answer your question about how to do this for n number of tables, the jQuery will do this already. To do it in raw Javascript, grab all the tables and then alter the function to be able to pass in the table as a parameter. For instance:
var tables = document.getElementsByTagName('table');
for(var i = 0; i < tables.length; i++)
{
  write_headers_to_excel(tables[i]);
  write_bodies_to_excel(tables[i]);
}
Then change the function write_headers_to_excel() to function write_headers_to_excel(table). Then change var myTableHead = document.getElementById('headers'); to var myTableHead = table.getElementsByTagName('thead')[0];. Same with your write_bodies_to_excel() or however you want to set that up.
Содержание
- Процедура преобразования из формата HTML в Эксель
- Способ 1: использование сторонних программ
- Способ 2: преобразование с помощью стандартных инструментов Excel
- Вопросы и ответы

Потребность преобразовать таблицу с расширением HTML в форматы Excel может наступить в различных случаях. Возможно, нужно конвертировать данные веб-страницы из интернета или файлы HTML, использовавшиеся локально для других нужд специальными программами. Довольно часто производят конвертацию транзитом. То есть, сначала переводят таблицу из HTML в XLS или XLSX, потом выполняют её обработку или редактирование, а потом снова преобразуют в файл с прежним расширением для выполнения его первоначальной функции. Это связано с тем, что с таблицами намного проще работать именно в Excel. Давайте узнаем, как можно перевести таблицу из формата HTML в Эксель.
Читайте также: Как перевести HTML в Word
Формат HTML является языком гипертекстовой разметки. Объекты с данным расширением чаще всего применяются в интернете, как статические веб-страницы. Но нередко они могут использоваться и для локальных нужд, например, как документы справки к различным программам.
Если возникает вопрос конвертации данных из HTML в форматы Excel, а именно XLS, XLSX, XLSB или XLSM, то неопытный пользователь может взяться за голову. Но на самом деле ничего страшного тут нет. Конвертация в современных версиях Excel встроенными инструментами программы выполняется довольно просто и в большинстве случаев относительно корректно. Кроме того, можно сказать, что сам процесс интуитивно понятен. Тем не менее, в сложных случаях можно воспользоваться для конвертации сторонними утилитами. Давайте рассмотрим различные варианты преобразования HTML в Excel.
Способ 1: использование сторонних программ
Сразу давайте остановимся на использовании сторонних программ для перевода файлов из формата HTML в Эксель. Преимущества данного варианта заключаются в том, что специализированные утилиты способны справляться с конвертированием даже очень сложных объектов. Недостаток заключается, в том, что подавляющее большинство из них платное. Кроме того, на данный момент практически все достойные варианты англоязычные без русификации. Давайте рассмотрим алгоритм работы в одной из самых удобных программ для выполнения вышеуказанного направления конвертации — Abex HTML to Excel Converter.
Скачать Abex HTML to Excel Converter
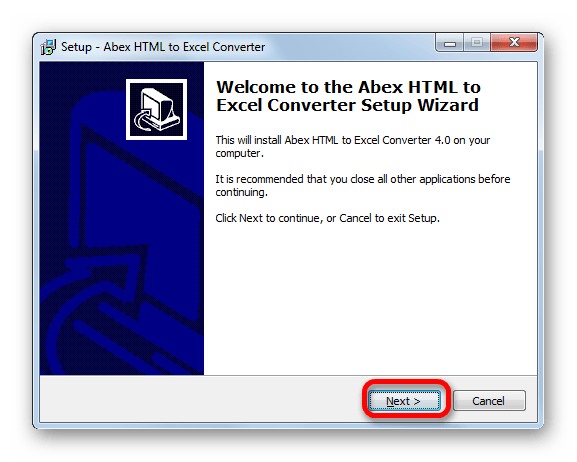
- После того, как был скачан инсталлятор программы Abex HTML to Excel Converter, запускаем его, выполнив по нему двойной щелчок левой кнопкой мыши. Открывается приветственное окно установщика. Щелкаем по кнопке «Next» («Далее»).
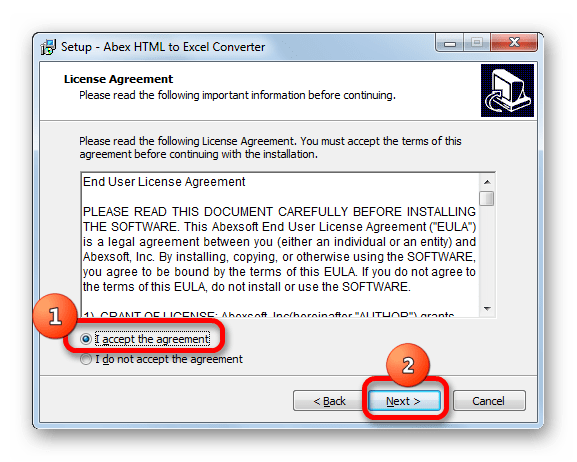
- Вслед за этим открывается окно с лицензионным соглашением. Для того, чтобы согласится с ним, следует поставить переключатель в позицию «I accept the agreement» и щелкнуть по кнопке «Next».
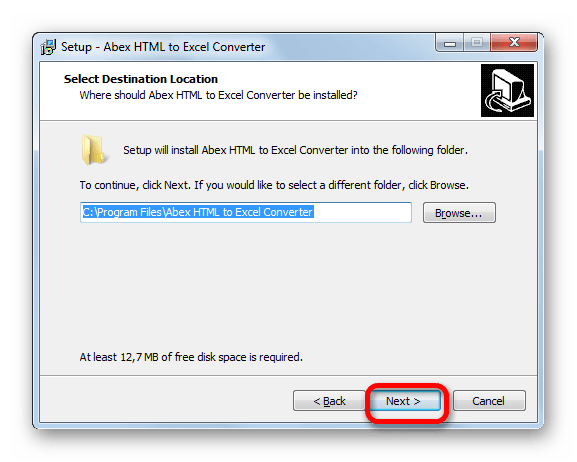
- После этого открывается окно, в котором указывается, куда именно будет устанавливаться программа. Конечно, при желании можно изменить директорию, но без особой нужды делать это не рекомендуется. Так что просто жмем на кнопку «Next».
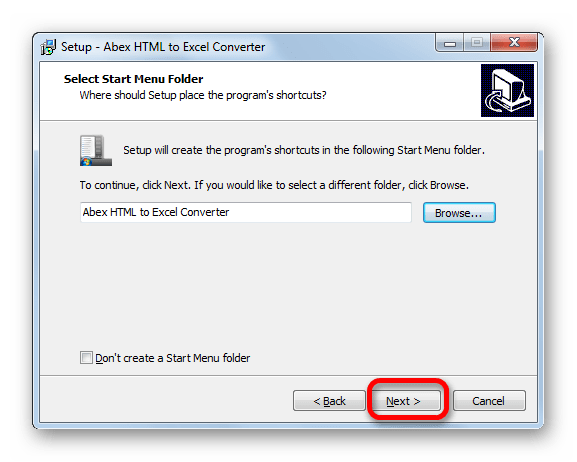
- В следующем окне указывается, каковым будет название программы, отображаемое в стартовом меню. Тут тоже можно просто нажать на кнопку «Next».
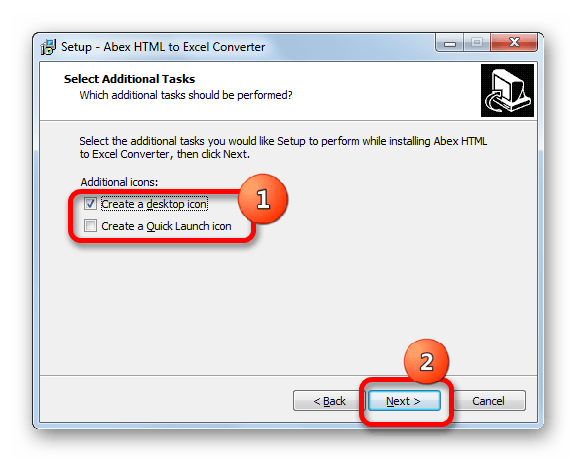
- В следующем окне предлагается путем выставления галочек установить иконку утилиты на рабочий стол (по умолчанию включено) и на панель быстрого запуска. Выставляем данные настройки согласно своим предпочтениям и жмем на кнопку «Next».
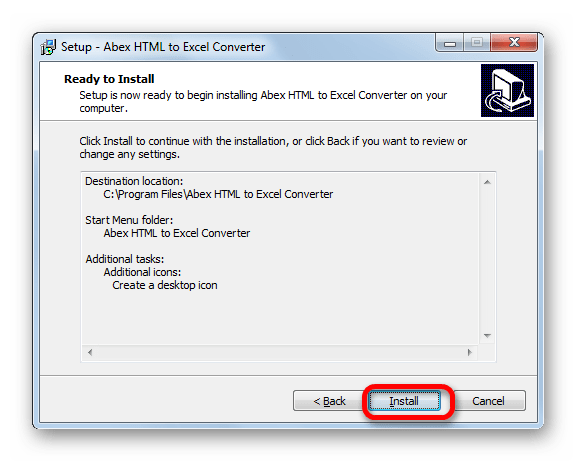
- После этого запускается окно, где обобщена вся информация о всех тех настройках установки программы, которые пользователь внес ранее. Если пользователя что-то не удовлетворяет, то он может нажать на кнопку «Back» и произвести соответствующее редактирование настроек. Если же он со всем согласен, то для начала установки следует нажать на кнопку «Install».
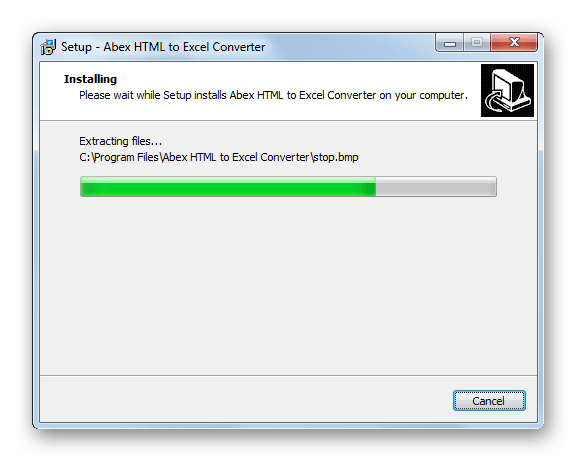
- Происходит процедура установки утилиты.
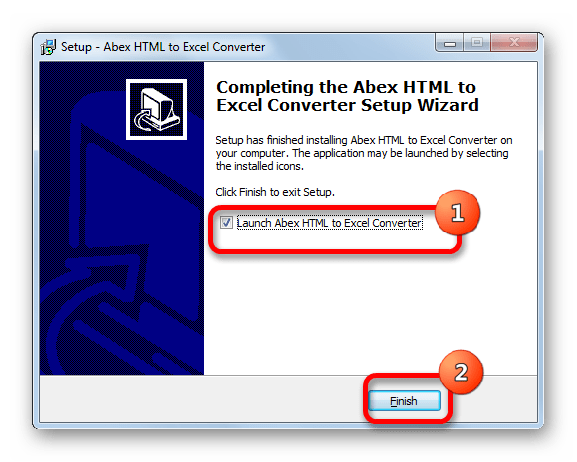
- После её завершения запускается окно, в котором сообщается об этом. Если пользователь хочет тут же запустить программу автоматически, то он должен проследить, чтобы около параметра «Launch Abex HTML to Excel Converter» была установлена галочка. В обратном случае нужно снять её. Для выхода из окна установки следует нажать на кнопку «Finish».
- Важно знать, что перед запуском утилиты Launch Abex HTML to Excel Converter, как бы он не проводился, вручную или сразу после установки приложения, следует завершить работу и закрыть все программы пакета Microsoft Office. Если вы этого не сделаете, то при попытке открыть Abex HTML to Excel Converter откроется окошко, в котором будет сообщаться, о необходимости выполнить данную процедуру. Чтобы перейти к работе с утилитой, нужно нажать в этом окне на кнопку «Yes». Если при этом офисные документы открыты, то работа в них принудительно будет завершена, а все несохраненные данные потеряны.
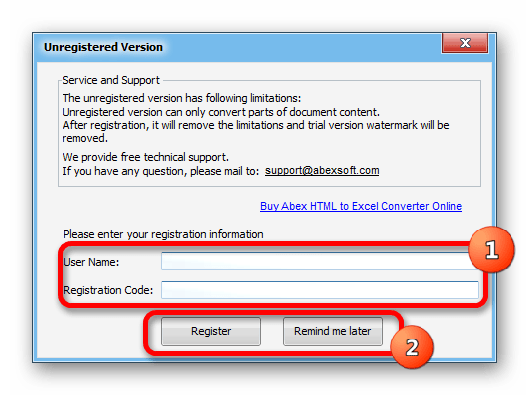
- Затем будет запущено окно регистрации. Если вы приобрели регистрационный ключ, то в соответствующих полях требуется ввести его номер и ваше имя (можно псевдоним), а после этого нажать на кнопку «Register». Если вы пока ключ не приобрели и хотите испытать урезанную версию приложения, то в этом случае просто нажмите на кнопку «Remind me later».
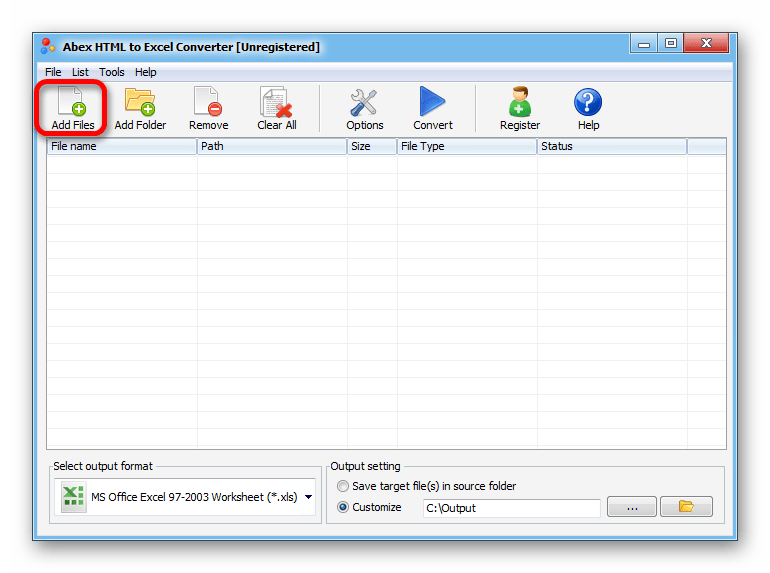
- После выполнения вышеуказанных действий запускается непосредственно окно программы Abex HTML to Excel Converter. Для добавления файла в формате HTML для конвертации следует нажать на кнопку «Add Files».
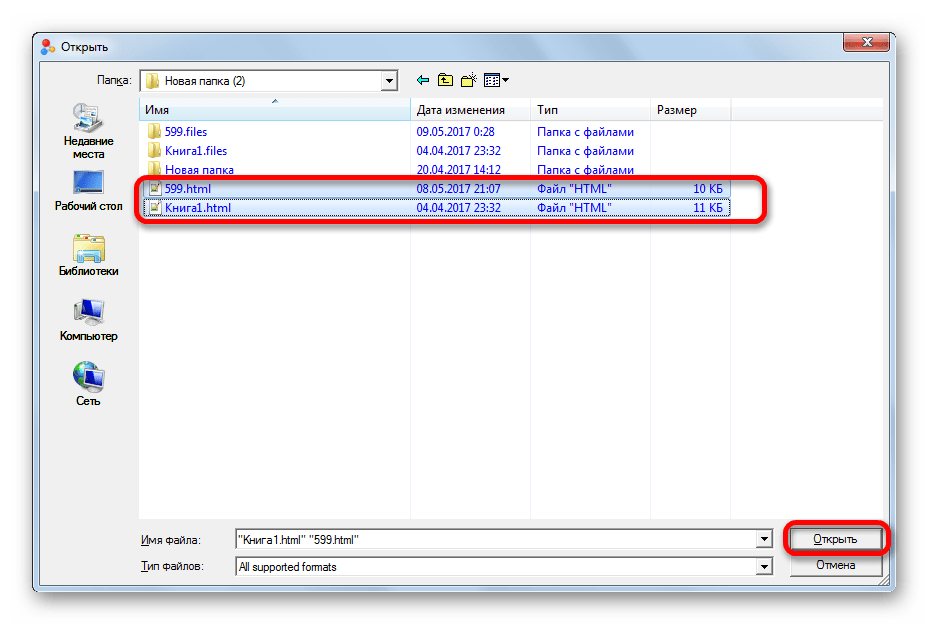
- После этого открывается окно добавления файла. В нем нужно перейти в категорию, где находятся объекты, предназначенные для конвертации. Затем нужно их выделить Преимущество данного способа перед стандартным преобразованием HTML в Excel заключается в том, что можно выбирать и конвертировать сразу несколько объектов. После того, как файлы выделены, жмем на кнопку «Открыть».
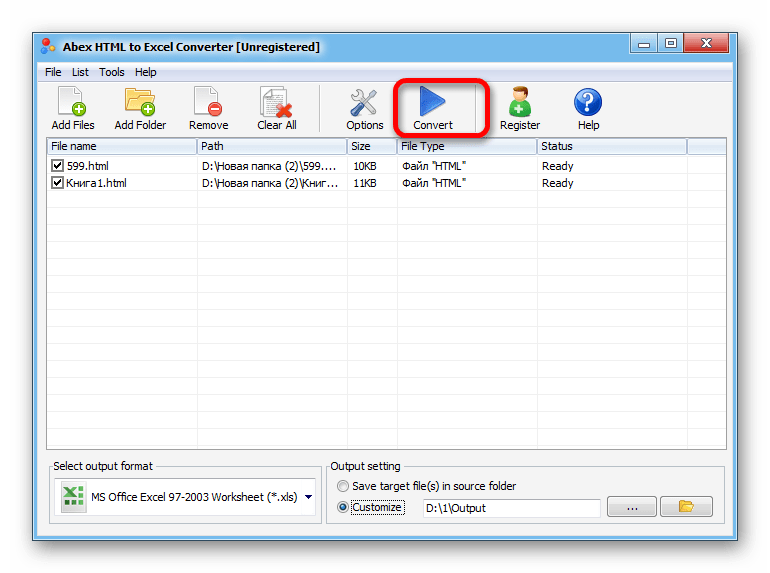
- Выбранные объекты будут отображены в основном окне утилиты. После этого кликаем по левому нижнему полю, чтобы выбрать один из трех форматов Excel, в которые можно преобразовать файл:
- XLS (по умолчанию);
- XLSX;
- XLSM (с поддержкой макросов).
Делаем выбор.
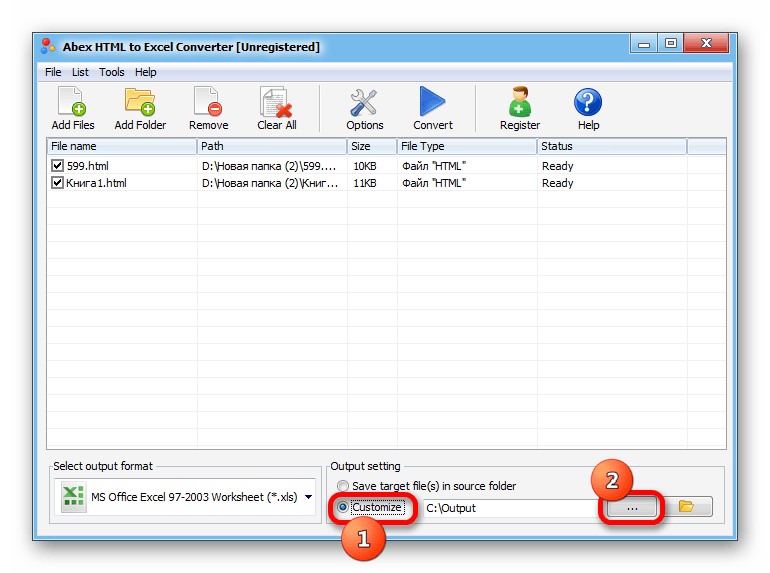
- После этого переходим к блоку настроек «Output setting» («Настройка вывода»). Тут следует указать, где именно будут сохраняться преобразованные объекты. Если выставить переключатель в позицию «Save target file(s) in source folder», то таблица будет сохраняться в той же директории, где расположен исходник в формате HTML. Если же вы желаете сохранять файлы в отдельной папке, то для этого следует переставить переключатель в позицию «Customize». При этом по умолчанию объекты будут сохраняться в папке «Output», которая в свою очередь размещена в корневом каталоге диска C.
Если вы желаете сами указать место сохранения объекта, то следует кликнуть по кнопке, расположенной справа от поля с адресом.
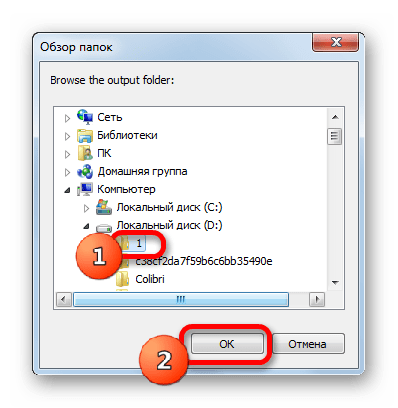
- После этого открывается окошко с обзором папок. Вам необходимо переместиться в ту директорию, которую хотите назначить местом сохранения. Затем следует нажать на кнопку «OK».
- После этого можно приступить непосредственно к процедуре конвертации. Для этого на верхней панели следует нажать на кнопку «Convert».
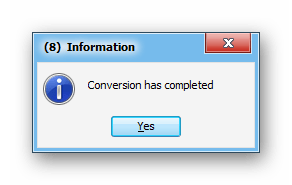
- Затем будет выполнена процедура преобразования. После её завершения откроется небольшое окошко, в котором сообщается об этом, а также автоматически запустится Проводник Windows в той директории, где расположены конвертированные файлы в формате Excel. Теперь с ними можно проводить любые дальнейшие манипуляции.


Но нужно учесть, что если вы используете бесплатную пробную версию утилиты, то будет выполнена конвертация только части документа.
Способ 2: преобразование с помощью стандартных инструментов Excel
Также конвертировать файл HTML в любой формат Excel можно довольно легко и при помощи стандартных инструментов данного приложения.
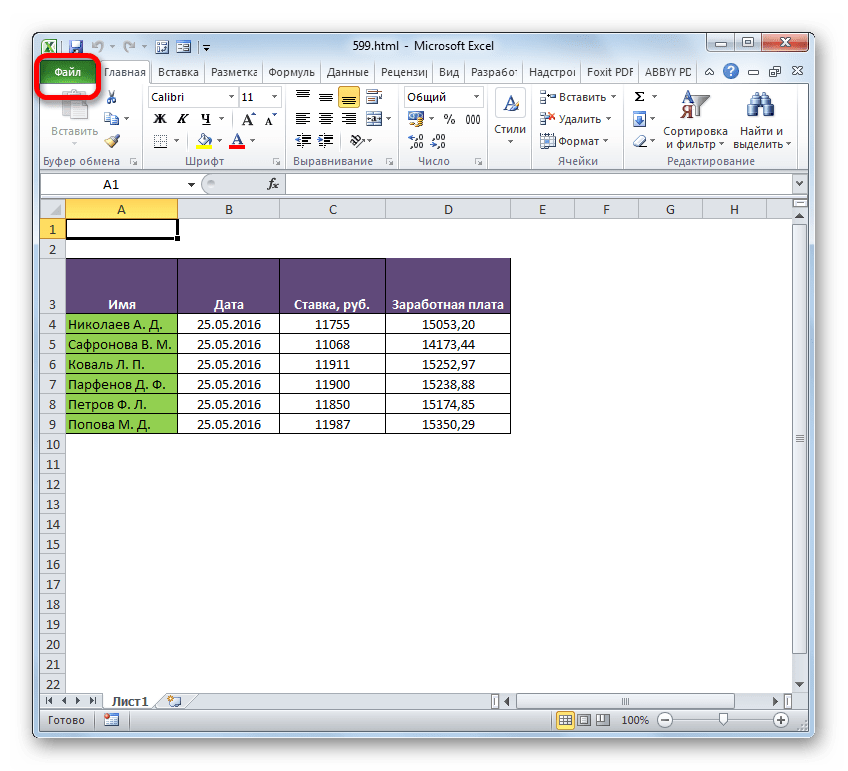
- Запускаем Эксель и переходим во вкладку «Файл».
- В открывшемся окне клацаем по наименованию «Открыть».
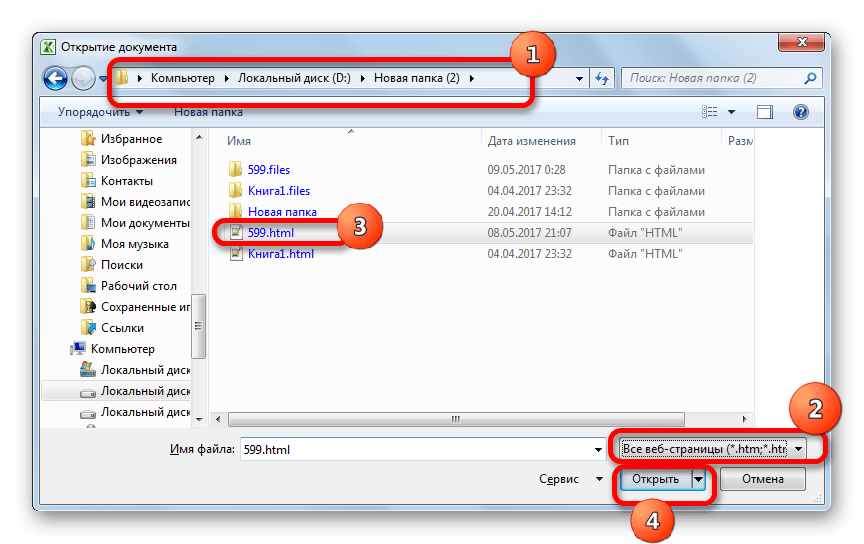
- Вслед за этим запускается окно открытия файла. Нужно перейти в ту директорию, где расположен файл в формате HTML, который следует преобразовать. При этом в поле форматов файлов данного окна должен быть установлен один из следующих параметров:
- Все файлы Excel;
- Все файлы;
- Все веб-страницы.
Только в этом случае нужный нам файл отобразится в окне. Затем его нужно выделить и нажать на кнопку «Открыть».
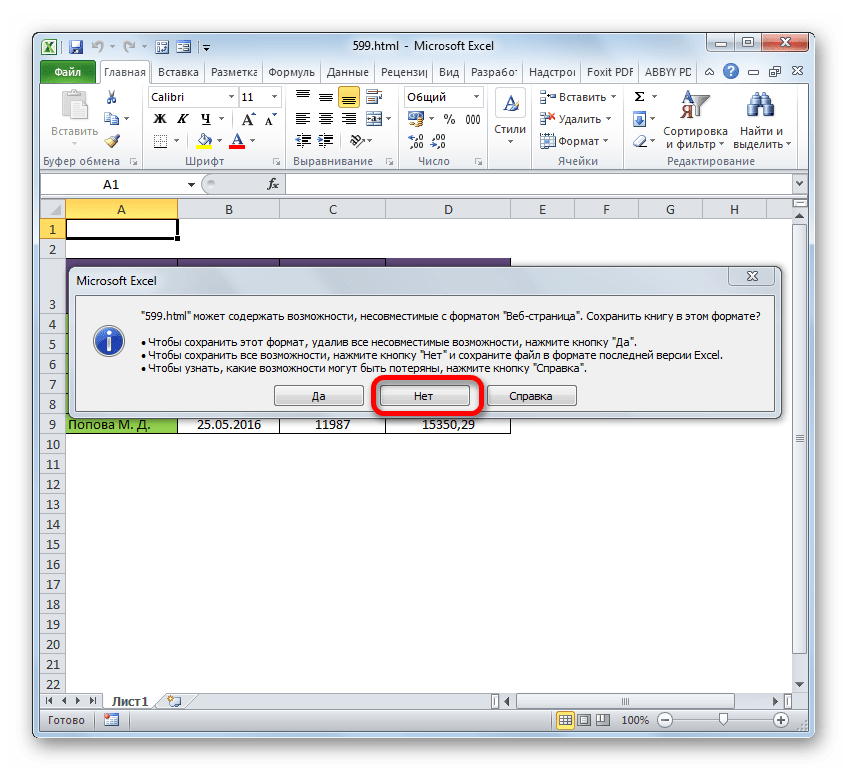
- После этого таблица в формате HTML отобразится на листе Excel. Но это ещё не всё. Нам необходимо сохранить документ в нужном формате. Для этого кликаем по пиктограмме в виде дискеты в левом верхнем углу окна.
- Открывается окошко, в котором говорится, что существующий документ может иметь возможности, несовместимые с форматом веб-страницы. Жмем на кнопку «Нет».
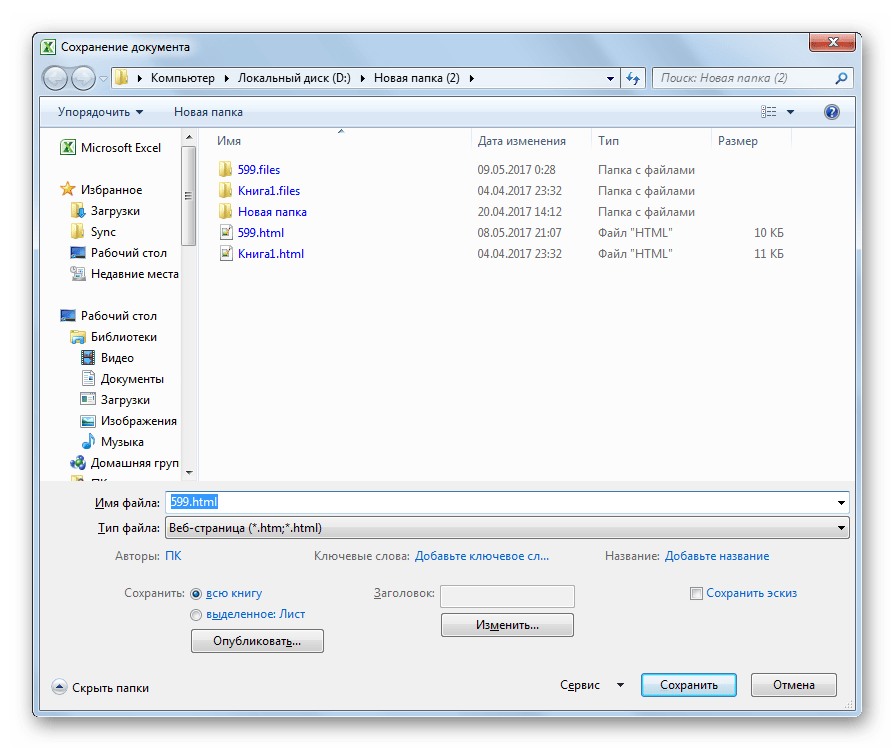
- После этого открывается окно сохранения файла. Переходим в директорию, где желаем его разместить. Затем при желании изменяем наименование документа в поле «Имя файла», хотя его можно оставить и текущим. Далее кликаем по полю «Тип файла» и выбираем один из типов файлов Excel:
- XLSX;
- XLS;
- XLSB;
- XLSM.
Когда все вышеуказанные настройки произведены, жмем на кнопку «Сохранить».
- После этого файл будет сохранен с выбранным расширением.


Также существует другая возможность перейти в окно сохранения документа.
- Перемещаемся во вкладку «Файл».
- Перейдя в новое окно, щелкаем по пункту левого вертикального меню «Сохранить как».
- После этого запускается окно сохранения документа, и все дальнейшие действия проводятся точно так же, как было описано в предыдущем варианте.

Как видим, преобразовать файл из HTML в один из форматов Excel довольно просто, применив стандартные инструменты данной программы. Но тем пользователям, которые желают получить дополнительные возможности, например, производить массовую конвертацию объектов по указанному направлению, можно порекомендовать приобрести одну из специализированных платных утилит.
Еще статьи по данной теме:
Помогла ли Вам статья?
Improve Article
Save Article
Like Article
Improve Article
Save Article
Like Article
Any HTML table that you have created can be converted into an Excel Spreadsheet by using jQuery and it is compatible with all browsers. There are two simple approaches that require basic HTML and jQuery knowledge to achieve this.
- Approach 1: Using jQuery plugin: A simple jQuery plugin ‘table2excel’ can be used for converting an HTML table to an excel sheet.
Syntax:
$("#table-id").table2excel({
    filename: "excel_sheet-name.xls"
});
- Example:
html
<table id="studtable">
<tr>
<th>ID</th>
<th>Name</th>
<th>Age</th>
<th>Address</th>
</tr>
<tr>
<td>101</td>
<td>Alex</td>
<td>15</td>
<td>Maldives</td>
</tr>
<tr>
<td>102</td>
<td>Chris</td>
<td>14</td>
<td>Canada</td>
</tr>
<tr>
<td>103</td>
<td>Jay</td>
<td>15</td>
<td>Toronto</td>
</tr>
</table>
<script>
$(document).ready(function () {
$("#studtable").table2excel({
filename: "Students.xls"
});
});
</script>
- Output:
ID    Name    Age    Address
101    Alex    15    Maldives
102    Chris    14    Canada
103    Jay    15    Toronto
- The above output gets converted into an Excel spreadsheet in the exact same manner the HTML table is. About ‘table2excel’: The ‘table2excel’ is a simple yet useful jQuery plugin that allows for exporting HTML table data to an Excel file. The ‘table2excel’ also has a feature to exclude cells that contain a specified class. Syntax for noExport:
$(document).ready(function() {
    $("#table-id").table2excel({
        exclude: ".noExport",
        filename: "name-of-the-file",
    });
});
- Example code for excluding some specified cells:
html
<script src=
"//ajax.googleapis.com/ajax/libs/jquery/2.2.4/jquery.min.js">
</script>
<script src=
"//cdn.rawgit.com/rainabba/jquery-table2excel/1.1.0/dist/jquery.table2excel.min.js">
</script>
<button>Export</button>
<table>
<thead>
<tr>
<td class="noExport">
This cell will not be exported.
</td>
<td>
This cell will get exported.
</td>
</tr>
</thead>
<tbody>
<tr>
<td>Alex</td>
<td class="noExport">Maldives</td>
</tr>
<tr>
<td>Chris</td>
<td>Canada</td>
</tr>
</tbody>
</table>
- Note: In the above sample code, the class ‘.noExport’ has been used to exclude those specified cells from the HTML table data. Therefore the exported Excel Spreadsheet also does not include those cells from the HTML table data.
- Approach 2: Using simple HTML: Consider the same students table above to understand the below. Let’s use a button in our code which when clicked to converts the HTML data table into an Excel spreadsheet. Note that the ‘export’ button below does not actually convert the HTML table to an excel sheet. This has to used in a proper and already existing HTML code to get the Excel spreadsheet and will not work in this IDE.
html
<!DOCTYPE html>
<html>
<head>
<title>
HTML Table To Excel
spreadsheet using
HTML only
</title>
</head>
<body>
<table id="studtable">
<tr>
<th>ID</th>
<th>Name</th>
<th>Age</th>
<th>Address</th>
</tr>
<tr>
<td>101</td>
<td>Alex</td>
<td>15</td>
<td>Maldives</td>
</tr>
<tr>
<td>102</td>
<td>Chris</td>
<td>14</td>
<td>Canada</td>
</tr>
<tr>
<td>103</td>
<td>Jay</td>
<td>15</td>
<td>Toronto</td>
</tr>
</table>
<button onclick="tableToExcel(
'studtable', 'Students')">
Click to Export
</button>
</body>
</html>
- Output:

HTML is the foundation of webpages, is used for webpage development by structuring websites and web apps. jQuery is an open source JavaScript library that simplifies the interactions between an HTML/CSS document, It is widely famous with it’s philosophy of “Write less, do more“.
- HTML Tutorial and HTML Examples.
- jQuery Tutorial and jQuery Examples.
Like Article
Save Article
Table to Excel 2

Export HTML table to valid excel file effortlessly.
This library uses exceljs/exceljs under the hood to create the excel.
(Initial version of this library was using protobi/js-xlsx, it can be found here)
Installation
Browser
Just add a script tag:
<script type="text/javascript" src="../dist/tableToExcel.js"></script>
Node
npm install @linways/table-to-excel --save
import TableToExcel from "@linways/table-to-excel";
Usage
Create your HTML table as normal.
To export content of table #table1 run:
TableToExcel.convert(document.getElementById("table1"));
or
TableToExcel.convert(document.getElementById("table1"), {
  name: "table1.xlsx",
  sheet: {
    name: "Sheet 1"
  }
});
Check this pen for working example.
Cell Types
Cell types can be set using the following data attributes:
| Attribute | Description | Possible Values |
|---|---|---|
data-t |
To specify the data type of a cell | s : String (Default)n : Number b : Boolean d : Date |
data-hyperlink |
To add hyper link to cell | External URL or hyperlink to another sheet |
data-error |
To add value of a cell as error |
Example:
<!-- for setting a cell type as number -->
<td data-t="n">2500</td>
<!-- for setting a cell type as date -->
<td data-t="d">05-23-2018</td>
<!-- for setting a cell type as boolean. String "true/false" will be accepted as Boolean-->
<td data-t="b">true</td>
<!-- for setting a cell type as boolean using integer. 0 will be false and any non zero value will be true -->
<td data-t="b">0</td>
<!-- For adding hyperlink -->
<td data-hyperlink="https://google.com">Google</td>
Cell Styling
All styles are set using data attributes on td tags.
There are 5 types of attributes: data-f-*, data-a-*, data-b-*, data-fill-* and data-num-fmt which corresponds to five top-level attributes font, alignment, border, fill and numFmt.
| Category | Attribute | Description | Values |
|---|---|---|---|
| font | data-f-name |
Font name | «Calibri» ,»Arial» etc. |
data-f-sz |
Font size | «11» // font size in points | |
data-f-color |
Font color | A hex ARGB value. Eg: FFFFOOOO for opaque red. | |
data-f-bold |
Bold | true or false |
|
data-f-italic |
Italic | true or false |
|
data-underline |
Underline | true or false |
|
data-f-strike |
Strike | true or false |
|
| Alignment | data-a-h |
Horizontal alignment | left, center, right, fill, justify, centerContinuous, distributed |
data-a-v |
Vertical alignment | bottom, middle, top, distributed, justify |
|
data-a-wrap |
Wrap text | true or false |
|
data-a-indent |
Indent | Integer | |
data-a-rtl |
Text direction: Right to Left | true or false |
|
data-a-text-rotation |
Text rotation | 0 to 90 | |
| -1 to -90 | |||
| vertical | |||
| Border | data-b-a-s |
Border style (all borders) | Refer BORDER_STYLES |
data-b-t-s |
Border top style | Refer BORDER_STYLES |
|
data-b-b-s |
Border bottom style | Refer BORDER_STYLES |
|
data-b-l-s |
Border left style | Refer BORDER_STYLES |
|
data-b-r-s |
Border right style | Refer BORDER_STYLES |
|
data-b-a-c |
Border color (all borders) | A hex ARGB value. Eg: FFFFOOOO for opaque red. | |
data-b-t-c |
Border top color | A hex ARGB value. | |
data-b-b-c |
Border bottom color | A hex ARGB value. | |
data-b-l-c |
Border left color | A hex ARGB value. | |
data-b-r-c |
Border right color | A hex ARGB value. | |
| Fill | data-fill-color |
Cell background color | A hex ARGB value. |
| numFmt | data-num-fmt |
Number Format | «0» |
| «0.00%» | |||
| «0.0%» // string specifying a custom format | |||
| «0.00%;(0.00%);-;@» // string specifying a custom format, escaping special characters |
BORDER_STYLES: thin, dotted, dashDot, hair, dashDotDot, slantDashDot, mediumDashed, mediumDashDotDot, mediumDashDot, medium, double, thick
Exclude Cells and rows
To exclude a cell or a row from the exported excel add data-exclude="true" to the corresponding td or tr.
Example:
<!-- Exclude entire row -->
<tr data-exclude="true">
  <td>Excluded row</td>
  <td>Something</td>
</tr>

<!-- Exclude a single cell -->
<tr>
  <td>Included Cell</td>
  <td data-exclude="true">Excluded Cell</td>
  <td>Included Cell</td>
</tr>
Column Width
Column width’s can be set by specifying data-cols-width in the <table> tag.
data-cols-width accepts comma separated column widths specified in character count .
data-cols-width="10,20" will set width of first coulmn as width of 10 charaters and second column as 20 characters wide.
Example:
<table data-cols-width="10,20,30">
  ...
</table>
Row Height
Row Height can be set by specifying data-height in the <tr> tag.
Example:
<tr data-height="42.5">
  <td>Cell 1</td>
  <td>Cell 2</td>
</tr>
Release Changelog
1.0.0
Migration Guide for migrating from V0.2.1 to V1.0.0
- Changed the backend to Exceexceljs/exceljslJS
- Added border color
- Option to set style and color for all borders
- Exclude row
- Added text underline
- Added support for hyperlinks
- Text intent
- RTL support
- Extra alignment options
- String «true/false» will be accepted as Boolean
- Changed border style values
- Text rotation values changed
1.0.2
- Fixed bug in handling multiple columns merges in a sheet
1.0.3
- Option to specify row height