
See all How-To Articles
This tutorial demonstrates how to import an HTML table into Excel or Google Sheets.
Import Table Data From Website
Using the Power Query feature, you can pull live data directly from a website into Excel.
- Open the Excel file that you wish to import the data into.
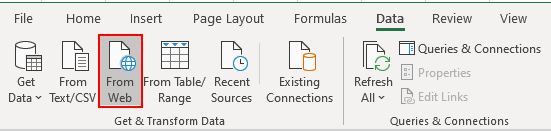
- In the Ribbon, select Data > Get & Transform Data > From Web.
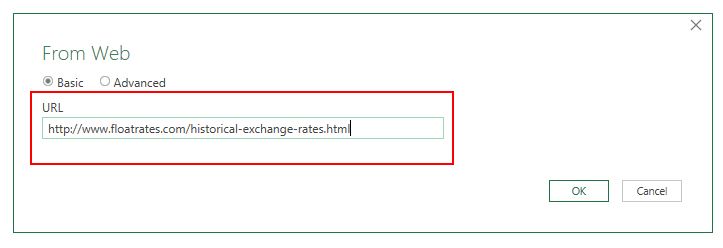
- Type in the URL from which you wish to fetch the data and click OK.
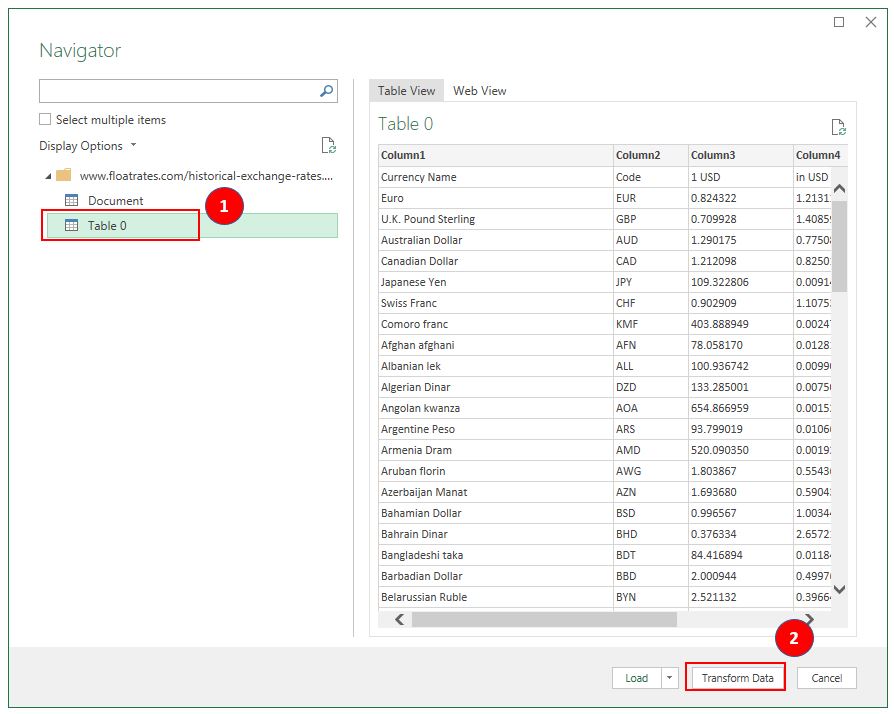
- In the Navigator, on the left, select the table to be imported, then click Transform Data.
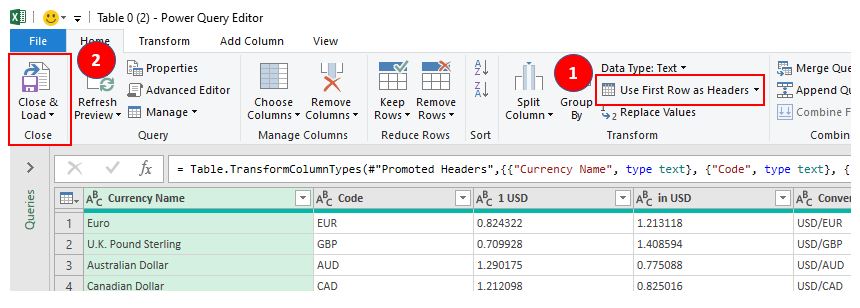
- The Power Query Editor will open. Manipulate the table as required – in this case, select Use First Row as Headers. Then to load the data, click Close and Load.
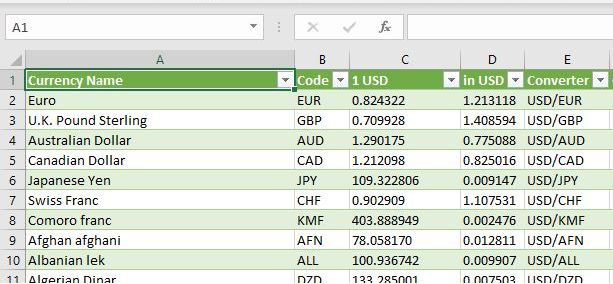
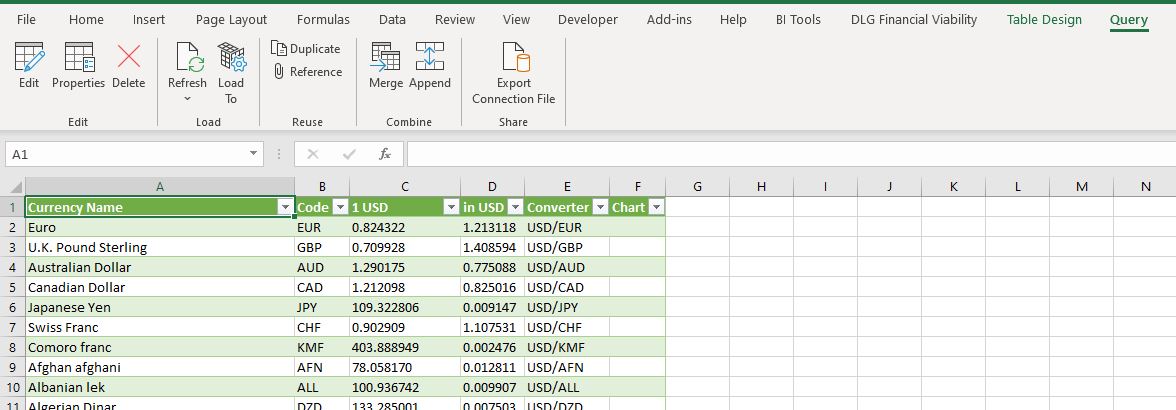
- The table will then be loaded into Excel with two new Ribbon tabs available: Table Design and Query.
How to Import an HTML Table into Google Sheets
- Open the Google sheet where the data needs to be imported to and select the cell where the data will be positioned.
- Then, type in an HTML import formula such as the one shown below:
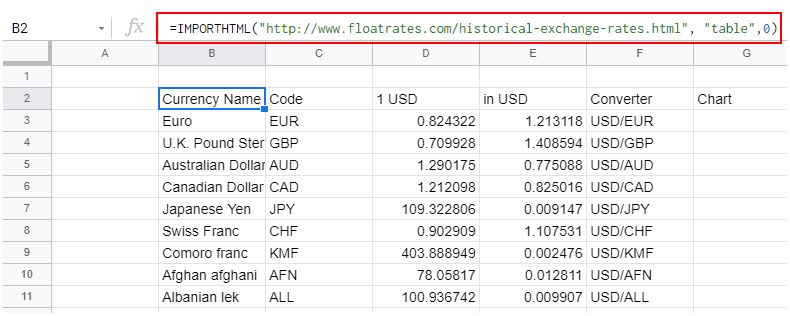
=IMPORTHTML("http://www.floatrates.com/historical-exchange-rates.html", "table",0)- As soon as you press ENTER, Google Sheets will try to load the data into the sheet.
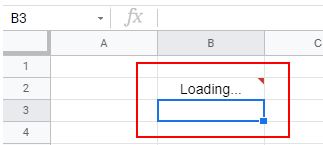
Once done, the data will be displayed.
The reason the solution you found on the internet is no working is because of the line that starts var colCount. The variable mytable only has two elements being <thead> and <tbody>. The var colCount line is looking for all the elements within mytable that are <tr>. The best thing you can do is give an id to your <thead> and <tbody> and then grab all the values based on that. Say you had <thead id='headers'> :
function write_headers_to_excel()
{
  str="";

  var myTableHead = document.getElementById('headers');
  var rowCount = myTableHead.rows.length;
  var colCount = myTableHead.getElementsByTagName("tr")[0].getElementsByTagName("th").length;

var ExcelApp = new ActiveXObject("Excel.Application");
var ExcelSheet = new ActiveXObject("Excel.Sheet");
ExcelSheet.Application.Visible = true;

for(var i=0; i<rowCount; i++)
{
    for(var j=0; j<colCount; j++)
    {
        str= myTableHead.getElementsByTagName("tr")[i].getElementsByTagName("th")[j].innerHTML;
        ExcelSheet.ActiveSheet.Cells(i+1,j+1).Value = str;
    }
}

}
and then do the same thing for the <tbody> tag.
EDIT: I would also highly recommend using jQuery. It would shorten this up to:
function write_to_excel()
{
 var ExcelApp = new ActiveXObject("Excel.Application");
 var ExcelSheet = new ActiveXObject("Excel.Sheet");
 ExcelSheet.Application.Visible = true;

  $('th, td').each(function(i){
    ExcelSheet.ActiveSheet.Cells(i+1,i+1).Value = this.innerHTML;
  });
}
Now, of course, this is going to give you some formatting issues but you can work out how you want it formatted in Excel.
EDIT: To answer your question about how to do this for n number of tables, the jQuery will do this already. To do it in raw Javascript, grab all the tables and then alter the function to be able to pass in the table as a parameter. For instance:
var tables = document.getElementsByTagName('table');
for(var i = 0; i < tables.length; i++)
{
  write_headers_to_excel(tables[i]);
  write_bodies_to_excel(tables[i]);
}
Then change the function write_headers_to_excel() to function write_headers_to_excel(table). Then change var myTableHead = document.getElementById('headers'); to var myTableHead = table.getElementsByTagName('thead')[0];. Same with your write_bodies_to_excel() or however you want to set that up.
In this tutorial you can find the solution of How to Export or Download the HTML Table Data in Excel Sheet by using JavaScript. Exporting Data to Excel is required feature in our web application. Because by export data functionality will helps to download data from web application to different file format for offline use of data and for this excel format is an ideal for exporting data in file for offline use. There many tutorial we have published for export data to excel at server side scripting using PHP. But if we can perform at client-side for export data into Excel sheet, so it will reduce load on server. So for this for export data to excel , here we will use JavaScript for perform client-side export data to excel sheet.
The client-side export feature will makes our web application more user-friendly. So with the help of JavaScript, we can export HTML table data to Excel format without refresh of web page. Under this tutorial, you can learn How to export HTML table data to excel using JavaScript. In this tutorial, we will use SheetJS JavaScript Library for export HTML table data to Excel.

- HTML Table Data:
- JavaScript Code:
1. HTML Table Data
For Export HTML data to Excel, here first we have to load some data in HTML table. So here we have make fetch employee table data and load in HTML table with table column like name, address, gender, designation and age. Here we have create HTML table with id employee_data. So this id we will use for fetch this HTML table data in JavaScript code. Under this HTML code we have make one button tag with id export_button, so when use has click on this button, then HTML table data will be download in Excel file format without refresh of web page using JavaScript.
<?php

$connect = new PDO("mysql:host=localhost;dbname=testing", "root", "");

$query = "SELECT * FROM tbl_employee ORDER BY name ASC";

$result = $connect->query($query);

?>

<!DOCTYPE HTML>
<html>
<head>
	<meta charset="utf-8" />
	<title>Export HTML table data to excel using JavaScript</title>
	<meta name="viewport" content="width=device-width, initial-scale=1" />
    <link rel="stylesheet" href="https://maxcdn.bootstrapcdn.com/bootstrap/4.0.0/css/bootstrap.min.css" integrity="sha384-Gn5384xqQ1aoWXA+058RXPxPg6fy4IWvTNh0E263XmFcJlSAwiGgFAW/dAiS6JXm" crossorigin="anonymous">

    <script type="text/javascript" src="https://unpkg.com/xlsx@0.15.1/dist/xlsx.full.min.js"></script>
</head>
<body>
    <div class="container">
    	<h2 class="text-center mt-4 mb-4">Export HTML table data to excel using JavaScript</h2>
    	<div class="card">
    		<div class="card-header">
    			<div class="row">
    				<div class="col col-md-6">Sample Data</div>
    				<div class="col col-md-6 text-right">
    					<button type="button" id="export_button" class="btn btn-success btn-sm">Export</button>
    				</div>
    			</div>
    		</div>
    		<div class="card-body">
    			<table id="employee_data" class="table table-striped table-bordered">
                    <tr>
                        <th>Name</th>
                        <th>Address</th>
                        <th>Gender</th>
                        <th>Designation</th>
                        <th>Age</th>
                    </tr>
                    <?php
                    foreach($result as $row)
                    {
                        echo '
                        <tr>
                            <td>'.$row["name"].'</td>
                            <td>'.$row["address"].'</td>
                            <td>'.$row["gender"].'</td>
                            <td>'.$row["designation"].'</td>
                            <td>'.$row["age"].'</td>
                        </tr>
                        ';
                    }
                    ?>
                </table>
    		</div>
    	</div>
    </div>
</body>
</html>
2. JavaScript Code
In this tutorial, we have use SheetJS JavaScript Library for export HTML table data to Excel using JavaScript. So first we have to include following SheetJS library link at header of this HTML web page.
<script type="text/javascript" src="https://unpkg.com/xlsx@0.15.1/dist/xlsx.full.min.js"></script>
In JavaScript code part, first we have make html_table_to_excel(type) function. This function has use SheetJS Library function and convert or Write HTML table data to Excel format and download in browser without refresh of web page.
Once function is ready then we have to called html_table_to_excel(type) function on button click event, so for trigger button click event, we have use addEventListener method. So when user has click on button then html_table_to_excel(type) function has been called with xlsx file type. So it will download HTML table data in .xlsx format Excel file in browser without refresh of web page at client-side.
function html_table_to_excel(type)
    {
        var data = document.getElementById('employee_data');

        var file = XLSX.utils.table_to_book(data, {sheet: "sheet1"});

        XLSX.write(file, { bookType: type, bookSST: true, type: 'base64' });

        XLSX.writeFile(file, 'file.' + type);
    }

    const export_button = document.getElementById('export_button');

    export_button.addEventListener('click', () =>  {
        html_table_to_excel('xlsx');
    });
Conclusion
This tutorial will helps you to add export feature of download HTML table data in Excel sheet without using third-party jQuery plugin or any server-side script. By follow this tutorial you can easily export HTML table data to Excel using minimal JavaScript code.
If you want to get complete source with .sql file, so please write your email address in comment box. We will send you complete source code file at your define email address.
Improve Article
Save Article
Like Article
Improve Article
Save Article
Like Article
Any HTML table that you have created can be converted into an Excel Spreadsheet by using jQuery and it is compatible with all browsers. There are two simple approaches that require basic HTML and jQuery knowledge to achieve this.
- Approach 1: Using jQuery plugin: A simple jQuery plugin ‘table2excel’ can be used for converting an HTML table to an excel sheet.
Syntax:
$("#table-id").table2excel({
    filename: "excel_sheet-name.xls"
});
- Example:
html
<table id="studtable">
<tr>
<th>ID</th>
<th>Name</th>
<th>Age</th>
<th>Address</th>
</tr>
<tr>
<td>101</td>
<td>Alex</td>
<td>15</td>
<td>Maldives</td>
</tr>
<tr>
<td>102</td>
<td>Chris</td>
<td>14</td>
<td>Canada</td>
</tr>
<tr>
<td>103</td>
<td>Jay</td>
<td>15</td>
<td>Toronto</td>
</tr>
</table>
<script>
$(document).ready(function () {
$("#studtable").table2excel({
filename: "Students.xls"
});
});
</script>
- Output:
ID    Name    Age    Address
101    Alex    15    Maldives
102    Chris    14    Canada
103    Jay    15    Toronto
- The above output gets converted into an Excel spreadsheet in the exact same manner the HTML table is. About ‘table2excel’: The ‘table2excel’ is a simple yet useful jQuery plugin that allows for exporting HTML table data to an Excel file. The ‘table2excel’ also has a feature to exclude cells that contain a specified class. Syntax for noExport:
$(document).ready(function() {
    $("#table-id").table2excel({
        exclude: ".noExport",
        filename: "name-of-the-file",
    });
});
- Example code for excluding some specified cells:
html
<script src=
"//ajax.googleapis.com/ajax/libs/jquery/2.2.4/jquery.min.js">
</script>
<script src=
"//cdn.rawgit.com/rainabba/jquery-table2excel/1.1.0/dist/jquery.table2excel.min.js">
</script>
<button>Export</button>
<table>
<thead>
<tr>
<td class="noExport">
This cell will not be exported.
</td>
<td>
This cell will get exported.
</td>
</tr>
</thead>
<tbody>
<tr>
<td>Alex</td>
<td class="noExport">Maldives</td>
</tr>
<tr>
<td>Chris</td>
<td>Canada</td>
</tr>
</tbody>
</table>
- Note: In the above sample code, the class ‘.noExport’ has been used to exclude those specified cells from the HTML table data. Therefore the exported Excel Spreadsheet also does not include those cells from the HTML table data.
- Approach 2: Using simple HTML: Consider the same students table above to understand the below. Let’s use a button in our code which when clicked to converts the HTML data table into an Excel spreadsheet. Note that the ‘export’ button below does not actually convert the HTML table to an excel sheet. This has to used in a proper and already existing HTML code to get the Excel spreadsheet and will not work in this IDE.
html
<!DOCTYPE html>
<html>
<head>
<title>
HTML Table To Excel
spreadsheet using
HTML only
</title>
</head>
<body>
<table id="studtable">
<tr>
<th>ID</th>
<th>Name</th>
<th>Age</th>
<th>Address</th>
</tr>
<tr>
<td>101</td>
<td>Alex</td>
<td>15</td>
<td>Maldives</td>
</tr>
<tr>
<td>102</td>
<td>Chris</td>
<td>14</td>
<td>Canada</td>
</tr>
<tr>
<td>103</td>
<td>Jay</td>
<td>15</td>
<td>Toronto</td>
</tr>
</table>
<button onclick="tableToExcel(
'studtable', 'Students')">
Click to Export
</button>
</body>
</html>
- Output:

HTML is the foundation of webpages, is used for webpage development by structuring websites and web apps. jQuery is an open source JavaScript library that simplifies the interactions between an HTML/CSS document, It is widely famous with it’s philosophy of “Write less, do more“.
- HTML Tutorial and HTML Examples.
- jQuery Tutorial and jQuery Examples.
Like Article
Save Article
by Vincy. Last modified on July 25th, 2022.
Converting a HTML table to an excel file is a standard requirement of reporting websites. It will be simple and easier if the conversion is taking place on the client side.
There are many client-side and server-side plugins to perform the excel export. For example, PHPSpreadSheet allows writing data into excel and exporting.
This article will give different options and approaches to achieving the HTML table to excel conversion with JavaScript.
This simple example includes a few lines of JavaScript that build the template for excel export.
It uses the following steps to convert the exported excel report of tabular data.
- Defines HTML template structure with required meta.
- Include the table’s inner HTML into the template.
- Marks the location by specifying the protocol to download the file via browser.
- Redirect via JavaScript to point to the location with the encoded excel content.
Quick example
A JavaScript handler to set export template and push HTML table data.
function exportToExcel() {
	var location = 'data:application/vnd.ms-excel;base64,';
	var excelTemplate = '<html> ' +
		'<head> ' +
		'<meta http-equiv="content-type" content="text/plain; charset=UTF-8"/> ' +
		'</head> ' +
		'<body> ' +
		document.getElementById("table-conatainer").innerHTML +
		'</body> ' +
		'</html>'
	window.location.href = location + window.btoa(excelTemplate);
}
View demo
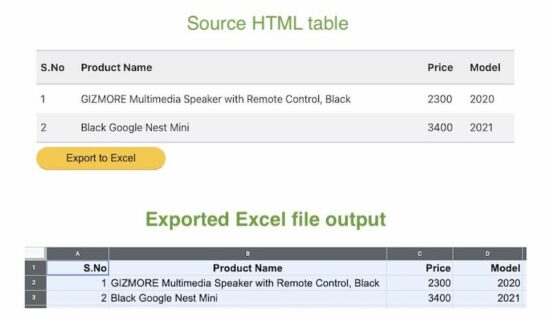
The below HTML table code displays a product listing and it is static. Refer jsPDF AutoTables examples to render a dynamic table by loading row by row.
The button below this table triggers the export to excel process on the click event. The exportToExcel() function handles the event and proceeds the client-side export.
<div id="table-conatainer">
	<table class="striped">
		<thead>
			<tr>
				<th>S.No</th>
				<th>Product Name</th>
				<th>Price</th>
				<th>Model</th>
			</tr>
		</thead>
		<tbody>
			<tr>
				<td>1q</td>
				<td>GIZMORE Multimedia Speaker with Remote Control, Black</td>
				<td>2300</td>
				<td>2020</td>
			</tr>
			<tr>
				<td>2</td>
				<td>Black Google Nest Mini</td>
				<td>3400</td>
				<td>2021</td>
			</tr>
		</tbody>
	</table>
</div>
Let us see more options available for converting HTML table data into an excel file.
Option 2: Export as CSV to view in excel
This example is for parsing the HTML table content via JavaScript. It follows the below steps to export an HTML table to excel as CSV.
- Accessing HTML table element object.
- Convert the object into an array of row data.
- Iterate row data array to prepare comma-separated values of records.
- Set the protocol and content type to export the CSV data prepared from the table.
The below JavaScript function implements the above steps to export table data on the client side.
function exportCSVExcel() {
	var tableElement = document.getElementById("table-product-list");
	var sourceData = "data:text/csv;charset=utf-8,";
	var i = 0;
	while (row = tableElement.rows[i]) {
		sourceData += ([
			row.cells[0].innerText,
			row.cells[1].innerText,
			row.cells[2].innerText,
			row.cells[3].innerText
		]).join(",") + "rn";
		i++;
	}
	window.location.href = encodeURI(sourceData);
}
Option 3 – Export HTML table to excel using jQuery-based plugin
The jQuery table2excel plugin is a popular solution to arrive HTML to excel export.
It has many features with the export core functionalities. Those are,
- Excludes/includes HTML tags like inputs, links, or images that are in the source table HTML.
- Excludes some table components with the reference of that particular element’s class or id selectors.
- Provides properties to set file name with which the exported data will be downloaded to the browser.
Include the jQuery and the table2excel plugin file in the <head> section as below.
There are alternative methods to install the table2excel plugin. Its Github page provides documentation of installation and usage methodologies.
<script
    src="https://ajax.googleapis.com/ajax/libs/jquery/2.2.4/jquery.min.js"></script>
<script
    src="https://cdn.rawgit.com/rainabba/jquery-table2excel/1.1.0/dist/jquery.table2excel.min.js"></script>
Then, initiate the plugin class by pointing to the source HTML table element.
The below JavaScript does the initiation. During instantiation, it sets the options array to specify a file name, extension and applicable flags.
function exportCSVExcel() {
	$('#table-product-list').table2excel({
		exclude: ".no-export",
		filename: "download.xls",
		fileext: ".xls",
		exclude_links: true,
		exclude_inputs: true
	});
}
This example uses the same HTML table source for the export operation. The difference is that the source table content marks some of the rows with no-export class.
This class is configured in the above script with exclude property of this plugin class.
Conclusion:
So, we have seen three simple implementations of adding HTML table to excel feature. Though the export feature is vital, we must have a component that provides a seamless outcome.
I hope, the above solution can be a good base for creating such components. It is adaptable for sure to dock more features to have an efficient excel report generation tool.
View demoDownload
↑ Back to Top