


People often assume that calligraphy and handwriting are synonymous, but they’re not. In general, calligraphy is comprised of stylized, embellished letters — it’s more art than writing. Conversely, handwriting refers to the style and technique that you use for everyday jotting. Handwriting needs to be quicker and more casual than calligraphy. While everyone has their own personal handwriting style, there’s always room for improvement! In this article, you’ll find eight tips to help you improve your handwriting in video and written form — plus a free worksheet.
Let’s have a little chat about how to improve your handwriting! You’re invited into my snowy sunroom to talk about all the different ways you can make your penmanship a bit better:
How to Improve Your Handwriting: The Article
1. Use a Nice Pen
The adjective “nice” is subjective — you’ll have to hunt to find the pen that works for you! Right now, I’m loving Muji 0.38 mm pens because they’re responsive and write such a fine line. I like Sakura Gelly Roll white pens for writing on dark papers. Keep in mind that preferences change, though, and there’s always a new pen or pencil to discover.

Handwriting purists tend to love fountain pens, and I happily agree that my Pilot Falcon is fabulous. But, don’t be fooled into thinking that a pen will magically transform your handwriting. Yes, a nice pen helps, but it’s not the be-all, end-all of pretty penmanship.
2. Maintain a Relaxed Grip
A relaxed, fairly loose grip is one of the main things that will improve your handwriting. None of the muscles in your hand should feel tense or flexed, and your fingernails shouldn’t be white from squeezing the pen’s barrel.

Many people tend to clutch the pen, which will result in an achy hand and shaky writing. We often clutch without realizing we’re doing it, so try to mentally check yourself every few minutes to make sure you’re still holding the pen comfortably.
3. Improve Your Handwriting With Drills
Whether you plan on writing in cursive or print, it can be difficult to form nice letters without warming up. Doing a couple of simple drills will help you to write clear, confident characters. You can use the Drills section of the Improve Your Cursive Worksheet …

… Or you can doodle a few “telephone wires” or similar forms.

If you’re interested in additional drills, the Improve Your Handwriting Online Course features several helpful exercises! Handwriting drills tend to be simple but mighty, and the more you do them, the more of a difference you’ll notice.
ENROLL IN THE IMPROVE YOUR HANDWRITING ONLINE COURSE
4. Experiment with Paper Rotations
As children, we are generally taught to keep our paper in a vertical position in front of us. If that works for you, great! If not, feel free to experiment with different paper rotations. Keeping the paper at a certain angle can go a long way in helping you to improve your handwriting!

Many right-handed people are fine with the traditional vertical paper position, but I’m not one of them. I have always found it easier to write — particularly in cursive– when my paper has a severe counterclockwise rotation. Lefties should try rotating their paper clockwise. For clarification, see my How to Improve Your Handwriting video.
5. Practice with a Worksheet
If you want a structured way to improve your handwriting, I made a free worksheet for you! It’s three pages long and focuses on cursive writing — you can download it by clicking here. Basically, the worksheet takes you through drills, capital and lowercase letters, words, and sentences.

The cursive writing featured in the worksheet set isn’t any sort of formal style. Instead, it focuses on the letterforms that I, personally, use in everyday cursive handwriting. Those letters are easy to create, and they connect to each other beautifully to make for quick writing. For intensive exercises and instructions over how to write vintage-style cursive, check out TPK’s Elegant Cursive Handwriting Worksheet. It’s a fabulous investment if you want to infuse your penmanship with sophistication.

Here’s a list of all the structured handwriting worksheets and instructions that TPK has to offer:
- Improve Your Cursive Worksheet Set – A free worksheet with helpful practice opportunities
- Grammy’s Handwriting Exemplar – A free worksheet that offers letterforms based on my grandmother’s beautiful handwriting
- Learn Cursive Worksheet for Kids (and Adults!) – A worksheet that teaches you how to write in cursive with the help of this free supplementary course
- Elegant Cursive Handwriting Worksheet – A detailed worksheet set that teaches you how to write in elegant, vintage-style penmanship
6. Sneak in Practice to Improve Your Handwriting
Just like anything else, you will improve your handwriting with use. The more you write using good habits and implementing styles that appeal to you, the better your handwriting will get.

You can get practice through a number of ways — for example, you might send someone a hand-written letter in place of an email or text. If you have the time and interest, you can start writing in a journal every night. Entries don’t have to be long; they can be short accounts of how your day went!
7. Write on Lined Paper or Use a Template
Writing nice, balanced words are a big shortcut to neat handwriting! If you want to write a letter to someone, you can put a piece of notebook paper under printer paper. More than likely, you’ll be able to see the notebook paper lines through the printer paper, and you can use those lines as guidelines for even writing. Or, if you don’t mind the lines, you can write someone a letter directly on notebook paper.

This point reminds me of another tip: always use a “padding” piece of paper. No matter what piece of paper you’re writing on, it should always have another piece of paper under it. For some reason, the slightly cushier surface provided by two pieces of paper makes it easier for all pens to write!
8. Embrace Your Personal Style
Handwriting is a very fluid, personal thing that is always evolving. It’s not like calligraphy, where you more or less write the same every time. Instead, you’ll have neat days, and you’ll have not-so-neat days (like the notes pictured below).

No matter how your handwriting looks, it is a wonderful reflection of you and your mood. That’s why people love receiving handwritten notes: they represent a piece of you! So, don’t get too hung up on a radical change: instead, focus on making clearly formed alphabet characters that are clear and legible.

I hope that you enjoyed this article, and that it inspires you to ditch the keyboard and write something by hand this weekend! Don’t forget that you can download the Improve Your Cursive Worksheet for free if you want a cursive refresher. It’s not a complicated little worksheet, and it should be helpful.
Thanks very, very much for reading TPK, and enjoy the rest of your day!
Warmly,

This article was first posted in March of 2017. It has been updated to include new photos, a freshly-filmed video, and additional resources.
This post may contain affiliate links. I may receive commissions for purchases made through these links with no extra cost to you.
How do you write nice words to a friend to make them feel special? Here is a list of nice things to say to a friend to make them smile. Whether is your boyfriend or your girlfriend.
Compliments are very necessary for maintaining and building friendships.
Here are cute things to say to your best friend to make them smile or even cry. Here are also some cute thank you messages for a friend to appreciate them for their love.
Saying nice things to someone can go a long way to make their day. Sweet words lift a broken heart. Don’t also forget to read how to be nice to your friends in order to strengthen your friendship.
Sweet words to tell a friend to make her smile
1. You’re incredible.
2. You dressed like an Angel
3. Your smile lights the room
4. You look so sweet
5. You’re like the bright morning star
6. A friend without you is useless
7. You’re the best I have met so far.
8. You’re cute
9. You have a sweet voice.
10. You look so takeaway
Importance of saying nice things to a friend
Saying nice things to someone, especially your friend can turn their mood from sad to happy. It can make them realize how much you love them. Words are powerful. Therefore, endeavor to use them wisely.
Examples of compliments for friends.
01. Life could have not been better for me if not because of you, thank you for being the best friend I have.
01a. Ever since I met you, I have come to notice 3 things about you. You are cute, kind, and trustworthy.
2. If I should ever come into the world a 2nd or 3rd time, you will still be my friend. You know what? You are incomparable.
3. If not for you, I wouldn’t have been where I am today. You are a friend indeed.
4. Words cannot describe how I feel about you. Ever since I met you, everything about me changed. Thank you, buddy.
5. As the soon cannot set in the night, so we are to each other. You complete me, my dear friend.
6. I may not have everything it takes to honor a friend like you but accept my profound gratitude. Thanks, dear.
7. Since I was born, and now I am getting old, I have never seen a friend like you. You are the best ever.
8. As gold is tested in the furnace, so have a hard time testing our friendship. I celebrate you, my best friend.
9. I may not have enough money to spend, and enough food to share, but with you, I am satisfied. Nice having you as a friend.
10. I owe you a million thanks. When everyone else abandoned me, you stood behind me. Thank you, my lovely friend.
12. You’ve made me realize the importance of friendship. You are a true friend indeed.
13. My happiest moment is not when I am at a party or a bar, but when I am with you. You complete me, dear.
14. I imagine how life would have been without you. Thanks for coming into my life.
15. You have the best smile in the world.
16. I love your dress. You look so cute
17. Knowing you are my greatest investment
18. You are such an incredible friend. Your kindness and generosity always brighten my day. Thank you for being such an amazing part of my life.

Sweet words to say to a friend to make them smile
1. You are a perfect friend.
2. Your smile lifts my soul.
3. Each day I see you, life becomes easy for me.
4. You are the star the world is waiting to shine.
5. You’re such an interesting friend.
6. I really love your sense of humor. You have a good personality.
7. You are a light to my soul, my best friend.
8. You’re the source of my inspiration.
9. You always give me joy
Read also: What to say to a friend who is grieving to comfort them.
11. You’re such an intelligent being
12. You look great today.
13. You’re enough for me.
14. Never give up, you will surely succeed.
15. You’re too beautiful to be stressed
16. You’re an excellent friend
17. You are my companion.
18. You’re amazing.
19. You’re like a bright morning star
20. Keep moving, you’re unstoppable my lovely friend.
21. Dear best friend, no matter how many new people I meet in life, you’re always at the top of the list. I love you, dear friend
22. If I call you an Angel, I’m not mistaken because you are an Angel in disguise.
23. Any friend who is not like you is fake. You are a true friend, indeed.

Funny Words To Say To A Friend
Here are words that will make your friend laugh out loud. These funny words are things to text your best friend to make them smile. Below are funny compliments for friends.
1. You look like an Angel that falls from heaven.
2. You are an ice block for me when am hot.
3. Your Angelic voice is capable of raising the dead.
4. Am finished if I had never met you. You are incredible.
5. If having a friend is a crime, I prefer going to jail for knowing you.
6. My shine, shine, you look so takeaway.
7. You always make me smile. Keep up the good work!
8. My day isn’t complete without seeing or hearing from you
9. I could have been dull if I had a dull person as a friend
10. My friendship with you is till prison tears us apart.
Motivating words to tell a Friend
Inspire and motivate your friends with these motivating words.
01. Never ignore your little beginning for your tomorrow shall be great.
2. When it seems like all hope is lost, never forget that weeping may endure for a night, but joy comes in the morning.
3. Never give up on your dreams for all things are possible to those who believe.
4. The moon cannot shine on its own. Therefore, never look down on anyone in life, no matter how insignificant they may appear to you.
5. When others shall be saying casting down, you will be saying lifting up.
6. Your courage and dedication inspire me.
7. You are one of the most thoughtful people I know.
8. Your persistence and hard work have paid off.
9. Your unique perspective always challenges me in the best way.
10. You always bring such positive energy to the room.
11. You have a great sense of humor and I love being around you.
12. You have an amazing talent for making the best out of any situation.
13. I’m so proud of how far you’ve come.
14. Your kind heart and willingness to help others are admirable.
15. Your intelligence and leadership skills are remarkable.
Nice Compliments for Your Girlfriend to make her feel special
Here are nice things to say to a girl. It consists of funny compliments for girls, things to say to a girl to make her feel special, cute things to say to a girl over text, things to say to a girl to turn her on, sweet things to say to your girlfriend to make her cry, cute things to say to a girl over text to make her smile, things to say to a girl you just met, what to say to a girl you want to date, sweet words to tell a girl to make her fall in love with you, letter to best friend to make her cry, etc.
#1. You are the woman every man would like to have.
#2. Your smile gives me joy.
#3. Your beauty is incomparable.
#4. You are the joy of my soul.
#5. I have found a perfect woman and that is you.
#6. Thank God I met You.
#7. Am complete without You.
#8. Each day I remember you I know my day will be great.
#9. You’re such a nice woman.
#10. You are enough for me.
#11. You’re beautiful
#12. You’re flawless.
#13. I can’t stop thinking about you.
#14. Being with you makes me happy always.
#15. You’re the best friend I have ever had.
#16. Your presence gives me joy.
#17. I always dream of dating you, my lovely friend.
#18. I love you with the whole of my heart.
#19. You’re such a darling.
Nice Words to say to your Boyfriend
Here are some one-word compliments for your boyfriend, Cute things to say to your boy best friend
#1. You’re the best boyfriend in the world
#2. My buddy, I love you.
#3. You’re indeed the love of my life.
#4. I need you
#5. My life has changed for the better because of you.
#6. You’re indeed a boyfriend.
#7. You’re a cute boyfriend.
#8. I love you, darling.
#9. I can’t stay without you
#10. I desire you.
11. You are the love of my life.
12. A life without you is a waste of time
13. My heart belongs to you, darling.
14. You are the best boyfriend any girl can ask for
15. You are my dream come through
16. I thank God I found you
17. Your love makes me feel better
18. I’m glad I found a humble and caring guy like you.
19. I want to always be seen beside you, my love.
20. You make life pleasurable for me.
Nice things to say to people
1. You are such a nice person
2. The world would be a better place if we could find good people like you
3. You deserve more than a compliment, thank you.
4. You are a savior to many generations
5. Thanks for being who you are.
6. You are on your way to greatness
7. May God reward you with success
8. You have made my day
9. Today was a success because you were part of it.
10. You deserve a million thanks
Nice words to say to a girl
1. You are the best cook in the world
2. A little smile on your face makes my day
3. You are such a beautiful damsel
4. Your body is so fresh and young
5. I am happy I met an amazing young beautiful girl like you
6. You encourage me to be the best even without speaking to me
7. I am where I’m today all because of you
8. Thanks for giving me room in your heart
9. Thanks for hanging out with me today.
10. You are a wife material
11. May you marry a nice man like me
12. I love your cute smile.
Nice things to say to someone
1. I love your courage
2. You never stop surprising me
3. I never get bored with your company
4. You are different from everyone else
5. I wouldn’t have achieved this without you
6. Never stop trying until you get there
7. Never stop dreaming until your dreams come through
8. You are more important than you think you are
9. May the good things of life never be far from you
10. You have given me a reason to smile.
Positive things to say
1. You are improving
2. Don’t quit until you get there
3. With courage and determination, you can make it.
4. Today shall be better than your yesterday
5. You are a genius
6. You are super talented
7. Do not be afraid, victory belongs to you.
8. You make everything easier for me
9. You are too caring
10. May your day be filled with pleasantries
Words to describe your best friend
1. You are my personal person
2. The best buddy in the world
3. You are more than a million friends
4. You are the only one that helps me solve problems that require thousands of people to solve
5. You are a burden lifter
6. My gossip mate
Nice things to say about someone’s personality
Are you looking for words to describe personality characteristics? Here are the best ways to describe someone’s personality. Here are words to describe someone special. Do you love your friend’s character and want to put them in words, here are nice things to say. This is the best way to tell someone they are amazing.
01. You have an amazing smile
2. You’re too intelligent and creative.
3. You have a good humor
4. You’re as gentle as a dove.
5. Your smile lights the room
6. You’re such a funny type.
7. I love the way you laugh
8. You have a lovely voice
9. You’re such a smart friend.
10. I love your sexy eyes.
11. You know how to take care of people. Am really proud of you
12. You’re a nice friend
Nice things to say to a friend on their birthday
1. I am glad you are plus one today
2. Congratulations on seeing your new age
3. Special people are born on this day. Congrats on your new age.
4. Welcome to a new season of your life. Be glad my dear friend
5. Bravo! my dear friend! Celebrate your new age.
Additional things to say
Here are some suggestions on nice words to say to your husband, wife, and a stranger
Cute Words For Your Husband
#1. You are the best husband in the world.
#2. You’re the commander of every Soldier in this territory.
#3. You are my strength in weakness.
#4. You’re such a loving husband.
#5. I thank God for a perfect man like you.
#6. Am so glad you are my husband.
#7. You’re my one and only.
#8. You are the reason why I smile every day.
#9. Life without you is nothing.
#10. I appreciate your love for me.
Nice Words To Say To Your Wife
#1. You are the best wife ever.
#2. He who finds you finds a good thing.
#3. You are my precious jewel
#4. I am so glad to have you as my wife.
#5. You are my pride
#6. You are awesomely made.
#7. Your beauty is immeasurable
#8. You are the Angel of my life
#9. You’re a paragon of perfection.
#10. You are the Apple of my eye.
#11. You’re the butter in my bread.
#12. You are the sugar in my tea.
#13. You’re my Queen
14. You’re a beautiful creature
15. Your appearance lights the room
Nice things to say to a Stranger
1. You’re such a kind person.
2. Nice meeting you, thank you.
3. You are a blessing to me. I really appreciate you.
4. Meeting you is the greatest thing I have ever had in life. You are so nice.
5. You’re a precious gift to those around you.
6. I love your style. You look so sweet
7. I like your personality. You’re selfless
8. I love your sense of humor. You are too funny to be with.
Best Compliments Quotes
“Be thankful without any reason. Compliment is the best gift you can offer to anyone“
Anonymous
“If you can’t get a compliment any other way, pay yourself one.“
“The greatest but the most difficult thing is showing appreciation. Appreciate the little you have for more to come”
Anonymous
The Importance of saying Nice Things
Having nice things said about you improves performance. A few positive words can go a long way to healing a wounded soul. Good compliments energize when one is weak and stranded.
They are lots of cute words you can say to your boyfriend or girlfriend to make him/her feel loved.
For instance, some nice words or funny words can make a friend who is in distress or unhappy put on a smile again.
According to Research, compliments are good for your health. Therefore, kind words are capable of helping you remain in a healthy state or healthy relationship.
When a friend does something for you, it is good to compliment them. So, use any of the above-suggested words to compliment your friend.
Most of your Word documents are likely set in standard, drab Times New Roman or Calibri typography, perhaps with the occasional cheesy Word Art thrown in for variety. Yet Word actually includes a number of text effect tools that give you everything you need to make beautiful art from your words.
In this tutorial, I’ll show you how to create the cool text effects you want in every modern version of Microsoft Word, using its advanced type and typography formatting features. Once you’re done, you’ll know the tricks that I used to make Word templates that look great.
How to Make a Stylish Text Effect in MS Word (Quick Video)
In this quick screencast video, you’ll learn how to go beyond default Word Art options and make a cool text effect in Microsoft Word, using text formatting tools to create stylish typography:
For more detailed information on how to make beautiful Word text effects, review the step-by-step instructions below.
How to Make MS Word Text Effects (Step by Step)
Learn how to apply both standard text effects and more advanced options inside Microsoft Word’s Format pane, such as Drop Shadow and Reflection. Discover how to transform your text into cool typography art. Let’s get started:
1. Set Up a New Page in MS Word
Start by creating a new document by either clicking File > New or pressing the Control-N shortcut. To set properties like the page orientation and the page size, jump into the Layout tab.
.jpg)
.jpg)
.jpg)
If you plan to print your document and you already know the final paper size, it is important to set it as a first step. Why? Microsoft Word lets you easily scale any object, but
some properties, like the outline width, remain unchanged. Font size also
stays the same during the resizing, and has to be updated manually. Working in
the final paper size right from the beginning helps save time in the
future.
There are two things you need to know about the Layout tab before we set the final page size values. First, the Size drop-down menu contains only the paper sizes which are possible to print with the currently selected printer. In other words, you cannot set an A3 paper size when your printer can only print up to A4 documents. To fix that, you can jump to the File > Print menu and change the printer to a different one for a second, for example the Microsoft XPS Document Writer, which is a «virtual printer» that only saves files locally to your computer.
.jpg)
.jpg)
.jpg)
Don’t print anything, but once you’ve chosen a different printer, go back (using the left arrow in the top left corner), and open Layout > Size again. The list of available sizes should be much larger now.
.jpg)
.jpg)
.jpg)
Then, the other thing worth noting is that the drop-down menus for Margins, Orientation and Size may not be enabled all the time. If you have a Text Box placed and selected inside the document, some Layout options will be disabled. I’m specifically pointing this out because we will use Text Box objects all the time, and jumping to the Layout tab and seeing those options disabled can be quite frustrating.
.jpg)
.jpg)
.jpg)
Now you know how to always be able to set a page Size. Set the size to A4
and the Orientation to Landscape. Your page is now set up the way you’ll want for your custom Word text effect art, and you’ll know how to tweak it again next time.
.jpg)
.jpg)
.jpg)
2. Change the Font and the Font Size
Now, it’s time to add your text and start tweaking it. Type anything you want, select the text, and pick the font and size you want. Most of the text effects look best in large sizes, so don’t be afraid to
use either the Increase Font Size button
or the font size drop-down menu to make the text really big.
If the maximum
value of 72 pt is not enough, type in any number you want, for example
250 pt (only type the number). You can also use non-integer values, such as 198.5, if you want to get the largest possible text without wrapping.
.jpg)
.jpg)
.jpg)
3. What Is Kerning? (How to Set It in Word)
Let’s look at an important concept for setting typography in Word. When a type designer creates a font, every letter has its own width set to make sure the gaps between the letters are even. This works fine in most cases, except for the combination
of letters with less «rectangular» shapes, like «V» and «A».
Thus, type designers add “kerning” features, which specify that those two letters when placed next to each other will have the gap smaller (or bigger). In a perfect world, an application uses this kerning and everything looks fine. Well, not everything functions as expected in the real world.
.jpg)
.jpg)
.jpg)
If you only need to know one thing about kerning, remember this—it should always be enabled, but it is off by default in Microsoft Word. To turn it on, open the Font dialog (Control-D) Advanced tab, and check Kerning for fonts X points and above.
When you check this checkbox, a current font size is filled into the edit box, but you probably want to change it to 1 pt instead—just to make sure it will be really enabled all the time for
any text. Then click the Set as Default button. For more information about kerning, see Quick Tip: Typography Skills, Basic Kerning.
.jpg)
.jpg)
.jpg)
It is important to know that the kerning also has to be enabled this way for every text box in the document. If you accidentally or on purpose delete everything in your document
(Control-A > Delete), the kerning is again turned off.
4. Apply Standard Text Effects in Microsoft Word
Before we start adding our own text effect, let’s briefly take a look what Word offers us in the Text Effect and Typography drop-down menu on the Home tab on the ribbon. There are 15 pre-defined text effects with different outlines, fills, and shadow effects, and some of the presets also include 3D effects. The colors of those presets always reflect the selected color theme.
.jpg)
.jpg)
.jpg)
You can jump to the Design tab and select a different color scheme from the Colors drop-down menu. Jump back to the Home tab, open the Text Effects and Typography drop-down menu, and it should look a bit different.
.jpg)
.jpg)
.jpg)
This is nice, but unfortunately there’s no way to adjust those presets. The items in this list cannot be edited or deleted, and you cannot add new presets. Those 15 presets can be helpful
if you need a nice looking header and you only have two minutes of your time, but you will learn nothing new about the text
effects just by using them.
5. Body Text vs. a Text Box
The text can be placed in a document in two different ways. The usual way is to create a new document and start typing. We can call this type of text «body text«. While the text effects can be added to this body text quite easily, they are limited, and thus using body text is not a preferred option.
The second way is to use a Text Box object and write into this text box. To insert a new Text Box, select Insert > Shapes > Text Box, and draw a new text box the same way you draw for example a rectangle.
.jpg)
.jpg)
.jpg)
The text placed inside a text
box has several advantages. It can be moved around the document freely without
any restrictions (even off the document or over the margins), and it can be
rotated. Moreover, some additional text effects like the 3D rotate options are
available.
If you do not like the default appearance of the text box—especially the white fill and the black outline—both can be easily set to none on the Format tab. Use the Shape Fill and the Shape Outline drop-down menus.
.jpg)
.jpg)
.jpg)
To select a text box with no fill and no outline, click over the text, which will show the text box
borders as a dotted line. Clicking over this dotted line to select a text box should be easy now.
6. Change Your Page Background in Word
The standard white paper color may seem a little bit boring for our text effect, and it may be a good idea to set it to a different color. Go to the Design tab, and from the Page Color drop-down menu, select a dark gray color. As for any other color
drop-down, the first two columns with grays are still the same, but the eight columns on the right side change depending on the chosen color palette. After changing the background, the black text inside the text box is almost invisible now, but that’s fine—we’ll fix it in a minute.
.jpg)
.jpg)
.jpg)
7. Master the Almighty Format Pane
The Format tab in Word allows us to format the text box as well as the text itself. There are drop-down menus for the text fill, outline, and all the other possible effects, and there are submenus and submenus and submenus. It is definitively not an easy way to tweak the effects,
and we only have access to a limited number of presets and options. There is
a better place to adjust the setting—the Format Pane.
The Format Pane is an essential pane for setting all the advanced options, yet there is no standard way to display this pane. In short, every «More…» item on the Format tab (More Lines, More Gradients, More Textures) opens the Format Pane,
but since we have the Text Box inside our document, we might as well right click
the text box border and select Format Shape.
.jpg)
.jpg)
.jpg)
Before we move on, remember there is only one Format Pane,
but the content of this pane changes depending on the selected content. It’s
different for the text box, for body text, and for an image.
I say it to
prevent any confusion, because the name of this Format Pane also changes—it
can be Format Shape, Format Text Effects or Format Picture. Because this will
be our base station for setting all the effect, it is a good habit to keep this
pane open all the time.
8. Set the Text Fill and the Outline
With the background color set and a Format Pane still open,
select the text box and type in any word, for example “Effect”. Keep the font set to
Calibri and set the size to 72 pt. In the Format Pane, select Text Options,
open the Text Fill settings, and change the Text fill from the Solid Fill to the
Gradient Fill. From the Preset Gradients drop-down menu, select a yellow top
spotlight. This will create a subtle shading, as if there was a light source
shining from the top.
.jpg)
.jpg)
.jpg)
To make the text a little bit more interesting, we will also add an outline. Change the Text
Outline from No Line to Solid Line, raise the Width to a bigger number,
for example 3 pt, and change the Color to white.
.jpg)
.jpg)
.jpg)
The outline is nice, but too
strong. We can open the Compound Type drop-down menu and select Double, which
will split the outline into two: one visible over the text, and one outside the
text. To get rid of the ugly joins, change the Join type to Round instead of the default Bevel.
.jpg)
.jpg)
.jpg)
All we need to do now
is to increase the Transparency to make this outline less visible. A value
around 60% seems to be just fine.
.jpg)
.jpg)
.jpg)
9. Add More Cool Word Text Effects
With the text box
still selected and the Format Pane still open, switch to the Text Effects
tab. As a first effect, we will add a simple drop shadow below the text. Open
the Shadow effect properties, and from the presets drop-down menu, select Outer:
Offset Bottom. Because the page background color is quite dark, the effect is
quite subtle, which is fine, and probably does not need any additional tweaking.
.jpg)
.jpg)
.jpg)
If you want, you can
also try to add a Reflection effect. Select any preset, but increase the Blur
value to make the reflection less visible and not too distracting.
.jpg)
.jpg)
.jpg)
In just a few steps, we have a nice looking text effect, and we can call it done.
.jpg)
.jpg)
.jpg)
10. Share the Document (.docx vs .pdf)
When sharing your
document with your friends, you can choose between two main formats: the Word
native .docx, or Adobe Acrobat .pdf file. The document saved in .docx format
keeps the effects fully dynamic, but depending on the effects used, the other
person often needs to have the latest version of Microsoft Word installed.
Otherwise, the document can look different (and most likely ugly).
The biggest advantage
of the document saved in a .pdf format is that it will look exactly the same on
every device, in any application. However, you lose the ability to edit the
text effects, and probably also the ability to edit the text. Microsoft Word
can export as well as import the .pdf files, but the ability to edit the text with the applied effects is in most cases lost. For more information, please read this helpful tutorial:
To save the document
in the .docx format, simply hit the save button—it should be the default
format. To save the document as a .pdf file, select File > Export >
Create PDF/XPS, and then choose PDF in the file type drop-down when saving the file.
.jpg)
.jpg)
.jpg)
Key Takeaways: For Making Your Own MS Word Text Effects
We’ve only scratched
the surface of the text effects in Microsoft Word, but you should have a solid
knowledge of the Word basics needed for future effects. Here is a list of
the main takeaways:
- When possible, set
the paper size as a first step. Resizing the objects afterwards can bring
unexpected complications. - Most text effects look best in very large sizes.
- Always be sure to enable kerning and good typography practices when working with text in Word.
- There is a
difference between «body text» and text placed inside a
Text Box. For text effects, text placed inside a Text Box is preferred. - The Format Pane is the
best place to change any formatting—make sure to have this pane
visible all the time. - Share your creations
in Word .docx format to keep the ability to edit, or Adobe Acrobat .pdf format to
make sure everything will look the same at all times.
Enjoy creating your own text effects using these steps, and leave a comment below if you have any trouble making your own text effects in Word!
To learn more about Microsoft Word, study the
following tutorials:
Editorial Note: This post was originally published in 2014. It has been comprehensively revised by our staff to make it current, accurate, and up to date—with special assistance from Laura Spencer.
Did you find this post useful?
![]()
Hello, I’m Vaclav, graphics designer from Czech Republic, mainly focused on GUI design. Despite everything I’ve created in Photoshop, my most well-known creation is a viral video «Was iOS7 created in Microsoft Word?».
![]()
Download Article
![]()
Download Article
Everyone’s handwriting is unique, like a fingerprint. All you have to do is tweak your penmanship a little bit and you’ll have beautiful and interesting handwriting. Beautiful writing is classy, tasteful, impressive, and attractive.
-

1
Look at a sample of your writing. Find a sample of your writing, anything from a grocery list to a handwritten story. You’ll need to analyze it for your handwriting tendencies. This will help you focus on improving and embellishing the words. You particularly want to see if you write with a loose, relaxed and easy hand rather than a cramped, tight hand.[1]
- Determine what letters you naturally embellish. Which have curls and flourishes?
- Look at your spacing. Is it all over the place or are your letters more evenly distributed on the page?
- Look at the pen or pencil strokes you use. You’ll want a mix of thin and thick strokes in your letters.
-
2
Figure out which muscles you use. Writing with a looser more relaxed script will be determined by which muscles you use when you’re writing. You don’t want to write only with your hand or your fingertips. Beautiful writing comes when you use your whole arm and shoulder as you write.
- To determine this, write a paragraph as you normally would. Pay attention to which muscles you’re using. This will tell you if you’re writing too much with only your hand rather than your whole arm in a loose, relaxed manner.
- Your fingers are there to be the guides on the page, but they shouldn’t be doing all the work, otherwise your writing will be cramped and tight.
- Your arm and shoulder should be moving, but not your wrist and fingers.
Advertisement
-
3
Pick your tools. You’ll need to find the right writing utensil, and paper for your writing. Every person is different, although there are some general ideas about what is easier to write more beautifully with. For instance, a pen is typically better than a pencil because a pen will usually give you smoother lines.[2]
- Nicer paper (usually more expensive) rather than computer paper will make your handwriting better, because you won’t have to deal with smudges and tears and bleeding ink. You can find some at a stationery shop.
- Moleskin journals can be very good for practicing beautiful writing in, because the paper helps your handwriting become smoother.
- People often use fountain pens rather than a cheap plastic ballpoint, because nicer pens have a better ink flow, but you could also use something like a calligraphy marker or Sanford elegant writer, which make nice variations in length and width of your letters because of the flat tip. They also tend to have bold colors.
-
4
Slow down. Fast handwriting is choppy, small, and has a great amount of applied pressure. Write slowly and gracefully with slow, light marks. You will have smoother pen-strokes and more consistent lines and curves. Make sure you are never straining your hand when writing or else you are pressing down too hard.
- Write as if your hand is moving through water.
-
5
Practice. As with anything important, you will have to practice your beautiful writing before you will be confident in it.[3]
Write as often as you can, paying attention to how you’re writing and what muscles you’re using.- Practice writing on lined paper to learn spacing. Spacing between letters and between words (you want it to be pretty uniform) is incredibly important for creating beautiful handwriting.
- Doodle constantly. Doodle on the margins of notebooks, while you’re waiting for the bus, while you’re on the phone. It will help you relax and get accustomed to your more beautiful writing.


Advertisement
-
1
Start with the alphabet. Grab one of those old cursive practice books that you had to use in elementary school and start practicing each letter in the alphabet. Just remember that everyone’s writing is distinctive, so your handwriting will be cursive (and attractive) it will be unique to you.
- You want to make sure that your letters are evenly spaced, so practice on lined paper so you can see the spacing.
- There are lots of free cursive worksheets and workbooks, either on the internet or in your local library.
-
2
Hold your writing utensil properly. The best way to write cursive is to put the writing utensil between your forefinger and your middle finger, with fingertips and thumb place near the pen or pencil’s tip.
- This position helps to alleviate the pain in forearm, wrist, and thumb.
-
3
Learn connections. Cursive is basically all about the connections between letters. It is supposed to be used as a rapid method of writing. As such it comes from the Latin word «currere» which means «to run» and so cursive translates as «a running hand.» Keep that in mind when you’re forming the connections.[4]
- The connections are simply the «air» between the letters when you would normally lift your writing utensil.
- Make sure to close gaps on the tops of words. If they aren’t closed it will be difficult to tell if a lowercase letter is an «a» or a «u.»


Advertisement
-
1
Make sure you have the right position. This means that your feet are firmly on the floor, you are comfortable and your back is straight. It also means that you need to have the right pen hold.[5]
- The pen should sit between your first two knuckles, gripped by your thumb and first finger. It should rest against the middle finger.
- For the proper position of the pen you need to make sure that you’re holding it at a 45 degree angle. To test this, draw a right angle (90 degrees) with a pencil. From the corner of the angle slide your pen upward cutting the right angle in half. It should be a thin stroke.
-
2
Choose the proper tools. You will want to make sure that you give the appearance of a weighted line, meaning that your strokes appear thick and thin, as needed. To do this you’ll need to pick the pens and paper and ink that work best for you.
- Broad edge writing tools that work well for calligraphy are markers, fountain pens, staff with inserted nibs (tips), brushes, quills, or reeds.
- You will want paper that doesn’t bleed ink through. You can practice on regular notebook paper. Check the cotton content of paper, because papers with a cotton content to give a crisper line. Of course you can always find paper specially for calligraphy and if you have a calligraphy set it often comes with appropriate paper.
- In terms of inks, you want to stay away from india drawing inks, because the lacquer in them has a tendency to rust the nibs of pens and to clog pens. It’s better to find a water soluble ink.
-
3
Set up your paper properly. This means understanding where the lines go so that your calligraphy has uniformity of appearance. You’ll need to set a nib height, which can be anything, but the 15th century italic has a height of 5 nibs, which will be used in the example of proper lines.
- Baseline is the writing line that all letters sit on.
- Waistline is the line above the baseline, which changes according to the x-height of the letter (in this case, 5 nibs above baseline).
- Ascending line is the line that all ascending letters hit. It should be 5 nibs above the waistline (or whichever nib length you’re using). Ascending letters are the letter like a lowercase «h» or «l.»
- Descending line is the line that descending letters hit. It should be 5 nibs below the baseline. Descending letters are the ones like a lowercase «g,» or «f.»
-
4
Practice. You will, of course, need to practice the letters of your chosen calligraphy style, so that you become accustomed to them, but you’ll also need to practice the angle of your writing utensil and the movement of your hand.
- Play around with your pen and ink. Make circles, tents, and lines as practice so you get the feel for the angle and the press of the pen.


Advertisement
-
1
Study other lettering. You can have beautiful handwriting that is based on one of the styles above, like calligraphy or cursive, but you can spice it up by using ideas from other creative sources.[6]
- Look at the works of artists, graphic designers, calligraphers and see how they use their words to create a distinctive style.
- Pay attention to things like billboards, signs, menus, posters for the styles of writing that they use.
- Look at patterns (like quilt patterns, drawing patterns) for inspiration on how to make your writing more interesting. You can even look at the shapes and lines of trees.
-
2
Look at book hand, or ancient writing. For instance, look at the illuminated medieval manuscripts and the first Initials of writings which were often inhabited by figures, animals and historical scenes.
- There are lots of ancient scripts that could be interesting and creative to incorporate into your own writing style. Check out Ancient Egyptian hieratic or hieroglyphic scripts or Norse runes.
-
3
Use your handwriting in projects and gifts. Of course you can always write beautiful cards to be your friends and family, for holidays and birthdays and thank yous, but you can also use your handwriting in other projects.
- You could make a hand lettered ornament, by using a permanent type pen on a plain round ornament with words you have chosen.
- You could make a poster with the words of a poem or quote you like.


Advertisement
Add New Question
-
Question
How do I write cursive beautifully and quickly?

Practice, practice, practice. That’s the best thing to do. Try sitting comfortably, with a suitable pencil or pen (whichever you prefer), and just write random words on paper. Do that in your usual handwriting, then below the words, write them neater and better. If that doesn’t help much, try tracing words over and over with a pen. That way you’ll get used to it.
-
Question
Which pen is the best to use?
This is up to you. Experiment by writing a few words with different pen and use the one or ones you like best.
-
Question
How can I write a pretty capital ‘s’?
Make them very swirly, and make the ends curl.
See more answers
Ask a Question
200 characters left
Include your email address to get a message when this question is answered.
Submit
Advertisement
Video
-
Don’t stress yourself. Pressuring can affect the actions of the human body. Just think of this as a fun game! It’ll make the pressure less.
-
Practice, practice, practice. This is the best way to have consistently beautiful writing. You’ll need to make sure that you’re practicing proper position of body and pen, as well as the words themselves.
Advertisement
-
If you’re cramping too much in your hand, you’re probably writing too hard or in the wrong position. Try a few different positions to find the one that works for you.
Advertisement
References
About This Article
Article SummaryX
To write beautifully, start by gathering your tools, like a quality piece of paper that has a smooth surface and a fountain pen for proper ink flow. As you start to practice your writing, make sure you have proper spacing between letters and words and that you use a mixture of thick and thin lines. Additionally, gather inspiration on how to form you letters from geometrical patterns, nature, billboards, and menus. You can also look at medieval writings and hieroglyphics for creative ways to make your handwriting stand out! To learn how to use calligraphy, keep reading!
Did this summary help you?
Thanks to all authors for creating a page that has been read 365,778 times.
Reader Success Stories
-

mustak ahmed
Oct 30, 2017
«I very much liked this article, thank you for giving many important procedures for improving handwriting. This was…» more
Did this article help you?
A translator to convert normal text to fancy text which you can copy and paste.
Generating fancy text
So perhaps, you’ve generated some fancy text, and you’re content that you can now copy and paste your fancy text in the comments section of funny cat videos, but perhaps you’re wondering how it’s even possible to change the font of your text? Is it some sort of hack? Are you copying and pasting an actual font?
Well, the answer is actually no — rather than generating fancy fonts, this converter creates fancy symbols. The explanation starts with unicode; an industry standard which creates the specification for thousands of different symbols and characters. All the characters that you see on your electronic devices, and printed in books, are likely specified by the unicode standard.
Unicode text
Amongst the hundreds of thousands of symbols which are in the unicode text specifications are certain characters which resemble, or are variations of the alphabet and other keyword symbols. For example, if we can take the phrase «thug life» and convert its characters into the fancy letters «𝖙𝖍𝖚𝖌 𝖑𝖎𝖋𝖊» which are a set of unicode symbols. These different sets of fancy text letters are scattered all throughout the unicode specification, and so to create a fancy text translator, it’s just a matter of finding these sets of letters and symbols, and linking them to their normal alphabetical equivalents.
Unicode has a huge number of symbols, and so we’re able to create other things like a wingdings translator too. Also if you’re looking for messy text, or glitchy text, visit this creepy zalgo text generator (another translator on LingoJam).
Copy and paste
After generating your fancy text symbols, you can copy and paste the «fonts» to most websites and text processors. You could use it to generate a fancy Agario name (yep, weird text in agario is probably generated using a fancy text converter similar to this), to generate a creative-looking instagram, facebook, tumblr, or twitter post, for showing up n00bs on Steam, or just for sending messages full of beautiful text to your buddies.
The only exception is if your paste destination has a font which doesn’t support some unicode characters. For example, you’ll might find that some websites don’t use a unicode font, or if they do, the font doesn’t have all the characters required. In that case, you’ll see a generic «box» in which was created when the browser tries to create a fancy letter. This doesn’t mean there’s an error with this translator, it just means the website’s font doesn’t support that character.
Mildly off topic, but you might also be interested in Facebook emojis — that’s a massive searchable list of all the emojis that you can use in your Facebook posts and chat. And actually, I made an 🐌 Emoji Translator 🎲 which you might like.
If there’s anything that I can do to improve this online fancy generator thing (e.g. by adding other font styles that you’ve found), then please let me know in the suggestions box! If you’ve some found new beautiful fonts that can be copy-pasted and that aren’t in this generator, please share them below as well. Thanks!
Writing is a part of everyday life. Perfect handwriting not only helps children improve their academic performance but also increases their focus. Handwriting skills are essential for both youngsters and adults. It is said that perfect handwriting, like speech fluency, is an essential personality trait of a person. Thus, it is essential to have good, clean, legible handwriting.
In this article, we will look at the characteristics of good handwriting and tips on how to improve your handwriting. Furthermore, we have listed some perfect handwritings written by individuals that will leave you awestruck.
Jump to Section
- What is perfect handwriting?
- Characteristics of Good Handwriting
- Specific Shape
- Character Spacing
- Characterization
- Font size
- Paper pressure
- Connecting Strokes
- Beginning and ending strokes
- Dots and cross-strokes
- Space between the words
- Make your Handwriting Better
- Examine your Posture
- Select the Appropriate Pen
- Select the Appropriate Paper
- People with the Best Handwriting
- A beautiful grocery list
- A Mesmerizing Self-Affirmation Quote
- A Thank You Note!
- Gorgeous calligraphy
- Beautiful Classroom Lesson
- An Essay on Children’s Day Celebrations
- Cursive handwriting
- A List of Cabinet Ministers
- The Finest Hindi Handwriting
- Simple Notes in Simple Handwriting
- Handwriting with a stylish sharp edge
- Indian National Flag Essay
- A Handwritten Letter by a Third Grade Student
- Hindi handwriting that is neat and clean
- Urdu Handwriting at its finest
- FAQS
What is perfect handwriting?
Perfect handwriting has certain requirements. They are as follows:
- The font should be readable.
- The alphabets should be uniform, balanced and well-spaced.
- You must write with minimal pressure.
Now, let us dive deeper into the characteristics of good handwriting.
Tips on “How to write an Informal Letter”
Characteristics of Good Handwriting
Specific Shape
This means that letters should be of the right shape. For example, do not write an ‘a’ to look like an ‘o’.
Character Spacing
The amount of space between characters must be appropriate. For example, all alphabets in a word are connected but the alphabets in two different words have a space between them.
Characterization
The slope of an alphabet (the angle at which a character tends to tilt) must be uniform. Furthermore, ensure that the letter tilts to the right side.
Font size
Font size should not be too large or too small to read. Additionally, it must be clearly readable.
Paper pressure
Paper pressure refers to the pressure a writer puts on the paper when writing. Applying too much pressure lead to an imprint on the later pages, thus, making the information on those pages illegible.
Connecting Strokes
Connecting strokes are those that link one alphabet to the next. These strokes indicate whether the writer wishes to raise the pen to go to the next word or wants to keep the alphabets together to form one word.
Beginning and ending strokes
This indicates if the writer uses an ending or a beginning stroke, thus, allowing the reader to understand if he is beginning or ending the sentence.
Dots and cross-strokes
Dots are used in some characters like ‘i’ and ‘j,’ whereas cross strokes are used in letters like ‘f’ and ‘t’. These dots and cross-strokes must be made perfectly for the handwriting to be considered good.
Space between the words
We have already talked about spaces between the words above, but for handwriting to be perfect and readable, there must be space between the words. Good handwriting with the appropriate gap between words earns a high legibility score.
Make your Handwriting Better
The foundations for good handwriting are laid by solid writing motor abilities. It’s crucial to learn and improve fundamental motions such as the smooth movement of fingers as well as wrists. Furthermore, you should hold the pen correctly, and ensure that you handle the writing tool and paper with less pressure.
These basic skills translate into writing words, sentences and paragraphs.
If you have the basic skills down, then look below for a few tips to improve your handwriting.
Select a look
Several handwriting styles are available to writers. Cursive handwriting, in which capital and lowercase letters flow together on a sheet of paper, is preferred by the majority. However, some individuals even opt for a print font. Here are the differences between the two types of fonts:
| Cursive Handwriting | Print Handwriting |
| It is the writing style in which letters are joined together to make a meaningful word | It is that style of handwriting in which the letters are written separately while forming a word |
| Cursive style has a flow that provides a comfortable and efficient method of writing. | Print style is a reflection of words or sentences when typed or printed on paper, book etc. using a computer device |
| It is written in a running hand. “Cursive” is derived from the Latin word “currere” which means “to run”. | This style involves breaks between every letter and requires pauses in the flow of hand |
| Cursive is an ancient style of writing and the history of which dates back almost 2000 years | Print is a more recent adaptation owing more to the technological advancements (keyboards) |
| Cursive style is more adaptable in countries like India and other Asian countries and forms an essential part of an elementary curriculum | Countries like the US, UK etc. encourage the print style to be included in the school syllabus |
Writers with exceptional handwriting may pursue a profession in hand lettering and typeface design. For example, calligraphers perform calligraphy, an ancient art form in which letterforms are handled with the same attention and regard as painted images.
Examine your Posture
Sit straight with your legs uncrossed, and your feet flat on the ground. Relax your forearm and hand. Then, make your hand floppy by shaking it.
Many youngsters curl their arm over the paper when writing, but sitting up straight, with your forearm resting on the table, allows the arm to move the fingers rather than the wrist, which is better for perfect handwriting.
Select the Appropriate Pen
Fountain pens, which lend themselves nicely to cursive writing, are commonly used in modern calligraphy. Ballpoint pens use less ink, and while they’re fantastic for doodling and scribbled notes, they’re often insufficient for fine lettering. However, they are a student’s choice of pen and are great while writing exams.
Select the Appropriate Paper
Write on lined paper. When beginning to practice writing, opt for a lined paper with lines much larger than normal to ensure good letter formation. When things have improved, you may reduce the width of the lines. Furthermore, a bulky pad may cause your posture to be distorted, so pull off a few pages or use a thin pad.
Look through your work
Write the alphabets on a sheet of lined paper, striving to unite every letter. Concentrate on the letters that are the most difficult for you. For example, your ‘Os’ could resemble your ‘ Qs’ or the other way around. Check if any letters are not properly formed. For example, writing with the tops of your ‘g’ and ‘a’ open, allowing them to be mistaken for a ‘y’ or ‘u’. Finally, make a note of the letters you don’t like and focus on fixing them.
Double-check the letter heights
Letters must have the exact height in proportion to one another; if the height of your letters is incorrect, it will be difficult to understand your writing. For example, your ‘k’ has a small ascender, but ‘g’, ‘j’ and ‘y’ have large descenders that invade the line below, making your writing seem cramped.
Consistent practice is essential
If you want to improve your penmanship start by writing on lined paper. You can use a handwriting book to practice writing, but the most basic method of handwriting practice is to simply write a piece of prose, concentrating on one sentence at a time.
Make sure you have the right grip. Furthermore, avoid using a vice grip with your pen; this approach is unsuitable for any type of writing, even doodling. Instead, use your index finger to guide your pen.
Here is a worksheet you can use to practice.
Take it easy and go slow
There’s no need to write at breakneck speed unless you’re in a hurry for an exam. Thus, focus on each word and ensure that the content you are writing is clean and legible.
Begin keeping a notebook or journal
Start a daily notebook to practice your handwriting regularly. All you need to do is spend about five minutes writing a small paragraph in your notebook. This will help you improve your handwriting faster. Additionally, you may also maintain a journal and write in it every day.
Make a copy of your favourite handwriting
Get some tracing paper and start copying a new style. The more you duplicate a certain method of writing, the simpler it will be to incorporate its components into your handwriting.
Consider enrolling in a formal class
It may be difficult to obtain a handwriting class after high school, however, calligraphy classes may be found in most cities. Graphic designers may also teach community programs, however, these are mostly for digital skills like layout and typeface design.
Summary
We have a step by step instruction guide given below. This guide is a summary of the points mentioned above.
| Step | Instructions |
| Step 1 | Being by selecting an individual style. You can choose either cursive or print font. |
| Step 2 | Analyze your handwriting. USe the character list above and determine how good your handwriting is. This will help you identify the areas you need to improve on. |
| Step 3 | Select a good pen and paper for practice. We recommend you opt for a fountain pen if you have a cursive font. |
| Step 4 | Sit at a table with the right posture and practice your handwriting on lined paper. While you practice, go slow and double-check the slant, size, letter height and spacing. |
| Step 5 | Practice at least 5 minutes daily to quickly see an improvement in your handwriting. You may do so by keeping a journal or a notebook to write a paragraph in each day. |
| Step 6 | If you are unable to improve your handwriting on your own, opt for a calligraphy class. |
People with the Best Handwriting
A beautiful grocery list
One of Continental Kosher Butchers’ clients submitted this list of meats she desired. The customer’s penmanship piqued the shopkeeper’s interest, and he couldn’t help but publish it on Instagram.
A Mesmerizing Self-Affirmation Quote

Richa Mourya posted this self-affirmation quotation to her Instagram account, captioning it, “Everything you express of yourself comes true.” Her flawless and neat handwriting is astounding and without a doubt one of the greatest examples of perfect handwriting you would’ve ever seen.
A Thank You Note!
Comfort posted a thank you card received to them by a client on Instagram. You can’t help but notice the lovely penmanship for the client.
Gorgeous calligraphy

Best Handwriting has presented gorgeous handwriting that undoubtedly elevated calligraphy to a whole new level, thus, providing handwritten inspiration.
Beautiful Classroom Lesson

Vinyl Sonar can do an almost impossible feat of writing on a chalkboard in such exquisite handwriting. This may be one of the greatest pieces of penmanship in the world.
An Essay on Children’s Day Celebrations

Master handwriting posted a message in immaculate handwriting by Sri Laxmi. This is sure to blow your head.
Cursive handwriting

Master handwriting added another set of handwritten sentences to their collection. These words are written in cursive and will surely inspire you to improve your cursive writing skills.
A List of Cabinet Ministers

Master Handwriting presented a list of India’s cabinet ministers in immaculate penmanship. This may be one of the greatest handwriting in the world.
The Finest Hindi Handwriting

When it comes to handwriting, English isn’t the only language that can exhibit perfect handwriting. This Marathi phrase was written by Samriddhi Deshmukh, who has one of the world’s cleanest, most wonderful, and greatest handwritings.
Simple Notes in Simple Handwriting

Your Easy Notes supplies students with a variety of stationery. They demonstrate some of the greatest writings when it comes to handwritten notes.
Handwriting with a stylish sharp edge

Another hit by Master Handwriting offered one of the most stylish cutting edge handwriting. Its lovely English penmanship looks like it is typed rather than penned.
Indian National Flag Essay

One more hit from Master Handwriting some of the world’s greatest handwriting. This is another example of calligraphy-style handwriting that makes you want to change your writing style.
A Handwritten Letter by a Third Grade Student

A third-grade student Ashton wants to ask for new flags. So he writes a letter to a Federal Member of Corio, Richard Marles. This is his beautifully written letter which, Richard Marles even posted on Instagram.
Hindi handwriting that is neat and clean

Your Easy Notes shared one of the greatest Hindi handwriting in the world. It is nice as well as clean and additionally, anybody can read the content. This is a must to look at if you write in Hindi.
Urdu Handwriting at its finest

Another one by Your Easy Notes, however, this time it is written in Urdu. Even if you do not understand Urdu, you can always appreciate how nicely the words are written.
FAQS
Who has the world’s best handwriting?
Finding the most perfect handwriting in the world is an easy process thanks to the internet. The same was not true in the past when there were geographical limits and thus, determining who had the greatest handwriting in the world was a far more difficult undertaking.
In 2021, Prakriti Malla, an eighth-grade student of Nepal was declared to have the world’s most beautiful handwriting and she quickly became a viral phenomenon on the internet. Her world-class handwriting has yet to be surpassed by anyone, although, to the best of our knowledge, there might be a plethora of people on the globe who have some of the most beautiful handwriting in the world.
What are some of the greatest scripts for handwriting?
Certain scripts are regarded as the best handwriting scripts. These are as follows:
- Textura script: It is a middle Age script dating back to the 12th to 16th centuries. Gothic Handwriting or Black Letter Handwriting are some other names for this script.
- Cursive Script: This is one of the most beautiful cursive handwriting scripts.
- Court Hand Script: This is another mediaeval script that was employed during that time and was regarded as the most beautiful handwriting in the world at the time.
Who has the best handwriting in India?
Ann Mariya Biju, class president, of Nirmala Higher Secondary School in Chemperi, Kannur, has won first place in the ‘artistic handwriting’ category of the World Handwriting Contest. The event, which is judged in New York, takes submissions from all over the world, and, Ann, who won in the teen category, claims that Kerala has only had one previous winner.
She has said that her books and answer papers are so nice that they earn her excellent grades. Ann became interested in calligraphy during the lockdown when she wanted to try something new and different. The youngster has even launched a YouTube channel to show people how to write in calligraphy.
Ann is self-taught and has honed her craft through constant practice, and this is a talent she would like to continue to practice after she becomes a doctor. She performs calligraphy in both English and Malayalam, although she prefers the former since it allows her to explore with different styles. She said, “Proper calligraphy is achieved by the use of good equipment, practice, and effort.” Therefore, she has invested in quality pens and paper for her hobby. Furthermore, she also states that as people have different handwriting each calligrapher would have evolved their style.
Which handwriting style is ideal for students?
Both a print and cursive font is acceptable in an exam. If you can write correctly in the script, then use that, but if your script is not legible, then a print front is the best option. A point to note is that cursive, joined-up writing enhances processing speed and accuracy. Remember that your handwriting should not be flashy or crammed in. It should be simple straightforward and easy-to-read text.
What are the benefits of perfect handwriting?
Benefits of a perfect handwriting
For children
Handwriting stimulates the brain
Writing requires advanced motor and cognitive abilities. Furthermore, as it triggers the visual perception of letters, good handwriting leads to reading fluency.
Students with dyslexia benefit from cursive writing.
Because several of the letters, especially ‘b’ and ‘d’, seem identical, children may struggle with writing in print. Additionally, writing in print may make them uneasy and feel disconnected. Cursive writing gives each letter a unique appearance and thus, helps the student write in a fluid, comfortable manner. Children may also overcome their dyslexic inclinations and gain confidence in their abilities.
For teenagers
Many standardized evaluations, like timed examinations, are based on written work.
Students will lose out on learning opportunities and fall behind if they cannot write quickly and legibly. Furthermore, for many qualifications, good handwriting is a primary element of evaluation.
Poor handwriting can lead to low self-esteem, which in turn can lead to a lack of confidence.
Children who struggle with handwriting may avoid writing altogether. Moreover, it is difficult for children with terrible handwriting to proofread their work. Therefore, they will be unable to see their errors, causing their confidence to plummet even more.
Examiners must decipher the written text.
The examiner must understand the content of the paper. If the handwriting is not legible, then the students will receive a lesser grade even if the paper is good.
Handwriting aids in the development of better writers.
Handwriting greatly affects the composition’s fluidity and quality. Furthermore, legible writing that can be produced quickly and easily allows students to focus on higher-level components of writing composition and topic. Thus, children who have mastered handwriting are more imaginative and talented writers.
Note-taking necessitates the use of handwriting.
Students of all ages should take notes by hand since it increases their attention, understanding, and results. Notes from students must be self-legible, otherwise, they are useless.
For adults
Handwriting is used to judge people.
Even after graduation, good penmanship is vital. People are assessed by their handwriting in our society.
It aids communication.
When writing down e-mail addresses, website URLs, and phone numbers, learning to write letters and numbers correctly is vital. Communication might be hampered by a single incorrect letter or number.
You can also read about Common Mistakes made by Calligraphy Beginners
 Helen browses her draft articles.
It’s time to clear up her archives.
Why did she never finish these posts?
Surely, she thinks, one of them must be almost ready for publication?
Excited, she opens her documents, one by one. She reads an opening here and scans the subheads there.
But slowly she loses her sense of optimism.
These articles are no good … Why is she such a bad writer?
Actually, that’s the wrong question.
We’re all bad writers. Even Nobel-prize winning authors write crappy first drafts.
And as legendary copywriter David Ogilvy suggested:
I am a lousy copywriter, but I am a good editor. So I go to work editing my own draft.
Writing a crappy first draft is normal. You just need to know how to turn it into shiny content.
Shall I explain?
What is good editing?
Editing is an essential part of the writing process.
While some people edit while writing, it’s often faster to make editing a separate stage.
To write a first draft, focus on getting your thoughts on paper. Next, revise your content to check for flow. Is the order of the sections logical? Are key arguments missing? Are some parts redundant?
Once you’re happy with your content—it’s complete and in a logical order, it’s time for editing sentence by sentence. Polish each sentence to make it concise, vivid, and human; and fine-tune the rhythm and tone of your writing.
Editing our own writing can be tricky as we read a text through our own eyes as the author of a text. We know what we want to express so we read that meaning between the lines—even if it’s not actually written.
To become a better editor, try to step into the shoes of your reader, and read your draft through their eyes. Read what IS written, not what you think is written.
1. Paint vivid imagery
 We often write in abstract language.
But that’s a problem because abstract language makes it hard for readers to visualize and understand our ideas.
For instance, in their book The Power of Moments, Chip and Dan Heath explain the difference between an abstract and a concrete goal in weightloss. Abstract is:
losing 20 pounds
A concrete goal is more motivational, such as:
fitting into my sexy black pants without gastrointestinal distress
Notice how that sketches a clear picture?
Making abstract language concrete requires some effort but it’s well worth it because it makes your writing more vivid and engaging. Readers will more quickly grasp your advice.
Editing tip for writers:
Read your text through your reader’s eyes. Can you visualize your advice?
To make your writing more vivid, it often helps to add an example—just like I did above. I used the snippets from Chip and Dan Heath’s book to show you the difference between abstract and concrete language.
2. Fine-tune the tone of your writing
 When writing a first draft, we often forget who we’re writing for.
We write for a faceless crowd.
And that makes it sound like we’re lecturing. Our writing seems distanced or even robotic.
So, one step in the editing process is to make your writing feel more human.
Start by reviewing where you can engage your reader so it feels like you’re having a conversation. Address your reader directly using the word you and ask a question.
Have you tried that?
Next, pay attention to when your reader may feel a little stupid or down. Perhaps they feel like they’ve made a mistake. Or they wonder why they’re struggling to achieve their aims. Here’s where you can add a note of compassion. For instance:
We’ve all wrestled with crappy first drafts. It takes time to learn how to edit but take it step by step, and you’ll get better.
Lastly, when does your reader need a little nudge to implement your advice or to buy the product you’re selling? Here’s where you can get a little bossy:
Come on. Start editing your text. It’s more fun than you think.
Adjusting the tone of your writing is an essential part of editing. It’ll help shape your voice and make readers feel like you’re writing for them, personally.
Editing tip for writers:
Imagine your favorite reader and read your text as if you’re them. How does your writing make them feel?
Where can you engage them with a question? When do you want to put a virtual arm around their shoulders? When can you encourage and nudge them into action?
3. Cut wordiness
 Wordiness slows readers down.
They have to plough through more words to get to the meaning of each sentence. The more excess words, the more exhausting reading becomes.
So, if you want to let readers glide through your text so they can grasp your ideas more quickly, make your writing more concise.
To practice concise writing, I like the Flip-Flop technique. Instead of scrapping weak words, you focus your attention on meaningful words. Here’s how it works:
- Read a sentence slowly
- Highlight the most meaningful words
- Rewrite your sentence by using the meaningful words
Here’s an example of a wordy sentence:
When I started my own business, it has given me a whole new perspective to see the bigger picture when it comes to finding a work / life balance.
And here’s the concise version:
Starting my own business has given me a new perspective on work / life balance.
Cutting wordiness is like sculpting your sentences. You remove any excess so your words can shine more brightly.
Editing tip for writers:
This editing step takes some practice and initially may feel time consuming so focus on sharpening the most important parts of your writing: Your headline, your opening, and your final paragraph.
4. Add zing to your word choice
 Playing with words is my favorite editing task.
I like trying to find the best words to express my ideas. Plus, playing with words helps inject pizzazz into my writing.
In my word game, I follow a few simple rules:
1. Avoid difficult words where possible
I’m not writing to impress so I prefer using the everyday words my readers would also use.
This sounds unnecessarily complicated:
His writing is more likely to obfuscate rather than to enlighten readers.
This seems easier:
His writing is more likely to confuse rather than to enlighten readers.
If your readers are professionals or experts who use jargon, then it’s okay to use the same jargon, too. But if you’re using difficult words your readers don’t understand, it’s better to switch to simpler words. Or if no simpler word exists, explain the difficult word to your readers.
Good writers don’t try to sound smart; they make their readers feel smarter.
2. Choose a precise word with the right connotation
For instance, the word emulate has a more positive connotation than the word imitate.
Note the difference between these two sentences:
To find your voice, emulate the writing techniques of your heroes.
To find your voice, imitate your writing heroes and steal their writing techniques.
Using a thesaurus can be useful. But be careful. Synonyms often have different connotations. Choose the word that has the right connotation and expresses your meaning most precisely.
3. Weave a few sensory words into your writing
Readers experience sensory words as if they can touch your silky-smooth words, as if they can hear the creaking of your braincells, as if they can taste your pork tenderloin with double mustard and tarragon sauce.
To add a little pizzazz to your writing, sprinkle a few sensory words. For instance, instead of:
Unfortunately, I’m currently too busy to take on new projects.
Try:
Unfortunately, my schedule is jam-packed; and I’m unable to squeeze in new projects.
Sensory words can be used to spice up any writing, even business writing.
Editing tip for writers:
To sharpen your word choice, pay attention to the words your favorite authors use. Which words make you feel something? Which work resonate more strongly? Which words spark joy?
Next, nurture a sense of play, and have fun trying different words in your writing.
5. Let your words dance
 Have you ever listened to music during a workout?
And did you notice how you vary the speed of your workout depending on the tempo in the music?
The rhythm in your writing influences readers, too. A higher tempo with shorter sentences gives energy. Medium-length sentences can add a sense of calm. And long sentences can accelerate a story or leave readers gasping for air.
A mix of short and long sentences creates a pleasurable reading experience.
Editing tip for writers:
Read your work aloud, and notice how the rhythm comes across:
- If the rhythm sounds too choppy, include a few longer sentences.
- If your writing lacks energy, try to chop up a long sentence and include a few shorter sentences. Broken sentences can work, too.
- If you stumble over your words, rewrite a sentence.
- If sentences don’t seem to follow each other logically, rewrite for clarity and add transitions.
Watch out for unhealthy perfectionism
I remember writing my first guest post for Copyblogger. It was early 2012.
I had read 6 books as well as numerous blog posts about writing, and I had summarized the main tips in a list with 58 tips. I had edited my text with a sharp knife. I had removed each redundant word.
Still, evening after evening, I was swapping one word for another to see whether it sounded better. I moved a tip up or down. I added a comma.
Sound familiar?
At some stage, editing efforts don’t make a difference anymore. It’s the law of diminishing returns. The first changes you make are big changes and make a big difference, but later changes? Your readers won’t notice the difference.
Knowing when to stop editing was a tough lesson for me. But if I wanted to publish more, I needed to get more pragmatic, overcome my publishing anxiety and understand when my text was good enough.
Understanding your inner perfectionist when editing can help you speed up.
Editing is fine if you’re enjoying it and improving your text.
Editing becomes a problem when you keep dithering because you’re nervous to hit publish, and you’re afraid of what others may say.
So, find your balance. Edit to improve your text. Have fun.
Then let go, and start your next piece of writing.
Happy editing!
Handwriting is a vital feature in learning, as it determines the quality of texts that students produce. Basically, cursive writing is one form of handwriting that is not so common in learning environments. Unlike standard writing, cursive writing requires particular skillsets. In this case, the defining feature of cursive writing is continuous texts characterized by looped and connected alphabets. When learning how to write in cursive, it is crucial that learners begin with lowercase alphabets and then move on to uppercase alphabets. In turn, some of the techniques involved include learning the correct body posture, learning the proper way to move hands, and practicing movement exercises.
General Guidelines on Cursive Writing
Handwriting is an essential exercise that determines one’s quality of writing. Like other life qualities, handwriting should be taught to children in their early years of education. The importance of this skill is that it enhances learning and communication through the literacy curriculum. Cursive writing is one of the most notable handwriting form, which entails writing continuous strokes to form words. In other words, writing in the cursive format loops and connects the alphabets to form words. There are different styles of cursive handwriting, allof which exhibit a flowing style. One of the reasons for writing in this format is to increase the speed of writing a text.
Important for Development
Like all other academic exercises, cursive writing has benefits to students and professionals. For example, the outstanding characteristic of cursive writing is that every alphabet has an approach stroke and a carry-on stroke. As such, students can join alphabets as soon as they learn about the letter usage. Basically, this aspect of joining alphabets helps students to master the art of quick and efficient writing. Then, another benefit of cursive writing is that it enables learners to produce neat and legible texts. Also, this skill is enhanced by the feature of cursive alphabets and words, where every letter and word has the same starting point – the “anchoring point.” As a result, this feature enables authors who tend to float off over the page when writing texts.
Cursive Writing Techniques
Some characteristics of cursive writing mentioned in the preceding section give the impression that students must learn how to construct cursive letters and words. Basically, there are several techniques that tutors can use to instruct learners on how to write cursive letters, words, and sentences. Moreover, these techniques include good posturing and the use of hands. In turn, posture is all about how students sit when writing, and the use of hands is about the movement of wrists and shoulders.
Good Posturing
Instructors should teach children how to sit uprightly at a desk. Basically, proper posture involves sitting at elbow height with their feet flat on the floor. In particular, this posture affects the learner’s shoulders and wrists, both of which are vital in developing smooth handwriting. Also, once students master this posturing, instructors should proceed to teach them cursive writing, while its order is critical. Then, tutors should start teaching young learners alphabets that descend below lines on the page. In turn, examples of these are j,y,g. Moreover, once learners understand how to write these letters, tutors should make them write each letter over and over until they develop a flow.
The Use of Hands
About the use of hands, instructors need to teach learners how to move their whole hand and wrist when writing in the uppercase and how to move their fingers when writing in the lowercase. Naturally, most individuals use their fingers when writing, an aspect that constrains one’s hand and handwriting. Therefore, to avoid this aspect, instructors must teach learners how to move the whole hand and fingers. When writing in the uppercase, instructors should teach learners to focus on using their entire hand to write cursive alphabets, but only their fingers for lowercase alphabets. Hence, mastering this practice will enable them to write longer without tiring and produce more graceful handwriting.
Cursive Uppercase and Lowercase Letter Worksheet
Cursive Writing
A worksheet above indicates an example of cursive alphabets in both the uppercase and lowercase. When writing these alphabets, the most critical skill that learners must master is to grasp each letter’s position. As indicated in the worksheet, every cursive alphabet has its own line upon which they are constructed. Here, students must also master the shape of each alphabet. Also, cursive letters are unique and exemplify a sloping feature. Ideally, writing some letters requires a learner to begin at the base of the body line or include loops, which can appear at the top or bottom of the alphabet. Hence, students must understand how each alphabet from A to Z appears in the cursive format they have chosen to use.
Writing Cursive Letters: Step One
The standard practice in cursive writing is first to master how to construct alphabets. Basically, the age of computer usage has replaced this essential practice in many learning institutions. In this case, the best and quick approach to learning cursive writing is to start with lowercase alphabets. Here, mastering how to write b, f, h, i, j, k, l, m, n, p, r, s, t, u, v, w, x, y, and z is critical as they all start with the upward stroke. While some have strokes that fill up the line’s entire height, others have strokes that only reach the dashed line. In turn, some letters, like ‘f,’ go beneath the bottom line. Hence, students need to start with the letter “u,” as it is the easiest to learn in this writing style.

Mastering Lowercase Cursive Alphabets
After mastering “u,” learners should proceed to “o” then “b,” “f,” “k,” and then the rest. Basically, the secret is to start with simple alphabets that have only one stroke then proceed to complex ones, still with one stroke. Moreover, the complexity is in the shape of the latter and not the number of strokes. When learning complex alphabets, a student should start with “h,” whose stroke reaches the top line. Then, a learner arcs to the left to make a downward stroke to the bottom line. Hence, individuals have to cross over the last line right near the bottom and arc up to the dash line to make a downward stroke back down to the bottom line, curling up at the end.
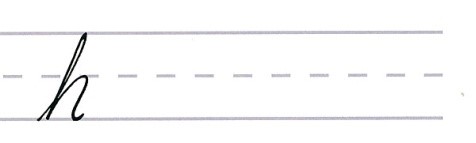
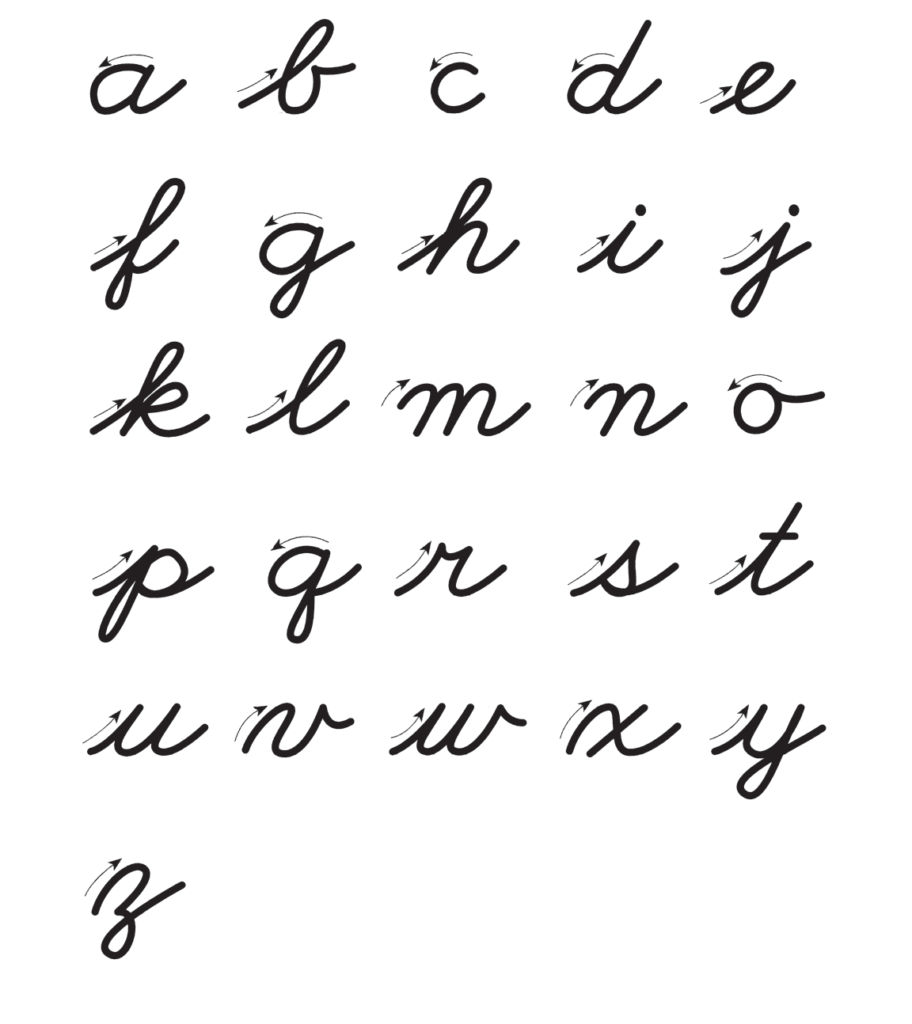
Writing Cursive Letters: Step Two
After mastering cursive writing in the lowercase, students should proceed to master writing in the uppercase. Basically, learners should begin with letters C, E, G, L, and O. Also, they should start with L and then proceed to the others in the group. In turn, these letters represent simple uppercase alphabets. After mastering this group, learners should move to try complex ones, beginning with R and then proceeding to B, D, F, I, J, P, and T.
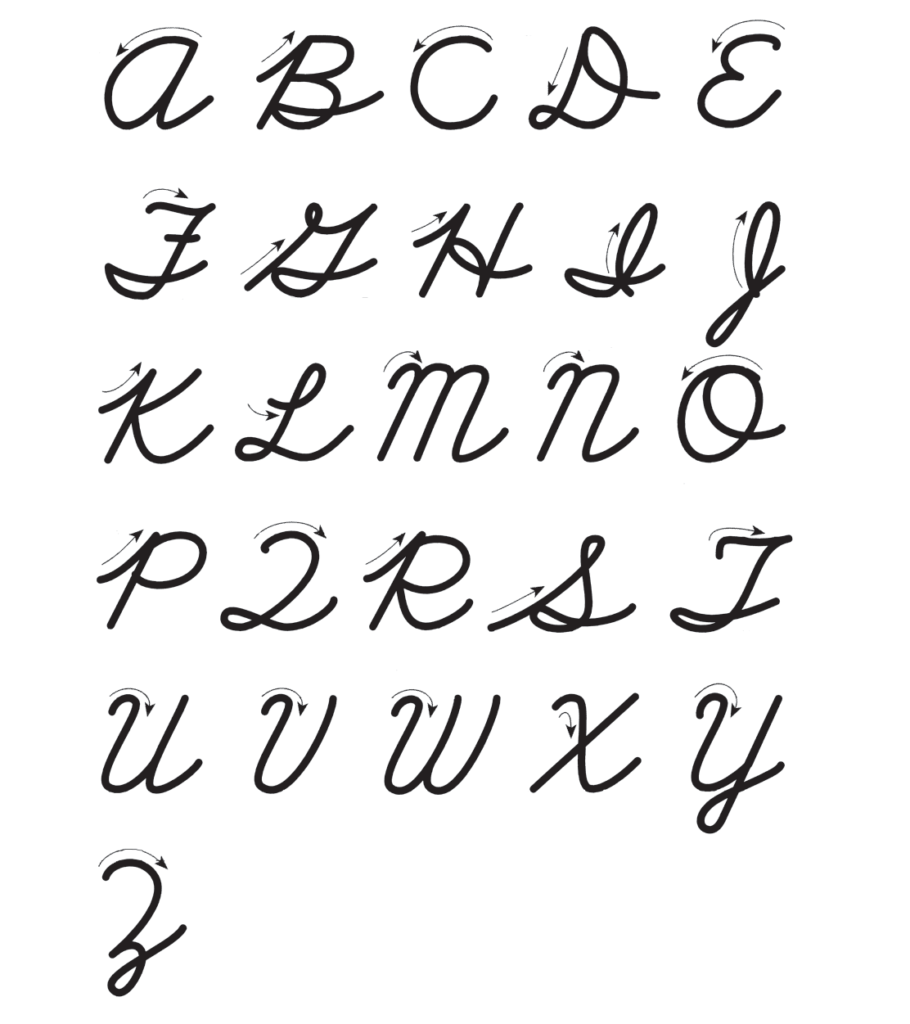
Writing Cursive Letters: Choosing a Cursive Font
About fonts, students are free to choose any when writing in cursive. Ideally, writers select a font that they intend to use for the rest of their lives. However, a student can master cursive writing in different fonts, many of which are on popular word processors, such as MS Word and Google Documents. In turn, the best way to choose a font is to study each carefully and determine which impresses or seems easy to write. Hence, below is a list of popular fonts:
- Allura
- Aquafina Script Pro
- Blackjack
- Caballero
- Columbine Light
- Kuenstler Script
- Fancier Script
- Lavender Script
- Shelley Script
- Citadel Script
- Buffet Script
- Hummingbird
- Creamy Script
- Ragazza Script
Writing Cursive Letters: Regular Exercise
The best approach to mastering cursive writing is for learners to practice regularly. Basically, it involves committing some time and dedication to write letters and construct words and sentences. In this case, students should prioritize this habit, starting with lowercase and then moving on to uppercase cursive alphabets. Then, perfecting this skill means a learner will have a much easier time writing texts, such as essays, in cursive. For example, students can develop the habit of writing the first draft of their articles in cursive and later typing it onto a word document. As a result, doing so would make it easier to generate ideas and, in the process, gain more experience writing cursive letters, words, and sentences, as indicated below:

When and How to Practice Cursive Writing
The best time for learners to practice cursive writing is when they join grade three. Basically, this practice should continue in grade four, and, by the time children are in grades five and six, they should write cursive letters with little difficulty. As discussed in the previous section, instructors should teach learners starting with lowercase alphabets and then uppercase alphabets. However, for quick perfection, students should practice regularly, both in the school environment and at home or in other social settings. In essence, proper practice is a secret to the quick mastering of the art.
1. Holding a Pen Correctly
Regarding how to practice cursive writing, learning the proper body posture and the right way to use the hand is an essential skill, as indicated earlier in a paper. Here, instructors should teach young learners how to hold a pen or pencil correctly. In essence, a learner’s penmanship can never blossom if students do not master the art of holding the pen in the right way. Moreover, the secret is to grip the pen or pencil so that it rests on the middle finger, holding it in place between the thumb and index finger. Then, students should loosen their grip on the pen or pencil as they write. In turn, a sign that learners have a tight grip on the pen or pencil is the whitening of fingernails. Also, such a grip makes the hand tired and makes the handwriting appear stiff and stilted.
2. Positioning a Paper Correctly
Properly placing a paper enhances effective cursive handwriting. Basically, if a learner is right-handed, a paper should appear in such a way that its top right and bottom left corners line up in a straight line with the learner’s nose. Meanwhile, their left arm should be holding the paper still. For a left-handed learner, instructors should, simply, flip these instructions.
3. Movement Exercises
Since cursive writing involves writing continuous strokes, learners should practice movement exercises frequently. Basically, doing so would train their hand muscles to support the wrist and shoulders, as students engage in the actual writing of cursive words and sentences. While practicing movement exercises, learners should maintain a comfortable, light touch and avoid being tense. Hence, some of the exercises that learners can follow include:
Connecting ovals starting from the top, as below:
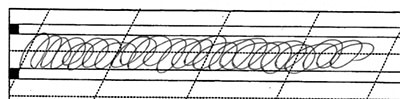
Connecting ovals starting from the bottom, as below:
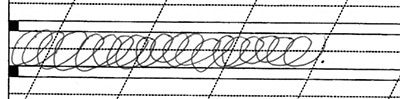
Connecting curves, as below:
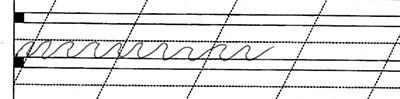
How to Become a Professional Cursive Writer
Like any art, cursive writing can be perfected. Basically, the only secret for students is to develop and observe specific habits. For example one of these habits is practicing how to create a linked pattern that exhibits continuous writing as below:

When practicing, learners should pick an easy alphabet, such as “c” or “u,” and try writing one line using the same alphabet. In this case, students would link letters together to form a fluid pattern. Also, they should repeat the exercise by using different alphabets, moving from simple to complex ones.
Chinese and Japanese Calligraphy
One approach that students can use to master cursive writing is calligraphy, a traditional Chinese and Japanese writing style. Here, writers use various brush movements and compositions of dots and strokes to construct letters, words, and sentences. In these traditions, children learn that calligraphy and beautiful handwriting reflect their character and personality. When students use calligraphy to learn cursive writing, they, basically, learn how to write in fluid quickly. Here, flow is more important than precision. Like Chinese and Japanese martial arts, the skill should come from the heart and not the head, thus exemplifying the essence of qi’s supernatural force.
Summing Up on How to Write in Cursive Correctly
Cursive writing is a unique style of writing alphabets, words, and sentences. Unlike the standard writing style, this form of writing involves the use of continuous strokes. In urn, writers loop and connect alphabets to form words. Hence, some tips of effective cursive writing include:
- Start mastering lowercase cursive alphabets and then uppercase.
- Observe neatness when looping and connecting the alphabets.
- Maintain correct body posture.
- Learn the correct use of hands, including wrists and shoulders.
- Select a font early on. For new learners, the font should not be complicated to use.
- Start perfecting easy letters, such as “o” and “u,” that consists of only one stroke of a pen before proceeding to more complex letters, like “h.”
- Avoid being tense or writing too fast.
- Avoid gripping a pen too tightly or losing hands when writing cursive texts.
- Practice movement exercises regularly.
- Consider using a lined paper because it is far better for any writing style, especially cursive.