
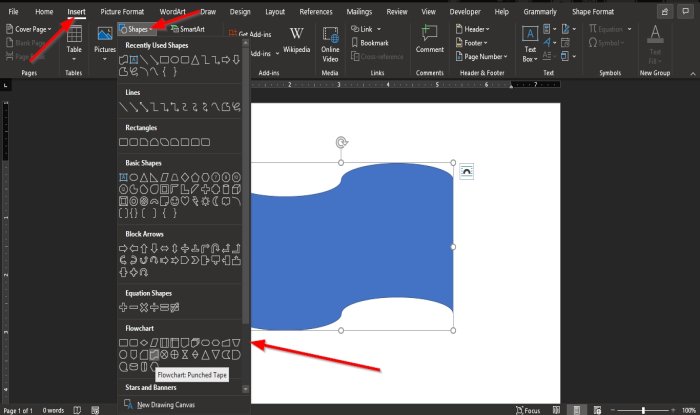
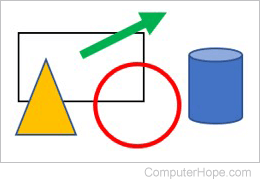
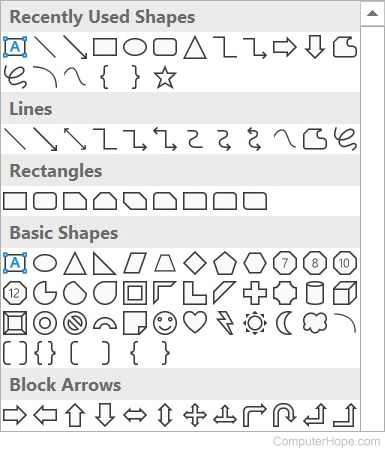
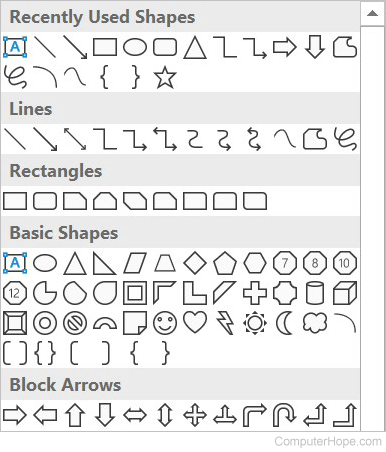
You can add shapes, such as boxes, circles, and arrows, to your documents, email messages, slide shows, and spreadsheets. To add a shape, click Insert, click Shapes, select a shape, and then click and drag to draw the shape.
After you add one or more shapes, you can add text, bullets, and numbering to them, and you can change their fill, outline, and other effects on the Format tab.
Tip: You can add individual shapes to a chart, or add shapes on top of a SmartArt graphic to customize the chart or the graphic.
Add a shape in Excel, Outlook, Word, or PowerPoint
-
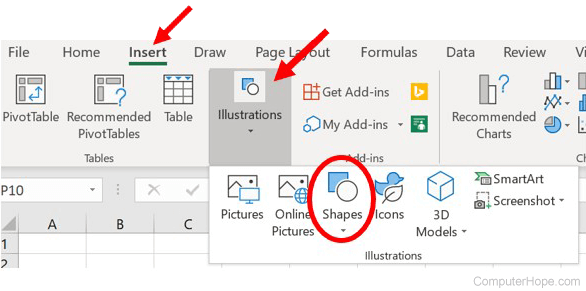
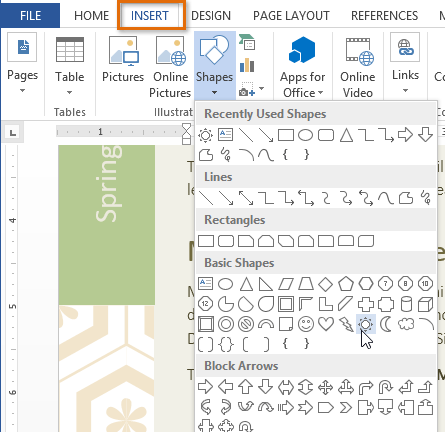
On the Insert tab, click Shapes.

-
Click the shape you want, click anywhere in the workspace, and then drag to place the shape.
To create a perfect square or circle (or constrain the dimensions of other shapes), press and hold Shift while you drag.


To follow these steps, you need to open or create a report. To do that, on the Report tab, click Recent to open an existing report, or click More Reports to select a report from the list in the Reports dialog box or create a new report.
-
In the open report, on the Design tab, click Shapes.
-
Click the shape you want, click anywhere in the workspace, and then drag to place the shape.
To create a perfect square or circle (or constrain the dimensions of other shapes), press and hold Shift while you drag.
Insert a shape, or click an existing shape, and then enter text.
-
Right-click the shape and click Add Text or Edit Text, or just start typing.
Note: The text that you add becomes part of the shape — if you rotate or flip the shape, the text rotates or flips also.
-
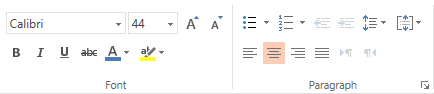
To format and align your text, click the Home tab, and then choose options from the Font, Paragraph, or Alignment groups, depending on the program you’re using and what kind of formatting you want to apply. (Text formatting options are limited in Project.)
Note: These commands aren’t available in Project.
-
Click the shape you want to change.
To change multiple shapes, press Ctrl while you click the shapes that you want to change.
-
On the Format tab, in the Insert Shapes group, click Edit Shape
, point to Change Shape, and then click the new shape that you want.
 , point to Change Shape, and then click the new shape that you want.
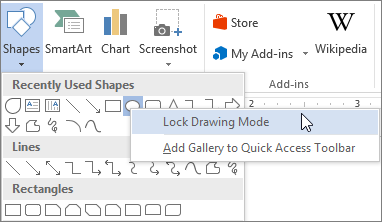
If you need to add the same shape repeatedly, you can do so quickly by using Lock Drawing Mode.
Note: Instead of adding individual shapes to create a drawing, you might want to Choose a SmartArt graphic. In a SmartArt graphic, the arrangement of the shapes and the font size in those shapes is updated automatically as you add or remove shapes and edit your text.
-
On the Insert tab, click Shapes.
-
Right-click the shape you want to add, and then click Lock Drawing Mode.
-
Click anywhere in the workspace, and then drag to place the shape.
-
Repeat step 3 to add the shape as many times as you like.
Tip: To create a perfect square or circle (or constrain the dimensions of other shapes), press and hold Shift while you drag.
-
After you add all the shapes you want, press Esc to turn off Lock Drawing Mode.
Note: This feature isn’t available in Project.
-
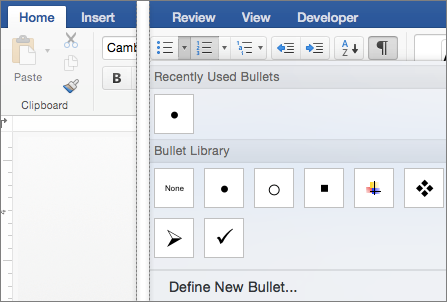
Select the text in the shape that you want to add bullets or numbering to.
-
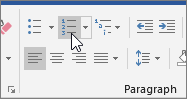
Select the Home tab on the ribbon, and in the Paragraph group, select Bullets or Numbering.
You can find different bullet styles and numbering formats by clicking the down arrow next to Bullets or Numbering.
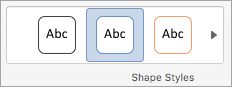
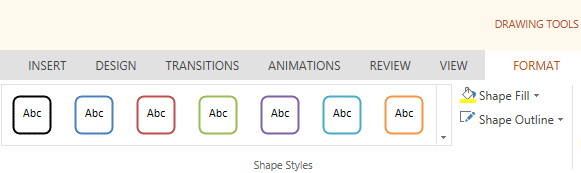
Quick Styles let you apply a style to your shape with one click. You’ll find the styles in the Quick Style gallery. When you rest your pointer over a Quick Style thumbnail, you can see how the style affects your shape.
-
Click the shape you want to change.
-
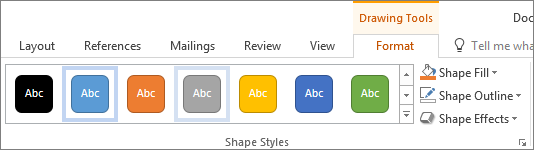
Select the Format tab, and in the Shape Styles group, select the Quick Style you want to use.
To see more Quick Styles, click the More button
.
 .
.Click the shape that you want to delete, and then press Delete. To delete multiple shapes, press Ctrl while you click the shapes that you want to delete, and then press Delete.
See Also
Draw or delete a line, connector, or freeform shape
Rotate a text box, shape, WordArt, or picture
Change the colors in a text box or shape
Draw a decorative line in Word or Outlook
Choose a SmartArt graphic
Create a chart from start to finish
Add clip art to a file
Draw and sketch notes on a page
After adding a shape to a document, you can modify it by adding connector lines, changing the style, adding a mirror image, changing the color, and applying a variety of other effects, such as shadows, glow, and 3-D.
Add a shape
-
On the Insert tab, click Shapes.
-
Click the shape you want, click anywhere in the workspace, and then drag to place the shape.

-
Right-click the shape and click Add Text or Edit Text, or just click inside the shape and start typing .
Note: The text that you add becomes part of the shape — if you rotate or flip the shape, the text rotates or flips also.
-
To format and align your text, click the Home tab, and then choose the available formatting options. For example, you can change font color, styles, sizes, change alignment or indentation, change the text orientation, to name a few.
-
Click the shape you want to change.
To change multiple shapes, press
while you click the shapes you want to change. -
On the Shape Format tab, click
, point to Change Shape, and click the new that you want.
 while you click the shapes you want to change.
 , point to Change Shape, and click the new that you want.
-
Select the shape you want to copy.
-
Press the option key and drag the shape anywhere you want. Release the mouse, and a copy of the shape is created. You can drag and release the shape as many times as necessary.
Note: Adding lists is not available in Excel 2016 for Mac.
-
Select the text in the shape that you want to add bullets or numbering to.
-
On the Home tab, click the arrow next to Bullets or Numbering.
-
Press Enter every time you want a new bullet or number, or press Enter twice to end the list.
-
Click the shape you want to change.
-
Click the Shape Format tab, and in the style gallery, click the style you want.
To see more styles, click
below the style gallery.
 below the style gallery.
-
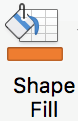
Click the shape you want to change.
-
Click the Shape Format tab, and click
(Shape Fill icon). -
Do one of the following:
-
To use a different fill color, under Theme Colors or Standard Colors, click the color that you want to use.
-
To remove the color from the selected chart element, click No Fill.
-
To use a fill color that is not available under Theme Colors or Standard Colors, click More Fill Colors. In the Colors dialog box, use the available options to pick a color, and then click OK.
-
To fill the shape with a picture, click Picture. In the Insert Picture dialog box, click the picture that you want to use, and then click Insert.
-
To use a gradient effect for the selected fill color, click Gradient, and then click the gradient style that you want to use.
For additional gradient styles, click More Gradients, and then in the Format Chart Area pane, under Fill, click the gradient options that you want to use.
-
To use a texture fill, click Texture, and then click the texture that you want to use.
-
 (Shape Fill icon).
-
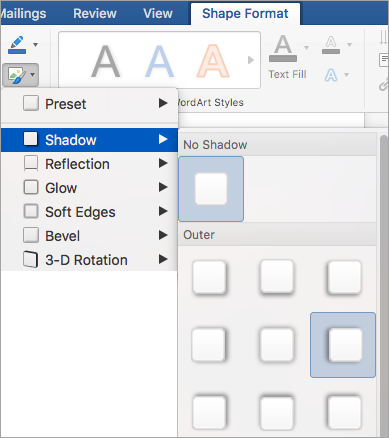
Click your shape, and then click the Shape Format tab.
-
In the Shape Styles group, click Shape Effects, point to an effect category, and then click the effect that you want.
-
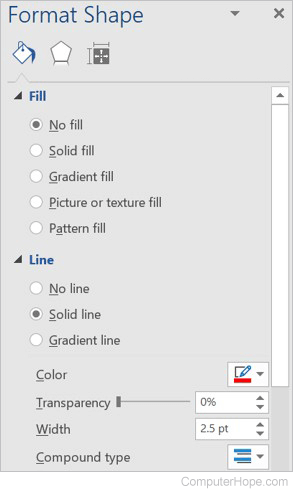
On the Shape Format tab, click Format Pane.
-
In the Format Shape pane, click the Fill & Line tab, and then click either Fill or Line.
-
Drag the Transparency slider to achieve the effect you want.


Click the shape that you want to delete, and then press Delete. To delete multiple shapes, press Command while you click the shapes that you want to delete, and then press Delete.
See also
Change the size of an object
Crop a picture
Move, rotate, or group a picture, text box, or other object
Align objects in Word for Mac
Group or ungroup objects
You can add shapes, such as boxes, circles, and arrows, to your workbooks and presentations. (Word for the web doesn’t support shapes.) To add a shape, select Insert on the ribbon, select Shapes, and then choose a shape.
After you add a shape, you can move it and resize it; add text, bullets, or numbering; and you can change the fill color or outline.
-
On the Insert tab, select Shapes.
-
Select the shape you want from the drop-down gallery.
A default-sized shape is immediately inserted in the middle of the visible page.
-
Select a sizing handle on the perimeter of the shape and drag inward or outward to change the size of the shape.
To create a perfect square or circle (or constrain the dimensions of other shapes), press and hold Shift while you drag.
-
To move the shape, point the mouse at it until the pointer turns into a four-headed arrow. Then click and drag to move the shape where you want it.
When a shape is selected in your document, a Shape tab appears on the toolbar ribbon. It has buttons for things you can do with the shape such as adding a fill color or outline, or choosing a predefined shape style.
Note: If you have the Simplified Ribbon turned off, the tab name in step #4 is Format. For more information on the Simplified Ribbon see The new look of Microsoft 365.

Insert a shape, or click an existing shape, and then enter text, as follows:
-
Right-click the shape and select Edit Text.
A blinking cursor appears in the center of the shape.
-
Type the text you want to add to the shape.
-
To format and align your text, select the Home tab, and then choose options from the Font, Paragraph, or Alignment groups.
Quick Styles let you apply a style to your shape with one click. You’ll find the styles in the Shape gallery.
-
Select the shape you want to change.
-
On the Shape tab (or the Format tab if you have the Simplified Ribbon turned off), open the Shape Style gallery and select the Quick Style you want to use.
Select the down arrow on the end of the gallery to open it and see the complete list of options:
You can pause the mouse pointer over an option in the gallery to see a short description of it.

-
Select the shape you want to change.
-
On the Shape tab (or the Format tab if you have the Simplified Ribbon turned off), select the down arrow next to Fill to open the gallery of fill colors.
-
Select a color.
-
To make the shape transparent, select No Fill at the bottom of the color gallery.
-
Select the shape you want to change.
-
On the Shape tab, (or the Format if you’re still using the classic ribbon) select the down arrow next to Outline to open the gallery of outline colors.
-
Select a color.
-
At the bottom of the gallery there are also options for the thickness (Weight) of the outline, and whether the outline is solid, dotted, or a dashed line. Point at Weight or Dashes to see a pop-out list of options.
Click the shape that you want to delete, and then press the Delete key. To delete multiple shapes, press Ctrl while you select the shapes that you want to delete, and then press Delete.
Add text to an AutoShape
- On the Insert tab, in the Illustrations group, click Shapes, and then click the shape that you want.
- Drag to create the shape.
- The shape is automatically selected.
- On the Drawing Tools tab, in the Insert Shapes group, click Edit Text.
- Type the text that you want.
Contents
- 1 How do you put text in a shape?
- 2 How do I write text in a circle in Word?
- 3 How do I put text in front of a shape in Word?
- 4 How do I write text in a circle shape?
- 5 How do you format shapes in Word?
- 6 How do I put a shape behind a shape in Word?
- 7 How do I put text behind text in Word?
- 8 How do you repeat headers in Word?
- 9 How do I fix shapes in Word?
- 10 How do you merge text and shapes in Word?
- 11 How do I group a text box and shape in Word?
- 12 How do you keep a shape from moving in Word?
- 13 How do you insert text in Word?
- 14 How do I place text over an image in Word?
- 15 Where is the text wrapping in Word?
- 16 How do I put different headers on each page in Word?
- 17 What is header row in Word?
- 18 What is repeat header row in Word?
- 19 How do I make a group in Microsoft Word?
- 20 How do you edit alt text in Word?
How do you put text in a shape?
Right-click anywhere in your shape and click the “Add Text” command. This places an insertion point in the shape where you can type your text. Once you’ve added whatever you want to write, the “Format” tab has tools you can use to give your text a little pop with things like text styles and shading.
How do I write text in a circle in Word?
To journal within a circle:
- Open up MS Word.
- Click on the Oval shape. Click and drag on your page to make the desired size.
- Double click on the shape.
- Click OK.
- Click on the Text Box.
- Click on the Text Box again.
- Click OK.
- Click on the Text Box and drag it over the circle shape so that it is right over it.
How do I put text in front of a shape in Word?
Click the WordArt, shape, or text box that you want to move up or down in the stack. On the Drawing Tools Format tab, click either Bring Forward or Send Backward. You’ll have the choice of moving the object up one layer (Bring Forward) or to the top of the stack (Bring to Front).
How do I write text in a circle shape?
Create curved or circular WordArt
- Go to Insert > WordArt.
- Pick the WordArt style you want.
- Type your text.
- Select the WordArt.
- Go to Shape Format > Text Effects > Transform and pick the effect you want.
How do you format shapes in Word?
Under Text Box Tools, on the Format tab, in the Text Box Styles group, click Change Shape, and then click the shape that you want.
How do I put a shape behind a shape in Word?
Add a color or pattern behind a group of objects, an entire page,…
- On the Insert tab, click the Shapes button, click the shape that you want, and then drag the shape so that it surrounds the group of objects.
- In the Arrange group, point to Send Backward, and then click Send to Back.
How do I put text behind text in Word?
Select the “Behind Text” button under the “With Text Wrapping” section. Once you do, any text on the Word document that got moved around when inserting the image will go back to its original position. Notice that when you select “Behind Text,” two more options become available.
Repeat table header on subsequent pages
- In the table, right-click in the row that you want to repeat, and then click Table Properties.
- In the Table Properties dialog box, on the Row tab, select the Repeat as header row at the top of each page check box.
- Select OK.
How do I fix shapes in Word?
Follow these steps to anchor an object in Word:
- Select an object.
- On the Ribbon’s Format tab, go to the Arrange group and choose Position→More Layout Options.
- Click the Position tab.
- (Optional) Set the position of an object precisely using controls in this dialog.
- Under Options, select the Lock Anchor check box.
How do you merge text and shapes in Word?
Merge shapes
- Select the shapes to merge. Press and hold Shift to select multiple shapes. The Shape Format tab appears.
- On the Shape Format tab, click Merge Shapes, and then pick the option you want. The order in which you select the shapes to merge may affect the options shown to you.
How do I group a text box and shape in Word?
Group shapes, pictures, or other objects
- Press and hold CTRL while you click the shapes, pictures, or other objects to group. You will need to select more than one shape, picture or object in order to enable the Group button.
- Select the Arrange button and choose Group.
How do you keep a shape from moving in Word?
Stop Graphics and Text from Jumping Around
- Display the File tab of the ribbon, then click Options.
- Click Display at the left side of the dialog box.
- Select the Object Anchors check box.
- Click on OK.
- In Print Layout view, select the shape (the block arrow).
How do you insert text in Word?
Go to Insert > Text Box. Click in your file where you’d like to insert the text box, hold your mouse button down, then drag to draw the text box the size that you want. After you’ve drawn the text box click inside it to add text.
How do I place text over an image in Word?
To allow text to wrap over a picture, select the picture. The “Layout Options” menu will be displayed near the picture. Click on the menu and choose “Behind Text.” This option will cause the picture to be treated as background and text will flow over the picture as you type.
Where is the text wrapping in Word?
To wrap text around an image:
- Select the image you want to wrap text around. The Format tab will appear on the right side of the Ribbon.
- On the Format tab, click the Wrap Text command in the Arrange group, then select the desired text wrapping option.
- The text will wrap around the image.
Using sections, you can have a different header on each page of your document or on different groups of pages. When you want a different header on a page, go to the Breaks menu on the Page Layout tab and select Next Page. With the cursor in the new section, activate the page header and add content.
Microsoft Office allows you to mark the first row of a table as table headers in both PowerPoint and Word. The general process is to find the table formatting options in the the ribbon and check Header Row for each table.
Allow rows to break across pages toggles whether the row can be split when the table expands to another page. When turned off, the row will move to the next page entirely instead of splitting. Repeat as header row at the top of each page lets you use the selected row as a header.
How do I make a group in Microsoft Word?
Group shapes, pictures, or objects
- Press and hold CTRL while you select the shapes, pictures, or objects that you want to group. The Wrap Text option for each object must be other than In line with Text.
- Go to Drawing Tools or Picture Tools, on the Format tab, in the Arrange group, select Group. , and then select Group.
How do you edit alt text in Word?
Microsoft Word: Add and Edit Alt Text
- Choose one of the following: Select any image and press the Alt Text button in the Format ribbon tab. Right-click an image and select Edit Alt Text.
- Describe the image content and context. Be accurate and equivalent.
We recently looked at how to insert images into shapes in Microsoft Word. Today, we are going to insert text into shapes in Microsoft Word. First, we will insert text using the shape’s built-in text option. Then, we will use WordArt to place text over the shape, which will create the appearance of text inserted into the shape.
Table of Contents
- How to Insert Text into Shapes (Built-In Method)
- How to Use WordArt to Insert Text into Shapes
Watch all the steps shown here in real time!
Explore more than 200 writing-related software tutorials on my YouTube channel.
The images below are from Word for Microsoft 365. These steps also apply to Word for Microsoft 365 for Mac (a.k.a., Word for Mac), Word 2021, Word 2019, Word 2016, and Word 2013 (PC only). These steps don’t apply to Word for the web.
Important Note: This tutorial assumes you have already created your shape. For information about creating shapes, please see “How to Insert and Modify Shapes in Microsoft Word (PC & Mac).”
How to Insert Text into Shapes (Built-In Method)
- Right-click (PC) or Control-click (Mac) the shape and then select Add Text from the shortcut menu.

- Your cursor will be placed in the center of the shape where you can type your text.

How to Modify the Font
- Select the Home tab.

- Select the text and use the font options in the Font group to adjust the (A) font style, (B) size, and (C) color. You can also add (D) text effects and typography (e.g., drop shadows, reflections, ligatures).

How to Modify the Text Position
- Select the Shape Format tab. (Note that this tab only appears when a shape or the text within a shape is selected.

- Select the dialog box launcher in the WordArt Styles group on a PC (see figure 6) or the Format Pane button on a Mac (see figure 7).


- Select the Text Options tab in the Format Shape pane. (PC users should already be in this tab.)

- Select the Layout & Properties button.

- Use the alignment and margin options to adjust the text’s position in the shape. (Note that these position changes are limited. Use the WordArt method shown below for additional placement control.)

- Select the X to close the Format Shape pane.

Pro Tip: Using this method, you can insert text and an image into the same shape. In addition, the order of insertion doesn’t matter; the text will always appear on the top.
If you are going to insert an image into the shape, I recommend doing so before starting this process.
- Select the Insert tab.

- Select WordArt in the Text group.

- Select a style from the drop-down menu. (This style can be modified later.)

A WordArt text box will appear.

- Type your text into the text box, drag the text box over the shape, and then use the resizing handles to place it over the shape in the desired position.

Pro Tip: Use the Rotation handle at the top of the text box to rotate the text as desired.

How to Modify the Font
- Select the Home tab (see figure 3).
- Select the text and use the font options in the Font group to adjust the font style, size, and color. You can also add text effects and typography (see figure 4).
How to Group the Text and Shape
- Select the WordArt text box and then press and hold the Shift key as you select the shape. Now the text box and the shape should both be selected.

- Right-click (PC) or Control-click (Mac) the text box or shape, and then select Group from the shortcut menu.

- Select Group from the submenu. (If you need to separate the text and shape later, select Ungroup.)

Your shape and text can now be moved throughout your document as one object.
Related Resources
How to Insert and Modify Images in Microsoft Word
How to Save Shapes and Objects as Images in PowerPoint
How to Change the Font, Font Size, and Font Color in Microsoft Word

Microsoft Word makes it easy to add geometric shapes (and a whole lot more) to your document. You can also add text into these shapes, which is handy when you’re creating flowcharts, network diagrams, mind maps, and so on. This being Word, there are plenty of options for doing this, so let’s take a look.
First, you’ll need to insert a shape by going to Insert > Shapes. We’re going to use a nice rounded rectangle, which by default will be filled in with blue.

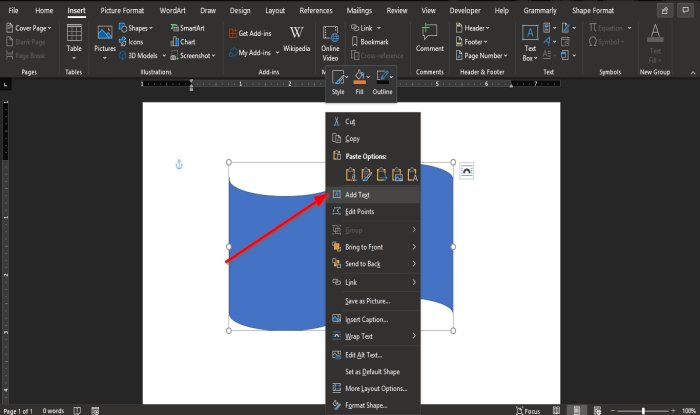
Right-click anywhere in your shape and click the “Add Text” command.
This places an insertion point in the shape where you can type your text. Once you’ve added whatever you want to write, the “Format” tab has tools you can use to give your text a little pop with things like text styles and shading.
You can also select the text and use the standard Font, Paragraph and Styles tools on the Home tab to format your text, just as if it were a normal part of the document. When you right click your text, you’ll find the usual quick options as well.
RELATED: How to Position Images and Other Objects in Microsoft Word
If you’d like a little more control over the placement and boundaries of your text, you can add a text box inside your shape instead. When you insert a new image or select an existing image, Word automatically switches you to the “Format” tab. You’ll see two ways here to insert a text box, both of which add a text box in the same way.
Select one of the options and move the cursor over your image. A yellow “+” mark will replace your pointer. Hold down the left mouse button and drag the “+” mark to create a text box. When the box looks about right, release the left click (don’t worry if the text box isn’t exactly the right size or location, you can change it afterward), and your text box will be created.
You can use the handles (the little squares) around the text box to resize it or select the whole text box to move it around within your shape. Add your text and format it in whatever way you want.
There are also text boxes with preset formatting that you can add by selecting your shape and then clicking Insert > Text Box. We’ve only scratched the surface of what you can do with text boxes here, so if you want to know more check out our guide to text boxes and all the things you can do with them.
RELATED: How to Create and Format a Text Box in Microsoft Word
READ NEXT
- › How to Circle Text in Microsoft Word
- › How to Link Text Boxes in Microsoft Word
- › How to Remove Borders in Microsoft Word
- › HoloLens Now Has Windows 11 and Incredible 3D Ink Features
- › BLUETTI Slashed Hundreds off Its Best Power Stations for Easter Sale
- › Google Chrome Is Getting Faster
- › How to Adjust and Change Discord Fonts
- › The New NVIDIA GeForce RTX 4070 Is Like an RTX 3080 for $599
How-To Geek is where you turn when you want experts to explain technology. Since we launched in 2006, our articles have been read billions of times. Want to know more?
Download PC Repair Tool to quickly find & fix Windows errors automatically
The Shape feature in Microsoft Word allows users to add ready-made shapes to the document, such as Circles, rectangles, and arrows. When the shape is selected, the color and body can be customized to the look you want.
Adding a shape in a Microsoft Word document is easy, but what if you want the text to be inside it. Microsoft Word has a feature that can fit text inside a shape. The text fill shape is like a textbox where you can format the text inside the shape; you can increase and decrease the size of the text, Underline, Bold, italic, and change the font and color of the text. Placing a text into shape is useful when creating flowcharts, network diagrams, and mind maps.
To insert Text into a Shape in Word, follow these steps:
- Open Word document
- Insert Shape
- Right-click and click Add text
- Type or paste the text into the shape
- Click outside the shape
- Save document and exit.
In this tutorial, we will explain how to insert text into a shape; follow the steps below.
Launch Microsoft Word.
Click the Insert tab and click the Shapes button in the Illustration group.
Choose a shape from the list.
Please draw the shape into the document by dragging the mouse and release it when you reach the size you want.
Right-click the shape and click Add text from the context menu.

Enter the text into the shape.
Click outside the shape.
Now, we have a text inside the shape.
You can also format the text inside the shape by changing the font, increasing and decreasing the size, changing the style to underline, italic and bold, and change the color to what you want.
We hope this tutorial helps you understand how to insert text into a shape in Microsoft Word.
Now read: Best Invoice Templates for Word Online to create Business Invoices for free.

Shantel has studied Data Operations, Records Management, and Computer Information Systems. She is quite proficient in using Office software. Her goal is to become a Database Administrator or a System Administrator.
Updated: 03/05/2023 by
When creating a document in Microsoft Word, or a spreadsheet in Microsoft Excel, users can add many types of shapes to highlight important items. Bringing attention to those items helps readers to better understand the content of the document or spreadsheet. After a shape is added, it can be modified by changing features, such as size, color, and fill.
To add and edit a shape in Microsoft Word and Microsoft Excel, select a link below for help.
Add shapes in Microsoft Word
Select the version of Microsoft Word you’re using below and follow the steps to learn how to add a shape in a document.
- Microsoft Word Online.
- Microsoft Word desktop application.
Microsoft Word Online
- In Microsoft Word Online, click the Insert tab at the top of the window.
- On the Insert tab, in the Illustrations group, click the Drawings option.
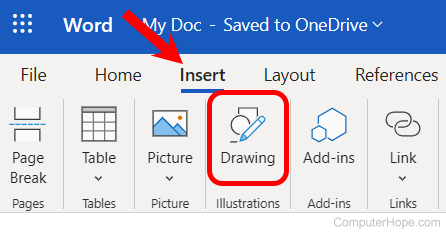
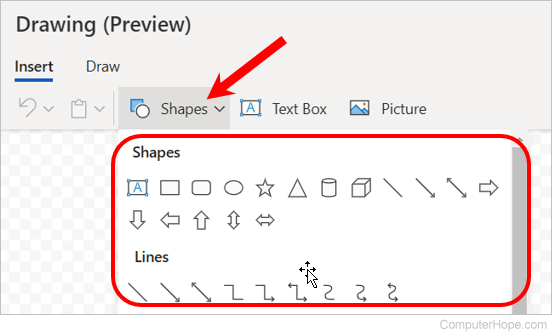
- In the Drawings (Preview) window, click the Shapes option, and select the type of shape you want to add or draw from the drop-down menu that appears.
- After selecting the desired type of shape, draw the shape in the Drawing window, then click the Save and Close button to add the shape in your Word Online document.
Microsoft Word desktop application
- In Microsoft Word, click the Insert tab at the top of the program window.
- On the Insert tab, in the Illustrations group, click the Shapes option.
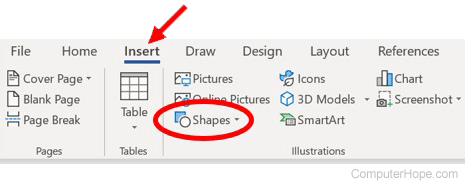
- Select the type of shape you want to add or draw from the drop-down menu that appears.
Add shapes in Microsoft Excel
The following steps help you add a shape to a spreadsheet in Microsoft Excel Online or the desktop application.
- In Microsoft Excel, click the Insert tab at the top of the program window.
- On the Insert tab, click the Illustrations option, then click the Shapes option.
- Select the type of shape you want to add or draw from the drop-down menu that appears.
Edit shapes in Microsoft Word and Excel
- Click the shape to select it.
- Right-click the shape and select Format Shape in the pop-up menu.
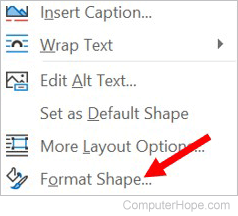
- The Format Shape section opens on the right side of the program window. You can change the shape’s fill, select the type and fill color (or no fill at all), and the size, color, and shape’s lines. You can also add shadow, glow, reflection, and other effects.
Microsoft Word allows users to work with shapes in text. This tool generates the opportunity to present ideas more clearly in writing . Besides, you can create different models in just a few steps.
To manage the function «Shapes» like a professional, you will need to know its advantages and secrets . This will allow you to use it as quickly as possible. All this information can be found in the following paragraphs.
Urban artist we will talk about the difference that exists with an image and we will introduce you to the types of shapes that you can insert in Microsoft Word. Let’s not waste any more time and let’s get started.
What is a shape in Word and how is it different from a picture?
A shape in Word is a predefined drawing that you can insert into your document . This way you will have a set of arrows, flowcharts, geometric figures and calls among other concepts. It will allow you to create different types of charts which will help you to work quickly.
The difference that exists with an image is that in the latter, you cannot modify the internal formats or write inside, as you can with a Microsoft Word form.
What are all the types of shapes that can be inserted in Word?
«UPDATE ✅ Want to learn more about how to insert shapes into Microsoft Word documents? ⭐ ENTER HERE ⭐ and learn all about SCRATCH! ”
The types of shapes you can insert into a Word document are:
- Lines: in this group you will find different types of lines. You can choose between straight, curved or freehand lines. Its termination may or may not be an arrowhead.
- rectangle: you can choose different shapes that will vary the opening of their angles.
- Basic shapes: they are related to triangles, text boxes, pentagons, and other shapes that will help you create emojis and other designs.
- Block arrows: with this type of shape you will be able to choose straight or curved arrows. In addition, you will have different types of formats to which you can add texts.
- Forms of equation: when you need to put the four signs of algebraic operations, you will need to use these types of shapes.
- Organizational chart: is related to the different shapes used in a flowchart. For example, you will find connectors, decisions and computer files.
- Ribbons and stars: the patterns you will find in this group will help you work when you need to incorporate different types of stars into the text. You can add words or numbers to them.
- captions: these shapes are useful when you need to incorporate short sentences into a graphic and want to grab the reader’s attention.
What should we keep in mind before inserting a shape in a Word document?
When you are going to insert a shape into a document, you should know that the default design offered by Word is a blue fill . In case you need to change this format, you will have to use the function “Format shapes”. Also, when you want add a word, you will have to use the tool «Add text» , because the numbers provided by Microsoft Word do not have the possibility of entering texts by default.
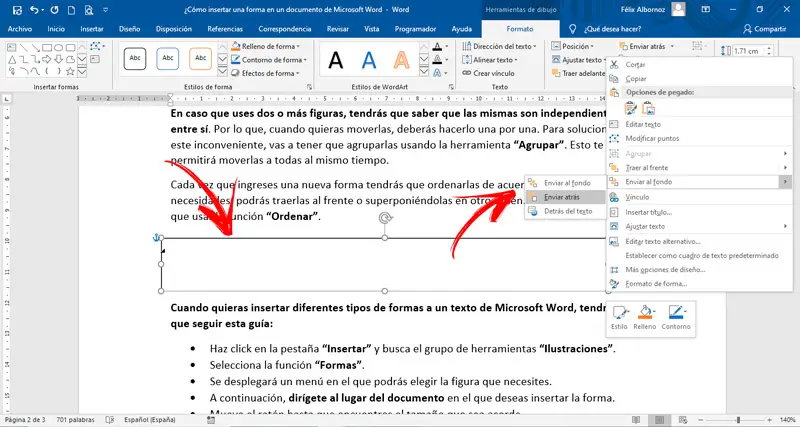
In case you are using two or more digits, you should know that they are independent of each other . So when you want to move them, you have to do it one by one. To resolve this issue, you will need to group them together using the tool «Group» . This will allow you to move them all at the same time.
Every time you enter a new form, you will have to order them according to your needs, you can bring them to the foreground or layer them in another order. For this you will have to use the function «To sourt out» .
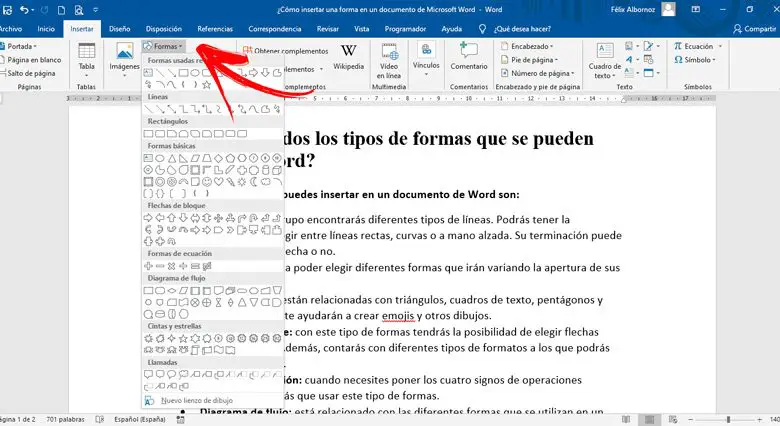
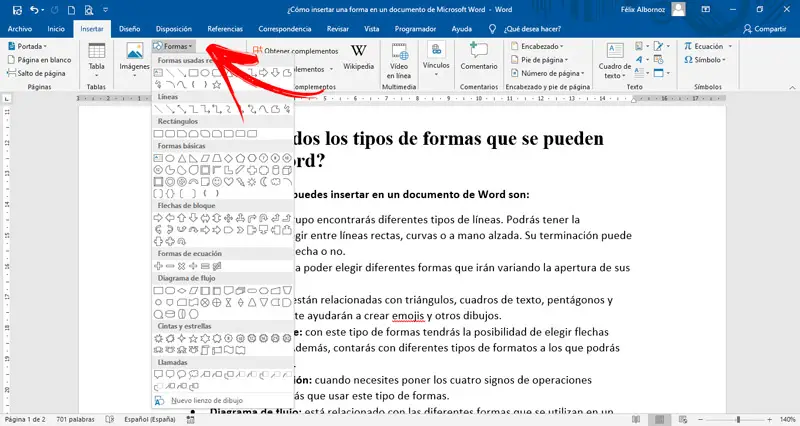
When you want to insert different kinds of shapes in Microsoft Word text, you will need to follow this guide:
- Click on the tab «Insertion» and find the tool group «Illustrations» .
- Select the function «Shapes» .
- A menu will appear where you can choose the figure you need.
- Then, go to the place du document where you want to insert the shape.
- Move the mouse until you find the correct size.
- To move the shape, you will need to select it until you see white dots at its vertices. Then, press the left mouse button and without releasing it, drag the figure to the place that suits you best.
If you have any questions, please leave them in the comments, we will get back to you as soon as possible, and it will be a great help for more community members as well. Thank you!
![]()
Download Article
![]()
Download Article
There is virtually no limit to what can be created using the Auto Shape feature in Microsoft Word. The feature provides a wide variety of geometric shapes that are useful in creating graphic objects, including lines, block arrows, banners, call-outs, equation shapes, symbols and many others. Additionally, a number of pre-formatted effects can be applied to enhance an Auto Shape, such as 3-D, shadow effects, gradient fills and transparencies. This article provides instructions on several ways to use the Microsoft Word Auto Shape feature.
-
1
Explore the Auto Shapes menu. Click the Insert tab on the menu bar, and click on the Shapes button located in the Illustrations menu on the formatting toolbar. Take note of the different Auto Shapes now visible in the pull-down menu.
-
2
Insert an Auto Shape into the document. Select a basic shape for the purposes of this tutorial. Simply click on any shape to begin the insertion process. The Auto Shapes menu will close automatically and the mouse-pointer will be replaced by a thin cross-hair. Click and drag anywhere in the document to insert the auto shape. The chosen shape has been inserted into the document.


Advertisement
-
1
Change the size of an Auto Shape once inserted. Click and drag on any corner of an Auto Shape to make it larger or smaller. The size of the Auto Shape has been adjusted.
-
2
Change the shape of an Auto Shape once inserted. To switch to a different Auto Shape, select the object, click the format tab on the menu bar and click the Edit Shape button, located in the Insert Shapes menu on the formatting toolbar. Select «Change Shape» from the pull-down menu to open the Auto Shapes menu, and make an alternate choice from the menu options. A new Auto Shape has been chosen.
-
3
Move the Auto Shape to a different location in the document. Click and drag anywhere along the edge of the object to move it to a different location within the document. The Auto Shape has been a repositioned within the document.


Advertisement
-
1
Select a fill color for the object. Click the Shape Fill button to fill the object with a solid color. The theme color palette will open. Select a color from the theme color palette or select the «More Fill Colors» option from the pull-down menu to create a custom color. The Colors dialogue box will open.
- Click and drag the cross hair on the right to adjust the hue of the custom color. Move the slider on the right side of the dialogue box up and down to adjust the brightness level of the custom color. Click OK to close the Color dialogue box. The fill color for the Auto Shape has been selected.
-
2
Select a style for the object. Confirm that the object is selected and click the Format tab on the menu bar. Take note of the available options provided in the Shape Styles menu, located on the formatting toolbar. Click on the down pointing arrow in the Shape Styles menu to open the Theme Fills menu.
- Choose a style from among the menu options. A preset style for the Auto Shape has been chosen.


Advertisement
-
1
Adjust the style of the object’s outline. Confirm that the object is selected and click the format tab on the menu bar. Click the Shape Outline button, located in the Shape Styles menu on the formatting toolbar. Select the «More lines» option from the pull-down submenu. The Format Shape dialogue box will open.
- Adjust the compound type, dash type, cap type or join type of the outline as desired and click OK to exit the dialogue box. The outline for the Auto Shape has been chosen.
-
2
Adjust the width of the object’s outline. Confirm that the object is selected and click the format tab on the menu bar. Click the Shape Outline button, located in the Shape Styles menu on the formatting toolbar. Change the thickness of the outline by selecting the «Weight» option from the Shape Outline pull-down menu. The Line Weight sub-menu will open.
- Choose a thickness from the options available or select the «More lines» option from the pull-down submenu. The outline’s width has been selected.
-
3
Adjust the color of the object’s outline. Confirm that the object is selected and click the format tab on the menu bar. Click the Shape Outline button, located in the Shape Styles menu on the formatting toolbar.
- Select a color from the color palette that appears in the pull-down menu, or click on the «More Colors» option to open the Colors dialogue box and create a custom color. A color has been chosen for the Auto Shape’s outline.


Advertisement
-
1
Apply preset effects to the object. Confirm that the object is selected and click the Effects button, located in the Illustrations menu on the formatting toolbar. Take note of the different effect presets visible in the pull-down menu. Open the sub-menus for each preset effect category by rolling the mouse-pointer over each category title.
- Browse through the options for each category and click on an effect to apply it to the Auto Shape. Change the selected effect by clicking on a different effect option under 1 of the effect categories. A preset effect has been selected.

-
1
Add text to the object. Right click the Auto Shape and select «Add text» from the pull-down menu. A cursor will appear in the center of the object. Type the desired text and click enter. To change the text formatting, select the text and choose from the available text formatting options on the Home tab.
- Choose a pre-formatted style from the Styles menu; change the alignment, spacing or indentation from the paragraph menu; and adjust the font, color, size or effects from the Font menu, located in the Home formatting toolbar. Text has been added to the Auto Shape.

Advertisement
Add New Question
-
Question
Can I put a picture in autoshape?

Yes, you may fill the autoshape with a picture.
-
Question
How do you delete a shape?
Select the shape and right-click; select the «delete» option. If you don’t see it, you can cut the image using the same steps.
-
Question
How do I add bullets to a list in an autoshape?
Right click in the autoshape to add text (unfortunately it adds a rectangle and does not follow the autoshape outline). Click on the bullet icon — done.
See more answers
Ask a Question
200 characters left
Include your email address to get a message when this question is answered.
Submit
Advertisement
Video
Thanks for submitting a tip for review!
About This Article
Thanks to all authors for creating a page that has been read 132,803 times.
Is this article up to date?
Lesson 20: Shapes
/en/word2013/formatting-pictures/content/
Introduction
You can add a variety of shapes to your document, including arrows, callouts, squares, stars, and flowchart shapes. Want to set your name and address apart from the rest of your resume? Use a line. Need to create a diagram showing a timeline or process? Use flowchart shapes. While you may not need shapes in every document you create, they can add visual appeal and clarity.
Optional: Download our practice document.
To insert a shape:
- Select the Insert tab, then click the Shapes command. A drop-down menu of shapes will appear.
- Select the desired shape.
 Selecting a shape
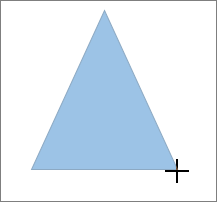
 - Click, hold, and drag in the desired location to add the shape to your document.
 Inserting a new shape
If you want, you can enter text in a shape. When the shape appears in your document, you can begin typing. You can then use the formatting options on the Home tab to change the font, font size, or color of the text.
 Entering text in a shape
To resize a shape:
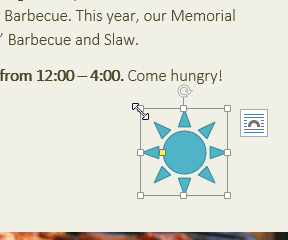
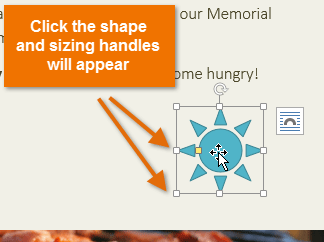
- Select the shape you want to resize. Sizing handles will appear.
 Clicking the shape
 - Click, hold, and drag the sizing handles until the shape is the desired size. You can use the corner sizing handles to change the shape’s height and width at the same time.
 Resizing the shape

Some shapes also have one or more yellow handles that can be used to modify the shape. For example, with star shapes you can adjust the length of the points.
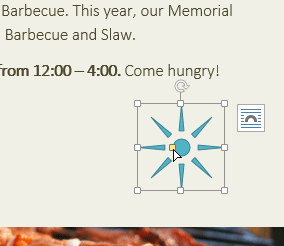 Modifying the shape
To rotate the shape, click, hold, and drag the rotation handle.
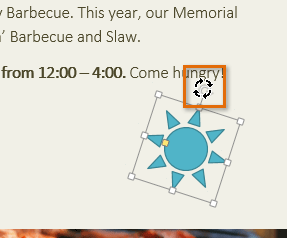 Rotating the shape
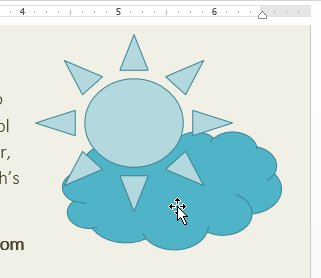
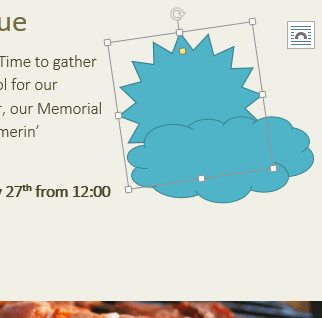
To change the order of shapes:
If one shape overlaps another, you may need to change the ordering so the correct shape appears in front. You can bring a shape to the front or send it to the back. If you have multiple images, you can use Bring Forward or Send Backward to fine tune the ordering. You can also move a shape in front of or behind text.
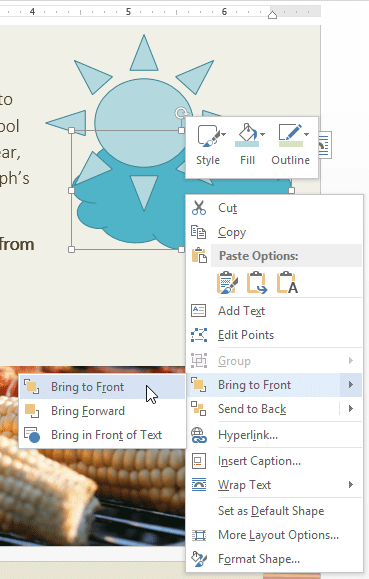
- Right-click the shape you want to move. In our example, we want the cloud to appear in front of the sun, so we’ll right-click the cloud.
 Right-clicking the shape
 - In the menu that appears, hover over Bring to Front or Send to Back. Several ordering options will appear. Select the desired ordering option. In this example, we’ll choose Bring to Front.
 Selecting an ordering option
 - The order of the shapes will change.
 The reordered shapes

In some cases, the ordering option you select will not affect the ordering of the shapes. If this happens, try selecting the same option again or try a different option.
If you have many shapes placed on top of each other, it may be difficult to select an individual shape. The Selection Pane allows you to select a shape and drag it to a new location. To access the Selection Pane, click Selection Pane on the Format tab.
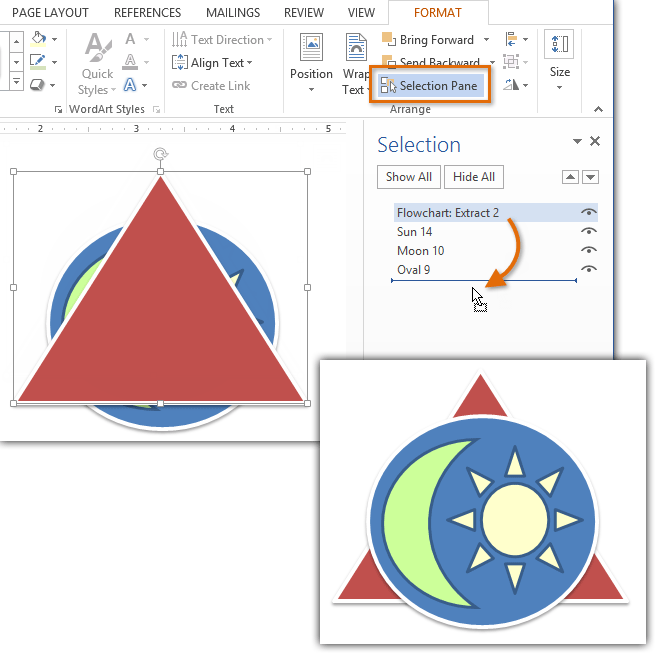 Changing the order of a shape in the Selection Pane
Modifying shapes
Word allows you to modify your shapes in a variety of ways so you can tailor them to your projects. You can change a shape into a different shape, format a shape’s style and color, and add shadow effects.
To change to a different shape:
- Select the shape you want to change. The Format tab will appear.
- On the Format tab, click the Edit Shape command. In the menu that appears, hover the mouse over Change Shape and select the desired shape.
 Changing a shape
 - The new shape will appear.
 The new shape

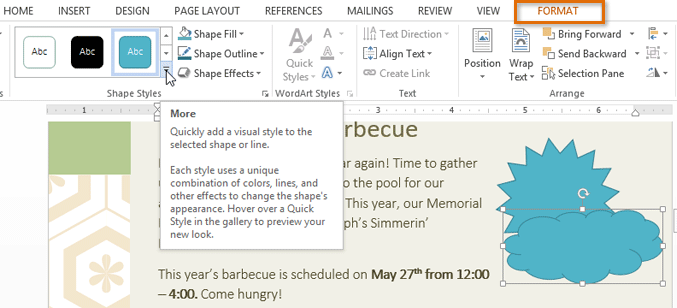
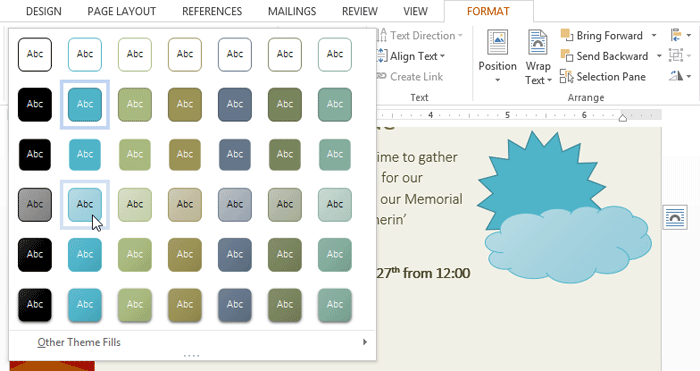
To change the shape style:
Choosing a shape style allows you to apply preset colors and effects to quickly change the appearance of your shape.
- Select the shape you want to change.
- On the Format tab, click the More drop-down arrow in the Shape Styles group.
 Changing the shape style
 - A drop-down menu of styles will appear. Select the style you want to use.
 Selecting a shape style
 - The shape will appear in the selected style.
To change the shape fill color:
- Select the shape you want to change.
- On the Format tab, click the Shape Fill drop-down arrow. The Shape Fill menu appears.
- Move the mouse over the various colors. Select the color you want to use. To view more color options, select More Fill Colors.
 Changing the shape fill color
 - The shape will appear in the selected fill color.
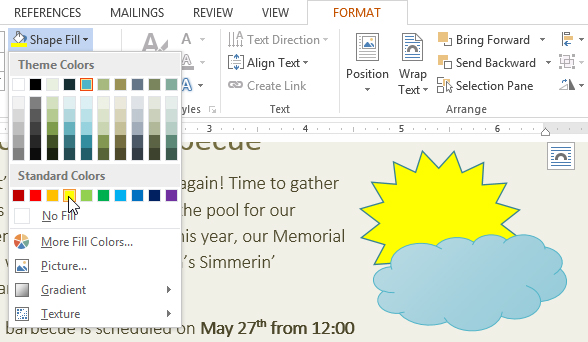
If you want to use a different type of fill, select Gradient or Texture from the drop-down menu. You can also select No Fill to make it transparent.
To change the shape outline:
- Select the shape you want to change.
- On the Format tab, click the Shape Outline drop-down arrow. The Shape Outline menu will appear.
- Select the color you want to use. If you want to make the outline transparent, select No Outline.
 Changing the shape outline color
 - The shape will appear in the selected outline color.
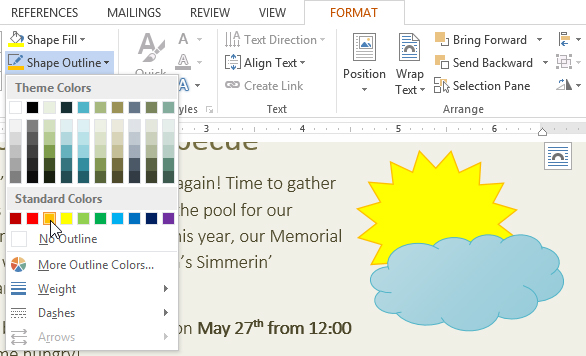
From the drop-down menu, you can change the outline color, weight (thickness), and whether or not it is a dashed line.
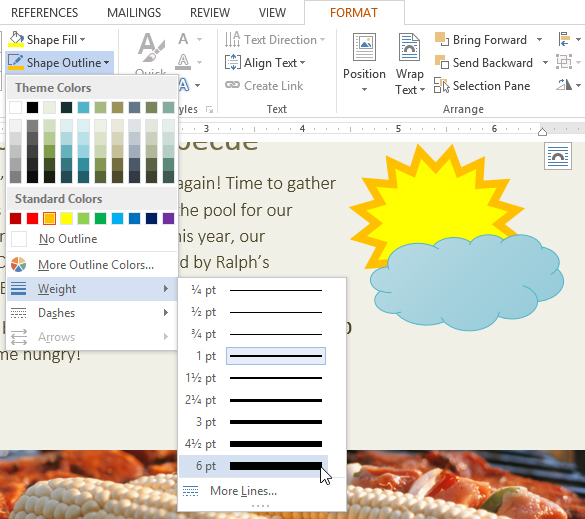 A thicker line
To change shadow effects:
Adding a shadow to a shape can make it appear as though it is floating above the page, and it can help to add contrast between the shape and the background.
- Select the shape you want to change.
- On the Format tab, click the Shape Effects drop-down arrow. In the menu that appears, hover the mouse over Shadow and select the shadow you want to use.
 Choosing a shadow type
 - The shape will appear with the selected shadow.
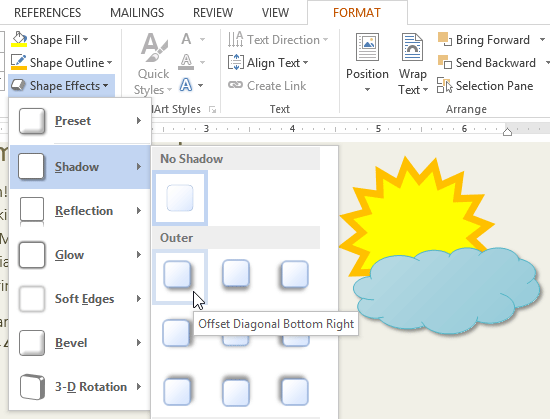
To adjust the shadow color, size, distance and more, select Shadow Options from the drop-down menu. The Format Shape pane will appear on the right side of the Word window, allowing you to customize the shadow.
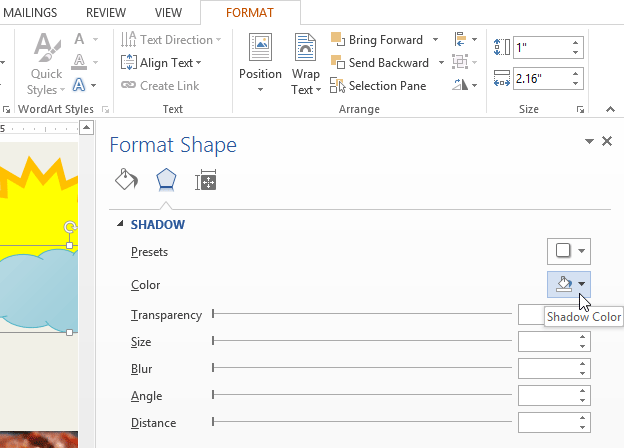 The Format Shape pane
3D effects
There are two kinds of effects you can apply to your shapes to give them a 3D appearance: 3-D Rotation and Bevel. 3-D Rotation gives the appearance that you are viewing an object from a different angle, and it can be applied to any shape. Bevel adds thickness and a rounded edge to shapes, but it doesn’t work with every type of shape.
To add 3-D Rotation:
- Select the shape you want to change.
- On the Format tab, click the Shape Effects drop-down arrow. In the menu that appears, hover the mouse over 3-D Rotation and select the desired 3-D effect.
 Choosing a 3-D effect
 - The shape will appear in the selected 3-D Rotation effect.

If you want, you can customize 3-D Rotation. Select 3-D Rotation Options… from the drop-down menu, and the Format Shape pane will appear on the right side of the Word window. From here, you can adjust the rotation values.
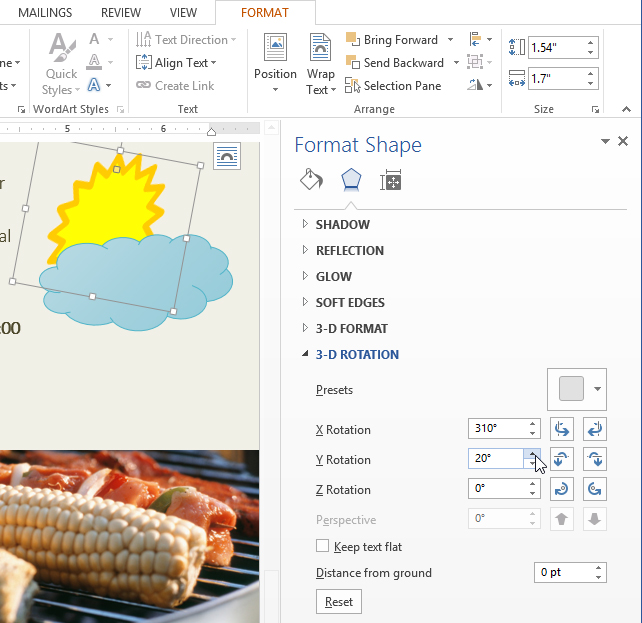 Customizing the 3-D rotation
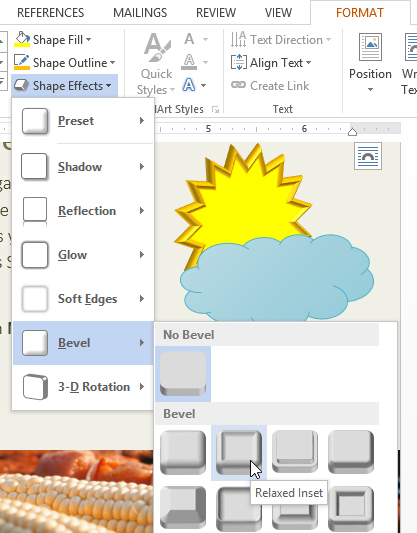
To add a bevel:
- Select the shape you want to change.
- On the Format tab, click the Shape Effects drop-down arrow. In the menu that appears, hover the mouse over Bevel and select the desired bevel preset.
 Choosing a bevel preset
 - The shape will appear in the selected bevel effect.
If you want, you can customize the bevel effect. Select 3-D Options… from the drop-down menu. The Format Shape pane will appear on the right side of the Word window. From here, you can modify the width, height, and depth of a bevel. You can also change the shape’s material to give it a metal, plastic, or translucent appearance, as well as choose the lighting type to change how the shape is illuminated.
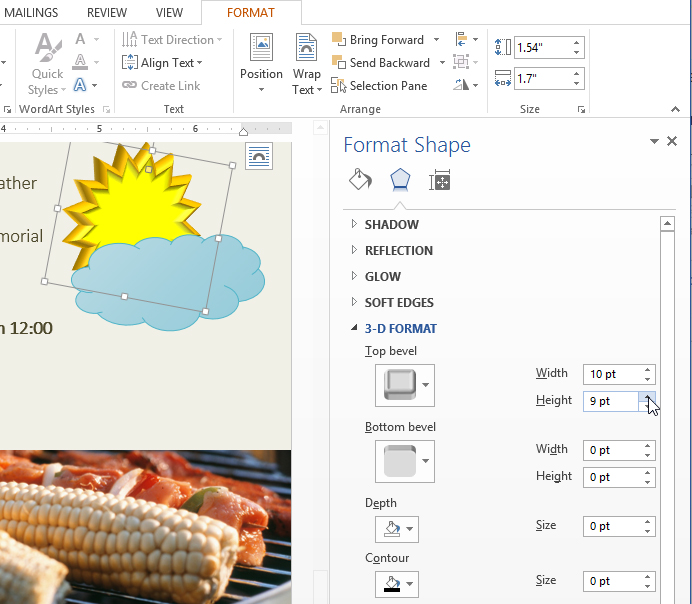 Customizing the bevel
Challenge!
- Create a new Word document. If you want, you can use our practice document.
- Insert a two or three shapes. If you’re using the example, insert a Lightning Bolt shape on the cloud.
- Select a shape and resize it. If you’re using the example, resize the cloud so it appears larger.
- Place one shape on top of the other, and try changing the order of the shapes. If you’re using the example, try changing the order of the shapes so the Lightning Bolt is behind the Cloud.
- Select a shape, and change it to a different shape. If you’re using the example, try changing the Moon into a Sun.
- Select a shape, and try changing the shape style, fill color, and outline.
- Try various shadow effects.
- Try various 3D effects.
/en/word2013/text-boxes-and-wordart/content/