
Write great papers with Microsoft Word
You may already use Microsoft Word to write papers, but you can also use for many other tasks, such as collecting research, co-writing with other students, recording notes on-the-fly, and even building a better bibliography!
Explore new ways to use Microsoft Word below.
Getting started
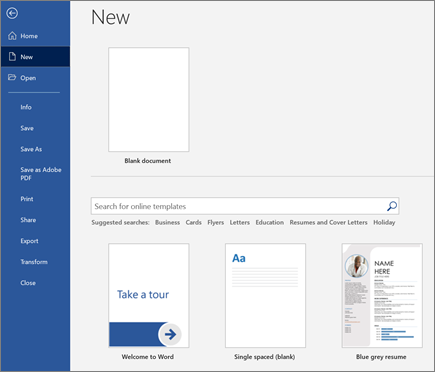
Let’s get started by opening Microsoft Word and choosing a template to create a new document. You can either:
-
Select Blank document to create a document from scratch.
-
Select a structured template.
-
Select Take a tour for Word tips.
The basics
Next, let’s look at creating and formatting copy. You can do so by clicking onto the page and beginning to type your content. The status bar at the bottom of the document shows your current page number and how many words you’ve typed, in case you’re trying to stay maintain a specific word count.

-
To format text and change how it looks, select the text and select an option on the Home tab: Bold, Italic, Bullets, Numbering, etc.
-
To add pictures, shapes, or other media, simply navigate to the Insert tab, then select any of the options to add media to your document.
-
Word automatically saves your content as you work, so you don’t have to stress about losing your progress if you forget to press Save.
Cool stuff
Here are some of the advanced tools you can try out while using Microsoft Word.
Type with your voice
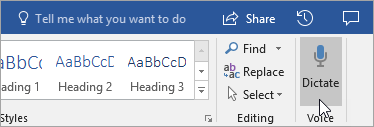
Have you ever wanted to speak, not write, your ideas? Believe it or not, there’s a button for that! All you have to do is navigate to the Home tab, select the Dictate button, and start talking to “type” with your voice. You’ll know Dictate is listening when the red recording icon appears.
Tips for using Dictate
-
Speak clearly and conversationally.
-
Add punctuation by pausing or saying the name of the punctuation mark.
-
If you make a mistake, all you have to do is go back and re-type your text.
Finding and citing sources
Get a head start on collecting sources and ideas for a big paper by searching key words in Researcher in the References tab of your document.
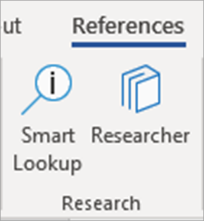
Researcher uses Bing to search the web and deliver high-quality research sources to the side of your page. Search for people, places, or ideas and then sort by journal articles and websites. Add a source to your page by selecting the plus sign.
As you write, Researcher saves a record of your searches. Just select My Research to see the complete list.
Citations
Keep track of all your sources by using Word’s built-in bibliography maker. Simply navigate to the References tab.
-
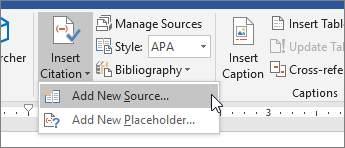
First, choose the style you want your citations to be in. In this example, we’ve selected APA style.
-
Select Insert Citation and Add New Source.
-
In the next window, choose what kind of work you’re citing—an article, book, etc.—and fill in the required details. Then select OK to cite your source.
-
Keep writing. At the ends of sentences that need sources, select Insert Citation to keep adding new sources, or pick one you already entered from the list.
As you write, Word will keep track of all the citations you’ve entered. When you’re finished, select Bibliography and choose a format style. Your bibliography will appear at the end of your paper, just like that.
Make things look nice
Make your report or project look extra professional in the Design tab! Browse different themes, colors, fonts, and borders to create work you’re proud of!
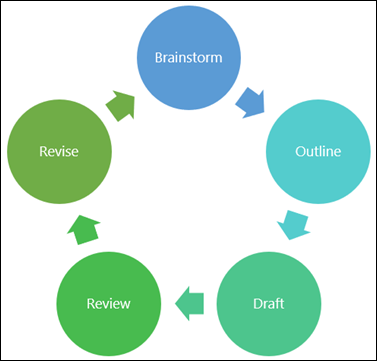
Illustrate a concept with a chart or a model by navigating to the Insert tab and choosing SmartArt. In this example, we chose Cycle and filled in text from the writing process to make a simple graphic. Choose other graphic types to represent hierarchies, flow charts, and more.
To insert a 3D model, select Insert > 3D Models to choose from a library of illustrated dioramas from different course subjects and 3D shapes.
Invite someone to write with you
If you’re working on a group project, you can work on a document at the same time without emailing the file back and forth. Select Share at the top of your page and create a link you can send to other students.
Now, everybody can open the same file and work together.
Keep learning
Check out more Microsoft Word training and support
Microsoft paper and report templates
Need more help?
Want more options?
Explore subscription benefits, browse training courses, learn how to secure your device, and more.
Communities help you ask and answer questions, give feedback, and hear from experts with rich knowledge.
This reference guide provides some tips to format academic papers in Microsoft Word. To give you an opportunity to practice proofreading, we have left a few spelling, punctuation, or grammatical errors in the text. See if you can spot them! If you spot the errors correctly, you will be entitled to a 10% discount.
-
Document Margins of Microsoft Word
-
Indentation of Microsoft Word Documents
-
How to Set Font Settings for Academic Papers in Microsoft Word
-
How to Change the Default Font of Your Academic Paper
-
How to Format Page Numbers for Academic Papers
-
Document Spacing of Academic Papers in Microsoft Word
-
How to Format Paragraph Spacing for Academic Papers
-
How to Create a New Page or Insert a Page Break in Microsoft Word
This reference guide will explain how to format your academic documents in Microsoft Word 2022, giving you the fundamental rules for formatting your academic papers as described in most guidelines, such as MLA and APA styles. The rules discussed in this guide apply to most of the academic papers you will submit as college assignments or articles for journals; however, keep in mind that some of your professors may want you to follow specific standards that may differ from the rules here. Adopting standard formatting for your academic papers indicates that you comprehend the rules of your college and therefore helps to improve your own credibility.
These rules and instructions can be applied to all versions of Microsoft Word for Mac and Windows. The tools, however, cannot be found at the same place on the toolbar at the top of your document.
Document Margins of Microsoft Word
Microsoft Word documents generally come with the default setting for margins. Check your default setting if it is to have different left and right margin. If so, change the default setting. Suppose that the paper you need to submit for review or grading should have 3.0 cm margins all around.
Here are the instructions you should follow:
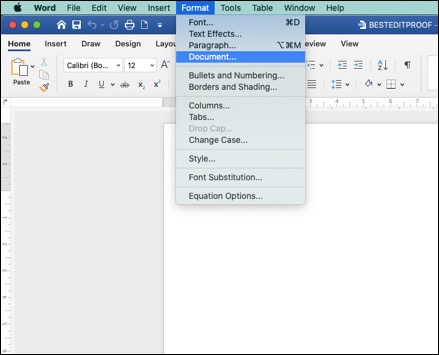
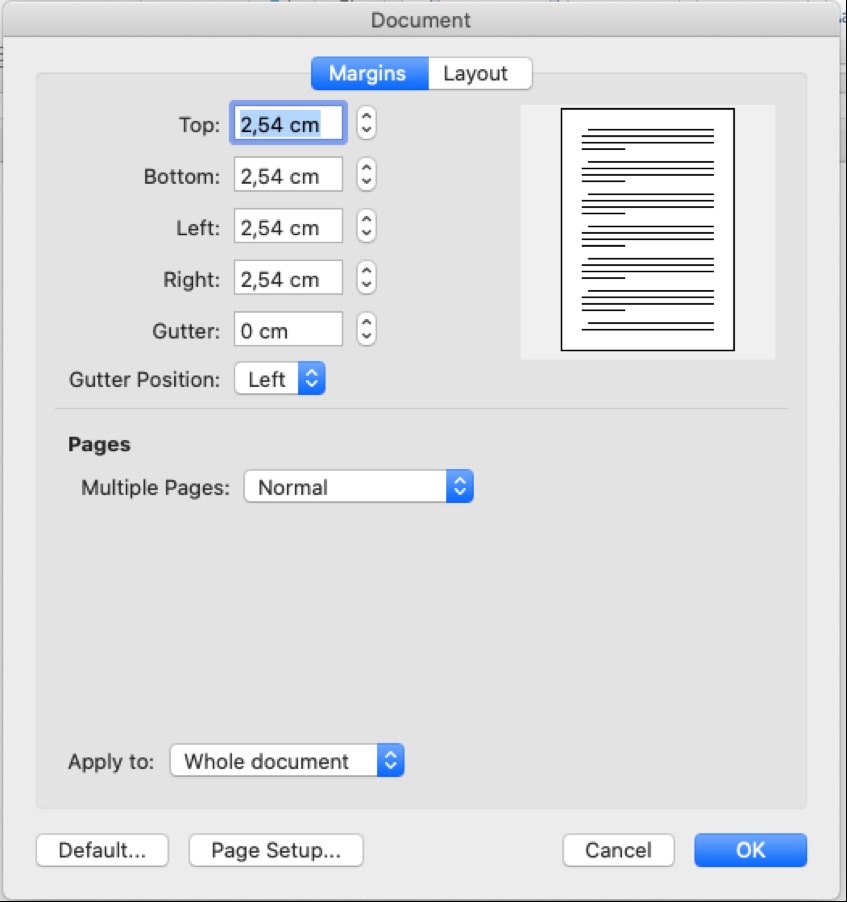
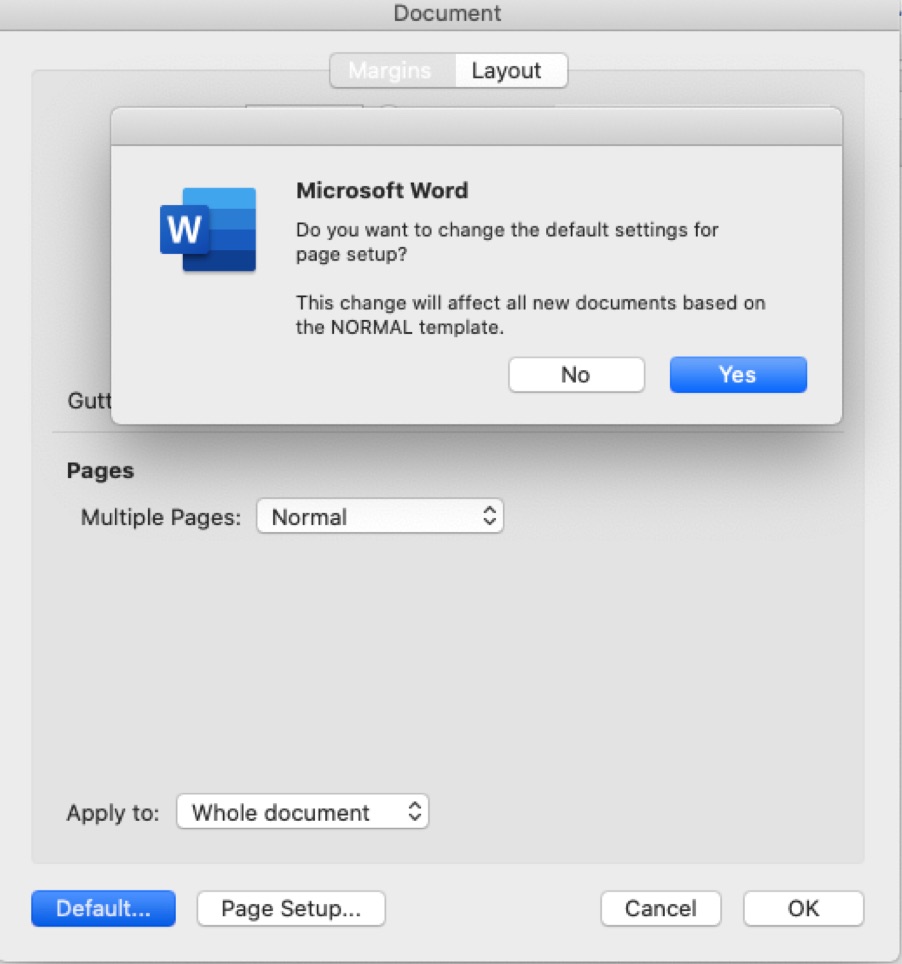
Go to the Format menu at the top, scroll down to Document, change the margins, click on the Default button, and accept the change to the Normal template.
Make sure you leave the gutter set to 0 cm; otherwise, your document formatting will be messed up.
Then, make your selection.
Indentation of Microsoft Word Documents
Suppose that you want the first line of each paragraph to be automatically indented. Here are the instructions to follow:
To change the indentation format for an academic paper in Microsoft Word, choose Select All from the Edit menu, or press the combinations of ⌘ A.
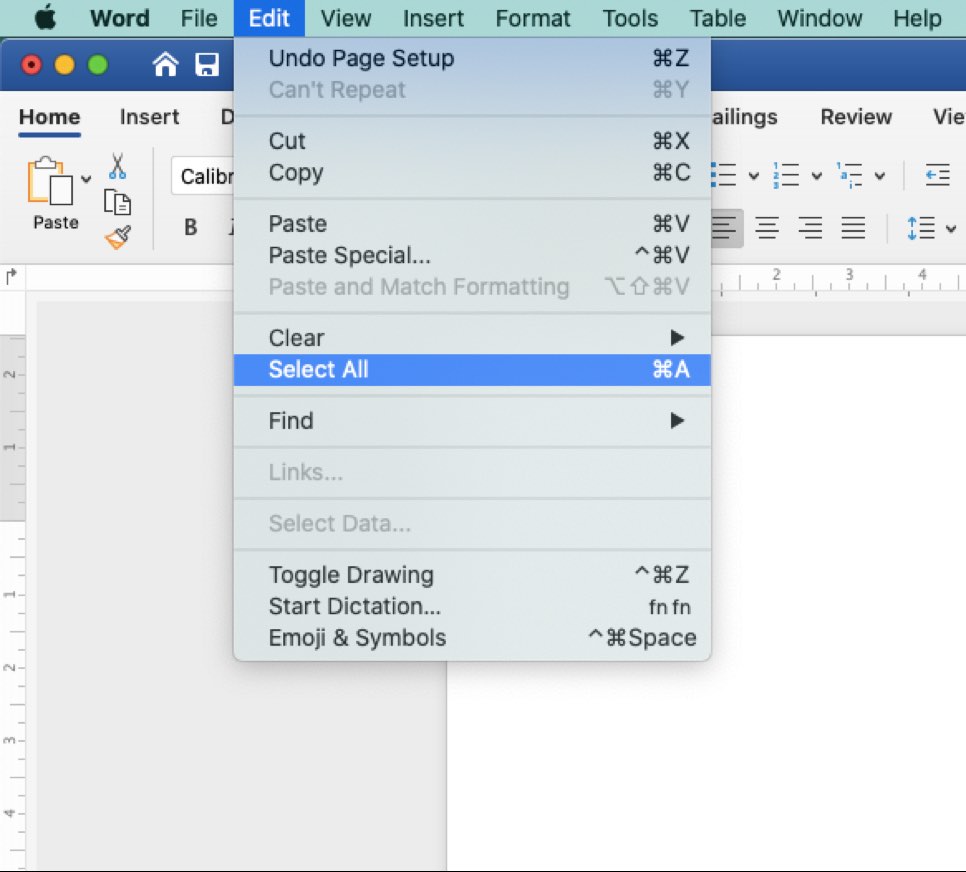
Then go to the Format menu, select Paragraph from the drop-down menu (or press the key combinations of ⌥⌘M).
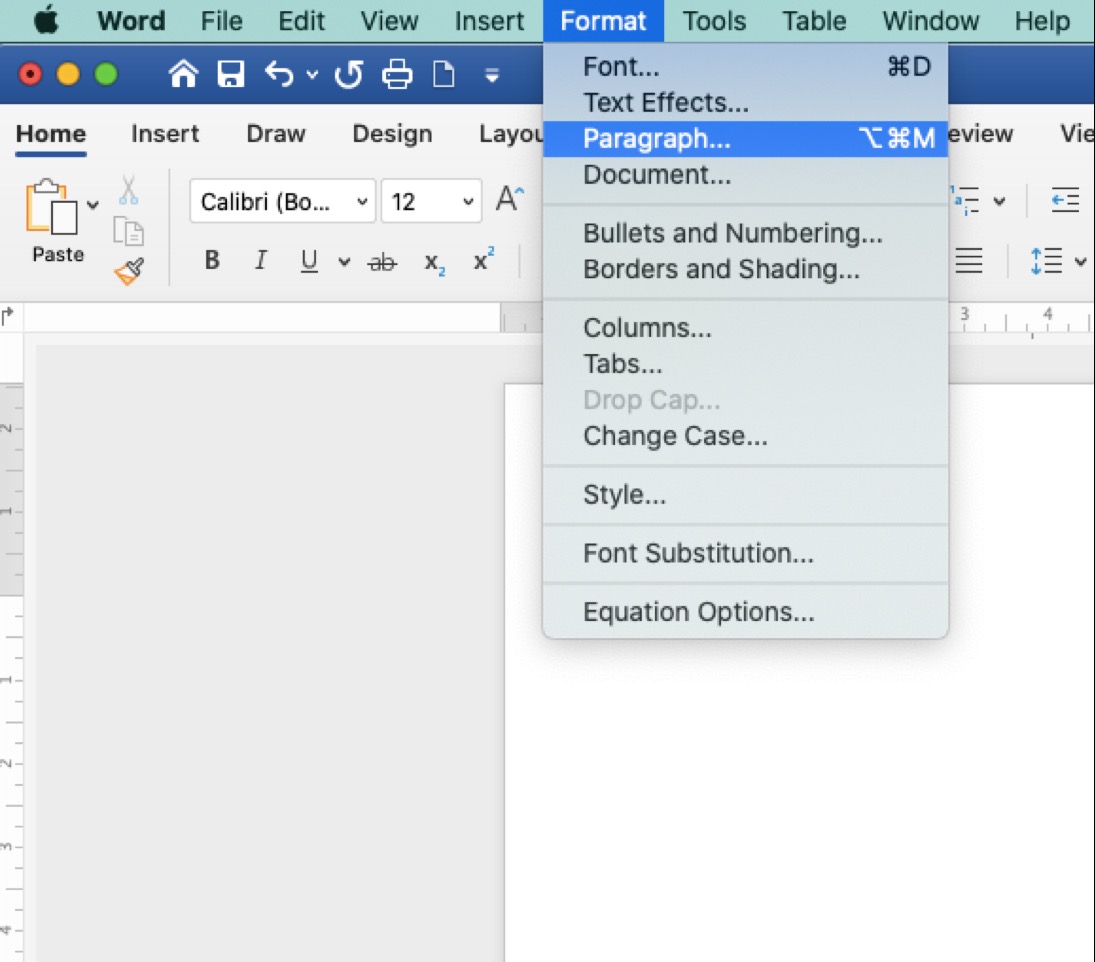
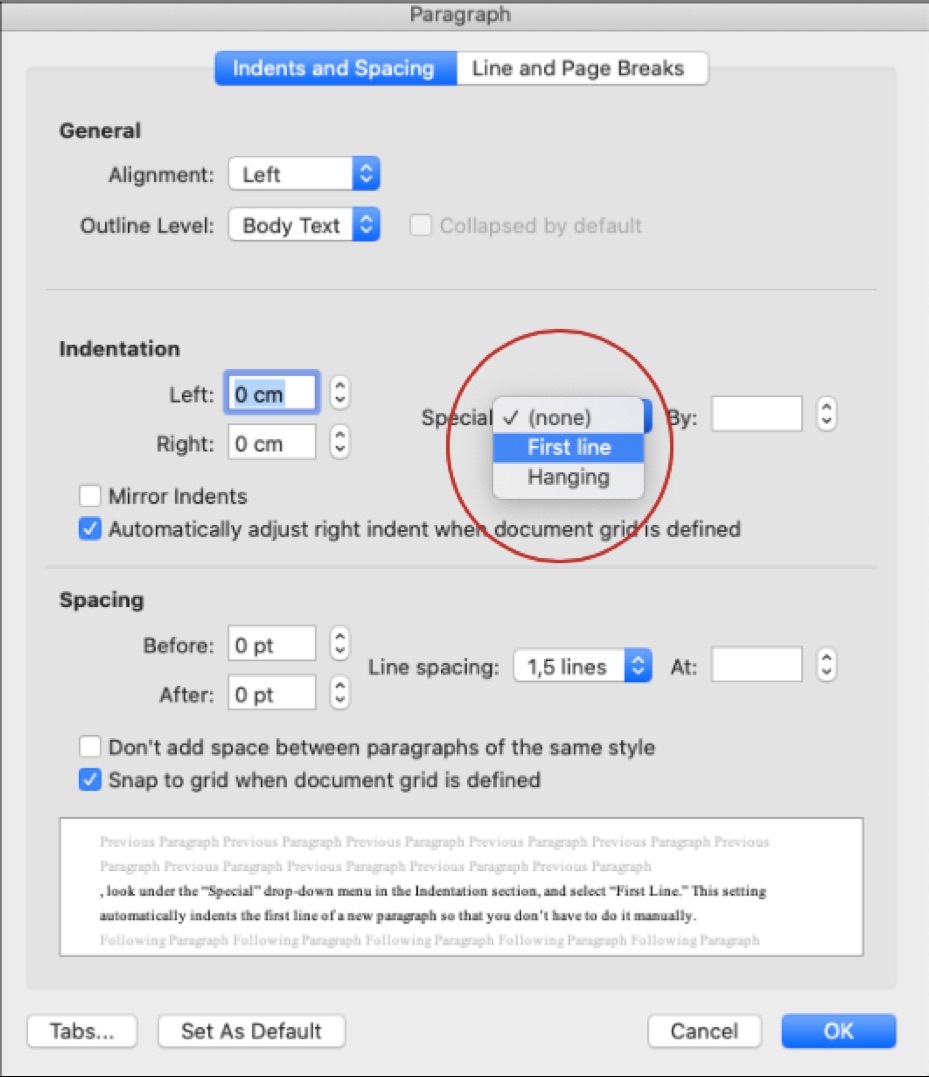
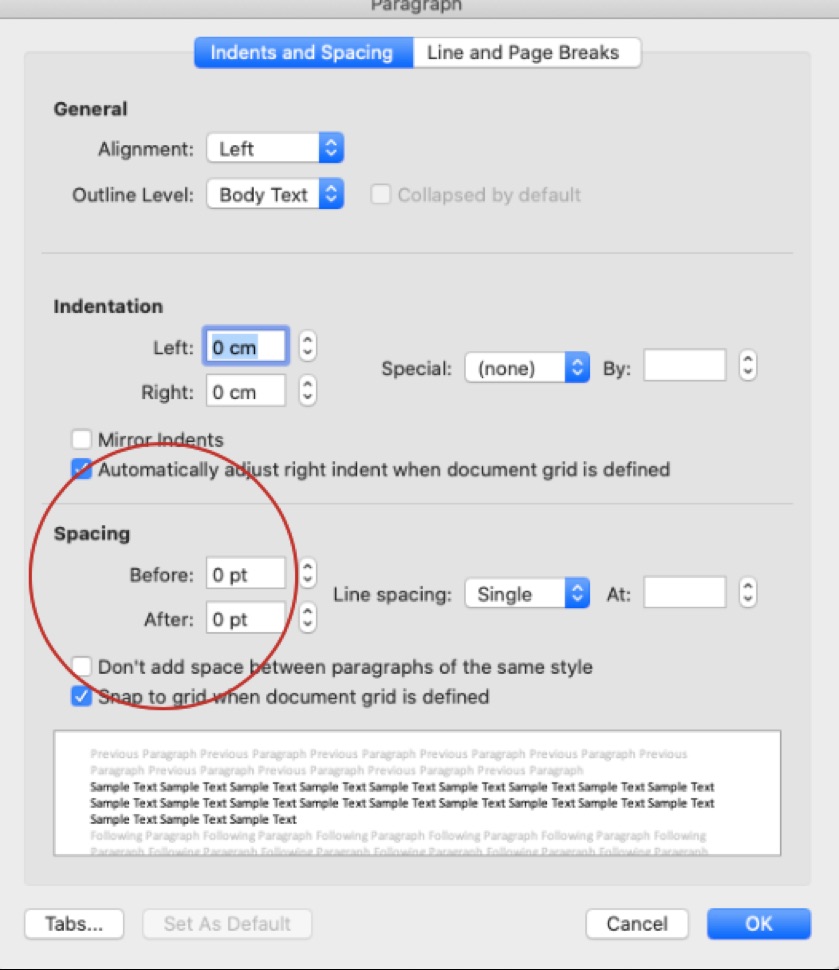
Indents and Spacing menu will be selected automatically. Under this menu, go to the Special drop-down menu and select First line. This setting automatically indents the first line of the new paragraph of your academic paper so that you do not have to set it manually each time.
How to Set Font Settings for Academic Papers in Microsoft Word
Guidelines may adopt different font settings for academic papers. For instance, a variety of fonts are permitted in APA Style papers. Font options in APA Style include sans serif fonts, such as 11-point Calibri, 11-point Arial, or 10-point Lucida Sans Unicode, serif fonts, such as 12-point Times New Roman, 11-point Georgia, or normal (10-point) Computer Modern (the default font for LaTeX).
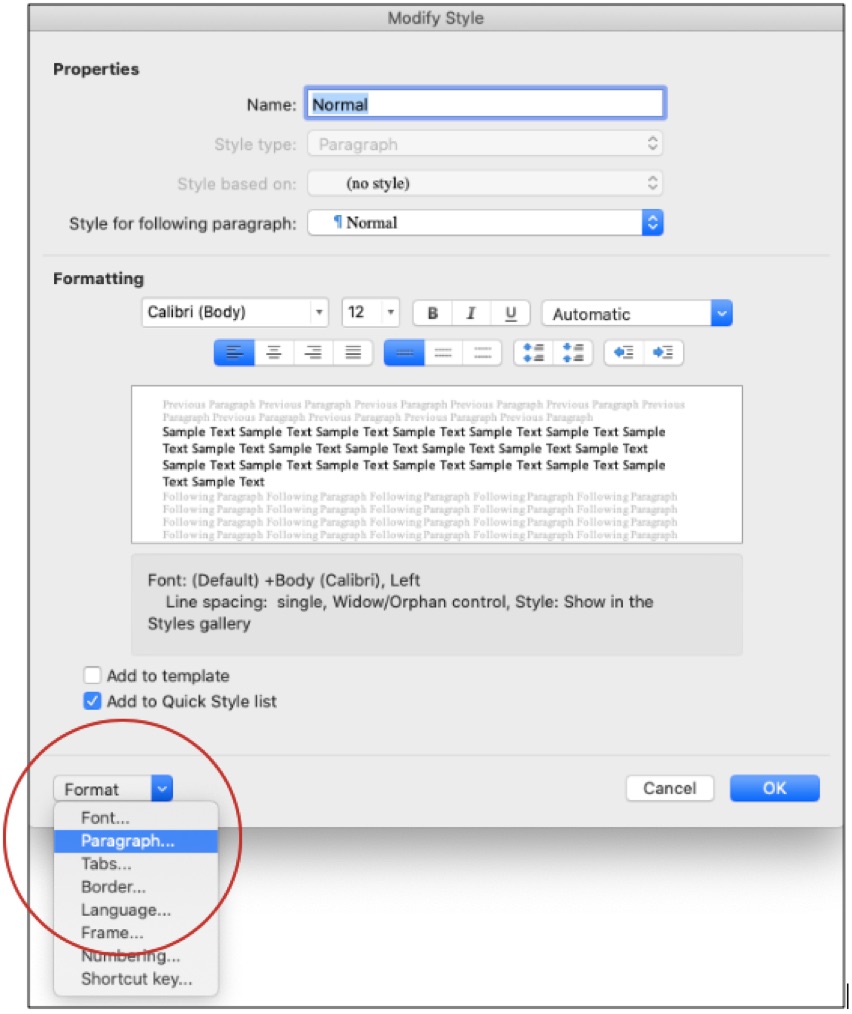
To change it, go to the Format menu, select Style under the drop-down menu.
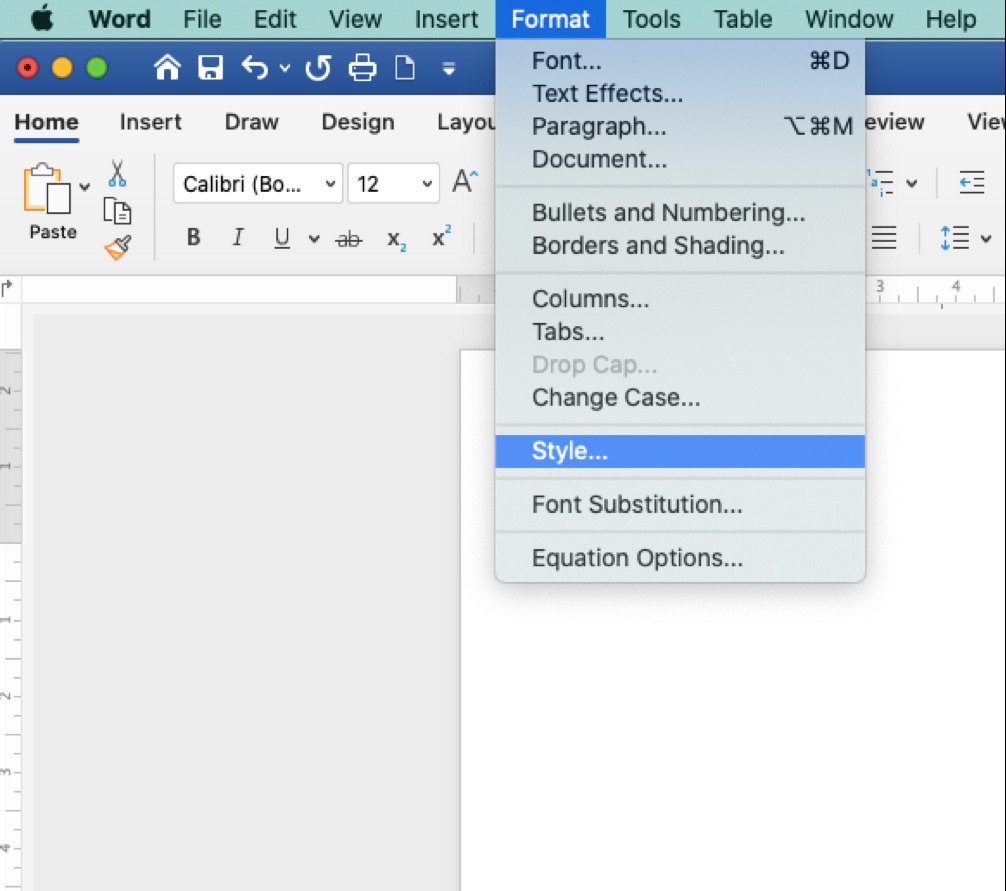
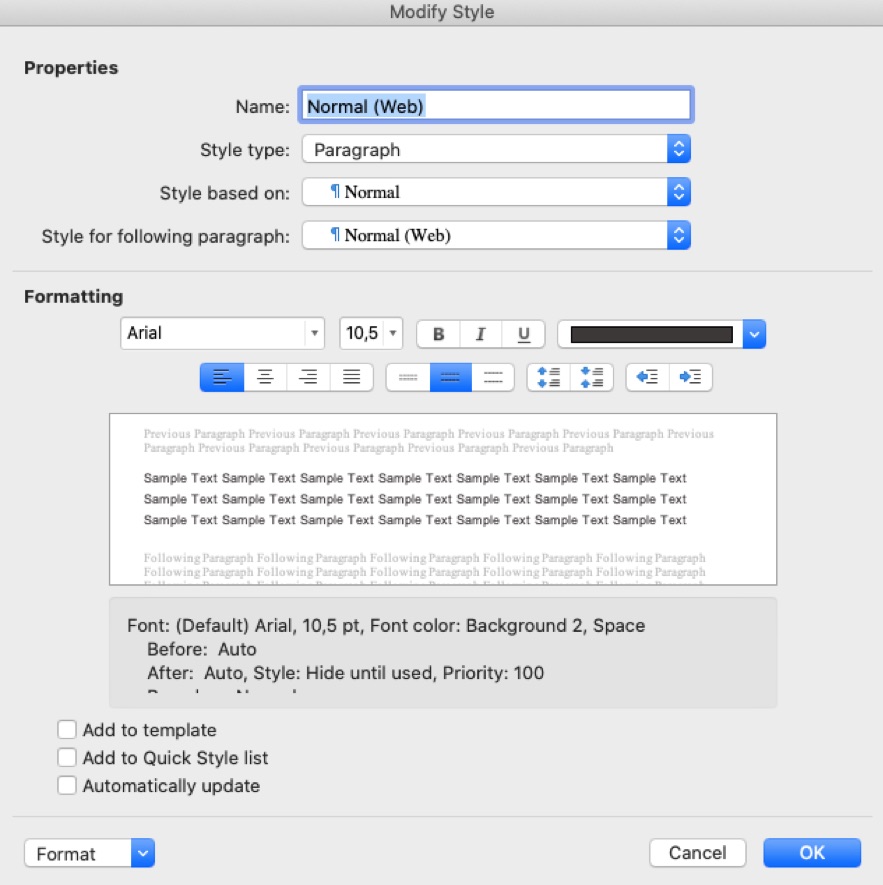
Make sure Normal is selected from the list of styles, and click Modify. Choose your preferred font and size from the Formatting menu.
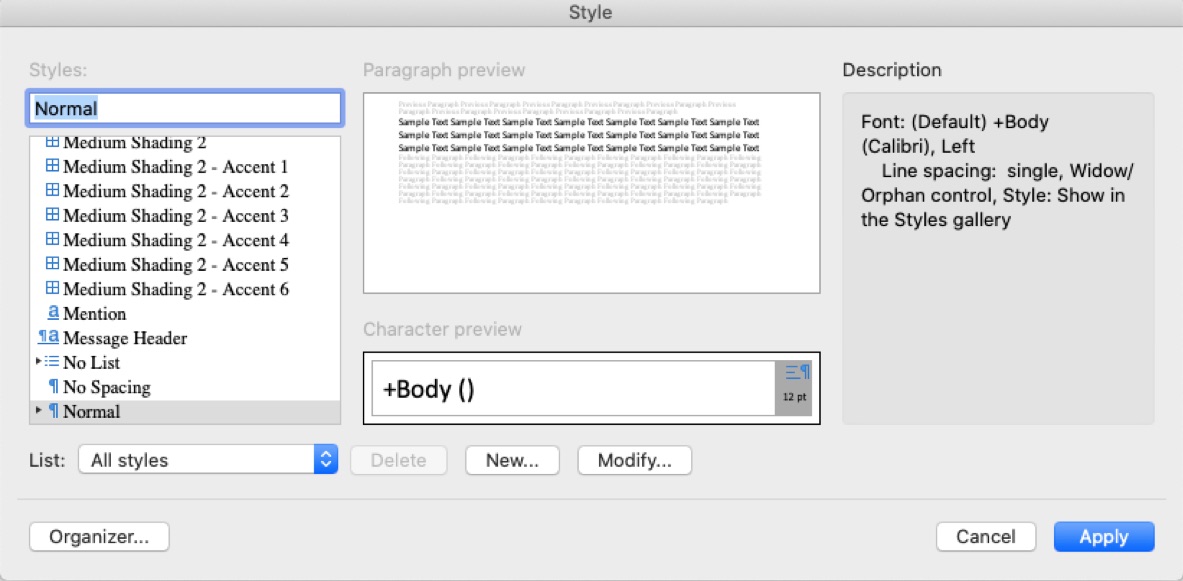
Click OK to make the change to your default settings. You may name it as you wish.
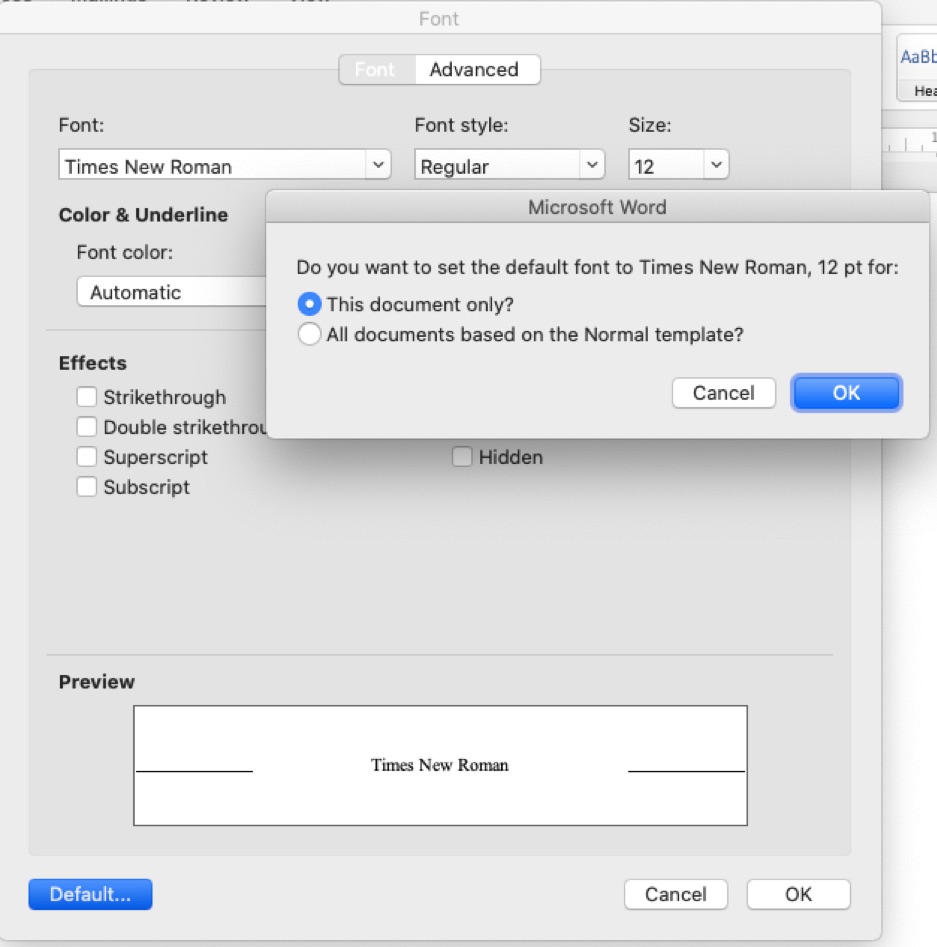
How to Change the Default Font of Your Academic Paper
Changing the default font in any template means that the newly set font will be used in every new document that is based on that template. For instance, the default font for new blank documents is based on the Normal template. First, open the template or a document based on the template whose default settings you wish to change. Go to the Format menu at the top of the screen, click the Font tab (or press the key combinations of ⌥⌘D).
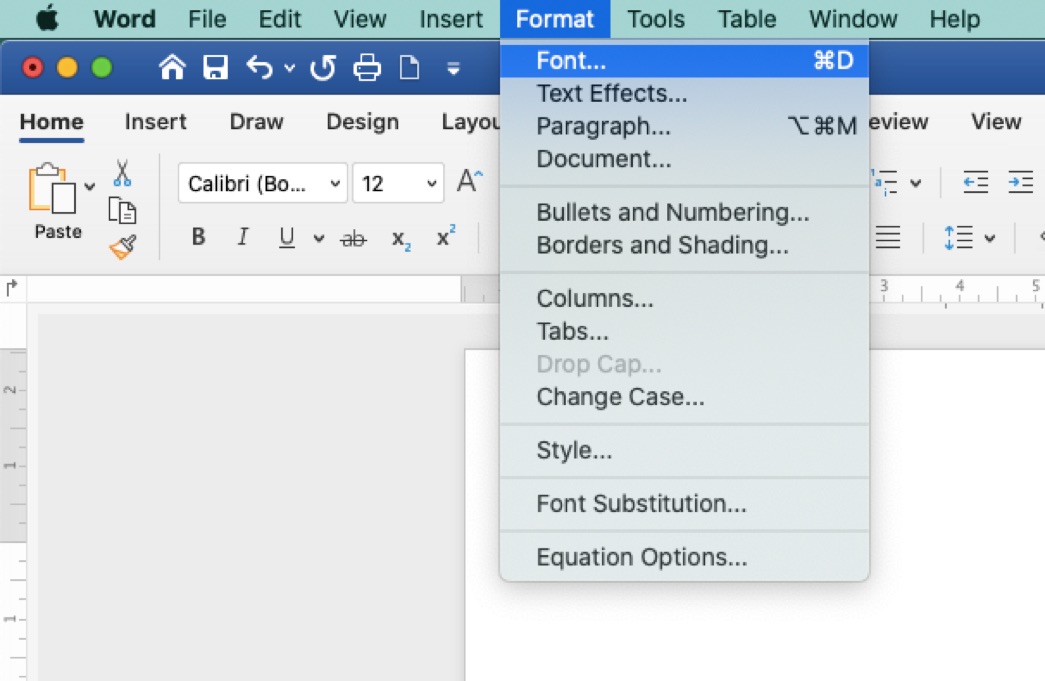
Make any changes that you want, and then click Default.
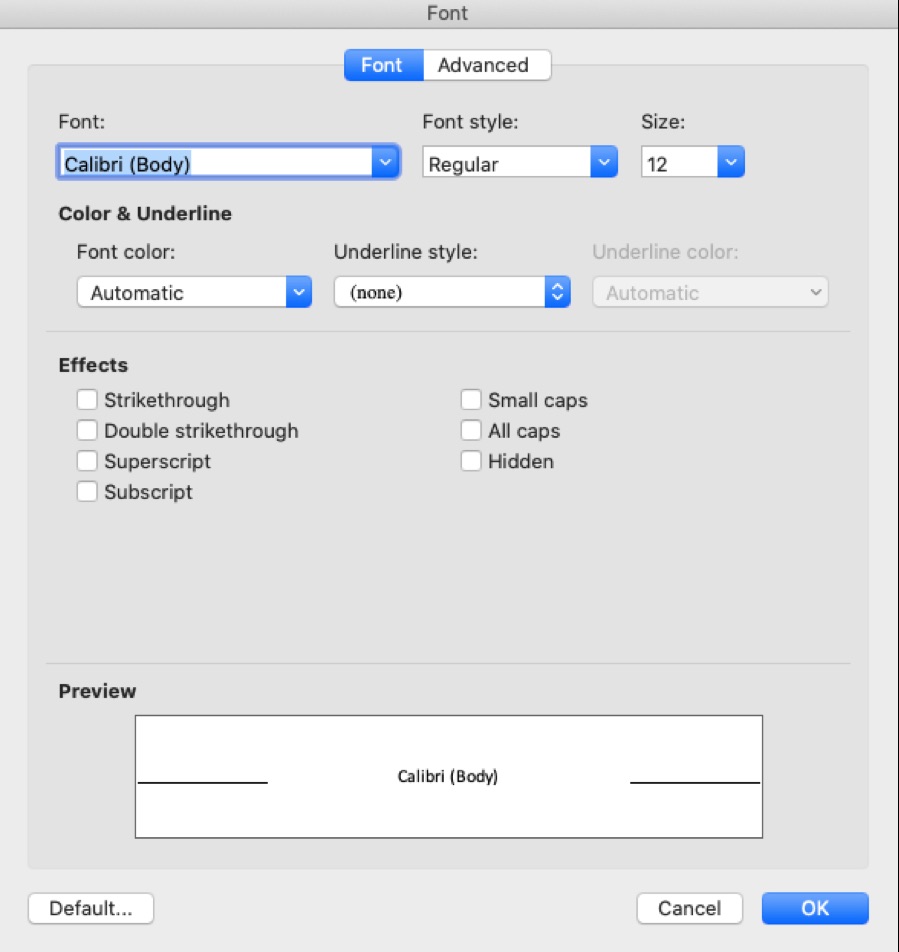
You will have two options here: You can set the default font to the selected option for This document only or All documents based on the Normal template. Then click OK.
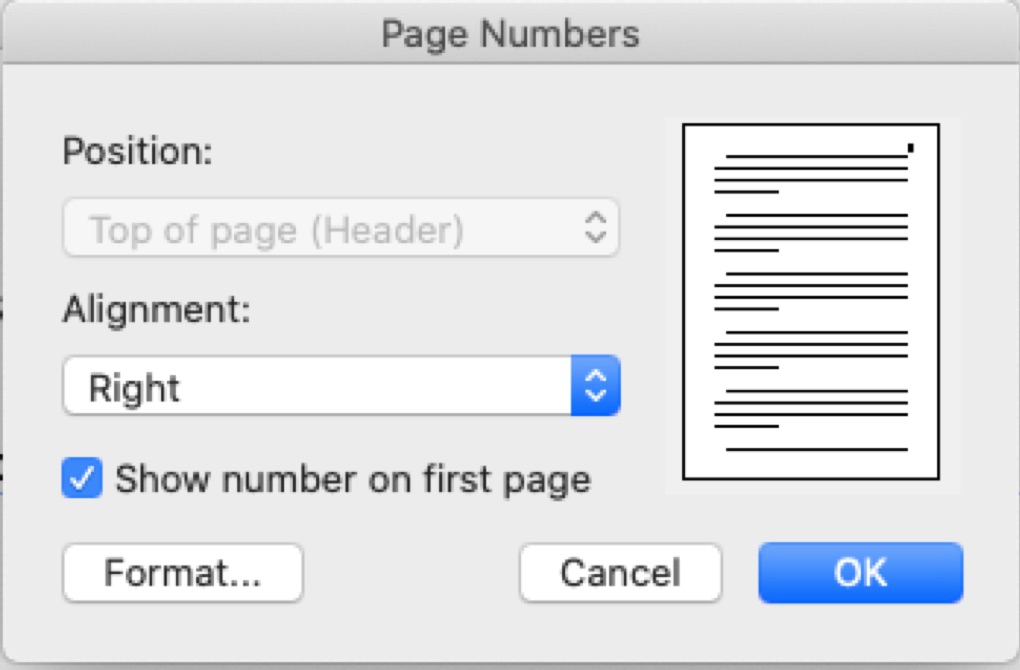
How to Format Page Numbers for Academic Papers
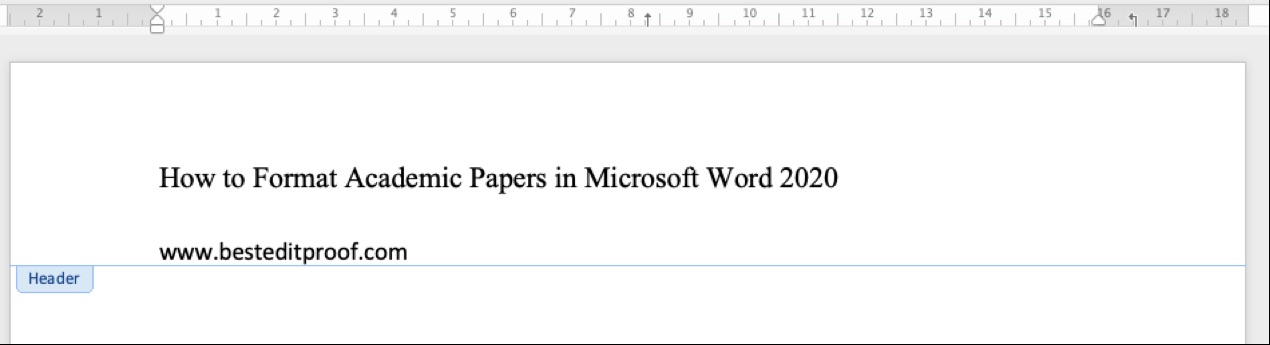
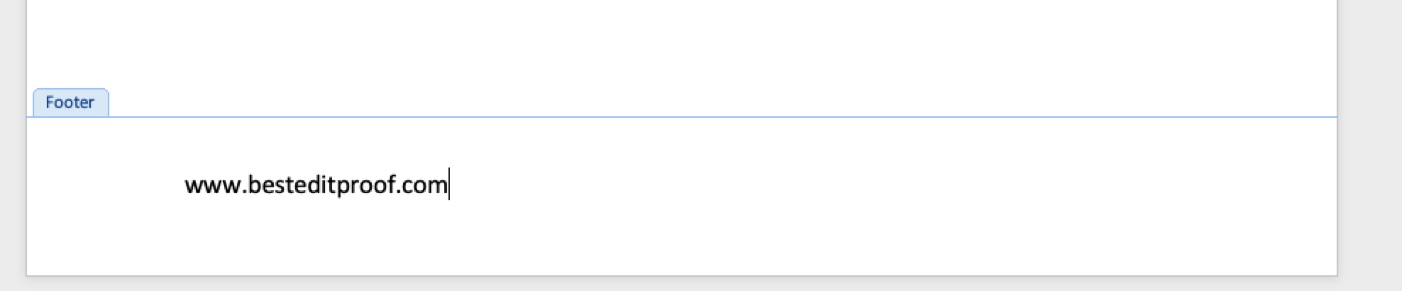
All documents should have automatically inserted page numbers shown in the upper right corner on all pages except the first page. Do not insert these page numbers manually. Use the Header/Footer tool of Microsoft Word instead.
Go to the View menu and choose Header and Footer.

A header box will appear at the top and a footer box at the bottom. Click in the header box; you can type your last name or the title of your document, and make it align to the right or left as you wish.
Then, select Page Numbers from the Insert menu.
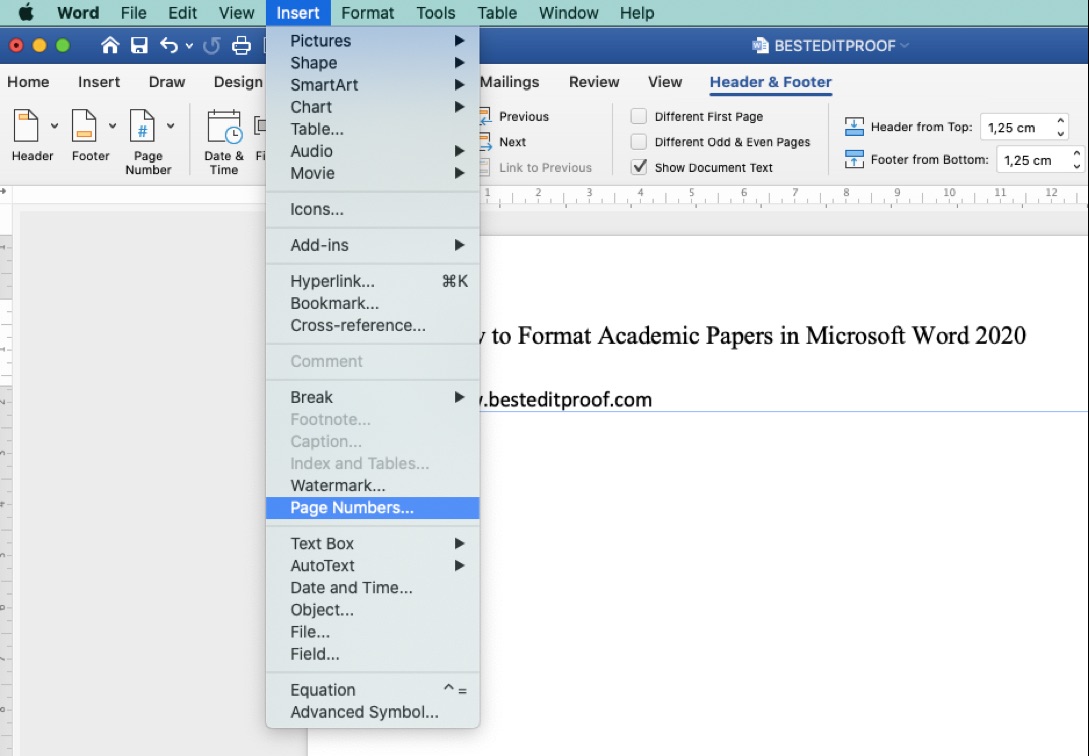
If you want to show the number on the first page of your document, check the box next to Show number on first page. Set your Position and Alignment as you wish.
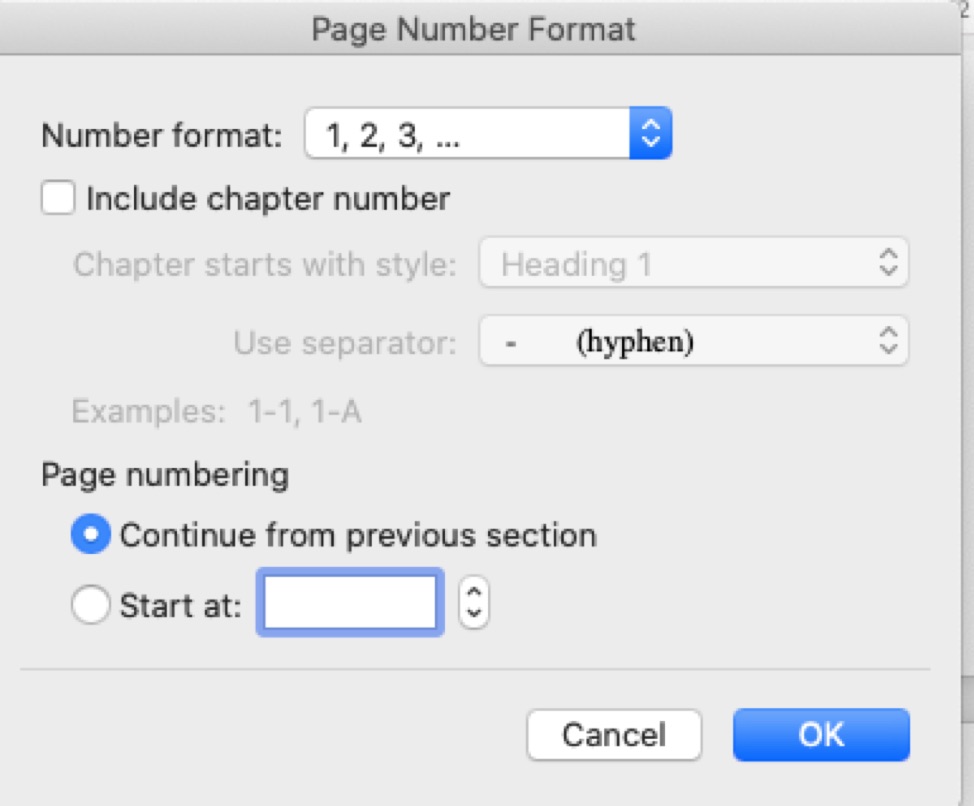
For advanced options, click Format, and set other settings, such as your number format, chat numbers, page numbering, etc.
When you are finished with the settings, click on the Close tab under the Header view. Each page of your document should now display a page number in the upper right corner that updates automatically when you make changes to your document. It will appear as grayed-out text unless you activate the Header and Footer tool to make changes.
If you want to change the setting so that page numbers do not display on the first page of your document, click on Document under the Format drop-down menu and click on the Layout menu.
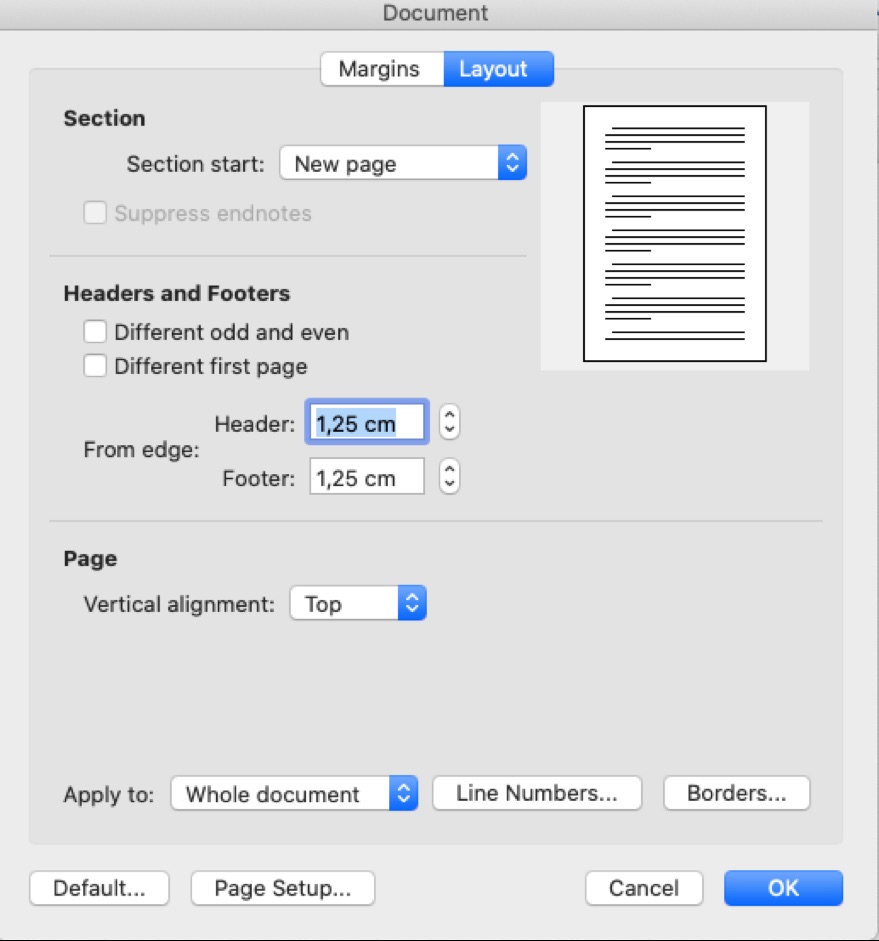
Under this menu, check the box next to Different First Page, and click OK. If required, remove the header that appears on the first page, and insert a header on the second page. This will automatically appear on all subsequent pages.
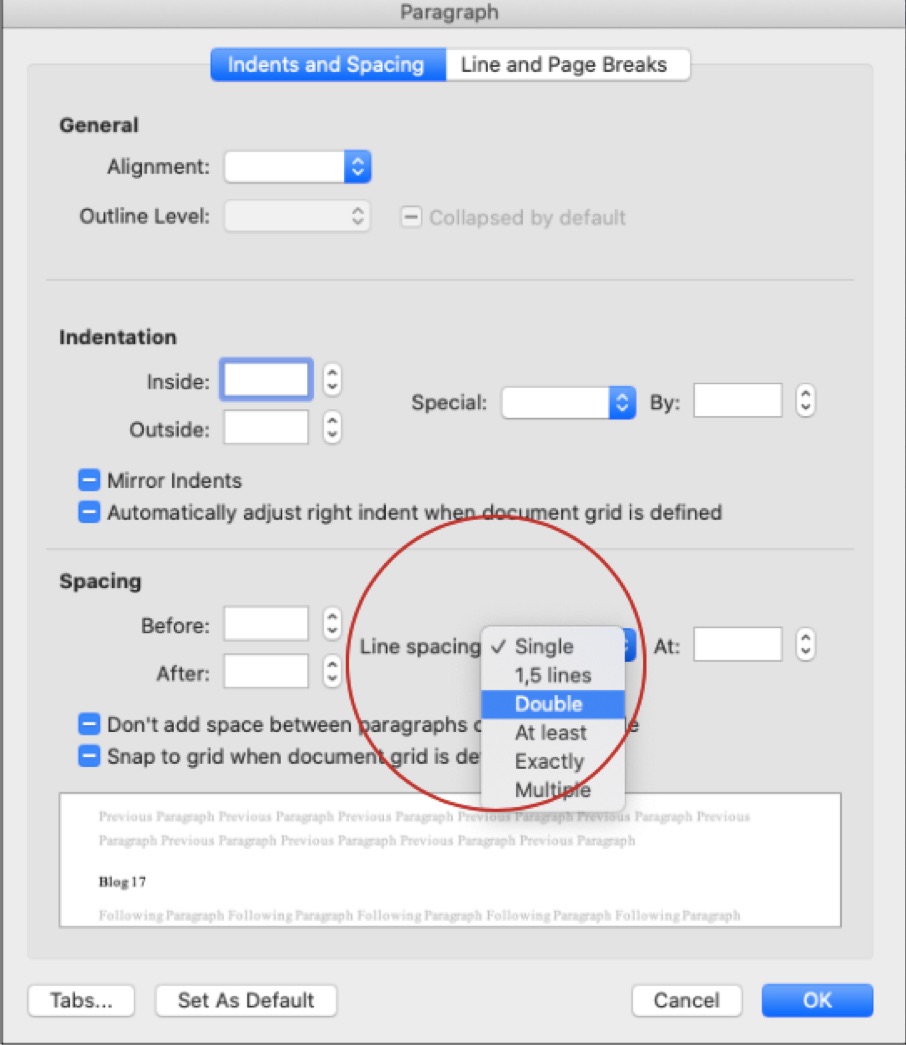
Document Spacing of Academic Papers in Microsoft Word
Choose Select All from the Edit menu. Select Paragraph under the Format drop-down menu. Choose your desired spacing from the Line spacing menu under the Spacing section. Alternatively, you can use keyboard shortcuts.
How to Format Paragraph Spacing for Academic Papers
Select the Style from the Format drop-down menu. Make sure that Normal is selected from the list of styles, and click Modify. In the lower-left corner, select the Paragraph under the Format drop-down menu.
In the Paragraph settings menu that pops up, change the settings for After to 0 pt under the Spacing menu.
How to Create a New Page or Insert a Page Break in Microsoft Word
If you wish to create a new page, instead of using numerous returns before starting your bibliography, go to the Insert menu at the top of the screen. Select Page Break under the Break drop-down menu. Alternatively, you can press ⌘+Enter to insert a page break.

If you need help with formatting your academic papers, contact us!
Best Edit & Proof expert editors aim to provide your manuscripts with proper scholarly and academic tone and style. They will significantly improve the chances of having your research manuscript accepted for publishing. They provide subject-area proofreading and editing services in several fields categorized under various disciplines. With our extensive knowledge and expertise, we will help you find the right tone and style for your manuscript.
If you need our subject-area editors to format your manuscripts, giving you the fundamental rules for formatting your manuscripts as described in your guidelines, such as APA, MLA, or Chicago/Turabian styles, then contact us. At Best Edit & Proof, our proofreaders and editors edit every type of academic paper. We have a user-friendly website and a simplified ordering process.
If you would like our subject-area editors and language experts to work on your project for the improvement of its academic tone and style, then please visit the order page. It is easy! It takes only a few minutes to submit your paper and complete the process. Click here to see how it works.
We have flat-rate pricing based on our type of service (editing or proofreading), word count, and turnaround time. Enter your word count or copy and paste your document into our pricing calculator to get an instant quote.

If you need support for academic editing and proofreading, contact us. You can also e-mail us or use the 24/7 live chat module to get direct support. Our doctorally qualified editors will polish and fine-tune your projects.
Follow us on Twitter, LinkedIn, Facebook, Instagram, and Medium.
For more posts, click here.
![]()
Download Article
![]()
Download Article
- Designing Your Paper
- Creating Your Paper
- Q&A
- Tips
- Warnings
|
|
|
|
This wikiHow teaches you how to create a newspaper using Microsoft Word’s built-in features. Once you have an idea of what your newspaper will look like, you can create a newspaper in Word on both Windows and Mac computers.
-

1
Examine a few different newspapers. To understand how the basic elements of a newspaper work together, look at how the following elements of each paper come together:
- Stories — The meat of the paper, where the majority of the text is.
- Images — Photos and graphics are an essential piece of newspaper design. They break up large swaths of text and help provide context for stories.
- Headlines — The headline is the first thing the reader will see before deciding whether or not the story is worth their time.
-
2
Account for printer size. Unless you have access to an industrial-sized printer, your document won’t be able to be more than the 8.5-inch-by-11-inch size that most printer paper comes in.
- This is the default page size setting for Microsoft Word on most computers.
Advertisement
-
3
Plan your layout before beginning. It will help to have a basic idea of your paper’s design before opening Word and messing with the formatting. Take a few sheets of scratch paper and sketch out a few different designs.
- Design different pages. The front page will look significantly differently than inside pages, and different sections will have slightly different styles.
- Draw lines to see how columns will affect the flow of your paper. Too many columns will make your text too crowded, while too few columns will lead to your stories appearing blocky.
- Try placing text blocks in different places on your scratch page. Wrap text around images, or try placing an image directly above or below the story that it’s related to.
- Experiment with headline placement. Headlines need to grab the reader’s attention, but they can’t be so large that they’re distracting.


Advertisement
-
1
Open Microsoft Word. Double-click the Word program icon, which resembles a white «W» on a dark-blue background.
-
2
Click Blank document. It’s a white box in the upper-left side of the page. Doing so will open a new, blank document.
- Skip this step on a Mac.
-
3
Add a title to your newspaper. Type in the title of your newspaper or the headline that you want to use.
-
4
Start a new line. Press the ↵ Enter key to jump down to a new line.
- This step is so that you can add columns without dividing the title.
-
5
Click Layout. This tab is in the dark-blue ribbon at the top of the Word window. Doing so will open the Layout toolbar below the ribbon.
-
6
Click Columns. It’s on the left side of the Layout toolbar. A drop-down menu will appear.
-
7
Click More Columns…. This option is at the bottom of the Columns drop-down menu. A window will appear with additional options.
-
8
Select a column number. For example, click Two at the top of the window to divide your paper into two columns.
- You can also change the number in the «Number of columns» box to your preferred number of columns.
-
9
Click the «Apply to» drop-down box. It’s in the lower-left side of the window.
-
10
Click This point forward. This option is in the drop-down menu. Doing so will apply your columns to your document with the exception of your title.
-
11
Click OK. This will split your Word document into two or more columns (depending on how many you chose).
-
12
Add your written content. Start with a title, then press Enter}} and begin writing a piece. When you get to the end of a piece, skip a couple of lines and then begin another title and piece.
- As you type, the left-most column will fill up first and then feed into the right column(s).
-
13
Insert photos. Click the place in your newspaper where you want to insert a photo, then click the Insert tab, click Pictures, select a picture, and click Insert in the bottom-right corner of the window.
- You can shrink or enlarge your photo by clicking and dragging one of the picture’s corner knobs in or out.
- To wrap text around the photo, click the photo, then click the Format tab, click Wrap Text, and click a wrap text option.
-
14
Center your newspaper’s title. Click the Home tab, highlight the title, and then click the «Centered» icon, which resembles a stack of centered horizontal lines in the «Paragraph» section of the toolbar.
-
15
Format your newspaper. There are countless things you might want to change about your newspaper before you save it, but there are a few main things you’ll likely need to change:
- Text Font and Size — Highlight the text that you want to change, then click the downward-facing arrow next to the current font in the «Font» section of the Home tab. Select a new font, then select a size in the numbered drop-down box next to the font box.
- Bold Titles — Highlight the title(s) you want to change, then click B in the «Font» section to make the text bold. You can also click the U or I button here to underline or italicize the text, respectively.
-
16
Save your work. Press Ctrl+S (Windows) or ⌘ Command+S (Mac) to save your newspaper, then select a save location, enter a title, and click Save. Your newspaper is ready to go!


Advertisement
Add New Question
-
Question
How can I make the first letter larger like newspapers do?

Place your text cursor on the letter in question, then click «insert» and select «drop cap.»
-
Question
What is the font used in newspapers?
Times New Roman is the most common ‘newspaper’ font. This will give it the authentic look.
-
Question
How can I add a picture in the first column only so that the text will still flow?
Wrap the image specifically, so text surrounds it. Place it where you want it, then click wrap image.
See more answers
Ask a Question
200 characters left
Include your email address to get a message when this question is answered.
Submit
Advertisement
-
Check out handy newspaper fonts, like Old English Text. In order to really make your Microsoft Word publication look «newsy,» you may want to look into what kinds of fonts are most popular with established newspapers. A variety of websites and print resources can show you the fonts that newspaper printers have used over the years.
Thanks for submitting a tip for review!
Advertisement
-
If you don’t select «Black and White» when printing your newspaper, the printing itself will likely be expensive.
Advertisement
About This Article
Article SummaryX
Before creating your newspaper in Word, consider planning out your newspaper’s content and design so that you have a general idea of how to format the Word document. Once you know what your newspaper should look like, create a new Word document and add your newspaper’s title at the top. You can insert columns by clicking Layout, clicking Columns, and selecting a number of columns. Write your newspaper articles’ content in the columns; if you want to add images, click Insert, click Pictures, and select a photo from your computer.
Did this summary help you?
Thanks to all authors for creating a page that has been read 638,505 times.
Reader Success Stories
-

Shilpa Suresh
Jun 24, 2017
«I have created 2 or 3 newsletters but after reading the tips, I am sure to make a better newsletter. Thank you…» more
Is this article up to date?
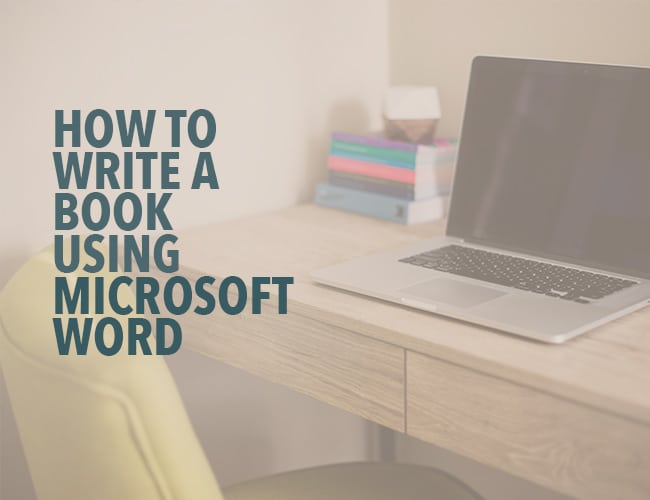
If you want to write a book, you’ll need book writing software that’s up to the task. Yes, you can invest in dedicated book writing programs. But you don’t have to: a great writing tool is likely already at your fingertips, if you know how to write a book using Microsoft Word.
There’s a lot of book writing software out there. Many of these programs claim to offer intuitive use, help with organization, and even say they’ll keep you from distraction. The options can be overwhelming.
There’s still one tried and true option if you’re not interested in all that (or can’t afford the fancier programs): Microsoft Word.
I write most of my books in Microsoft Word, not to mention short stories. Here’s the rundown of how to write a book using Microsoft Word, and why that might be your best choice.
The Benefits of Microsoft Word for Book Writing
You most likely already have it. And so does everybody else. Word is the standard, accepted across platforms, and is easy to access for non-writers (your beta readers). It’s been around forever, so most people know how to use it.
There are book formatting templates. A ton of them. They have them for short story format and for manuscript format. Personally, I don’t use those templates, but they’re a nice baseline for beginners, or even old hats that just want to hurry up and write without setting up their document first.
It’s simple and uncluttered. There are a ton of apps and programs out there that will allow you to keep your plot structure notes close at hand, to rearrange your chapters with the click of a button, and to keep detailed character profiles right in the program. That’s all a little too much for me. I prefer handwritten notes and nothing else blocking my screen while I’m typing and Word gives me that.
It is worth noting that if all that sounds appealing to you, you can do those things in Word as well, it just won’t be as fancy as other programs.
Hey writer: the first step to writing a book is coming up with a great idea. The second step is figuring out the structure of your book. If you have an idea but you need help with the structure, check out our new book The Write Structure. In it, we’ll teach you how to apply timeless story structure principles to write a great book. Get The Write Structure »
How to Navigate Your Book in Microsoft Word
When you have a 90,000-word manuscript, navigating becomes daunting. Luckily there are ways to do it in Word that make it easier if you know where to look.
Chapter Headings
Word doesn’t divide your book into chapters for you like some other programs. There will be no easy way to click and drag to rearrange chapters.
What I recommend is using headings. On Word’s Home page, there are already standard headings listed. Definitely mess with them and change their formatting to something simple.
No one needs giant blue words as their chapter headings. (You can set your simpler formatting as your default style as well, so you don’t have to change it every time.)
Make the title or number of each chapter a heading. Then you can easily bounce around to different chapters through the navigation pane (check the Navigation Pane box under the View menu).
Bookmarks
These basically work the same way as headings, but they’re for anywhere in your document. Have a specific scene you need to do more research on? You can bookmark it and jump back to it later.
Bookmark by going to the Insert menu and clicking Bookmark. Name your bookmark and voilà. You can delete them easily from the popup menu as well.
Find and Replace
CTRL+F brings up a simple search option to find words and phrases in your document. CTRL+H brings up the full gambit. From that dialogue box, you can search, replace certain words with others (i.e. Jennifer now becomes Julia all through the manuscript), and go to any page, section, heading, bookmark, etc. that you need to go to.
Microsoft Word is Great for Editing Your Book
Word has a ton of options for editing your story, including comments, tracking changes, and comparing documents. All of these are under the Review menu.
I use the comments feature to make notes to myself where I need to recheck facts or add description later. It’s easy to navigate through the comments with the search feature or the buttons under the Review menu. Don’t forget to remove them all before saving your document as a PDF or sending it off to an editor.
Tracking changes is awesome and a lot of editors (for short stories anyway) will use this feature to collaborate with you during the editing process. You can accept or reject changes or even revert back to the original.
Finally, make sure you have grammar and spellcheck on! Grammar check even allows you to check style issues (like how to use an ellipsis correctly) and passive voice. It’s invaluable.
Pro tip: To keep you on track while you’re writing, turn off some of the more fine-tuning features of grammar check. There’s nothing that will ruin your flow more than a bunch of underlining you feel like you need to take care of immediately. I recommend running the full check when you’re done (or at least done for the day).
Formatting Your Book in Microsoft Word
Make sure you’re familiar with standard manuscript format for novels and formatting short stories. Take a look at those links and follow their instructions. You don’t want to get rejected out of hand because you tried some weird formatting that’s hard to look at.
One of the biggest gripes I see from editors is writers using spaces to indent paragraphs. Don’t do this. It makes it super hard on them when they’re putting a book together. Instead, use the ruler in Word (under the View menu) or the paragraph settings (under the Home menu) to adjust your tabs. A half inch is standard.
Despite what most of us were taught in school, the standard is now one space after periods, not two. This is another sticking point with editors, so don’t do it. If you’re used to two, there’s a grammar check feature in Word you can turn on to highlight every time you use two spaces.
Finally, use the page break option to break for a new chapter, not enter or a million spaces. You can find the page break under the Insert menu.
Pro tip: When in doubt about your formatting, you can turn on the Show/Hide option under the Home menu (looks like a paragraph symbol) to see all your formatting symbols.
Now That You’ve Mastered Microsoft Word, Go Write Your Book
Don’t let choosing writing software stagnant your writing. Don’t overthink it. You don’t need to keep up with the Joneses with the latest writing technology that’s trotted out on tech forums and in writing chats.
The important thing about writing a book is actually writing it. No fancy book writing software is going to help you with that.
So get writing!
Ever used Word to write a book? Do you have any more tips for how to write a book using Word? Let me know in the comments!
PRACTICE
Take fifteen minutes to write. Just write. Don’t worry about page setup, formatting, or which program you’re going to use. Open up Word or get out a pen and paper if you’d like!
When you’re done, share your writing in the comments. Don’t forget to comment on your fellow writers’ work!

Sarah Gribble
Sarah Gribble is the author of dozens of short stories that explore uncomfortable situations, basic fears, and the general awe and fascination of the unknown. She just released Surviving Death, her first novel, and is currently working on her next book.
Follow her on Instagram or join her email list for free scares.
If you want to create a lined paper in Microsoft Word and print it out for some special requirements, you actually don’t need to download the template from Internet or draw the line by yourself. Just imagine the lined paper is a one-column table without vertical borders, the method is quite self-explanatory now.
1. First, you can adjust the paper margins in Layout tab. Hit the small arrow on the bottom-right corner or Page Setup section to evoke the setting window.

2. Change the value of Margins according to your actual needs. Then hit OK to confirm it.

3. Go to Insert tab, click the button of Tables and choose Insert Table… in the menu.

4. Change Number of columns to 1 in Table size, and then you can customize the Number of rows freely. Here I enter 20 as an example.

5. Click OK and the table will be inserted. Right-click the archer button on the top-left corner of it to choose Table Properties… in the menu.

6. Switch to Row tab, customize the Specify height as you like and set Row height is to Exactly.

7. Then click the table and go to Design tab under Table Tools. Hit the small arrow under Borders to expand the menu. Choose Borders and Shading at the bottom.

8. Follow the steps in the GIF below to disable the vertical borders, and set the Style and Color for the horizontal borders. Then hit OK to implement the settings.

9. If you want it more like a letter paper, you can add a header and a footer to the page as well.


10. You can also remove the horizontal line in page header to make the paper looks more concise. Thus a lined paper is ready. You can print it out and then write on it.

Copyright Statement: Regarding all of the posts by this website, any copy or use shall get the written permission or authorization from Myofficetricks.