
Время Perfect в английском языке — это совершенное время, выражающее завершенные действия, результат которых непосредственно связан с данным моментом времени. Данные действия или завершили только что, или к наступлению определенного момента — все это Perfect Tenses.
С точки зрения русского языка действие в настоящем времени не может закончиться, на то оно и настоящее. Если действие завершилось, значит, время должно быть прошедшее. Английский язык придерживается другой логики: в нем действие в настоящем может быть законченным, и пример этому — Present Perfect. Также поступок мог быть совершен давно или вовсе никогда не совершен, но он имеет значение в настоящем времени.
Как образуется Present Perfect
Утверждение
Сказуемое в Present Perfect состоит из вспомогательного глагола have (has) и основного глагола. С местоимениями I, you, we, they и существительными во множественном числе используется have, с местоимениями he, she, it и существительными в единственном числе — has.
Основной глагол при формировании предложения в Present Perfect должен быть в третьей форме: к правильным глаголам добавляется окончание –ed, у неправильных глаголов может видоизменяться корень слова.
Формула: I/We/You/They + have + 3-я форма глагола
Примеры: I have started. — Я начал. We have gone. — Мы ушли. You have finished. — Вы закончили. They have come. — Они пришли.
Формула: He/She/It + has + 3-я форма глагол
Примеры: He has decided. — Он решил. She has done. — Она сделала. It has turned off. — Оно выключилось.
Отрицание
При построении отрицательного предложения в Present Perfect Tense между вспомогательным и основным глаголами ставится отрицательная частица not.
Формула: I/We/You/They + have not + 3-я форма глагола
Примеры: I have not started. — Я не начал. We have not gone. — Мы не ушли. You have not finished. — Вы не закончили. They have not come. — Они не пришли.
Формула: He/She/It + has not + 3-я форма глагола
Примеры: He has not decided. — Он не решил. She has not done. — Она не сделала.
It has not turned off. — Оно не выключилось.
В разговорной речи глагол to have (has) может принимать сокращенные формы. В утвердительном предложении have (has) объединяется с местоимением, в сокращенном виде have выглядит как «‘ve», has как «‘s». В отрицательном предложении have (has) объединяется с not, сокращенные формы выглядят как «haven’t» и «hasn’t».
Примеры: We’ve gone. He’s decided. I haven’t started. She hasn’t done.
Вопрос
Вопросительное предложение в Present Perfect в английском языке начинается с вспомогательного глагола, далее следует местоимение и основной глагол в третьей форме.
Формула: Have + I/we/you/they + 3-я форма глагола
Примеры: Have I started? — Я начал? Have we gone? — Мы ушли? Have you finished? — Вы закончили? Have they come? — Они пришли?
Формула: Has + he/she/it + 3-я форма глагола
Примеры: Has he decided? — Он решил? Has she done? — Она сделала? Has it turned off? — Оно выключилось?
Когда употребляется Present Perfect
- Необходимо показать результат действия, которое уже совершилось. С помощью Present Perfect внимание акцентируется именно на результате.
Примеры: Я делал это. — I did it (Past Simple — действие было в прошлом).
Я сделал это. — I have done it (Present Perfect — действие закончилось, значит, есть результат).Слова-маркеры: already (уже), just (только что), yet (уже, еще).
- Present Perfect в английском языке используется, когда речь идет о личном опыте говорящего.
Пример: I’ve been to England but I haven’t been to Scotland. — Я был в Англии, но не был в Шотландии (на данный момент моей жизни я посетил Англию и не успел посетить Шотландию).
Для описания жизненного опыта характерно наличие наречий ever (когда-нибудь) и never (никогда).
I have never tried green tea. — Я никогда не пробовал зеленый чай.
- С помощью Present Perfect показывается длительное действие, которое все еще актуально: оно началось в прошлом, у него есть результат в настоящем и, возможно, оно будет продолжаться в будущем.
Примеры:
We’ve known each other since school years. — Мы знаем друг друга со школы.
I’ve studied English for 5 years. — Я учу английский в течение 5 лет (начал в прошлом, 5 лет — результат в настоящем).
I’ve lived in the suburbs since childhood. — Я живу в пригороде с детства (я начал жить там в детстве и, как результат, живу в пригороде и сейчас).
Обычно в подобных случаях в предложении употребляются предлоги for (в течение) и since (с тех пор как, начиная с).
Как образуется Past Perfect
Past Perfect — прошедшее совершенное время в английском языке. Его особенность в том, что оно не используется в речи самостоятельно и обязательно привязывается к другому действию. Например, нужно сообщить о событии в прошлом, которое произошло ранее других упомянутых событий.
Утверждение
Сказуемое в Past Perfect состоит из двух частей: вспомогательного глагола had и третьей формы основного глагола.
Формула: I/He/She/It/We/You/They + had + 3-я форма глагола
Примеры: I had done. — Я сделал. He had seen. — Он увидел. She had found. — Она нашла. It had fallen. — Оно упало. We had learned. — Мы выучили. You had decided. — Вы решили. They had gone. — Они ушли.
Отрицание
Отрицательное предложение в Past Perfect Tense формируется путем употребления отрицательной частицы not между вспомогательным глаголом had и основным глаголом.
Формула: I/He/She/It/We/You/They + had not + 3-я форма глагола
Примеры: I had not done. — Я не сделал. He had not seen. — Он не увидел. She had not found. — Она не нашла. It had not fallen. — Оно не упало. We had not learned. — Мы не выучили. You had not decided. — Вы не решили. They had not gone. — Они не ушли.
В разговорной речи используются сокращенные формы: в утвердительном предложении had объединяется с местоимением, в отрицательном – с частицей not.
Примеры: I’d done. You’d decided. I hadn’t done. You hadn’t decided.
Вопрос
Вопросительное предложение в Past Perfect начинается со вспомогательного глагола had, за которым следует подлежащее и основной глагол.
Формула: Had + I/he/she/it/we/you/they + 3-я форма глагола
Примеры: Had I done? — Я сделал? Had he seen? — Он увидел? Had she found? — Она нашла? Had it fallen? — Оно упало? Had we learned? — Мы выучили? Had you decided? — Вы решили? Had they gone? — Они ушли?
Когда употребляется Past Perfect
- Past Perfect Tense всегда идет рука об руку с другим действием в прошлом. Эта временная конструкция используется для описания действия, которое произошло раньше другого действия или определенного момента в прошлом. Другое действие в прошлом чаще всего обозначается Past Simple.
Пример: We arrived at the station at 7.30, but the train had left. — Мы прибыли на вокзал в 7:30, но поезд уже ушел (сначала поезд ушел — Past Perfect, потом мы прибыли на вокзал — Past Simple).
В подобном случае часто используются слова: by… (к какому-то времени/моменту), after (после того как), before (перед тем как, до того как), when (когда), earlier (раньше), first (сперва, сначала).
- Past Perfect может объяснять причину: в предложении уточняется, что действие, выраженное Past Perfect, стало причиной того, что произошло другое действие.
Пример: He was hungry. He hadn’t eaten for eight hours. — Он был голоден. Он не ел восемь часов.
- В Past Perfect также можно рассказывать о личном опыте, который дал некий результат в прошлом.
Пример: The last week of my holidays was the worst week I had ever had. — Последняя неделя моего отпуска была самой худшей неделей, которая у меня когда-либо была.
Как образуется Future Perfect
Future Perfect — будущее совершенное время в английском языке, оно показывает действие, которое начнется в будущем и закончится до определенного момента в будущем.
Утверждение
Утвердительное предложение в Future Perfect строится с помощью вспомогательного глагола have во времени Future Simple (will have) и третьей формы основного глагола.
Формула: I/He/She/It/We/You/They + will have + 3-я форма глагола
Примеры: I will have finished. — Я закончу. He will have decided. — Он решит. She will have painted. — Она нарисует. It will have produced. — Оно произведет. We will have arrived. — Мы прибудем. You will have confirmed. — Вы подтвердите. They will have received. — Они получат.
Отрицание
В отрицательном предложении между will и have появляется отрицательная частица not.
Формула: I/He/She/It/We/You/They + will not have + 3-я форма глагола
Примеры: I will not have finished. — Я не закончу. He will not have decided. — Он не решит. She will not have painted. — Она не нарисует. It will not have produced. — Оно не произведет. We will not have arrived. — Мы не прибудем. You will not have confirmed. — Вы не подтвердите. They will not have received. — Они не получат.
В разговорной речи вспомогательный глагол will have чаще встречается в сокращенной форме, в утвердительном предложении эта форма будет звучать как «‘ll have», в отрицательном — «won’t have».
Примеры: She’ll have painted. You’ll have confirmed. It won’t have produced. We won’t have arrived.
Вопрос
Вопросительное предложение в Present Perfect Tense формируется путем вынесения на первое место will, затем ставится подлежащее, после него have и далее 3-я форма основного глагола.
Формула: Will + I/he/she/it/we/you/they + have + 3-я форма глагола
Примеры: Will I have finished? — Я закончу? Will he have decided? — Он решит? Will she have painted? — Она нарисует? Will it have produced? — Оно произведет? Will we have arrived? — Мы прибудем? Will you have confirmed? — Вы подтвердите? Will they have received? — Они получат?
Употребление Future Perfect
Время Future Perfect показывает действие, которое начнется в будущем и также закончится до определенного момента в будущем.
Примеры:
I want to quit my job in a month. I will have worked for 5 years for this company by then. — Я хочу через месяц уволиться. К тому времени я проработаю в этой компании 5 лет.
We will have built our new house by the next year. — Мы достроим наш новый дом к следующему году.
В таких предложениях могут употребляться слова: by… (к какому-то времени/моменту), by the time (к тому времени как), by then (к тому времени), by tomorrow (к завтрашнему дню, до завтра), before (перед тем как), when (когда), until/till (до того как).
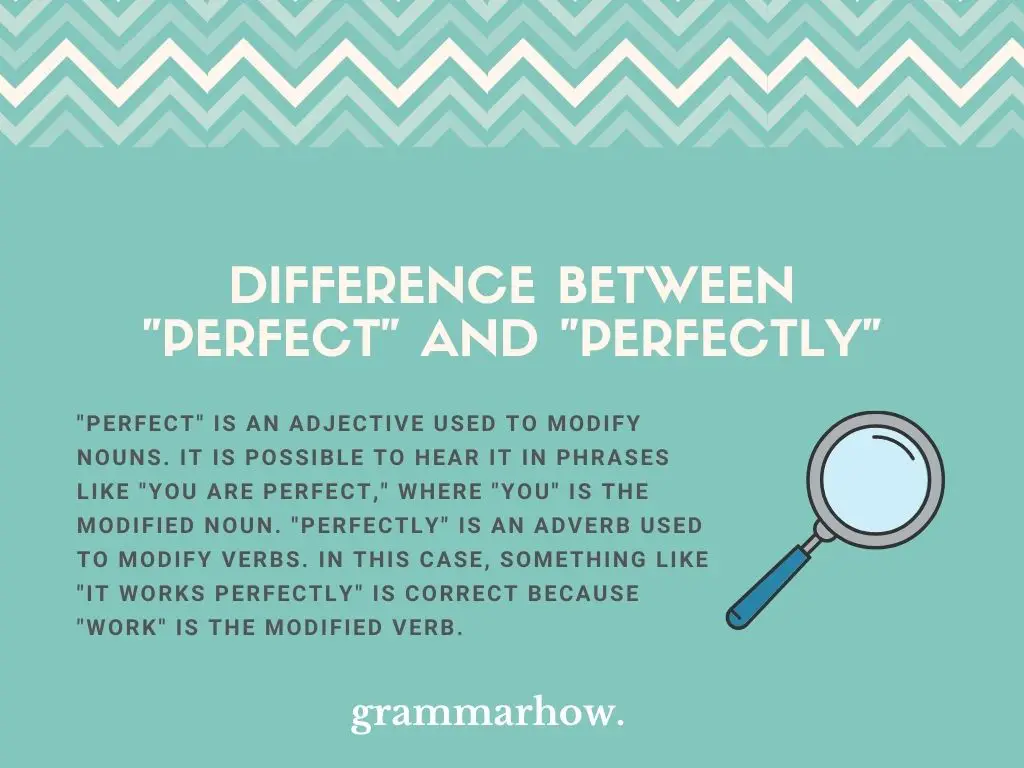
Adjectives and adverbs can get confusing. Even native speakers have a hard time differentiating them sometimes, so don’t worry if you’re a bit stumped. This article will explain the differences between “perfect” and “perfectly.”
What Is The Difference Between “Perfect” and “Perfectly”?
“Perfect” is an adjective used to modify nouns. It is possible to hear it in phrases like “you are perfect,” where “you” is the modified noun. “Perfectly” is an adverb used to modify verbs. In this case, something like “it works perfectly” is correct because “work” is the modified verb.
It’s possible to hear “perfect” used interchangeably with “perfectly” when you are listening to native speakers talk. This is because spoken English doesn’t have as strict rules as written English, so the standard methods can be overlooked.
You might hear a native say either of the following:
- That worked perfectly.
- That worked perfect.
However, “Perfect” should not be used here as “worked” is a verb and not an adjective.
We do not encourage you to follow the trend of dropping adverbs just because you’re speaking to someone informally, though. It’s always best to practice proper grammar and English, meaning that “perfectly” should be best when referring to a verb or action.
How to Use “Perfect” In A Sentence
- You are perfect just the way you are. Please don’t feel like you ever need to change yourself for someone else.
- You’re not perfect yet, but you’re not a long way off! Keep working towards it, and you’ll be fine.
- This is the perfect example of how you can get adjectives right. It’s easy to see how perfect things can be.
- Stop being so perfect, please. I’m sick of having to live in your shadow all the time! I can’t keep up.
- Is this the perfect date? I feel like I hit the nail on the head when I was putting this one together.
“Perfect” is only correct as the adjective form when following standard English rules. We can use it after a pronoun (“you are perfect”) or before an object (“perfect answer”). In either case, “perfect” is the only form that works to modify them.
How to Use “Perfectly” In A Sentence
- You did this perfectly, just like I knew you would. I always know I can count on you with this stuff.
- I thought he completed it perfectly, but I guess that’s open for interpretation.
- It was done perfectly, and I don’t see a reason for it to be done again. It just doesn’t make sense to me.
- This was not handled perfectly, and I’ll be the first to admit that. Next time, I’ll get it right.
- It was working perfectly just a second ago! You must have done something to affect it because I didn’t touch it!
“Perfectly” is the adverb form. We use this whenever we are modifying a verb. It’s possible for the verb to come before (“worked perfectly”) or after (“perfectly designed”). The position of the verb is mainly based on personal preference or contextual tone.
Is It “Works Perfect” or “Works Perfectly”?
“Works perfectly” is the only correct form to use here. “Works” is the modified verb, which means that the adverb form (“perfectly”) is the only acceptable choice. “Works perfect” is a common mistake, but it’s not one that we encourage you to make.
- Correct: It works perfectly, thank you very much.
- Incorrect: I knew it works perfect. I just had to prove it.
Is It “More Perfect” or “More Perfectly”?
“More perfect” and “more perfectly” are both correct. You can use “more perfect” as a comparative adjective form, meaning a noun is still being modified. “More perfectly” is a comparative adverb form, which only works when modifying a verb.
- You look more perfect than the day I laid eyes on you. (Noun = “you”)
- You did that more perfectly than the first time I met you. (Verb = “did”)
As a side note, “more perfect” and “more perfectly” are rarely used in English. Even when they are used, they’re reserved for informal speaking only.
“Perfect” is supposed to be the highest possible degree of something, meaning it’s impossible to make something “more” perfect. That’s why neither of these forms is common, as they are redundant.
What Word Type is “Perfectly”?
“Perfectly” is an adverb. It is an extension of the root adjective form “perfect,” where the “-ly” suffix is added to show that a verb can be modified. It is used whenever we want to show that someone performed an action in a “perfect” manner.
Is It Right To Say “Perfectly”?
While we can use some adverbs as a one-word reply to someone, it is not correct to use “perfectly” in these situations. You would have to be prompted with the correct verb to use this one well, but there are always better one-word alternatives over “perfectly.”
You may also like:
Smooth or Smoothly? Difference Explained (With Examples)
Slow or Slowly? Difference Explained (With Examples)
Drive Safe Or Drive Safely? Here’s The Correct Version (+14 Examples)

Martin holds a Master’s degree in Finance and International Business. He has six years of experience in professional communication with clients, executives, and colleagues. Furthermore, he has teaching experience from Aarhus University. Martin has been featured as an expert in communication and teaching on Forbes and Shopify. Read more about Martin here.
User Manual: corel WordPerfect Office — X5 — Instruction Manual Free User Guide for Corel WordPerfect Software, Manual
Open the PDF directly: View PDF ![]() .
.
Page Count: 314 [warning: Documents this large are best viewed by clicking the View PDF Link!]

User Guide
?
t
s
A
#
&
2
z
%
92
@
+
5
m
!
“
7
*
=
6
W
g
}
9
;
0
3

Contents
Part One: Overview 1
Part Two: WordPerfect 17
Part Three: Quattro Pro 123
Part Four: Presentations 193
Part Five: Utilities 263
Part Six: Writing Tools 267
Part Seven: Macros and Migration 269
Part Eight: Other Resources 273

Part One: Overview 1
Part One: Overview
Welcome to Corel® WordPerfect® Office X5, a feature-rich suite of
productivity software. WordPerfect Office X5 is designed for
compatibility with Microsoft® Office and with industry-standard file
formats such as PDF and HTML.
This user guide is intended to introduce you to the main programs and
features of WordPerfect Office X5, and to help you get started using the
software right away.
Not all of the programs and features described in this user guide
are included in every edition of the software. For information on
which programs and features are included in each edition of the
software, please visit www.wordperfect.com.
Main programs in WordPerfect Office X5
WordPerfect Office X5 includes the following programs:
• Corel® WordPerfect® X5 — a word-processing program that lets
you create professional-looking documents and publish them to a
wide variety of formats. For more information, see “Part Two:
WordPerfect” on page 17.
• Corel® Quattro Pro® X5 — a spreadsheet program that lets you
manage, analyze, report, and share data. For more information, see
“Part Three: Quattro Pro” on page 123.
• Corel® Presentations™ X5 — a program that lets you create
high-quality slide shows and drawings. For more information, see
“Part Four: Presentations” on page 193.

2PartOne:Overview
Additional features of WordPerfect Office X5
WordPerfect Office X5 also provides the following:
• utilities — help you accomplish various tasks quickly and easily. For
more information, see “Part Five: Utilities” on page 263.
• writing tools — help improve the quality of your writing, and provide
project-based tips on writing well. For more information, see “Part
Six: Writing Tools” on page 267.
• support for macros and migration — includes tools and features for
using macros to automate tasks, and for migrating from earlier
versions of the software. For more information, see “Part Seven:
Macros and Migration” on page 269.
• other resources — include accessibility features, extra content, and
Web-based resources. For more information, see “Part Eight: Other
Resources” on page 273.
Getting started with WordPerfect Office X5
Before delving into the finer aspects of WordPerfect Office X5, you may
want to get started by reading the following chapters:
• “Welcome to WordPerfect Office X5” on page 3 — explains what’s
new in WordPerfect Office X5, and helps you install and set up the
software
• “Learning to use WordPerfect Office X5” on page 9 — introduces
you to the documentation that is included with the software

Part One: Overview 3
Welcome to
WordPerfect Office X5
In this chapter, you’ll find these topics:
• What’s new in WordPerfect Office X5?
• Using the WordPerfect Office X5 setup
• Registering WordPerfect Office X5
• Updating WordPerfect Office X5
• About Corel® Support Services
• About customer feedback
•About Corel®
What’s new in WordPerfect Office X5?
WordPerfect Office X5 includes the following new features:
• Reference Center — provides you with centralized access to the Help
files and new PDF manuals that install with the software, as well as
links to Web-based resources. For information on the Reference
Center and its documentation, see “Using the documentation” on
page 9.
• integration with the Microsoft® SharePoint® technology — gives
you direct access to Microsoft SharePoint document management
systems from within WordPerfect, letting you quickly retrieve and
store WordPerfect (WPD) documents. For information, see “Using
Microsoft SharePoint with WordPerfect” on page 114.
• support for Web services — lets you create customized WordPerfect
documents by querying the information stored in a networked

4PartOne:Overview
location. For information, please see “Linking and embedding data”
in the WordPerfect Help.
WordPerfect Office X5 also includes the following enhancements:
• improved compatibility with Microsoft Office 2007 programs — lets
you open and save files that use the Office Open XML (OOXML)
format. For information, see the “Compatibility” chapters for
WordPerfect (page 119), Quattro Pro (page 189), and Presentations
(page 259).
•improved migration features — let you easily move to
WordPerfect Office X5 from an earlier version of the software. For
information, see “Using migration features” on page 270.
For a complete list of the new and enhanced features of
WordPerfect Office X5, please visit www.wordperfect.com.
Using the WordPerfect Office X5 setup
The setup makes it easy to install WordPerfect Office X5 applications and
components. It lets you
• install any applications included in your software package
• add and delete components in the current installation
• repair the current installation by reinstalling all application features
To install WordPerfect Office X5
1Close all applications.
2Insert WordPerfect Office X5 Disc 1 in the CD drive.
If the setup does not start automatically, click Start on the
Windows® taskbar, click Run, and type D:SetupSetup.exe (where D
is the letter that corresponds to the CD drive).
3Follow the setup instructions for installing the software.

Part One: Overview 5
If the setup detects a previous version of WordPerfect Office on
your computer, the Upgrade page lets you choose to replace this
previous version with the current version.
The Upgrade page also lets you migrate the following customized
settings from any previous version of WordPerfect Office that is
detected:
• Most Recently Used (MRU) documents list
• any templates that you created
• any macros that you created
• address book
•QuickWords™
• user word lists
If you purchased the Oxford™ Dictionary upgrade for a previous
version of WordPerfect Office, it is automatically migrated to the
current version.
To add or delete components in a WordPerfect Office X5
installation
1Close all applications.
2On the Windows taskbar, click Start ` Control panel.
3Do one of the following:
• Windows 7 or Windows Vista® — Click Uninstall a program.
• Windows® XP — Double-click Add or remove programs.
4Do one of the following:
• Windows 7 or Windows Vista — Double-click
WordPerfect Office X5 on the Uninstall or change a program page.
• Windows XP — In the Add or remove programs dialog box,
choose WordPerfect Office X5 from the list, and click Change/
Remove.
The setup appears.

6PartOne:Overview
5Enable the Modify option, and then click Next.
6Follow the setup instructions for modifying the software.
To repair a WordPerfect Office X5 installation
1Follow steps 1 through 4 in the previous procedure.
2Enable the Repair option, and then click Next.
3Follow the setup instructions for repairing the software.
Registering WordPerfect Office X5
Registering Corel products is important. Registration provides you with
timely access to the latest product updates, valuable information about
product releases, and access to free downloads, articles, tips and tricks,
and special offers.
WordPerfect Office X5 prompts you when it is time to register the
product. There is no registration necessary when installing the product.
At any time, you can also register in one of the following ways:
•by visiting www.corel.com/support/register
• by phoning the Corel Customer Service Center nearest you. For more
information, see “About Corel Support Services” on page 7.
Updating WordPerfect Office X5
WordPerfect Office X5 offers a messaging service that allows you to
receive the latest information on WordPerfect Office X5. The messaging
service helps keep your WordPerfect Office X5 installation up-to-date by
informing you when critical updates become available, thus helping to
ensure that you are always running the latest version of
WordPerfect Office X5. You need to be online to access the messaging
service.

Part One: Overview 7
For more information about the messaging service, you can access the
Messages Help file.
To access the messaging service
• In WordPerfect, click Help ` Messages.
To update WordPerfect Office
• In WordPerfect, click Help ` Check for updates.
To modify the messaging settings
• In WordPerfect, click Help ` Message settings.
To access the Messages Help file
1Click Start ` Programs ` WordPerfect Office X5 ` Reference Center.
The Overview page of the Reference Center is displayed.
2Click the Messages Help item.
About Corel Support Services
Corel Support Services can provide you with prompt and accurate
information about product features, specifications, pricing, availability,
services, and technical support. For the most current information on
support services available for your Corel product, please visit
www.corel.com/support.
About customer feedback
If you have any comments or suggestions about WordPerfect Office X5 or
its documentation, please submit them by using the contact information
at www.corel.com/contact.
You can also visit www.wordperfect.com for the latest news, tips and
tricks, and upgrade information.

8PartOne:Overview
About Corel
Corel is one of the world’s top software companies, with more than 100
million active users in over 75 countries. We develop software that helps
people express their ideas and share their stories in more exciting,
creative, and persuasive ways. Through the years, we’ve built a reputation
for delivering innovative, trusted products that are easy to learn and use,
helping people achieve new levels of productivity. The industry has
responded with hundreds of awards for software innovation, design, and
value.
Our award-winning product portfolio includes some of the world’s most
widely recognized and popular software brands, including
CorelDRAW® Graphics Suite, Corel® Painter™,
Corel DESIGNER® Technical Suite, Corel® PaintShop Photo™ Pro,
Corel® VideoStudio®, Corel® WinDVD®, Corel® WordPerfect® Office,
WinZip®, and the recently released Corel® Digital Studio™ 2010. Our
global headquarters are in Ottawa, Canada, with major offices in the
United States, United Kingdom, Germany, China, Taiwan, and Japan.

Part One: Overview 9
Learning to use
WordPerfect Office X5
WordPerfect Office offers numerous learning resources.
In this chapter, you’ll find these topics:
• Using the documentation
• Accessing information on the Corel Web site
Using the documentation
WordPerfect Office includes a wide variety of documentation, which can
help you learn all about WordPerfect Office programs and features.
Not all components are available in all versions of
WordPerfect Office. Unavailable components may include Corel
applications and features, third-party utilities, and extra content
files. References to these components may nevertheless appear
within the applications and within the documentation.
The following resources are available to help you:
Documentation type What it does
In-product Help Lets you quickly retrieve all the
information you need. Help
displays in a separate window on
your screen. For quick access, you
can keep the Help window
displayed on top of the application
window.

10 Part One: Overview
New to WordPerfect Office X5 is the Reference Center, which provides
all-in-one access to the Help files and PDF manuals that install with the
software suite, as well as links to Web-based resources.
You can access Help either from within the Reference Center or directly
from within a program. You can search the Help for specific information,
and you can print specific Help topics or print entire sections of the Help.
Context-sensitive Help Displays information relevant to the
task you are currently performing.
Context-sensitive Help provides
help for menu commands, toolbar
buttons, dialog boxes, and dialog
box controls. You access
context-sensitive Help by clicking
the What’s This? button, and
clicking the item you want
information about.
QuickTips™ Provide information about icons
and buttons on the toolbars and
the Toolbox. QuickTips display in a
balloon when you point to an icon
or a button.
PerfectExpert™ Guides you through basic tasks and
helps you create detailed projects.
PerfectExpert includes the best
features of QuickTask™, templates,
and Coaches, combined with
information from the online Help
and the power of a
natural-language interface, to
assist you with everyday tasks.
PDF manuals Provide a “book-based” approach
to the documentation
Documentation type What it does

Part One: Overview 11
If you want to access and search all the Help files for WordPerfect,
Quattro Pro, or Presentations, you can use the new Help Finder
tools provided by the Reference Center.
You can access context-sensitive Help, QuickTips, and the PerfectExpert
directly from within a program.
Understanding the documentation conventions
The following table describes conventions used in the documentation.
When you see this Do this
Click File ` New.Click the File menu, and click New
in the menu.
Click Format ` Justification ` Left.Click the Format menu, click
Justification, and click Left in the
submenu that displays.
Enable a check box. Click the check box to place a check
mark or an “X” inside the box.
Disable an option. Click the option to remove the
indicator.
Select text. Click and drag to highlight text.
Click an object. Click anywhere on an object.
Right-click, and click Paste. Press the right mouse button, and
click Paste in the submenu that
displays.
Press Enter.Press the Enter key.
Ctrl + Shift Press the Ctrl key and the Shift key
at the same time.

12 Part One: Overview
To access the Reference Center
1Do one of the following:
• On the Windows taskbar, click Start ` Programs `
WordPerfect Office X5 ` Reference Center.
• In WordPerfect, Quattro Pro, or Presentations, click Help `
Reference Center.
2Click any tab to display the available documentation for that
category.
3Click any category entry to display its associated documentation.
To access the Help
1Do one of the following:
• In WordPerfect, Quattro Pro, or Presentations, click Help ` Help
topics.
• In the Reference Center, click a Help entry.
2Click one of the following tabs:
• Contents — lets you browse through topics in the Help
• Index — lets you use the index to find a topic
• Search — lets you search the full text of the Help for a particular
word or phrase. For more information, see “To search the Help” on
page 13.
You can also
Access macros Help Do one of the following:
• In WordPerfect, Quattro Pro, or
Presentations, click Help `
Macro commands.
• In the Reference Center, click the
Macros and Migration tab, and
then click the PerfectScript™
Help entry.

Part One: Overview 13
To search the Help
1Click the Search tab in the left pane of the Help.
2Type a word or phrase in the search box.
For example, if you are looking for information about macros, you
can type macro to display a list of relevant topics. To search for a
phrase, type the phrase, and enclose it in quotation marks (for
example, type “writing tools” or “file formats”).
3Click the List topics button.
4Choose a topic from the list that appears, and press Enter. The topic
is displayed in the right pane of the Help.
If your search results do not include any relevant topics, check
whether you spelled the search word or phrase correctly. Note that
the English Help uses American spelling (for example, “color,”
“favorite,” “center,” and “customize”), so searching for British
spellings (“colour,” “favourite,” “centre,” and “customise”) produces
no results.
To determine the location of a displayed topic within the Help,
click the Contents tab in the left pane of the Help.
Access CorelTUTOR™ Help In WordPerfect, Quattro Pro, or
Presentations, click Help `
CorelTUTOR.
You can also
Search for a word or phrase in a list
of topics generated by the previous
search
Enable the Search previous results
check box.
You can also

14 Part One: Overview
To print Help topics
You can also print a topic by right-clicking the window and
clicking Print.
Search for all forms of a word Enable the Match similar words
check box.
For example, if you type “type” and
enable this check box, the search
results will include topics that
contain the words “types” and
“typing.”
Search only the titles of Help topics Enable the Search titles only check
box.
Repeat a recently performed search On the search box, click the arrow
that points down, and choose a
word or phrase.
To Do the following
Print a section Select the section you want to
print, click Print, and enable the
Print selected heading and all
subtopics option.
Print a topic Select the topic you want to print,
click Print, and enable the Print
selected topic option.
You can also
Part One: Overview 15
To access context-sensitive Help
You can also access context-sensitive Help in a dialog box by
pressing F1.
To access the PerfectExpert
• In WordPerfect, Quattro Pro, or Presentations, click Help `
PerfectExpert.
A check mark next to the PerfectExpert command indicates that the
command is enabled, and the PerfectExpert panel displays in the left
side of the document window.
Accessing information on the Corel Web site
You can access the Corel Web site directly from within WordPerfect,
Quattro Pro, or Presentations. The Corel Web site gives you general
product information, as well as information on support and training.
To get help for Do the following
Menus Point to a menu item for QuickTips
information.
You can also point to a menu item
and press F1.
Toolbar buttons Point to a toolbar button for
QuickTips information.
You can also point to a toolbar
button, press Shift + F1, and click
the button.
Dialog boxes Click Help.
Dialog box controls Click the Context-sensitive Help
button in an open dialog box, and
click a control.
16 Part One: Overview
To access the Corel Web site
An active Internet connection is required to access Web-based
resources.
The Other Resources page of the Reference Center provides access
to additional resources on the Web.
To access Click
WordPerfect Office Web site Help ` Corel on the Web `
WordPerfect Office Web site
WordPerfect Office Community site Help ` Corel on the Web ` Office
Community
Web-based resources Help ` Corel on the Web ` Online
resources
Technical support Help ` Corel on the Web `
Technical support
Training Help ` Corel on the Web ` Training

Part Two: WordPerfect 17
Part Two: WordPerfect
WordPerfect is a powerful word-processing application that helps you
produce newsletters, articles, reports, proposals, books, and other
documents. WordPerfect lets you add graphics, tables, and charts to
documents. You can publish to paper, electronic media, and the Web.
WordPerfect allows you to format, structure, and edit documents at any
time and gives you complete control over their design.
Getting started with WordPerfect
The following chapters show you how to get started creating documents
with WordPerfect:
• “WordPerfect basics” on page 19
• “Creating and opening documents” on page 23
• “Viewing and navigating documents” on page 27
• “Saving and closing documents” on page 31
• “Entering and inserting text” on page 35
• “Selecting and deleting text” on page 37
• “Finding and replacing text and codes” on page 39
Editing and formatting documents
The following chapters show you how to edit and format your
documents:
• “Editing basics” on page 43
• “Formatting text” on page 47

18 Part Two: WordPerfect
• “Working with styles” on page 51
• “Formatting paragraphs” on page 55
• “Formatting pages” on page 59
Structuring documents
The following chapters show you how to structure your documents:
• “Using bulleted lists, numbered lists, and outlines” on page 67
• “Numbering the parts of a document” on page 71
• “Working with graphics” on page 75
• “Working with footnotes and endnotes” on page 79
Sharing documents and collaborating with others
The following chapters show you how to share your documents and
collaborate with others:
• “Working with files” on page 83
• “Printing” on page 87
• “Performing merges” on page 91
• “Working with PDF files” on page 101
• “Reviewing and comparing documents” on page 105
• “Using a document management system with WordPerfect” on
page 113
• ”WordPerfect compatibility with Microsoft® Word” on page 119
For more information on WordPerfect
For even more information on WordPerfect, please see the Reference
Center, which installs with WordPerfect Office X5. See “To access the
Reference Center” on page 12.

Part Two: WordPerfect 19
WordPerfect basics
This chapter tells you how to perform basic operations in WordPerfect.
You can explore the work area and gain a better understanding of the
basic tools and features available for creating powerful word processing
documents.
In this chapter, you’ll find these topics:
• Starting WordPerfect
• Exploring the workspace
•Changing the workspace
• Quitting WordPerfect
Starting WordPerfect
Let’s begin by starting WordPerfect.
To start WordPerfect
• On the Windows taskbar, click Start ` Programs `
WordPerfect Office X5 ` WordPerfect X5.
Exploring the workspace
The workspace in WordPerfect includes everything you see on your screen
when you start the application. The large open area is the document
window.
20 Part Two: WordPerfect
The menu bar, located at the top of the workspace, just below the title
bar, provides access to most of the WordPerfect commands.
Toolbars
Many menu commands can be accessed through toolbars, located below
the menu bar.
This is the WordPerfect toolbar.
The property bar is a context-sensitive toolbar that displays buttons and
options related to the task you are performing. For example, when text is
selected, the property bar contains only text-related commands.
This is the property bar.
By default, the property bar is located above the document window.
The application bar
The application bar displays information about the status of the active
WordPerfect document. By default, the application bar is located below
the document window.
When you open a file, a document button with the name of the file
appears on the application bar. You can use document buttons to quickly
move between the documents. For more information about moving
between documents, see “Navigating documents” on page 30.
This illustration shows items on the right side of the application
bar.

Part Two: WordPerfect 21
Changing the workspace
WordPerfect lets you use different workspaces for creating documents.
When choosing a workspace, you are specifying the toolbars, buttons,
options, and menus that WordPerfect displays. The following workspaces
are available:
•WordPerfect Office mode — displays the default WordPerfect
workspace
•Microsoft Word mode — simulates the Microsoft Word workspace
by positioning the WordPerfect features, including toolbars,
keyboards, and menu items, where you would find the equivalent
features in Microsoft Word. For more information about using
Microsoft Word mode, see “Simulating the Microsoft Word
workspace” on page 119.
•WordPerfect Legal mode — exposes the WordPerfect legal features,
such as tools that let you create specialized legal documents such as
cases and pleadings.
•WordPerfect Classic mode — lets you work in the familiar visual
environment of Corel WordPerfect 5.1 and use its keystrokes.
To change the workspace
1Click Tools ` Workspace manager.
2Enable one of the following options:
• WordPerfect Office mode
• Microsoft Word mode
• WordPerfect Classic mode (version 5.1)
• WordPerfect Legal mode

22 Part Two: WordPerfect
Quitting WordPerfect
You can quit WordPerfect, which closes the application along with all of
the documents you have open.
To quit WordPerfect
• Click File ` Exit.
You are prompted to save any modified documents before
quitting.

Part Two: WordPerfect 23
Creating and opening
documents
WordPerfect lets you start a document from a blank page or from a
template. A blank page lets you customize every aspect of a document’s
text and layout. A template is a preformatted document that you can
use as-is, or customize to best suit your needs.
In this chapter, you’ll find these topics:
• Understanding the parts of a document
•Creating documents
• Opening documents
Understanding the parts of a document
A WordPerfect document consists of one or more of the following
components.
Text
Text can be typed directly into WordPerfect or imported from text editors
or other word-processing applications. For more information about
adding text to a document, see “Entering and inserting text” on page 35.
Graphics
Graphics include shapes, drawings, pictures, and clipart. A shape is any
object created with WordPerfect drawing tools. A drawing is created with
Presentations menus and tools.

24 Part Two: WordPerfect
A picture is a bitmap, or graphic image, that has been imported into a
WordPerfect document. Pictures can be imported from a CD or from
photo-editing programs, such as Corel® PHOTO-PAINT™. You can also
import pictures by using a scanner. Clipart images are images that can be
brought into Corel applications and used as they are or edited. For more
information about adding graphics to a document, see “Inserting
graphics” on page 75.
Styles
A style is a collection of formatting attributes applied to characters,
paragraphs, or documents. By formatting items with styles, you ensure
consistent formatting throughout a document. Whenever you change
the formatting in a style, you change the appearance of all items that use
that style. For more information about formatting with styles, see “Using
text styles” on page 51.
Templates
A template is a preformatted document that can be used as a guide for
creating a new document. Every document created in WordPerfect is
based on a template or a project template. When you open WordPerfect,
the blank document you see is based on the default template. Project
templates include fax cover sheets, memos, newsletters, and brochures.
For more information about templates, see “Creating documents from
project templates” in the WordPerfect Help.
Macros
Macros are used to automate application tasks. For example, you can use
WordPerfect macros to set margins, select a font, or create a merge file.
For more information about macros, see “Using recordings, macros, and
automation features” in the WordPerfect Help.

Part Two: WordPerfect 25
Creating documents
You can create a document in WordPerfect by using the default template,
a blank document that includes formatting elements such as margin
settings, tab settings, and toolbars. WordPerfect also includes
ready-made project templates that you can open and use to create a wide
range of documents, including letters, fax cover sheets, calendars, and
business cards.
To create a document by using the default template
• Click File ` New.
You can also create a new document based on the default
template by clicking the New blank document button on the
toolbar.
Opening documents
You can open word-processing documents that were created in
WordPerfect or in another application. The advantage of opening, rather
than importing a document created in another application, is that many
of the formatting attributes in the original document, such as page size,
margins, font properties, bullets, and underlining are preserved. Some of
the features that are not supported include embedded pictures, hidden
text, interline spacing, kerning, macros, multiple page layouts (the first
one in the document is used throughout), and OLE objects. For more
information about importing files, see “Import and export file formats for
WordPerfect” in the WordPerfect Help.
You can also
Create a document from a project
template
Click File ` New from project.

26 Part Two: WordPerfect
To open a document
1Click File ` Open.
2Choose the drive and folder where the document is stored.
3Choose a file.
4Click Open.
You can also open a document by clicking the Open button on
the toolbar.
If you know where a file is located, you can type the full path and
filename in the File name list box.

Part Two: WordPerfect 27
Viewing and navigating
documents
WordPerfect lets you customize the way you view and navigate
documents. WordPerfect lets you switch document views. You can also
use Reveal Codes, which lets you quickly format long or complex
documents by viewing and editing formatting codes.
In this chapter, you’ll find these topics:
• Switching document views
• Changing document display settings
•Using Reveal Codes
• Navigating documents
For additional topics, please see “Viewing and navigating
documents” in the WordPerfect Help.
Switching document views
In WordPerfect, you can view documents in four ways: draft, page, two
pages, and browser preview.
To switch the document view
• Click View, and click one of the following:
• Draft — to hide some document elements such as footers, page
breaks, margins, and watermarks
• Page — to display the document the way it will look when printed

28 Part Two: WordPerfect
• Two pages — to display two consecutive pages in a document side
by side
• Preview in browser — to display a document in HTML format
Changing document display settings
WordPerfect lets you change document display settings in several ways.
You can enlarge or reduce the page display.
You can cascade or tile multiple open documents.
To enlarge or reduce the page display
1Click View ` Zoom.
2Enable one of the following options:
• Margin width — displays a complete line or block of text within a
window with minimal white space to the right and left
• Page width — displays the width of the page including margins in
the window
• Full page — displays all page margins in the document window
• Other — lets you enter a custom zoom percentage
To enlarge or reduce the page display, the document must be in
Draft or Page view.
To cascade multiple documents
• Click Window ` Cascade.
You can also
Display the ruler in Two p ag es view In Tw o p age s view, click View `
Ruler.
Part Two: WordPerfect 29
To tile multiple documents
• Click Window, and click one of the following:
• Tile side by side
• Tile top to bottom
Using Reveal Codes
Formatting codes are inserted when you add text and formatting to a
document. Reveal Codes gives you full control over document formatting,
especially when copying and pasting text from various sources. For
example, to remove bold formatting, you can turn on Reveal Codes,
locate the <Bold> code, and then just drag it out of the Reveal Codes
window. You can also double-click any code in the Reveal Codes window
to make advanced alterations to the settings or styles. Codes are hidden
by default; however, they can be displayed in a separate window below
the active document.
This is how the text is displayed in the Reveal Codes window.
You can hide or display formatting codes.
To hide or display formatting codes
• Click View ` Reveal Codes.
A check mark beside Reveal Codes indicates that formatting codes
are displayed.

30 Part Two: WordPerfect
Navigating documents
WordPerfect lets you navigate documents in several ways. You can move
to a specific section of a document, or you can scroll through a
document.
To move to a specific section of a document
1Click Edit ` Go to.
2Choose an option from Go to what list box.
3Choose any applicable options from the area to the left of the list
box.
4Click Go to.
You can also access the Go to dialog box by pressing Ctrl + G.
To scroll through a document
1On the toolbar, click the Autoscroll button.
The pointer changes to the Autoscroll arrow.
2Move the Autoscroll arrow in the direction you want to scroll.
The scrolling speed increases if you move the arrow further away
from the Autoscroll tool.
You can disable Autoscroll by clicking anywhere in the document.

Part Two: WordPerfect 31
Saving and closing
documents
WordPerfect lets you save and close documents.
In this chapter, you’ll find these topics:
•Saving documents
• Closing documents
Saving documents
By default, you can save documents in WordPerfect 6–X5 format. This
ensures cross-platform compatibility for documents saved in WordPerfect
6.x and later, and lets you save a document in an earlier version of
WordPerfect. You can also save documents in formats other than
WordPerfect, such as Microsoft Word.
WordPerfect lets you create backup copies of documents. Creating
backup copies helps prevent the loss of your work if you close a
document before saving it, or if a power failure occurs.
When you save a document, it may contain information that you do not
want others to see. For example, the name of your computer or a
document summary may be included in the file. This information is
known as metadata, which is data used to identify, describe, and locate
electronic resources on a network. Metadata is used to enhance the
editing, viewing, filing, and retrieving of electronic documents. It is
important to keep this information stored in the original document, but
you can avoid sharing the metadata with others by saving a version of the
document without including the metadata.
32 Part Two: WordPerfect
To save a document
1Click File ` Save.
2Choose the drive and folder in which you want to save the file.
To save a file in a format other than WordPerfect, choose a file
format from the File type list box.
3Type a name in the Filename box.
To embed the fonts in the document, enable the Embed fonts using
TrueDoc® check box.
4Click Save.
If you have already saved the document, you will not be prompted
to specify the drive, folder, and filename.
Embedding ensures that the information for all fonts used in a
document is saved with the document. You may want to embed
fonts if you are using an unusual font, or if you want to ensure
that the font you are using is displayed properly.
A filename cannot exceed 255 characters.
You can also save a document by pressing F3 or by clicking the
Save button on the toolbar.
To set timed document backups
1Click Tools ` Settings.
2Click Files.
You can also
Save changes to a document Click File ` Save.
Rename a file Right-click the file, and click
Rename. Type a new name in the
Filename box.

Part Two: WordPerfect 33
3On the Document page, enable the Timed document backup every
check box.
4Type a value in the minutes box.
To save a document without metadata
1Click File ` Save without metadata.
2Choose the drive and folder in which you want to save the
document.
By default, _mtd is added to the filename to identify that the file
does not contain metadata.
3Enable the Keep original document open check box.
If the Keep original document open check box is not enabled, the
original document closes, and the metadata-free version remains
open.
4In the Select metadata to remove area, enable any of the following
check boxes:
• Comments — Comment information includes the comment
writer’s name, initials, and the date the comment was inserted in
the document. If you want to remove both the comment text and
the comment information, enable the Content and information
option. If you want to remove only the comment information,
enable the Information only option.
You can also
Save backup files in a specific folder In the Backup folder box, click the
Browse button. Choose the
drive and folder in which you want
to save backup files.
Save a backup file each time you
save a document
Enable the Save original document
as a backup at each save check
box.

34 Part Two: WordPerfect
• Hidden text
• Annotations
• Undo/redo history
• Document summary data
• Headers
• Footers
• Hyperlinks
• OLE object information
• Routing slip
5Click Save.
Closing documents
You can close WordPerfect documents.
To close a document
• Click File ` Close.
You are prompted to save any modified documents before
closing.
You can also close a document by clicking the Close button on the
menu bar.

Part Two: WordPerfect 35
Entering and inserting text
There are several ways to enter and import text into a WordPerfect
document.
In this chapter, you’ll find these topics:
•Entering text
• Inserting text
For information about selecting and deleting text, see “Selecting and
deleting text” on page 37.
Entering text
You can enter text in the document window. You can use the shadow
cursor to show where the text will be positioned.
You can also enter text in a text box so that it appears in a separate frame.
To enter text in a document window
1Click in the document window.
2Type text.
To enter text by using the shadow cursor
1Click View ` Shadow cursor.
A check mark next to the menu command indicates that the shadow
cursor is enabled.

36 Part Two: WordPerfect
2Click anywhere on the page.
3Type text.
The shadow cursor changes appearance to show how text will be
aligned when you start typing. Small arrows beside the shadow
cursor point in different directions when text is left-justified,
centered, or right-justified.
To enter text in a text box
1Click Insert ` Text box.
2Type text.
Inserting text
You can insert text from another file.
If you have more than one document opened, you can use the
application bar to insert text from one document to another document.
For information, see “To insert selected text from another document” in
the WordPerfect Help.
To insert the entire text of another document
1Click where you want to insert the text.
2Click Insert ` File.
3Choose the drive and folder where the document is stored.
4Choose a file.
5Click Insert.

Part Two: WordPerfect 37
Selecting and deleting text
With WordPerfect, you have different options for selecting and deleting
text.
In this chapter, you’ll find these topics:
• Selecting text
• Deleting text
Selecting text
You can select text or deselect text, a tabular column, a rectangular block
of text, or a range of text.
To select text
To select Do the following
A character or word Drag across a character or word.
A sentence Click in a sentence. Click Edit `
Select ` Sentence.
A paragraph Click in a paragraph. Click Edit `
Select ` Paragraph.
A page Click on a page. Click Edit ` Select
` Page.
A document Click Edit ` Select ` All.

38 Part Two: WordPerfect
To deselect text
• Click anywhere outside the selected text.
Deleting text
You can delete text.
To delete text
1Select the text you want to delete.
2Press Delete.
You can also delete text by clicking after the text you want to
delete, and pressing Backspace.
A tabular column Select the text from the first
character in the tabular column to
the last character in the tabular
column, and then click Edit ` Select
` Tabular c ol umn .
A rectangular block of text Select the text from the upper left
corner to the lower left corner of
the block, and then click Edit `
Select ` Rectangle.
A range of text in a document Click Edit ` Select ` Section, choose
an option from the Select list, and
then type a value in the Range box.
To select Do the following

Part Two: WordPerfect 39
Finding and replacing text
and codes
WordPerfect lets you find and replace text and codes.
In this chapter, you’ll find these topics:
• Finding and replacing text
• Finding and replacing formatting codes
Finding and replacing text
WordPerfect lets you find and replace text. You can search for words,
phrases, or individual characters in a document. Once the text is found,
you can replace some or all occurrences of the text with other text, or you
can delete the text.
You can also find and replace forms of a word. For example, you can
replace forms of the word “entry” with the word “insertion.” Therefore,
if the plural form, “entries,” is found, it is replaced with the word
“insertions.” Furthermore, you can search for occurrences of words that
are whole words, and not part of a larger word. For example, if you do a
default search for the word “sum,” you will find “sum,” “summer,” and
“summit.” If you do a whole-word search for the word “sum,” you will
find only occurrences of the word “sum.”
To find and replace text
1Click Edit ` Find and replace.
2In the Find box, type the text you want to search for.
3Type the replacement text in the Replace with box.
40 Part Two: WordPerfect
4Click one of the following:
• Find next — finds the next occurrence of the search text
• Find prev — finds the previous occurrence of the search text
• Replace — finds and replaces the next occurrence of the search
text
• Replace all — finds and replaces all occurrences of the search text
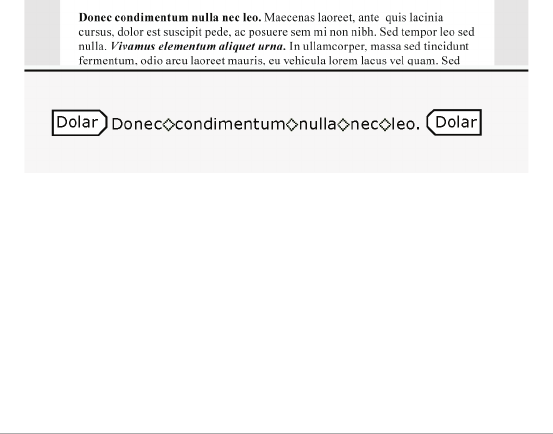
You can delete all occurrences of a text string by typing the text
you want to delete in the Find box and leaving the Replace with
box empty.
You can search for a word or phrase you searched for previously
by choosing the word or phrase from the Find list box.
To find and replace a form of a word
1Click Edit ` Find and replace.
2Click Type ` Word forms.
3In the Find box, type the word you want to find.
4Type the replacement word in the Replace with box.
5Click one of the following:
• Find next — finds the next occurrence of the word
• Find prev — finds the previous occurrence of the word
• Replace — finds and replaces the next occurrence of the word
• Replace all — finds and replaces all occurrences of the word
You can also
Find the next occurrence of the
search text
Press Ctrl + Alt + N.
Find the previous occurrence of the
search text
Press Ctrl + Alt + P.

Part Two: WordPerfect 41
To find and replace a whole word
1Click Edit ` Find and replace.
2Click Match ` Whole word.
3In the Find box, type the word you want to find.
4Type the replacement word in the Replace with box.
5Click one of the following:
• Find next — finds the next occurrence of the word
• Find prev — finds the previous occurrence of the word
• Replace — finds and replaces the next occurrence of the word
• Replace all — finds and replaces all occurrences of the word
Finding and replacing formatting codes
You can search for and replace codes in a document. For example, if you
search for a font size code, all font size codes are found.
You can also search for specific codes, such as a specific font size. For
information, see “To find and replace a specific formatting code” in the
WordPerfect Help.
To find and replace codes, you must first enable Reveal Codes. For more
information about using Reveal Codes, see “Using Reveal Codes” on
page 29.
To find and replace a general formatting code
1Click Edit ` Find and replace.
2Click Match ` Codes.
To choose a merge code, enable the Display merge codes only check
box.
3Choose a code from the Find codes list box.
4Click Insert.

42 Part Two: WordPerfect
5In the Find and replace dialog box, click in the Replace with box.
6In the Codes dialog box, choose a replacement code from the
Replace codes list box.
7Click Insert and close.
8Click one of the following:
• Find next — finds the next occurrence of the code
• Find prev — finds the previous occurrence of the code
9Click Replace.
To replace all occurrences of a code, click Replace all.

Part Two: WordPerfect 43
Editing basics
After you create a document, you can edit it by using a variety of
methods.
In this chapter, you’ll find these topics:
• Cutting, copying, and pasting text and graphics
• Moving text and graphics
• Undoing, redoing, and repeating actions
You can also apply comments and digital signatures to
documents. For information, see “Editing basics” in the
WordPerfect Help.
Cutting, copying, and pasting text and graphics
You can cut or copy text or graphics and paste them to a new location in
a document.
When you cut or copy information, it is stored on the Clipboard. You can
paste it in the active document, in another document, or in another
application.
You can also choose a specific format when you paste information from
the Clipboard into WordPerfect. For example, you can copy text from
another application as Rich Text Format (.rtf) or as simple text (.txt).
44 Part Two: WordPerfect
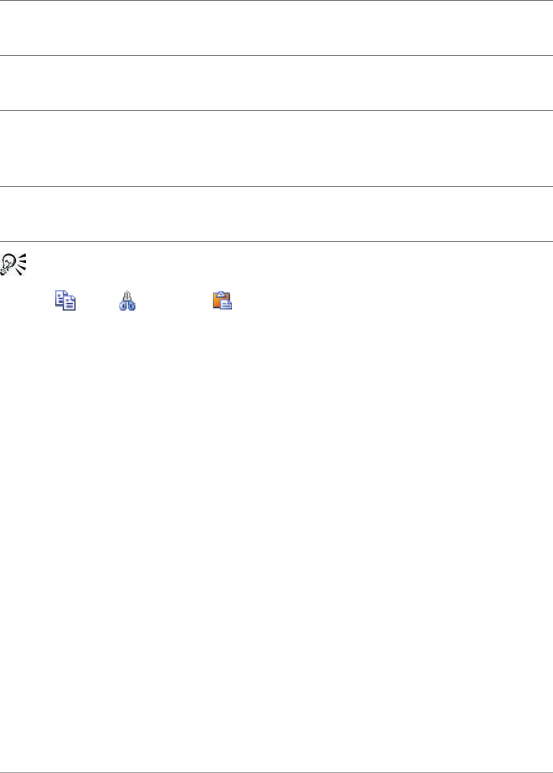
To cut, copy, and paste text and graphics
You can also copy, cut, or paste text or graphics by clicking Copy
, Cut , or Paste on the toolbar.
You can link copied information to a document by enabling the
Paste link option. The changes you make to the linked information
in the active file are reflected in the original file. The changes made
to the original file also appear in the active file.
To paste Clipboard contents in a specified format
1Select the text or graphic.
2Click Edit, and click one of the following:
• Copy
• Cut
3Click Edit ` Paste special.
4Enable the Paste option.
5Choose a format from the As list.
To Do the following
Copy text or graphics to the
Clipboard
Select the text or graphic, and click
Edit ` Copy.
Cut text or graphics and move to
the Clipboard
Select the text or graphic, and click
Edit ` Cut.
Paste text or graphics in a
document
Click where you want to insert the
text or graphic, and click Edit `
Paste.
Add a selection to the current
Clipboard contents
Select the text to add to the
Clipboard, and click Edit ` Append.

Part Two: WordPerfect 45
You can paste text without formatting by pressing Ctrl + Alt + V.
This technique is useful for pasting text that was copied from a
Web browser.
Moving text and graphics
You can move text and graphics within a document or between
documents.
To move text or graphics by dragging within a document
• Select a text or graphic, and drag it to a new position.
To move text or graphics by dragging to another document
1Click Window, and click one of the following:
• Tile top to bottom — arranges the windows so that the
documents are displayed above or below one another
• Tile side by side — arranges the windows so that the documents
are displayed side by side
2Select the text or graphic, and drag it to the other document.
Undoing, redoing, and repeating actions
WordPerfect lets you undo actions one at a time, or undo a series of
actions all at once. You can undo changes made to text, graphics, or
tables. However, some actions, such as scrolling or saving a document,
cannot be reversed. You can redo actions that you have undone. You can
also repeat actions.
46 Part Two: WordPerfect
To undo actions
You can undo an action by clicking the Undo button on the
toolbar.
You can undo a series of actions by clicking the drop-down arrow
beside the Undo button on the toolbar.
To redo actions
You can redo an action by clicking the Redo button on the
toolbar.
You can redo a series of actions by clicking the drop-down arrow
beside the Redo button on the toolbar.
To repeat an action
1Click Edit ` Repeat next action.
2Type a value in the Number of times to repeat next action box.
To Do the fol lowing
Undo the last action you
performed
Click Edit ` Undo.
Undo a series of actions Click Edit ` Undo/Redo history,
choose an action from the Undo
list, and click Undo.
To Do the fol lowing
Redo an action that was just
undone
Click Edit ` Redo.
Redo a series of actions Click Edit ` Undo/Redo history,
choose an action from the Redo
list, and click Redo.

Part Two: WordPerfect 47
Formatting text
In WordPerfect, you can use a variety of formatting tools to control the
look of text.
In this chapter, you’ll find these topics:
• Modifying font settings
• Copying the text format
For additional topics, please see “Formatting text” in the
WordPerfect Help.
Modifying font settings
You can apply formatting to text to change the font and its attributes,
such as style, size, and color.
You can also apply relative font sizes, which allows you to format text
relative to the specified font size. Suppose you want to add a heading to
a document that has a 12-point paragraph font. If you select the heading
text and specify a large relative font size, the text displays proportionately
larger than the 12-point font.
Using Corel® RealTime Preview™ lets you view text fonts and sizes before
you apply them. For example, you can view text as it will display in various
fonts before choosing which is the most suitable.
You can also change the default font and font size for the active
document or for all documents.
48 Part Two: WordPerfect
To change the font
1Click in the document.
2Click Format ` Font.
3Click the Font tab.
4Choose a font from the Face list.
You can also change the font color by clicking the Font color
button on the property bar, and clicking a color.
You can also change the underline font style by opening the
Underline picker on the property bar and clicking an underline
style.
To change the font appearance
1Select the text you want to modify.
2Click Format ` Font.
3Click the Font tab.
4In the Appearance area, enable one or more of the following check
boxes:
• Bold — applies bold formatting to the selected text
• Italic — applies italic formatting to the selected text
• Underline — applies a single underline to the selected text
• Outline — outlines the selected text
You can also
Change the font size Choose a font size from the Size
list box.
Change the relative font size Click Relative size, and click a font
size.
Change the font color Open the Color picker, and click a
color.

Part Two: WordPerfect 49
• Shadow — applies a shadow to the selected text
• Small caps — applies small capitals to the selected text
• Redline — applies the color red to the selected text
• Strikeout — applies a line through the selected text
• Hidden — applies the hidden format to the selected text
To change the font by using Corel RealTime Preview
1Click in a document.
2Open the Font face list box on the property bar, and point to a font.
Changes to the font display in the font face preview window.
3Choose a font from the Font face list box.
You can change the font size using Corel RealTime Preview by
opening the Font size list box on the property bar, viewing the
font sizes in the font size preview window, and choosing a font
size.
To change the default font and font size
1Click File ` Document ` Default font.
2Choose a font from the Face list.
3Choose a font size from the Size list box.
If you want to change the default font and font size for all new
documents, click Settings, and click Set as default for all documents.
You must install a printer before you can change the default font.
If you specify a default printer font and distribute the file to others,
the file may not display or print correctly if their printer doesn’t
have the specified default font.
You can view the available attributes for each font by clicking the
plus sign (+) to the left of a font in the Face list.

50 Part Two: WordPerfect
Copying the text format
You can copy the format of text and apply it to other text in a document.
If you want to copy selected text, then formatting attributes, such as font,
font size, and font style, are all copied. If you want to copy the heading
in a paragraph, the paragraph style as well as the font and its attributes
are copied.
To copy the text format
1Click in the text whose format you want to copy.
2Click Format ` QuickFormat™.
3Enable one of the following options:
• Selected characters — copies the format of the font and its
attributes
• Headings — copies the format of the paragraph and its styles, and
the font and its attributes
4Click OK.
5Drag the QuickFormat paintbrush pointer over the text to which you
want to copy the format.
6Click Format ` QuickFormat.
QuickFormat is disabled when no check mark displays beside the
QuickFormat menu command.
You can also enable or disable QuickFormat by clicking the
QuickFormat button.

Part Two: WordPerfect 51
Working with styles
WordPerfect provides several preset styles ready for use. You can also
create your own styles. A style is a collection of formatting attributes
that you can apply to text or graphics.
In this chapter, you’ll find these topics:
• Using text styles
For information about list styles, variables, and graphics styles, see
“Working with styles” in the WordPerfect Help.
Using text styles
You can create text styles. Text styles are collections of formatting
attributes that you can apply to selected text, paragraphs, or the entire
document. Text styles you create are saved with the active document. You
can create a QuickStyle for text. QuickStyles are styles created based on
the formatting in effect at the cursor location. You can also create a
QuickStyle for a paragraph.
Formatting text with styles ensures consistent formatting throughout a
document. Whenever you change the formatting in a style, you change
the appearance of all text that uses that style.
You can save a text style. You can also specify where to save text styles.
When you save a text style, you can associate it with a specific template
or with the active document only, or you can save it as a separate file.

52 Part Two: WordPerfect
Saving a text style as a separate file is useful if you plan to use the style
with a different template or on a different computer.
You can apply a style to text in a document.
You can edit a text style.
To create a text style
1Click Format ` Styles.
2Click Create.
3In the Styles editor dialog box, type a name for the style in the Style
name box.
You can create style names that contain up to 12 characters.
4Type a description for the style in the Description box.
5Choose a style from the Type list box.
6Using the Styles editor toolbar and menu bar, apply any style
attributes.
If you want to define what function the Enter key performs when the
style is applied, choose a style from the Enter key inserts style list box.
If you want to display the codes that take effect when a style ends,
enable the Show ‘off codes’ check box.
Give each style a unique name; otherwise, when you combine
documents that contain a style with the same name, one style is
used and the other deleted in the new document.
The Reveal Codes check box is enabled by default and displays the
codes for the style attributes in the Contents box.
You can also
Delete a text style Click Format ` Styles, choose a style
from the Available styles list, and
click Options ` Delete.

Part Two: WordPerfect 53
You can also define the style attributes by typing codes or text in
the Contents box in the Styles editor dialog box.
To create a QuickStyle
1Select the text or paragraph for which you want to create a
QuickStyle.
2Click Format ` Styles.
3Click QuickStyle.
4In the QuickStyle dialog box, type a name for the style in the Style
name box.
5Type a description for the style in the Description box.
6Enable one of the following options:
• Character with automatic update — creates a QuickStyle for
characters
• Paragraph with automatic update — creates a QuickStyle for
paragraphs
To save a text style
1Click Format ` Styles.
2Click Options ` Save as.
3In the Save styles to dialog box, type a filename in the Filename box.
4In the Style type area, enable one of the following options:
• Both — includes both the styles you have created and the preset
styles provided with WordPerfect
• User styles — includes only the styles you have created
• System styles — includes only the preset styles provided with
WordPerfect
5Click Options ` Settings.
6In the Save new styles to area, enable one of the following options:

54 Part Two: WordPerfect
• Current document — associates the style with the active document
• Default template — associates the style with the default template
• Additional objects template — associates the style with an
additional objects template
The Additional objects template option is available only if you
have specified a second default template to use for additional
objects such as keyboards, menus, template macros, toolbars, and
styles.
To apply a text style
1Click Format ` Styles.
2Choose a style from the Available styles list.
3Click Insert.
4Type the text in the document.
5Press Enter.
6Press Backspace.
To edit a text style
1Click Format ` Styles.
2Choose a style from the Available styles list box.
3Click Edit.
4In the Styles editor dialog box use the Styles editor toolbar and
menus to apply any style attributes.
If you want do define what function the Enter key performs when
the style is applied, choose a style from the Enter key inserts style list.
If you want to display the codes that take effect when a style ends,
enable the Show ‘off codes’ check box.

Part Two: WordPerfect 55
Formatting paragraphs
WordPerfect allows you to control the look of documents by formatting
paragraphs. By changing the paragraph formatting, including
justification, tab stops, and line spacing, you can control the placement
of paragraphs on a page.
In this chapter, you’ll find these topics:
• Indenting text
• Justifying text
• Changing the spacing between lines
For additional topics, please see “Formatting paragraphs” in the
WordPerfect Help.
Indenting text
Indenting arranges text on a page by moving one or more lines to the left
or the right of the paragraph margin. You can indent a line or paragraph
manually or you can indent lines or paragraphs using the ruler or
automatically.
To move the first line of a paragraph farther to the left than subsequent
lines, you can apply a hanging indent. To indent an entire paragraph one
tab stop from both the left and right margins, you can apply a double
indent. A double indent is often used to format lengthy quotations.

56 Part Two: WordPerfect
To apply a single indent to text
To apply a hanging or double indent to text
1Click at the beginning of a paragraph.
2Click Format ` Paragraph, and click one of the following:
• Hanging indent — indents all but the first line in the paragraph
• Double indent — indents the paragraph equally from both
margins
You can also apply a hanging indent by clicking at the beginning
of any line in a paragraph, except the first line, and pressing Tab .
Justifying text
You can justify text in a document. Doing so aligns the text horizontally
between the left and right margins of the page.
To indent Do the following
A line of text Click at the beginning of a line of
text. Press Tab.
A paragraph Click at the beginning of a
paragraph. Click Format `
Paragraph ` Indent.
The first line of a paragraph using
the ruler
Click in a paragraph. Drag the First
line indent marker to a new
position on the ruler.
The first line of every paragraph
automatically
Click in a paragraph. Click Format `
Paragraph ` Format. In the First
line indent box, type a value to
specify the distance to indent.
Part Two: WordPerfect 57
To justify text
1Click in a paragraph.
2Click Format ` Justification, and click one of the following:
• Left — aligns text evenly with the left margin
• Right — aligns text evenly with the right margin
• Center — centers text between the right and left margins
• Full — aligns text, excluding the last line, along both the right and
left margins
• All — aligns text, including the last line, along both the right and
left margins
Justification is applied to all text from the cursor location forward.
If you want to apply justification to a word, line, or paragraph, you
must first select the text.
You can also justify text by clicking the Justification picker on
the property bar and clicking a justification.
Changing the spacing between lines
The space between lines, or the amount of white space that appears
between the bottom of one line and the top of the next line, is referred
to as leading.
You can change the leading by changing the line spacing and changing
the line height.
You can also change the spacing between paragraphs. For
information, see “Adjusting paragraph spacing” in the
WordPerfect Help.

58 Part Two: WordPerfect
To adjust the leading
1Click in a paragraph.
2Click Format ` Typesetting ` Word/Letter spacing.
3Enable the Adjust leading check box.
4Type a value in the Between lines box.
A positive value increases the leading; a negative value decreases it.
To change the line spacing
1Click in a paragraph.
If you want to limit the line spacing change to a specific section of
text, select the text.
2Click Format ` Line ` Spacing.
3Type a value in the Spacing box.
To change the line height
1Click in the line of text where you want the line height change to
begin.
If you want to limit the line height change to a specific section of
text, select the text.
2Click Format ` Line ` Height.
3Enable one of the following options:
• Automatic — defines the line height according to the font being
used
• Fixed — lets you specify the height of the line regardless of the
font being used
• At least — lets you specify the minimum height of the line
Line height is determined by multiplying the current line height by
the number you specify.

Part Two: WordPerfect 59
Formatting pages
WordPerfect lets you format a document by modifying the physical
arrangement of information on pages. For example, you can adjust page
size and margins. You can also add columns to documents. When
formatting pages, you can modify the format of an entire page or a
portion of a page.
In this chapter, you’ll find these topics:
• Setting page margins
• Choosing page size and orientation
• Creating custom page sizes
• Making text fit a specific number of pages
• Creating and deleting columns
For additional topics, please see “Formatting pages” in the
WordPerfect Help.
Setting page margins
WordPerfect lets you set margins using various methods.
You can set margins by using guidelines. Guidelines are vertical or
horizontal dotted lines that are displayed on pages.
You can also set margins using exact measurements or the ruler. For
information, see “Setting page margins” in the WordPerfect Help.

60 Part Two: WordPerfect
All margin settings affect the current page and subsequent pages
until you change them.
To set the margins by using the margin guidelines
1Click View ` Guidelines.
2Enable the Margins check box.
3Point to one of the following guidelines:
• left vertical dotted guideline
• right vertical dotted guideline
• upper horizontal dotted guideline
• lower horizontal dotted guideline
The pointer changes to a double-sided arrow.
4Drag the guideline to a new position.
Choosing page size and orientation
When creating documents, you can choose the size and orientation of
pages. The page size and orientation determine how a printer formats
and prints pages. You can choose from preset page sizes, or you can
create your own. For more information about creating custom page sizes,
see “Creating custom page sizes” on page 62.
Page sizes are matched to the printer you have selected. A size may not
be available when you change to another printer or a different computer.
If the same size is not available, WordPerfect finds the best match for a
page size, selecting from those available with the other printer. If the
match does not work, you may need to customize a page size.
As you edit a document, each logical page is treated as a separate page.
The document window also changes to show the dimensions of the
logical page. After you fill a logical page, the text continues on the next
logical page.

Part Two: WordPerfect 61
To select a preset page size
1Click File ` Page setup.
2Click the Page setup tab.
3From the Page definition list box, choose one of the following:
• Printer page types — lists all page size options for installed printers
• Standard page types — lists all page size options for most printers
4Choose a page definition from the Page definition list.
5In the Page definition applies to area, enable one of the following
options:
• Current and following pages — applies the page definitions to the
current and following pages
• Current page only — applies the page definitions to the current
page only
If you apply the page size definition to the current page only,
WordPerfect inserts a delay code in the next page. For more
information about delay codes, see “Inserting and editing delay
codes” in the WordPerfect Help.
To specify page orientation
1Click File ` Page setup.
2Click the Page setup tab.
3In the Orientation area, enable one of the following options:
• Portrait — prints the document on pages that have greater length
than width
• Landscape — prints the document on pages that have greater
width than height

62 Part Two: WordPerfect
Creating custom page sizes
You can create a custom page size from scratch, or you can modify a
preset page size. When you create a custom page size, it is added to the
printer’s page size selection as a preset. Therefore, you can apply the
custom size to more than one document.
To create a custom page size
1Click File ` Page setup.
2Click the Page setup tab.
3Click Add.
4In the Add new form dialog box, type a name for the new page size
in the Name box.
5Choose a predefined paper type from the Type list box.
6Choose a predefined paper size from the Size list box.
If you want to create a page size definition from a nonstandard
paper size, choose User defined size from the Size list box.
7Type values in the following boxes:
• Width
• Height
8Choose a paper source from the Source list box.
The paper source is not saved as part of the document. It must be
redefined for each document.
All printers have a nonprintable zone. If information is formatted
to print in this area, it will not print. To shift information out of
the nonprintable zone, you must specify printing adjustments.
To modify a preset page size
1Click File ` Page setup.
2Click the Page setup tab.

Part Two: WordPerfect 63
3Choose a page definition from the Page definition list.
4Click Edit.
5Modify any of the settings.
Making text fit a specific number of pages
You can make selected text or all text in a document fit a specific number
of pages.
To make text fit a specific number of pages
1Click in a document.
2Click Format ` Make It Fit™.
3Type a value in the Desired number of pages box.
The number of pages you set must be within 50 percent of the
document’s current page count.
4In the Items to adjust area, enable any of the following check boxes:
• Left margin
• Right margin
• Top margin
• Bottom margin
• Font size
• Line spacing
5Click Make it fit.
To make only a certain block of text fit, select the text.
Creating and deleting columns
You can use columns to divide text vertically on a page. You can use four
types of columns in documents: newspaper, balanced newspaper,
parallel, and parallel with block protect. You can add columns to
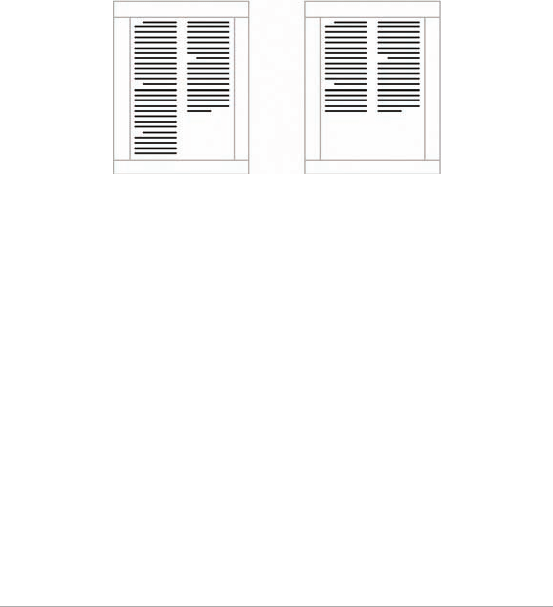
64 Part Two: WordPerfect
documents to create newsletters, glossaries, scripts, or inventory lists. You
can discontinue columns when they are complete. You can also delete
columns and quickly move through columns.
Text in newspaper columns flows down the column to the bottom of a
page or column break and starts again at the top of the next column.
Balanced newspaper columns are similar to regular newspaper columns,
but each column is adjusted on the page so that all columns are equal in
length.
These are examples of pages with columns. The left page displays
newspaper columns. The right page displays balanced
newspaper columns.
The parallel column text is grouped across the page in a row. The next
row starts below the longest column of the previous row. Parallel columns
are useful for resumes, scripts, charts, inventory lists, or lists where
columns span multiple pages.
Parallel columns with block protect keep each row of columns together.
If a column in one row becomes so long that it moves across a page
break, the entire row moves to the next page.

Part Two: WordPerfect 65
This is an example of parallel columns with block protect.
To create columns
1Click a page.
2Click Format ` Columns.
3Type a value in the Number of columns box.
4In the Type of columns area, enable one of the following options:
• Newspaper — makes text flow down a column to the bottom of a
page or column break and continues it at the top of the next
column
• Balanced newspaper — adjusts newspaper columns so that
columns are of equal length
• Parallel — groups columns across the page in rows, and starts
subsequent rows below the longest column of the previous row
• Parallel w/block protect — keeps all rows of the columns together
across page breaks
You can also apply columns to a page by clicking the Columns
button on the toolbar.

66 Part Two: WordPerfect
To discontinue columns
1Click where you want columns to discontinue.
2Click Format ` Columns.
3Click Discontinue.
Press Ctrl + Enter to end one column and start the next column.
To delete all columns
1Click in the top-left corner of the first column.
2Click Format ` Columns.
3Click Discontinue.
You can also delete columns by dragging the [Col Def] code out
of the Reveal Codes window.
To navigate columns
To mov e t o Press
The top of a column Alt + Home
The last line of a column Alt + End
The previous column Alt + Left Arrow
The next column Alt + Right Arrow

Part Two: WordPerfect 67
Using bulleted lists,
numbered lists, and outlines
In WordPerfect, you can organize text by using bullets, numbers, or
outlines. Bullets help to differentiate items in a list or add emphasis to
selected paragraphs. You can use bullets to mark list items that have no
particular order. Numbered lists and outlines help you organize and
display information and are used to show the relationship between
ideas.
Bulleted lists, numbered lists, and outlines can include several levels of
numbering. For example, you can number first-level items 1, 2, 3, and
second-level items a, b, c. You can also use outline or legal styles, such as
1, a, i, or 1, 1.1, or 1.1.1.
In this chapter, you’ll find these topics:
• Creating and applying bulleted lists
• Creating numbered lists
• Arranging items in lists and outlines
For additional topics, please see “Using bulleted lists, numbered
lists, and outlines” in the WordPerfect Help.
Creating and applying bulleted lists
When creating a bulleted list, you can choose a preset bullet format.
You can also apply a bullet format to existing text.

68 Part Two: WordPerfect
To create a bulleted list
1Click in a document.
2Click Insert ` Outline/Bullets & numbering.
3Click the Bullets tab.
4Choose a bullet style from the Bullets list.
5Click OK.
6Type text, and press Enter.
You can discontinue a bulleted list by pressing Backspace.
Perform this step for each entry in the list.
You can also create a bulleted list by opening the Bullets
picker on the toolbar, and clicking a bullet format.
To create a bulleted list from existing text
1Select the text to which you want to apply the bullet format.
2Click Insert ` Outline/Bullets & numbering.
3Click the Bullets tab.
4Choose a bullet style from the Bullets list.
You can also add a bullet to existing text by clicking at the
beginning of a line, opening the Bullets picker on the
toolbar, and clicking a bullet format.
You can type body text between list items by pressing Enter twice,
and pressing the Up arrow to type on the line that begins without
a bullet.
Creating numbered lists
You can create a numbered list in a document.

Part Two: WordPerfect 69
You can also use QuickNumbers to create lists as you type. For
information, please see “To create a numbered list by using
QuickNumbers” in the WordPerfect Help.
You can number existing text. You can also renumber an existing
numbered list.
To create a numbered list
1Click in a document.
2Click Insert ` Outline/Bullets & numbering.
3Click the Numbers tab.
4Choose a number style from the Numbers list.
5Click OK.
6Type text, and press Enter.
You can discontinue a numbered list by pressing Backspace.
Perform this step for each entry in the list.
You can also create a numbered list by opening the Numbers
picker on the toolbar and clicking a numbering format.
To number existing text
1Select the text you want to number.
2Open the Numbering picker on the toolbar, and click a
numbering format.
To renumber a numbered list
1Click in a list or outline.
2Click the Set paragraph number button on the property bar.
3Type the new number in the Paragraph number box.
The number you change and all numbers following it are
renumbered accordingly.

70 Part Two: WordPerfect
You can also renumber paragraphs by pressing Ctrl + Shift + F5.
If the numbering you want to change is indented from the left
margin, type “?” for each indention level in the Paragraph number
box before you type the new number. For example, if the text is
indented two levels from the margin, type “??” followed by the
new number.
Arranging items in lists and outlines
You can arrange the items in bulleted lists, numbered lists, and outlines
by changing the level and the order in which the items display. For
information, please see “Arranging items in lists and outlines” in the
WordPerfect Help.
In addition, you can create an outline from text, which lets you apply
different levels to text.
To create an outline
1Click in a document.
2Click Insert ` Outline/Bullets & numbering.
3Click the Text tab.
4From the Text list, choose one of the following options:
• Heading
• Quotations
• Definitions
5Click OK.
6Type text, and press Enter.

Part Two: WordPerfect 71
Numbering the parts of a
document
WordPerfect allows you to count elements of a document. You can also
change the appearance of numbering and use counters to count
elements of a document. WordPerfect allows you to number pages and
change the appearance of numbering.
In this chapter, you’ll find these topics:
•Numbering pages
• Changing the appearance of page numbers
• Forcing, suppressing, and stopping page numbers
For additional topics, please see “Numbering the parts of a
document” in the WordPerfect Help.
Numbering pages
WordPerfect allows you to insert page numbers in a document and to
choose where to position page numbers on a page. When you begin
page numbering, you can also specify which number to begin with. For
example, you may want the first page of a document to be labeled page
3 instead of page 1.
You can also insert secondary page numbers, which allow you to start a
new page numbering scheme in a document. For example, suppose you
are creating a document in WordPerfect, but in the middle of the
document, you need to add maps that were not created in WordPerfect.
The WordPerfect document is 10 pages, but the maps need to be added

72 Part Two: WordPerfect
as pages 7 and 8. To accomplish this, you can start page numbering at 1
at the beginning of the document and insert a secondary page number,
number 9, on the document’s page 7. This would allow for the addition
of the maps without disrupting the page numbering.
These are examples of various page numbering options: 1) no
page number, 2) page number in the bottom-right corner, 3)
page number at the bottom center, and 4) page number in the
top-right corner.
To insert page numbers
1Click Format ` Page ` Numbering.
2From the Position list box, choose a position for the page numbers.
3From the Page numbering format list, choose a format for the page
numbers.
To specify an alternate starting page
1Click Format ` Page ` Numbering.
2Click Set value.
3In the Values dialog box, click the Page tab.
4Type a new page number in the Set page number box.
5Enable one of the following options:
• Always keep number the same — ensures that the number
remains the same when the document is edited
21
34

Part Two: WordPerfect 73
• Let number change as pages are added or deleted — lets the
number change as the document is edited
When you merge a multiple-page form document, you can restart
the page numbering for each merged record by enabling the
Always keep number the same option.
To insert a secondary page number
1Click Format ` Page ` Insert page number.
2Choose Secondary page from the list.
3Click Value/Adjust.
4In the Values dialog box, click the Secondary tab.
5Choose a numbering format from the Secondary page number
method list box.
6Type a value in the Set secondary page number box.
7Click Insert.
Changing the appearance of page numbers
You can change the font size and style, which includes attributes, such as
bold or italic, of page numbers.
In addition, you can also create custom page numbering formats. For
example, you can add the name of a document or a chapter number to
a page number. If you no longer need the custom format, you can delete
it; however, you cannot delete the default page numbering formats
provided with WordPerfect. For information, please see “Changing the
appearance of page numbers” in the WordPerfect Help.

74 Part Two: WordPerfect
To change the font attributes of page numbers
1On a page, click where you want the font change to begin.
2Click Format ` Page ` Numbering.
3Click Font.
4In the Page numbering font dialog box, choose a font from the Face
list.
5Choose a font size from the Size list box.
Forcing, suppressing, and stopping page numbers
By forcing a page number, you can insert a new page or make sure that
a certain page in a document always has an odd or even page number.
In addition, you can suppress page numbering on one page in a
document. You can also stop the page numbers so that they are removed
from the entire document.
For detailed procedures, please “Forcing, suppressing, and stopping page
numbers” in the WordPerfect Help.
You can also
Change page number style In the Appearance area, enable one
or more check boxes.
Change page number color Open the color picker, and click a
color.
Change page number shading Type a value in the Shading box.

Part Two: WordPerfect 75
Working with graphics
WordPerfect lets you insert graphics, such as shapes, drawings, and
clipart images, into documents.
In this chapter, you’ll find these topics:
• Inserting graphics
• Sizing graphics
• Arranging graphics
For additional topics, please see “Working with graphics” in the
WordPerfect Help.
Inserting graphics
You can insert clipart images into a WordPerfect document, such as those
included with WordPerfect. Clipart images are images that can be
brought into a WordPerfect document and edited or used as is. You can
also insert pictures from the WordPerfect Office CD.
You can link to an image on disk. When you link to an image on disk, the
location of the image, not the image itself is inserted into the document.
This way, you can considerably reduce the size of the file, especially if the
image is used in several places throughout the document.

76 Part Two: WordPerfect
To insert a clipart image
1Click where you want to insert an image.
2Click Insert ` Graphics/Pictures ` Clipart.
The Scrapbook™ opens.
3Browse through the folders in the Scrapbook until you find the
image you want to insert.
4Select the clipart image.
5Click Insert.
You can also insert a clipart image by dragging the image from
the Scrapbook into a document.
To insert a picture from the WordPerfect Office CD
1Insert the WordPerfect Office CD into your CD drive.
2Click where you want to insert a picture.
3Click Insert ` Graphics/Pictures ` From file.
4Choose the drive and folder where the file is stored.
Pictures have a .jpg filename extension.
5Double-click a filename.
You can also insert a picture by dragging. Enable the Shadow
cursor by clicking the Shadow cursor icon on the application bar,
drag across the area of the document in which you want the
picture, and click Image from file in the QuickMenu™.
You can preview a picture before you insert it by clicking Toggle
preview , and clicking the picture filename.
To link to an image on disk
1Click where you want to insert a link to an image.
2Click Insert ` Graphics/Pictures ` From file.

Part Two: WordPerfect 77
3Choose the drive and folder where the file is stored.
4Click the image you want to link to the document.
5Enable the Image on disk check box.
6Click Insert.
If you want to display the name of the image file, right-click the
image, and click Content.
You can link to images copied from the Scrapbook by saving them
to your hard disk.
Sizing graphics
You can size a graphic by dragging its handles.
To size a graphic
1Select a graphic.
2Drag a corner handle until the graphic is the size you want.
Arranging graphics
When two or more graphics overlap in a document, you can arrange their
order by moving them in front of or behind the others in the stack. You
can also move graphics behind text (like a watermark) or in front of text
(like a sticky note).
You can also align and distribute graphics. For information, please see
“Aligning and distributing graphics” in the WordPerfect Help.
You can also
Stretch a graphic Drag a side handle until you
achieve the effect you want.
Size a graphic proportionally Hold down Shift, and drag a
handle.

78 Part Two: WordPerfect
To move a graphic by using the keyboard
1Select a graphic.
2Press any of the Arrow keys to move the graphic in the direction you
want.
To reorder overlapping graphics
1Right-click a graphic.
2Click Order, and click one of the following:
• To front — moves a graphic in front of the overlapping graphics
• To back — moves a graphic behind the overlapping graphics
• Forward one — moves a graphic forward one layer
• Back one — moves a graphic back one layer
You can also reorder overlapping graphics by selecting a graphic,
and clicking the Object(s) forward one button or the Object(s)
back one button on the property bar.
To move a graphic behind or in front of text
1Select a graphic.
2Click the Graphics picker on the property bar, and click one of the
following:
• In front of text — moves the selected graphic in front of the text
• Behind text — moves the selected graphic behind the text

Part Two: WordPerfect 79
Working with footnotes and
endnotes
Footnotes and endnotes allow you to add reference information to a
document, such as additional notes that accompany a topic or that
provide references. Footnotes are displayed at the bottom of a page,
while endnotes are found at the end of a document.
In this chapter, you’ll find these topics:
• Inserting footnotes and endnotes
• Finding footnotes and endnotes
• Editing and deleting footnotes and endnotes
For additional topics, please see “Working with footnotes and
endnotes” in the WordPerfect Help.
Inserting footnotes and endnotes
When creating a document, WordPerfect allows you to insert footnotes
or endnotes. When you insert endnotes or footnotes, a reference number
or mark is inserted in the document text. That number or mark is linked
to the corresponding information in the endnote or footnote. For more
information about modifying footnote and endnote numbering, see
“Numbering footnotes and endnotes” in the WordPerfect Help.
While working with a footnote or endnote, you do not have
access to all available WordPerfect functions until you return to
the body of the text.

80 Part Two: WordPerfect
To insert a footnote
1Click where you want the footnote reference mark to display.
2Click Insert ` Footnote/Endnote.
3Enable the Footnote number option.
If you want to restart the footnote numbering at a specific number,
type the number in the Footnote number box.
4Click Create.
5Type the footnote text.
If you want to align the footnotes with the document margins,
enable the Align with document margins check box.
6Click File ` Close.
To insert an endnote
1Click where you want the endnote reference mark to display.
2Click Insert ` Footnote/Endnote.
3Enable the Endnote number option.
4Click Endnote placement.
5Enable the Insert endnotes at insertion point option.
6Click Create.
7Type the endnote text.
If you want to align the endnotes with the document margins,
enable the Align with document margins check box.
8Click File ` Close.
You can restart the endnote numbering at a specific number by
typing the number in the Endnote number box. When you enable
the Insert endnotes at insertion point and restart numbering
option, all endnotes up to the number you’ve specified display on
one page, and then a note numbering starts over with 1 on a new
page.

Part Two: WordPerfect 81
Finding footnotes and endnotes
WordPerfect lets you find specific footnotes or endnotes in a document.
To find a footnote
1Click Insert ` Footnote/Endnote.
2Enable the Footnote number option.
3In the Footnote number box, type the number of the footnote you
want to find.
4Click Edit.
To find an endnote
1Click Insert ` Footnote/Endnote.
2Enable the Endnote number option.
3In the Endnote number box, type the number of the endnote you
want to find.
4Click Edit.
Editing and deleting footnotes and endnotes
Once you insert footnotes or endnotes in a document, you can edit the
footnote or endnote text. You can also delete footnotes and endnotes
from a document. When you delete a footnote or endnote number or
mark, the note text for that footnote or endnote is automatically deleted.
In addition, the footnotes and endnotes that follow are renumbered.
To edit a footnote
1Use the procedure “To find a footnote” on page 81 to find the
footnote.
2Edit the footnote text.
3Click File ` Close.

82 Part Two: WordPerfect
If you are using page view, you can edit the footnote text by
clicking in the text.
You can restore a deleted footnote number by clicking the Note
number button on the property bar.
To edit an endnote
1Use the procedure “To find an endnote” on page 81 to find the
endnote.
2Edit the endnote text.
3Click File ` Close.
If you are using page view, you can edit the endnote text by
clicking in the text.
You can restore a deleted endnote number by clicking the Note
number button on the property bar.
To delete a footnote or endnote
1Select the footnote or endnote number or mark.
2Press Delete.

Part Two: WordPerfect 83
Working with files
File management is an important part of any project.
In this chapter, you’ll find these topics:
• Adding the date or time to a document
• Inserting files into active documents
•Using document summaries
• Counting words
For additional topics, please see “Working with files” in the
WordPerfect Help.
Adding the date or time to a document
You can insert the date and time into a document. The format of the date
and time text can be edited.
You can create a custom format for the date and time. For information,
please see “To create a custom format for the date and time” in the
WordPerfect Help.
To insert the date or time into a document
1Click where you want to add the date or time.
2Click Insert ` Date/Time.
3Choose a format from the Date/Time formats list.

84 Part Two: WordPerfect
If you want the date or time to be updated when you open or print
the document, enable the Keep the inserted date current check box.
4Click Insert.
You can insert the date as text by pressing Ctrl + D.
You can insert the date as a code that is updated when you open
or print the document by pressing Ctrl + Shift + D.
To modify the format of the date or time
1Select the date or time.
2Click Insert ` Date/Time.
3Choose a new format from the Date/Time formats list box.
4Click Apply format.
Inserting files into active documents
You can insert a copy of a file into an active document.
To insert a file into an active document
1Click where you want to insert the file.
2Click Insert ` File.
3Choose All files from the File type list box.
4Choose the drive and folder in which the file is stored.
5Click a file.
6Click Insert.
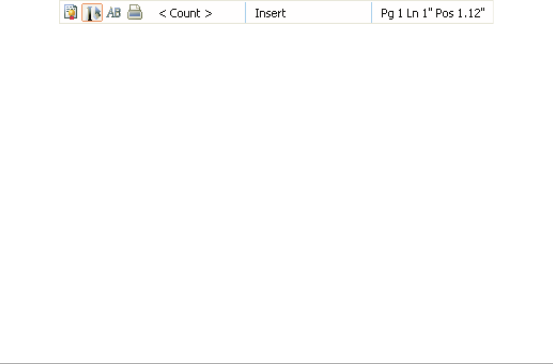
Part Two: WordPerfect 85
Using document summaries
You can use document summaries to record information about
documents, such as title, subject, author, keywords, and comments. If
you publish a document to the Internet, the summary information is
transferred to the corresponding fields in the Web document.
To record summary information about a document
1Click File ` Properties.
2Click the Summary tab.
3Type text in any of the boxes.
Counting words
With WordPerfect, you can find out how many words are in a document
or in selected text. You can also verify the number of pages, paragraphs,
sentences, and lines that are in the document. In addition, you have the
ability to exclude various elements, such as headers, footers, footnotes,
endnotes, or comments, from the word count.
The <Count button> appears on the Application bar, making
word count functionality easier to access than ever before.
To count words in a document
1Click Tools ` Word count.
2Disable any of the following check boxes to exclude document
elements from the count:
• Headers
• Footers
• Comments
• Footnotes

86 Part Two: WordPerfect
• Endnotes
• Watermarks
• Text boxes
• Box captions
3Click Update.
The word count summary appears in the Statistics area.
While working in a document, you can perform or refresh a word
count by clicking the <Count> button on the Application bar.
To count words in selected text
1Select the text.
2Click Tools ` Word count.
The word count summary appears in the Statistics area.
While working in a document, you can perform or refresh a word
count by clicking the <Count> button on the Application bar.

Part Two: WordPerfect 87
Printing
WordPerfect allows you to print a variety of documents, including
envelopes and labels.
In this chapter, you’ll find these topics:
•Printing documents
• Printing envelopes and labels
For additional topics, please see “Printing” in the WordPerfect
Help.
Printing documents
WordPerfect provides numerous options for printing documents.
To print a document
1Click File ` Print.
2On the the Main page, choose a printer from the Name box.
3In the Print range area, enable one of the following options:
• Full document — prints the entire file
• Current page — prints the page where the cursor is located
• Pages — prints the pages specified in the page box
• Selected text — prints the selected text in the document (available
only if text is selected)
• Document summary — prints only the document summary
(available only if there is a document summary)

88 Part Two: WordPerfect
If you enable the Pages option, type the pages you want to print in
the Pages box.
A hyphen (-) between numbers defines a range of sequential pages
(for example, 1-5 prints pages 1 to 5). A comma (,) between
numbers defines a series of non-sequential pages (for example, 1, 5
prints pages 1 and 5 only). Any combination of hyphens and
commas is supported (for example, 1-3, 5, 7, 10-12 prints the
following pages: 1, 2, 3, 5, 7, 10, 11, and 12).
4Click Print.
To print multiple copies
1Click File ` Print.
2On the Main page, type the number of copies you want to print in
the Number of copies box.
If you want the copies collated, enable the Collate option.
3Click Print.
To print a document saved on disk or on a network drive
1Click File ` Print.
2Click the Advanced tab.
3Enable the Document on disk check box.
4Click Browse.
5In the Open file dialog box, choose the drive and folder where the
document is stored.
6Double-click the document name.
7Click Print.
To print sections of a document
1Click File ` Print.
2Click the Advanced tab.

Part Two: WordPerfect 89
3Type a number or a combination of numbers in any of the following
list boxes:
• Page(s)/Label(s) — prints the specified pages
• Secondary pages — prints the specified secondary pages
• Chapters — prints the specified pages in the specified chapters
• Volumes — prints the specified pages in the specified volumes
4Click Print.
The Volumes setting takes precedence over all other settings,
followed by chapters, secondary pages, and then page(s)/label(s).
Printing envelopes and labels
To print on different sizes of paper, you must select a page size definition
so the printer can format and print a document as you want.
You can print envelopes in WordPerfect. WordPerfect allows you to print
different sizes of envelopes.
You can select a label size. You can also print labels.
To print an envelope
1Click the page of a document that is set up as an envelope.
2Click File ` Print.
3Click the Main tab.
4Click Print.
You can also print an envelope by clicking the Print current
envelope button on the property bar.

90 Part Two: WordPerfect
To select a label size
1Click the page where you want labels to begin.
2Click Format ` Labels.
3In the List labels for area, enable one of the following options:
• Laser printed — if you are using a laser printer
• Tractor—fed — if you are using a tractor-fed printer
• Both — if you are using a tractor-fed laser printer
4Choose a label definition from the Labels list.
5Click Select.
To print a label
1Click File ` Print.
2Click the Advanced tab.
3In the Page(s)/Label(s) list box, type the number of each label or a
range of labels.
For example, to print label 3, type 3; to print labels 3 and 8, type 3,
8; to print label 3 through the end of the document, type 3-.
4Click Print.
The screen changes so that the first label is displayed and the rest
of the document window is shaded. As you fill the labels with text,
more label “pages” display in the window.
Labels that reach the edge of the sheet may not print correctly on
printers with a wide nonprinting zone. You must adjust the label
size to account for the printer’s nonprinting zone. Also, printing
the same label on different printers may give different results.

Part Two: WordPerfect 91
Performing merges
When you merge documents, such as to create mass mailings, you
combine a form document and a data source. The merge produces
varying copies of the form document, each containing information from
a specific record in the data source.
In this chapter, you’ll find these topics:
• Creating data for a merge
• Working with form documents for a merge
• Associating merge files
• Performing a merge
For additional topics, please see “Performing merges” in the
WordPerfect Help.
Creating data for a merge
When you merge documents, you produce varying copies of a form
document. Each copy contains specific information from a record in a
data source, such as a data file, an address book, or keyboard input.
To use a WordPerfect data file as the data source, you can create either a
data text file or a data table file. In both types of data files, information
is organized into records and fields. For example, a record may include a
name, address, telephone number, and other contact information. Each
item within the record, such as name or address, is recognized as a field.
It is recommended that you use no more than 512 fields per record.
92 Part Two: WordPerfect
When you create a data text file, each field is marked by the ENDFIELD
code and each record by the ENDRECORD code.
When you create a data table file, fields and records are arranged in
columns and rows. Each column contains a field. Each row contains a
record.
This is an example of a data table file containing 1) records, 2)
fields, and 3) field names.
You can retrieve data from other file formats to use as data files in
WordPerfect. For example, you can retrieve and convert a database file, a
spreadsheet file, an ODBC data source, or a text file. For information
about converting files, see “Opening and previewing files” in the
WordPerfect Help.
You can also use an address book as a merge data source. For
information, see “Using address books in merges” in the WordPerfect
Help.
When you create a data file, WordPerfect automatically inserts a Merge
toolbar into the merge data file. For more information about the Merge
toolbar, see “Using the Merge toolbar” in the WordPerfect Help.
To create a data file for a merge
1Click Tools ` Merge.
2In the Merge dialog box, click Data source ` Create data file.

Part Two: WordPerfect 93
If there is text in the active document, enable one of the following
options in the Data file source dialog box:
• Use file in the active window — uses the active document
• New document window — creates a new document
3Click OK.
4In the Create data file dialog box, type the name of a field in the
Name a field box.
For example, if you are creating data for a form letter, you might
include fields such as name, address, city, province, postal code,
phone number, and e-mail address.
To create a data table file, enable the Format records in a table check
box.
5Click Add.
6To organize a selected field, click any of the following:
• Replace — replaces the name of the selected field
• Delete — deletes the selected field
• Move up — moves the selected field up in the Fields used in merge
list
• Move down — moves the selected field down in the Fields used in
merge list
7When you are satisfied with the field names and arrangement for
your data file, click OK.
8In the Quick data entry dialog box, type information for each field
that you have created.
9Click New record to add the completed record to your data file.
Repeat steps 8 and 9 to continue adding records to your data file.
Click Close, and click Yes.

94 Part Two: WordPerfect
It is recommended that you use no more than 512 fields per
record.
Working with form documents for a merge
A form document provides the pattern and layout for a merged
document. It can contain text, formatting, graphics, and merge
commands. You create form documents the same way you create regular
documents; however, you insert merge commands which are replaced by
information from a data source during the merge. For more information
about inserting merge commands, see “Using merge commands” in the
WordPerfect Help.
At the top of the document window, WordPerfect inserts the Merge
toolbar to give you greater control over a merge. For more information
about the Merge toolbar, see “Using the Merge toolbar” in the
WordPerfect Help.
WordPerfect lets you create a form document that you can personalize
during a keyboard merge. A keyboard merge lets you enter information
into the form document each time you need to send it. For more
information about the KEYBOARD command, see “Reference: List of
merge programming commands” in the WordPerfect Help.
You can also
Number the fields in an empty data
file
Click OK in the Create data file
dialog box. Specify the number of
fields in the Number of fields in
each record box.
Add a line to a field Press Ctrl + Enter.
Move to the next field Press Tab .

Part Two: WordPerfect 95
You also can create a form document for labels. For information on this
procedure, please see “To create a form document for labels” in the
WordPerfect Help.
If you do not want to create a new series of merged documents, you can
send all of the merged data to a table. After you perform the merge, all
of the merged output will be formatted into a single table with each
column representing a field. For information on this procedure, please see
“To create a table for a merge” in the WordPerfect Help.
To create a form document for a merge or keyboard merge
1Click Tools ` Merge.
2In the Merge dialog box, click Form document ` Create form
document.
If there is text in the active document, enable one of the following
options in the Data file source dialog box, and click OK:
• Use file in active window — uses the active document
• New document window — creates a new document
3In the Associate form and data dialog box, enable one of the
following:
• Associate a data file — specifies the path and filename for the file
• Associate an address book — specifies an address book
• Associate an ODBC data source — lets you select the ODBC source
to use
• No association — does not associate any data file
4Click OK.
5Perform an action from the following table.

96 Part Two: WordPerfect
To insert a field in a form document for a merge
1On the Merge toolbar, click Insert Field.
2Click in the form document where you want data to be filled in from
a data source.
3In the Insert field name and number dialog box, choose a field from
the Field names list.
4Click Insert.
To Do the following
Create a form document for a
merge
Type text, apply formatting, and
insert merge commands in the
form document.
You can now begin inserting fields
in the form document.
Create a form document for a
keyboard merge
Add text and formatting, and insert
fields in the form document. Click
where you want to insert a
keyboard prompt in the form
document. On the Merge toolbar,
click Insert merge code, and choose
Keyboard.
In the Insert merge code dialog
box, type a user prompt for the
information to be entered and click
OK.
Create a sideways text form
document
On the WordPerfect menu bar, click
Insert ` Text box, insert fields in the
new text box, and click Close.
Right-click the text box, and click
Content. Then, enable a rotation
option in the Rotate text
counterclockwise area, and click
OK.

Part Two: WordPerfect 97
Associating merge files
Before you can merge documents, you must link a data source filename
to a form document. This is called associating a data source. You can
associate a data source with a form document, or you can associate a
form document with a data file, such as an ODBC data source. The
association is always stored in the form document.
If the data source changes, you can associate a different data file. You can
also go to an associated form document from its data file or to an
associated data file from its form document.
To associate a data file with a form document
1Open a data file.
2On the Merge toolbar, click Go to form.
3In the Associate dialog box, click one of the following:
• Select — associates an existing form document
• Create — creates a new form document
The association is stored in the form document.
If there is no associated data file, you can select an existing data
file or create a new one. For information about creating a data file,
see “To create a data file for a merge” on page 92.
You can also
Change the associated data source Open a form document. On the
Merge toolbar, click Insert field.
Click Data source, and browse to
locate a data file.
Go to the associated data file Open a form document. On the
Merge toolbar, click Go to data.

98 Part Two: WordPerfect
To associate a form document with a data source
1Open a form document that has no association with a data source.
2On the Merge toolbar, click Go to data.
3Click one of the following:
• Select — associates a data file
• Create — creates and names a new data file or form file
• Address book — associates an address book
• ODBC — associates an ODBC data source
To associate a form document with an ODBC data source
1Open a form document that has no association with a data source.
2On the Merge toolbar, click Go to data.
3Click ODBC.
If prompted, log in to the database.
4Choose a location from the Data source list box.
5From the Ta ble lis t box, choose a table in the database that contains
the merge data.
For more information about logging in to an ODBC database, see
the online Help for the Microsoft® SQL Server™ ODBC driver.
Performing a merge
When you merge documents, you combine a form document and a data
source. WordPerfect provides a variety of output options for the merged
You can also
Go to the associated form
document
Open a data file. On the Merge
toolbar, click Go to form.
The associated form document
must be open.

Part Two: WordPerfect 99
documents. For example, you can save it to disk, print it, or add it to the
active document.
This is an example of 1) a data source document, 2) a form
document, and 3) merged documents.
You can perform a keyboard merge and add information at the time of
the merge. When you perform the keyboard merge, WordPerfect pauses
the merge as specified in the form document and waits for you to enter
information from the keyboard.
You can create envelopes as you merge a form document (such as a
letter), or you can create merged envelopes on their own. An envelope is
created for each record selected in the data source. For more information
about merging to envelopes, see “To merge to envelopes” in the
WordPerfect Help.
You can also send each merged document as e-mail. For information,
please see “To merge to e-mail” in the WordPerfect Help.
Please note that it is recommended that you use no more than 512 fields
per record.
To perform a merge
1Click Tools ` Merge.
2In the Merge dialog box, click Form document, and choose the
location of the form file to merge.

100 Part Two: WordPerfect
3Click Data source, and choose the location of the data file to merge.
4Click Output, and choose one of the following:
• Current document
• New document
• Printer
5Click Merge.
To perform a keyboard merge
1Open a form or data file containing the KEYBOARD merge
command.
2Click Tools ` Merge.
3Click Form document, and choose Current document.
4Click Data source, and choose the location of the data file.
5Click Output, and choose a location for the merged file.
6Click Merge.
7When the merge pauses at the KEYBOARD command, type the
information as prompted.
8On the Merge toolbar, click Continue.
To continue the merge to the end of the active record and ignore
all other merge commands, click Quit on the Merge toolbar.

Part Two: WordPerfect 101
Working with PDF files
If you need to share files with others who do not have Corel WordPerfect
Office installed on their computers, you can publish the files to PDF. This
file format does not require the use of a particular operating system, so
after downloading and installing Adobe® Reader®, any computer user
can view, share, or print PDF files.
You can also open PDF files in WordPerfect to edit them.
In this chapter, you’ll find these topics:
• Publishing to PDF
• Importing PDF files for editing
Publishing to PDF
When you need to share files with others, you can publish them to PDF
and preserve the typography, images, graphics, color, and formatting of
the original file. In order to view the PDF file, the recipients of the file must
have Adobe Reader or Corel® WordPerfect® Lightning™ installed on
their computers.
To publish to PDF
1Click File ` Publish to PDF.
2Choose the drive and folder where you want to save the file.
3Type a filename in the File name box.
4From the PDF style list box, choose one of the following options:

102 Part Two: WordPerfect
• Commercial printing (Largest file size) — creates a high-quality PDF
to send to a printer or digital copier
• PDF/A-1a (Level A compliance) — creates a standardized PDF file
that ensures the long-term archiving of the document. This option
allows document tags and font encoding to be preserved.
• PDF/A-1b (Level B compliance) — creates a standardized PDF file
that ensures the long-term archiving of the content. This option
does not include the preservation of document tags and font
encoding.
• Publishing online (Smallest file size) — creates a PDF suitable for
online viewing, such as a document to be distributed by e-mail or
displayed on the Web
• Publishing online and printing — creates a PDF suitable for
viewing or printing on a laser or desktop printer
5Click Settings, and specify any additional PDF settings in the Publish
to PDF settings dialog box that appears.
For example, if you want to publish only parts of the document to
PDF, you can enable one of the following options in the Export range
area of the General page:
• Full document — publishes the entire file
• Current page — publishes the active page only
• Pages — publishes a portion of the file. This option requires you to
type a page range in the box: You can use a hyphen to indicate a
range of pages and a comma to indicate nonconsecutive pages.
For example, typing 1-5 lets you publish pages 1 to 5, whereas
typing 1,5 lets you publish pages 1 and 5.
• Selection — publishes selected text
Click OK to apply your settings and return to the Publish to PDF
dialog box.
6Click Save.

Part Two: WordPerfect 103
If you do not want the PDF file to open automatically after it is saved,
disable the Open PDF after saving check box.
If you publish to a PDF/A style, the document fonts are
automatically embedded in the file. Some licensed fonts are
meant to be viewed only in the original document, however, and
you are prohibited from redistributing the font. Therefore, before
publishing to the PDF/A style, you must make sure that you can
redistribute the fonts.
Importing PDF files for editing
WordPerfect lets you import PDF files and scanned PDF files and then
access and reuse the text and graphics content. For example, if you have
a PDF file that was created by someone else, you can open it in
WordPerfect and edit the contents.
Effectively opening PDFs in WordPerfect
When you import PDF files, the text formatting may appear different from
that of the original PDF. You can alleviate most conversion issues if you are
familiar with the two most common PDF document types: design
documents and scanned documents.
A design document is a PDF in which the layout is not necessarily based
on flow — for example, a magazine advertisement. Design documents
are typically created with graphics or illustration software, such as
CorelDRAW. Text strings may be individual lines across sections on the
page, as opposed to a long paragraph that flows down a page. In such
cases, WordPerfect provides text flows for all text strings that were saved
in the graphics application when the PDF was created. The text and
formatting of graphic elements are also maintained. Images are
maintained in their original file formats, as is text that is embedded in
images that are not vector based. The layout in the imported PDF may be
different from the layout in the original PDF, but you can still modify text

104 Part Two: WordPerfect
strings and create a new document without having to copy or redesign
all the elements.
A scanned document is a document that is read with a scanner and saved
as a graphic file, such as a JPEG. Scanned documents store all information
as one large image file that is not vector based. When you import a
scanned document, WordPerfect uses OCR technology to scan the
document and reconstruct text strings and images. The quality of the
original scanned PDF that you import affects the accuracy of what is
displayed in the WordPerfect document.
To import PDF files
1Click File ` Open PDF.
2Choose the drive and folder where the PDF document is stored.
3Choose the file.
4Click Open.
The Open PDF settings appears.
If the PDF document is protected by a password, type the password
in the Password box. If both permission and open passwords are
applied, type the permission password in the Password box.
5In the Page range area, enable one of the following options:
• Full document
• Pages (requires you to type a page range in the box)
6Click Open.
The PDF import dialog box appears.
You can import the content from the PDF file without text
formatting by enabling the Bring in content from original PDF
without any formatting check box.
JBIG2 and JPEG 2000 images are not supported.

Part Two: WordPerfect 105
Reviewing and comparing
documents
Using WordPerfect, you can send a document to a reviewer, or multiple
reviewers, to add changes or make revisions to the document. You can
also compare a current version of a document with an earlier version to
see what changes have been made.
In this chapter, you’ll find these topics:
• Reviewing documents
• Routing documents
• Comparing documents
For additional topics, please see “Reviewing and comparing
documents” in the WordPerfect Help.
Reviewing documents
If you send the document to multiple reviewers, the annotations of each
reviewer are displayed in a unique color. All revisions are displayed as
strikeout text ( ), and comments are displayed as redline text
( ). However, you can modify the way annotations are displayed.
For more information about modifying the display of annotation text, see
“Changing the settings for document review and comparison” in the
online Help.

106 Part Two: WordPerfect
To review a document
1Click File ` Document ` Review.
2Click Reviewer.
3Type your name in the User name box.
4Type your initials in the User initials box.
5Open the color picker on the feature bar, and click a color. All
changes you make to the document are displayed in the color you
choose.
To avoid choosing the same color as another reviewer, view the color
selections of other reviewers by choosing their names from the
Reviewer list box.
6Edit the document.
7Click File ` Save.
8Click Close.
You can use all WordPerfect features except Sort to edit a
document. Only text editing changes, however, are marked with
a color.
You can edit the additions made by previous reviewers; however,
you cannot edit or undo the deletions made by previous reviewers.
To incorporate reviewers’ changes
1Click File ` Document ` Review.
2Click Author.
3Choose a reviewer from the View annotations from list box.
4Only changes made by the selected reviewer are displayed. To display
the changes made by all reviewers, choose All reviewers from the
View annotations from list box.
5Click one of the following:
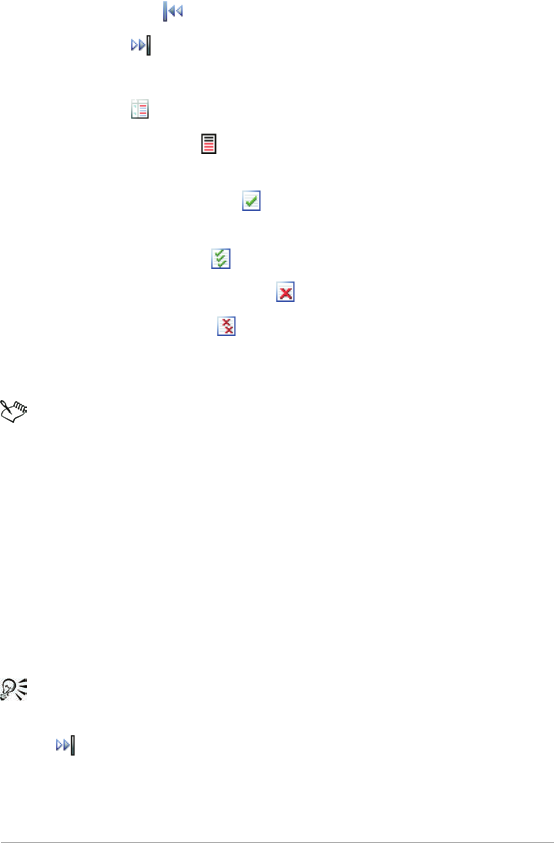
Part Two: WordPerfect 107
• Go to previous — moves to the previous change
• Go to next — moves to the next change
6Click one of the following:
• Show/hide — displays or hides margin markers
• Display annotations — shows the edited text with or without
color markings
• Insert current annotation — incorporates the current
annotation
• Insert all annotations — inserts all annotations
• Delete the current annotation — deletes the current annotation
• Delete all annotations — deletes all the annotations in the
document
7Save the document.
When moving through the document from change to change,
you cannot move through subsections, such as headers, footers,
and footnotes.
If you save a reviewed document in another file format — for
example, Rich Text Format (.rtf files) — the document will not be
in review mode when you open it. The reviewer’s remarks will be
lost because the added text (red) and the deleted text (strikeout)
revert to regular text. Therefore, make sure that all changes are
incorporated before you save the document to a different file
format.
You can also incorporate a reviewer’s changes in a subdocument
by clicking in the subdocument and then clicking the Go to next
button to move from change to change.

108 Part Two: WordPerfect
Routing documents
Routing a document allows you to send a document for an online review
to several reviewers in a specified order. In this routing process, the
document is sent to one reviewer at a time, so that each reviewer sees the
changes made by each of the previous reviewers. When you route a
document, it is inserted in an e-mail as an attachment. You must have an
e-mail client, such as Mozilla® Thunderbird® or Microsoft® Outlook®,
installed on your computer for this option to work.
To route a document, you must create a routing slip. The routing slip
allows you to specify the recipients of the document and the order in
which they will receive the document.
A reviewer who receives a routed document can make changes and
revisions to the document. The reviewer can then save the changes, close
the document, and send it to the next reviewer listed on the routing slip.
Alternatively, a reviewer can wait before sending the document to the
next reviewer or can reassign a routed document to another reviewer
listed on the routing slip.
To create a routing slip
1Click File ` Document ` Routing slip.
2Type a subject name in the Subject box.
The subject name that you type in the box appears in the subject box
of the e-mail to be sent.
3Type a message in the Message box.
The text that you type in the Message box appears in the message
area of the e-mail to be sent.
4Click Addresses to add reviewers to the Reviewers list box.
The WordPerfect or Outlook address book opens to allow you to
choose the reviewers’ e-mail addresses.

Part Two: WordPerfect 109
When you create the first routing slip for a document, the e-mail
address specified in the environment settings or in Outlook
automatically appears in the Author’s e-mail address text box. If
you insert a different e-mail address in the box, the new e-mail
address becomes the default address the next time you create a
routing slip for the same document. If you enable the Store as
default address check box, this e-mail address appears every time
you create a routing slip.
To review a routed document
1In an e-mail message, double-click the attached document.
If you want, you can save the document and then open the saved
document to review it.
2In the Reviewer mode options dialog box, click Review.
3Type your name in the Reviewer list box.
4Open the color picker on the feature bar, and click a color. All
changes you make to the document are displayed in the color you
choose.
To see another reviewer’s color selection, choose the reviewer’s name
from the Reviewer list box.
5Edit the document.
6Click Close.
You can edit the additions made by previous reviewers; however,
you cannot edit or undo the deletions made by previous reviewers.
To reassign a routed document
1In the e-mail, double-click the attached document.
2In the Reviewer mode options dialog box, click Reassign.
3In the Reassign document review dialog box, choose a reviewer from
the list and click Send.

110 Part Two: WordPerfect
Comparing documents
You can compare a current version of a document with an earlier version
to see what changes have been made. When comparing documents, you
can generate a comparison summary and a list of changes. A comparison
summary describes the color and the attributes used to display deletions
and insertions. It also lists the number of deletions, insertions, and moves
that were made. The list of changes details all of the changes made in the
document.
When you compare and review a document, the document that contains
the comparison markings is opened in review mode. For more
information about reviewing documents, see “Reviewing documents” on
page 105.
In addition, you can restore a document to the way it was before the
comparison.
To compare two documents
1Click File ` Document ` Compare.
2In the With box, type the folder and filename of the file you want to
compare.
To browse for the file, click the Browse button.
3In the Show markings in area, enable one of the following options:
• New document — displays comparison results in a new document
• Current document — displays comparison results in the active
document
4Click Compare only.

Part Two: WordPerfect 111
To generate a comparison summary
1Click File ` Document ` Compare.
2Click Settings ` Compare only.
3In the Document compare settings dialog box, click the Options tab.
4In the Summary of comparison area, enable one of the following
options:
• None — inserts no comparison summary
• Insert at beginning — inserts the comparison summary at the
beginning of the document
• Insert at end — inserts the comparison summary at the end of the
document
To generate a list of changes
1Click File ` Document ` Compare.
2Click Settings ` Compare only.
3In the Document compare settings dialog box, click the Options tab.
4In the List of changes area, enable one of the following options:
• None — displays no revision list
• Show surrounding context — displays a revision list that details the
changes in the context of the document
• Show change only — displays a revision list that includes only the
changes made to the document
To compare and review the differences between documents
1Click File ` Document ` Compare.
2In the With box, type the folder and filename of the file with which
you want to compare the active document.
To brow se for the file, click the Browse button.
3In the Show markings in area, enable one of the following options:

112 Part Two: WordPerfect
• New document — displays comparison results in a new document
• Current document — displays comparison results in the active
document
4Click Compare/Review.
To restore a document
1Click File ` Document ` Remove markings.
2Enable one of the following options:
• Remove redline markings and strikeout text — restores the current
document to its condition before the comparison
• Remove strikeout text only — keeps the markings for added and
moved text, but removes markings for deleted text
• Remove document compare deletions only — removes only
markings for deleted text
• Remove all document compare markings — removes all markings,
insertions, deletions, and moves

Part Two: WordPerfect 113
Using a document
management system with
WordPerfect
WordPerfect gives you direct access to your organization’s document
management system (DMS), such as Microsoft SharePoint, to quickly
retrieve and store WordPerfect (WPD) documents from within
WordPerfect.
In this chapter, you’ll find these topics:
• Understanding document management systems
• Using Microsoft SharePoint with WordPerfect
For additional topics, please see “Using a document management
system with WordPerfect” in the WordPerfect Help.
Understanding document management systems
A document management system is a server-based computer system that
lets organizations store and track their electronic documents. In other
words, a document management system is a secure central location, or
virtual filing cabinet, for electronic documents. It lets you easily search for
and retrieve electronic documents and make them available to others.
A document management system can also include tools that make it easy
for a group of people to collaborate on the same documents. For
example, some document management systems can track and store
multiple versions of documents, so that you can track changes and
retrieve previous versions.

114 Part Two: WordPerfect
Understanding document libraries
In some document management systems, the term “document library” is
used to refer to the component that lets you access, store, and retrieve
your documents. To access documents, you must know where the
document library is located on the server. You can obtain this information
from your network administrator, who can provide you with the Web
address, or URL, of the document library.
Using Microsoft SharePoint with WordPerfect
WordPerfect gives you direct access to your organization’s
Microsoft SharePoint document management system (DMS).
Getting started
To get started using Microsoft SharePoint with WordPerfect, you must
enable the enhanced file-management feature. This feature lets you
access the Web and navigate to the document library from directly within
WordPerfect.
In addition, you may want to display the Document Management
toolbar, and disable Microsoft® Internet Explorer from opening
WordPerfect (WPD) files.
Saving documents to a document library
You can share WordPerfect documents with others by saving them to
your organization’s document library. After you save a document to the
document library, others can view the document, or check it out,
provided they have the permission to do so.
Checking documents in and out of a document library
The checkout process lets you collaborate with others on the same set of
documents. It provides a method for controlling and tracking the
changes that are made to the documents. You can check out a document

Part Two: WordPerfect 115
if it is not already checked out by someone else. By checking out a
document, you can temporarily prevent others from making changes to
it.
You can make changes to a document after checking it out. When you
are ready for others to view the changes that you made, you can check in
your version of the document to the document library. After the
document is checked in, your version of the document can be checked
out by someone else.
When you check out a document, a copy of the document is saved to
your working folder. You can modify this copy of the document and save
the changes locally, without sharing them with others. You can also keep
working on the copy of the document when you are offline. You can
repeatedly close and reopen the copy without affecting the checkout
status and then check in the document when you are online again.
If your organization’s document management system supports version
tracking, you may have the option of adding a version description or
choosing a version type, such as a major or minor version. For example,
major versions might be used for making important content or structural
changes, whereas minor versions might be used for making lighter
changes, such as correcting typos. In addition, depending on how the
permissions are set up in your document library, a minor version might be
treated as a draft document that only certain users can access. The major
versions might have greater availability and be published.
To enable the enhanced file-management feature
1Click Tools ` Settings ` Files.
2Click the Document tab.
3Enable the Use enhanced file dialogs check box.

116 Part Two: WordPerfect
To display the Document Management toolbar
• Click View ` Toolbars, and enable the Document management check
box.
To disable Microsoft Internet Explorer from opening WordPerfect
(WPD) files
1Click Tools ` Settings ` Files.
2Click the Document tab.
3Disable the Allow Internet Explorer to display WPD files check box.
To save a document to a document library for the first time
1Click File ` Save as.
2Click the Web mode button .
3Type the document library URL in the Save in text box, and then press
Enter.
If the document library was added to the Favorites list by your
network administrator, click Favorites, and choose the library name
from the Favorites list.
The document library Web page appears.
4Browse to the location where you want to save the file.
5Type a name for the document in the File name box.
6Click Save.
7Do one of the following:
• Click File ` Document management ` Check in.
• Click the Check in document button on the Document
management toolbar.
If the Document properties dialog box appears, fill out all required
fields (and any other desired fields) to proceed.
8In the Check in dialog box, type a description of the changes that
you made to the document in the Description of changes text box.

Part Two: WordPerfect 117
If you want to keep working on the document after checking it in,
enable the Keep document checked out after checking in this version
check box.
To check a document out of a document library
1Click File ` Open.
2Click the Web mode button .
3Type the document library URL in the Look in text box, and then
press Enter.
If the document library was added to the Favorites list by your
network administrator, click Favorites, and choose the library name
from the Favorites list.
The document library Web page appears.
4Browse to the location of the file that you want to check out.
5Click the filename.
6Click Open.
The file appears in WordPerfect as read-only.
The checkout status of the file appears in the title bar. The file is
ready to be checked out if it is described as Checked in.
7Do one of the following:
• Click File ` Document management ` Check out.
• Click the Check out document button on the Document
management toolbar.
You can also
Check in and publish the document
as a major version
Enable the Major version (publish)
option.
Check in the document as a minor
version
Enable the Minor version (draft)
option.

118 Part Two: WordPerfect
When you check out a document, a copy of the document is saved
to a working folder on your computer.
To check a document into a document library
1Do one of the following:
• Click File ` Document management ` Check in.
• Click the Check in document button on the Document
management toolbar.
2In the Check in dialog box, type a description of the changes that
you made to the document in the Description of changes text box.
If you want to check in the changes but keep working on the
document, enable the Keep document checked out after checking in
this version check box.
If you copy a file to another location and make changes to the file,
you will not be able to check in the changes from within
WordPerfect. Instead, you must either check the file directly in
SharePoint or copy the file to the working folder and then check
the file in from within WordPerfect.
You can also
Check in and publish the document
as a major version
Enable the Major version (publish)
option.
Check in the document as a minor
version
Enable the Minor version (draft)
option.
Replace a minor version that is
currently open
Enable the Replacement of minor
version (draft) option.

Part Two: WordPerfect 119
WordPerfect compatibility
with Microsoft Word
WordPerfect offers compatibility features geared towards those who are
migrating to WordPerfect from Microsoft Word and those who need to
exchange WordPerfect documents with Microsoft Word users.
If you are new to WordPerfect, the compatibility features can help you
adapt to WordPerfect by simulating the Microsoft Word workspace. This
allows you to switch to WordPerfect with minimal impact on your
productivity. For those of you who aren’t new to WordPerfect, but need
to collaborate with Microsoft Word users, the compatibility features
make it easier for you to exchange documents.
In this chapter, you’ll find these topics:
• Simulating the Microsoft Word workspace
• Sharing documents with Microsoft Word users
For additional topics, please see “Compatibility with
Microsoft Word” in the WordPerfect Help.
Simulating the Microsoft Word workspace
If you recently switched from Microsoft Word to WordPerfect, you may
not be familiar with the WordPerfect workspace. While there are many
similarities between the two applications, you may find it easier to
simulate the Microsoft Word workspace until you are accustomed to
working in WordPerfect. What the Microsoft Word workspace does is
position the WordPerfect features, including toolbars and menu items,

120 Part Two: WordPerfect
where you would find the equivalent feature in Microsoft Word. It also
applies Microsoft Word keyboard shortcuts to WordPerfect features,
allowing you to quickly find the tools you need to create documents in
WordPerfect.
If you prefer to work in the WordPerfect workspace, but you want to
access the most common WordPerfect features using Microsoft Word
buttons and icons, you can display the Microsoft Word toolbar. In
addition, you can display the Microsoft Word Compatibility toolbar,
which gives you immediate access to features, such as saving documents
to Microsoft Word and publishing to PDF.
To work in the Microsoft Word workspace
1Click Tools ` Workspace manager.
2Enable the Microsoft Word mode option.
To display the Microsoft Word toolbar in WordPerfect
1Click View ` Toolbars.
2Enable one of the following check boxes:
• Microsoft Word 97
• Microsoft Word 2002
To display the Compatibility toolbar
1Click View ` Toolbars.
2Enable the Compatibility check box.
Sharing documents with Microsoft Word users
WordPerfect makes it possible for you to share WordPerfect documents
with Microsoft Word users and they can share their documents with you.

Part Two: WordPerfect 121
For example, to share a WordPerfect document with a Microsoft Word
user, you must save the WordPerfect document as a Microsoft Word file.
The saving process automatically converts the document to the
Microsoft Word format.
In addition, if you receive a file created in Microsoft Word, all you need
to do is open it in WordPerfect. The opening process automatically
converts the file to the WordPerfect format. If you modify the same file
and you want others to view the changes in Microsoft Word, then you
need to save the file as a Microsoft Word file. You can specify that the
default format when saving files is set to the Microsoft Word file format
or you can choose to automatically save files in the same file format in
which the file was opened. If you don’t specify the Microsoft Word
format when saving, the file is saved as a WordPerfect file by default.
You can also insert a Microsoft Word document into a WordPerfect
document.
To save a WordPerfect document as a Microsoft Word document
1Click File ` Save as.
2Choose the drive and folder where you want to save the file.
3Type the filename in the Filename box.
4Choose MS Word from the File type list box.
5Click Save.
When you save a WordPerfect document as a Microsoft Word
document, some of the formatting in the document may no
longer display properly.
To open a Microsoft Word document
1Click File ` Open.
2Choose the drive and folder where the Microsoft Word file is stored.

122 Part Two: WordPerfect
If you can’t see the file, choose All files from the File type box.
3Click the Microsoft Word file.
4Click Open.
You can open documents created in Microsoft Word for MS-DOS
versions 1.0, 1.1, 1.2, 2.0, 4.0, 5.0, and 5.5, Microsoft Word for
Windows 6.0, and 7.0, and Microsoft Word 97, 2000, XP (2002),
2003, and 2007. You can also open Microsoft Word Open XML
documents (.docx) and Microsoft Word Open XML
Macro-enabled document (.docm).
When you open a Microsoft Word document in WordPerfect,
some information in the file may not be displayed in the same way
after it is converted.
To automatically save Microsoft Word files opened in
WordPerfect to the Microsoft Word format
1Click Tools ` Settings ` Files.
2On the Document page, choose a version of the MS Word format
from the Default save file format list box.
To automatically save files to their original format
1Click Tools ` Settings ` Files.
2On the Document page, enable the On save, keep document’s
original file format check box.
To insert a Microsoft Word file into a WordPerfect document
1Click Insert ` File.
2Choose the drive and folder where the Microsoft Word file is stored.
If you can’t see the file, choose All files from the File type box.
3Click the Microsoft Word file.
4Click Insert.

Part Three: Quattro Pro 123
Part Three:
Quattro Pro
Quattro Pro lets you create professional spreadsheet-based documents
to help you manage data. It provides all the tools you need to produce
tables, financial forms, lists, databases, charts, reports, or any other type
of data-oriented document. With Quattro Pro, you can create a
notebook that contains a single spreadsheet or an entire project,
complete with spreadsheets, reports, and charts. A notebook is saved as
a single file that you can publish to paper, electronic media, and the
Web.
Getting started with Quattro Pro
The following chapters show you how to get started creating
spreadsheets with Quattro Pro:
• “Quattro Pro basics” on page 125
• “Creating spreadsheets” on page 129
• “Viewing and navigating spreadsheets and notebooks” on page 155
• “Managing files and data” on page 161
Editing and formatting spreadsheets
The following chapters show you how to edit and format your
spreadsheets:
• “Editing spreadsheets” on page 167
• “Formatting spreadsheets” on page 171

124 Part Three: Quattro Pro
Working with formulas and functions in spreadsheets
The chapter “Working with formulas and functions” on page 179 shows
you how to use formulas and functions in your spreadsheets.
Creating charts from spreadsheets
The chapter “Presenting spreadsheet data in a chart” on page 183 shows
you how to use spreadsheet data to create charts quickly and easily.
Sharing spreadsheets
The following chapters show you how to share your spreadsheets with
others:
• “Sharing Quattro Pro projects” on page 187
• “Quattro Pro compatibility with Microsoft® Excel®” on page 189
For more information on Quattro Pro
For even more information on Quattro Pro, please see the Reference
Center, which installs with WordPerfect Office X5. See “To access the
Reference Center” on page 12.

Part Three: Quattro Pro 125
Quattro Pro basics
Before beginning your project, you should familiarize yourself with the
concepts and desktop components that will help you create
spreadsheet-based documents. Quattro Pro features many tools that
increase your efficiency by giving you quick access to your data. You can
also customize your workspace and tailor your toolbars to present a
familiar working environment each time you launch your application.
In this chapter, you’ll find these topics:
•Starting Quattro Pro
• Understanding the components of a notebook
• Quitting Quattro Pro
For additional topics, please see “Quattro Pro basics” in the
Quattro Pro Help.
Starting Quattro Pro
Let’s begin by starting Quattro Pro.
To start Quattro Pro
• On the Windows taskbar, click Start ` Programs `
WordPerfect Office X5 ` Quattro Pro X5.
126 Part Three: Quattro Pro
Understanding the components of a notebook
Notebooks, spreadsheets, and their associated elements are the core of
the Quattro Pro application. Notebooks provide a way to organize many
spreadsheets within the same file. There are 18,000 spreadsheets in a
notebook. Each spreadsheet consists of approximately 1,000,000 rows
and 18,000 columns.
Outline of notebook components
The following information describes the basic components of a
Quattro Pro notebook.
Spreadsheets
A spreadsheet is an electronic ledger. It contains columns and rows in
which you enter, arrange, calculate, and analyze data. In a spreadsheet,
you can arrange and categorize data, perform simple math operations,
and apply complex formulas. Once you enter your data in a spreadsheet,
you can create a chart, add maps and graphics, or produce a report. The
spreadsheet you see when Quattro Pro opens is one of thousands
available in each notebook.

Part Three: Quattro Pro 127
Objects sheet
The last sheet of every notebook is the Objects sheet. The Objects sheet
displays an icon for every chart in the notebook. This sheet also displays
icons for custom dialog boxes you build. You can copy, rename, and print
items in the Objects sheet. The Objects sheet property bar has buttons for
creating, editing, and displaying charts and for building custom dialog
boxes.
Project templates
Project templates let you create a new notebook based on a pre-designed
project. Many of the Quattro Pro project templates provide a basic format
and structure for common spreadsheets and data entry forms. You can
also create your own project templates.
Values
A value is a number, date, formula, or the result of a formula. Quattro Pro
automatically determines whether data is a value or a label. As you type
your data in a cell, the READY indicator on the application bar changes to
LABEL or VALUE, depending on the type of data you enter.
Labels
Labels contain alphanumeric data, such as titles, phone numbers, or
addresses. Quattro Pro interprets and formats labels differently than it
does values. Values are calculable; labels are not.
Formulas
Formulas are mathematical equations. Formulas usually refer to numbers
in other cells in order to calculate a value, such as the difference between
the values in two cells or the total of values in a column. You can use
mathematical functions and numbers in formulas.

128 Part Three: Quattro Pro
Spreadsheet functions
Spreadsheet functions are built-in formulas that automate many of the
calculations you perform in a spreadsheet. For example, @AMAINT is a
spreadsheet function that calculates the accumulated interest paid on a
loan after a specified number of payments. All spreadsheet functions are
preceded by an @ sign.
Macros
Macros are computer scripts that automate complex or repetitive
command sequences. A macro is a sequence of commands that
Quattro Pro runs automatically. Macros can perform keystrokes, mouse
actions, and menu commands. You can use macros to automate tasks
(such as printing a standard report), enter frequently used labels with a
keystroke, or build complete applications to simplify Quattro Pro tasks for
other users.
Quitting Quattro Pro
You can quit Quattro Pro.
To quit Quattro Pro
• Click File ` Exit.
If you have changed any files, you are prompted to save your
work.

Part Three: Quattro Pro 129
Creating spreadsheets
Quattro Pro contains spreadsheets in a notebook. Once you have
created a spreadsheet, you can enter data and perform calculations. For
example, you can enter a list of items and the cost of each item and then
calculate the total cost of all items.
In this chapter, you’ll find these topics:
• Creating and opening notebooks
• Adding and deleting spreadsheets
• Moving and copying spreadsheets
• Renaming spreadsheets
• Selecting cells, rows, and columns
• Inserting and deleting cells, rows, and columns
• Creating labels and special characters
• Entering values
• Filling cells and spreadsheet tabs automatically
• Creating simple equations
• Calculating data in rows and columns
• Using preset calculations
For additional topics, please see “Creating spreadsheets” in the
Quattro Pro Help.

130 Part Three: Quattro Pro
Creating and opening notebooks
When you start a new spreadsheet in Quattro Pro, you must first create a
notebook. You can create a notebook from a list of project templates or
from the default template. Project templates prompt you for data and
then format and calculate it automatically. When you create a notebook
from the default template, you must format the data yourself and
perform your own calculations.
You can also open a notebook.
To create a notebook
• Click File ` New.
To create a notebook by using a project template
1Click File ` New from project.
2Click the Create new tab.
3Select Quattro Pro from the Categories list box.
4Choose a project from the Projects list.
5Click Create.
6Use the PerfectExpert panel to modify the project.
To open a notebook
1Click File ` Open.
2Choose the driver and folder where the notebook is stored.
3Click a filename
4Click Open.
Adding and deleting spreadsheets
You can add or delete single or multiple spreadsheets to or from your
notebook.

Part Three: Quattro Pro 131
To insert a spreadsheet
1Click the tab of the spreadsheet you want to follow the new
spreadsheet.
2Click Insert ` Insert sheet.
To insert multiple spreadsheets
1Click Insert ` Insert cells.
2Enable the Sheets option in the Dimension area.
3Enable the Entire option in the Span area.
4Type a 3D selection in the Cells field.
For example, to insert three sheets before spreadsheet B, enter
B:A3..D:A3 (it does not matter which cell you reference).
To delete a spreadsheet
1Click a spreadsheet tab.
2Click Edit ` Delete cells.
3Enable the Sheets option.
4Enable the Entire option.
You can also delete a spreadsheet by right-clicking a spreadsheet
tab, and clicking Delete sheet.
To delete multiple spreadsheets
1Click the first spreadsheet tab.
2Hold down Shift while you click the last spreadsheet tab to delete.
A black line appears under the tabs.
3Click Edit ` Delete cells.
4Enable the Sheets option.
5Enable the Entire option.

132 Part Three: Quattro Pro
Moving and copying spreadsheets
You can move sheets within a notebook or between notebooks to reorder
them, using the mouse to drag the spreadsheet tab to another location.
In the same way, you can also copy spreadsheets within a notebook.
To move a spreadsheet
1Click the tab of the spreadsheet you want to move.
2Drag the spreadsheet tab in any direction until a sheet icon appears.
3Move the sheet icon by dragging right or left along the row of tabs.
4Release the mouse button when the sheet icon is where you want to
place the spreadsheet.
You can also move a spreadsheet by clicking Edit ` Move Sheets,
and specifying the sheets to move.
To copy a spreadsheet
1Hold down Ctrl and click the tab of the spreadsheet you want to
copy.
2Drag the spreadsheet tab in any direction until a sheet icon appears.
3Move the sheet icon by dragging right or left along the row of tabs.
4Release the mouse button when the sheet icon is where you want to
place the spreadsheet.
You can also copy a spreadsheet by clicking Edit ` Select all, and
then clicking Edit ` Copy.
Renaming spreadsheets
Each spreadsheet in a notebook has a tab at the bottom. This tab displays
the name of the spreadsheet. Spreadsheets are initially named with letters
of the alphabet in sequence, from A to Z, continuing from AA to AZ, up

Part Three: Quattro Pro 133
to ZZZ. You can assign a descriptive name to a spreadsheet using up to
64 characters (letters and numbers).
You can also change the spreadsheet name to reflect the naming
conventions used by applications such as Microsoft Excel.
To rename a spreadsheet
1Click Format ` Sheet properties.
2Click the Name tab.
3Type a descriptive name.
The Objects sheet (the last sheet in the notebook) cannot be
renamed.
When you rename a spreadsheet, formulas that refer to the
renamed spreadsheet adjust to use the new name.
To reassign the original name to a spreadsheet, click Reset.
You can also name a spreadsheet by double-clicking its tab.
To use Microsoft Excel conventions when you rename a
spreadsheet
1Click Tools ` Settings.
2Click Compatibility.
3Enable the Display as numbers check box.
To change spreadsheet tabs back to letters, disable the Display as
numbers check box.

134 Part Three: Quattro Pro
Selecting cells, rows, and columns
You can select cells individually or in rows, columns, blocks, or 3D blocks.
When you select a cell, a black-bordered rectangle displays to indicate the
active cell. This rectangle is called the selector.
You can select nonadjacent cells, allowing you to write formulas that refer
to various selections in different locations. You can also select a 3D block
of cells, which is a group of cells selected on more than one spreadsheet.
For example, A2..B5 on sheets A through D is a 3D selection.
When you need to enter cell references in dialog boxes, it is usually easier
to select the cells rather than type the entire cell address. Quattro Pro lets
you use the Range picker to easily select cells.
SpeedSelect lets you quickly select an entire block of cells. In addition, you
can use the SpeedSelect buttons to quickly move to each corner of the
block.
You can select entire rows, columns, and spreadsheets. You can also
select multiple spreadsheets.
You can lock specific rows and columns of a spreadsheet so that their
titles remain on the screen as you scroll. A blue line divides the locked area
and the notebook data. Locked titles do not affect printing.
Finally, you can repeat titles on each spreadsheet of a printed notebook.
To select nonadjacent cells
1Select the first group of cells.
2Hold down Ctrl, and select additional cells.
If you want to type references to nonadjacent selections in a
formula, separate each selection with a comma, as shown in this
example: A2..A5,B7,D5..E12.

Part Three: Quattro Pro 135
To select a 3D block of cells
1Select the cells on the first spreadsheet.
2Hold down Shift, and click the tab for the last spreadsheet in the
series.
A black line appears under the tabs; the same cells are now selected
on all the sheets where the black line appears.
The cells remain selected only until you click elsewhere in the
notebook.
If you want to type a reference to a 3D block, include the
spreadsheet references first, followed by the cell coordinates.
To select cells from a dialog box
1Click the Range picker .
2Select the cells you want to appear in the edit field of the dialog box.
3Maximize the dialog box.
You can also select cells by double-clicking the contents of the edit
field.
To quickly select data on a spreadsheet
1Select one cell within a block of cells.
2Right-click a toolbar, and click Data manipulation.
3On the Data manipulation toolbar, click Select table .
All the cells are selected.
To quickly move to a corner of a block of cells
1Select one cell within a block of cells.
2Right-click a toolbar, and click Data manipulation.
3Click one of the following navigation tools:

136 Part Three: Quattro Pro
• — Top left of table button
• — Top right of table button
• — Bottom left of table button
• — Bottom right of table button
To select a row or column
• Click the row or column heading.
To select multiple spreadsheets
1Click the tab of the first spreadsheet to select.
2Hold down Shift while you click the last spreadsheet tab you want
included in the selection.
A black line appears under the tabs.
To lock titles on a spreadsheet
1Select the top-left cell of the spreadsheet area you want to remain
scrollable.
2Click View ` Locked titles.
A blue line divides the locked area and the notebook data.
The Locked titles option is only available in Draft view.
You can display only row titles or only column titles as locked titles
by selecting the row or column below or to the right of the last
one to be displayed.
To unlock titles, click View ` Locked titles again.
To repeat column titles on each spreadsheet of a printed
notebook
1Click File ` Page setup.

Part Three: Quattro Pro 137
2Click the Options tab.
3Type the location of the column title in the Top headi ng box.
You can also repeat row titles by typing the location of the row
title in the Left heading box.
Inserting and deleting cells, rows, and columns
You can insert cells, rows, or columns anywhere in a spreadsheet. When
you insert an item, existing data is pushed down, to the right, or to the
back of the notebook to make room for the new item.
You can also copy and insert data and cells. When you copy and insert
data and cells, Quattro Pro inserts the correct number of cells for the
copied data and pastes the data in the spreadsheet.
When data is no longer useful, you can easily delete cells, rows, columns,
or multiple rows and columns.
You can prevent other users from adding rows and columns to a
spreadsheet by entering data in the last cell of the spreadsheet. Since this
cell can’t be pushed down or to the right, no extra cells can be added to
the spreadsheet.
To insert a cell
1Select a cell in the location where you want to insert a new cell.
2Click Insert ` Insert cells.
3Enable the Partial option in the Span area.
4Enable one of the following options in the Dimension area:
• Rows — the selected cell will shift down and out of the way
• Columns — the selected cell will shift to the right
• Sheets — the selected cell will shift to the next spreadsheet

138 Part Three: Quattro Pro
You can also insert multiple cells. Make sure the upper-left corner
of the cells you select contains the first cell entry you want shifted
right, down, or back. The cells you select should be the same size
as the number of cells you want to insert.
To insert a row
1Select the row heading just below where you want the row inserted.
2Click Insert ` Insert row.
When you insert a row within the boundaries of a named area or
a cell referenced by a formula, the cell references expand to
include the new row.
You can also insert the correct number of cells for a row of data
that you copy. For more information, see “To copy and insert data
and cells” on page 139.
You can insert multiple rows by selecting multiple row headings,
and clicking Insert ` Insert row.
To insert a column
1Select the column heading to the right of where you want the
column inserted.
2Click Insert ` Insert column.
When you insert a column within the boundaries of a named area
or a cell referenced by a formula, the cell references expand to
include the new column.
You can insert multiple columns by selecting multiple columns
headings, then clicking Insert ` Insert column.

Part Three: Quattro Pro 139
To copy and insert data and cells
1Select the row, column, or block of cells that contains the data you
want to copy.
2Click Edit ` Copy.
3Select the upper left-most cell where you want to insert the copied
data and cells.
4Right-click, and click QuickPaste.
5In the Dimension area, enable one of the following options:
• Rows — to shift cells down and out of the way
• Columns — to shift cells to the right
6In the Span area, enable one of the following options:
• Entire — to insert an entire row or column
• Span — to insert the required cells in a row or column
To delete a cell
1Select the cell you want to delete.
2Click Edit ` Delete cells.
3Enable the Partial option in the Span area.
4Enable one of the following options in the Dimension area:
• Rows — the cell below the selected cell will shift up
• Columns — the cell to the right of the selected cell will shift to the
left
• Sheets — the corresponding cell on the next spreadsheet will shift
to the current spreadsheet
You can also delete multiple cells by first selecting a block of cells.

140 Part Three: Quattro Pro
To delete a row or a column
1Select the row or column heading.
2Click Edit ` Delete cells.
You can delete multiple rows or columns by selecting multiple
headings, and clicking Edit ` Delete cells.
To restrict the addition of rows and columns
1Press End, and press the Down arrow.
2Press End, and press the Right arrow.
The cursor is at the last cell in the spreadsheet.
3Type any label or value.
4Press Home to get back to the first cell in the spreadsheet.
When you try to add a row or column, an out of boundary message
displays.
If the spreadsheet contains data, pressing End and then the Down
arrow and Right arrow keys moves the cursor to the last cell of the
block. Keep pressing this combination to move to the last cell in
the spreadsheet.
Creating labels and special characters
You can create labels in a spreadsheet which, unlike other cell data,
cannot be calculated in formulas. A label can be text (address), text with
numbers (145 Howard Street), or numbers seen as text (202-555-1212,
a phone number). A label can begin with any letter, punctuation mark, or
symbol, except the following characters:
Character Description
/forward slash
+plus

Part Three: Quattro Pro 141
If you type one of these characters, Quattro Pro treats the information as
a formula or value. You can force Quattro Pro to read values as labels by
typing an alignment character before the value. For example, to enter
(Before Taxes), you would type: «(Before Taxes).
You can insert special characters and symbols that are not on your
keyboard, such as icons, phonetic characters, and characters in other
languages. Quattro Pro also lets you repeat characters or a series of
characters in a cell.
To create a label
1Click a cell.
2Type alphanumeric characters.
3Press Enter.
To create a label from a value
— minus
$ dollar sign
( opening parenthesis
@ at sign
# number sign
.period
=equals
To create Do the following
Left-aligned label Type ‘ before a value.
Right-aligned label Type » before a value.
Character Description
142 Part Three: Quattro Pro
You can also type an alignment character before a backslash, if
you want a label to begin with a backslash, but don’t want to
repeat the character after it.
To insert special characters and symbols
1Click a cell.
2Click Insert ` Symbol.
3Choose a character set from the Set list box.
4Choose a character from the Symbols list.
5Click Insert.
You can also insert special characters and symbols by clicking the
WP characters button on the property bar.
To repeat a character
1Click a cell.
2Type (backslash character), and type a character.
3Press Enter.
To repeat a series of characters in a pattern
1Click a cell.
2Type (backslash character). and type the set of characters to be
repeated.
For example: abc.
Centered label Type ^ before a value.
To create Do the following

Part Three: Quattro Pro 143
Entering values
A value is a number, formula, date, or time. Quattro Pro determines that
data is a value from the characters you type. The data type displays in the
application bar.
For information on entering formulas, see “Working with formulas and
functions” on page 179.
Numbers entered in cells can consist only of the following:
•numerals (0 to 9)
• minus sign (-) for negative numbers
• plus sign (+) for positive numbers
• currency symbols; for example, $
• one decimal point
• a trailing %
• an E for scientific notation
When entering numbers, be aware of the following restrictions:
• Use a minus sign (-), not parentheses, to indicate a negative number.
However, if you change the numeric format to currency or a value
with a decimal, negative numbers appear in parentheses.
• Do not include spaces in the entry.
• If a number does not fit into a cell, it is displayed in exponential
format.
• Use numeric characters, not letters, to represent 1 and 0. For
example, do not substitute a lowercase l («el») for 1 (one) or an
uppercase O («oh») for 0 (zero).
• Quattro Pro also lets you enter numbers as fractions.
You can enter fractions in a cell.

144 Part Three: Quattro Pro
You can enter a date or time, including the current date, in a cell. While
Quattro Pro reads dates and times as values, it applies specific formatting
and calculation criteria to them depending on the date and time formats
you set as defaults. Dates or times can be in many formats, such as
04-04-98, 04/04/98, and 01:42:30 PM. For information on entering
dates prior to 1900 and after 2000, see “Entering dates” in the
Quattro Pro Help.
You can also automatically enter the current date.
Quattro Pro stores all dates as serial integers and times as decimal
fractions, so that it can calculate dates and times as values. The minimum
serial integer is -109,571, which represents January 1, 1600; the
maximum is 474,816, which represents December 31, 3199. The
minimum decimal fraction for time is 0.99999 (for the time 23:59:59)
and the maximum is 0.000 (for 00:00:00). The serial integer or decimal
fraction appears in the input line when you select a cell. A cell containing
a serial integer mixed with a decimal fraction indicates the date and time.
For example, 2.5 represents January 1, 1900 at 12:00 noon.
If a notebook includes many dates, you may want to force specific cells
to accept only dates and times. This is particularly useful when you create
notebooks that others will use.
To enter a number
1Click a cell.
2Type a number.
3Press Enter.
For more information, see “To change the number of decimal
places in a value” in the Quattro Pro Help.

Part Three: Quattro Pro 145
To enter fractions
1Click a cell.
2Type a number as a decimal.
3Press Enter.
4Click the cell.
5Click Format ` Selection properties.
6Click the Numeric format tab.
7Choose Fraction from the Numeric formats list.
8Choose a type from the Fraction list.
To enter a date or time
1Click a cell.
2Type a date or time.
3Press Enter.
For a list of available date and time formats, see “Default date and
time formats” in the Quattro Pro Help.
To enter the current date
1Click a cell.
2Click Insert ` Date.
Quattro Pro inserts the short date format specified in the Windows
Regional Settings on the Control Panel.
You can also enter the current date by clicking a cell and pressing
Ctrl + D.

146 Part Three: Quattro Pro
To enter a date by using the spreadsheet DATE function
1Click a cell.
2Click Insert ` Insert function.
3Choose Date from the Function category list.
4Choose DATE from the Function list.
5Click OK.
6Type the date (year, month, and day) between parentheses.
7Press Enter.
For a list of available date and time formats, see “Default date and
time formats” in the Quattro Pro Help.
Filling cells and spreadsheet tabs automatically
Quattro Pro lets you automatically enter repeated labels and functions.
Once the initial letters or sequence you are typing is recognized, the data
is automatically inserted. As you type a function, the likeliest function
displays.
You can fill cells automatically. You can save time by automatically filling
cells with a sequence that you start with a seed value. You can also fill
spreadsheet tabs automatically.
To insert repeated data automatically
1Click Tools ` Settings.
2In the list of categories, double-click Workspaces, Application, and
click General.
3Enable the QuickType check box.
4Click OK.
5Type text in a cell.

Part Three: Quattro Pro 147
The blank cells to be filled must be contiguous with the seed value,
extending down the column or across the row to the right.
To fill empty cells automatically
1Select the cells.
2Click Edit ` Fill ` QuickFill.
3Choose a series from the Series name list box.
4Choose an element from the Series elements list.
5In the Fill as area, enable one of the following options:
• Columns — fills to the bottom of the first column of cells, and
continues at the top of the second column
• Rows — fills to the end of the first row of cells, and continues at
the beginning of the second row
You can also open the QuickFill dialog box by clicking the QuickFill
button on the Notebook toolbar.
You can create a new series using part of an existing series by
modifying the series and saving it under another name.
To fill cells automatically by using seed values
1Type a seed value in a cell.
2Select the seed value cell and the blank cells you want to fill.
3Click Edit ` Fill ` QuickFill.
For a list of seed values and resulting sequences, see “QuickFill
seed values” in the Quattro Pro Help.
You can also fill cells automatically by clicking the QuickFill
button on the Notebook toolbar.
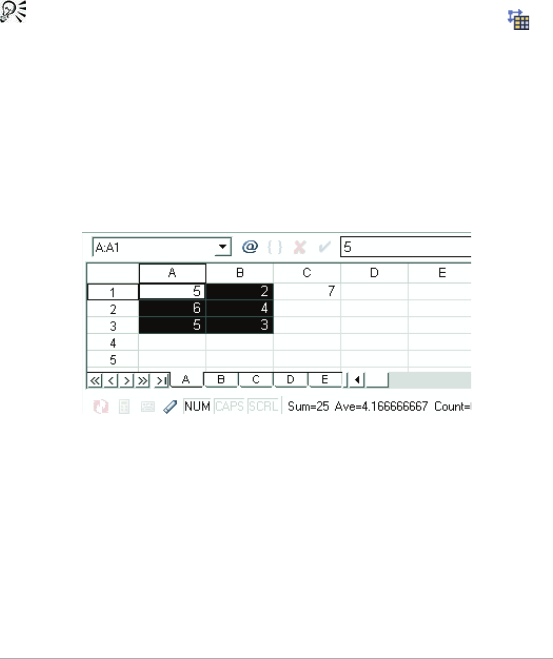
148 Part Three: Quattro Pro
To fill spreadsheet tabs automatically
1Select an empty cell.
2Click Edit ` Fill ` QuickFill.
3Choose a list series from the Series name list box.
4Choose an element from the Series elements list.
5Enable the Tab s option in the Fill as area.
You can also fill cells automatically by clicking the QuickFill
button on the Notebook toolbar.
Creating simple equations
You can perform simple mathematical operations such as 1+1 directly in
a cell. Quattro Pro interprets these equations as formulas and indicates
cells with formulas by adding a blue triangle to the bottom-left corner of
the cell. Quattro Pro also totals values for you.
In this example, the sum of the selected cells (columns A and B,
rows 1 through 3) is displayed on the application bar.
You can also specify to have Quattro Pro identify the forward slash ( / ) as
a division sign.
For example, when the forward slash is used as a division sign, 4/4 is
interpreted as 4 divided by 4, and the result 1 displays. Otherwise, when
you type a forward slash, Quattro Pro might assume you are typing a
date. For example, 4/4 might be interpreted as the date 04/04.

Part Three: Quattro Pro 149
To do simple math in cells
1Type the numbers and math operators in a cell.
For example, type 4500+450.
2Press Enter.
Do not include commas in numbers.
To total values in a column
1Click in the first blank cell below and one column to the left of the
cells to be totaled.
2Type total.
3Press Enter.
This feature is not case sensitive and is language dependent.
You can also total values in a row by clicking the first blank cell to
the right and one row above the cells to be totaled, and typing
total. Press Enter.
To set the forward slash (/) as a division sign
1Click Tools ` Settings.
2In the list of categories, double-click Workspaces, Application, and
click General.
3Enable the Mathematical formula entry check box.
You can also identify the forward slash as a division sign by typing
a plus sign (+) before the equation (for example, +4/12).
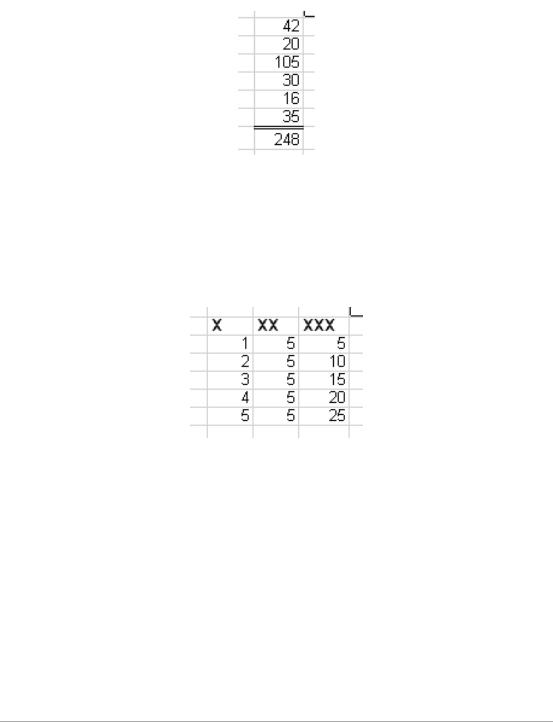
150 Part Three: Quattro Pro
Calculating data in rows and columns
Using PerfectExpert, you can calculate data in rows and columns. For
example, you can add a column, find the average of a list of figures, or
find the middle value of either.
This is an example of the Quick Math feature automatically
entering a formula into a cell to calculate a column of values.
You can also perform calculations on individual cells.
Quattro Pro also lets you perform calculations on two rows or columns.
In this example, the cell in last row of the first column is
multiplied by the cell in the last row of the second column and
the total is displayed in the cell in the last row of the third
column.
To calculate data in a single row or column
1Click Help ` PerfectExpert.
2Click Do simple math in the PerfectExpert panel.
3Click Quick math.
4In the Select a row or column box, specify the cells to calculate.

Part Three: Quattro Pro 151
5Choose a math operation from the Do math list box.
6In the Insert answer in cell box, specify the cell where you want to
display the answer.
You can also specify cells by clicking the Range picker tool and
selecting the cells.
To perform a calculation on each item in a row or column
1Click Help ` PerfectExpert.
2Click Do simple math in the PerfectExpert panel.
3Click More quick math.
4In the Select a row or column box, specify the cells to calculate.
5Choose a math operation from the Do math list box.
6In the Insert answer in cell box, specify the cell where you want to
display the answer.
The answer row or column must have as many cells as are in the list
on which you’re performing calculations.
You can also specify cells by clicking the Range picker tool and
selecting the cells.
To calculate data in two rows or columns
1Click Help ` PerfectExpert.
2Click Do simple math in the PerfectExpert panel.
3Click 2-column quick math.
4In the Select first row/column box, specify the cells to calculate for
the first row or column.
5In the Select second row/column box, specify the cells to calculate
for the second row or column.
6Choose a math operation from the Do math list box.
152 Part Three: Quattro Pro
7In the Insert answer in cell box, specify the cell where you want to
display the answer.
The answer row or column must have as many cells as are in the list
on which you’re performing calculations.
You can also specify cells by clicking the Range picker tool and
selecting the cells.
Using preset calculations
Quattro Pro lets you perform calculations quickly by using preset
calculations. You can also total cells in rows or columns. For example, you
can calculate totals in a single row, or multiple rows or columns. The row
or column cannot contain blank cells, and any labels in the selected cells
are treated as zero values.
You can also total all cells on multiple spreadsheets and total the
subtotals in a column.
Calc As-You-Go™ lets you display several different running totals for cells
you select; the sum, average, count, maximum value, and minimum value
display on the application bar.
This is an example of the application bar displaying different
running totals.
To perform preset calculations
1Type values across a row or down a column.
2Click the first blank cell after the values.
3Open the QuickFunction flyout on the Notebook toolbar, and click a
function.

Part Three: Quattro Pro 153
The icon on the flyout varies depending on which calculation you
select.
To total cells
You can total several cells in a column by selecting the data plus
one blank cell below. For example, to total the values in the cells
A1..A3, select A1..A4. The total appears in cell A4.
You can also total cells in a column or multiple columns.
To total Do the following
Cells in a row Select the cells and one blank cell
to the right, and click the
QuickSum button on the
Notebook toolbar.
Multiple rows Select the cells and a blank column
to the right, and click the
QuickSum button on the
Notebook toolbar.
Rows and columns for a grand
total
Select the cells with a blank
column to the right, and a blank
row below, and click the QuickSum
button on the Notebook
toolbar.
Rows or columns on multiple
spreadsheets
Select the rows or columns and a
blank row and column around the
data on each spreadsheet, and
click the QuickSum button on
the Notebook toolbar.

154 Part Three: Quattro Pro
To total all cells on multiple spreadsheets
1Select the cells that you want to total on each spreadsheet.
2Select the same cells on a blank spreadsheet.
3Click the QuickSum button on the Notebook toolbar.
To total subtotals in a column
1Select the first blank cell below the column containing the subtotal
cells.
2Click the QuickSum button on the Notebook toolbar.
To use Calc-As-You-Go
1Select the cells on which to perform running calculations.
2View the totals on the application bar.

Part Three: Quattro Pro 155
Viewing and navigating
spreadsheets and notebooks
Quattro Pro lets you customize the way you view and navigate
spreadsheets and notebooks.
In this chapter, you’ll find these topics:
• Navigating spreadsheets and notebooks
• Displaying, arranging, resizing, and hiding windows
• Hiding and revealing rows and columns
For additional topics, please see “Viewing and navigating
spreadsheets and notebooks” in the Quattro Pro Help.
Navigating spreadsheets and notebooks
You can navigate columns and rows on a spreadsheet using the arrow
keys, the Enter key, and the Tab key. You can also automatically scroll
through a spreadsheet using the AutoScroll tool.
You can also go directly to specific cells or data types using the Go To and
Browse By features.
To cycle through open notebooks
• On the application bar, click the button that displays the notebook’s
name.
You can also move through open notebooks by pressing
Shift + F6 to cycle forward or Ctrl + F6 to cycle backwards.

156 Part Three: Quattro Pro
To go to a specific cell in a notebook
1Click Edit ` Go to.
2Type the cell address in the Reference box.
If the cell is on another spreadsheet, include the spreadsheet name
in the address. For example, to move to cell Z36 on spreadsheet D,
type D:Z36. If the cell is in another notebook, add the notebook
prefix, for example, [Budget]D:Z36.
To browse to specific data in a notebook
1Right-click the Browse By button in the lower-right corner of the
spreadsheet.
2Choose a data type.
To navigate a spreadsheet
• Press the relevant key, as outlined in the table below.
You can also move across rows by pressing Ta b.
To Do the following
Move down columns after entering
data
Press Enter or the Down arrow.
Move up columns after entering
data
Press the Up arrow.
Move across rows after entering
data
Press the Left arrow or Right arrow.

Part Three: Quattro Pro 157
To automatically scroll through a spreadsheet
1On the notebook toolbar, click AutoScroll .
The cursor changes to the AutoScroll arrow.
2Move the AutoScroll arrow in the direction you want to scroll.
The scrolling speed increases as you move the arrow farther away
from the AutoScroll tool.
You can disable AutoScroll by clicking anywhere on the
spreadsheet.
Displaying, arranging, resizing, and hiding windows
A Quattro Pro window displays a Quattro Pro file, or a file imported into
Quattro Pro. While working in Quattro Pro, you can have several windows
open. For example, suppose you are working with four different
notebooks, each dealing with a quarterly report. You can display all four
at once.
You can select which windows you want open, and how you want to view
the data in those windows. In addition, there are several methods of
rearranging windows on your desktop. You can also hide windows.
You can change how you view your notebook without changing the
notebook itself.
To select a notebook window
• On the application bar, click the button that displays the window’s
name.
The window with the highlighted title bar is active.

158 Part Three: Quattro Pro
You can toggle back and forth between Quattro Pro and a
non-spreadsheet window, such as the spelling checker, by
pressing Alt + F6.
To arrange notebook windows
When possible, tiled windows are given equal room on the screen.
To hide a notebook window
1Click the window.
2Click Window ` Hide.
To show a hidden notebook window, click Window ` Show.
To select a notebook view
1Click View.
2Click one of the following views:
• Draft — does not display some document elements such as
footers, page breaks, and margins, although they may exist in the
notebook. Because not all features display, working in Draft view is
often faster than working in Page view.
• Page — displays your notebook pages the way they will look when
printed. Page view displays elements such as fonts, appearance
features, headers, footers, footnotes, page breaks, and margins.
Page View offers more WYSIWYG (What You See Is What You Get)
editing, such as dragging margins and page breaks. You can also
To Do the fol lowing
Tile windows vertically Click Window ` Tile top to bottom.
Tile windows horizontally Click Window ` Tile side by side.
Have windows overlap Click Window ` Cascade.

Part Three: Quattro Pro 159
get to the Page setup dialog box by double-clicking or
right-clicking in a margin.
• Page breaks — displays soft and hard page breaks. You can use
this view to edit these page breaks.
• Objects — displays the Objects sheet, the last sheet in the
notebook. You can view your charts, maps, and dialog boxes from
this sheet.
The view that is currently selected when you exit Quattro Pro is the
view that will appear when you open Quattro Pro again.
You can drag graphics or charts while in Draft view or Page view.
To see multiple pages while in Page view, click View ` Zoom, and
choose 50 percent (%) or less. To change margins while in Page
view, drag a blue margin line to set the current margin for a
column or row of pages.
To display formulas instead of formula results
• Click View ` Formulas.
To display spreadsheet comments
• Click View ` Comments.
To display a new view of a notebook window
• Click Window ` New view.
The New view feature allows you to drag and drop cells between
spreadsheets.
To remove an extra view, click the Close window button at the
top-right corner of the window. If you click File ` Close, all views
are closed because all views of the notebook are saved as the same
file.

160 Part Three: Quattro Pro
Hiding and revealing rows and columns
Quattro Pro lets you hide rows or columns from view on the screen.
Hidden rows and columns do not print. Although they are hidden from
view, they are still used in calculations. Columns move left to fill in the
space left by the hidden column, and rows move up; however, row
numbers and column letters do not change. For example, if you hide
column B, the columns on the screen are labeled A, C, D, and so on.
You can reveal rows and columns that are hidden.
To hide rows or columns
1Select the rows or columns to hide.
2Right-click the rows or columns, and click Hide.
To reveal hidden columns
1Click Edit ` Select all.
2Click Format ` Selection properties.
3Click the Row/column tab.
4Enable the Reveal option in the Column options area.
You can also reveal a hidden column by placing the pointer
slightly to the right of where the hidden column should be and
dragging.
You can reveal hidden rows by enabling the Reveal option in the
Row options area.

Part Three: Quattro Pro 161
Managing files and data
File management is an important part of any project. You can open
many different file formats in Quattro Pro, and you can import, insert, or
combine data.
In this chapter, you’ll find these topics:
• Opening and saving files
• Inserting, importing, and combining files
• Importing text into columns
For additional topics, please see “Managing files and data” in the
Quattro Pro Help.
Opening and saving files
Using Quattro Pro, you can open files from other applications. For
example, if you use Microsoft Excel or Lotus® 1-2-3®, you can open
these files in Quattro Pro. Quattro Pro can also open a
Quicken® Interchange Format (.qif) file.
You can save Quattro Pro files in other formats. You can also save
Quattro Pro data as database files, in dBASE® or Paradox® file format.
The field names are based on the data in the first row of the first sheet.
If the first row contains data that is invalid as a database field name, for
example, containing numbers, spaces, symbol characters, or duplicate
labels, Quattro Pro uses the spreadsheet column letters to represent the
field names.

162 Part Three: Quattro Pro
To open a file from another application
1Click File ` Open.
2Choose the drive and folder where the file is stored.
3Choose the filename extension from the File type list box.
4Double-click the filename.
If the drive you require is not displayed in the Look in list box, you
may have to map the drive. If the drive will not map to the path
you specify, you may not have access to that location.
To save a Quattro Pro file to another format
1Click File ` Save as.
2Choose a file type from the File type list box.
3Type a filename in the Filename list box.
4Click Save.
To save a database file
1Click File ` Save as.
2Choose one of the following from the File type list box:
• dBASE
• Paradox
3Type the filename in the Filename box.
4Click Save.
5Choose a field from the Fields list, and make any changes to the field
name or field type.
6Click Write.
If you have used unique Quattro Pro features, a message may
display stating that you are saving in a file format other than

Part Three: Quattro Pro 163
Quattro Pro. Click the database format to continue saving the
database file.
To mark a field to be deleted, click it in the list, and press Delete.
An asterisk displays next to the field name. To restore the field,
press Delete again.
Inserting, importing, and combining files
Quattro Pro lets you insert a file into a notebook.
You can also import both delimited and fixed-width text files. When you
import text, you can specify how the text should be arranged on the
spreadsheet. Arranging data into columns and rows is called parsing. For
example, you can parse a column of long labels into two or more columns
of data.
When you open a text file that includes tabs indicating new segments of
data, Quattro Pro starts a new column each time it encounters a tab in
the text.
Every sheet in the inserted or imported file that contains data is placed on
a new sheet in the active notebook. If only one sheet is inserted, the sheet
is given the name of the inserted file. If multiple sheets are inserted, the
new sheets are named in the default letter sequence.
You can save notebooks as tab- or comma-delimited text files.
To insert a file into a notebook
1Close the file you want to insert.
2Click Insert ` Insert file.
3Choose a filename.
If you want to insert a file from another application, include its
filename extension.

164 Part Three: Quattro Pro
4Type the cell location before which you want to place the inserted file
in the Before sheet box.
If the file is inserted within the boundaries of a named selection of
cells, or cells referenced by a formula, references expand to
include the new spreadsheets.
If inserting a file expands a named selection of cells or cell
reference beyond the limit of a notebook (beyond spreadsheet
ZZZ), the reference becomes ERR.
To import a text file
1Click File ` Open.
2Choose the drive and folder where the file is stored.
3Choose ASCII Text (*.txt) from the File type list box.
4Double-click the filename.
5From the Parse settings list box, choose one of the following:
• Automatic — automatically determines how best to parse the
imported text file
• Delimited auto — automatically parses imported delimited text
files
• Fixed width auto — automatically parses imported fixed-width text
files
Lines larger than 4 KB are not imported. If the total number of
lines (rows) you import exceeds the limit of the number of rows
you specified for a spreadsheet, the data is truncated to this limit.
Files must be unformatted and saved as plain ASCII text files
without any control codes or other word-processor formatting.
Before you open a text file, remove any special formatting
characters such as bold, underlining, or centering.

Part Three: Quattro Pro 165
To save a text file
1Select a cell on the relevant sheet.
2Click File ` Save as.
3Type the filename with the extension .txt in the Filename box.
4Choose ASCII Text (tab delimited or comma delimited) from the File
type list box.
Only the contents of the current sheet (or, if it is empty, the first
non-empty sheet) of a notebook are saved.
Importing text into columns
You can import a text file and rearrange the text into columns at the same
time.
You can adjust the widths of imported columns and specify a parsing
format for imported text.
You can customize how delimited and fixed-width text files are parsed.
You can also add a fixed-width parse break to imported text. For
information, please see “Importing text into columns” in the Quattro Pro
Help.
To import a text file into columns
1Click Tools ` Data tools ` QuickColumns™.
2Click the Browse button in the Text source box, and choose the
text file.
3Click the Range picker in the Text source box and select the
source cells.
4Click the Range picker in the Destination box and select a location
for the imported data.
5From the Parse settings list box, choose one of the following:

166 Part Three: Quattro Pro
• Automatic — automatically determines how best to parse the
imported text file
• Delimited auto — automatically parses imported delimited text
files
• Fixed width auto — automatically parses imported fixed-width text
files
If you want to view how data displays in the spreadsheet, click
Format.
The QuickColumns Expert parses one column at a time.
The Destination box displays the active cell in the spreadsheet.
Instead of specifying all the destination cells, you can specify one
cell in which to begin inserting the parsed cells.
You can load previously saved parse settings by pressing the
Browse button beside the Parse settings list box, and locating the
.qpx file you want to load.
To adjust the column width for imported text
1Click Tools ` Data tools ` QuickColumns.
2Click Format.
3In the column heading, point to the border until it changes to a
double arrow.
4Drag the border until the column reaches the required width.
When you adjust columns that contain fixed-width text, the
adjustment may change where the data is placed in the
destination cells. When you adjust columns that contain delimited
text, the adjustment resizes the entire column and does not affect
where the data is placed.

Part Three: Quattro Pro 167
Editing spreadsheets
Quattro Pro lets you edit cells, rows or columns, or an entire
spreadsheet. For example, you can copy cells to different parts of a
notebook.
In this chapter, you’ll find these topics:
• Editing cell content
• Copying and moving cells, rows, and columns
For additional topics, please see “Editing spreadsheets” in the
Quattro Pro Help.
Editing cell content
Quattro Pro lets you overwrite, replace, or edit cell content.
Quattro Pro lets you quickly find a cell and automatically replace the data
it contains. You can look for data in cell formulas or cell values. You can
also set conditions for the search criteria. For example, in an expenses
spreadsheet, you can look only for expenses greater than $300.

168 Part Three: Quattro Pro
To overwrite data
1Click a cell.
2Press Insert.
The Typeover button on the application bar appears pressed
when the typeover mode is on.
You can return to inserting data by pressing Insert.
To replace the entire contents of a cell
1Click a cell.
2Type a new entry.
3Press Enter.
To edit cell contents
1Double-click a cell.
2Click where you want to edit.
3Edit the cell content.
4Press Enter.
You can move the insertion point within a cell by using the arrow
keys.
To find and replace data
1Click Edit ` Find and replace.
2Type the text or value to find in the Find box.
3Type the replacement text or value in the Replace box.
4Type the cells to search in the Cell(s) box.
5In the Look in area, enable one of the following options:
• Formula — finds data in a formula
• Value — finds data in a value

Part Three: Quattro Pro 169
• Condition — compares cells in the spreadsheet with any
conditions specified in the Find box
6Click one of the following buttons:
• Find next
• Previous
7Click Replace.
Quattro Pro makes replacements from the cursor position to the
end of a document, so you must position the cursor at the
beginning of a document before you search.
You can replace all occurrences of the search item with the
replacement text or value by clicking Replace all.
When using conditional searches, type a question mark (?) before
the search condition (e.g. ? > 300).
Copying and moving cells, rows, and columns
Quattro Pro lets you copy or move cells. You can copy or move cells by
selecting the cells directly on a spreadsheet or you can copy cells by
specifying the location of the cell.
To copy and paste cells
1Select the cells to copy.
2Click Edit ` Copy.
3Select the destination cells within the active spreadsheet.
4Click Edit ` Paste.
When you copy a selection of cells to a specific cell, the Clipboard
uses that cell as the upper-left position of the copied information.

170 Part Three: Quattro Pro
You can also copy a cell to the input line of another cell, a text box,
another spreadsheet in the notebook, or another notebook.
To copy cells to a specified location
1Click Edit ` Copy cells.
2In the From box, specify the cells to copy.
3In the To box, specify the destination cells.
If you copy cells containing absolute references, enable the Model
copy check box.
Instead of specifying the cells you want to copy, you can press F3
and choose a named cell from the Cell names dialog box.
To move cells by cutting and pasting
1Select the cells to move.
2Click Edit ` Cut.
3Select the destination cells within the active spreadsheet.
4Click Edit ` Paste.
You can also move a cell to the input line of another cell, a text
box, another spreadsheet in the notebook, or another notebook.
To move cells by dragging
1Select a cell or cells.
2Point to an edge of the cells until a four-way arrow displays.
3Drag the cells to the destination area.
You can use the colored outline as a guide when you move cells.
You can copy a cell by holding down Ctrl as you drag.

Part Three: Quattro Pro 171
Formatting spreadsheets
Quattro Pro lets you format cells, rows or columns, or an entire
spreadsheet.
In this chapter, you’ll find these topics:
• Resizing rows and columns
• Using formatting tools
•Wrapping text
• Joining cells
• Changing the appearance of text
• Aligning data
• Working with numeric formats
For additional topics, please see “Formatting spreadsheets” in the
Quattro Pro Help.
Resizing rows and columns
Quattro Pro lets you change the row height in a spreadsheet. You can also
change the width of a column.

172 Part Three: Quattro Pro
To change the row height
1Select a cell in each row you want to resize, or select the row
borders.
2Click Format ` Selection properties.
3Click the Row/column tab.
4In the Row options area, enable the Set height option and type a
value in the box.
5Enable one of the following options:
• Points
• Inches
• Centimeters
You can also change row height by moving the pointer to the
bottom edge of a row border until it changes to a double arrow,
and dragging the double arrow to resize the row.
You can select noncontiguous rows by pressing Ctrl before
selecting the rows.
To change the column width
1Select a cell in each column you want to resize, or select the column
borders.
2Click Format ` Selection properties.
3Click the Row/column tab.
4In the Column options area, enable the Set width option and type a
value in the box.
5Enable one of the following options:
• Characters
• Inches
• Centimeters

Part Three: Quattro Pro 173
You can also change column width by moving the pointer to the
right edge of a column border until it changes to a double arrow,
and dragging the double arrow to resize the column.
You can select noncontiguous columns by pressing Ctrl before
selecting the columns.
Using formatting tools
Quattro Pro lets you format a spreadsheet by copying the formatting
(background color, font, numeric format, and so on) of one cell to
another cell or selection of cells.
To copy cell formatting
1Click the cell or cells with the format you want to copy.
2Click the QuickFormat button on the toolbar.
3Select the cell or cells where you want to copy the formatting.
To turn off QuickFormat, click the QuickFormat button on the
toolbar.
Wrapping text
Text that displays wider than a column width overflows to the next cell
when that cell is empty. If the next cell contains data, the overflow text is
hidden and the text appears truncated. To fix this, you can wrap text
within a cell or enter short lines of text in one cell.
To wrap text within a cell
1Click the cell in which you want to wrap text.
2Click Format ` Selection properties.
3Click the Alignment tab.
4Enable the Wrap text check box in the Cell options area.

174 Part Three: Quattro Pro
Wrapping text works only on text, not on numeric data. You can
include up to 4096 characters (4 KB) in a single cell.
You can also wrap text by clicking the Property button on the
toolbar.
To enter short lines of text in a cell
1Click a cell.
2Type a line of text.
3Press Alt + Enter.
4Continue typing.
5Press Enter.
Joining cells
Quattro Pro lets you join cells to create a title across multiple cells or a
vertical side bar. In joined cells, you can center and align text and numbers
as you would in a single cell. You can join cells in rows, columns, or rows
and columns. You can also perform calculations and use formulas in a
joined cell as you would in a regular cell.
To join cells
1Drag across the cells you want to join.
2Click Format ` Selection properties.
3Click the Alignment tab.
4Enable the Join cells check box in the Cell options area.
You can also join cells by selecting the cells to join and clicking the
Join cells button on the toolbar. The data in cells joined with
this method is automatically centered.

Part Three: Quattro Pro 175
Changing the appearance of text
You can change the text in one or more cells by adjusting its font face,
font size, or text color.
You can also change the appearance of text.
To change the typeface, size, and color of text
1Select the cells with text to format.
2Click Format ` Selection properties.
3Click the Cell font tab.
4Choose a font face from the Face list.
5Choose a font size from the Size list box.
6Open the Color picker, and click a color.
To change the properties of the text font
1Select the cells with text to format.
2Click Format ` Selection properties.
3Click the Cell font tab.
4Enable any of the following check boxes in the Appearance area:
• Bold
• Italics
• Underline
• Strikeout
You can also change the text appearance by clicking the Bold ,
Italic , or Underline button on the property bar.

176 Part Three: Quattro Pro
To convert text to superscript or subscript
1Double-click a cell.
2Select the data to change.
3Click one of the following buttons on the property bar:
• Superscript
• Subscript
Aligning data
You can align data horizontally and vertically in a cell. The default
alignment setting for numbers and formula results is right-aligned; the
default setting for labels and dates is left-aligned.
You can also center data across multiple cells; for example, you can center
a title across columns C, D, and E. You can also change the orientation of
text in a cell by rotating it horizontally, vertically, or by a specific degree.
To align data in a cell
1Select a cell.
2Click Format ` Selection properties.
3Click the Alignment tab.
4In the Horizontal alignment area, enable one of the following
options:
• General — right-aligns values and left-aligns labels
• Left — left-aligns all types of data
• Right — right-aligns all types of data
• Center — centers cell data
• Indent — moves data in from the edge of a cell. Type a value to
specify the amount by which you want to indent the cell content.
5In the Vertical alignment area, enable one of the following options:

Part Three: Quattro Pro 177
• Top
• Center
• Bottom
You can also click the Alignment button on the property bar
to change horizontal cell alignment.
To center text across multiple cells
1In the left-most cell, type the text to be centered.
2Select the cells over which to center the text starting with the cell
containing the text.
3Click Format ` Selection properties.
4Click the Alignment tab.
5In the Horizontal alignment area, enable the Center across block
option.
If you type text in a second cell where text is centered across cells,
the first entry is centered over cells to the left of the next entry.
To display the centered text in the input line, click the cell where
the text was originally entered.
To rotate text
1Click a cell with text to rotate.
2Click Format ` Selection properties.
3Click the Alignment tab.
4In the Orientation area, enable one of the following options:
• Horizontal — orients text horizontally
• Vertical — orients text vertically
• Rotated — rotates text to the degree you specify

178 Part Three: Quattro Pro
If you enable the Rotated option, specifying 90 or -90 rotates the
text vertically.
Working with numeric formats
Quattro Pro uses two types of numeric formats: number formats and
date/time formats. Numeric formats do not change cell values; they
change only the way values display.
Quattro Pro lets you format dates and times in a spreadsheet. For
example, by default, Quattro Pro displays times in long form as
HH:MM:SS (for example, 09:32:30), or in short form as HH:MM (for
example, 09:32) when no seconds are specified, but you can change this
format.
To change the numeric format of a cell
1Select a cell.
2Click Format ` Selection properties.
3Click the Numeric format tab.
4Choose a numeric format from the Numeric formats list.
To format dates and times
1Select a cell to format.
2Click Format ` Selection properties.
3Click the Numeric format tab.
4Click one of the following formats from the Numeric formats list:
• Date — lets you choose a date format from the Date formats
options
• Time — lets you choose a time format from the Time formats
options

Part Three: Quattro Pro 179
Working with formulas and
functions
Formulas are mathematical equations that calculate a final value, such as
the difference between two cells or the total of a column. Functions are
a set of standard built-in formulas used to simplify complex calculations.
Quattro Pro allows you to use both formulas and functions in
developing spreadsheet projects.
In this chapter, you’ll find these topics:
• Working with formulas
• Working with spreadsheet functions
For additional topics, please see “Working with formulas and
functions” in the Quattro Pro Help.
Working with formulas
Using Quattro Pro, you can create math formulas. The following
characters are used when creating a formula:
Character Result
. Establishes the following data as a
value
+ Establishes the following data as a
positive value
— Establishes the following data as a
negative value

180 Part Three: Quattro Pro
As well, a formula can use any of the following arguments:
You can also create text formulas. Text formulas are any formulas that
have a textual result.
Quattro Pro also allows you to create logical formulas that evaluate true
or false. For example, the result of the formula +C3<10 displays either 1
or 0 depending on the value of cell C3.
( ) Establishes the following data as a
formula and calculates first
anything contained in the
parentheses
@ Establishes the following data as a
function
# Establishes the following data as a
logical equation
$ Establishes the following data as a
currency value
= Establishes the following data as a
value
Argument Examples
Numbers 1948, -84, 43.23, 12½
Cell coordinates B12, G29..G31, B:A3..D6, or
[NOTEBK2]A:A1
Cell names EXPENSES (which may reference
D5..D10)
Spreadsheet functions @SUM(B1..B24)
Text set off by » « «PROFIT» or «Dear Mr.»
Character Result

Part Three: Quattro Pro 181
You can also create a formula by using the Formula Composer.
To create a math formula
1Type a plus sign (+) in a blank cell.
2Type a formula.
3Press Enter.
To view formula results as you enter the formula data, press F9.
To create a text formula
1Type a plus sign (+) in a blank cell.
2Type the formula using an ampersand (&) to combine text strings.
For example,+C4&»Review» enters the text in cell C4, then the word
Review.
If you want to add a space between strings, type it inside the
quotation marks. For example,+C4&» Review» enters the text in cell
C4, a space, then the word Review.
3Press Enter.
To create a formula that evaluates to true or false
1Click a blank cell.
2Type a formula using one of the logical operators.
3Press Enter.
If the statement is true, a 1 displays in the cell. If the statement is
false, a 0 displays.
To create a formula in the Formula Composer
1Select a blank cell.
2Click the Formula Composer button.
182 Part Three: Quattro Pro
3Enable one of the following options:
• Standard view — displays all three panes (spreadsheet
function description, outline, and argument)
• Argument view — displays the outline and argument panes
• Outline view — displays only the outline pane
4Type a formula in the Expression box.
If a formula is incomplete or syntactically incorrect, a red question
mark icon in the outline alerts you to the error. Expressions that
cannot be expanded, such as values, display a small yellow circle to
their left.
You can expand and collapse selected parts of the formula outline
by clicking Expand and Collapse .
Working with spreadsheet functions
Instead of composing formulas, you can use spreadsheet functions.
Spreadsheet functions are a set of standard built-in formulas used to
simplify complex calculations. Quattro Pro offers more than 500 built-in
spreadsheet functions. These spreadsheet functions cover a range of
calculations, including database, financial, engineering, and statistical
calculations. A common spreadsheet function is @SUM, which adds the
cell values you reference. For example, typing @SUM(A1..A4,B1) is
equivalent to typing +A1+A2+A3+A4+B1.
For documentation on the available functions for Quattro Pro, please see
the Quattro Pro Functions Help (qpfn.chm).
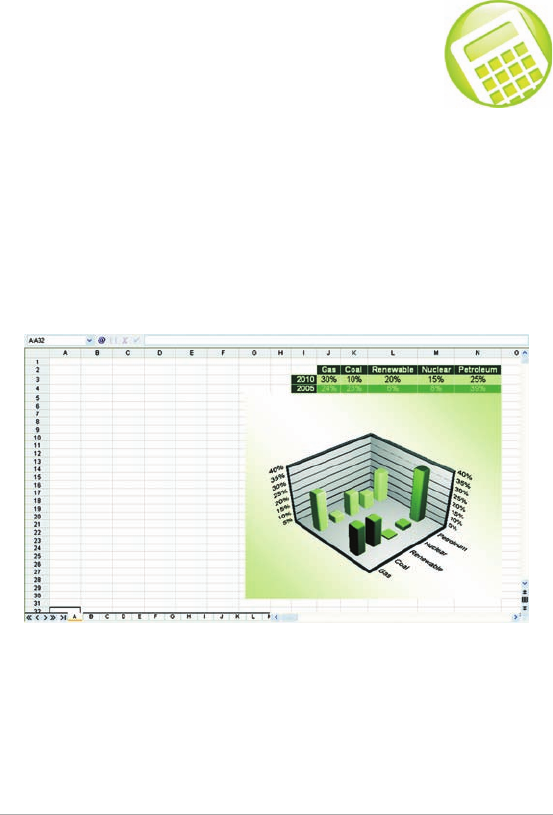
Part Three: Quattro Pro 183
Presenting spreadsheet data
in a chart
Quattro Pro lets you present data graphically by plotting it in a chart.
Chart types
You can create the following chart types: area (2D and 3D), bar (2D and
3D), bubble, Gantt, high/low, histogram, line (2D and 3D), mixed, pie (2D
and 3D), polar, radar, scatter (2D and 3D), spectral, and surface (2D and
3D).
Quattro Pro lets you create a variety of chart types.
In this chapter, you’ll find these topics:
• Plotting chart data
• Creating charts automatically
• Adding titles to charts

184 Part Three: Quattro Pro
For additional topics, please see “Presenting spreadsheet data in a
chart” in the Quattro Pro Help.
Plotting chart data
How Quattro Pro plots data depends on the range and values of the cells
you select before you create the chart.
When a selection contains more rows than columns or an equal number
of rows and columns:
• Quattro Pro plots each column as a single series.
• If the first column contains labels, the labels are placed along the
x-axis.
• If the first row contains labels, the labels are used as the chart
legend.
When a selection contains more columns than rows:
• Quattro Pro plots each row as a single series.
• If the first row contains labels, the labels are placed along the x-axis.
• If the first column contains labels, the labels are used as the chart
legend.
Setting up chart axes
All charts except pie and doughnut charts have two references for
plotting data: the x-axis and the y-axis. The x-axis is a horizontal line at
the bottom of the chart pane with fixed reference points; the column
labels in your data series are used for x-axis labels to explain what each
data series represents. Y-axis labels show the values being represented.
Depending on the data series, Quattro Pro determines the range and
increment amounts of the y-axis.
There are a few exceptions to this format:

Part Three: Quattro Pro 185
• Horizontal charts have a vertical x-axis and a horizontal y-axis.
Quattro Pro reverses the axes of horizontal charts automatically.
• In XY charts (scatter diagrams), the x-axis series is data, not labels.
Quattro Pro scales the x-axis to match the data.
• If the chart is a 2D bar, line, or area chart, you can assign any series
to a secondary y-axis, which appears on the right side of the chart.
Creating charts automatically
Creating a chart lets you represent spreadsheet data graphically. You can
create a chart automatically and have all the chart options chosen for you,
or you can create a chart by using the Chart Expert, which guides you
through the steps of creating a chart that best suits a data set.
For information about creating specific types of charts, please see
“Presenting spreadsheet data in a chart” in the Quattro Pro Help.
For information about editing charts, please see “Editing charts”
in the Quattro Pro Help.
To create a chart automatically
1Select the cells you want to plot.
If the surrounding cells contain explanatory labels, you can include
them in the selection for use as the chart axis labels or the chart
legend.
2Click the Chart button on the toolbar, and choose Create QuickChart.
3On the spreadsheet, click where you want to insert the chart.
When you create a chart automatically, it is placed on the
spreadsheet in a floating graphics window; however, you can view
it on its own page.

186 Part Three: Quattro Pro
If you want to customize the size of the chart, click and drag
diagonally on the spreadsheet.
If the cells you select contain dates, you can display the dates on
the x or y axes by changing the numeric format to Date.
To create a chart by using the Chart Expert
1Click Insert ` Chart ` Use Chart Expert.
2Follow the steps of the Expert.
If the cells you select contain dates, you can display the dates on
the x or y axes by changing the numeric format to Date.
Adding titles to charts
You can customize a chart by adding titles. You can add titles to the chart,
or to a specific axis.
You can add a title for any numeric chart type.
To add a title to a chart
1Click a chart.
2Click Chart ` Titles.
3Enable the Main title check box, and type a title in the box.
You can also
Add a subtitle Enable the Subtitle check box, and
type a subtitle in the box.

Part Three: Quattro Pro 187
Sharing Quattro Pro projects
You can share your Quattro Pro projects by printing them, or by
publishing them to PDF.
In this chapter, you’ll find these topics:
• Printing Quattro Pro projects
• Publishing Quattro Pro projects to PDF
For additional topics, please see “Printing” and “Sharing projects”
in the Quattro Pro Help.
Printing Quattro Pro projects
Quattro Pro lets you print part of a notebook, or an entire notebook.
To print the active spreadsheet or a notebook
1Click File ` Print.
2On the the Print page, choose a printer from the Name box.
3In the Print area, enable one of the following options:
• Current sheet — prints the active spreadsheet
• Notebook — prints a notebook
4In the Copies area, type the number of copies you want to print in
the Number of copies box.
If you want the copies collated, enable the Collate option.
5Click Print.

188 Part Three: Quattro Pro
Publishing Quattro Pro projects to PDF
Quattro Pro lets you publish to PDF.
To publish to PDF
1Click File ` Publish to PDF.
2Choose the drive and folder where you want to save the file.
3Type a filename in the File name box.
4From the PDF style list box, choose one of the following options:
• Commercial printing (Largest file size) — creates a high-quality PDF
to send to a printer or digital copier
• PDF/A-1b (Level B compliance) — creates a standardized PDF file
that ensures the long-term archiving of the content.
• Publishing online (Smallest file size) — creates a PDF suitable for
online viewing, such as a document to be distributed by e-mail or
displayed on the Web
• Publishing online and printing — creates a PDF suitable for
viewing or printing on a laser or desktop printer
5Click Settings, and specify any additional PDF settings in the Publish
to PDF settings dialog box that appears.
For example, if you want to publish only parts of the spreasheet to
PDF, you can enable one of the following options in the Export range
area of the General page:
• Notebook — publishes the notebook to PDF
• Selection — publishes the selected cells to PDF
• Current sheet — publishes the selected sheet to PDF
Click OK to apply your settings and return to the Publish to PDF
dialog box.
6Click Save.
If you do not want the PDF file to open automatically after it is saved,
disable the Open PDF after saving check box.

Part Three: Quattro Pro 189
Quattro Pro compatibility
with Microsoft Excel
Quattro Pro offers compatibility features geared towards those who are
migrating to Quattro Pro from Microsoft Excel and those who need to
exchange Quattro Pro spreadsheets with Microsoft Excel users.
In this chapter, you’ll find these topics:
• Simulating the Microsoft Excel workspace
• Sharing Quattro Pro spreadsheets with Microsoft Excel users
For additional topics, please see “Compatibility with Microsoft
Excel” in the Quattro Pro Help.
Simulating the Microsoft Excel workspace
If you recently switched from Microsoft Excel to Quattro Pro, you may not
be familiar with the Quattro Pro workspace. While there are many
similarities between the two applications, you may find it easier to
simulate the Microsoft Excel workspace. What the Microsoft Excel
workspace does is position the Quattro Pro features until you are
accustomed to working in Quattro Pro, including toolbars and menus
items, where you would find the equivalent feature in Microsoft Excel. It
also automatically saves to the Microsoft Excel format, displays sheets as
numbers, and applies Microsoft Excel keyboard shortcuts to Quattro Pro
features, allowing you to quickly find the tools you need to create
Microsoft Excel compatible files in Quattro Pro.

190 Part Three: Quattro Pro
In addition, you can display the Compatibility toolbar, which gives you
immediate access to tools such as saving documents to Microsoft Excel
and publishing to HTML.
You can also change spreadsheet tabs in a Quattro Pro notebook to adopt
the Microsoft Excel spreadsheet naming convention.
To work in the Microsoft Excel workspace
1Click Tools ` Settings.
2Click Workspace.
3Enable the check box beside the Microsoft Excel workspace in the
available workspaces list.
To display the Compatibility toolbar
1Click View ` Toolbars.
2Enable the Compatibility toolbar check box in the Toolbar list.
To switch to the Microsoft Excel naming convention for
spreadsheet tabs
1Click Tools ` Settings.
2In the list of categories, expand Workspace ` Application, and click
Compatibility.
3In the Sheet tab display area, enable the Display as numbers check
box.
Sharing Quattro Pro spreadsheets with Microsoft Excel
users
Quattro Pro makes it possible for you to share your Quattro Pro
spreadsheets with Microsoft Excel users and for them to share their
workbooks with you.

Part Three: Quattro Pro 191
For example, to share a Quattro Pro spreadsheet with a Microsoft Excel
user, you must save the Quattro Pro spreadsheet as a Microsoft Excel file.
The saving process automatically converts the spreadsheet to the
Microsoft Excel format.
In addition, if you receive a file created in Microsoft Excel, all you need to
do is open it in Quattro Pro. The opening process automatically converts
the file to the Quattro Pro format. If you modify the same file and you
want others to view the changes in Microsoft Excel, then you need to save
the file as a Microsoft Excel file. You can, however, specify that the default
format when saving files is set to the Microsoft Excel file format. If you
don’t specify the Microsoft Excel format when saving, the file is saved as
a Quattro Pro file by default.
Microsoft Excel workbooks that contain custom spreadsheet names may
not open in Quattro Pro if characters used in the names are not
recognized by Quattro Pro. If this happens, Quattro Pro displays a dialog
box warning you about the invalid spreadsheet name. You can change
the spreadsheet name to make it compatible with Quattro Pro.
To save a Quattro Pro notebook as a Microsoft Excel file
1Click File ` Save as.
2Choose the drive and folder where you want to save the file.
3Type a filename in the Filename box.
4Choose a Microsoft Excel file type from the File type list box.
To open a Microsoft Excel workbook in Quattro Pro
1Click File ` Open.
2Choose the drive and folder where the workbook is stored.
If you can’t see the file, choose All files from the File type box.
3Double-click the workbook’s filename.

192 Part Three: Quattro Pro
You can open Microsoft Excel version 3, 5, 7, 97, 2000, 2002 (XP),
2003, and 2007 workbooks in Quattro Pro. You can also open
Microsoft Excel Open XML workbooks (.xlsx) and Microsoft Excel
Open XML Macro-enabled workbooks (.xlsm).
When opening Microsoft workbooks in Quattro Pro, some
information may not display as it did in Microsoft Excel.
To automatically save files opened in Quattro Pro to the
Microsoft Excel format
1Click Tools ` Settings.
2In the list of categories, double-click Compatibility.
3Choose XLS from the Default file type list box.
To fix invalid spreadsheet names
1Open a Microsoft Excel file in Quattro Pro.
In the Quattro Pro dialog box, the invalid spreadsheet name displays
in the Invalid name box.
2Enable one of the following options in the Rename options area:
• Fix invalid spreadsheet name — changes the spreadsheet name to
include only valid Quattro Pro characters. The new name displays
in the New name box.
• Do not fix invalid spreadsheet name — keeps the original
spreadsheet name
If you want to make additional changes to the name, type them in
the New name box, using valid Quattro Pro characters.

Part Four: Presentations 193
Part Four:
Presentations
Presentations lets you create high-quality slide shows and drawings that
can include text, data charts, organization charts, and graphic objects.
Getting started with Presentations
The following chapters show you how to get started creating slide shows
with Presentations:
• “Creating and accessing slide shows” on page 195
• “Adding and formatting text in slide shows and drawings” on
page 203
Working with text in Presentations
The following chapters show you how to work with text in your
Presentations projects:
• “Working with titles and subtitles in Presentations” on page 207
• “Working with bulleted lists” on page 211
Working with graphics and charts in Presentations
The following chapters show you how to work with graphics and charts
in your Presentations projects:
• “Working with graphics and pictures” on page 215
• “Drawing and editing shapes in slide shows and drawings” on
page 223
• “Creating data charts and drawings” on page 227
• “Working with datasheets” on page 231

194 Part Four: Presentations
• “Working with organization charts” on page 235
• “Working with objects in slide shows and drawings” on page 239
Creating multimedia projects in Presentations
The chapter “Working with sound, movies, and animation in slide shows”
on page 245 shows you how to create multimedia projects in
Presentations.
Laying out projects in Presentations
The chapter “Using the Master Gallery” on page 249 shows you how to
apply masters and backgrounds to slides.
Sharing Presentations projects with others
The following chapters show you how to share your Presentations
projects with others:
• “Playing and controlling slide shows” on page 253
• “Sharing slide shows and drawings” on page 257
• “Presentations compatibility with Microsoft® PowerPoint®” on
page 259
For more information on Presentations
For even more information on Presentations, please see the Reference
Center, which installs with WordPerfect Office X5. See “To access the
Reference Center” on page 12.

Part Four: Presentations 195
Creating and accessing slide
shows
Presentations includes comprehensive slide show tools that allow you to
create professional-looking slide shows and drawings.
In this chapter, you’ll find these topics:
• Starting Presentations
• Creating and opening slide shows
• Saving and closing slide shows
• Viewing slide shows
•Working with the Slide Outliner
• Adding and removing slides
•Adding speaker notes
• Working with the Slide Sorter
For additional topics, please see “Creating and accessing slide
shows” in the Presentations Help.
Starting Presentations
Let’s begin by starting Presentations.
For help getting started with Presentations, please see “Exploring
the Presentations work area” in the Presentations Help.

196 Part Four: Presentations
To start Quattro Pro
• On the Windows taskbar, click Start ` Programs `
WordPerfect Office X5 ` Presentations X5.
Creating and opening slide shows
A slide show project is a predefined slide show that includes a prepared
layout and outline. All you need to do is type in data. You can design your
own slide show or start a slide show from a predefined slide show project.
You can also open an existing slide show.
You can create a self-executing version of a slide show that can be played
on any computer that uses the Windows operating system, even if it
doesn’t have Presentations installed. The slide show files and the
Presentations application files necessary to run the slide show are copied
to the disk on which you create the portable slide show.
To create a slide show from a blank master
1Click File ` New.
2In the Master Gallery, choose a slide show from the Category list box.
3Click a slide show master on the palette.
To create a slide show from a predefined project
1Click File ` New from project.
2Click the Create new tab.
3Choose Presentations from the list box.
4Choose Presentations slide show from the list.
5Click Create.
6In the Master Gallery, choose a slide show from the Category list box.
7Click a slide show master on the palette.

Part Four: Presentations 197
To create a portable slide show
1Click File ` Show On The Go™.
2Click Create.
To open an existing slide show
1Click File ` Open.
2Choose the drive and folder where the slide show is saved.
3Choose a filename.
4Click Open.
If there are fonts in the file that are missing on your system, the
Font matching results dialog box will appear. This dialog box
shows the missing fonts and the fonts with which Presentations
will substitute them. You can click OK to proceed with the font
substitution, or you can cancel opening the document so that you
can install the missing fonts on your system.
Saving and closing slide shows
You can save new slide shows.
When you have completed your tasks, you can close a document, and you
can quit Presentations.
To save a slide show
1Click File ` Save.
2Choose the drive and folder where you want to save the file.
3Type a filename in the Filename box.
4Click Save.
198 Part Four: Presentations
To close a slide show
• Click File ` Close.
You can also close a document by clicking the Close button at the
top-right corner of the document window.
You can also quit Presentations by clicking the Close button at the
top-right corner of the document window.
Viewing slide shows
You can create, edit, and sort a slide show in three views.
You can use the Slide Editor to add, view, and edit the text, objects, and
charts of individual slides. The Slide Editor is also used to specify slide
properties for the slides in a slide show.
You can use the Slide Outliner to create an outline for a slide show. You
can specify a layout, and then type the text for each slide. You can also
import a WordPerfect outline. For more information about the Slide
Outliner, see “Working with the Slide Outliner” on page 199.
An example of a slide displayed in the Slide Outliner.
The Slide Sorter displays thumbnail sketches of each slide in a slide show.
You can select slide properties and display detailed information about the
settings used for each slide in the current slide show. For more
You can also
Quit Presentations Click File ` Exit.
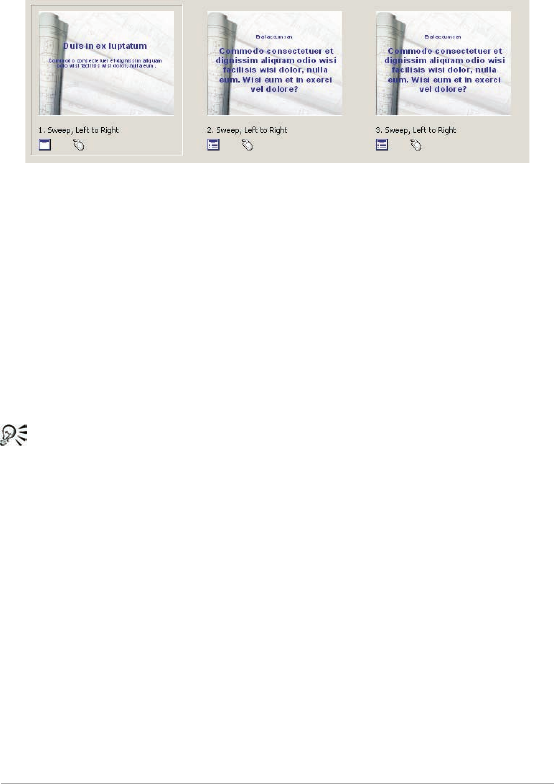
Part Four: Presentations 199
information about sorting slides, see “Working with the Slide Sorter” on
page 202.
An example of slides displayed in the Slide Sorter.
You can switch between each of these slide show views.
To switch between slide show views
• Click View, and click one of the following:
• Slide Editor
• Slide Outliner
• Slide Sorter
You can also change the slide show view by clicking the Slide
Editor, Slide Outliner, or Slide Sorter tab on the right side of the
slide show window.
Working with the Slide Outliner
You create an outline for a slide show in the Slide Outliner. An outline is
a numbered list that includes all the text found in every slide in a slide
show. You can create an outline by choosing a slide layout and typing the
text for each slide. You can type the text for slide titles, subtitles, text
slides, bulleted list slides, and combination slides.

200 Part Four: Presentations
Importing a WordPerfect outline into a Presentations slide show converts
each first level paragraph number to a slide title and any second or third
level paragraph numbers to text in each slide.
To create a slide show outline
1Click View ` Slide Outliner.
2Type a title in the slide show, and press Enter.
3Type a subtitle in the slide show, and press Enter.
4Type any text in the slide show.
5Click Insert ` New slide.
6In the New slide dialog box, click a slide layout on the Layout palette.
If you delete text, you can restore it by clicking the Undelete
button on the property bar, and clicking Restore.
You can move an outline down or up one level by clicking the
Previous level button or the Next level button on the
property bar.
To import a WordPerfect outline
1Click View ` Slide Outliner.
2Click in the slide.
3Click Insert ` File.
4Choose the drive and folder where the file is stored.
5Choose a filename.
6Click Insert.
Adding and removing slides
You can build a slide show by adding one slide or several slides at a time.
When you add a slide, it’s added immediately after the current slide. You
can also delete any slides you have added.

Part Four: Presentations 201
You can clear a slide or all slides in a slide show. By clearing a slide, you
remove all objects within it, but the cleared slide remains in the slide
show.
To add a slide
1Click Insert ` New slide.
2Click a slide layout on the Layout palette.
3Type a value in the Number to add box.
To delete a slide
1Click a slide tab at the bottom of the slide show window.
2Click Edit ` Delete slide(s).
To clear a slide
1Click Edit ` Clear.
2Enable one of the following options:
• Slide
• Entire slide show
3Click Clear.
Adding speaker notes
You can use speaker notes as cue cards for slide show presentations. You
can type your own notes, or you can insert the text that appears on the
slides.
To create speaker notes
1Click Format ` Slide properties ` Speaker notes.
2Type text in the box.

202 Part Four: Presentations
To insert text from a slide
1Click Format ` Slide properties ` Speaker notes.
2Click Insert text from slide.
Working with the Slide Sorter
The Slide Sorter displays thumbnail sketches of each slide in a slide show.
You can sort the slides in a slide show by dragging them. Once you drag
a slide to a new position, the Slide Sorter reorders and renumbers each
slide.
To sort slides
1Click View ` Slide Sorter.
2Drag a slide to a new position.
You can also
Sort a range of slides Hold down Shift, click the first and
last slide in the range of slides, and
drag them to a new position.
Sort a range of nonconsecutive
slides
Hold down Ctrl, click each slide,
and drag them to a new position.

Part Four: Presentations 203
Adding and formatting text
in slide shows and drawings
You can customize the appearance of slides with a variety of text objects.
In this chapter, you’ll learn about:
• Creating and managing text objects
• Changing font properties by using Corel RealTime Preview
• Formatting paragraphs
For additional topics, please see “Adding and formatting text in
slide shows and drawings” in the Presentations Help.
Creating and managing text objects
You can create text objects by inserting text boxes and text lines. Text
boxes expand in length and text lines expand in width to contain text as
you type.
You can also move individual characters or blocks of text, and you can
delete them. You can also adjust the position of text in a text box.
To insert a text box
1Click Insert ` Text box.
2Drag to define the text box.
3Type text in the text box.
You can also insert a text box by clicking the Text box button
on the tool palette.

204 Part Four: Presentations
To insert a line of text
1Click Insert ` Text line.
2Click in the slide show or drawing window.
3Type text.
To move text
1Double-click a text object.
2Select the text.
3Drag the selected text to a new position inside the selected text
object.
To delete text
1Double-click a text object.
2Select the text.
3Click Edit ` Delete.
To position text in a text box
1Double-click a text box.
2Click at the beginning of the text.
3Click Format ` Line, and click one of the following:
• Center — centers text
• Flush right — positions text to the right
Changing font properties by using Corel RealTime Preview
You can use Corel RealTime Preview to view different font styles, sizes,
and colors before you apply them to your text.
You can also customize the text in a slide show or drawing by
setting text attributes. For information, please see “Setting text
attributes” in the Presentations Help.

Part Four: Presentations 205
To change font properties by using Corel RealTime Preview
1Double-click a text object.
2Open the Font selection list box on the property bar, and point to a
font.
The text object changes to display the font to which you’re pointing.
Choose a font from the Font selection list box to apply it.
3Open the Font size list box on the property bar, and point to a font.
The text object changes to display the font size to which you’re
pointing. Choose a font from the Font size list box to apply it.
4On the tool palette, open any of the following pickers:
• Fill pattern
• Foreground fill color
• Background fill color
Point to a pattern or color. When you pause on a color, the text in
the text object displays a preview of the font color. Click a pattern or
color to apply it.
Formatting paragraphs
You can format text and text objects by adjusting the spacing between
lines of text. You can also set text alignment by positioning text to the left,
right, or center in relation to the sides of a text box. You can also indent
lines or paragraphs of text.
To set the line spacing
1Click a text box.
2Click Format ` Line ` Spacing.
3Type a number in the Spacing box.

206 Part Four: Presentations
To set text alignment
1Click a text box.
2Click Format ` Justification, and click one of the following:
• Left — aligns text to the left
• Right — aligns text to the right
• Center — aligns text to the center
You can also justify text by opening the Justification picker on
the property bar and clicking an alignment.
To indent text
1Double-click a text box.
2Click at the beginning of a line of text.
3Click Format ` Paragraph, and click one of the following:
• Indent — indents the left margin of the paragraph by one tab stop
• Hanging indent — indents all but the first line of the paragraph by
one tab stop
• Double indent — indents the paragraph equally from both sides

Part Four: Presentations 207
Working with titles and
subtitles in Presentations
In Presentations, when slides with layouts are inserted into a slide show,
they are automatically created with placeholders for titles and subtitles.
In this chapter, you’ll learn about:
• Formatting titles and subtitles
• Adding boxes and fills to titles and subtitles
For additional topics, please see “Working with titles and subtitles
in Presentations” in the Presentations Help.
Formatting titles and subtitles
You can format the appearance of a title or subtitle by changing such
attributes as the font, the font size, and the color. You can also change
the font fill of a title or subtitle.
To change the font properties of a title or subtitle
1Click a title or subtitle.
2Click Format, and click one of the following:
• Title properties
• Subtitle properties
3Click the Fonts tab.
4Choose a font from the Font face list box.
5Type a value in the Size box.
208 Part Four: Presentations
6In the Appearance area, enable any of the following check boxes:
• Bold
• Underline
• Italic
7In the Color area, open the Foreground picker, and click a color.
8Open the Background picker, and click a color.
The background color is visible only if a font fill style other than
the default is selected.
You can also format the appearance of a subtitle by clicking the
Subtitle properties button on the property bar.
To change the font fill of a title or subtitle
1Follow steps 1 through 3 in the previous procedure.
2In the Appearance area, click Font properties.
3In the Font properties dialog box, click the Fill tab.
4In the Fill style area, click one of the following:
• Pattern
• Gradient
5Open the Foreground picker, and click a color.
6Open the Background picker, and click a color.
7Click a fill style on the palette.
To change the font outline of a title or subtitle
1Follow steps 1 and 2 in the previous procedure.
2In the Font properties dialog box, click the Outline tab.
3Open the Color picker, and click a color.
4Open the Style picker, and click a line style.

Part Four: Presentations 209
5Open the Width picker, and click a line width.
Adding boxes and fills to titles and subtitles
You can add a box to a title or subtitle and choose its position, shape, and
color. You can then apply pattern or gradient fills to the box to, for
example, emphasize certain points in your presentation. A pattern fill
consists of two colors arranged to form a design. A gradient fill creates
smooth transitions between two colors by gradually changing their
transparency as it progresses from one color to another.
As well, you can apply texture or picture fills, including custom made fills,
to a box. A texture fill lets you fill a title or subtitle box with a textured,
natural looking pattern, such as clouds, wood, or oil. A picture fill lets you
fill a box with a bitmap.
To add a box to a title or subtitle
1Click a title or subtitle.
2Click Format, and click one of the following:
• Title properties
• Subtitle properties
3Click the Box tab.
4In the Position area, enable one of the following options:
• Above
• Below
• Above and below
• Behind
5In the Corner style area, enable one of the following options:
• Rectangle
• Rounded rectangle
• Octagon

210 Part Four: Presentations
6In the Frame style area, choose a frame from the Type list box.
7Open the Color picker, and click a color.
To apply a pattern or gradient fill to a title or subtitle box
1Click a title or subtitle.
2Click Format, and click one of the following:
• Title properties
• Subtitle properties
3Click the Box tab.
4In the Fill style and color area, click Properties.
5In the Object properties dialog box, click one of the following icons:
• Pattern
• Gradient
6Open the Foreground picker, and click a color.
7Open the Background picker, and click a color.
8Click a pattern or gradient on the palette.
To apply a texture or picture fill to a title or subtitle box
1Follow steps 1 through 4 in the previous procedure.
2In the Object properties dialog box, click one of the following icons:
• Texture
• Picture
3Choose a texture or picture from the Category list box.
4Click a texture or picture on the palette.

Part Four: Presentations 211
Working with bulleted lists
You can create bulleted lists in Presentations to effectively communicate
sequential ideas within drawings and slide shows.
In this chapter, you’ll learn about:
• Creating bulleted lists
• Changing the appearance of bullets in bulleted lists
• Animating bulleted lists
For additional topics, please see “Working with bulleted lists” in
the Presentations Help.
Creating bulleted lists
You can create bulleted lists in slide shows and drawings.
This is an example of a bulleted list.
Keep the following points in mind when you create any type of bulleted
list:

212 Part Four: Presentations
• Express a single idea on each line.
• Avoid using more than six items in a list.
• Use nouns and action verbs to start sentences.
Levels can be created within these bulleted lists. As well, you can move a
bulleted list item up a level.
To create a bulleted list
1Click Insert ` Bulleted list.
2Click in the slide show or drawing window.
3Type text on the bulleted line.
4Press Enter.
If you want to create a new level within the list, press Tab .
5Click outside the bulleted list to return to the slide show or drawing
window.
To create a new level for a bulleted list item
1Double-click a bulleted list.
2Click at the beginning of a list item.
3Press Tab.
To move an existing bulleted list item up one level
1Double-click a bulleted list.
2Click at the beginning of a list item.
3Press Shift + Ta b.
Changing the appearance of bullets in bulleted lists
You can change the shape of a bullet, or use a different symbol for a
bullet. You can also choose to change the bullet type for all list levels and
resize a bullet.

Part Four: Presentations 213
To change the shape of a bullet
1Click a bulleted list.
2Click Format ` Bulleted list properties.
3Click the Bullets tab.
4Choose a list level from the list.
5Choose a bullet shape from the Bullet shape list box.
To use a different symbol as a bullet
1Follow steps 1 through 4 in the previous procedure.
2Choose Other from the Bullet shape list box.
3In the Symbols dialog box, click Set, and click a symbol set.
4Click a symbol on the Symbols palette.
5Click Insert and close.
To change the bullet type for all list levels
1Click a bulleted list.
2Click Format ` Bulleted list properties.
3Click the Bullets tab.
4Choose a bullet type from the Bullet set (all levels) list box.
To resize a bullet
1Follow steps 1 through 3 in the previous procedure.
2Choose a list level from the list.
3Type a value in the Relative size box.
Relative bullet size is calculated in relation to the current bullet
size.

214 Part Four: Presentations
Animating bulleted lists
You can use animation as a special effect to capture your audience’s
attention and reinforce the points in your presentations. For example, you
can animate list items so that they move across the screen or animate
them in place.
To animate a bulleted list on a bulleted list slide
1Click Insert ` New slide.
2Click the Bulleted list layout on the Layout palette, and click OK.
3Create the bulleted list, and click Format ` Bulleted list properties.
4Click the Bullet animation tab.
5In the Animation type area, enable one of the following options:
• Animate object in place
• Animate object across screen
If you are publishing the slide show using Macromedia® Flash®,
enable the Show only Flash enabled transitions check box.
6Choose an animation effect from the Effects list.
7Choose an animation direction from the Direction list.
8In the Speed area, enable one of the following options:
• Fast
• Medium
• Slow
• Enable any of the following check boxes:
• Display one at a time — displays main level list items and
subordinate level list items one at a time during a slide show
• Highlight current bullet — selects one list item at a time, and greys
all other list items on the slide
• Display in reverse order — begins the cascade effect with the last
item in the list, and progresses to the first list item

Part Four: Presentations 215
Working with graphics and
pictures
The two main types of computer graphics are vector graphics and raster
graphics, or bitmaps. Vector graphics are made of lines and curves, and
they are generated from mathematical descriptions that determine the
position, length, and direction in which lines are drawn. Bitmaps, also
known as raster graphics, are composed of tiny squares called pixels;
each pixel is mapped to a location in an image and has numerical color
values.
Vector graphics are ideal for logos and illustrations because they are
resolution-independent and can be scaled to any size, or printed and
displayed at any resolution, without losing detail and quality. In addition,
you can produce sharp and crisp outlines with vector graphics.
Bitmaps are excellent for photographs and digital paintings because they
reproduce color gradations well. Bitmaps are resolution-dependent —
that is, they represent a fixed number of pixels. While they look good at
their actual size, they can appear jagged or lose image quality when
scaled, or when displayed or printed at a resolution higher than their
original resolution.
In this chapter, you’ll find these topics:
• Inserting graphics
• Creating and saving bitmaps
• Modifying bitmaps
• Using special effects
•Converting bitmaps and vector graphics

216 Part Four: Presentations
For additional topics, please see “Working with graphics and
pictures” in the Presentations Help.
Inserting graphics
You can enhance slide shows and drawings by inserting objects from the
Scrapbook, the WordPerfect Office CD, or from a file. You can also create
other graphics, such as shapes. For information about drawing shapes,
see “Drawing shapes” on page 223.
When adding an image to a slide show, the best graphics format to use
is vector, such as an image created in CorelDRAW. You can, however, add
bitmaps in formats such as Windows bitmap (.bmp) or TIFF (.tif) to slide
shows. Don’t compress the images or you’ll lose much of the image
quality. If you plan to use bitmaps, they should contain 256 colors, and,
if you don’t plan to print handouts, 96 dpi. If you do plan to print
handouts, they should contain 150 dpi.
To insert a graphic from the Scrapbook
1Click Insert ` Graphics/Pictures ` Clipart.
2Click one of the following tabs:
• Clipart — vector graphics
• Photos — bitmaps
3Choose a category from the list.
4Click a graphic on the palette.
5Click Insert.
6Click Close.
You can also insert clipart from a CD through Scrapbook by
inserting a CD into the CD drive.

Part Four: Presentations 217
To insert a graphic from a file
1Click Insert ` Graphics/Pictures ` From file.
2Choose the drive and folder where the file is stored.
3Choose a file.
4Click Insert.
Creating and saving bitmaps
You can create new, original bitmaps, using the Bitmap Editor. You can
also save a new bitmap or save an existing bitmap in another bitmap
format.
To create a bitmap
1Click Insert ` Graphics/Pictures ` Bitmap.
2Drag to define the bitmap frame.
3Use the bitmap tools in the Bitmap Editor to create a bitmap.
4Click File ` Close Bitmap Editor.
To save a bitmap
1Click a bitmap.
2Click File ` Save.
3Enable the Selected items option.
4Click OK.
5In the Save as dialog box, choose the drive and folder where you
want to save the bitmap.
6Type a filename in the Filename box.
7Click Save.
WordPerfect Graphic (WPG) is the default bitmap format.

218 Part Four: Presentations
To save a bitmap to another bitmap format
1Click a bitmap.
2Click File ` Save as.
3Enable the Selected items option.
4Click OK.
5In the Save dialog box, choose the drive and folder where you want
to save the bitmap.
6Type a name in the Filename box.
7Choose a graphic type from the File type list box.
8Click Save.
9In the Export dialog box, choose a predefined size from the
Predefined sizes list box.
If you want to specify the size of the bitmap, type values for the
width and height of the image in the Width and Height boxes.
You can also
Choose a unit of measure In the Export dialog box, choose a
unit of measure from the Units of
measure list box.
Choose a resolution In the Export dialog box, choose a
resolution from the Resolution list
box.
Specify a color option In the Export dialog box, enable a
color option.
Display a TIFF file in stages in a
Web browser
Enable the Interlaced check box.
Apply the standard transparent
color to a TIFF file
Enable the No transparency check
box.
Compress a BMP file so it will take
up less memory space
Enable the Compressed check box.

Part Four: Presentations 219
Modifying bitmaps
Modifying bitmaps in Presentations can be done with precision. You can
refine small details, make drastic changes, and intensify effects on the
bitmap as a whole. You can select a specific area of the bitmap to modify.
You can size the frame around the graphic, which is useful if you want to
eliminate white space around a bitmap. You can resample, or change the
resolution of, bitmaps to improve print quality or reduce memory and file
size requirements when you are editing, printing, or saving.
Zooming in on a bitmap lets you perform editing tasks at a precise level
of magnification. You can then zoom out to view the entire image and
the changes that you have made.
You can also remove a bitmap from a document and erase parts of a
bitmap.
To select an area of a bitmap
1Double-click a bitmap.
2Click Edit ` Select area.
3Drag to select an area of the bitmap.
To size the frame around a bitmap
To Do the following
Size the frame around a bitmap Double-click the bitmap, and drag
the side or corner handles to resize
the frame.
Size the frame around a rotated or
skewed bitmap
Click Tools ` Convert to bitmap.
Click OK. Double-click the bitmap,
and drag the side or corner handles
to resize the frame.

220 Part Four: Presentations
Increasing the size of the frame around a bitmap does not alter
the bitmap itself; however, moving any part of the bitmap outside
of the resized frame will delete that part when you close the
Bitmap Editor window and return to the drawing window.
To zoom in on a bitmap
1Double-click a bitmap.
2Click View ` Zoom.
A check mark beside Zoom indicates that you have zoomed in on
the bitmap.
To remove a bitmap
1Double-click a bitmap.
2Click Edit ` Clear.
To erase parts of a bitmap
1Double-click a bitmap.
2Click Insert ` Eraser.
3Click Format ` Brush.
4In the Brush attributes dialog box, choose a brush shape from the
Brush shape list box.
5Type a value in the Brush width box.
6Drag to erase any part of the bitmap.
When you erase parts of a bitmap, they are replaced with the
transparent color that you specify.
You can also erase a selected area of a bitmap by clicking
Edit `Select area, dragging to select an area of a bitmap, and
clicking Edit ` Erase selection.

Part Four: Presentations 221
Using special effects
Presentations includes a variety of special effects that you can add to
bitmaps.
You can apply the following special effects to enhance an entire bitmap
or a specific area that you have selected: Blur, Brightness, Contrast,
Emboss, Equalize, Mosaic, Rain, Saturation, Sharpen, Smooth, Spike
removal, Stereogram, Trace contours, and Wind.
To apply a special effect to a bitmap
1Double-click a bitmap.
2Click Edit ` Select area.
3Drag to select an area of the bitmap.
4Click Tools ` Special effects.
5Enable one of the following options:
• Full image — applies the special effect to the entire bitmap
• Inside area — applies the special effect inside the selected area
• Outside area — applies the special effect outside the selected area
6Choose a special effect from the Effects list.
If you want to preview the effect, click Apply and view the effect in
the After preview window.
If you increase the Mosaic effect by more than 10%, the bitmap
will disappear.
Converting bitmaps and vector graphics
You can convert raster images to vector graphics and vector images into
raster images.

222 Part Four: Presentations
To convert a vector object to a bitmap
1Click a vector object.
2Click Tools ` Convert to bitmap.
3Click Convert.
To convert a bitmap to a vector object
1Click a bitmap.
2Click Tools ` Trace bitmap.
Converting complex bitmaps, such as photographs and grayscale
images, is not recommended.
You can also convert a bitmap to a vector object by right-clicking
the bitmap and clicking Trace bitmap.

Part Four: Presentations 223
Drawing and editing shapes
in slide shows and drawings
You can enhance Presentations slides and drawings with seven
categories of preset shapes: line, basic, arrow, flowchart, star, callout,
and action.
In this chapter, you’ll find these topics:
•Drawing shapes
•Editing shapes
Drawing shapes
Line shapes can be everything from a simple line to a polyline. You can
draw lines, polylines, and curves. You can also draw closed curves and
Bezier curves.
Other shapes that you can draw include basic shapes, such as rectangles
and diamonds; arrow shapes; flowchart shapes, such as connectors and
processes; star shapes; callout shapes; and action shapes, such as volume
buttons and transition buttons.
To draw a line
1Click Insert ` Shape ` Line shapes, and click a line shape.
2Drag to draw the line shape.
You can also draw a precise horizontal, vertical, or diagonal line
shape by holding down Shift while dragging to draw the line.

224 Part Four: Presentations
You can also draw line shapes by clicking the Line shapes
button on the tool palette.
To draw a polyline
1Click Insert ` Shape ` Line shapes, and click a polyline shape.
2Drag to draw the polyline.
3Double-click to complete the shape.
You can transform an elliptical arc polyline shape into a circle by
double-clicking the shape with the Selection tool and moving
an edit point to the inside of the arc.
To draw a curve
1Click Insert ` Shape ` Line Shapes ` Curve.
2Click once in the drawing or slide show window.
3Drag to start the curved line.
4Click to create the first section of the curve.
5Drag to continue the curve.
6Double-click to complete the curve.
To draw a closed curve
1Click Insert ` Shape ` Line shapes ` Closed curve.
2Click once in the drawing or slide show window.
3Drag to start the curved shape.
4Click to create the first section of the curve.
5Continue to drag and click to create the curved shape you want.
6Double-click to complete the closed curve.

Part Four: Presentations 225
To draw a Bezier curve
1Click Insert ` Shape ` Line shapes ` Bezier.
2For each section of the curve, click to start the curved line, and drag
to curve the line in another direction.
3Double-click to finish the curve.
The distance between the control points and the node determines
the height or depth of the segment that you are drawing.
You can draw a cusp in the Bezier curve by dragging from the
anchor point, sizing and curving the segment, then holding down
Alt and dragging in the direction that you want the next curve.
You can then release Alt and size and curve the next segment.
To draw a shape
1Click Insert ` Shape, and click a shape in one of the following
categories:
• Basic shapes
• Arrow shapes
• Flowchart shapes
• Star shapes
• Callout shapes
• Action shapes
If you want to draw a shape from the center, hold down Alt, and
click where you want to create the center of the shape.
2Drag diagonally to draw the shape.
You can also create a shape with equal horizontal and vertical
dimensions by holding down Alt + Shift as you draw the shape.
You can also draw shapes by clicking the Basic shapes button,
the Arrow shapes button, the Flowchart shapes button,

226 Part Four: Presentations
the Star shapes button, the Callout shapes button, or the
Action shapes button on the tool palette.
Editing shapes
You can resize the shapes you add to slides and drawings by using a
glyph.
You can also change the form, angle, or direction of a line or polyline by
using the edit points.
To size a shape by using a glyph
1Click a shape.
2Drag a glyph until the shape is the size you want.
To change the shape of a line or polyline
1Click a line or polyline.
2Click Edit ` Edit points.
3Drag the edit points until the shape is the size you want.
Edit points are specific to lines and polylines. If you want to access
the edit points of a shape other than a line or polyline, you must
first convert the shape to a polygon. For information, please see
“To convert a shape to a polygon” and “To change the shape of a
polygon” in the Presentations Help.

Part Four: Presentations 227
Creating data charts and
drawings
You can use Presentations to create and update various types of data
charts.
In this chapter, you’ll learn about:
• Creating and saving data charts
• Creating and saving drawings
For additional topics, please see “Creating data charts and
drawings” in the Presentations Help.
Creating and saving data charts
You can create different types of data charts in Presentations using a
collection of predesigned chart templates and color schemes. You can
also create any of these data charts as a three-dimensional chart. Creating
a data series for a chart lets you visually represent a row of data from a
datasheet, and lets you add additional data to a chart by using a
secondary y-axis.
To create a data chart
1Click Insert ` Data chart.
2Drag to define a chart area.
3Choose a chart type from the Chart type list.
If you want to begin with a blank datasheet, disable the Use sample
data check box.

228 Part Four: Presentations
4Click a chart style.
5Click OK.
6Type data in the datasheet.
7Click outside the chart to close the datasheet.
To create a data series
1Double-click a chart.
2Click Chart ` Series.
3Click the arrows to select a series.
4Click the Type/Axis tab.
5In the Series type area, enable one of the following options:
• Area
• Bar, and choose a bar shape from the Bar shape list
• Line
• Line and marker, and click a marker shape in the Marker shape
area, and type a value in the Marker size box
• Marker, and click a marker shape in the Marker shape area, and
type a value in the Marker size box
6In the Axis area, enable one of the following options:
• Primary (y1)
• Secondary (y2)
You can also
Create a three-dimensional data
chart
In the Data chart gallery, enable the
3-D check box.
You cannot create
three-dimensional bubble, radar, or
table charts.

Part Four: Presentations 229
It is recommended that you use no more than eight series when
you create a bar chart.
You can also create a data series by clicking the Series button
on the toolbar.
Creating and saving drawings
Presentations drawings can contain data charts, bitmaps, clipart, and
drawn objects. You can create drawings, and you can also create posters
and banners. Drawings, unlike Presentations slide shows, cannot contain
transitions, animations, sound files, or movie files.
You can save Presentations drawings in various file formats such as
WordPerfect graphic (WPG), Windows bitmap (BMP), JPEG, and GIF. This
allows you to use the drawings you create in other applications, such as
WordPerfect documents, or in Web pages.
You can also save a drawing to a new location or with a new name.
To create a drawing
1Click File ` New from project.
2Click the Create new tab.
3Choose Presentations from the list box.
4Choose Presentations drawing from the list.
5Click Create.
To create a poster or a banner
1Click File ` New from project.
2Click the Create new tab.
3Choose Presentations from the list box.
4Choose Presentations drawing from the list.

230 Part Four: Presentations
5Click Create.
6Click File ` Page setup.
7Click the Poster tab.
8Click Poster size.
9Drag to select the poster size.
Each square in the poster size table represents one page.
You can also create posters from slides by saving them as
drawings in the WordPerfect Graphic (WPG) format.
To save a drawing for the first time
1Click File ` Save.
2Choose the drive and folder where you want to save the file.
3Type a filename in the Filename box.
4Choose a graphic file format from the File type list box.
5Click Save.
To save a drawing to a new location or with a new name
1Click File ` Save as.
2Choose the drive and folder where you want to save the file.
3Type the filename in the Filename box.
4Click Save.

Part Four: Presentations 231
Working with datasheets
The datasheet is a spreadsheet that is used to enter, edit, or format the
data that a data chart displays.
In this chapter, you’ll find these topics:
• Manipulating datasheets
• Adding and copying data
•Removing data
For additional topics, please see “Working with datasheets” in the
Presentations Help.
Manipulating datasheets
When you have finished entering data in a datasheet, you can hide the
datasheet. You can also move a datasheet to a new location on the
screen, and you can adjust the size of a datasheet. In addition to
displaying datasheet information in a chart, it can be displayed in a table.
To hide a datasheet
1Double-click a data chart.
2Click View ` Datasheet.
No check mark beside the Datasheet command indicates that the
datasheet is hidden.
The datasheet displays by default.

232 Part Four: Presentations
You can also view or hide a datasheet by double-clicking the data
chart and clicking the View datasheet button on the toolbar.
To move a datasheet
• Drag a datasheet to a new location in the drawing window.
To size a datasheet
1Point to any side or corner of a datasheet.
2Drag to size the datasheet.
Dragging inward reduces the size of the datasheet; dragging
outward increases it.
To display datasheet information in a table
1Click a datasheet.
2Click Chart ` Layout/Type.
3Click Tabl e.
4In the Table properties dialog box, enable the Display table check
box.
You can also display datasheet information in a table by
double-clicking the data chart and clicking the Show table
button on the toolbar.
Adding and copying data
Entering and editing data in Presentations datasheets is similar to
entering data in a spreadsheet application such as Quattro Pro. The
datasheet consists of cells in which you enter data. These cells display in
a series of rows and columns in the datasheet.
You can also import spreadsheet data from files created in other
applications into a data chart. If you link the imported data to a chart, any

Part Four: Presentations 233
changes you make to the chart data in a spreadsheet application, such as
Quattro Pro, are automatically updated in the Presentations chart data
every time you open the chart.
In addition, you can export a datasheet data.
To type or edit data
1Click a cell on a datasheet.
2Click Edit ` Edit cell.
3Type data in the Data box.
You can also enter or edit data by typing directly in a cell.
To import spreadsheet data
1Click a datasheet.
2Click Data ` Import.
3Choose Spreadsheet from the Data type list box.
4Enable any of the following check boxes:
• Transpose data — switches data from columns to rows and rows
to columns
• Clear current data — deletes all the data already in the datasheet
• Link to spreadsheet — links the imported data to the data chart,
resulting in automatic updating of the data when the spreadsheet
is changed
• Import at current cell — imports data at the selected cell
5In the Filename box, type the path and filename of the import file.
6Type a value in the Range box to import a range of data.
You can also import a predefined range of data by choosing a
range from the Named ranges list.

234 Part Four: Presentations
To export data from a datasheet
1Click a datasheet.
2Click Data ` Export.
3Choose the drive and folder to which you want to export the data.
4Choose a file format and delimiter type from the File type list box.
5Type a filename in the Filename box.
6Click Export.
Removing data
You can clear all of the data in a datasheet, and you can clear specific cells
of data in a datasheet.
To clear all data from a datasheet
1Click a datasheet.
2Click Edit ` Clear all.
To clear data from a cell
1Select a cell.
2Click Edit ` Clear.
3Enable the Data option.

Part Four: Presentations 235
Working with organization
charts
Organization charts can be used to show an organization’s structure or
the relationships of people and positions. For example, you can use
organization charts to create family trees, show a chain of command,
diagram a process, or illustrate a workflow.
In this chapter, you’ll find these topics:
• Creating and saving organization charts
• Adding and editing text in organization charts
• Viewing organization charts
For additional topics, please see “Working with organization
charts” in the Presentations Help.
Creating and saving organization charts
Before you begin creating an organization chart, here are some
suggestions for presenting information effectively:
• Try to avoid showing too much information on one chart; break up
large, complex charts into separate ones.
• Try to start each box the same way, for example, with either a
position title or a person’s name.
There are many different pre-defined organization chart layouts to
choose from when you create an organization chart. The layout
determines the structure and orientation of an organization chart. You
can save an organization chart style so that you can use the same box

236 Part Four: Presentations
options and attributes, font properties, and other chart characteristics for
other organization charts.
To create an organization chart
1Click Insert ` Organization chart.
2Drag diagonally to define a chart area.
3Click a chart layout.
To save an organization chart style
1Double-click an organization chart.
2Click Chart ` Save style.
3Choose the drive and folder where you want to save the chart style.
4Type a filename in the Filename box.
5Click Save.
The filename extension of a chart style file is (.chs).
Adding and editing text in organization charts
You can type text in each of the boxes in an organization chart and
include names, titles, and other information. You can also edit this text.
If you no longer want to include text in a chart box, you can clear it.
To add text to an organization chart
1Double-click an organization chart.
2Double-click one of the following fields in a box:
• Name
• Title
3Type the text in the field.

Part Four: Presentations 237
You can change the font of text in an organization chart by
clicking the Font button on the toolbar.
To edit text in an organization chart
1Double-click an organization chart.
2Click a box.
3Click Edit ` Edit text.
4Edit the text.
To clear text from an organization chart
1Double-click an organization chart.
2Click a box.
3Click Edit ` Clear text only.
Viewing organization charts
You can view a selected branch of an organization chart or the entire
organization chart. You can also display or hide subordinate positions in
an organization chart. Hiding subordinate positions is useful when an
organization chart is large or complex.
To view an organization chart
In organization charts, manager positions are represented by the
highest boxes in the chart, subordinate and staff positions by the
To view Do the following
A branch of an organization chart Double-click an organization chart.
Click a subordinate box. Click View
` Zoom to branch.
An entire organization chart Double-click an organization chart,
and click View ` Zoom to chart.

238 Part Four: Presentations
next level of boxes, and co-worker positions by the lowest level of
boxes.
You can also view an organization chart branch by clicking the
Zoom branch button on the property bar.
To display or hide a subordinate position
1Double-click an organization chart.
2Click a manager or subordinate position box.
3Click View, and click one of the following:
• Expand subordinates — displays subordinate positions
• Collapse subordinates — hides subordinate positions
You can also expand or collapse subordinates by clicking the
Collapse/expand button on the property bar.

Part Four: Presentations 239
Working with objects in slide
shows and drawings
All of the elements that you add to slides, including text, clipart, shapes,
charts, and bitmaps, are treated as objects in Presentations.
In this chapter, you’ll find these topics:
• Selecting objects
• Transforming objects
• Arranging objects
• Animating objects
For additional topics, please see “Working with objects in slide
shows and drawings” in the Presentations Help.
Selecting objects
You must select an object before you can arrange, edit, or move it. You
can select one object, or you can select multiple objects simultaneously.
You can also optimize Presentations so that any object you draw is
automatically selected.
To select an object
To select Do the following
An object Click an object using the Selection
tool.

240 Part Four: Presentations
A check mark beside the Auto select menu command indicates
that it is enabled.
Transforming objects
You can resize objects in slides or drawings by sizing and stretching them.
You can size an object while keeping its original proportions intact, and
stretching an object lets you extend it horizontally or vertically.
You can flip, rotate, and skew objects in the drawing window. Flipping
lets you mirror an object left to right or top to bottom. For example, you
can copy an object, position it opposite to the original object, and create
a mirror image. Rotating lets you reposition the object, and skewing lets
you distort the horizontal or vertical dimensions of the object.
To size an object proportionately
1Click an object.
2Drag a corner handle until the object is the size you want.
You can also size an object proportionately by holding down Alt
while dragging any handle until the object is the size you want.
Multiple objects Hold down Ctrl, and click the
objects using the Selection
tool.
All objects in a window or slide Click Edit ` Select ` All.
Objects automatically when they
are created
Click View ` Auto select.
To select Do the following
Part Four: Presentations 241
To stretch an object
1Click an object.
2Drag a side handle until you achieve the effect you want.
To flip an object
1Click an object.
2Click Edit ` Arrange ` Flip, and click one of the following:
• Left/Right — flips the selected object around a vertical axis
• Top/Bott om — flips the selected object around a horizontal axis
You can also flip an object by opening the Flip picker on the
property bar and clicking a direction.
To rotate an object
1Click an object.
2Click Edit ` Arrange ` Rotate.
3Drag a corner rotation handle.
You can also rotate an object by opening the Rotation options
picker on the property bar and clicking a rotation angle.
You can also
Rotate an object automatically Right-click a rotation handle. In the
Rotate dialog box, type a value in
the Degrees box.
Rotate a copy of an object Right-click a rotation handle. In the
Rotate dialog box, enable the
Rotate a copy of the object check
box.

242 Part Four: Presentations
To skew an object
1Click an object.
2Click Edit ` Arrange ` Rotate.
3Drag a side rotation handle.
Arranging objects
You can arrange the layering of objects on slides. As well, you can
combine and group objects. Combined objects are treated as one object,
but they adopt the attributes of the first selected object in the
combination. Grouped objects are also treated as one object, but the
individual objects in the group retain their original attributes.
This is an example of grouping objects.
You can also separate the layering of any of the combined or grouped
objects on slides.
To arrange objects
1Click an object.
2Click Edit ` Arrange ` Order, and click one of the following:
• To front
• To back
• Forward one
• Back one

Part Four: Presentations 243
You can also arrange the order of objects by opening the Order
picker on the property bar and clicking a direction.
To combine objects
1Hold down Ctrl, and click the objects you want to combine.
2Click Edit ` Arrange ` Combine.
You cannot combine bitmaps, text, or charts.
To group objects
1Hold down Shift, and click the objects you want to group.
2Click Edit ` Arrange ` Group.
If you group an object that contains a SpeedLink™ or animation,
these features will be removed.
To separate objects
1Click a grouped object.
2Click Edit ` Arrange ` Separate objects.
Animating objects
Objects or multiple objects can have animation effects applied to them.
For example, you can choose the direction and speed of an animation
effect, and you can animate an object in its place or across the slide.
To animate an object
1Click an object.
2Click Format ` Object properties ` Object animation.
3In the Animation type area, enable one of the following options:

244 Part Four: Presentations
• Animate object in place — animates the object in place on the
slide
• Animate object across screen — animates the object by moving it
across the slide
If you want to show animation in Flash format, enable the Show
only Flash-enabled transitions check box.
4Choose an animation effect from the Effects list.
5Choose an animation direction from the Direction list.
6In the Speed area, enable one of the following options:
• Fast
• Medium
• Slow
Enable the Show only Flash-enabled transitions check box if you
intend to publish the slide show to the Internet using Flash
format.
If you want to animate multiple objects, hold down Shift, and click
the objects.

Part Four: Presentations 245
Working with sound, movies,
and animation in slide shows
You can add sounds and movies to slide shows in Presentations.
In this chapter, you’ll learn about
• Using sounds in slide shows
• Using movies and animation in slide shows
Using sounds in slide shows
Once you have correctly installed and set up sound hardware on your
computer, you can add Wave (WAV), MPEG-1 Audio Layer-3 (MP3), and
Windows Media® Audio (WMA) sound files. You can also add
Musical Instrument Digital Interface (MIDI) files to slides. You can add an
entire CD track or only sections of a track to slides by choosing specific
starting and stopping points.
If you have a microphone and an internal sound card that supports digital
audio or an external sound device that supports digital audio, you can
also record any sound and add it to your slides. For more information
about recording and saving sounds, consult your operating system’s Help
file.
To insert a sound or MIDI file into a slide
1Click Insert ` Sound.
2Click Browse beside one of the following boxes:

246 Part Four: Presentations
• Sound
• MIDI
3Choose the drive and folder where the sound file is stored.
4Type a filename in the Filename box.
5Click Open.
You can only play one MIDI and one sound file at the same time.
You cannot play two sound files of the same type simultaneously.
To get the best results from the MIDI files that are included with
Presentations, make sure that your system is set up correctly for
your sound card.
To add an entire CD track to a slide
1Click Insert ` Sound.
2Click Browse beside the CD box.
3In the Slide CD — Audio dialog box, type a track description in the
Description box.
4Type the number of the CD track in the Track box.
To add part of a CD track to a slide
1Follow the previous procedure.
2Disable the From beginning check box.
3In the Start location area, type a value in any of the following boxes:
• Minutes
• Seconds
• Frames
4Disable the To end check box.
5In the End location area, type a value in any of the following boxes:
• Minutes

Part Four: Presentations 247
• Seconds
• Frames
To record a sound file
1Click Format ` Slide properties ` Sound.
2Click Record.
3In the Sound dialog box, click Record.
4Click Stop when you finish recording.
Using movies and animation in slide shows
You can add movies to slide shows in a variety of formats, including
Animated GIF (.gif), Moving Pictures Experts Group (.mpeg), Audio Video
Interleaved (.avi), and QuickTime® (.mov and .qt).
To add a movie file to a slide show
1Click Insert ` Movie.
2Choose the drive and folder where the file is stored.
If you want to save the movie within the slide show, enable the Save
movie within slide show document check box.
3Choose a file type from the File type list box.
4Type a filename in the Filename box.
5Click Insert.
To insert .mov and .mpeg movie files into Presentations slide
shows, you must install the required MCI driver.
Inserting a movie file into a slide show greatly increases the file
size of the slide show.
You can play a movie within the slide show by clicking View ` Play
movie or by clicking the Play movie button on the property bar.
248 Part Four: Presentations
To insert an animated GIF into a slide show
1Click Insert ` Animated GIF.
2Choose the drive and folder where the file is stored.
If you want to save the movie within the slide show, enable the Save
movie within slide show document check box.
3Type a filename in the Filename box.
4Click Insert.
An animated GIF displays correctly in Show It!™, QuickPlay™, or
Show On The Go.
You can also play an animated GIF by double-clicking the GIF, or
by right-clicking the GIF and clicking Play movie.
To set a movie to play automatically
1Right-click a movie, and click Movie properties.
2Enable the Play movie check box.
3Type a value in the Seconds after slide transition box.
You can also set a movie to play automatically by clicking the
Movie properties button on the property bar.
You can also
Hide the movie when it is not
playing
Enable the Hide movie while not
playing check box.
Set the movie to play only when
clicked
Enable the Play movie when clicked
check box.

Part Four: Presentations 249
Using the Master Gallery
A master is a set of layouts and backgrounds. A layout is a slide with
preset placeholders for objects such as titles, subtitles, bulleted lists, text,
data charts, and organization charts. Each layout has a page format and
color scheme that is consistent with the other layouts and backgrounds
that are part of a master. A background can include a border, a gradient
background, and other related images. Presentations provides a
selection of masters to work with in the Master Gallery.
In this chapter, you’ll find these topics:
• Applying masters to slides
• Applying backgrounds and layouts to slides
For additional topics, please see “Using the Master Gallery” in the
Presentations Help.
Applying masters to slides
Presentations provides a collection of masters in the Master Gallery. Each
master is a set of professionally designed slide backgrounds and layouts
that include preset objects, such as titles, bulleted lists, and charts.
Choosing a preset layout allows you to concentrate on the content of the
slide show, rather than on the format.
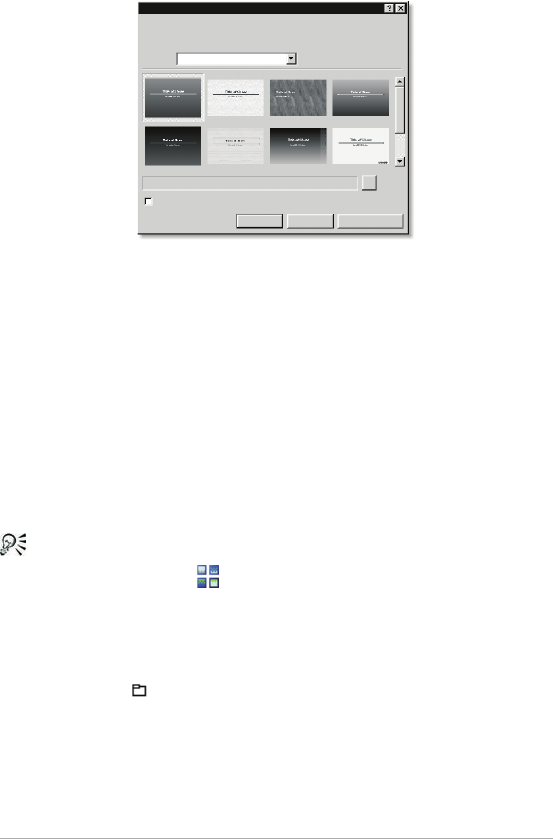
250 Part Four: Presentations
This is an example of the Master Gallery.
The masters in the Master Gallery are grouped into categories. You can
use a master provided with Presentations in the Master Gallery.
You can also import a master from another location on your computer.
To use a master in the Master Gallery
1Click Format ` Master gallery.
2Choose a slide show category from the Category list box.
3Click a master on the palette.
You can also choose a master from the Master Gallery by clicking
the Master gallery button on the toolbar.
To import a master from another location
1Click Format ` Master gallery.
2Click Browse button.
3Choose the drive and folder where the master is stored.
4Choose a filename.
5Click Insert.

Part Four: Presentations 251
Applying backgrounds and layouts to slides
When you add a new slide to a slide show, you can apply preset
backgrounds and layouts from the Background Gallery and the Layout
Gallery. For example, if you want a slideshow with a grayscale or
black-and-white look, you can choose one of the printout masters
available in the Master Gallery category list.
The preset layouts included in Presentations are listed in the following
table.
To apply a background to a slide
1Click Format ` Background gallery.
2Click the Appearance tab.
3In the Backgrounds area, choose a background category from the
Category list box.
Use a To
Title layout Introduce your subject or to serve
as a divider between subjects.
Bulleted list layout Summarize and reinforce major
points.
Text layout Display sentences or paragraphs of
text on a slide.
Organization chart layout Show the structure of positions
and span of control in a business,
department, agency, group,
division, or office.
Data chart layout Display percentages, trends,
market shares, and relational
information.
Combination layout Display a bulleted list and a data
chart on a slide.

252 Part Four: Presentations
4Click a background on the Background palette.
If you want to apply the background to all slides in the slide show,
enable the Apply selected background to all slides in slide show
check box.
You can add up to 30 different backgrounds to a slide show.
You can also apply a background that is not in the Category list
box by clicking Browse and choosing the drive and folder where
the background is stored. For example, you can apply clipart as a
background.
To apply a layout to a slide
1Click Format ` Layout gallery.
2Click the Appearance tab.
3Click a layout on the Layouts palette.
You can add up to 30 different layouts to a slide show.
You can also apply a layout to a slide by opening the Select layout
picker and clicking a layout.

Part Four: Presentations 253
Playing and controlling slide
shows
Once you create a slide show, different options are available to play it in
Presentations.
In this chapter, you’ll find these topics:
• Playing slide shows
• Increasing the speed of slide shows
• Using the slide highlighter
Playing slide shows
There are different ways to play slide shows in Presentations. You can play
a slide show by manually controlling the display of each slide. A slide
show can also be played automatically, with each slide displayed in
succession and where you can control the time delay between the display
of each slide.
To check the appearance, transition, sound, and so on of a slide without
playing the entire slide show, you can use QuickPlay.
You can also play portable slide shows, which play on any computer that
uses the Windows operating system, even if it doesn’t have Presentations
installed. For information about creating portable slide shows, see
“Creating and opening slide shows” on page 196.

254 Part Four: Presentations
To play a slide show manually
1Click View ` Play slide show.
2Choose a slide from the Beginning slide list box.
If you want to play the slide show continuously, enable the Repeat
slide show until you press “Esc” check box.
3Click Play.
4Click in the slide show window to advance to the next slide or
animation.
If you want to return to the previous slide or animation, right-click
the slide show window, and click Previous slide.
You can also play a slide show by clicking the Play slide show
button on the toolbar.
You can also return to the previous slide or animation by pressing
Page up.
To play a slide show automatically
1Click Format ` Slide properties ` Display sequence.
2In the Display next slide area, enable the After a delay of option.
3Type a value in the Seconds box.
4Enable the Apply to all slides in slide show check box.
The time delay begins the second the first slide displays on the
screen.
Time delays also apply to animated images. For example, if you set
a two-second time delay for a slide, the first animated object
automatically displays two seconds after the slide appears. The
next animated object follows two seconds later, and so on. Two
seconds after the last animated object displays, the show
advances to the next slide.

Part Four: Presentations 255
You can also apply a different time delay to each slide in a slide
show by selecting an individual slide.
To play a slide show by using QuickPlay
1Click a tab on the bottom of the slide show window.
2Click the QuickPlay tab on the side of the slide show window.
3Press Esc to stop playing the slide show.
When QuickPlay reaches the end of the show, it returns to the
slide show window.
To play a portable slide show
1Insert a disk containing a slide show into the floppy disk drive.
2Click Start on the Windows taskbar, and click Run.
3In the Open box, type the path and filename of the portable slide
show.
Increasing the speed of slide shows
You can speed up the display of a slide show by creating a QuickShow.
When you create a QuickShow, each slide in the slide show is saved as a
bitmap for quicker display. Slides from a QuickShow file display on the
screen with the delay time you apply. For information about delay times,
see “To play a slide show automatically” on page 254.
To increase the speed of a slide show
1Click View ` Play slide show.
2Click Create QuickShow.
3Enable the Use QuickShow file check box.

256 Part Four: Presentations
If you change any part of a slide show, you must re-create the
QuickShow file.
QuickShow files use more memory than regular slide show files,
creating a larger file.
Using the slide highlighter
During a slide show, you can emphasize points by using the slide
Highlighter to circle, underline, and mark objects on a slide. The
highlighting remains on the screen until the show advances to the next
slide. You can erase the highlighting at any time.
To use the slide highlighter while playing a slide show
1Click View ` Play slide show.
2Open the Highlighter color picker, and click a color.
3Open the Width picker, and click a highlighter width.
4Click Play.
5As the slide show plays, drag to highlight areas of each slide.
To erase highlighting on the current slide
• Right-click a slide, and click Erase highlighter.

Part Four: Presentations 257
Sharing slide shows and
drawings
You can share your slide shows and drawings by printing them, or by
publishing them to PDF.
In this chapter, you’ll find these topics:
• Printing slide shows and drawings
• Publishing slide shows and drawings to PDF
For additional topics, please see “Printing” and “Sharing projects”
in the Presentations Help.
Printing slide shows and drawings
You can print an entire slide show or drawing, a range of slides or pages,
a specific slide or page, or selected objects on a slide or page. You can
also print handouts, speaker notes, and audience notes.
To print a slide show or drawing
1Click File ` Print.
2On the the Main page, choose a printer from the Name box.
3In the Print range area, enable one of the following options:
• Full document — prints the entire file
• Current view — prints only the current page or slide
• Selected objects — prints a specific object in a slide or drawing
• Slides — prints only the specified slides

258 Part Four: Presentations
• Handouts — prints handouts
• Speaker notes — prints speaker notes
• Audience notes — prints audience notes
If you are printing handouts, speakers notes, or audience notes, type
a value in the Number of slides per page box.
4In the Copies area, type the number of copies you want to print in
the Number of copies box.
If you want the copies collated, enable the Collate option.
5Click Print.
You can also print a slide show or drawing by clicking the Print
button on the toolbar.
Publishing slide shows and drawings to PDF
Presentations lets you publish to PDF.
To publish to PDF
1Click File ` Publish to PDF.
2Choose the drive and folder where you want to save the file.
3Type a filename in the File name box.
4From the PDF style list box, choose a PDF type.
5Click Settings, and specify any additional PDF settings in the Publish
to PDF settings dialog box that appears.
Click OK to apply your settings and return to the Publish to PDF
dialog box.
6Click Save.
If you do not want the PDF file to open automatically after it is saved,
disable the Open PDF after saving check box.

Part Four: Presentations 259
Presentations compatibility
with Microsoft PowerPoint
Presentations offers compatibility features geared towards those who
are migrating to Presentations from Microsoft PowerPoint and those
who need to exchange Presentations slide shows with PowerPoint users.
If you are new to Presentations, the compatibility features can help you
adapt to Presentations by simulating the Microsoft PowerPoint
workspace. This allows you to switch to Presentations with minimal
impact on your productivity. For those of you who aren’t new to
Presentations, but need to collaborate with Microsoft PowerPoint users,
the compatibility features make it easier for you to exchange files.
In this chapter, you’ll find these topics:
• Simulating the Microsoft PowerPoint workspace
• Using Microsoft PowerPoint shortcut keys in Presentations
• Sharing files with Microsoft PowerPoint users
For additional topics, please see “Compatibility with
Microsoft PowerPoint” in the Presentations Help.
Simulating the Microsoft PowerPoint workspace
If you recently switched from Microsoft PowerPoint to Presentations, you
may not be familiar with the Presentations workspace. While there are
many similarities between the two applications, you may find it easier to
simulate the PowerPoint workspace while in slide show mode, which
includes toolbars and menus, until you are accustomed to working in

260 Part Four: Presentations
Presentations. It allows you to quickly find the tools you need to create
slide shows in Presentations.
To work in the Microsoft PowerPoint workspace
1In Presentation slide show mode, click Tools ` Workspace manager.
2Enable the PowerPoint mode option.
You can work in the PowerPoint workspace only in slide show
mode.
Using Microsoft PowerPoint shortcut keys in Presentations
Most Microsoft PowerPoint keyboard shortcuts are the same as in
Presentations. However, the keyboard shortcuts for controlling slide
shows are different, as described in the following table.
Microsoft PowerPoint
keyboard shortcut What it does Presentations keyboard
shortcut
Enter or Spacebar Advances to the next
slide
Enter or Spacebar
P or Backspace Returns to the
previous slide
Page up
<number> + Enter Goes to slide
<number>
Ctrl + G
Esc Ends a slide show Esc
EErases on-screen
annotations
Ctrl + E

Part Four: Presentations 261
Sharing files with Microsoft PowerPoint users
You can share your Presentations slide shows with Microsoft PowerPoint
users and they can share their files with you. To share a Presentations slide
show, you must save it as a PowerPoint file. The saving process
automatically converts the slide show to the PowerPoint format.
If you receive a PowerPoint file, all you need to do is open it in
Presentations. The opening process automatically converts the file to the
Presentations format. If you modify the file and you want others to view
the changes in PowerPoint, then you need to save the file as a PowerPoint
presentation. If you don’t specify the PowerPoint format when saving, the
file is saved as a Presentations slide show by default.
To open a Microsoft PowerPoint with Presentations
1Click File ` Open.
2Choose the drive and folder where the PowerPoint file is stored.
If you can’t see the file, choose All files from the File type box.
3Click the PowerPoint file.
4Click Open.
For more information about how Presentations opens PowerPoint
files, see “Notes for opening Microsoft PowerPoint files” in the
Presentations Help.
To save a Presentations slide show to the PowerPoint format
1Click File ` Save as.
2Choose the drive and folder where you want to save the file.
3Type the filename in the Filename box.
4Choose the MS PowerPoint file format from the File type list box.
5Click Save.

262 Part Four: Presentations
For more information about how Presentations saves PowerPoint
files, see “Notes for saving Microsoft PowerPoint files” in the
Presentations Help.
You can also save a Presentations slide show to the PowerPoint
format by clicking the Save as PowerPoint button on the toolbar.

Part Five: Utilities 263
Part Five: Utilities
WordPerfect Office X5 provides utilities that can help you accomplish
various tasks quickly and easily.
The Utilities page of the Reference Center provides links to
resources for the utilities that install with WordPerfect Office X5.
See “To access the Reference Center” on page 12.
Corel WordPerfect Lightning
Corel WordPerfect Lightning was invented to make the common tasks of
viewing, capturing, and reusing information and images simpler and
easier than ever before. WordPerfect Lightning gives you the tools you
need to work with others and to capture and fine-tune your ideas. You
can use this application to take notes or to view graphics, photos, or
documents saved as PDF, Microsoft Word, or WordPerfect files. When it’s
time to polish your work, WordPerfect Lightning integrates seamlessly
with Corel WordPerfect Office and Microsoft Word — something no
online office tool does.
WordPerfect Lightning has three components:
• The Navigator — lets you create, store, and organize your
WordPerfect Lightning notes in a familiar tree structure.
• The Viewer — lets you view PDF, Microsoft Word, WordPerfect, and
image files.
• The Notes window — lets you capture your ideas and reuse
information from other sources.

264 Part Five: Utilities
To start WordPerfect Lightning, click Start ` Programs `
WordPerfect Office X5 ` WordPerfect Lightning.
Other WordPerfect Office X5 utilities
WordPerfect Office X5 includes numerous additional first-party utilities.
Address Book
The Address Book is an information center that lets you store personal
and business contact information.
To start the Address Book, click Tools ` Address book in WordPerfect.
Conversion utility
The conversion utility lets you convert files in various formats to one of
five WordPerfect file formats.
To start the conversion utility, click Start ` Programs `
WordPerfect Office X5 ` Utilities ` Conversion utility.
Equation Editor
Equation Editor lets you insert equations in WordPerfect, Quattro Pro,
and Presentations files. Simply click where you want to insert an
equation, and then click Insert ` Equation.
File-management tools
WordPerfect Office provides two file-management tools:
WordPerfect Office file-management dialog boxes (or “enhanced file
dialogs”), and QuickFinder™.
The enhanced file dialogs let you perform many file-management tasks
— and even view Web pages! — from directly within WordPerfect,
Quattro Pro, and Presentations.

Part Five: Utilities 265
QuickFinder consists of two components:
• QuickFinder Searcher — lets you find files within a specified search
scope. Click Start ` Programs ` WordPerfect Office X5 ` Utilities `
QuickFinder Searcher.
• QuickFinder Manager — lets you create standard or custom Fast
Search files that are required to perform Fast Searches. Click Start `
Programs ` WordPerfect Office X5 ` Utilities ` QuickFinder Manager.
Printing engine
The WordPerfect Office printing engine provides a variety of printing and
page-setup options for WordPerfect (see page 87), Quattro Pro (see
page 187), and Presentations (see page 257).
Paradox
Included only in certain editions of WordPerfect Office, Paradox is a
powerful and easy-to-use relational database program that helps you
organize, track, and retrieve information.
Scrapbook
Scrapbook is a graphics utility that lets you search for and insert clipart,
photo, sound, and movie files into WordPerfect Office files.
To start Scrapbook, click Insert ` Graphics/Pictures ` Clipart from within
WordPerfect, Quattro Pro, or Presentations.
TextArt
TextArt™ lets you transform words into designs. You can use multiple
visual effects, such as font, color, and rotation options, to create
professional-looking 2D or 3D images.
To start TextArt, click Insert ` Graphics/Pictures ` TextArt from within
WordPerfect, Quattro Pro, or Presentations.

266 Part Five: Utilities
Third-party utilities
Certain editions of WordPerfect Office X5 also include the following
third-party utilities.
Mozilla Thunderbird for WordPerfect Office
Mozilla Thunderbird for WordPerfect Office provides a powerful new
approach to e-mail:
• Use the tabbed interface to keep multiple e-mails open in separate
tabs for easy reference.
• Quickly locate saved messages by using filters, timelines, or indexes.
• Spend more time reading the mail that matters! Take advantage of
leading-edge junk-mail filters, and train Thunderbird to refine its
filtering settings based on the messages that you mark as spam.
Mozilla Thunderbird for WordPerfect Office lets you take full control of
your e-mail experience.
Nuance PaperPort 12 SE
Eliminate paper clutter, “go green,” and organize your office!
With Nuance PaperPort® 12 SE, you can use your personal computer to
scan, organize, access, share, and manage your documents — both
paper and digital. The large, clear thumbnails on the PaperPort desktop
let you visually organize, retrieve, assemble, and use all your documents:
scanned paper, photographs, word-processing files, spreadsheets, PDF
files, and more!

Part Six: Writing Tools 267
Part Six: Writing Tools
WordPerfect Office X5 includes tools that can help improve the quality
of your writing. These writing tools let you correct errors in spelling and
grammar, correct mistakes automatically, and help to refine your writing
style.
If you open a file that is written in a language that is different from
the writing tools you have installed, the writing tools run in the
installed language. For example, suppose the English Writing
Tools are installed and you open a Spanish file: the writing tools
run in English. If you want to use the Writing Tools in a different
language, you must install the Writing Tools for that language by
modifying the installation. See “To add or delete components in a
WordPerfect Office X5 installation” on page 5.
For project-based tips on writing well, you can refer to the PerfectExpert
Help files that install with WordPerfect Office X5. For more information
on the PerfectExpert, see “Using the documentation” on page 9.
The Writing Tools page of the Reference Center provides links to
the writing resources that install with WordPerfect Office X5. See
“To access the Reference Center” on page 12.
Using the spelling checker
You can use the spelling checker to check the spelling of a file in
WordPerfect, Quattro Pro, or Presentations.

268 Part Six: Writing Tools
To check the spelling of a file
1Click Tools ` Spell checker.
2From the Check list box (if available), choose an option.
3Click Start.
Using the thesaurus
You can use the thesaurus to refine your writing style. The thesaurus lets
you look up options such as synonyms, antonyms, and related words.
To replace a word
1Select a word.
2Click Tools ` Thesaurus.
3Click Look up.
4In the list of categories, double-click a definition and click a word.
5Click Replace.
Using the dictionary
You can use the dictionary to check word definitions and spelling.
To look up a word
1Click Tools ` Dictionary.
If the Auto lookup feature is enabled, the dictionary will look up the
selected word from the document.
2Type a word in the box to the left of Go.

Part Seven: Macros and Migration 269
Part Seven:
Macros and Migration
WordPerfect Office X5 offers tools, features, and resources for users
who want to do any of the following:
• use macros to automate tasks
• migrate from earlier versions of the software
• deploy the software to a network
For advanced users, WordPerfect Office X5 also offers a software
development kit (SDK).
Using macros
You can create WordPerfect Office X5 macros in three ways:
• by using the built-in macro features of WordPerfect, Quattro Pro,
and Presentations
• by using the PerfectScript utility that installs with
WordPerfect Office X5
• by using Microsoft® Visual Basic® for Applications (VBA)
For information on creating macros from directly within WordPerfect,
Quattro Pro, and Presentations, please see their main Help files.
For information on creating macros by using the PerfectScript Utility,
please see the following resources:
•PerfectScript Help (psh.chm)
•Corel WordPerfect Office X5 User Guide for PerfectScript (ps_ug.pdf)

270 Part Seven: Macros and Migration
• spreadsheet of changes to PerfectScript macro commands since
version 8 (PS_Macro_changes.qpw)
• spreadsheet of changes to WordPerfect macro commands since
version 8 (WP_Macro_changes.qpw)
For information on creating macros by using VBA, please see the
Corel WordPerfect Office X5 User Guide for VBA (vba_ug.pdf).
The Macros and Migration page of the Reference Center provides
links to the macro resources that are described in this chapter. See
“To access the Reference Center” on page 12.
Using migration features
WordPerfect Office X5 offers numerous features that make it easy to
upgrade, or “migrate,” from an earlier version of the software.
Migrating the software
WordPerfect Office X5 can coexist with earlier versions of the software,
provided that you have enough disk space.
By default, the WordPerfect Office X5 setup keeps older versions of
WordPerfect Office when installing WordPerfect Office X5. However, you
can choose to remove any older versions of WordPerfect Office that are
detected by the setup. For information, see “To install
WordPerfect Office X5” on page 4.
Migrating customized settings
The WordPerfect Office X5 setup lets you migrate customized settings
from the older versions of the software that it detects. For information,
see “To install WordPerfect Office X5” on page 4.

Part Seven: Macros and Migration 271
Migrating templates
WordPerfect Office X5 lets you use templates that were created in a
previous version of the software.
You can copy templates from one location for another. This technique is
useful, for example, if you want to migrate a user—created template from
an earlier version of WordPerfect Office to WordPerfect Office X5.
User-created templates are stored at CorelPerfectExpert15EN in the
user’s application-data folder. For more information, see “To copy a
project template to another location” in the WordPerfect Help.
Are your migrated WordPerfect templates missing the new menu
commands for WordPerfect X5? If so, you can merge the missing menu
commands into your templates. For information, please see “Merging
default menu commands into templates” in the WordPerfect Help.
Migrating macros
WordPerfect Office X5 lets you use macros that were created in a
previous version of the software.
By default, WordPerfect automatically compiles macros that were created
in a previous version of the software. The compile process locks the macro
file, preventing other users from accessing it until the compile process is
complete. For organizations that want to create a centralized, shared
macro repository that supports multiple versions of WordPerfect, the best
practice is to set WordPerfect to compile and run all macros locally (that
is, from the user’s temporary folder). For information, please see “Storing
macros in a centralized, shared repository” in the WordPerfect Help.
Deploying the software to a network
The WordPerfect Office X5 setup supports network installations. Using
this setup, Information Technology (IT) managers and system

272 Part Seven: Macros and Migration
administrators can deploy WordPerfect Office X5 to multiple
workstations.
The Corel WordPerfect Office X5 Deployment Guide provides detailed
information on deploying WordPerfect Office X5 to a network. To get a
copy of this guide, please contact Corel Support Services (see “About
Corel Support Services” on page 7).
Using the WordPerfect Office SDK
The WordPerfect Office Software Development Kit (SDK) is a set of tools
and resources that let you customize WordPerfect Office applications for
commercial or business use.
The SDK is included in certain editions of WordPerfect Office X5.

Part Eight: Other Resources 273
Part Eight:
Other Resources
In addition to the programs and features previously described in this
user guide, WordPerfect Office X5 offers the following:
• accessibility features, which allow persons with disabilities to work
more easily and efficiently with the software
• extra content in the form of clipart and fonts, as well as a PDF
manual that depicts this content
• Web-based resources
The Other Resources page of the Reference Center provides links
to the resources that are described in this chapter. See “To access
the Reference Center” on page 12.
Using accessibility features
The Help files for WordPerfect Office X5 are available in ASCII text format.
To access this content, use a file-extraction method to “unzip” the files at
the following location on your computer:
Program FilesCorelWordPerfect Office X5LanguagesENShared
HelpAccessibility
WordPerfect Office X5 programs provide additional accessibility features,
in the form of keyboard shortcuts, display settings, customizable
workspaces, and more. For detailed information, please see the main
Help files for WordPerfect, Quattro Pro, and Presentations.

274 Part Eight: Other Resources
Accessing extra content and the content manual
Packaged with certain editions of WordPerfect Office X5 are clipart and
fonts, as well as a PDF manual that depicts them. To access this extra
content and accompanying manual, please see Disc 2, or speak with your
network administrator.
Using Web-based resources
If you have an active Internet connection, you can use the following
Web-based resources to get the most out of WordPerfect Office.
Official WordPerfect Office resources
•www.wordperfect.com — provides the latest news, tips and tricks,
and information about upgrades
•www.officecommunity.com — provides interaction with other users
through sharing experiences, asking questions, and receiving help
and suggestions
Corel Learning resources
•www.corel.com/resources — provides learning resources: tutorials,
tips and tricks, newsletters, and more
•www.corel.com/training — provides information on training
resources: videos, books, courseware, and more
Corel Support resources
•www.corel.com/support — provides prompt and accurate
information about product features, specifications, pricing,
availability, services, and technical support
•www.corel.com/kb — provides a repository of articles written by the
Corel Support Services team in response to questions by users

Index 275
Index
Numerics
3D data charts 227
A
accessibility features 273
actions
redoing 45, 46
repeating 45, 46
undoing 45, 46
Address Book 264
aligning
content 173, 176, 177
animated GIFs
inserting 248
animating
bulleted lists 214
GIFs 248
objects 243
annotations
adding 105
incorporating 105
application bar 20
applying
text styles 54
audience notes
printing 257
B
backgrounds
Background Gallery 251
slides 251
backing up documents 32
banners
creating 229
Bezier curves
drawing 225
bitmaps
converting to vector 221, 222
creating 217
editing 219
editing frames 219
file formats 218
removing 220
saving 217, 218
selecting areas 219

276 Index
special effects 221
zooming 220
bolding text 48, 175
browsing documents 30
bulleted lists
animating 214
applying to text 68
arranging 70
creating 67, 68, 211, 212
formatting 212
levels 212
reshaping bullets 213
resizing bullets 213
slide shows 211
C
calculating
cells 150
data in a single column 150
data in a single row 150
calculations
performing preset 152
performing running 154
preset 152
QuickFunctions 152
using Calc As-You-Go 152
capitalization
changing 48
CD
inserting graphics 76
inserting tracks 246
cell content
replacing 168
cells
alignment 176
centering 176
clearing 234
copying 169, 170
copying formatting 173
creating titles 174
deleting 137, 139
deleting content 168
editing 167, 168
formatting 167, 171
indenting 176
inserting 137
inserting symbols 142
joining 174
moving 169, 170
naming 179
navigating 135
performing simple math 149
QuickFill 146
referenced 179

Index 277
relative references 179
replacing content 168
rotating 175
search and replace 167
selecting 134, 135
selecting 3D 135
selecting columns 136
selecting rows 136
special characters 142
spreadsheet functions 182
totaling 152, 153, 154
using Go To 156
wrapping text 173, 174
centering
text 56
text across blocks 177
text across cells 177
changes
document compare list of 111
characters
counting 85, 86
creating special 140
repeating 142
chart styles
organization charts 236
charts
adding footnotes 186
adding titles 183, 186
axis titles 186
creating automatically 185
for spreadsheet data 185
formatting dates 178
formatting times 178
organization 235
plotting data 184
See data charts 227
times 178
checking documents in 118
checking documents out 117
checking spelling 268
Classic mode workspace 21
clipart
inserting 76
clipart manual 274
Clipboard
pasting contents 44
codes
finding and replacing 41
collapsing
organization charts 238
colors
changing text 175
column width
adjusting 172

278 Index
columns
adding 137, 138
block protecting 63
calculating 150, 151, 152
calculating data 150
copying 169
creating 63, 65
default width 170
deleting 63, 66, 137, 140
delimiters 165, 166
discontinuing 63, 66
filling 147
hiding and displaying 160
inserting 137
inserting vertical lines 63
joining cells 174
moving 169
navigating 66
newspaper 63
parallel 63
parsing 165, 166
QuickFill 146
restricting 137, 140
selecting 134, 136
sizing 170
totaling 149, 153, 154
transposing 169
combining objects 243
comments
displaying 157
comparing documents
generating list of changes 111
generating summary 111
removing markings 112
comparison markings
removing 112
compatibility
Microsoft Excel 189, 190
toolbar 120
with Microsoft Word 119
with PowerPoint 259, 260
components
installation 5
context-sensitive Help
dialog boxes and controls 15
menus 15
toolbar buttons 15
using 9
Conversion utility 264
converting
bitmaps to vector graphics 221
bitmaps to vector objects 222
vector objects to raster 222
copying
cell formatting 173

Index 279
cells 169, 170
data 139, 169
graphics 43, 44
spreadsheets 132
text 43, 44
text formats 50
Corel Corporation
contacting 7
learning about 8
Web site 16
Corel RealTime Preview
previewing font changes 49
Corel Support Services 7
counting
words 85, 86
creating
paragraph QuickStyles 53
styles 51
text QuickStyles 53
text styles 52
curves
Bezier 225
drawing 224
customer feedback 7
customer support 274
customizing page sizes 62
cutting
graphics 43, 44
text 43, 44
D
data
aligning in cells 176
presenting in charts 183
data charts
3D 227
creating 227
series 228
styles 227
data files
associating merges 97
associating with form
documents 97
changing data source 97
fields 91
ODBC 97
opening form documents 98
records 91
table 91, 92
text 91, 92
data points
browsing 156
calculating 151
copying and pasting 139

280 Index
finding and replacing 168
inserting 146
linking 161
overwriting 168
restricting 137
selecting 134, 135
data series 228
data sources
associating merge files 97
changing 97
form document 94
form documents 98
using address books 91
datasheets
displaying in tables 232
editing data 233
entering 233
entering data 232
exporting data 234
hiding and displaying 231
importing data 233
manipulating 231, 232
moving data 232
removing data 234
dates
DATE function 146
editing 84
entering 145
formatting 178
in charts 178
inserting 83
decimal points
moving 178
deleting
cells 139
columns 137, 140
rows 137, 140
spreadsheets 130, 132
text styles 52
delimiters for columns 165, 166
dialog box Help
accessing 15
for individual controls 15
dictionary 268
displaying
datasheets 231
division
using forward slash 149
document libraries
checking documents in 118
checking documents out 117
saving files 116
understanding 114

Index 281
document management
systems
Microsoft SharePoint 114
understanding 113
Document Management
toolbar 116
document summaries
automating 85
creating 85
customizing 85
document windows
cascading 28
viewing multiple 28
documentation
context-sensitive Help 15
conventions 11
online Help 12
printing Help 14
documents
adding reviewers’ changes 106
backing up 32
cascading 28
closing 22, 31, 34
comparing 110
See also comparing
documents
comparing and reviewing 111
comparison summary 111
components 23
creating 23, 25
creating a routing slip 108
creating backups 31, 34
creating summaries 85
displaying the ruler 27
editing 43
formatting 59
generating list of changes 111
inserting files 84
merging 91
metadata 33
Microsoft Word 31, 34
navigating 27, 30
opening 25, 26
opening Microsoft Word 120
page display 28
printing 87, 88
removing metadata 33
renaming 32
restoring compared 112
reviewing 105, 106, 109
routed 109
routing 108, 109
saving 31, 32, 34
saving Microsoft Word 120
scrolling 30
selecting 37
tiling 29
viewing 27

282 Index
draft
viewing 157
drawing objects
action shapes 225
Bezier curves 225
curves 224
lines 223
polylines 224
shapes 223, 225
drawings
creating 229
objects 239
printing 257
saving 229, 230
slide shows 223
working with text 203
E
edit points
lines and polylines 226
editing
bitmaps 219
cells 167
data 167
documents 43
endnotes 82
footnotes 81
images 215
PDF files 103, 104
shapes 223, 226
text styles 54
editing. See also reviewing
effects
bitmaps 221
multimedia 245
merged documents 98
endnotes
deleting 81, 82
editing 81
finding 81
inserting 80
Enhanced file dialogs 264
envelopes
creating 98
merging 98
printing 89
Equation Editor 264
equations
creating 148
creating simple 148
simple math 149
using forward slash 149
erasing bitmaps 220

Index 283
Excel
see Microsoft Excel 189
expanding
organization charts 238
exporting
as PowerPoint files 261
Microsoft Excel files 191
spreadsheet data 234
extra content
WordPerfect Office CD 274
F
fields
in data table files 91
in data text files 91
in form documents 96
limit 91
file formats
Microsoft Excel 190
opening 162
saving 162
saving slide shows 197
file-management tools 264
files 31
adding movies 247
adding sounds 247
closing 31, 34
combining 163
creating backups 31, 32
creating summaries 85
inserting 161, 163
inserting graphics 217
inserting in documents 84
inserting into active
documents 84
managing 161
Microsoft SharePoint 114
Microsoft Word 31
OLE 161
opening Microsoft Word 120
PDF 101
See also PDF files
renaming 32
saving 31, 32
saving Microsoft Word 120,
122
fills
boxes 209, 210
fonts 208
titles and subtitles 209
Find and Replace 39
finding
codes 41
text 39, 40
whole words 41
first-party utilities 264

284 Index
fixing
invalid spreadsheet names 192
flipping
objects 240, 241
font properties
RealTime Preview 205
fonts
changing 48, 175
color 48
default 49
filling 208
modifying settings 47
outlines 208
page numbers 73, 74
previewing 49
size 48, 175
style 48, 175
TrueType 175
footnotes
deleting 81, 82
editing 81, 82
finding 81
inserting 80
form documents
associating data sources 98
associating merge files 97
associating ODBC sources 98
associating with data files 97
changing data file 97
creating 95
for keyboard merge 95
inserting fields 96
merging 91
opening data files 97
formats
currency 178
custom 178
fraction 178
hidden 178
numeric 178
percent 178
scientific 178
formatting
aligning data 176
cells 167, 171, 178
dates 178
imported text 165
numbers 178
text 175
times 178
formatting symbols
documents 59
pages 59
text 47
formulas
arguments 179

Index 285
built-in 182
calculating 179
cell addresses 179
clearing values 167
composing 181
concatenation operator 179
copying 179
displaying 159
evaluating to true or false 181
math 181
moving 179
spreadsheet functions 182
text 181
tracing errors 179
fractions
entering 145
frames
bitmaps 219
freehand shapes
drawing 223
functions
built-in 179
date 146
spreadsheet 182
G
GIFs
animated 248
glyphs
resizing shapes 226
gradient fills 208, 210
graphics
appending 44
bitmaps 215
copying 43, 44
creating bitmaps 217
creating raster 217
cutting 44
inserting 75, 216, 217
modifying 219
moving 45
pasting 44
saving bitmaps 217
saving slides as 197
special effects 221
graphics styles
arranging 77
cutting 43
embedding 75
inserting from CDs 76
inserting from files 76
moving 78
ordering 78
overlapping 78
pasting 43
sizing 77

286 Index
grouping objects 243
H
handouts
printing 257
height
lines 57, 58
Help
accessing 12
conventions 11
customer support 274
newsletters 274
printing 14
searching 13
Web resources 274
hiding
columns 173
rows 173
windows 157
hiding or displaying
Reveal Codes 29
text 48
highlighting
applying 256
erasing 256
I
importing
character limit 164
file formats 161
files 161
masters 250
Microsoft Excel files 190, 191
outlines 200
PDF files 103, 104
PowerPoint files 261
spreadsheets 233
text 163, 164, 165
incorporating reviewers’
changes 106
indenting
double 56
first line of paragraph 56
hanging indents 56
paragraphs 56
text 55, 56, 206
inserting
animated GIFs 248
bitmaps 216
endnotes 79, 80
files 163
files into documents 84
footnotes 79, 80
footnotes and endnotes 80

Index 287
objects 216
installations
modifying 5
repairing 6
installing
WordPerfect Office 4
integers
serial 143
italicizing text 48
J
joining
cells 174
joining cells 174
justifying text 56, 57, 206
K
keyboard merge
performing 98
skipping records 100
stopping a merge 99
L
labels
aligning 141
creating 140, 141
printing 89, 90
Layout Gallery 251, 252
layouts
applying to slides 251, 252
leading
adjusting 58
setting 205
learning
WordPerfect Office X5 9
Legal mode workspace 21
levels
bulleted lists 212
line height
adjusting 57, 58
line spacing
adjusting 57
setting 205
lines
counting 85, 86
drawing 223
height 57, 58
shapes 226
spacing 57, 58
linking
notebook links 161

288 Index
lists of tables
arranging items 70
bulleted 67
numbering 68
locking
spreadsheet titles 136
looking up words 268
M
macros
migrating 271
WordPerfect Office 269
Make it fit
using 63
margins
page 59
setting 60
markings
removing redline 112
Master Gallery 249
applying to slides 250
masters
applying to slides 249
importing 250
Master Gallery 249
slide show 196
math
in cells 149
math operations
division 149
Quick Math 150
simple equations 148
mathematical operations
performing in cells 148
menu Help 15
menus
using Microsoft Excel 189
merge files 91
associating 97
data table files 91
data text files 91
merged documents
e-mailing 98
merging
adding to active document 98
creating data 91
creating form documents 95
creating labels 94
creating sideways text 95
data files 91
documents 91, 99
e-mailing merges 98
envelopes 98

Index 289
form documents 91, 94
keyboard 98, 100
merge commands 94
printing merges 98, 99
saving merges 98, 99
saving output 98
skipping records 100
to tables 98
metadata
removing 33
Microsoft Excel 189
Microsoft Excel PivotTable
compatibility 189, 190
exporting to 190, 191
importing in Quattro Pro 191
menus and tabs 189
naming conventions 190
opening in Quattro Pro 190
saving as 191, 192
workspace 189, 190
Microsoft PowerPoint
see PowerPoint 259
Microsoft SharePoint
accessing 114
checking documents in 118
checking documents out 117
displaying toolbar 116
enhanced file options 115
saving files 116
Microsoft Word
compatibility with 119
opening files 120, 121, 122
saving 120, 121, 122
toolbar 120
workspace 21, 119, 120
MIDI files
inserting 245
migrating
customized settings 270
macros 271
templates 271
modifying
installations 5
MOV files 247
movies
hiding 248
in slide shows 245, 247
playing 248
saving 247
moving
bulleted list items 212
cells 169, 170
columns 169
graphics 45
rows 169

290 Index
text 45
Mozilla Thunderbird 266
MPEG files 247
multimedia effects
slide shows 245
multiple documents
cascading 28
tiling 29
viewing 28
N
naming cells 179
navigating
Browse By 155
cells 135
documents 30
Go To 155, 156
notebooks 155
Objects sheet 155
spreadsheets 155, 156, 157
using shortcut keys 155
network installations 271
newspaper columns 63
notebooks
browsing 156
cascading windows 158
components 126
creating 129, 130
cycling through 155
displaying 158
displaying formulas 159
editing 167
formatting 171
hiding and displaying 157
navigating 155
Objects sheet 126
opening 130
printing 187
repeating column titles 136
resizing 161
start options 130
tiling windows 158
using project templates 126
views 157, 158, 159
Nuance PaperPort 266
numbered lists
applying to text 69
arranging items 70
creating 68, 69
renumbering 69
numbering
pages 71
text 71

Index 291
numbering styles
changing 72
font 73, 74
forcing 74
inserting 72
pages 71, 72, 73, 74
secondary 73
suppressing 74
numbers
aligning 176
entering 143, 144
justifying 176
numeric formats
date and time 178
O
objects
animating 243
arranging 242
combining 243
flipping 240, 241
flipping and skewing 242
grouping 243
inserting 216
printing 257
rotating 240, 241
selecting 239
separating 243
sizing 240
skewing 240
stretching 241
text 203
vector 221, 222
Objects View
selecting 157
ODBC
data merge 91
with form documents 98
OLE 75
online Help
accessing 12
conventions 11
using 9
opening
database files 162
file formats 162
Microsoft Excel files 190
Microsoft Word files 120
PDF files 103, 104
PowerPoint files 261
slide shows 196, 197
organization charts
collapsing and expanding 238
creating 235, 236
saving 235, 236

292 Index
text 236, 237
viewing 237
orientation
aligning data 176
pages 60, 61
rotating 177
outlines
arranging items 70
creating 69, 70
fonts 208
importing 200
renumbering 69
slide shows 200
outlining text 48
P
Page Breaks View
selecting 157
page display
sizing 28
Page View
selecting 157
pages
customizing sizes 62
definitions 60, 62
fitting text 63
formatting 59
margins 59
modifying size 62
numbering 71, 72, 73, 74
orientation 60, 61
printing 257
printing sections 88
selecting 37
setting margins 60
size 60, 61
viewing 27
panes
resizing 157
splitting notebook 157
synchronizing scrolling 157
Paradox 265
paragraphs
counting 85, 86
creating QuickStyles 53
formatting 55
indenting 56
selecting 37
parallel columns 63
parsing
columns 165
rows 165
text files 164

Index 293
pasting
Clipboard contents 44
data 139
graphics 43, 44
text 43, 44
pattern fills 208
PDF files
compliance with PDF/A 101
importing 103
opening 103, 104
publishing 101, 188, 258
publishing slide shows as 101
PDF/A standard 101
PerfectExpert
displaying 15
Quick Math 150
PerfectScript macros 269
picture fills 210
pictures
inserting 76, 217
inserting from CDs 75, 76
playing
movies 248
portable slide shows 255
slide shows 253, 254, 255
polylines
converting into circles 224
drawing 224
shapes 226
portable slide shows
playing 255
posters
creating 229
PowerPoint
compatibility 259
opening files 261
saving files 261
shortcut keys 260
workspace 259, 260
Presentations 193
previewing
font face 175
fonts 49
printing
audience notes 257
documents 87, 88
drawings 257
envelopes 89
handouts 257
Help 14
Help topics 14
labels 89, 90

294 Index
locked titles 136
merge output 98
merged documents 99
multiple copies 88
notebooks 187
pages 257
sections 88
sections of Help 14
slide shows and drawings 257
slides 257
speaker notes 257
spreadsheets 187
printing engine 265
project templates
creating notebooks 130
opening 130
publishing
files to PDF 101, 188, 258
slide shows to PDF 101
Q
Quattro Pro 123
Quick Math
calculating data 150
QuickColumns
importing text 165
QuickFinder 264
QuickFormat 50
QuickFunctions
calculating 152
QuickSum 153
QuickPaste
using 139
QuickPlay
playing slide shows 255
QuickShow 255
QuickStyles
for paragraphs 53
for text 53
QuickTips 9
quitting
Presentations 197
Quattro Pro 128
WordPerfect 22
R
range of slides
printing 257
RealTime Preview
changing font properties 205
changing text 204
reassigning
routed documents 109

Index 295
recording
sounds 247
records
merging 91
redline text
removing markings 112
text 48
redoing
actions 45, 46
Reference Center 12
registering
WordPerfect Office 6
removing
comparison markings 112
text styles 51
renaming files 32
repairing installations 6
repeating
actions 45, 46
replacing
codes 41
text 39
whole words 41
word forms 40
words 268
resizing
bullets 213
shapes 226
windows 157
resources
Corel on the Web 274
restoring
compared documents 112
restricting
rows and columns 140
Reveal Codes
customizing 29
hiding or displaying 29
reviewing
changes to documents 106
creating a routing slip 108
documents 106, 111
routed documents 109
rotating
bitmaps 219
cells 175
objects 240, 241
text 177
text vertically 175
routing
creating a routing slip 108
documents 108

296 Index
reassigning documents 109
reviewing documents 109
routing slip
creating 108
rows
adding 137, 138
calculating 150, 151, 152
deleting 137, 140
filling 147
hiding 160
hiding and displaying 160
inserting 137
moving 169
parsing 165
QuickFill 146
restricting 140
selecting 134, 136
sizing 170
totaling 153
ruler
indenting first line 56
S
saving
as PowerPoint files 261
bitmaps 217, 218
documents 31, 32, 33
drawings 230
file formats 162
files to PDF 101, 188, 258
merge output 98
Microsoft SharePoint 116
Microsoft Word 121, 122
movies 247
organization charts 235, 236
slide shows 197
slide shows to PDF 101
slides as graphics 197
text files 165
text styles 53
to Microsoft Excel 190, 191
Scrapbook
clipart 265
inserting clipart 76
inserting graphics 216
scrolling
documents 30
spreadsheets 155, 157
SDK 272
searching
codes 41
Help 13
text 39, 40, 41
sections
printing Help 14
printing pages 88

Index 297
selecting
areas of bitmaps 219
blocks of 3D cells 135
cells 134
columns 134
objects 239
rows 134
spreadsheets 136
sentences
selecting 37
settings
migrating 270
setup 4
shadow cursor
text 48
shapes
drawing 223, 225
editing 223, 225, 226
polylines 226
resizing 226
shortcut keys
navigating notebooks 155
simple math
performing 149
simulating workspaces
Microsoft Excel 189
Microsoft PowerPoint 259
Microsoft Word 119
size
pages 60, 61
sizing
bitmaps 219
datasheets 232
objects 240
page display 28
skewing
bitmaps 219
objects 240, 242
skipping
rows 165
Slide Editor 198
Slide Outliner
viewing 198, 199
slide shows
closing 197
creating 195
highlighting 256
movies 245, 247
opening 196, 197
outlines 200
playing 253, 254, 255
portable 197
printing 257
publishing to PDF 101

298 Index
saving 197
sound files 245, 247
speeding up 255
viewing 198, 199
working with text 203
Slide Sorter
using 202
viewing 198, 202
slides
adding 200
adding and removing 201
applying masters 249, 250
background layers 251
clearing 201
highlighting 256
layouts 251, 252
printing 257
removing 200, 201
saving as graphics 197
selecting objects 239
sorting 202
sound files 245, 246
time delays 254
software deployment 271
sorting slides 202
sounds
adding 245
inserting CD tracks 246
inserting MIDI files 245
inserting Wave files 245
recording files 247
spacing
between lines 58
columns 63
lines 57, 205
speaker notes
adding 201
inserting text 202
special characters
in cells 140, 142
special effects 221
spelling checker 267
spreadsheet functions
entering 182
spreadsheet tabs
filling 148
moving 132
using 130
spreadsheets
adding 130
adding and deleting 131
comments 159
copying 130, 132
creating 129
creating titles 174

Index 299
DATE functions 146
editing 167
entering functions 179
exporting from datasheets 234
formatting 171, 173
importing to datasheets 233
invalid names 192
locking titles 136
moving 132
moving tabs 132
naming 132, 133
navigating 155, 156
printing 187
repeating column titles 136
running calculations 152
scrolling 157
selecting 134, 136
selecting data 135
totaling 154
starting
Presentations 195
Quattro Pro 125
WordPerfect 19
stretching
objects 241
strikeout
text 48
styles
changing 175
data charts 227
editing 51
organization charts 236
removing 51
restoring 51
text styles 51
WordPerfect 51
subtitles
box fills 209, 210
boxes 209
font fills 208
font outlines 208
formatting 207
slide shows 207
subtotals
totaling 154
summary
of document comparison 111
support
customer feedback 7
registration 6
suppressing
numbering 74
symbols
applying to bullets 213

300 Index
in cells 142
inserting in cells 142
T
tables
displaying datasheet
information 232
tabs
naming conventions 190
templates
creating notebooks 126, 130
migrating 271
text
adding 203
appending to Clipboard 44
centering across cells 177
copying 43, 44
cutting 43, 44
finding and replacing 39
moving 45
numbering 71
pasting 44
text boxes
creating 94
entering text 36
inserting 203
rotating text 94
text files
adjusting column width 166
importing 164, 165
parsing 163, 164
text lines
inserting 204
text objects
boxes 203
creating 203
formatting 205
lines 204
text boxes 204
text orientation
aligning 174
angled 175
appearance 175
bold 175
centering 174
distributing 173
flipping 175
formatting 173, 174
italics 175
orientation 177
properties 176
rotating 175
strikeout 175
subscript 175
superscript 175

Index 301
underlining 175
wrapping 173, 174
text styles
alignment 56, 57
applying 54
centering 56
copying and cutting 43
copying formats 50
creating 52
creating QuickStyles 53
deleting 38, 204
deselecting 38
editing 51, 54
editing styles 51, 54
entering 35, 36
finding and replacing 39
fitting to pages 63
formatting 47
indenting 55, 56, 206
inserting 35, 36
justifying 56, 57, 206
line spacing 205
merging sideways 95
moving 204
objects 205
organization charts 236
paragraphs QuickStyles 53
previewing 204
replacing 39
restoring 51
rotating 95
saving 53
selecting 37
speaker notes 202
styles 51
text boxes 204
TextArt 265
texture fills 210
thesaurus 268
third-party utilities 266
tiling
document windows 29
time delays
applying to slides 254
time formats
editing 84
inserting 83
times
entering 143, 145
formatting 178
titles
adding to charts 186
box fills 209, 210
boxes 209
fills 209

302 Index
font fills 208
font outlines 208
formatting 207
locking 136
repeating 136
slide shows 207
toolbar
Microsoft Word 120
toolbar button Help 15
toolbars
Document Management 116
Microsoft Word 120
WordPerfect 20
totaling
cells 152, 153, 154
columns 149, 152
Quick Math 150
rows 152
subtotals 154
totals
running 152
tutorials
Corel on the Web 274
typesetting
leading 58
U
undoing
actions 45, 46
updating
WordPerfect Office 6
User Guide 9
utilities 263
V
values
entering 143, 144, 145
totaling 149
VBA macros 269
vector objects
converting from raster 222
converting to raster 222
view
changing 157
Draft View 157
formulas 157
new views of notebook 157
notebooks 157
Page Breaks View 157
Page View 157
selecting 157
types 157
zoom 157

Index 303
viewing
slide shows 198, 199
views
switching 27
switching document 27
W
Wave sound files 245
Web
customer support 274
Web resources 274
width
column 172
options 172
windows
arranging 157
cascading 158
displaying 157
displaying notebook 157
hiding 157
hiding notebook 157
notebook 157, 158
resizing 157
selecting 157
splitting notebook 157
tiling 158
Windows Write
tiling 29
Word
see Microsoft Word 119
word count 85, 86
WordPerfect 17
WordPerfect graphics
saving slides as 197
WordPerfect Lightning 263
words
counting 85, 86
finding and replacing 40, 41
looking up 268
replacing 268
selecting 37
work area
customizing 21
exploring 19
workspace
changing 21
Classic mode 21
Legal mode 21
Microsoft Excel 190
Microsoft Word 21, 119, 120
PowerPoint 259, 260

304 Index
writing tools 267
Z
zooming
bitmaps 220
Corel® WordPerfect® Office X5 User Guide
Copyright 2010 Corel Corporation. All rights reserved.
Product specifications, pricing, packaging, technical support and
information (“specifications”) refer to the retail English version only. The
specifications for all other versions (including other language versions)
may vary.
INFORMATION IS PROVIDED BY COREL ON AN «AS IS» BASIS, WITHOUT
ANY OTHER WARRANTIES OR CONDITIONS, EXPRESS OR IMPLIED,
INCLUDING, BUT NOT LIMITED TO, WARRANTIES OF MERCHANTABLE
QUALITY, SATISFACTORY QUALITY, MERCHANTABILITY OR FITNESS FOR A
PARTICULAR PURPOSE, OR THOSE ARISING BY LAW, STATUTE, USAGE OF
TRADE, COURSE OF DEALING OR OTHERWISE. THE ENTIRE RISK AS TO
THE RESULTS OF THE INFORMATION PROVIDED OR ITS USE IS ASSUMED
BY YOU. COREL SHALL HAVE NO LIABILITY TO YOU OR ANY OTHER
PERSON OR ENTITY FOR ANY INDIRECT, INCIDENTAL, SPECIAL, OR
CONSEQUENTIAL DAMAGES WHATSOEVER, INCLUDING, BUT NOT
LIMITED TO, LOSS OF REVENUE OR PROFIT, LOST OR DAMAGED DATA OR
OTHER COMMERCIAL OR ECONOMIC LOSS, EVEN IF COREL HAS BEEN
ADVISED OF THE POSSIBILITY OF SUCH DAMAGES, OR THEY ARE
FORESEEABLE. COREL IS ALSO NOT LIABLE FOR ANY CLAIMS MADE BY
ANY THIRD PARTY. COREL’S MAXIMUM AGGREGATE LIABILITY TO YOU
SHALL NOT EXCEED THE COSTS PAID BY YOU TO PURCHASE THE
MATERIALS. SOME STATES/COUNTRIES DO NOT ALLOW EXCLUSIONS OR
LIMITATIONS OF LIABILITY FOR CONSEQUENTIAL OR INCIDENTAL
DAMAGES, SO THE ABOVE LIMITATIONS MAY NOT APPLY TO YOU.
Corel, the Corel logo, Calc As-You-Go, Corel DESIGNER, CorelDRAW,
CorelTUTOR, Digital Studio, Knowledge Base, Lightning, Make It Fit,
Painter, PaintShop Photo, Paradox, PerfectExpert, PerfectScript,
PHOTO-PAINT, Presentations, Quattro Pro, QuickColumns, QuickFinder,
QuickFormat, QuickMenu, QuickPlay, QuickTask, QuickTips, QuickWords,
RealTime Preview, Scrapbook, Show On The Go, Show It!, SpeedLink,
TextArt, VideoStudio, WinDVD, WinZip, and WordPerfect are trademarks
or registered trademarks of Corel Corporation and/or its subsidiaries in
Canada, the U.S., and/or other countries. All other product names and
any registered and unregistered trademarks mentioned are used for
identification purposes only and remain the exclusive property of their
respective owners.
102030

It’s easy take advantage of all the great
®
features and tools in WordPerfect
Office with the help of these learning
resources.
With training, Quick Start cards and
other tools from Brainstorm, you’ll be
®
up and running with WordPerfect in
no time. Check out their free training
included in the box.
Create impressive documents,
spreadsheets, or presentations in
minutes with the pre-formatted
templates in the WordPerfect Office
Solution Packs.
Find out how to do almost anything
faster in WordPerfect Office thanks to
this 500-page book full of tips and
how-tos from Laura Acklen, the WP
Writer.
See WordPerfect.com for details.

Now it’s easier than ever to stay up-to-date
®
on all the latest WordPerfect Office news!
Visit OfficeCommunity.com, the official
WordPerfect Community site, to interact with
other users and ask questions.
Connect with Corel WordPerfect Office on
Facebook.
Follow @wordperfect on twitter to get all
the latest WordPerfect news, learn from
tutorials and be the first to know about
special offers!
See WordPerfect.com for details.
Twentieth century grammars and style guides — and a few recent ones — insist that an absolute adjective cannot be compared: something is either perfect, square, or complete or it isn’t. But there is a workaround:
Use the expressions: more nearly perfect, more nearly square, more nearly true, and unique. (Since unique means only one of its kind, it is clear that one does not say more nearly unique.) — Sophie C. Hadida, Pitfalls in English and How to Avoid Them, 1927, 127.
And use them they did:
We, therefore, in order to achieve a more nearly perfect industrial cooperation, in order to give more nearly perfect protection to the human beings engaged in the business of production, and in order to render to the general public a more nearly perfect service, do associate ourselves together and enact the following constitution. — Constitution of the American Guild of the Printing Industry, 1922.
This increase may reflect more nearly complete registration of nonwhite births and also more nearly complete and accurate recording of birth weight for nonwhite infants. Tennessee Vital Statistics, 1961, 9.
The more nearly square the house, the less wall area there is in proportion to the floor area. — Hajime Ota, Houses and Equipment for Laying Hens, 1967, 16.
Some writing guides are still recommending this construction with absolute adjectives:
Some examples are immaculate, perfect, square, round, complete, excellent, and unique. When you use those words in sentences, use them alone or precede them with the terms more nearly or most nearly. For example: Irene’s suggestion is the most nearly perfect one of all of them. Your yard is more nearly square than mine. — Thomas L. Means, English and Communication for Colleges, 2006.
But, as a Google Books query shows, such advice is bucking a trend:
Almost flatlined until 1840 — which is why the US Constitution is happy with “a more perfect Union” but not the printers’ guild — this usage peaks around 1940 with a steep decline thereafter.
There are still contexts, however, where such logical precision is not out of place:
If we take a shorter time than a second this will be more nearly true, approaching the limit of complete truth as the period of time is indefinitely diminished. — Bertrand Russell, Human Knowledge, Its Scope and Limits, 1948, 200.
Insofar as a statement approaches perfection, insofar as the system approaches completeness, our statements become more nearly true. A statement will be more nearly complete to the extent that its opposite is inconceivable. — Frank Northen Magill, Masterpieces of World Philosophy in Summary Form, 1961.
What is nearly true when the unit is small and more and more nearly true as the unit grows smaller is said to be “true in the limit, as the unit decreases.” — Philip Henry Wicksteed, The Alphabet of Economic Science, 1955, 42.
Now these rules always have had more formal written English in mind, which makes Means’ examples so curious. Imagine Irene’s reaction to her most nearly perfect idea or the neighbor at his more nearly square yard. Even at the peak of this construction, I can’t imagine someone commenting on how a lime is more nearly round than a lemon. At least the grammar guides don’t insist on “more nearly spherical.”
Asked by: Prof. Anderson Conn Jr.
Score: 4.4/5
(58 votes)
The legendary word processor that so many swear by to create documents, letters, brochures, resumes, and more. With compatibility of over 60 file-formats, including Microsoft, and powerful Reveal Codes, document control has never been easier.
Is WordPerfect and Microsoft Word the same?
[Word and WordPerfect] are very different. Wordperfect was clearly designed by programmers; you program documents in it, using codes to format. … The correct way to use Word is to type in all of your text, finalize the wording, and then format.
Does anyone still use WordPerfect?
Wordperfect, as you may know, is still very much in production. Corel releases new versions every year or two. It’s the #2 word processor in the market, still. Someone is still using it, then.
What is WordPerfect in MS word?
WordPerfect has compatibility features that let you open and edit Microsoft® Word files. You can then save the file in the native file format of Microsoft Word, allowing for the sharing of files across applications. WordPerfect also lets you save any document in the Microsoft Word file format.
Is WordPerfect good?
WordPerfect Office Ratings
It is an excellent word processing software for creating beautiful documents.» «Very good program and product. Very affordable, compared to other systems of similar type.» «It’s still the best program for editing complex legal documents.»
23 related questions found
How much does WordPerfect cost?
WordPerfect Office Pricing Overview
WordPerfect Office pricing starts at $175.60 per feature, as a one-time payment. They do not have a free version. WordPerfect Office offers a free trial.
Is WordPerfect free?
Letter Perfect is now WordPerfect: Download Your Trial Free Now.
What is better than MS word?
LibreOffice Writer is a free and powerful word processor available for Windows, Linux, and Mac. This Microsoft Word alternative can edit and save DOCX file format meaning that if you often collaborate on documents with Microsoft Office users, LibreOffice Writer is your best choice.
Can I convert WordPerfect to word?
WordPerfect documents have a WPD extension and can be easily converted to Word 2010. In fact, Microsoft Word is able to perform the conversion in the background without using any third-party tools and can open the WPD file like a normal DOC file.
Can you open a WordPerfect document in word?
Navigate through your document folders and located the WordPerfect file. Select it and click «Open.» Microsoft Word will convert the file and open it. If no conversion filter is set, the document may contain formatting errors relating to text size, font or layout.
Who owns Corel?
New York-based global investment equity firm KKR announced Wednesday that it acquired Corel, taking ownership from Vector Capital. Terms were not disclosed. TechCrunch initially reported the deal Tuesday. Earlier reports pegged the deal at more than $1 billion.
What is the most popular word processor in the world?
The most popular word processing program is Microsoft Word, but other options such as Google Docs, LibreOffice Writer and Apple Pages also have a following.
Will WordPerfect run on Windows 10?
Replies (6) According to Corel all versions of wordperfect that were released for Windows 7, Windows 8, Windows 8.1 and of course now for Windows 10 are compatible with Windows 10.
Who started Word Perfect?
Bruce Wayne Bastian (born March 23, 1948) is an American computer programmer, businessperson, philanthropist, and social activist. He co-founded the WordPerfect Software Company with Alan Ashton in 1978 (originally known as Satellite Software International and then changed to WordPerfect Corporation in 1982).
Which file starts with MS Word?
Winword.exe is the executable file name for Microsoft Word which is used when Word is launched. The word WinWord stands for Windows Word (Microsoft Word).
How do I convert WPD to DOCX?
How to Convert WPD to DOCX with Doxillion Document Converter Software
- Download Doxillion Document Converter Software. Download Doxillion Document Converter Software. …
- Import WPD Files into the Program. …
- Choose an Output Folder. …
- Set the Output Format. …
- Convert WPD to DOCX.
How do I install WordPerfect?
To install WordPerfect on a University computer:
Click on the Windows [Start] button > Select «All Programs» > «CedarNet.» (In Windows 10, click on «CedarNet» from the desktop.) Choose «Office Suites.» Select «Corel WordPerfect X6 Suite Installation.» Follow the prompts to install WordPerfect X6 on your machine.
How do I open an old WordPerfect file?
Former Users of WordPerfect
- Open Microsoft Word.
- From the FILE menu, choose Open.
- In the new window which appears, click on the drop-down menu which reads «All Word Documents…»
- From the drop-down menu, choose WORDPERECT 6.
What is the free version of Microsoft Word?
The good news is, if you don’t need the full suite of Microsoft 365 tools, you can access a number of its apps online for free — including Word, Excel, PowerPoint, OneDrive, Outlook, Calendar and Skype. Here’s how to get them: Go to Office.com. Log in to your Microsoft account (or create one for free).
Where can I get Word for free?
At the new Office.com, you can use basic versions of Word, Excel, PowerPoint, and OneNote for free in your browser. They’re the same Microsoft Office apps you’re used to, only they run online and are 100% free.
How can I edit a Word document for free?
How to Edit Word Document Online for Free
- Aspose Words Editor.
- Google Docs.
- Zoho Writer.
- ScanWritr.
- ONLYOFFICE.
What is included in WordPerfect?
What’s Included
- WordPerfect word processor.
- Quattro Pro spreadsheet application.
- Presentations slideshow creator.
- WordPerfect Lightning digital notebook.
- Paradox database management system.
- AfterShot™ 3 photo-editing and management.
- Corel® MultiCam Capture™ Lite.
Can you install WordPerfect on more than one computer?
Can be installed on how many computers? Answer: … (https://www.corel.com/en/eula/) Depending on where you live, you can install WordPerfect Office on up to two (2) devices if you have a second computer, but still limited to you only being able to use the software on one (1) of those devices at a time.
What is the newest version of WordPerfect?
WordPerfect® Office Standard 2021 introduces the latest version of the office suite supporting your everyday work needs—from crafting documents and presentations, to creating impressive spreadsheets!