
Things You Should Know
- To create a basic document, choose a template from the list provided or start with a blank document.
- Use the File tab to open, save, and start documents, and the Insert tab to add any images, symbols, or other media to your document.
- Highlight your text and play around with formatting options in the «Home» tab. You can change the font, italicize/bold/underline your words, and play around with font size.
-

1
Open the Microsoft Word application. Do this by double-clicking the Microsoft Word icon.
-
2
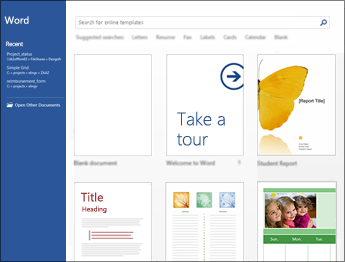
Review the available templates. On the right side of the screen, you’ll see several templates of interest:
- Blank document — A blank document with default formatting.
- Creative Resume/Cover Letter — A clean, pre-formatted resume (and accompanying cover letter) document.
- Student Report with Cover Photo — A document format geared toward an academic demographic.
- Fax Cover Sheet — A document to preface fax reports.
- You can also search for specific templates online from within Word by using the search bar at the top of this screen.
Advertisement
-
3
Choose a template. Doing so will open the template in Word with whatever pre-determined formatting applies to it. Now that your document is open, you’re ready to review your Toolbar options.
- When in doubt, open a blank document.


Advertisement
-
1
Click the File tab. It’s in the top left side of the screen (or in the menu bar for Mac users). From here, you have several useful options on the far left side of your screen:
- Info (PC only) — Click this to review the documents statistics, such as when it was last modified, as well as any potential issues with the document.
- New — Click this to bring up the «New Document» page that lists all of the pre-formatted templates. Opening a new document will prompt you to save your old one.
- Open — Click this to review a list of recently-opened documents. You can also select a directory (e.g., «This PC») in which to search.
- Save — Click this to save your document. If this is your first time saving this particular document, you’ll be prompted to enter a name, save location, and preferred file format as well.
- Save As — Click this to save your document «as» something (e.g., a different name or file format).
- Print — Click this to bring up your printer settings.
- Share — Click this to view sharing options for this document, including email and cloud options.
- Export — Click this to quickly create a PDF or change the file type.
-
2
Click ← in the top left corner of your screen. If you’re using a Mac, you won’t have this option—simply click your document to exit the «File» menu.
-
3
Review the Home tab to see your formatting options. At the top of your screen—from left to right—are five sub-sections of this tab:
- Clipboard — Whenever you copy text, it is saved on your clipboard. You can view copied text by clicking the Clipboard option here.
- Font — From this section, you can change your font style, size, color, formatting (e.g., bold or italic), and highlighting.
- Paragraph — You can change aspects of your paragraph formatting—such as line spacing, indentation, and bullet formatting—from this section.
- Styles — This section covers different types of text for various situations (e.g., headings, titles, and subtitles). You’ll also see the popular «No Spacing» option here, which removes excess spaces between lines of text.
- Editing — A couple of commonly-used tools—such as «Find and Replace», which allows you to quickly replace all appearances of one word with another—live here.
-
4
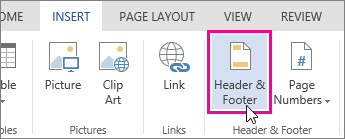
Click the Insert tab to review the types of media you can place in your document. Insert is to the right of the Home tab. The Insert tab allows you to add things like graphics and page numbers to your document. From left to right, a couple of notable options include the following:
- Table — Clicking this option will allow you to create an Excel-style table right in your document.
- Pictures — Use this feature to insert a picture into your document.
- Header, Footer, and Page Number — These options are all essential for writing in MLA- or APA-style formatting. The Header places a space at the top of the document for comment, while the Footer goes at the bottom—page numbers are customizable.
- Equation/Symbol — These options use special formatting to accurately display simple equations. You can select these equations or symbols from the pertinent drop-down menu.
-
5
Click the Design tab to create your own template. It’s to the right of the Insert tab.
- The Design tab contains pre-designed themes and formats listed across the top of the page.
-
6
Click the Layout tab to customize your page’s formatting. This tab contains options for changing the following aspects of your document:
- Margins
- Page orientation (vertical or horizontal)
- Page size
- Number of columns (defaults to one)
- Location of page breaks
- Indentation
-
7
Click the References to manage your citations. If you have a bibliography page, you can also manage it from here.
- For quick bibliography formatting, click the Bibliography drop-down menu and select a template.
- In the «Citations & Bibliography» group of options, you can change your bibliography formatting from APA to MLA (or other citation styles).
- The «Captions» group has an option to insert a table of figures. This is useful for scientific review papers or similar documents in which statistical data is prioritized over quotations.
-
8
Click the Mailings tab to review your document sharing options. You can review your email settings and share your documents from within this section.
- You can also print an envelope or label template by clicking the pertinent option in the top left corner of your screen.
- The Select Recipients drop-down menu allows you to choose Outlook contacts as well as an existing contact list within Word.
-
9
Click the Review tab. The Review section is geared towards editing, so it includes options for marking up documents and proofreading. A couple of important options include:
- Spelling & Grammar — Click this option (far left corner) to underline any spelling or grammatical errors.
- The «Changes» section — This is to the far right of the toolbar. From here, you can enable the «Track Changes» feature which automatically formats any additions or deletions you make in a document to appear in red print.
-
10
Decide on the set of options that best apply to your work. If you’re a student, for example, you’ll likely use the Insert and References tab often. Now that you’re familiar with the toolbar options, you can format your first Word document.


Advertisement
-
1
Open a new Blank Document in Word. If you have an existing document, you can open that instead.
-
2
Enter text. Do this by clicking on the blank section of the document and typing away.
- If you opened an existing document, be sure to save your work before re-formatting.
-
3
Highlight a section of text. To do this, click and drag your cursor across your writing, then let go when you’ve highlighted the section you wish to edit.
-
4
Consider what you want to do to the writing. Some potential options include:
- Quickly format your writing. Do this by right-clicking (or two-finger clicking) your highlighted text and then selecting an option from the right-click menu.
- Change the font of your selection. You can do this by clicking the drop-down bar at the top of the «Font» section (Home tab) and then selecting a new font.
- Bold, italicize, or underline your highlighted section. To do this, click the B, I, or U in the «Font» section of the Home tab.
- Change your document’s spacing. This is easiest to accomplish by right-clicking your selected text, clicking Paragraph, and modifying the «Line Spacing» value in the bottom right corner of this window.
-
5
Continue working with Word. Your preferred options for your documents will differ based on the intention behind creating them, so the more you work within your own particular format, the more proficient you’ll become.


Advertisement
Add New Question
-
Question
How do I copy and paste?

To copy a certain piece of text, highlight it and press Ctrl + C. Then click the spot you want to place the copied text and press Ctrl + V to paste.
-
Question
How do I place a logo in MS Word?
Press the Insert tab and then press the Pictures button. You will then be allowed to select the image.
-
Question
How can I save a document to a specific location?
Click File —> Save As… and you’ll be allowed to select the destination location (and filename and format) of the file.
Ask a Question
200 characters left
Include your email address to get a message when this question is answered.
Submit
Advertisement
-
A red line under a word means the word is misspelled, a green underline suggests a grammatical error, and a blue underline pertains to formatting.
-
If you right-click (or two-finger click) an underlined word, you’ll see a replacement suggestion at the top of the right-click menu.
-
You can quick-save your document by holding down Control (or Command on Mac) and tapping S.
Thanks for submitting a tip for review!
Advertisement
-
Don’t forget to save your work before closing Word.
Advertisement
About This Article
Article SummaryX
1. Create blank documents or from templates.
2. Format text colors, fonts, and sizes.
3. Insert media like photos and animations.
4. Insert data like tables, page numbers, headers, and equations.
5. Customize the on-screen and print layouts.
6. Add references and citations.
Did this summary help you?
Thanks to all authors for creating a page that has been read 213,472 times.
Is this article up to date?
Word 2016 is designed to help you create professional-quality documents. Word can also help you organize and write documents more efficiently.
When you create a document in Word, you can choose to start from a blank document or let a template do much of the work for you. From then on, the basic steps in creating and sharing documents are the same. And Word’s powerful editing and reviewing tools can help you work with others to make your document great.
Start a document
It’s often easier to create a new document using a template instead of starting with a blank page. Word templates come ready-to-use with pre-set themes and styles. All you need to do is add your content.
Each time you start Word, you can choose a template from the gallery, click a category to see more templates, or search for more templates online.
For a closer look at any template, click it to open a large preview.
If you’d rather not use a template, click Blank document.
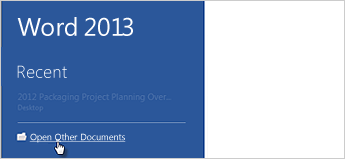
Open a document
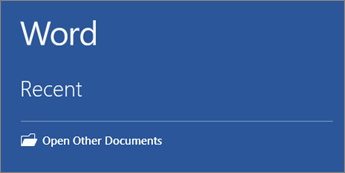
Every time you start Word, you’ll see a list of your most recently used documents in the left column. If the document you’re looking for isn’t there, click Open Other Documents.
If you’re already in Word, click File > Open and then browse to the file’s location.
When you open a document that was created in earlier versions of Word, you see Compatibility Mode in the title bar of the document window. You can work in compatibility more or you can upgrade the document to use Word 2016.
Save a document
To save a document for the first time, do the following:
-
On the File tab, click Save As.
-
Browse to the location where you’d like to save your document.
Note: To save the document on your computer, choose a folder under This PC or click Browse. To save your document online, choose an online location under Save As or click Add a Place. When your files are online, you can share, give feedback and work together on them in real time.
-
Click Save.
Note: Word automatically saves files in the .docx file format. To save your document in a format other than .docx, click the Save as type list, and then select the file format that you want.
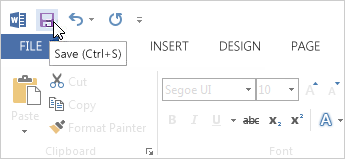
To save your document as you continue to work on it, click Save in the Quick Access Toolbar.
Read documents
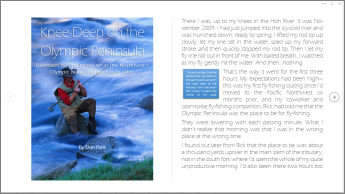
Open your document in Read Mode to hide most of the buttons and tools so you can get absorbed in your reading without distractions.
-
Open the document you want to read.
Note: Some documents open in Read Mode automatically, such as protected documents or attachments.
-
Click View > Read Mode.
-
To move from page to page in a document, do one of the following:
-
Click the arrows on the left and right sides of the pages.
-
Press page down and page up or the spacebar and backspace on the keyboard. You can also use the arrow keys or the scroll wheel on your mouse.
-
If you’re on a touch device, swipe left or right with your finger.
Tip: Click View > Edit Document to edit the document again.
-
Track changes
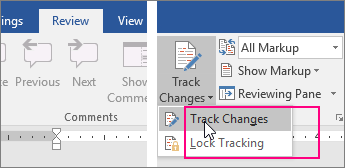
When you’re working on a document with other people or editing a document yourself, turn on Track Changes to see every change. Word marks all additions, deletions, moves, and formatting changes.
-
Open the document to be reviewed.
-
Click Review and then on the Track Changes button, select Track Changes.
Read Track changes to learn more.
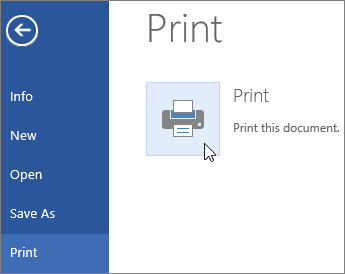
Print your document
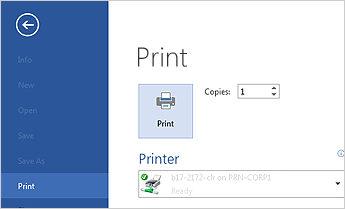
All in one place, you can see how your document will look when printed, set your print options, and print the file.
-
On the File tab, click Print.
-
Do the following:
-
Under Print, in the Copies box, enter the number of copies you want.
-
Under Printer, make sure the printer you want is selected.
-
Under Settings, the default print settings for your printer are selected for you. If you want to change a setting, just click the setting you want to change and then select a new setting.
-
-
When you’re satisfied with the settings, click Print.
For details, see Print a document.
Beyond the basics
For more on the fundamentals of using Word, see What’s new in Word 2016.
Top of Page
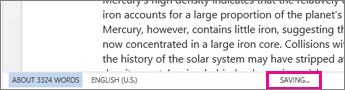
With Word for the web, you use your web browser to create, view, and edit the personal documents that you store on OneDrive. If your organization or college has a Microsoft 365 plan or SharePoint site, start using Word for the web by creating or storing documents in libraries on your site.Save changes
Word saves your changes automatically. Look on the status bar at the bottom left corner of Word for the web. It will either show Saved or Saving.
Share documents online
Because your document is online, you can share it by sending a link instead of an email attachment. People can read it in their web browser or mobile device.
Click File > Share > Share with People.

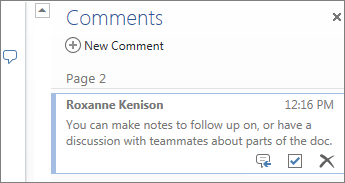
Comment in the browser
A comment balloon shows where comments have been made in the doc.

Reply to comments, and check off items you’ve addressed.
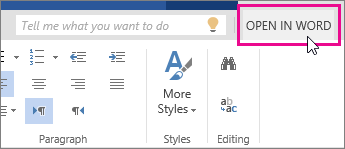
Edit in the browser
If you try to type in the document and nothing happens, you’re probably in Reading view. Switch to Editing view: click Edit Document > Edit in Word for the web.

Type and format text, add pictures, adjust the layout of the page, and more. For more advanced editing, click Open in Word.
Work together on the same doc
To work together in Word for the web, you edit a document as you normally would. If others are also editing it, Word for the web alerts you to their presence. You can see everyone who is currently working in the document by clicking in the ribbon.

Clicking on an author’s name jumps you to where they’re working in the doc. And you’ll see the changes they make as they’re happening. They can be working in Word for the web, Word 2010 or later, or Word for Mac 2011.
Add a header or footer
Go to Insert > Header & Footer to add headers and footers to your document.
Click Options to choose how you’d like them to appear.

Add page numbers
Click Insert > Page Numbers and then choose from the gallery where you’d like the page numbers to appear.
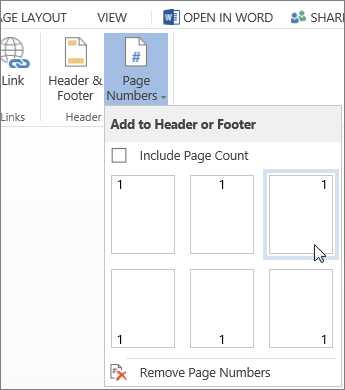
Select Include Page Count to show the current page number along with the total number of pages (page X of Y).
Find and replace text
Quickly search for every occurrence of a specific word or phrase in your document by clicking Home > Find (or type Ctrl+F). Results appear next to your document so you can see the term in context. Clicking on a search result jumps you to that occurrence.
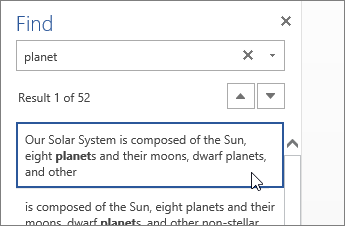
Click Replace (or type Ctrl+H) to find and replace text.
Print in Word for the web
Go to File > Print. Word for the web creates a PDF preview of your document that keeps all the layout and formatting of your document. Send the PDF to your printer and it will print the way you expect.
Microsoft Word 2013 is a word-processing program designed to help you create professional-quality documents. Word helps you organize and write your documents more efficiently.
Your first step in creating a document in Word 2013 is to choose whether to start from a blank document or to let a template do much of the work for you. From then on, the basic steps in creating and sharing documents are the same. Powerful editing and reviewing tools help you work with others to make your document perfect.
Choose a template
It’s often easier to create a new document using a template instead of starting with a blank page. Word templates are ready to use with themes and styles. All you need to do is add your content.
Each time you start Word 2013, you can choose a template from the gallery, click a category to see the templates it contains, or search for more templates online. (If you’d rather not use a template, just click the Blank document.)
For a closer look at any template, just click it to open a large preview.
Top of Page
Open a document
Every time you start Word, you’ll see a list of your most recently used documents in the left column. If the document you’re looking for isn’t there, click Open Other Documents.
If you’re already in Word, click File > Open and then browse to the file’s location.
When you open a document that was created in earlier versions of Word, you see Compatibility Mode in the title bar of the document window. You can work in compatibility more or you can upgrade the document to use features that are new or enhanced in Word 2013.
Top of Page
Save a document
To save a document for the first time, do the following:
-
Click the File tab.
-
Click Save As.
-
Browse to the location where you’d like to save your document.
Note: To save the document on your computer, choose a folder under Computer or click Browse. To save your document online, choose a location under Places or Add a Location. When your files are online, you can share, give feedback and work together on them in real time.
-
Click Save.
Note: Word automatically saves files in the .docx file format. To save your document in a format other than .docx, click the Save as type list, and then select the file format that you want.
To save your document as you continue to work on it, click Save in the Quick Access Toolbar.
Top of Page
Read documents
Open your document in Read Mode to hide most of the buttons and tools so you can get absorbed in your reading without distractions.
-
Open the document you want to read.
Note: Some documents open in Read Mode automatically, such as protected documents or attachments.
-
Click View > Read Mode.
-
To move from page to page in a document, do one of the following:
-
Click the arrows on the left and right sides of the pages.
-
Press page down and page up or the spacebar and backspace on the keyboard. You can also use the arrow keys or the scroll wheel on your mouse.
-
If you’re on a touch device, swipe left or right with your finger.
Tip: Click View > Edit Document to edit the document again.
-
Top of Page
Track changes
When you’re working on a document with other people or editing a document yourself, turn on Track Changes to see every change. Word marks all additions, deletions, moves, and formatting changes.
-
Open the document to be reviewed.
-
Click Review and then on the Track Changes button, select Track Changes.

Read Track changes to learn more.
Top of Page
Print your document
All in one place, you can see how your document will look when printed, set your print options, and print the file.
-
Click the File tab and then click Print.
-
Do the following:
-
Under Print, in the Copies box, enter the number of copies you want.
-
Under Printer, make sure the printer you want is selected.
-
Under Settings, the default print settings for your printer are selected for you. If you want to change a setting, just click the setting you want to change and then select a new setting.
-
-
When you’re satisfied with the settings, click Print.
For details, see Print and preview documents.
Beyond the basics
Go beyond the basics with your documents by creating a table of contents or saving a document as a template.
Top of Page
Important:
Office 2010 is no longer supported. Upgrade to Microsoft 365 to work anywhere from any device and continue to receive support.
Upgrade now
In this article
-
What is Word?
-
Find and apply a template
-
Create a new document
-
Open a document
-
Save a document
-
Read documents
-
Track changes and insert comments
-
Print your document
What is Word?
Microsoft Word 2010 is a word-processing program, designed to help you create professional-quality documents. With the finest document-formatting tools, Word helps you organize and write your documents more efficiently. Word also includes powerful editing and revising tools so that you can collaborate with others easily.
Top of Page
Find and apply a template
Word 2010 allows you to apply built-in templates, to apply your own custom templates, and to search from a variety of templates available on the web.
To find and apply a template in Word, do the following:
-
On the File tab, click New.
-
Under Available Templates, do one of the following:
-
To use one of the built-in templates, click Sample Templates, click the template that you want, and then click Create.
-
To reuse a template that you’ve recently used, click Recent Templates, click the template that you want, and then click Create.
-
To use your own template that you previously created, click My Templates, click the template that you want, and then click OK.
-
To find a template on Office.com, under Office.com Templates, click the template category that you want, click the template that you want, and click Download to download the template from Office.com to your computer.
-
Note: You can also search for templates on Office.com from within Word. In the Search Office.com for templates box, type one or more search terms, and then click the arrow button to search.
Top of Page
Create a new document
-
Click the File tab and then click New.
-
Under Available Templates, click Blank Document.
-
Click Create.
For more information about how to create a new document, see Create a document.
Top of Page
Open a document
-
Click the File tab, and then click Open.
-
In the left pane of the Open dialog box, click the drive or folder that contains the document.
-
In the right pane of the Open dialog box, open the folder that contains the drawing that you want.
-
Click the document and then click Open.
Top of Page
Save a document
To save a document in the format used by Word 2010 and Word 2007, do the following:
-
Click the File tab.
-
Click Save As.
-
In the File name box, enter a name for your document.
-
Click Save.
To save a document so that it is compatible with Word 2003 or earlier, do the following:
-
Open the document that you want to be used in Word 2003 or earlier.
-
Click the File tab.
-
Click Save As.
-
In the Save as type list, click Word 97-2003 Document. This changes the file format to .doc.
-
In the File name box, type a name for the document.
-
Click Save.
For more information about how to create a document that is compatible with Word 2003 or earlier versions, see Create a document to be used by previous versions of Word.
Top of Page
Read documents
-
Open the document that you want to read.
-
On the View tab, in the Document Views group, click Full Screen Reading
-
To move from page to page in a document, do one of the following:
-
Click the arrows in the lower corners of the pages.
-
Press PAGE DOWN and PAGE UP or SPACEBAR and BACKSPACE on the keyboard.
-
Click the navigation arrows at the top center of the screen.
Tip: Click View Options, and then click Show Two Pages
to view two pages, or screens, at a time.
-
 to view two pages, or screens, at a time.
For more information about how to view documents, see Read documents in Word.
Top of Page
Track changes and insert comments
-
To turn on change tracking, on the Review tab, in the Tracking group, click Track Changes.
-
To insert a comment, on the Review tab, in the Comments group, click New Comment.
For more information about how to track changes made while revising, see Track changes and insert comments.
Top of Page
Print your document
-
Click the File tab and then click Print.
-
Do the following:
-
Under Print, in the Copies box, enter the number of copies that you want to print.
-
Under Printer, make sure that the printer that you want is selected.
-
Under Settings, the default print settings for your printer are selected for you. If you want to change a setting, click the setting you want to change and then select the setting that you want.
-
-
When you are satisfied with the settings, click Print.
For more information about how to print a file, see Preview and print a file.
Top of Page
As part of the Microsoft Office Suite, MS Word is one of the most popular office productivity tools in the world.
In this guide, you’ll learn the basics of how to use Microsoft’s word processing software. Whether you’re just getting started with Word or have years of experience, you’ll find this guide helpful.

With Microsoft Word, you’ll be creating useful business documents in no time. Also, many other file formats can be converted to MS Word (.doc) format. And Word documents can be saved as .pdf files.
How to Use Microsoft Word to Create Professional Business Documents
One of the best and easiest ways to create an effective business document with Word is to use a template. There are hundreds of professional Word templates you can use available through Envato Elements and GraphicRiver. Here are just some of them:
-
25 Microsoft MS Word Business Proposal Templates to Make Deals in 2022
-
25 Free Creative Resume Templates (Word & PSD Downloads for 2022)
-
20 Best Free Microsoft Word Resume CV Cover Letter Templates 2022


How to Use This Tutorial Guide
Learn how to work with Word’s tools to make great business documents quickly. We’ll explore everything from formatting basic text styles to making awesome page layout designs to using headers and footers.
Note: Be sure to bookmark this Microsoft Word tutorial guide to start working through each tutorial at your own pace.
This Microsoft Word beginner guide provides free & basic lessons, tutorials & fundamentals for learning MS Office Word software. Microsoft Word is everyone’s favorite text editor. With so many features, it can meet all your requirements. It may look complicated to use initially, but once you get the hang of it, things start falling in place. This blog post is for those who want to learn the basic functions and features and know more about Microsoft Word.
To start the Microsoft Word application, click on the START button > Microsoft Office > Word or simply search for ‘Word’ in the search box and then click on the result. Once it is opened, select New document.
This is how the opened blank Microsoft Word document will look like.

Now let us take a look at the features that it has to offer.
1] Title and the Quick Access Toolbar
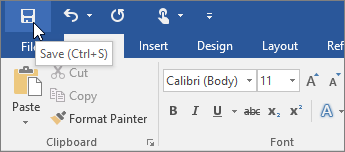
At the top, you have the Title of the document, the Quick Access Toolbar and a few other functions such as Minimize, Restore Down / Maximize, Close and Ribbon Display Options.
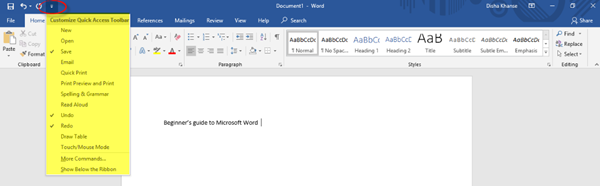
In the Quick Access Toolbar to the left of the Title Bar, you will find the Save button (Ctrl+S), wherein you can save the document in the desired folder; the Undo Typing button (Ctrl+Z); the Repeat Typing button (Ctrl+Y); and the Customize Quick Access Toolbar, wherein you have the various commands as shown in the image below.
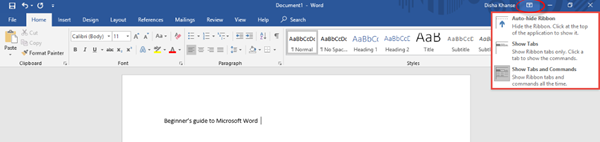
In the Ribbon Display Options, it is possible to Auto-hide the ribbon, show the ribbon tabs only or show the tabs and commands all the time. Refer to the image below.
Below the Title Bar, you will see what is called the Ribbon which consists of various tabs such as File, Home, Insert, Design, Layout, References, Mailings, Review, View, Help, Search. Now let us go through every Tab and its commands.
2] Home
The Home tab is the default tab in Microsoft Word. This tab comprises of features related to the clipboard, font, paragraph, styles, and editing.
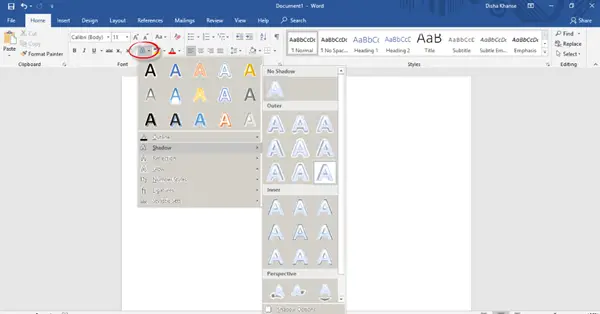
In the Clipboard section, you will find commands such as copy, cut and paste. Next, we have the Font section. Here you can change the font and the font size for your text, change the case, apply bold or italic formatting, underline, change the font color and highlight text and also add various text effects and typography. Go ahead and explore all the different options to make your text look great and innovative!

The Paragraph section includes the alignment options where you can choose to align your text in the center, left, right or justify it (that is, evenly distribute the text between the margins).
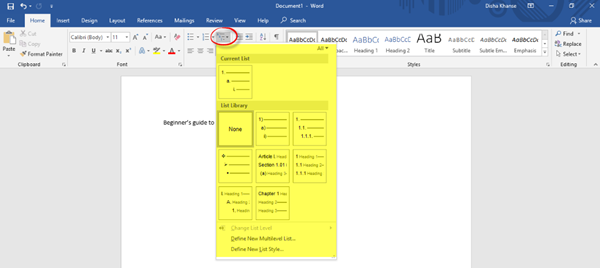
You can add or remove borders, increase or decrease indent, adjust the line and paragraph spacing, and also add bullets and numbers from the bullets and numbering libraries.
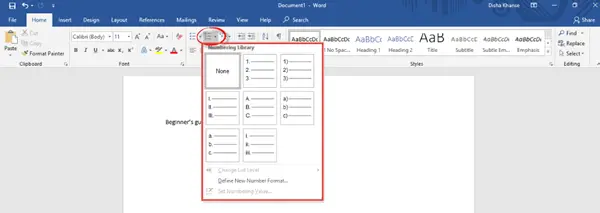
You can also create a multilevel list to organize items or create an outline.
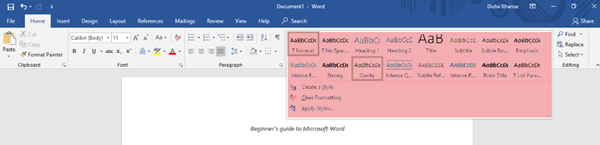
From the Styles section, you can select any style of your choice to change the way your document looks. In the Editing section, you can find text or any content in the document and also replace a specific word or text with something else.
3] Insert
The next tab is the Insert tab.

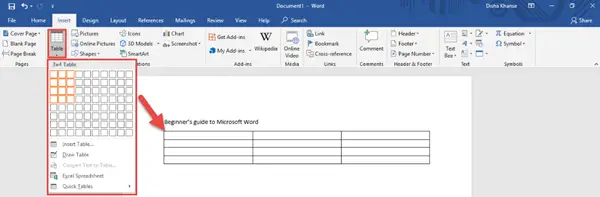
You can add a stylish cover page from the numerous styles available to make your document look more professional and also add a blank page from the Pages section. Another important feature is inserting a table, a picture from your picture gallery, an online picture from the web, shapes, 3D models, charts, SmartArt and screenshots from the Tables and the Illustrations section. Refer to the images below for guidance.
You can insert Tables.
You can insert Shapes.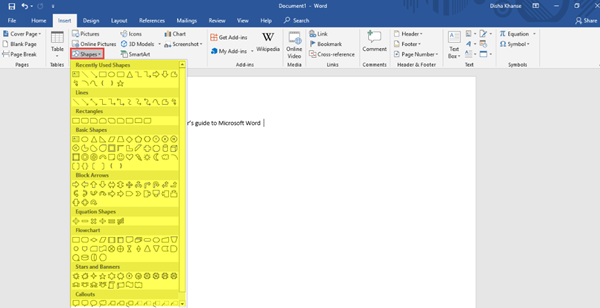
You can insert SmartArt – and more!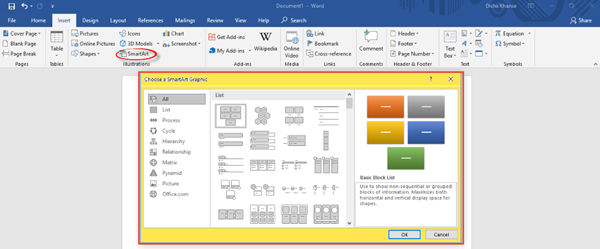
In the Header & Footer section, you can add a built-in header and a footer or from online sources. You can also add page numbers to your document.
Similarly, there are a lot of other features and commands in the Add-ins, Media, Links, Comments, Text and Symbols sections.
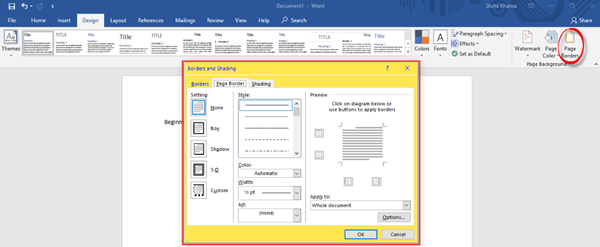
4] Design
The Design tab comprises of commands related to Document Formatting and Page Background. To make your document look more consistent and classy, choose the right theme of your liking from the various options available. Additional features include colors, fonts, effects, and paragraph spacing.
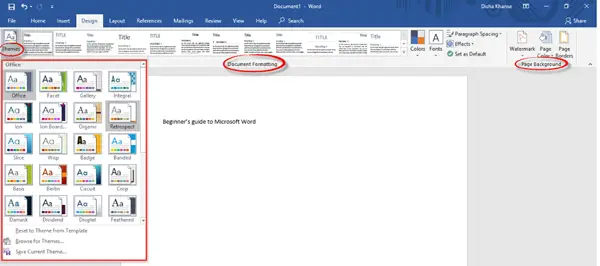
If you wish to go for a splash of color for the document background, you can change the page color as well, add Watermark and page borders.
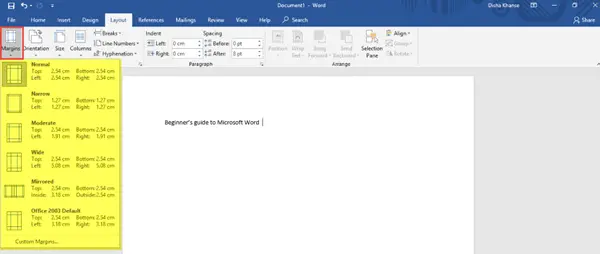
5] Layout
In this tab, in the Page Setup section, you can adjust margins for the entire document or for a particular section; and also customize it. You can change the Page Orientation to Landscape or Portrait; choose the page size for your document, and add or remove columns.
You can also decide the Size for the document.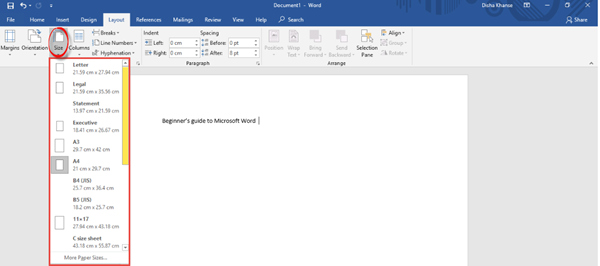
Find the settings to increase or decrease the Indent and Spacing in the Paragraph section.
Other features related to the placement of text and pictures, grouping multiple images and rotation options will be found in the Arrange section.
6] References
In the References tab, you will find different commands related to the table of contents, footnotes, research, citations and bibliography, captions, index and table of authorities.

7] Mailings
Here, you will find settings that will help you to create envelopes and labels, start the mail merge wherein you can send it to multiple recipients, write and insert fields, preview results and finish mail merge.

8] Review
The Review tab includes various functions related to proofing, speech, accessibility, language, comments, tracking, changes, compare, protect and ink. Out of all these, the Spelling and Grammar function (F7) is of utmost importance. Do check for spelling and grammatical errors after you are done writing your document.

9] View
In the View tab, you can change the views such as Read Mode, Print Layout, Web Layout, etc. Feel free to explore the additional features from the immersive, page movement, show, zoom, window, macros, and SharePoint sections.

10] Help
In the Help tab, you can contact an office support agent and give feedback.

11] Search
In the Search tab, you can type any feature that you are looking for and get help.
12] File
In the File tab, you can save the document, print and share the document, and also publish it.

In this post, I have tried to cover all the basic and useful features and functions of Microsoft Word.
This is my first blog post and I hope it was helpful to you. Your suggestions are most welcome.
Do try out all these features in order to make your MS Word document absolutely presentable and perfect!
Next, you might want to take a look at our Microsoft Word Tips And Tricks post.
What to Know
- To enter Focus Mode, select View > Focus. Press the Esc key to exit.
- To use Smart Lookup, right-click a word or phrase and select Smart Lookup to open an Insights panel.
- To quickly change text case, select the text and choose Change Case. Select an option.
This article explains a variety of little-known tips and tricks to help you use Microsoft Word like an expert. Tips include how to use Focus Mode, Spike, Tell Me, Smart Lookup, and more in Word 2019, Word 2016, and Word for Microsoft 365.
How to Pick up Where You Left Off
Press Shift+F5 to return to the last place you made changes.
Focus Mode: How to Use Word With No Distractions
Changing the view in Word can be helpful in varying situations. Changing to Focus Mode could help when you need to zero in on your document. It hides all the toolbars from view, allowing you to concentrate on your work. Toggle between Focus Mode and other view options as needed.
-
Select the View tab.
-
Select Focus in the Immersive group. The document view will change to Focus Mode.
-
Press the Esc key to exit focus mode.
Smart Lookup: How to Research Without Leaving Word
Smart Lookup lets you check multiple sources on a topic, including Bing, Wikipedia, and the Oxford English Dictionary. This feature lets you research a topic without leaving the document you are working on.
-
Select a word or phrase in your Word document.
-
Right-click the selection and select Smart Lookup. The Insights pane will open showing relevant search information.
-
Select the Explore tab to browse articles and other search results, or select the Define tab to view definitions.
-
Select More to expand the search results and see more options.
-
Select a search result to view it in full detail online.
-
Close the Insights pane when finished.
Tell Me: Get Microsoft Word Help Fast
When you know what you want to do in a document, but aren’t sure how to go about it, Word is there to lend a helping hand with a feature called Tell Me.
To use Tell Me, find the search box at the top of the ribbon and enter a brief description of what you’re looking for or the result you hope to achieve. Select an option from the provided results to use the tool or apply the formatting desired.
How to Change Case Quickly
If you’ve ever typed away while reading a hardcopy or talking to someone only to look back at your monitor to realize you had the Caps Lock on, you’ll appreciate this feature in Microsoft Word, which lets you change the case of selected text with only a few clicks.
-
Select the text you want to change.
-
Select the Change Case drop-down arrow in the Font group of the Home tab.
-
Choose the desired option from the following:
- Select Sentence Case to capitalize the first letter of each sentence and change the rest of the letters to lowercase.
- Select Lowercase to change all of the selected text to lowercase letters.
- Select Uppercase to capitalize all of the letters in the selected text.
- Select Capitalize Each Word to capitalize the first letter of every word and change the rest of the letters to lowercase.
- Select Toggle Case to shift between two case views.
Press Ctrl+Z to undo a case change.
How to Proofread Your Work
Word’s editing tools will check a document for spelling and grammar errors as well as potential issues with clarity.
-
Select the Review tab.
-
Select Check Document or Spelling & Grammar in the Proofing group. The Editor pane will open.
-
Select Review all Results to move through the document checking for errors.
-
Choose a suggested edit or select Ignore Once to skip to the next one.
How to Use Word to Check Your Score
Another way to review and potentially improve your work in Word is by checking a document’s readability score. Set up Word to check the score of any document when you check spelling and grammar.
-
Select File > Options to open the Word Options window.
-
Select Proofing in the left pane of Word Options.
-
Under the When Correcting Spelling and Grammar in Word section, select Check Grammar and Refinements in the Editor Pane and Show Readability Statistics.
-
Select OK to apply the changes.
-
Press F7 or select the Review tab, then select Check Document or Spelling & Grammar in the Proofing group.
-
Correct or Ignore all errors found in the document. When you’re finished, the Readability Statistics window will open.
How to Compare Documents Side-by-Side
Open two files next to each other in Word to view, compare, or copy and paste from them.
-
Select File > Open, then find the first Word document you want to view and open it.
-
Select File > Open again and find the second Word document you want to view and open it.
-
Select the View tab.
-
Select View Side by Side in the Window group.
-
Choose the name of the second document you want to compare in the Compare Side by Side with dialog box.
-
Select OK.
Select Synchronous Scrolling on the View tab in the Window group to scroll both documents at the same time.
How to Spike Copied Text in Microsoft Word
Cutting, copying, and pasting in Word is pretty basic, but if you want to cut and paste several text selections, use the Spike feature.
-
Select the first section of text you want to copy in Word, then press Ctrl+F3.
-
Repeat the process for each bit of text you want to copy.
-
When you’re ready to paste all of the text selections, select inside of another document and press Ctrl+Shift+F3. Word will paste all of the text segments following the order in which you cut them.
If you want to use Spike, but would rather copy than cut the text, press Ctrl+Z to undo the cut. Doing so will not remove the text from Spike.
How to Use Microsoft Word to Create Quick Parts
If you use blocks of custom text on a regular basis, such as a signature, business information, or legal wording, creating AutoText with Quick Parts could save loads of time.
-
Select the text you want to save. It can be a phrase, sentence, paragraph or any portion of a document.
-
Select the Insert tab.
-
Select Quick Parts in the Text group.
-
Select Save Selection to Quick Part Gallery.
-
If you want to reuse the text after you save it to the Quick Part Gallery, select Quick Parts, then choose the selection from the gallery.
FAQ
-
Can I use Microsoft Word for free?
Yes. You can get a Microsoft Office free trial to try Word, Excel, Outlook, PowerPoint, and other Microsoft products for one month.
-
What can I use instead of Microsoft Word?
Popular free alternatives to Microsoft Word include WPS Office Writer, WordGraph, WriteMonkey, FocusWriter, and RoughDraft. Many of them can edit Word documents and use free MS Word templates.
-
How do I use Microsoft Word Online?
Go to Office.com and log in with your Microsoft account to use Word online. That way, you can share files and work on documents with other people in real-time.
-
How do I use word count in Microsoft Word?
To display word count in Microsoft Word, go to the Review tab and choose Word Count in the Proofing group. Alternatively, right-click the status bar at the bottom of the window and select Word Count, or use the keyboard shortcut Ctrl+Shift+G.
Thanks for letting us know!
Get the Latest Tech News Delivered Every Day
Subscribe